Big Papa Leather
-
Posts
296 -
Joined
-
Last visited
Content Type
Profiles
Forums
Events
Blogs
Gallery
Store
Everything posted by Big Papa Leather
-
Time for another Pay It Forward?
Big Papa Leather replied to TwinOaks's topic in Special Events, Contests and Classes
I'll ship where-ever as well. Allen Twin- No sweat on the name dealie, I was just poking at ya. -
Time for another Pay It Forward?
Big Papa Leather replied to TwinOaks's topic in Special Events, Contests and Classes
Hey you dropped off a few names... Mine included. Allen -
Simple Notepad cover
Big Papa Leather replied to Big Papa Leather's topic in Books, Journals and Photo Albums
That is awesome. I have some others made from Walnut and bird's eye maple. Allen -
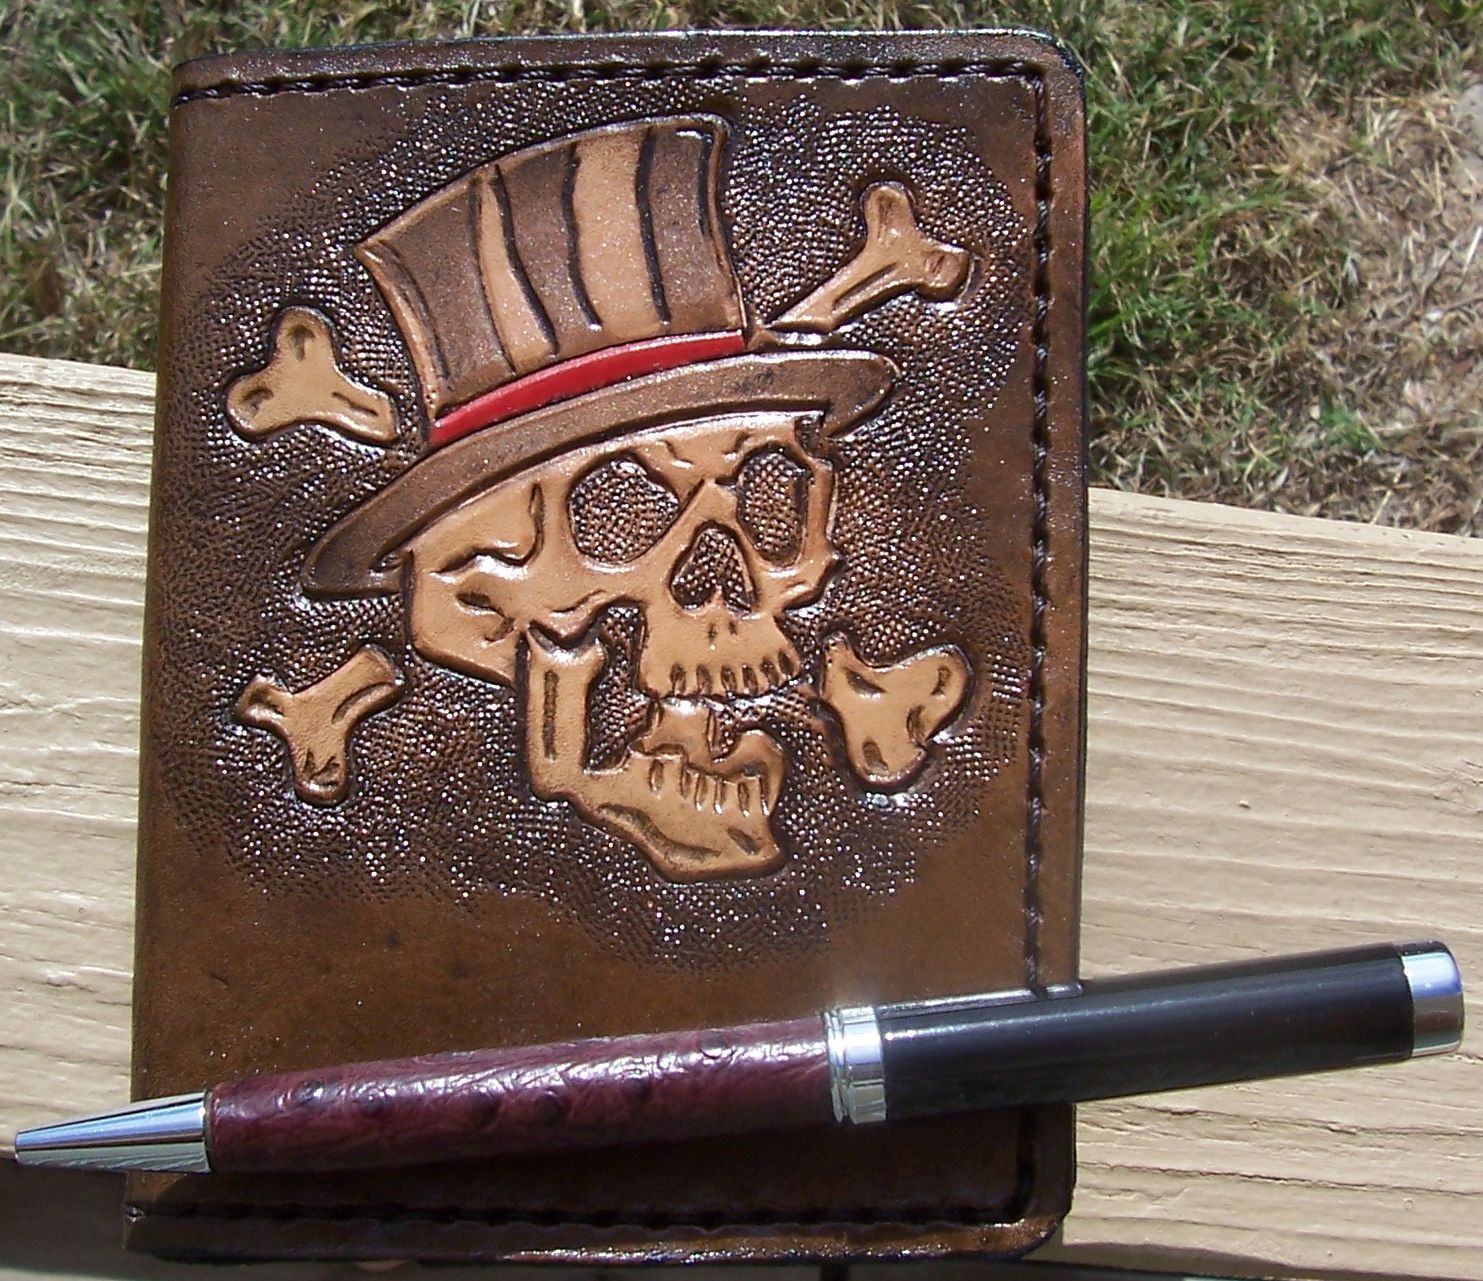
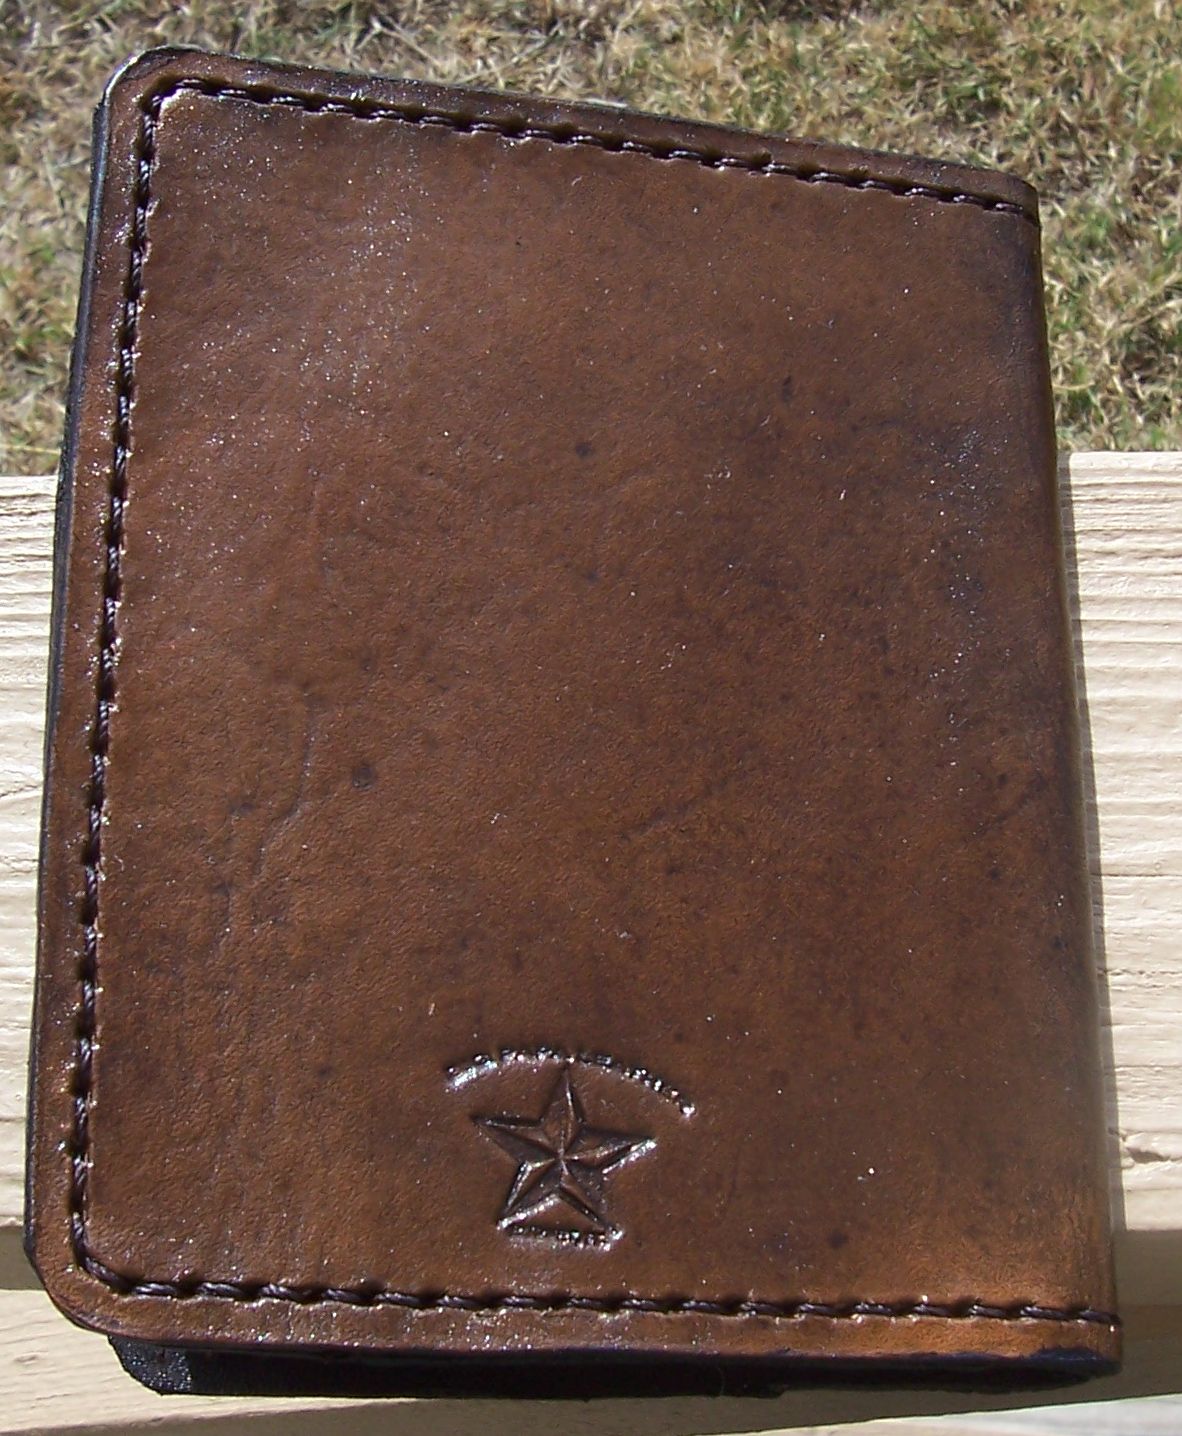
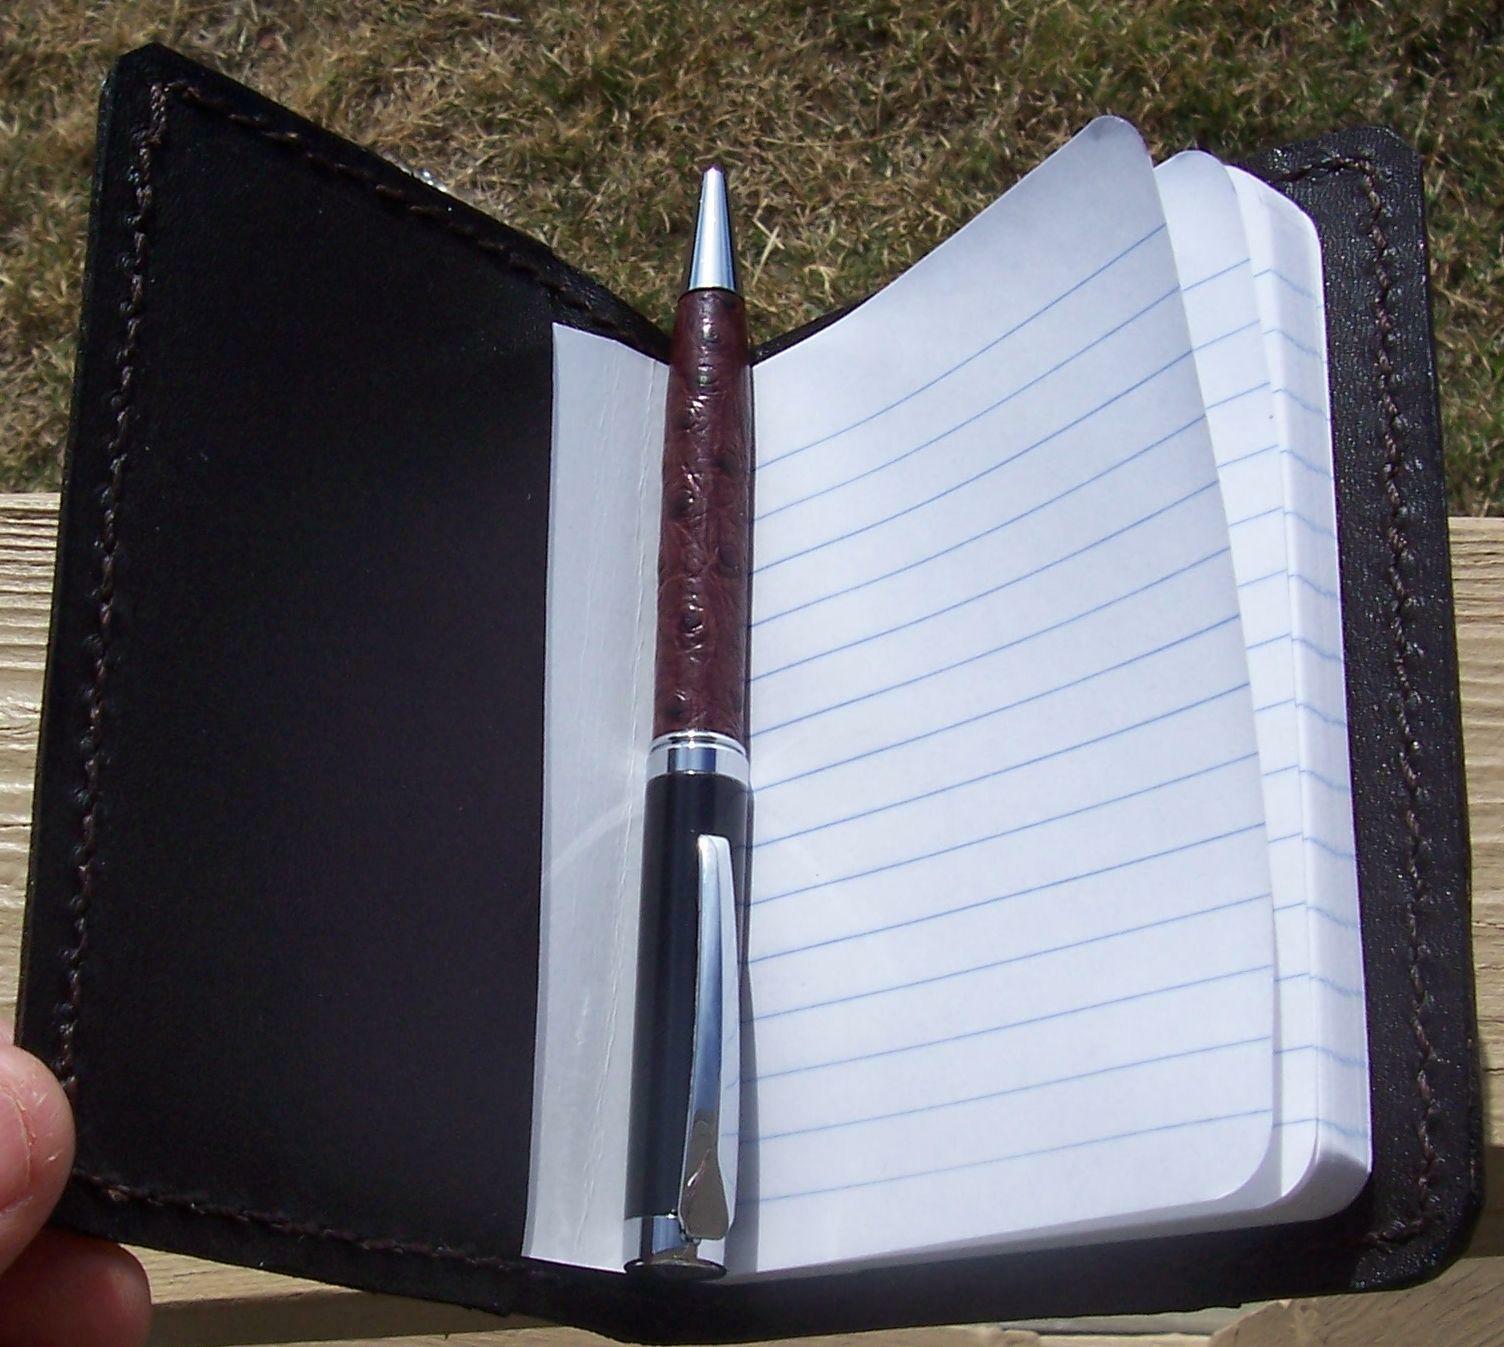
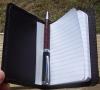
Here is a note pad I started last night. I did the rough out and tooling last night. Today I did the staining and assembly. For the most part it came out as I had planned. A few color errors, like the top hat, the black did not stay black as I had hoped. I used brushed on Eco-Flo antique smoke black. Over all color is called Coffee Brown, rapidly becoming my go to color. The edge coat slipped up on the back. Interior is out of black pig skin liner. The pin is an ostrich lined gel pen that is my absolute favorite pen ever. Whatcha think?
-
Time for another Pay It Forward?
Big Papa Leather replied to TwinOaks's topic in Special Events, Contests and Classes
I would like to participate as well. If'n you get the go ahead to proceed, add me! Allen -
They look great. They aught to like em. Allen
-
Crash Wallet
Big Papa Leather replied to Big Papa Leather's topic in Purses, Wallets, Belts and Miscellaneous Pocket Items
Same thing I thought. It will end up being kind of heavy. I'm thinking to make it kind of small, maybe for a short outing. When my kids were in diapers it seemed my wife carried enough to outfit 6 kids when we left the house. I'll have to put some thought into it. Allen PS Suggestions will be appreciated! -
Crash Wallet
Big Papa Leather replied to Big Papa Leather's topic in Purses, Wallets, Belts and Miscellaneous Pocket Items
Well, I talked to him the other night. You have to know my brother, he is ummm, different. He don't really have what we call da people skills. Anyway he was pleased with the wallet, he likes the design and appreciated the time it took to make it, but feels it is too wide. When he put all his stuff into it, it was about 1 1/2" thick. But he plans on using it and he'll get used to it. I did however get about 1/2 dozen requests for other people who were in attendance at our family dinner for Christmas. One request was a diaper bag. I don;t even know where to start on that one... Allen -
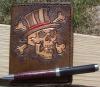
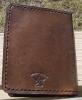
I made this Tandy kit tri-fold for my brother. His knick-name is Crash as he has a way of running into things with his vehicles. I think about 10 accidents in 10 years. Luckily he only tears up his stuff. The center was done with Antique Coffee brown and the lettering was done with Super sheen as a resist. The black outer was hand brushed with regular black dye. My first lacing job. Used the Tandy lace in the kit, but it frays ALOT. I'd try kangaroo if it wasn't so darned expensive for someone just starting out in this craft. Let me know what ya'll think. Allen
-
You are now infringing on my full time job! LOL Actually I sharpen beauty shears for a living (along with sales). I have seen and sold dozens of different designs of such holsters/belts. Most are just as you claim a tool roll with a belt. Do you know how many scissors she wants to hold? Any accessories? She will appreciate a way to easily remove hair that falls in. On a side note, I have used my shear sharpening equipment to sharpen and or hone my leather tools. I even carried the machine to a guild meeting and sharpened there for the members. It can put a unbelievable polished edge on a swivel knife. Makes ceramic blades cut even better.
-
I just recieved my Barry King swivel knife today. I did a quick little doodle design and man, I 'm loving the knife. The blade is pretty much good to go straight from the box, but I stropped it to a mirror shine and it cut fantasticly. I also got me a Barry King 16 oz tapered head maul. Wow. It is much better to use to tool than the Tandy hammers. I'm gonna be up late I think... Allen
-
Check out this post: http://leatherworker.net/forum/index.php?s...&hl=scissor Allen
-
Really cool. It looks so good, if I owned it, it drive me to drink! Wonder if anyone would know I was walking around with a flask full of Mountain Dew? Allen
-
I got a silly question. The leather on the inside writing surface, does it get marred or impressions if the owner does not use several "backer" pages? Either way... It's added to my "To-Make" list. Thanks Art! Allen
-
Free Midas swivel knife....
Big Papa Leather replied to badger's topic in Floral and Sheridan Carving
It appears there are still quite a few Midas knives floating around on the other side of the Atlantic. Would you be willing to keep your eyes open for another... for me? Allen -
I have a couple of the Harbor Freight aprons. One I have is a heavy green canvas and I have the blue denim. I prefer the heavy canvas when I work with machinery, it makes me feel alittle more secure as it is stiffer and goes not flap as much. The blue denim is also nice. I would not be afraid of either allowing the dye to soak through faster than I could get it off if I poured it directly on it while I was wearing them. I think the canvas (since it is so heavy) would resist a much greater time. I didn't pay but $3.99 or so for either. Allen
-
I have never seen one that has an off feature for the oscillating function. The reason to ascillate is to prevent there from being sanding marks as the medium changes constantly. If you wanted to make a stationary machine. Use the motor and controller set up listed in my belt sander example above. Get the sanding drum and spindle attachment and mount it to the motor. Maybe a source of income for me? Building belt sanders and non-oscillating sanders/Burnishers? LOL Allen
-
Sorry Randyc for hi-jacking your thread. Ok, here is the stuff you will need to build it. Sander frame: Lee Valley Tools http://www.leevalley.com/wood/page.aspx?c=...072&p=44884 Motor and Controller Motor 4Z140 1800 RPM, Torque 4.38 in/lb, 1/8 HP, 90V DC http://www.grainger.com/Grainger/items/4Z140 Grainger's price on the new motor is CRAZY! Check eBay. Occasionally used ones go for $50-60 RAE motors has a generic one that shows up occasionally, same motor, same manufacturer just under the RAE name. Control 5X412 http://www.grainger.com/Grainger/items/5X412 These too can be bought cheaper on eBay. Think about $40.00 new unused. Just about any of the 90V controllers will work. I used this one because of the enclosed case but you can use most of the controllers rated for 90V. Switch 6-Terminal; Forward, Neutral & Reverse This can be bought at Radio Shack and Home Depot it is a three position switch. Home Depot calls them a Heavy Duty Three position Toggle Switch. The motor is connected to the switch and the feed from the controller is attached to the switch. This makes it variable speed in both directions. You can install an electric brake if you like. I didn't. If you turn the machine off and then switch the direction, the controller acts like an electric brake bringing the belt to a immediate stop. Make sure you turn it off first or you'll blow the fuse. The shaft of the motor is ½ so is the arbor hole on the pulley. I used a piece of plate aluminum to mount the motor to (4 bolts) Then mounted the motor and plate to the machine. My sander frame had a Large hole where the shaft went through and the bolts didn't have anything to hold on to. A buddy of mine just built this machine and he said they changed the motor mounting to a smaller hole. You may be able to make a template of the mounting arrangement on the motor and drill the holes for the motor to mount directly. That's what he did. You will need three core wire. Positive, Negative and ground to run from the motor to the controller, and from the controller to the electrical outlet. Also a three prong electrical end will be needed to plug it in. You can install a two position toggle to turn on and off but the controller also has an off position I just used that one. I used feet from here: Amp Feet http://cgi.ebay.com/Set-of-8-Rubber-Feet-G...93%3A1|294%3A50 See the attachment for a very crude rendition of the plate I used to mount the feet so the sander could be laid down. If your really gonna apply a lot of pressure, you can hang the belt attachment over the bench and use a clamp to hold it down, Or drill a couple holes in the foot plate and then mount some bolts with wing nuts through your bench. That way you can unbolt it quickly to stand it up if needed. If you have any questions let me know. I do not have the sander with me it is still in South Carolina in my brother-in-laws garage. Hopefully over the Christmas break I can go pick it up along with my other tools and my 1989 Blazer that did not fit into the moving truck! Allen

-
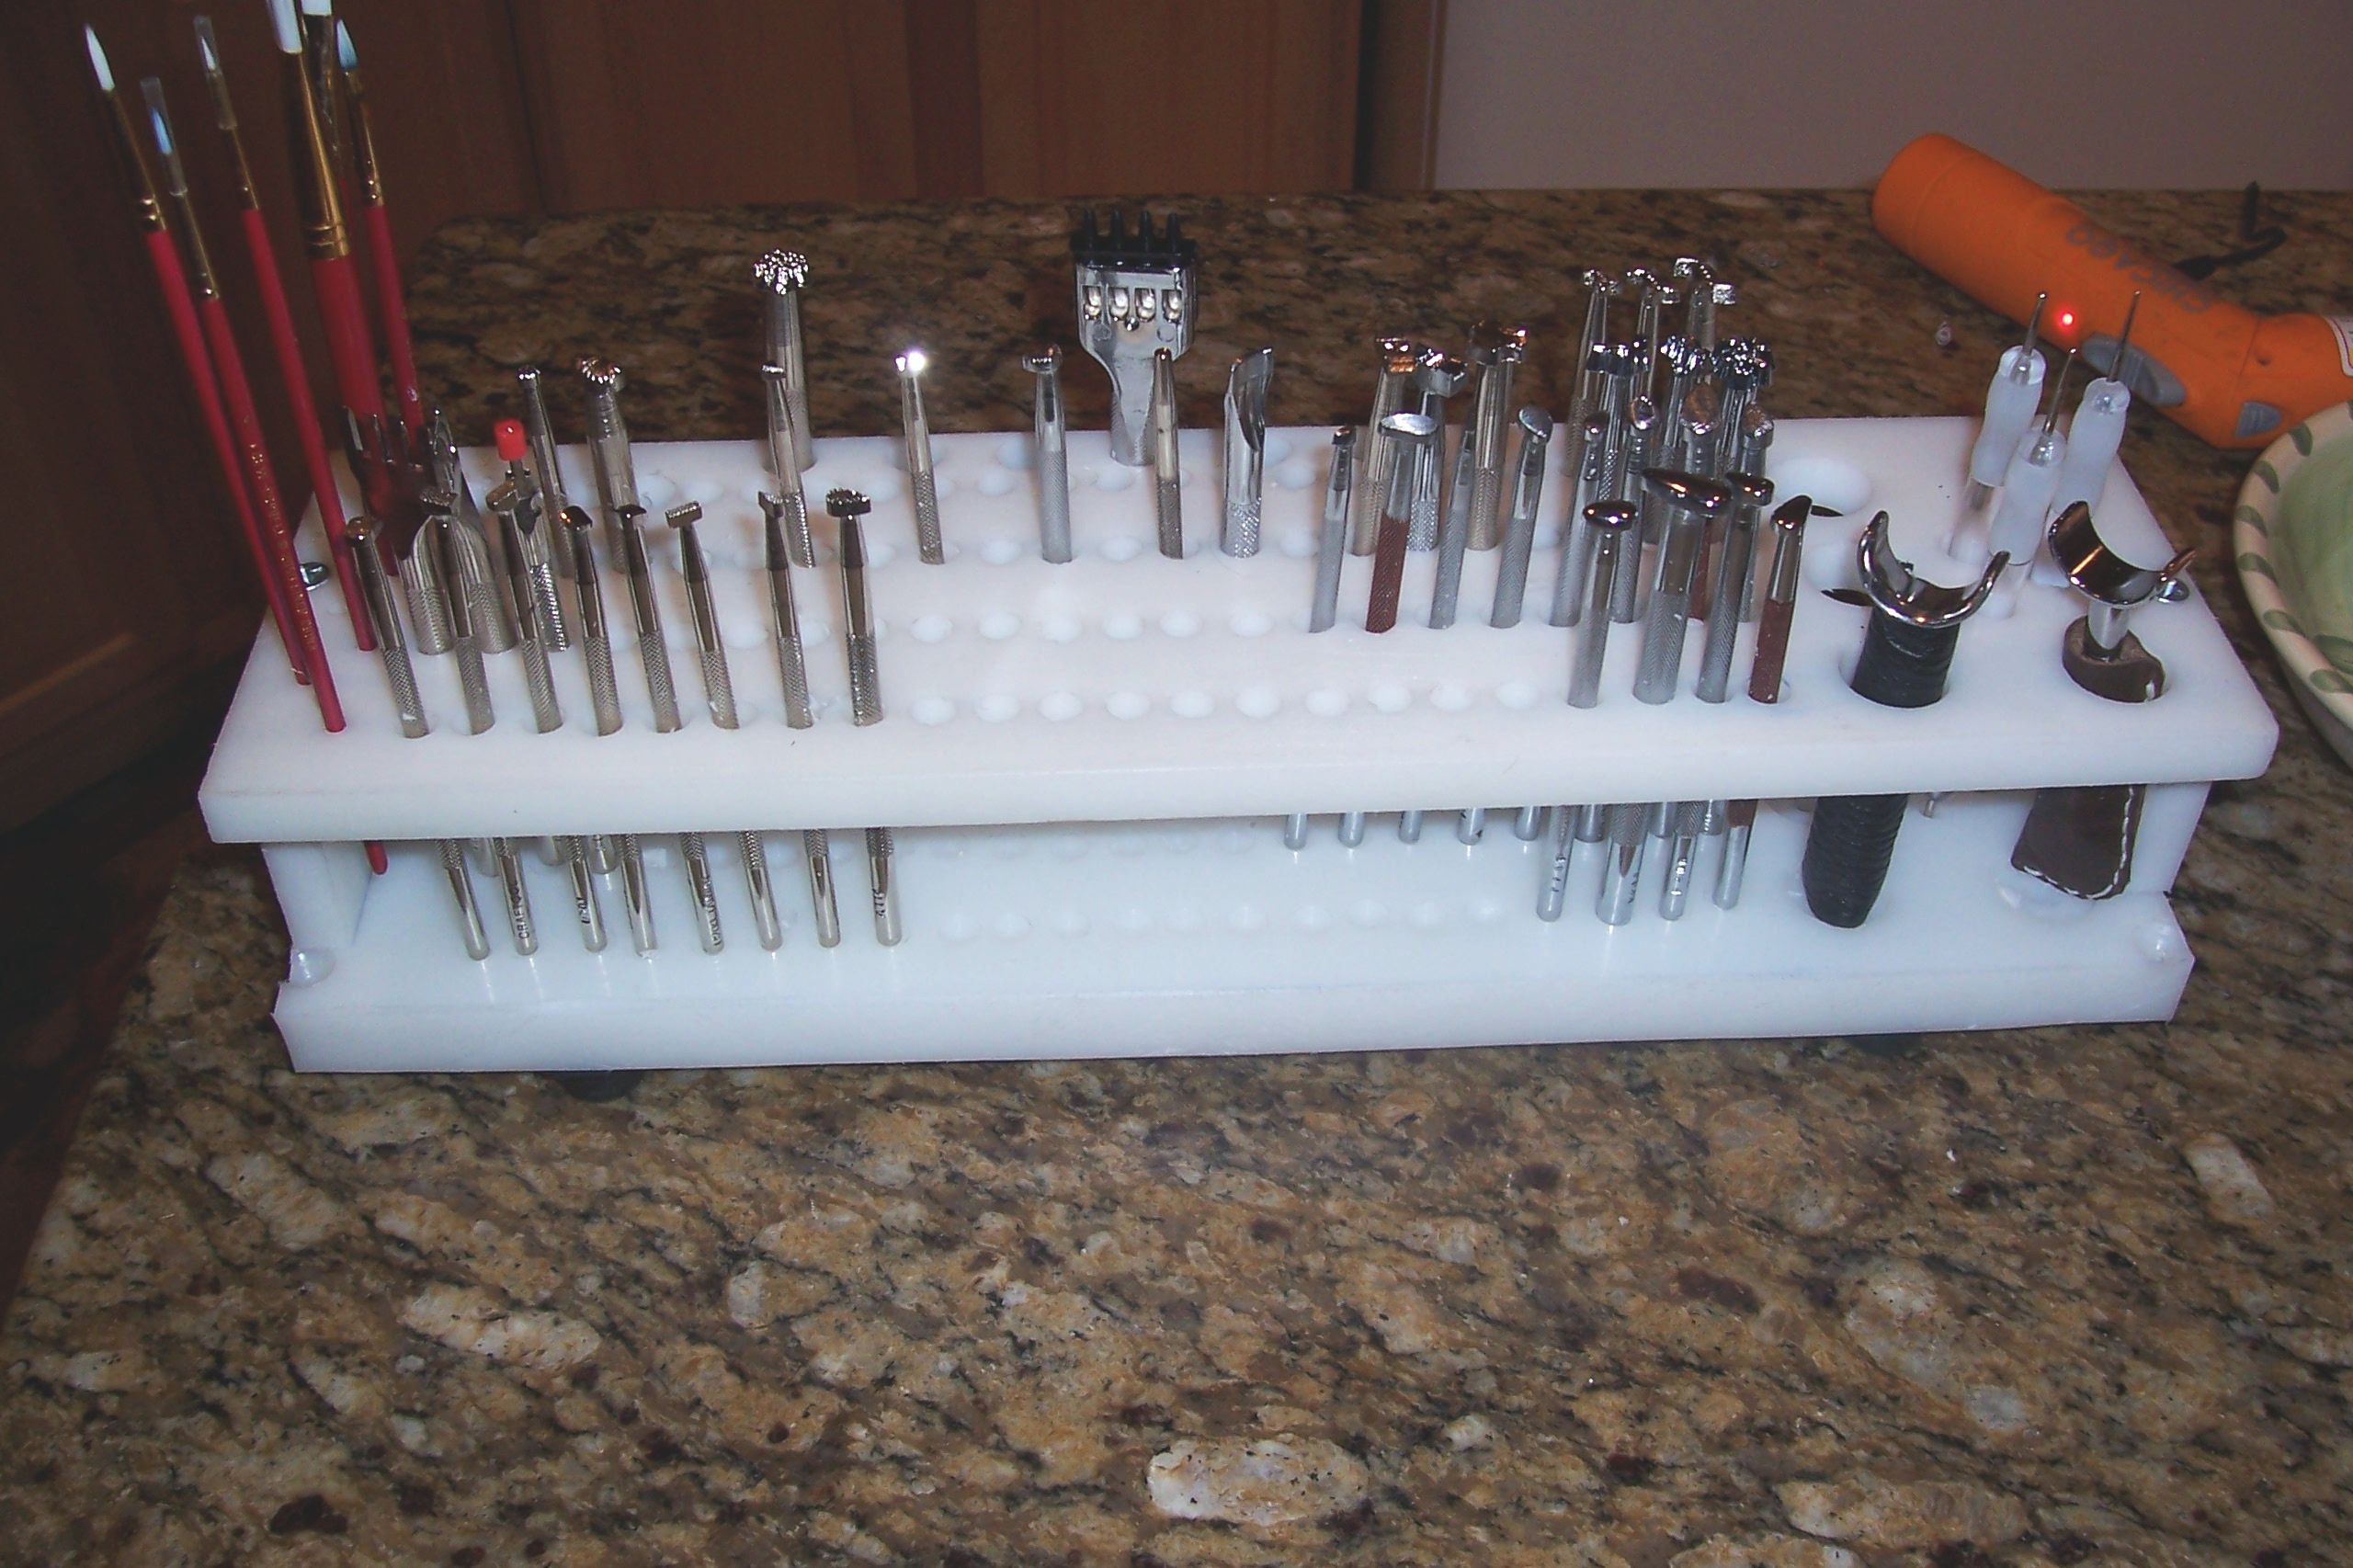
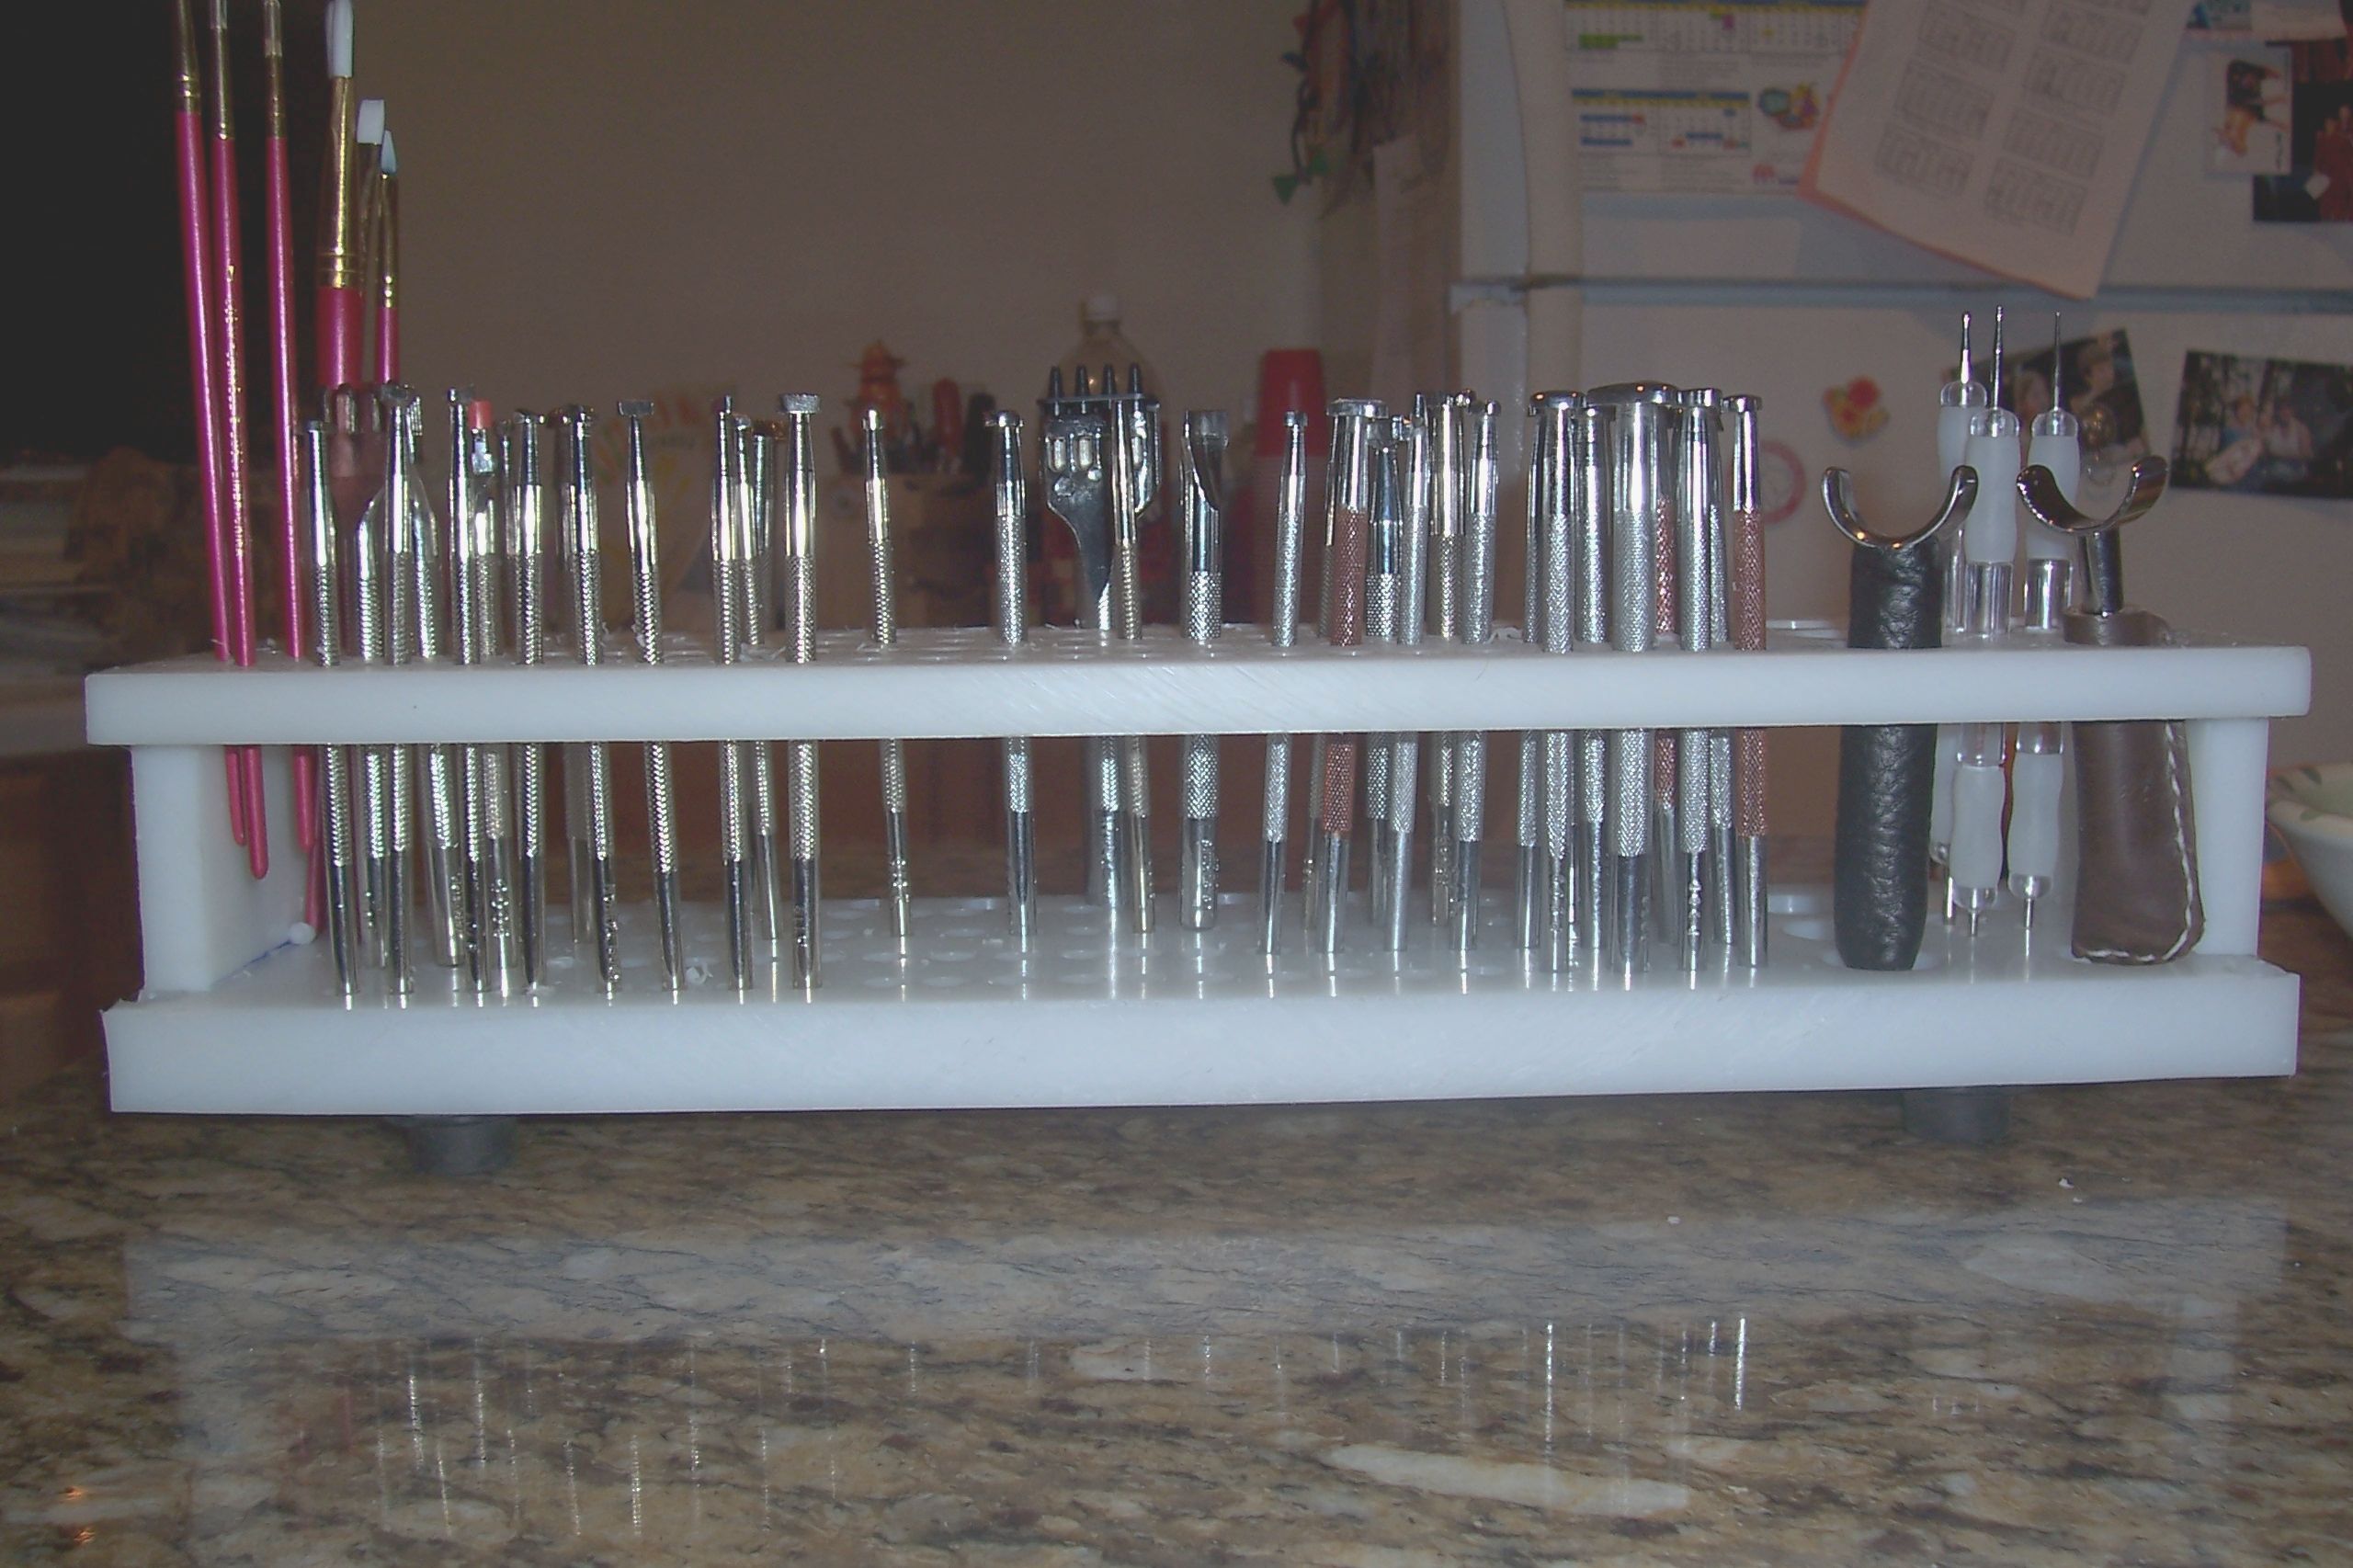
It's not glued. I used screws to attach the pieces. I drilled a pilot hole and then ran the screws in. I used sheet rock screws on the bottom and tapered machine screws on the top. If you look closely to the left between the first two paint brushes you will see screw top and to the right side, just behind the swivel knife you can see another screw top. I actually have the spacing far enough between each row if I ever (should say when) enough tools to fill it I can add rows and stagger the holes in between the existing ones. This thing is WAY overbuilt. I placed it on the floor with no tools in it and could stand on it without it breaking, it barely flexed! I imagine a thinner material would work just fine. This is what I had on hand though. Allen
-
For those who may be interested I can provide you with "off the shelf" part numbers and where to buy the stuff to build your own variable speed 1X42" belt sander. The motor and controller are available through grainger and the sander frame/body from Lee Valley tools. The sander can be outfitted with belts of whatever grit you desire and with a simple addition of a three way toggle switch it can run in two directions. You can lay it on its side with the belt traveling away from you to do knives and other sharpening jobs, use it in this position in front of the platen and you can convex quite easily. Stand it up and reverse the belt and use a tool rest to sharpen chisels and other tools if you like. If you have just a tiny bit of mechanical aptitude you can build this thing easily. It is basically a put together deal. No real fabrication required. I built mine for about $250.00 using a used motor. The motor is a Dayton 1/7 HP with a tremendous amount of torque. You would REALLY have to work at it to bog it to a stop. If anyone is interested let me know! Allen
-
Hey Art, Hope this is cool but I wanted to share the rack I built yesterday. Maybe I should have started my own thread but??? It is made from UHMW plastic sheeting I bought on eBay a few years back to make a worktable top. When I moved I unscrewed it and took it with me. I had routed channels for jigs and guides in it. I have since started cutting it up using it for other projects. If you look at the ends you can see the counter sink holes I had in the sheets to mount it to the workbench in it's former life! This stuff is great. You can use it as a cutting surface, it machines like wood, easy to clean and most of your stains and dyes wipe off rather easy. I am buying another sheet soon to do the top of another workbench. Eventually I plan on doing a leather cover that will use snaps on the base piece like the Stohlman case in Making leather cases Vol. 1 Allen


-
Ok, I have alot of stuff to do, things I want to make, things I have oblogated myself to make. If and when I get these finished (most are freebies, brother-in-law deals and otherwise learning experiences) I want to make myself a bag. A man bag or murse or wharever you want to call it. I have looked online for a few different styles and I have a basic idea what I want to do. Is there anyone willing to share some photos of bags they have done, it could be as basic as some of the belt bags or as elaborate as a fully decked out breif case or messenger bag. However post stuff that has not already be posted. I have scowered the archives and those photos are already available. By posting you are aware I may leach an idea or two from your design to use on mine. I will not duplicate it but may use some of the design elements. Thanks in advance! Allen
-
Holiday Gifts for the Leatherworker
Big Papa Leather replied to HARVEY's topic in Leatherwork Conversation
That made me laugh. My wife may amend that to say "Swivel knives are the gift that say, go disappear in your workshop for hours on end and return to the house well after the evening news." Allen -
I use Propay and have for almost 3 years now. Only thing I dislike is it takes 3 days to do anything. 3 day to recieve your money. 3 days to transfer to bank account. Using the debit card eliminates the 3 day transfer deal. I just started using the card reader and it has been very convenient. Allen
-
8 1/2 x 11 notepad cover.
Big Papa Leather replied to Rawhide's topic in Books, Journals and Photo Albums
Thanks for the info! I prolly make one soon. After I make a man purse, koozie, a couple wallets, a belt, carry case for my daughter(s) Nintendo DS, a three ring binder and tool/assemble the Tandy Clarissa purse kit my brother brought over last night for me to do for his wife! LOL Allen