Brokenolmarine
-
Posts
596 -
Joined
-
Last visited
Content Type
Profiles
Forums
Events
Blogs
Gallery
Store
Everything posted by Brokenolmarine
-
Nice work. Have you tried the belt on with both guns and all the loops filled? I was shocked at how much my belt weighed with 18 rounds, 4-1/2 inch Uberti 357 Birdshead, and the stag skinner. . I'm thinking my next will be the holster, sheath, and two six round loops.
-
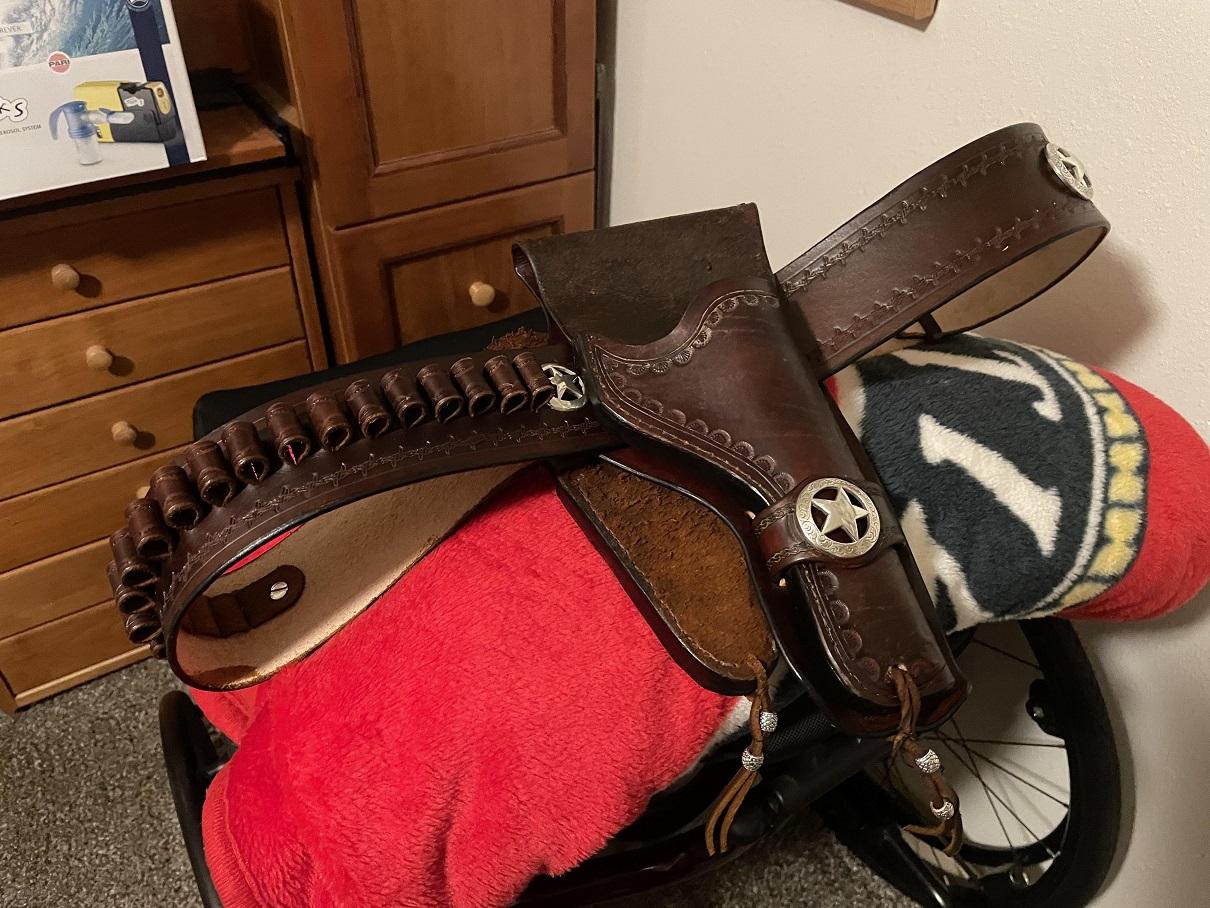
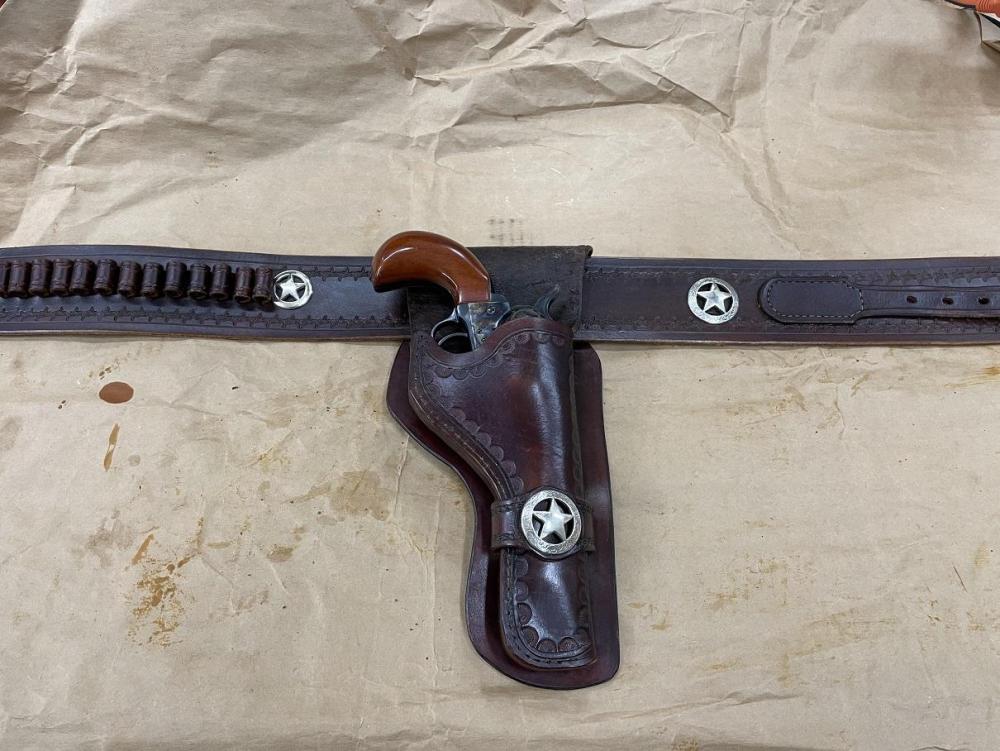
The Sun did it's job and the melt off finally occurred. UPS arrived today and Edge Kote in hand I headed to the shop and worked the edge kote around all the edges. Holster, sheath, and of course the gun belt itself. Once that dried, I re-burnished all the edges to a high sheen. I am pleased with the black accent. I call this one done!

-
Thanks, choosing a knife was an issue for me as well. Choosing... My wife told me to slow down on the knife making... She was kidding. SHE is knee deep in Quilts. Hopefully all the orders will arrive today, the snow has melted away.
-
Beautiful job.
-
As I said, I'm waiting for the edge coat, it was supposed to arrive Thursday, started snowing and UPS didn't run. Kept snowing all thru the night and into the afternoon on Friday. UPS didn't run. Our tertiary rural Oklahoma roads don't get treated or plowed. The company that takes care of them is called "Mr. Sun." Supposed to hit the Mid 40s for the next four or five days, before dropping back in the low 30s or so. Mr. Sun should do his job... The UPS updates on tracking say, "Sorry for the delay, should see your stuff by Tuesday ..."
-
Very Clean stitching, and nice looking with the brass guard, but would not be very practical for use. Would look nice for Costume or dress wear but would get dirty quick being white. If it was for ceremonial use, like a Guard Post somewhere like at the Alamo, Great Job.
-
Thanks, I was going to use a couple walmart bags. I had seen the trick of tipping the top edge out a bit to keep it from getting eaten up from the cylinder edge. I've also seen them use a hammer or mallet handle to open the barrel channel up a bit first, so you aren't fighting it so much when you first insert the firearm. I may use a piece of dowel the right size so I don't tear the bag/plastic wrap. I don't care if I scuff the internal leather.
-
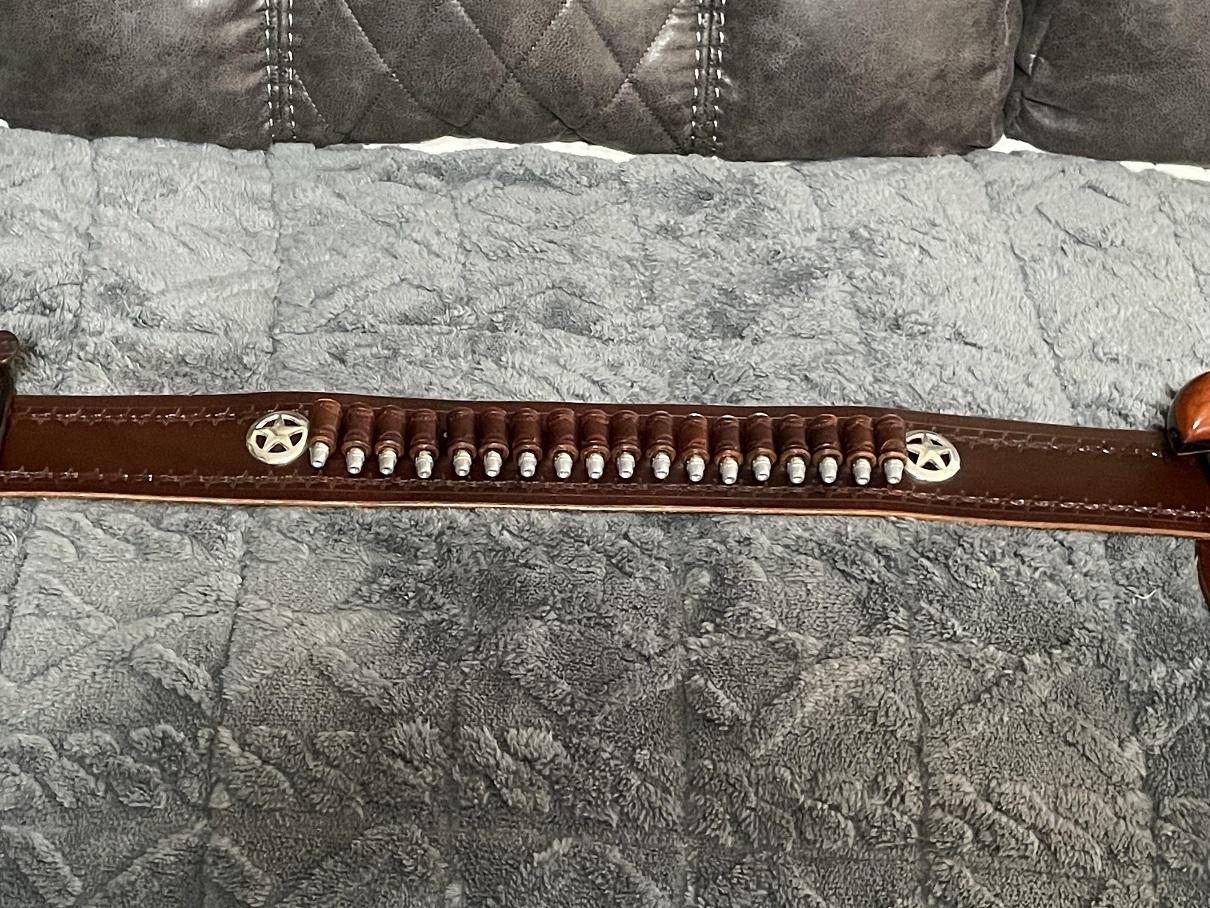
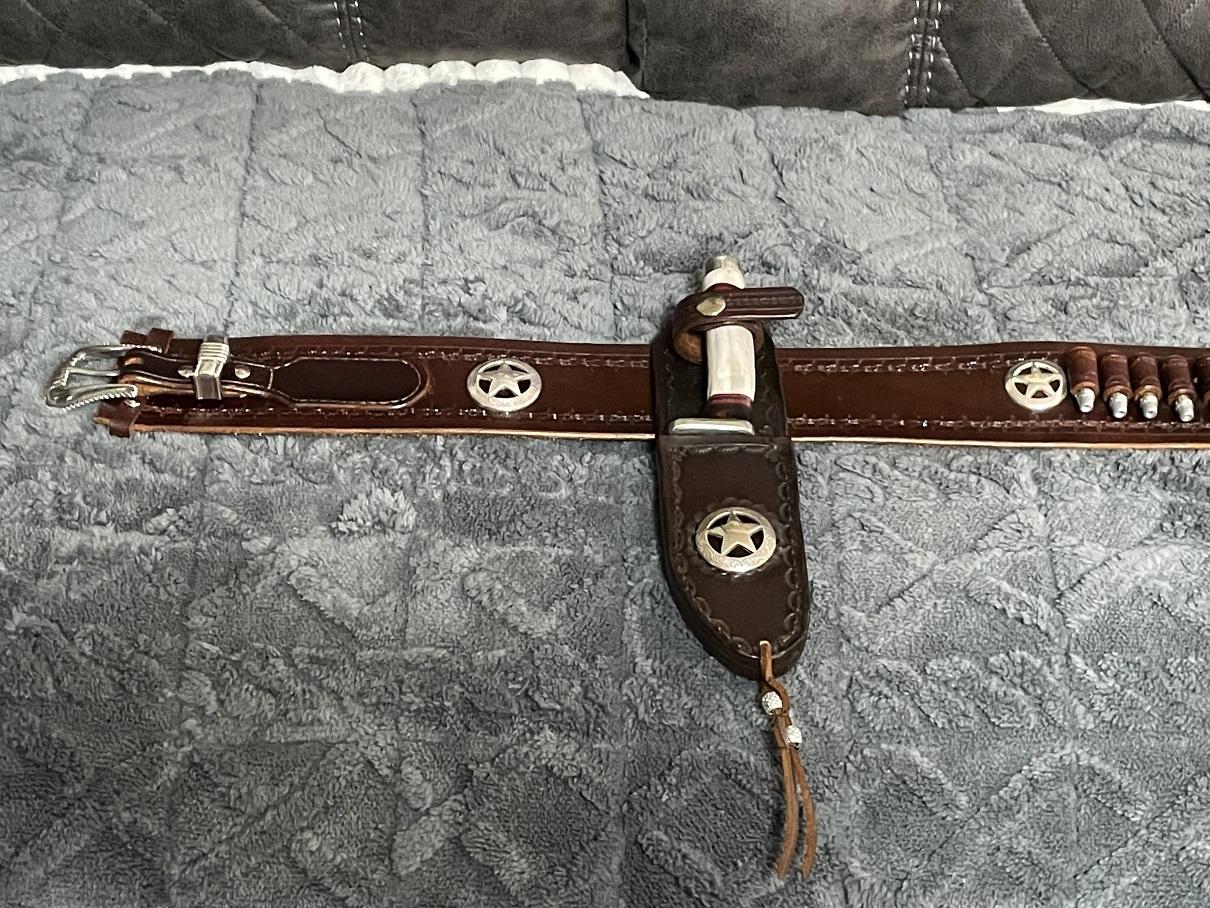
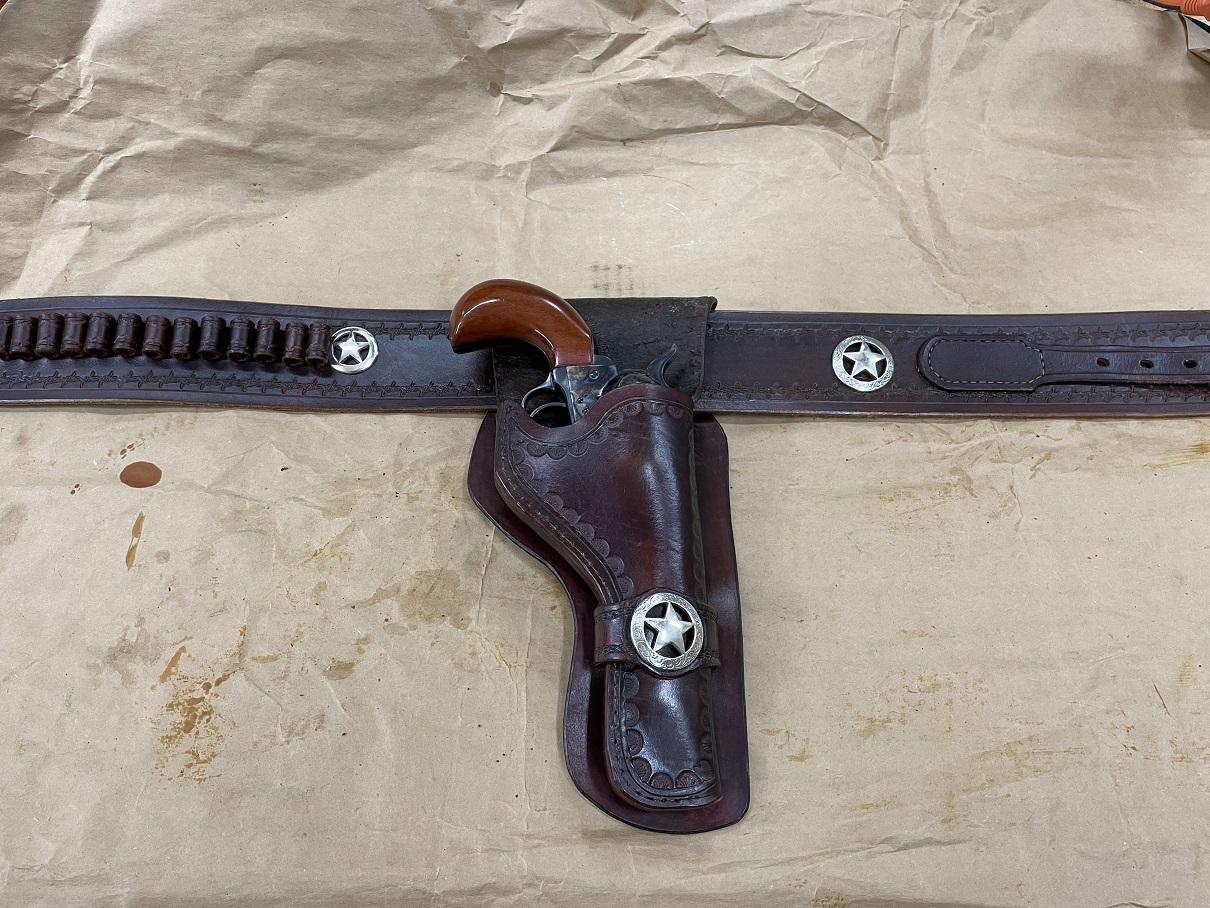
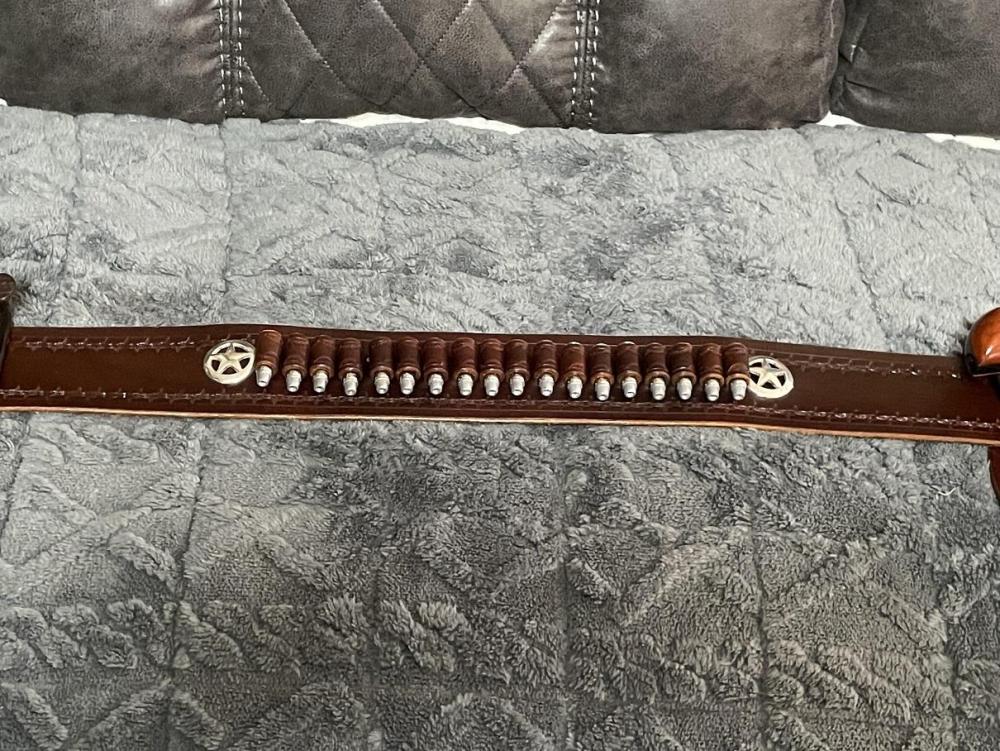
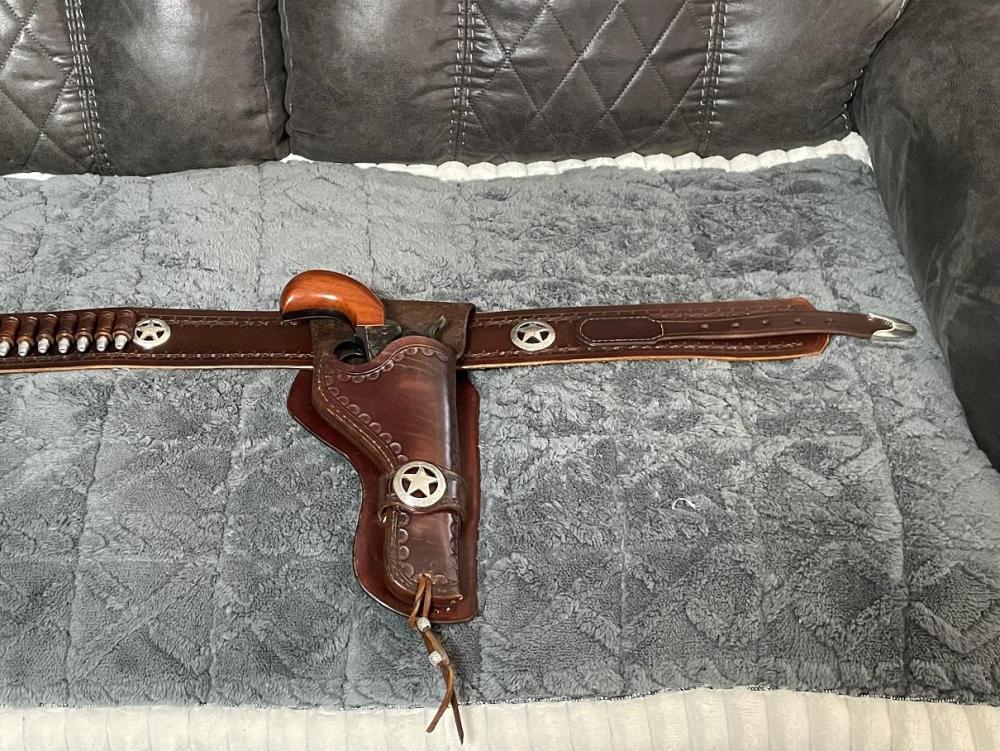
A look at the middle of the gunbelt where the cartridge loops ride: and of course the holster end. Once the edge dressing hits the mailbox, I'll post a final set of pics, but it's basically finished. It's been a great learning experience and I learned a lot from all the YouTube Vids and the practical application of the skills shared there. Next build I'll do some tooling and perhaps some inlays, something a bit more fancy. Surprised to discover the holster shrunk dramatically when it fully dried. It was a chore to get the Uberti to seat fully AND to draw from the rig. I'll soak the holster a bit then bag the gun and fit it back in the holster to stretch it back out and let it dry with the gun in place to form fit the pair. Hopefully this will cure that issue. Watch the space for a later update.
-
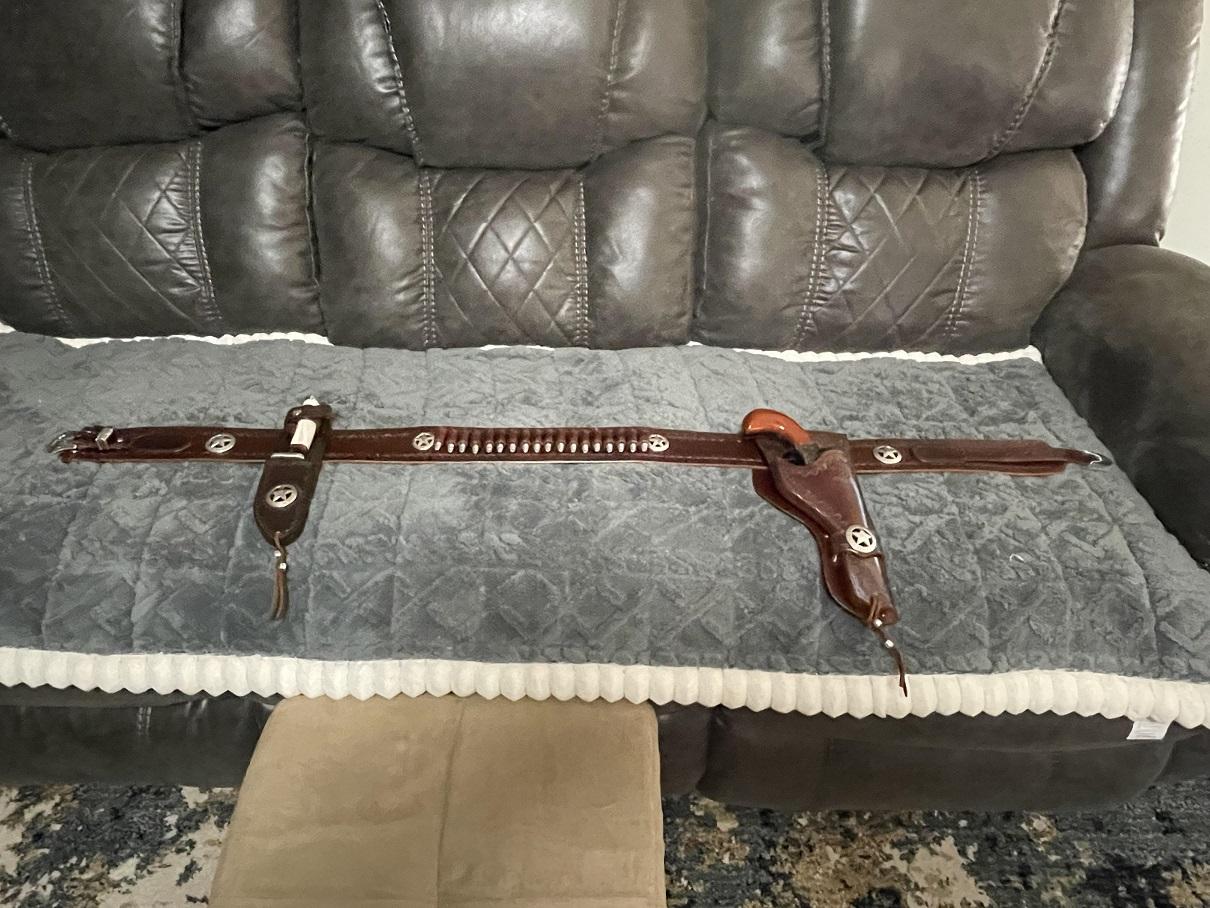
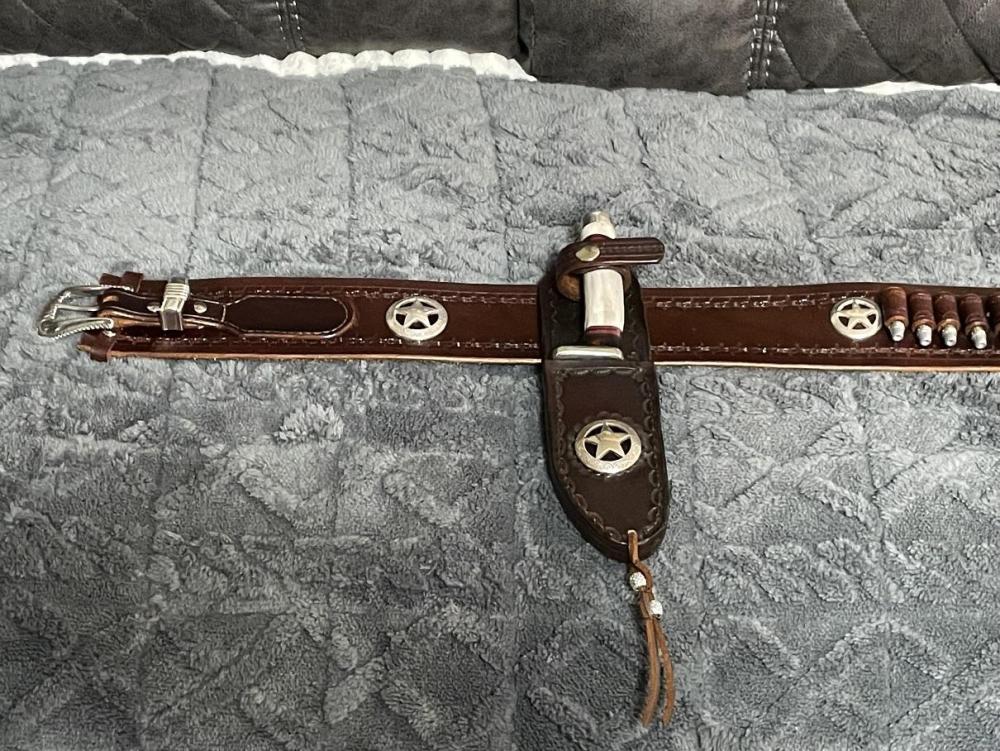
Back out this morning after breakfast and knocked out the sewing duties. Then stained the areas that showed raw leather from the holes. Added the decorative loop at the bottom of the sheath, and burnished the edges. Fitted the sheath to the gunbelt, then the holster. We are basically done until the edge dressing I ordered comes in. A long view of the completed project: Here is a close up view of the Sheath End:

-
Got a lot done in the afternoon. Got the snaps done, the retention strap sewn in place and the front glued on. Just need to trim and burnish the edges and sew down the front panel and the belt loop panel on the back. I got the burnishing done, and sewed down the front this evening, then started on the belt loop, then the boss called and told me dinner was ready. Shut it down and headed in. It was COLD out, in the mid 20s, wind blowing and DARK out already. I will not be heading back out. I'll finish up in the morning, or even after lunch. NO rush. Looking good so far.... Not perfect by a long shot, but not bad for a first attempt at the western rig.

-
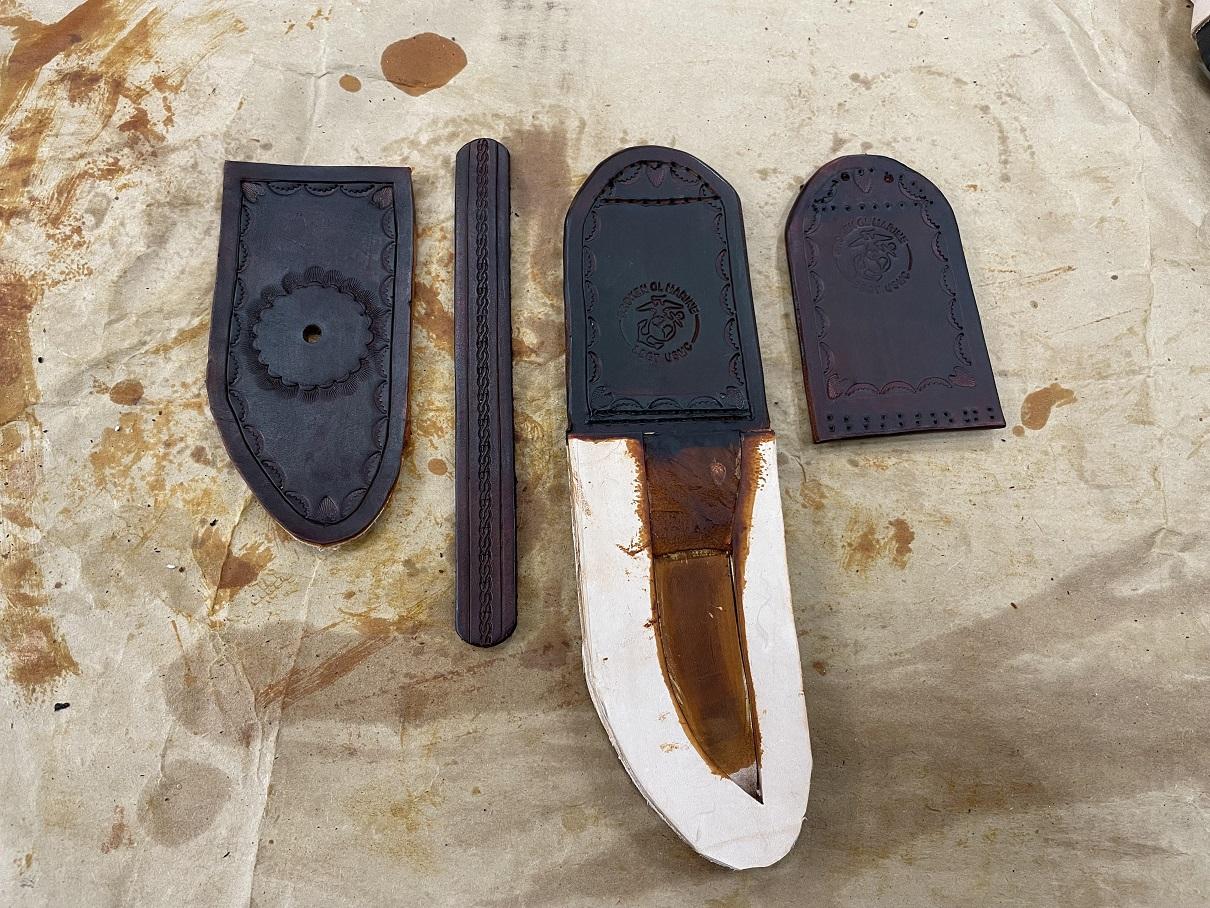
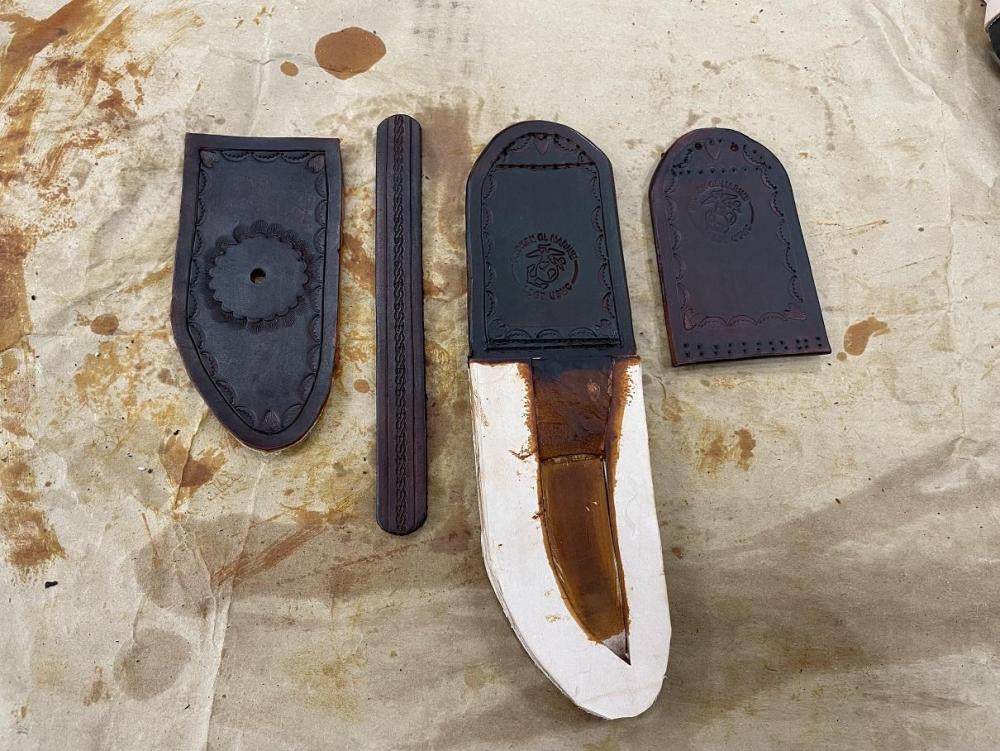
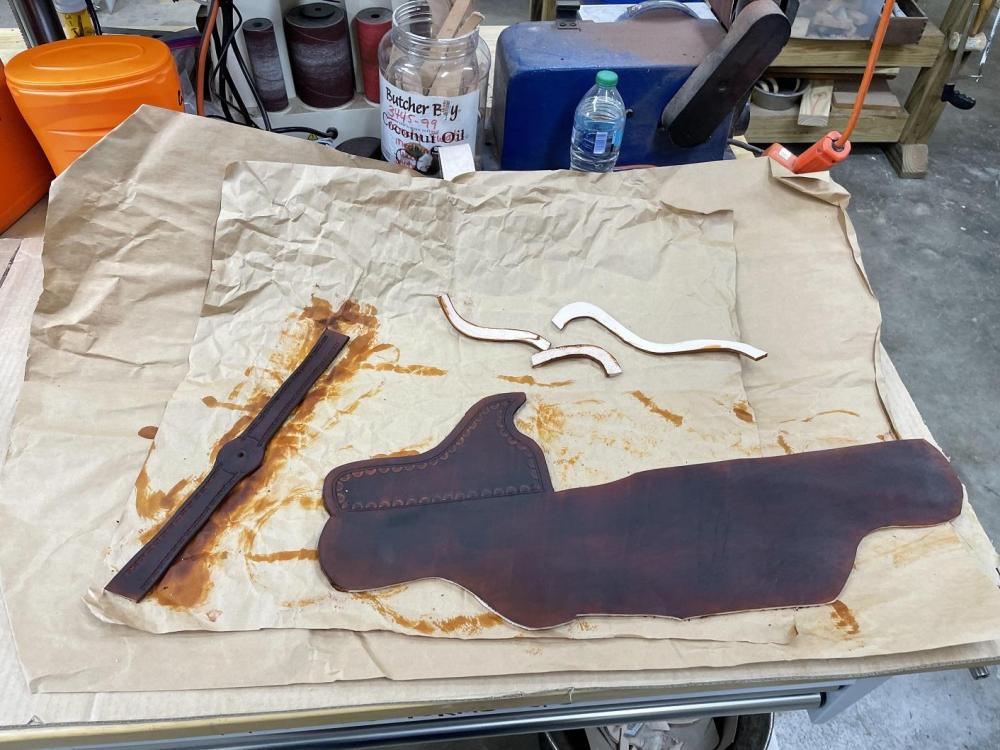
Several sessions. Got a good bit done. I have gotten some of the assembly done, and gotten two coats of dye on and a coat of neatsfoot oil on to restore the flexibility. I burnished the edges of the loop and upper portion of the sheath body, and the retention strap. The sheath body will be burnished after assembly. This portion was not without a stutter here and there, but I used the part I messed up. Take a look at the far right. The tooled piece was the sheath body, but ... oops. Cut off the top portion and will use that for the belt loop. LOL. Getting close to having this done... will antique the tooling on the sheath body and upper sheath, as well as the retention strap, then apply a finish and the snaps for the strap. Glue up, then sew the belt loop and the sheath body. Boom. Sew around the edge of the sheath body... Couple coats of wax...
-
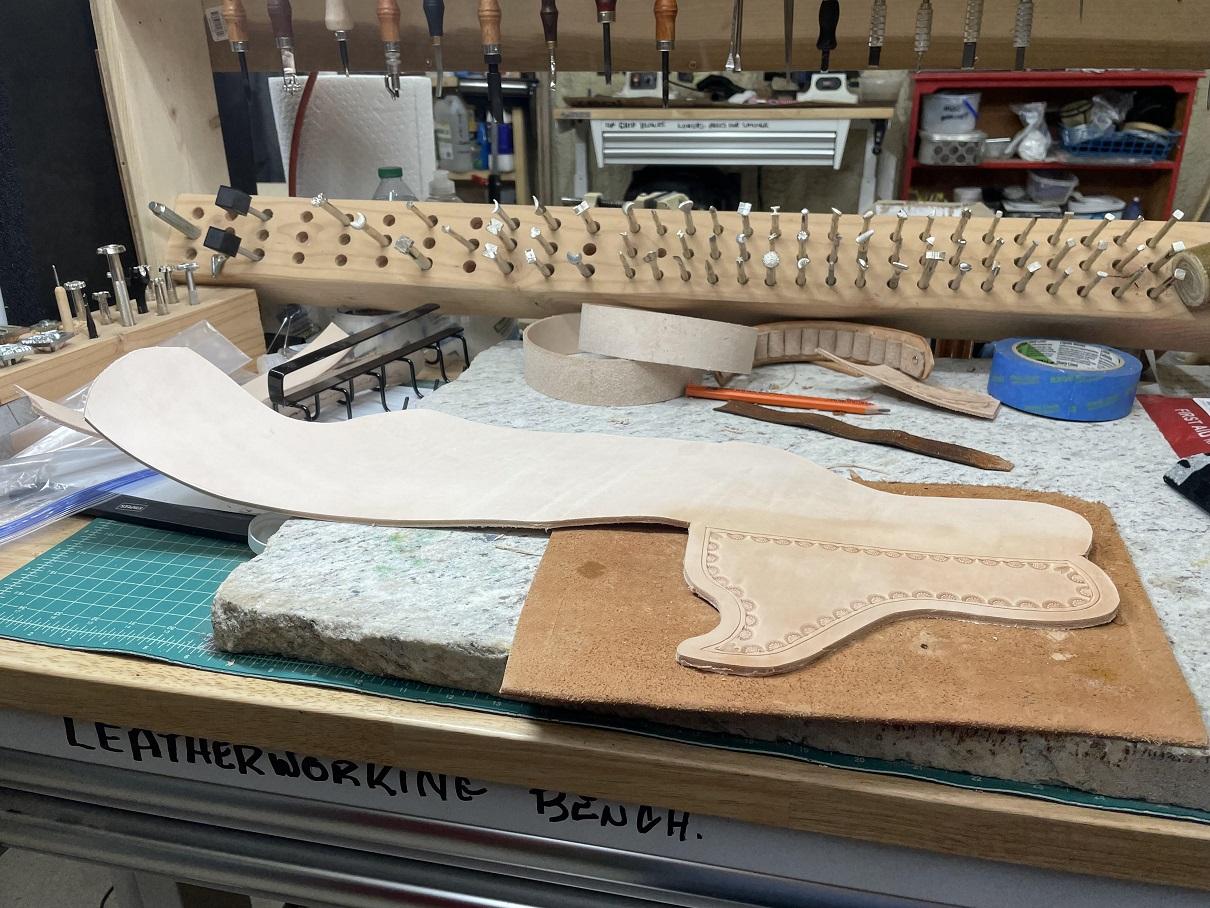
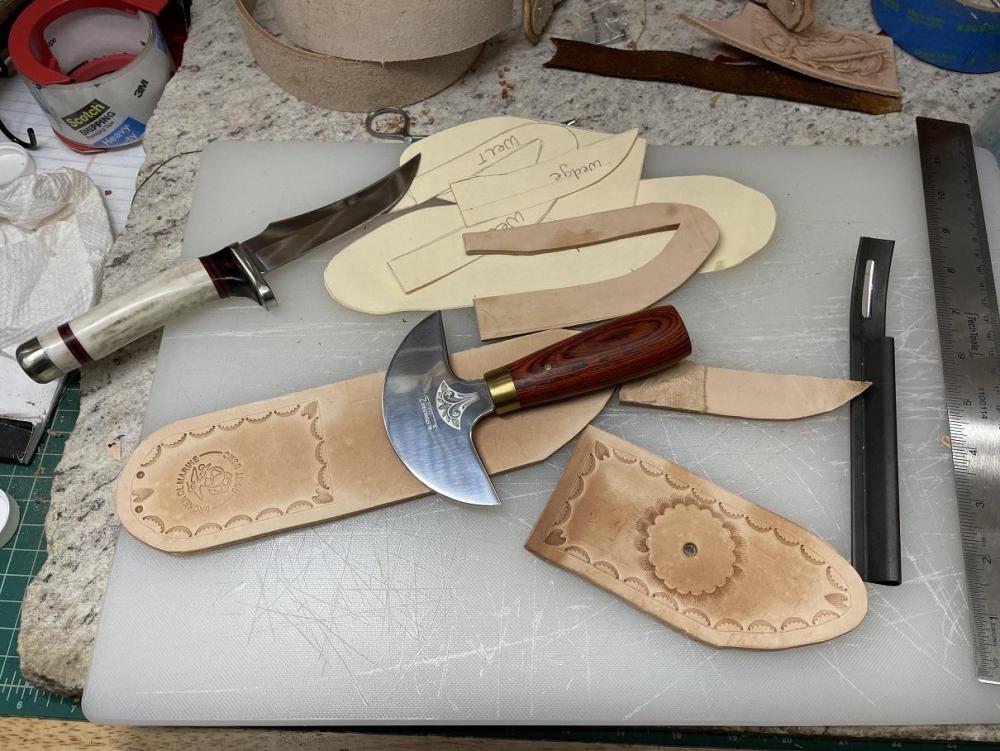
Next I went to work. I cut out each piece, then cut out two pieces of the wedge shape when test fitting showed I'd need extra. Test fitting let me mark where adjustments would be needed to the parts I had cut out. I marked and then tooled the front and back panels, while they dried, I skived the wedges so they would work. Got a lot done, but still plenty to go. Tomorrow I will recheck my work, and I'll also cut out the belt loop for the back of the back panel, as well as the front strap that will secure the knife to the sheath, and tool that. I am in no rush as I can't glue up the project until AFTER the concho is installed and I am waiting for those to arrive from Tandy, they should be finished with end of the year inventory and beginning to ship soon. NO rush... I can dye the pieces once they are done, taking care NOT to dye the areas that will be taking glue. I can install the various hardware that needs to be in place before the assembly and sew the belt loop on the back of the back panel.
-
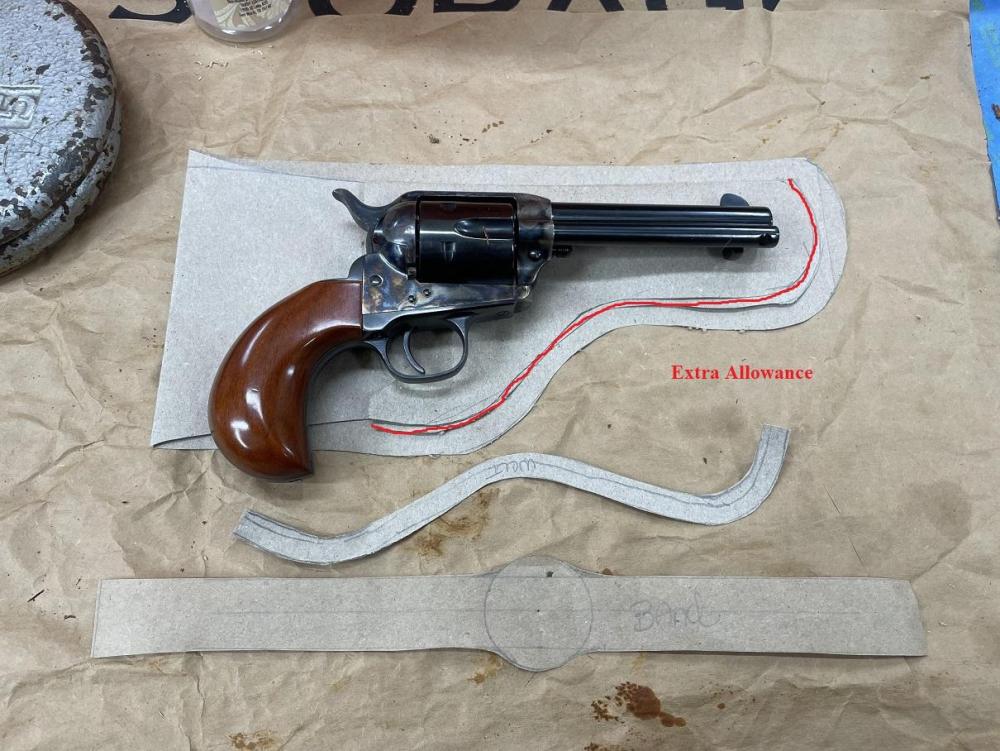
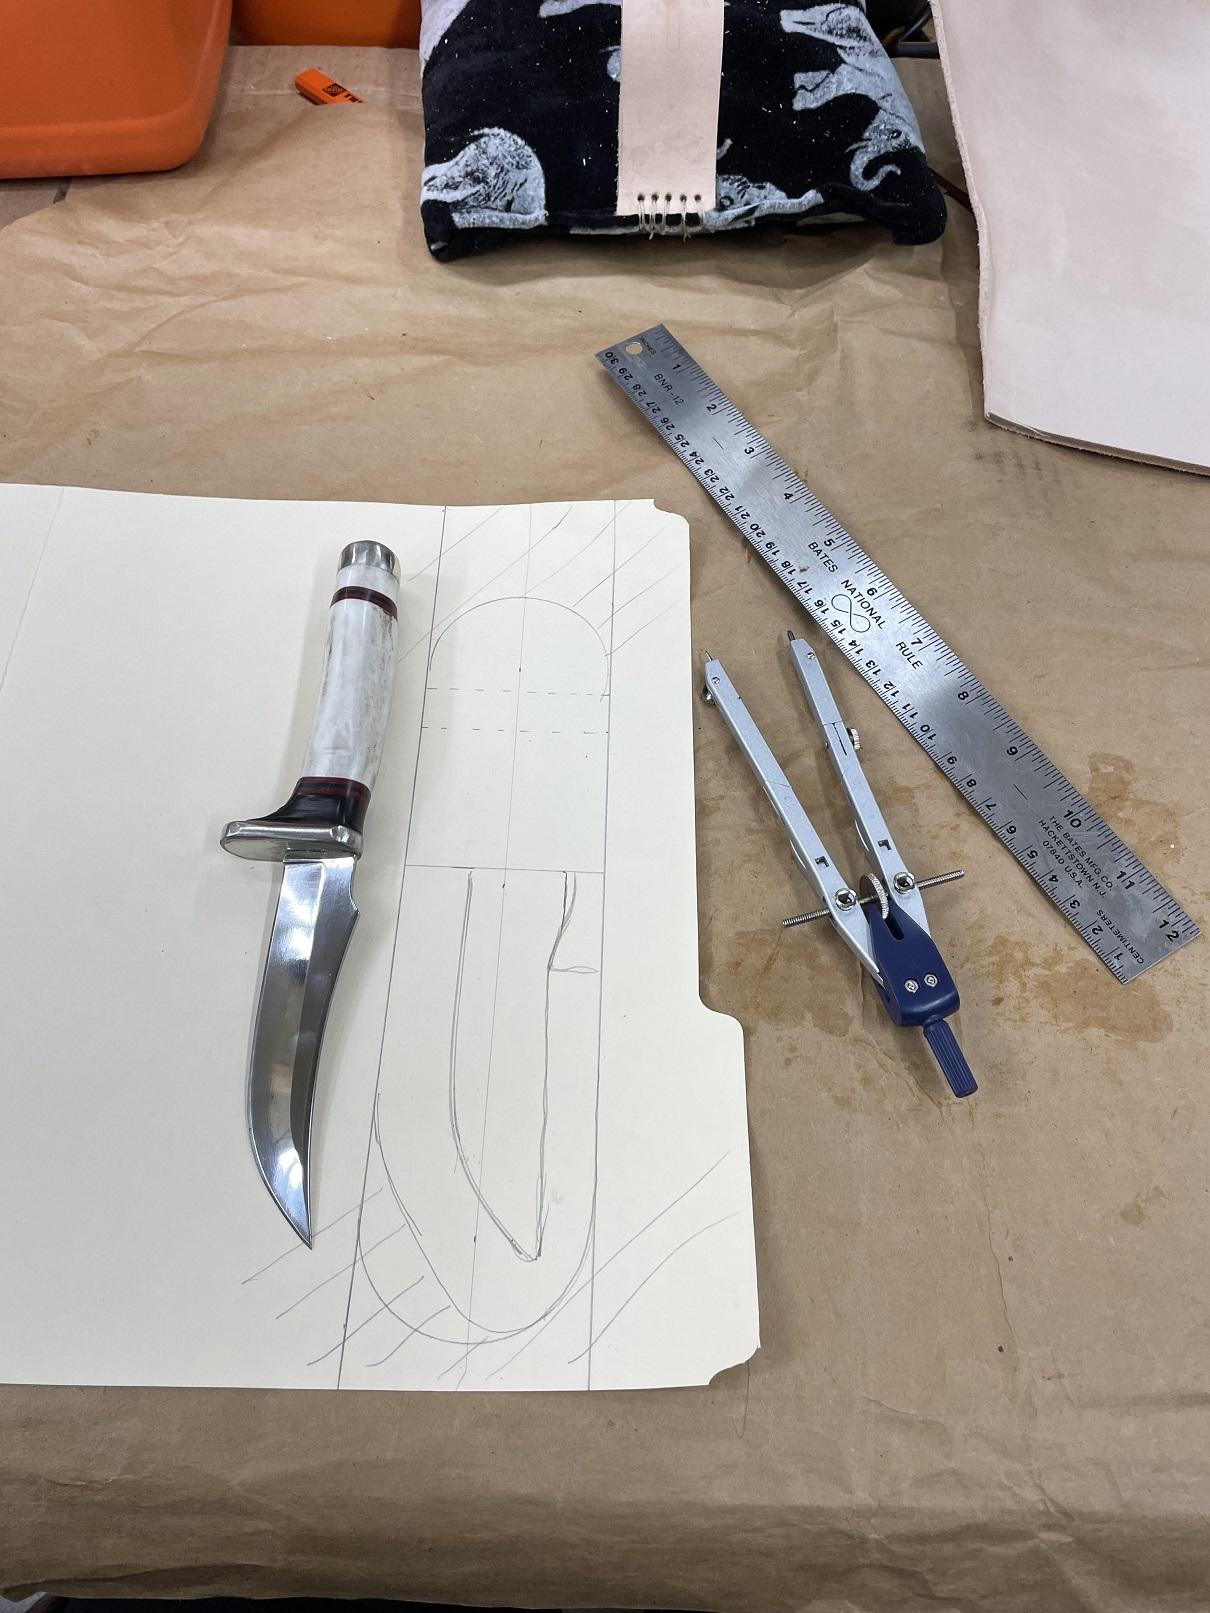
First step on laying out the pattern is to draw the knife itself on the material used for the pattern. In this case, an old file folder. Then you play with the layout and design. I went with a two piece rather than a rolled over, so I could insure I'd have room for the concho, the tying piece for each aspect of the Gunbelt. As you can see, I added each component to stabilize the knife when sheathed. Once the layout was done, I cut out the main pattern, and redrew that on the folder. Then cut out the front section, redrew it. Cut out the welt, from the front piece, and redrew it on the file folder. Lastly I used that center I had cut out to make the welt as the pattern for the wedge. Then, using each pattern piece, I prepped the leather for cutting by transferring the pattern to the leather. I added the wedge to my pattern as I had seen it used on a post HERE on the forum. (A post regarding the Randall Knife Sheath.) Thank you Sir.

-

Starting on the holster and knife sheath
Brokenolmarine replied to Brokenolmarine's topic in Show Off!!
I forgot to add, I learned a lot along the way. In my next build, I will know what to do and how to do it. More importantly, I will know what NOT to do. I made a number of mistakes along the way that were costly. Duh. -
Starting on the holster and knife sheath
Brokenolmarine replied to Brokenolmarine's topic in Show Off!!
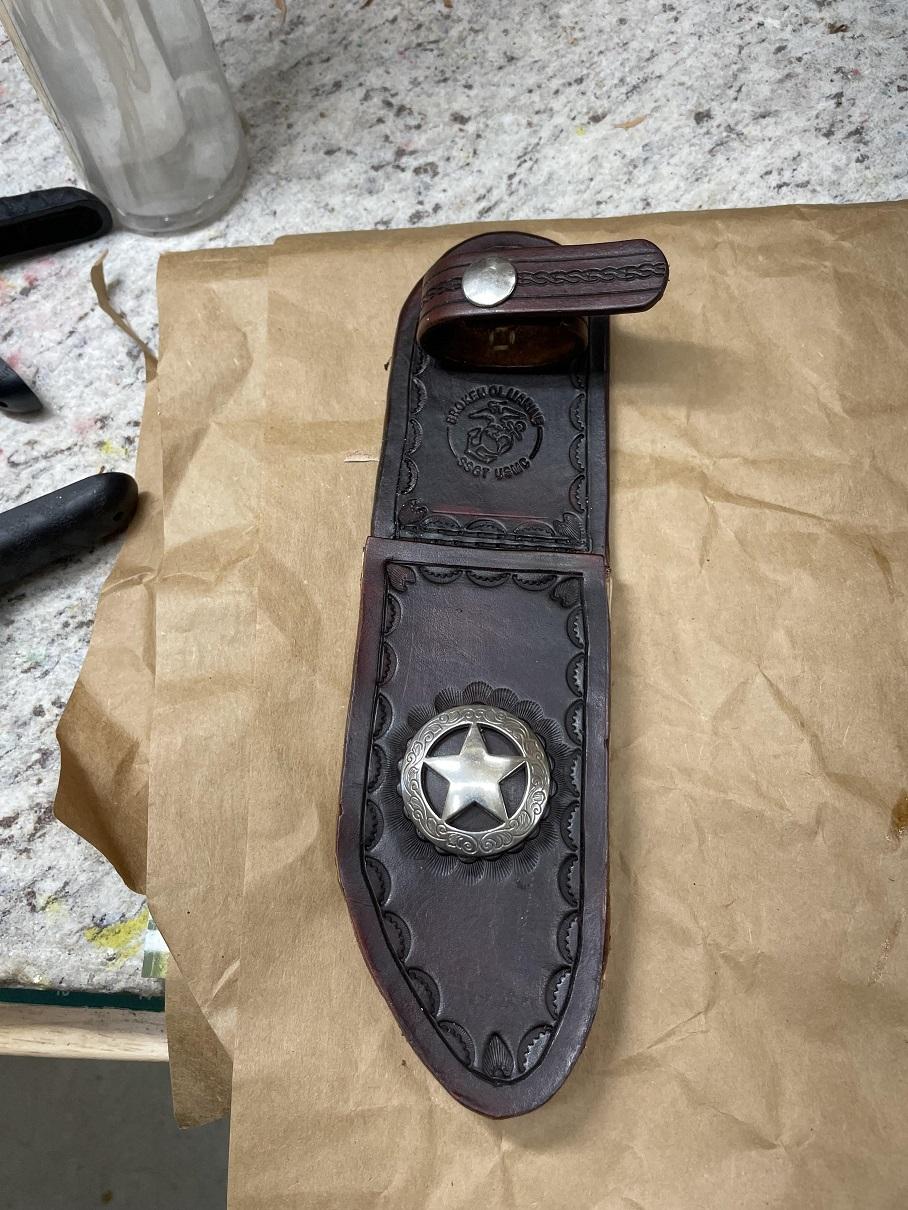
Out this morning after a nice breakfast. I made a Western Omelet. Fitting don't you think? I trimmed those curves I wanted, including the bottom of the skirt. Smoother look there as well. Then I burnished the skirt edges and reburnished the holster body. I have picked up tips and experience along the way, and am getting better, still NOT perfect, but looking much better. There might be some touch up later. I did sand the entire rough out to about 400 grit, then burnished and dyed the area that will show. Big improvement. When I do the next one, I'll line it, avoid this issue entirely. Next up, I waxed all the bits and pieces again and buffed them to a high sheen, then carefully sewed the loop into position after installing the concho, with blue loctite. The piece is mostly finished, all that is left is to add a hammer retention strap at the top and the tie down lace at the bottom. I likely won't use either, but they will give it the authentic look and the tie down lace will insure the holster doesn't shift in the retention loop. Not bad for a first try at the western belt. Next up is the knife sheath for the off side. Waiting for the matching concho's to come in from Tandy. They are due to start shipping on Thursday after the year end inventory finishes. I ordered back before Christmas. Maybe end of next week? I can build the sheath and use a stand in Concho of the same size.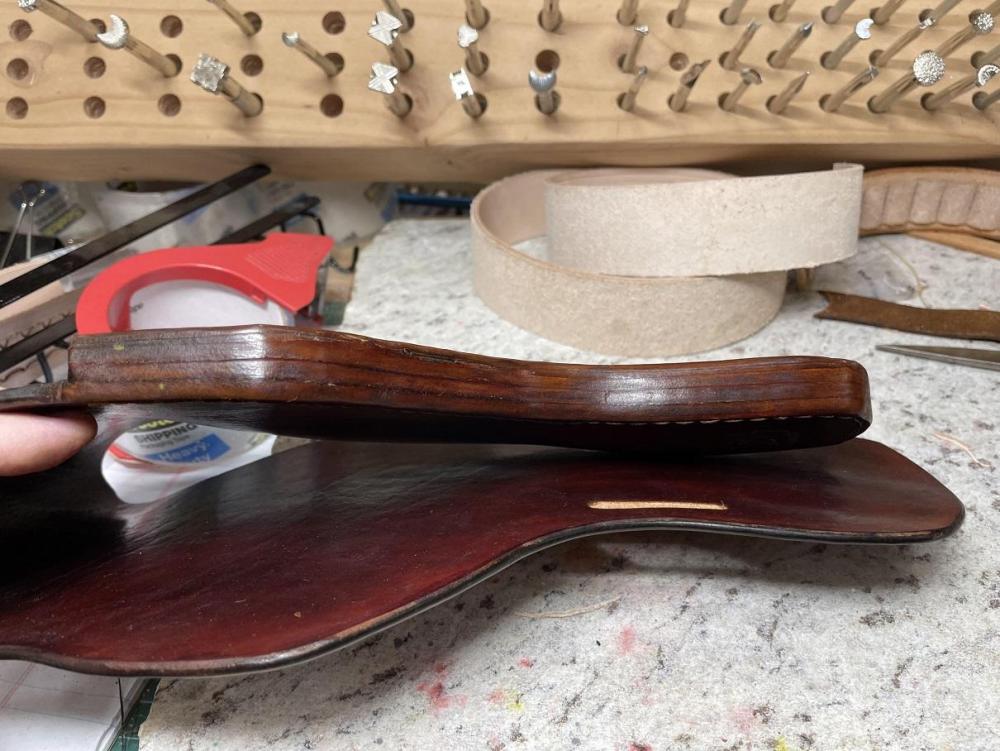
-
Starting on the holster and knife sheath
Brokenolmarine replied to Brokenolmarine's topic in Show Off!!
Back out for a couple hours today. I antiqued the loop after correcting some small issues with the tooling that likely only I noticed... then recoated the finish. I set that aside to dry, and with my tongue held just right, I marked the holster for sewing, and drilled the holes. The front went where I wanted. I used a saddle stitch and sewed it up tight to insure we stayed together. Using dark brown dye, I dyed the edges of the holster and the thread and the tooling, and set 'er aside. While THAT dried I went back to the loop and buffed it out. The holster was folded over and I marked the location of the slots for the retention loop and punched those with a slot cutter. Then I could measure the loop and cut it. I punched the holes I'll need to sew that together tomorrow once everything is done. One last task before stopping for the day, I burnished the edge of the holster where the welts are, and they cleaned up very nice. Looking good. Tomorrow? Burnish the edge of the skirt, the top of the holster body, (Which I should have done before assembly... duh. :roll: ) ... and install and sew the retention loop. I'll also drill holes at the bottom of the holster and in the skirt for a tiedown, which will keep the holster from moving up and down in the loop. I WON'T be tying down the holster for quick draw. :twisted: I need to address that rough side to get rid of the ragged look. A little sanding and some burnishing there as well should help. Miss Tina suggests taking the square edges off in a few small places and otherwise it's good.
-
I especially like the tooling.
-
Starting on the holster and knife sheath
Brokenolmarine replied to Brokenolmarine's topic in Show Off!!
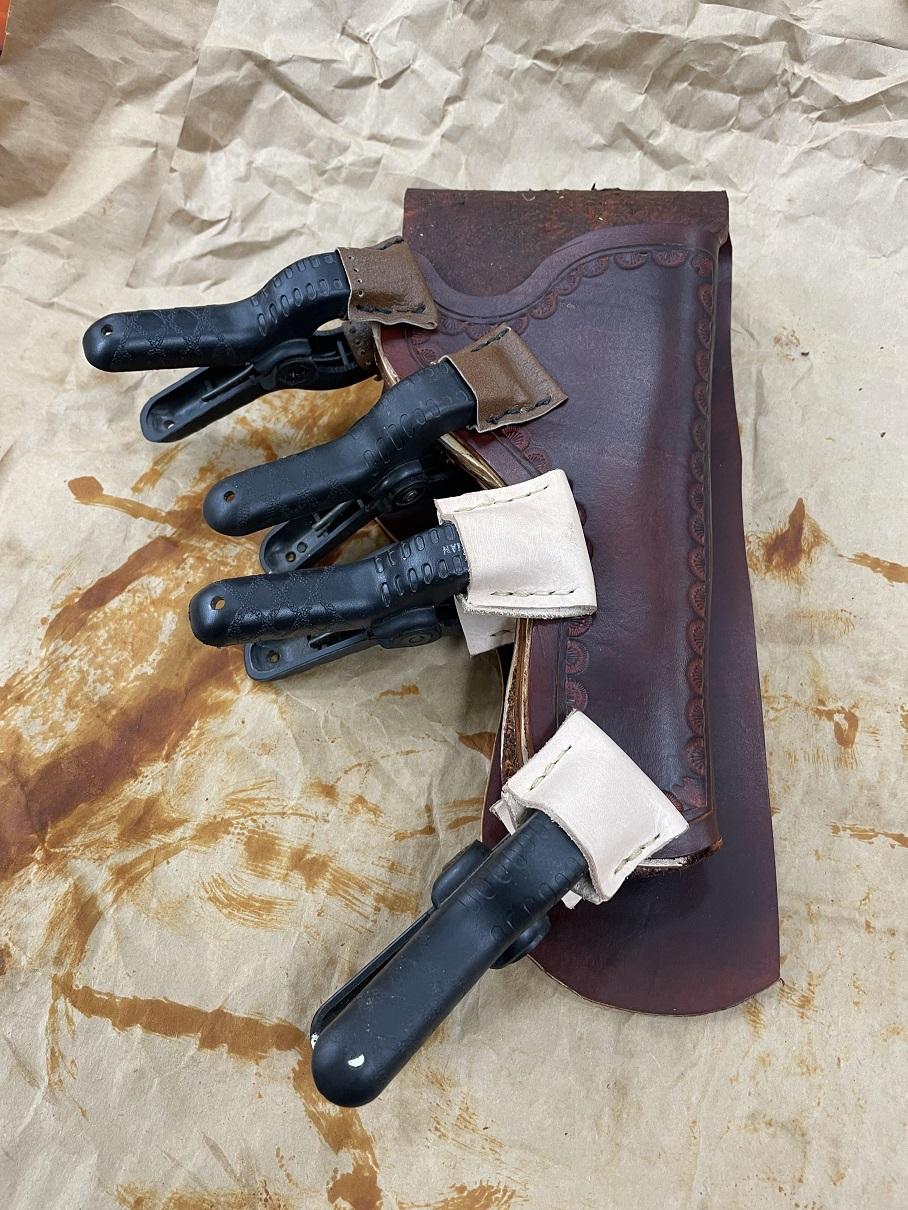
Don't have to be pretty, just have to keep the clamps from marking the project. First tooled sheath, worked hard, I thought it looked pretty good. (It didn't). Clamped it. Plastic teeth left grooves in the leather. Made covers from the scraps. Been using them ever since. -
Starting on the holster and knife sheath
Brokenolmarine replied to Brokenolmarine's topic in Show Off!!
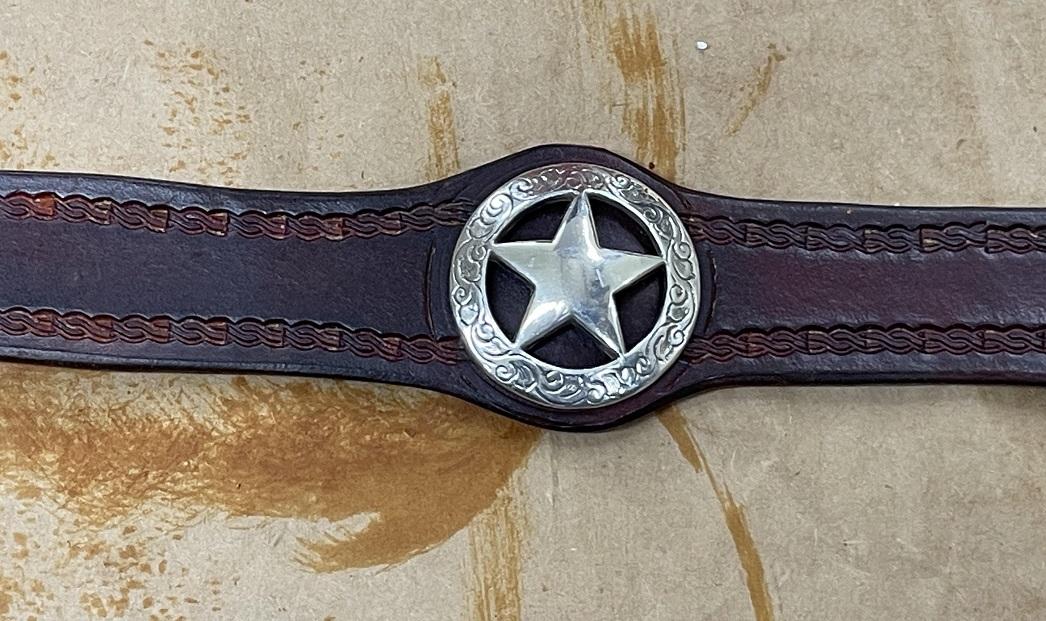
Went back out to work and treated the pieces with the Mink Oil. Really returned the flexibility and deepened the color. Especially the Retention Loop which had gotten VERY stiff after dying. Once that was done, I went to work prepping the holster for glue up, roughing the welts and marking the inside edges of the holster for alignment. Got 'er done and then glued up and clamped. It will cure overnight, then I can trim the edges flush and sew it in the morning. After that was done, I went to work on the Loop, buffing it out, waxing it, and mounting the Concho, as I wanted that in place when I went to mount it on the skirt. I think it looks good against that dark brown dye. I hear the project calling but I like to let the contact cement cure overnight.

-
And doesn't smell as bad... LOL. Four kids and seven grandkids later, I AM qualified to agree with BOTH statements. When the First kid was born while stationed in Hawaii I sold my Ovation Custom Legend Guitar and hard case, plus a matched pair of Pythons and Zero Haliburton Aluminum Case to buy all the Jenny Lind furniture the wife had to have. I love the kids, all of them, but I miss those sequentially serialized Pythons.
-
I WISH I could get my stitching to look like that. I am learning my Cowboy 3200, but on many projects, I don't trust myself with the machine and still hand sew them. Beautiful Work. I wanted a Randall when I was in the Corps... My wife said we were having KIDS intead.
-
Starting on the holster and knife sheath
Brokenolmarine replied to Brokenolmarine's topic in Show Off!!
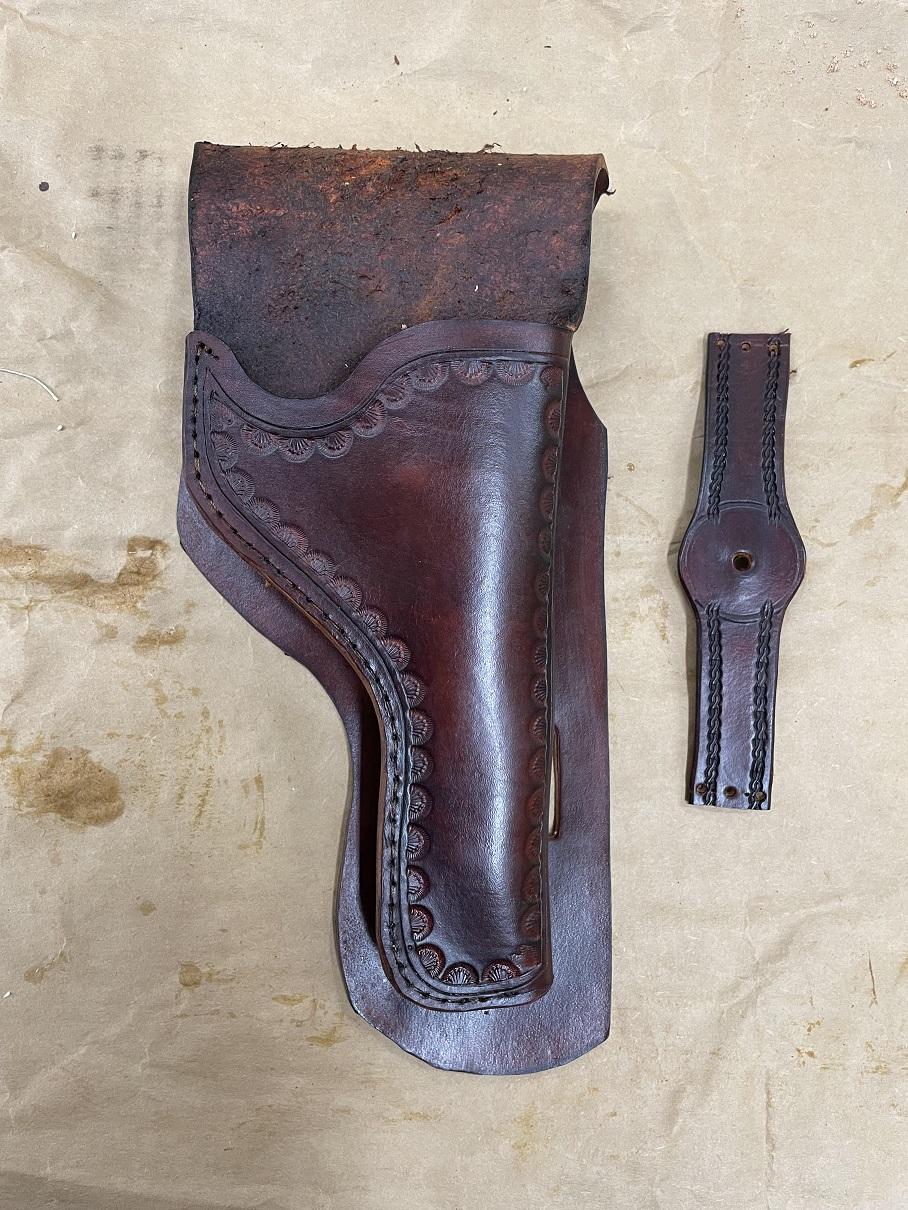
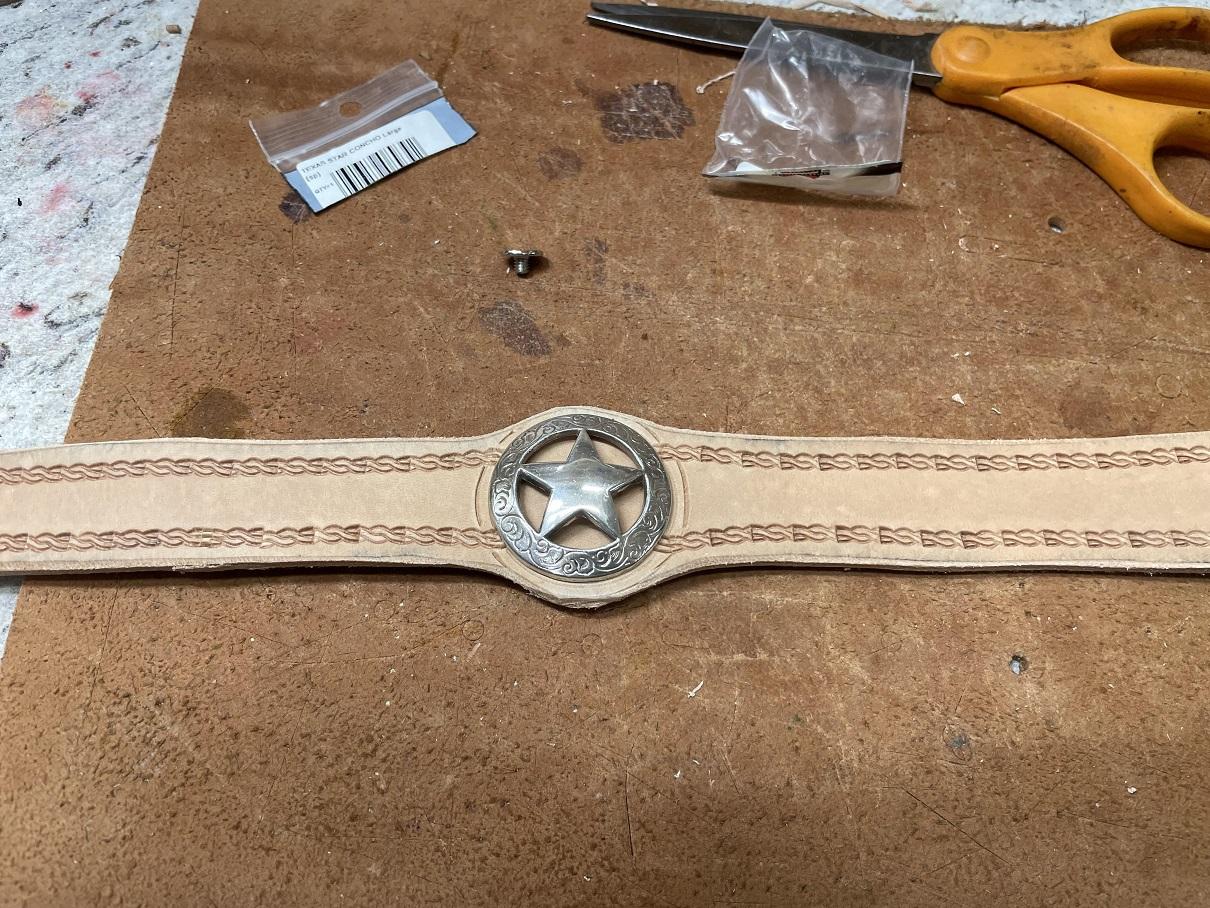
Got out in the shop, using the pattern, I made the retention loop and welts and got the tooling done on the loop. I laid the concho on the loop to see what it might look like. I liked the look. Will look even better when the leather is dyed a rich brown to match the belt. Laid it all out and dyed the pieces. I only dyed the edges of the welt. I cut out two thicknesses of the welt in case I needed them. Hopefully I'll get away with just the one.
-
Starting on the holster and knife sheath
Brokenolmarine replied to Brokenolmarine's topic in Show Off!!
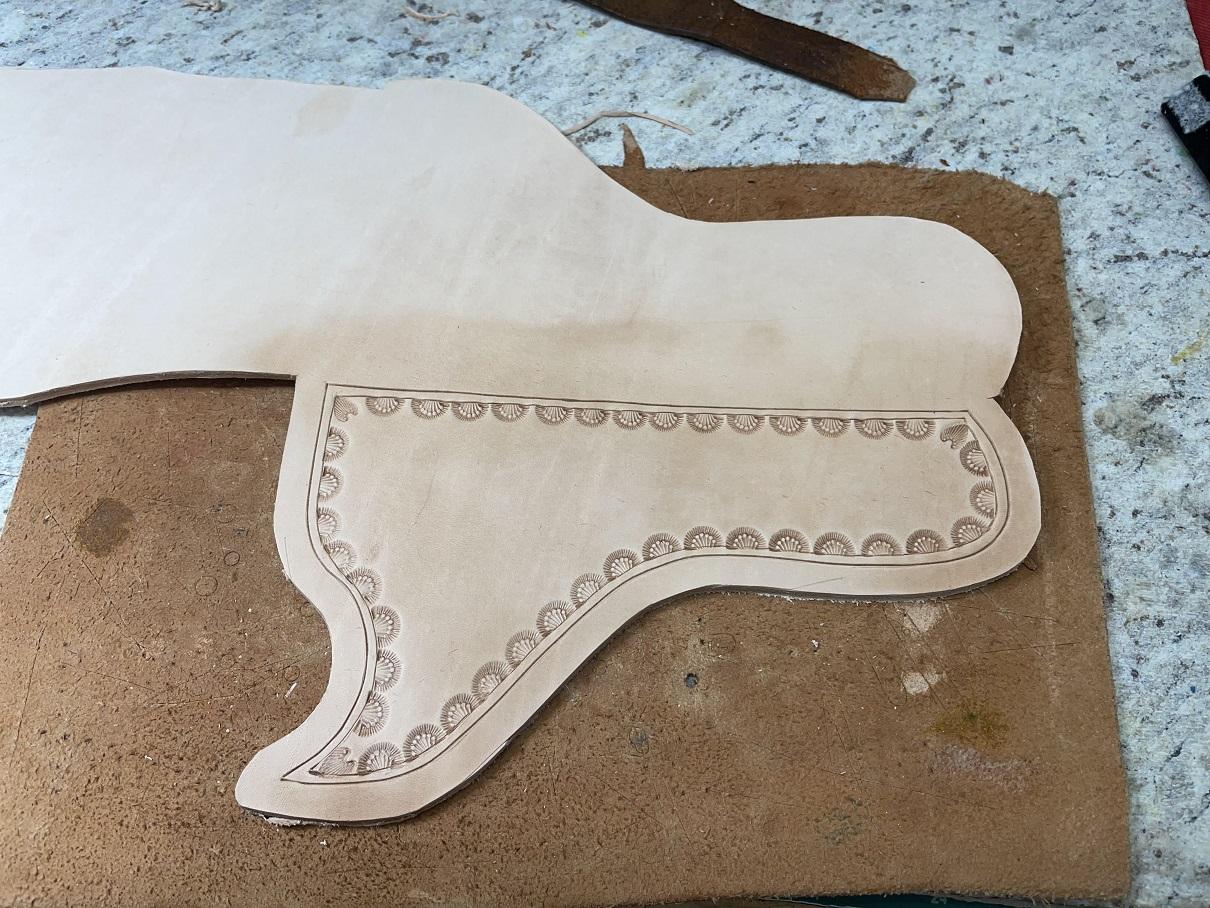
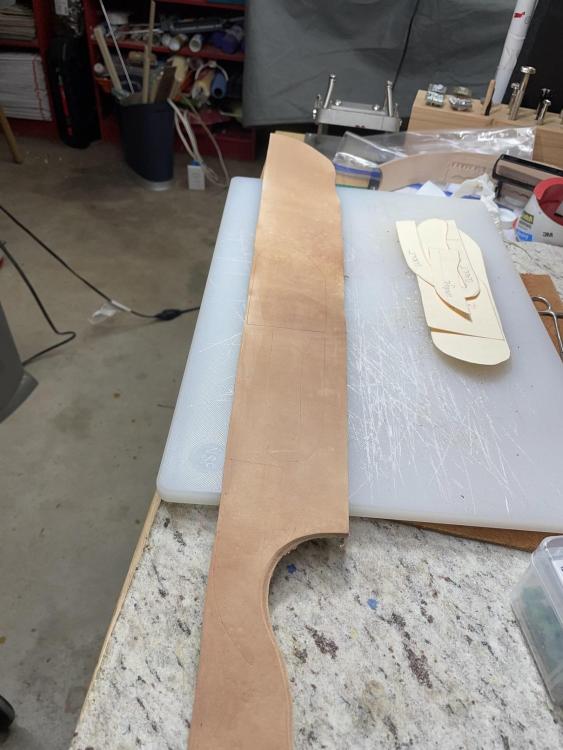
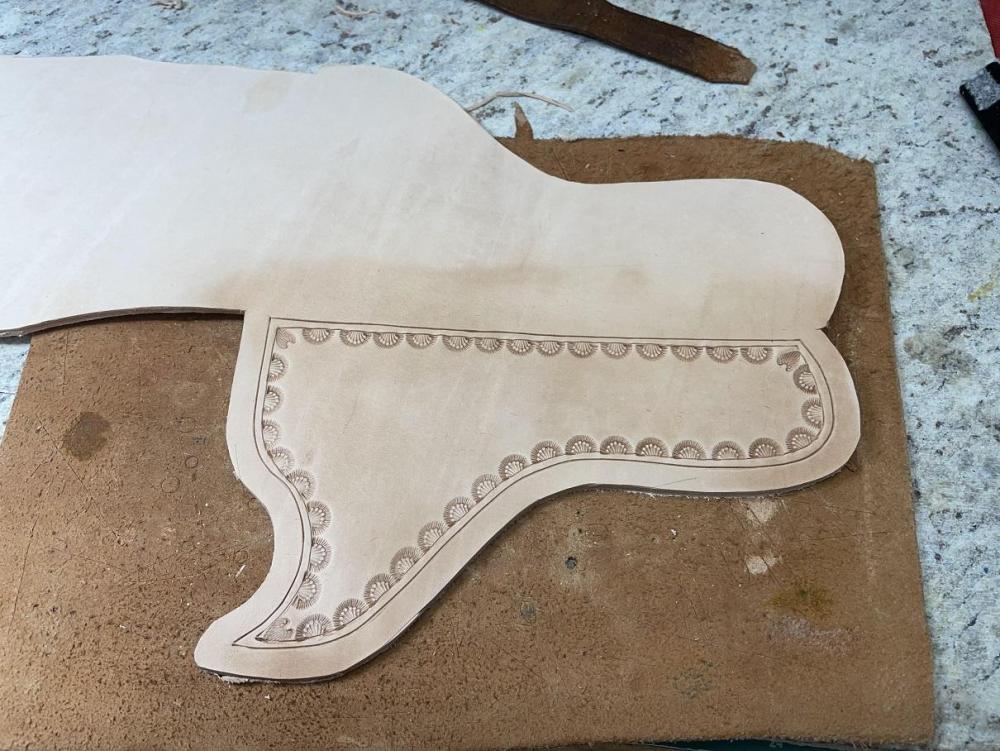
Had family up for Christmas, so not able to get out and work on the holster for a few days. But, they left yesterday morning and I was able to get out in the afternoon and finally pull the 10 ounce leather out and cut out the pattern. I was pretty happy so far, and laid out the tooling and got 'er knocked out. Here is a closer look at the accent tooling on the holster body. Once the leather is dyed, any small errors won't be so visible, I hope. After coffee and toast this morning, I hope to get out and get the retention loop and welt cut out and tooled and dyed, so we will be ready to move forward. So far so good.
-
Starting on the holster and knife sheath
Brokenolmarine replied to Brokenolmarine's topic in Show Off!!
I'll give it a try, thanks.... -
Starting on the holster and knife sheath
Brokenolmarine replied to Brokenolmarine's topic in Show Off!!