Brokenolmarine
-
Posts
596 -
Joined
-
Last visited
Content Type
Profiles
Forums
Events
Blogs
Gallery
Store
Everything posted by Brokenolmarine
-
By the way, a special thanks to DoogMeister for suggesting the French Cleats. As I said in the thread, I had known about them in the past, but my anesthesia erased memory had forgotten them. PERFECT solution for hanging this Display Case.
-
Thanks all. Now to decide on the sword display.
-
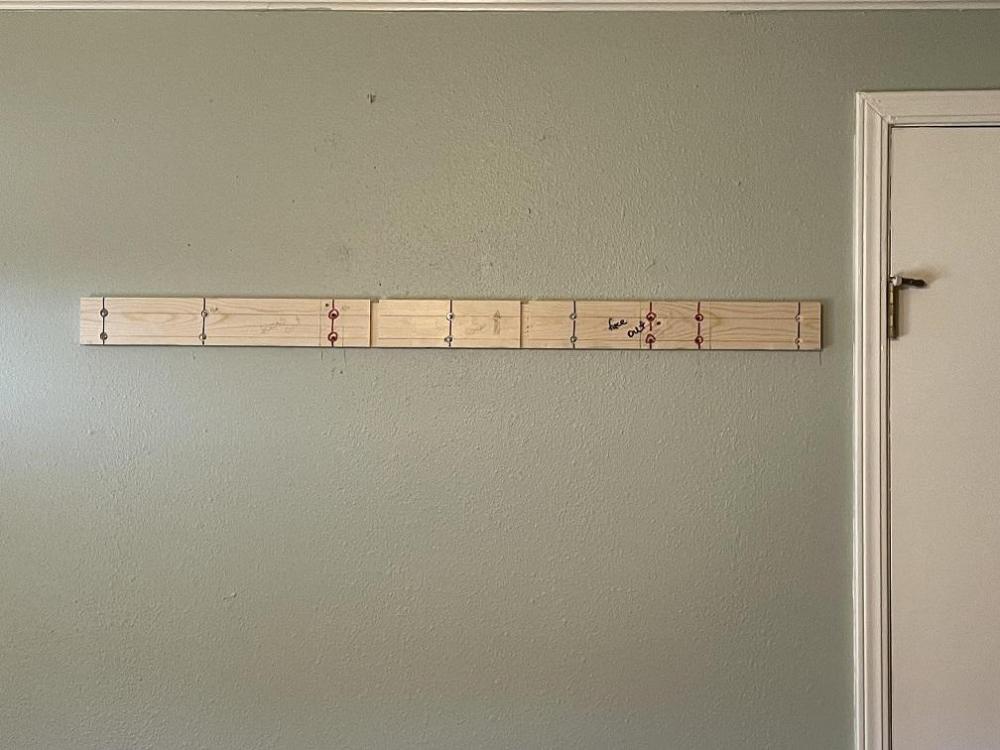
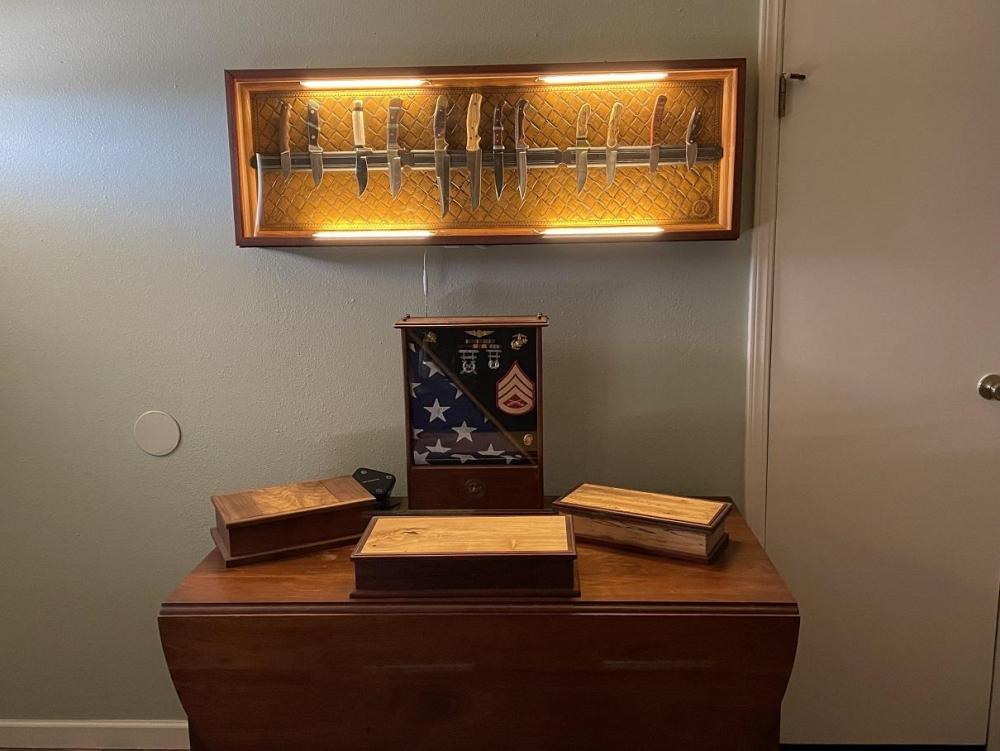
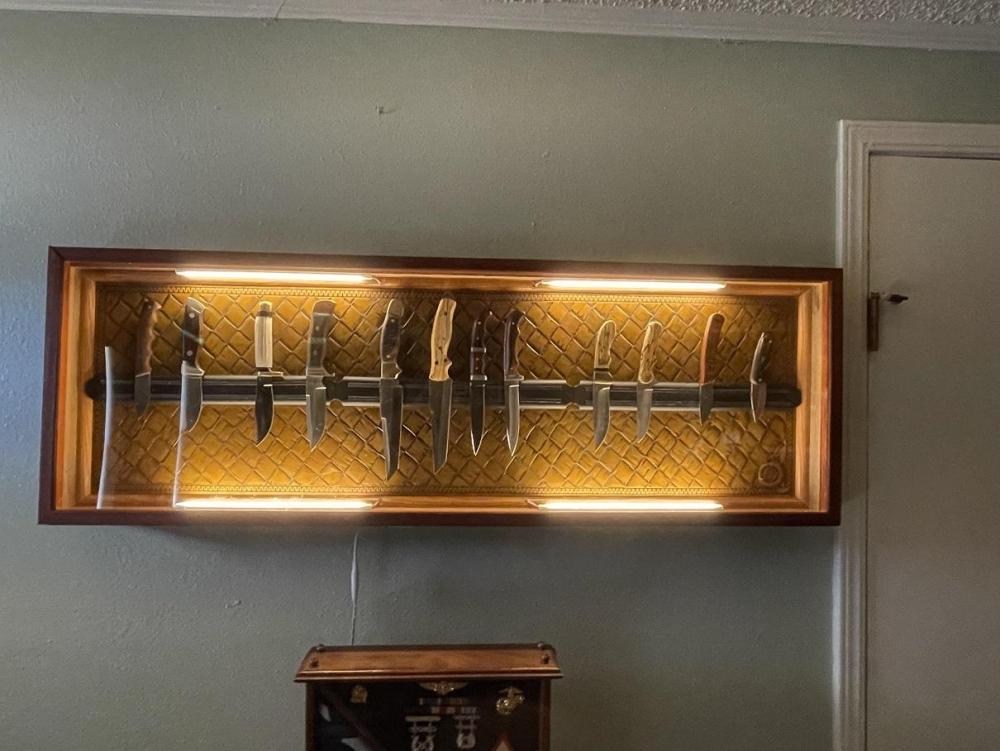
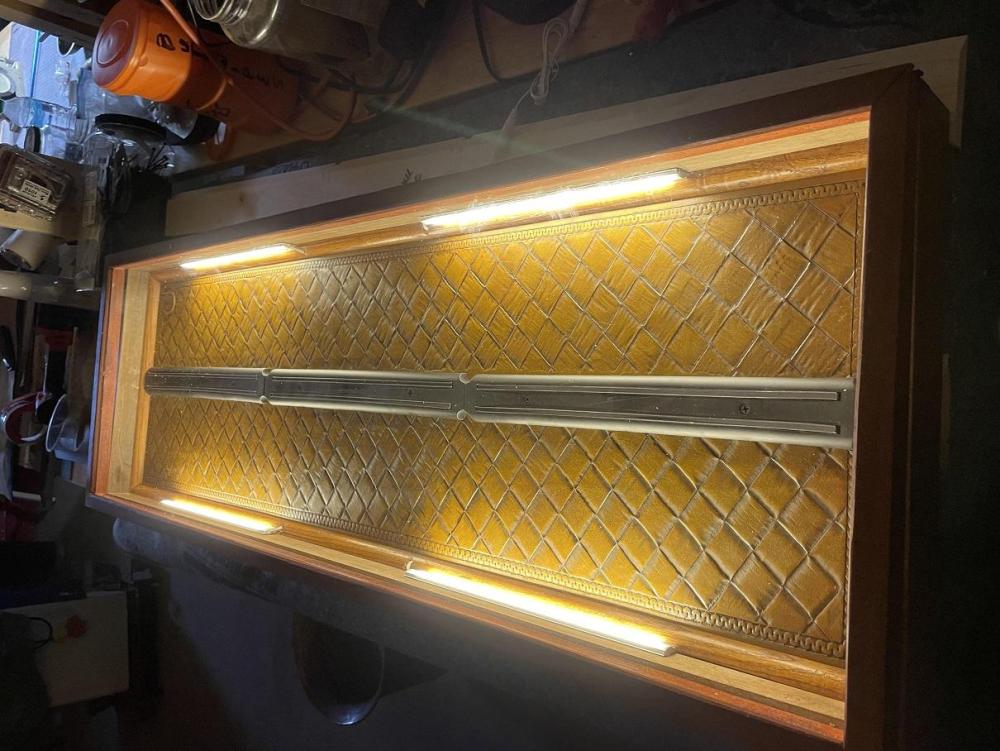
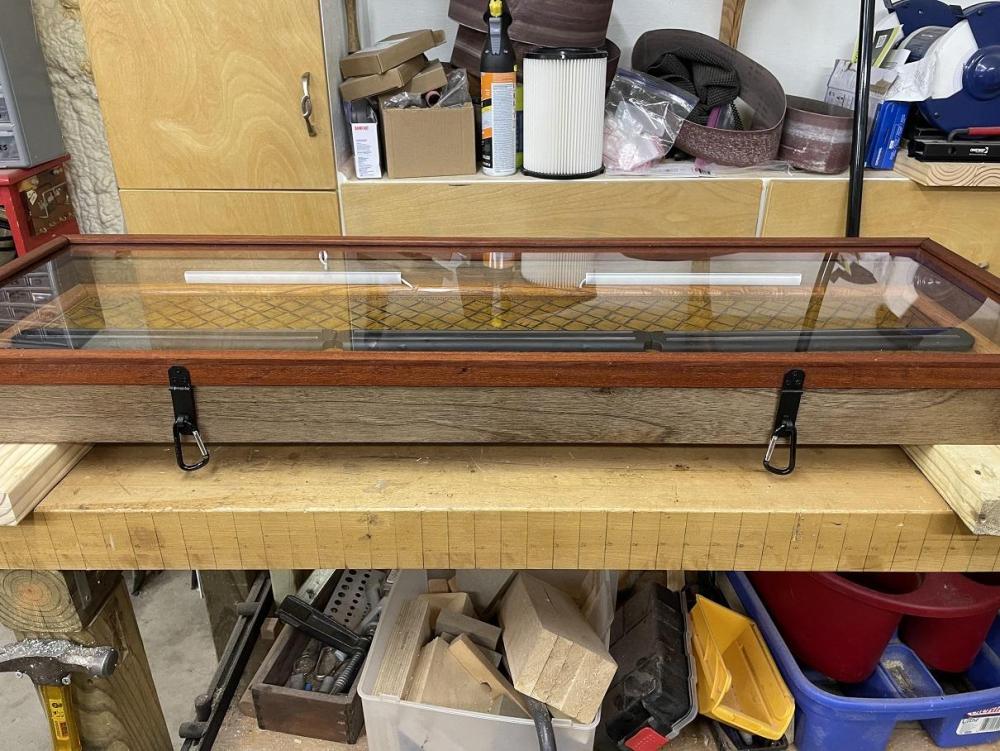
Okay, here we go, time to get 'er done. I used two screws in the studs to temporarily mount the cleat, then an awl to mark ALL the hole locations. Took the cleat back down and set the wall anchors where needed. THEN put the cleat back in place and mounted it. Worked as planned, she's up there. With the case hanging on the cleat, I could slip both the bottom cleats in, and mark their location from the side, then take it all down and mark the holes for mounting, and repeat the process. All the cleats got screwed in place and we are solid. Looks good. I added the trim to hide the cleats. A closer look The project is done, the book is closed. Time for a nap. I am really happy with the way it came together.
-
Moved the table out and took down the picture, cleared the wall and marked the eyeline. Measured up 8" from that, and down. Careful measurement of the back of the display case let me mark the height of the top cleat on the wall. Using a level, I marked a reference line for it's installation. Using a stud finder, I marked the position of the studs in the wall, and holding the cleat up, I transferred the info onto the cleat. I took my time, and double checked the work. I did the same with the two lower (one foot) cleats, marking the location of the stud that fell on the right hand cleat, and the lack of studs on the left hand cleat. I took the cleats to the shop, and using the 6' metal ruler, laid out the location of the holes to be countersunk and drilled, and CAREFULLY determined which would be into studs. THOSE didn't need countersunk due to screw type. Got the countersink done, then drilled thru them all. The cleats HAVE to sit flush against the wall, so I cleaned up the slight blowout on the back. I could have avoided blowout with a scrap backer, but I wasn't worried about the looks.
-
I too, re-read and rewatch. The house is filled with bookcases and the bluerays and dvds are now in sleeves made for music cds in binders. We toss the box as soon as we buy them. The boxes take up way too much space. Binders will hold 150 discs. I have an index for the collection in excel.
-
When I say I went thru it all, I mean everything. I found things I had forgotten I had. My last five surgeries were supposed to be just an hour or an hour and a half, but turned into five hour marathons. Under that long, they all had an affect on short term memory. Sucks to forget things you knew, all the shortcuts and tips and tricks. I have binders full of notes and watch youtube videos before starting projects to refresh my memory these days. I also make checklists. Just like my old flying days.
-
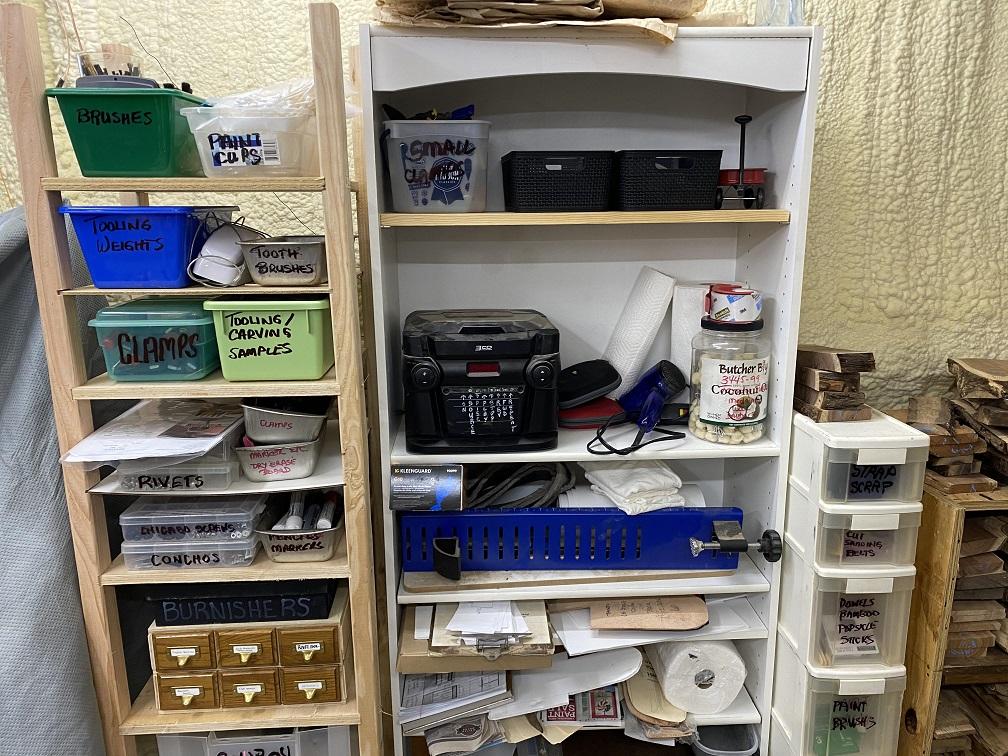
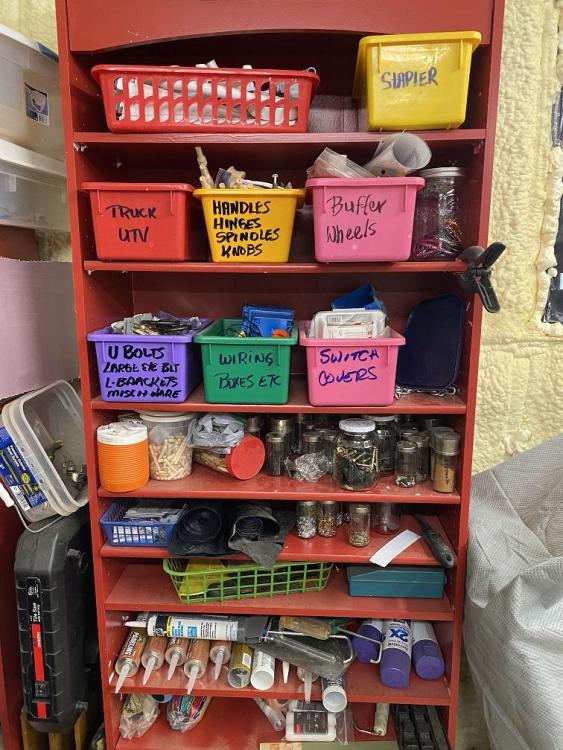
Sadly, I have to be. I have had thirty surgeries. If I don't keep things organized, in their place, and MOSTLY labeled, I would spend (waste) LOTS of time looking for them. If you look in the background of the pictures, you'll see that the drawers, boxes, shelves... all labeled. A couple years ago I spent a month going thru everything in the shop de-cluttering and re-organizing. As you can see in the pics below, I used blue tape where needed, or just wrote on the tubs or containers where possible. The tool drawers are all kept neat, extra tools were thinned out. Cheap crap tools were thrown away. Quality extras were put in bags and went into the trucks, or the barn for use down there.

-
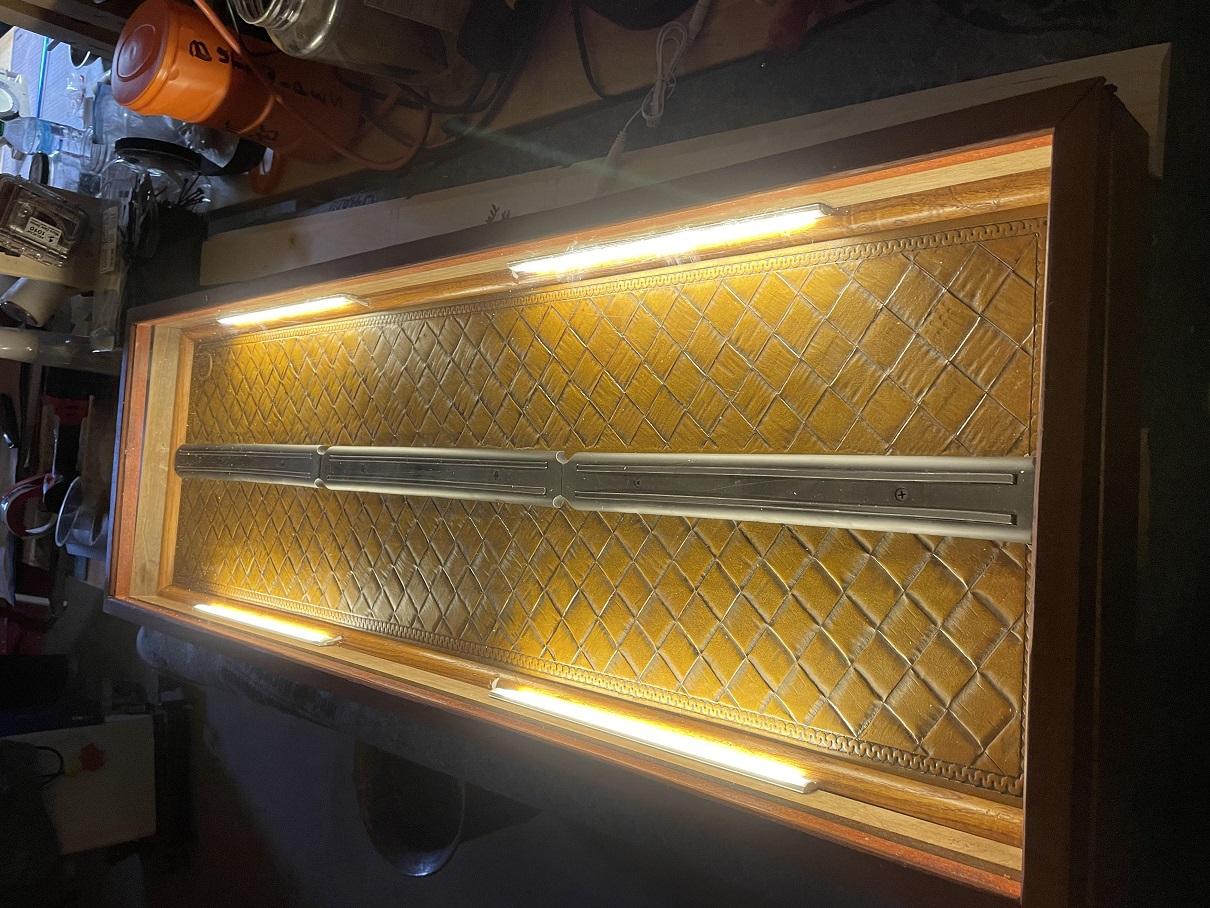
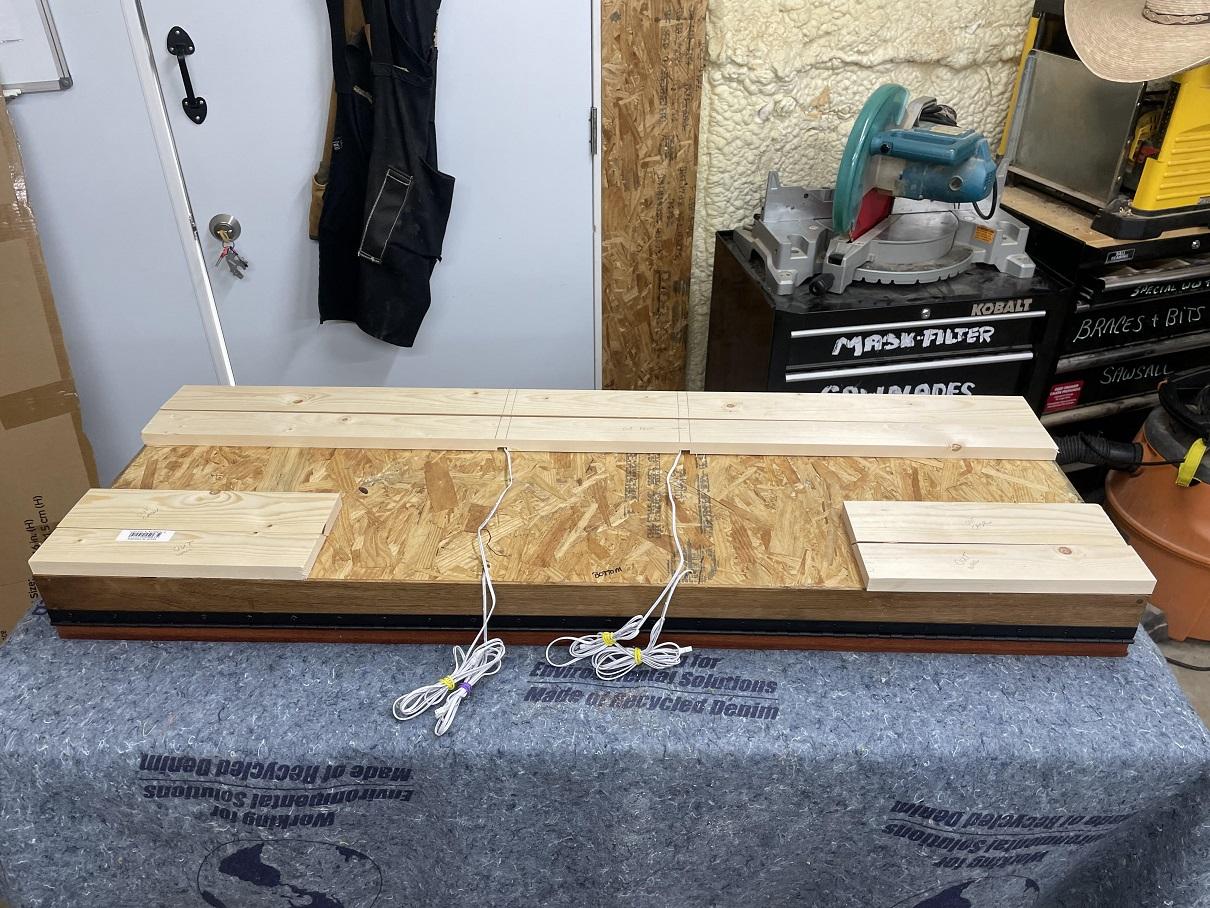
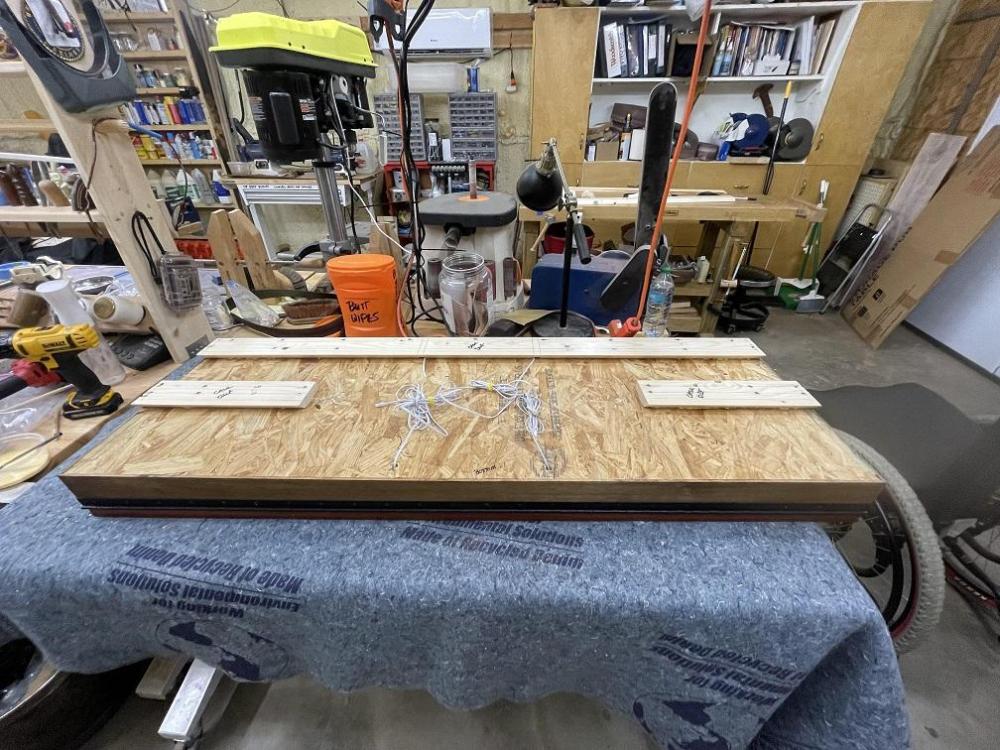
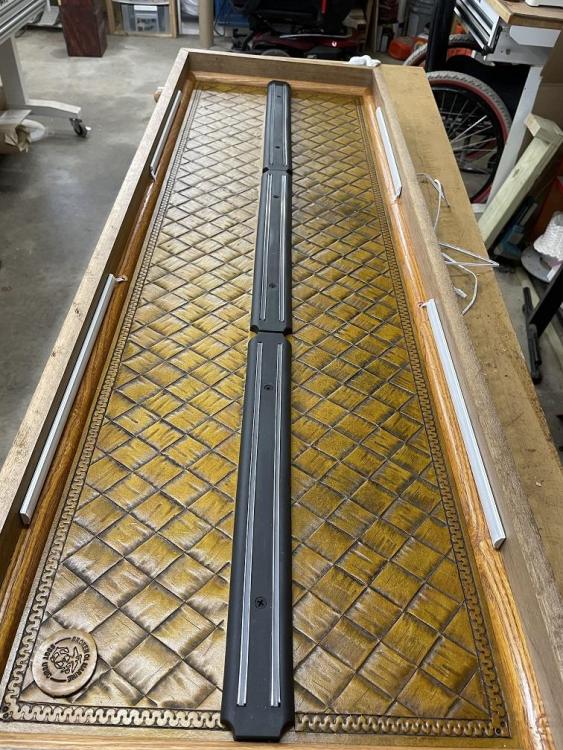
Out in the shop after breakfast and hit it hard. Got the wiring organized and secured to prep for mounting. Got the molding cut and prepped, then stained a dark walnut. Performed a lighting test o the system. Bright and dim. I think it looks awesome. Oh wait, that's just me. I'll have to rest for a while, too much time standing. Back and legs are complaining. I should get her up on the wall this afternoon.
-
Time to mount the cleats. I gave it a lot of thought and decided that I'd use longer screws around the edge of the top, where most of the strain would be anyway. Those would go into the vertically mounted wood that wouldn't engage the leather. The screws that MIGHT engage the leather would be inserted with extra care. I laid out the pattern with care and marked the holes and marked the two different size screw locations. They would need different pilot hole bits and depths. Following the layout carefully, I drilled the holes taking care to follow the depths I needed. The red markings were 2" depths. The other holes were 1-1/4 depths. They also used different bits. I glued the back of the boards and the back panel in areas I laid out. Slow and careful, and it worked out perfectly. I left the glue to cure overnight and tomorrow we'll set the wiring, cut and stain the molding in preparation for attaching it after the case it hung. The case and the molding pieces will all get a final coat of wax. The wall cleats will go up and we will set the case and then we will be .... well, done.
-
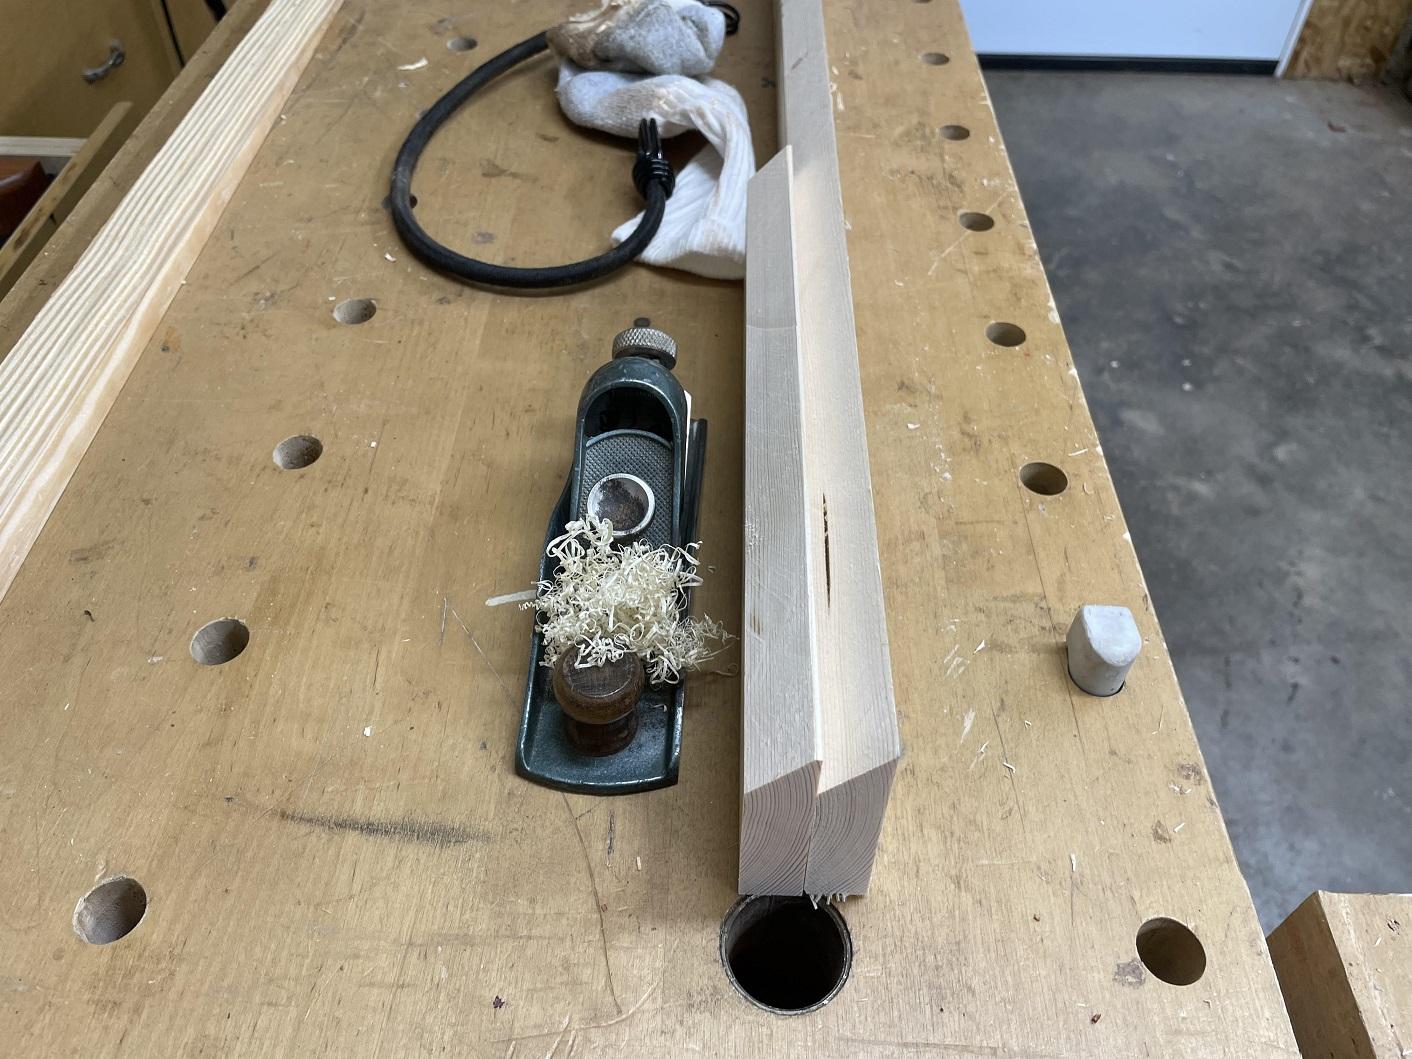
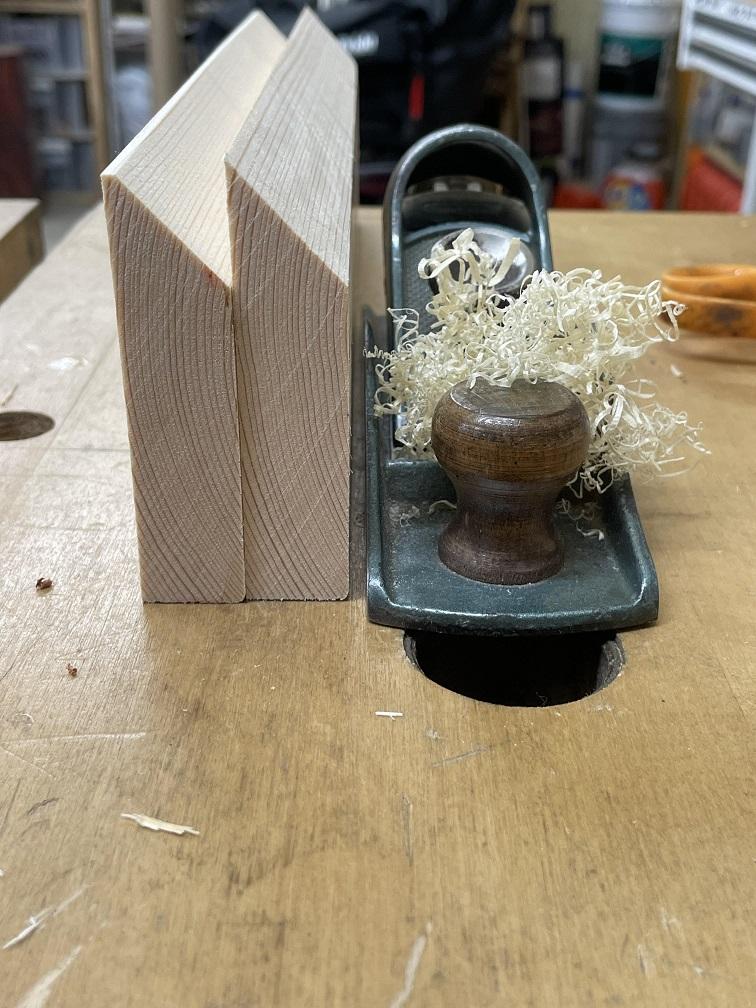
An interesting anecdote about that little plane... If I were told I could only save ONE tool from my shop if it were suddenly engulfed in flame, I would grab that plane. There are tens of thousands of dollars worth of tools in the shop. Yes, it's a great little plane. You can tell what a great job it's doing by how fine those shavings are. But it's still just a $20 plane at best, a fifty year old Craftsman, if not older. It might actually be worth more like $5. To me? Priceless. The plane belonged to my Stepfather. He owned a small contracting company, and never had to advertise. He had customers waiting, usually two or three deep. He was known as a perfectionist, and for his honor and integrity. He taught me to appreciate woodworking and Carpentry, and the love of quality. That plane rode in his personal toolbox, or his apron pocket. WE were not allowed to use it. When he passed, I got his personal toolbox, and the plane, his hammer, square, and a few other hand tools. If they said I could have TWO tools, I'd pull his hammer off the wall to accompany that plane. When I use that little plane, I can sometimes feel his hand on my shoulder. Yup, only one tool? That Plane.
-
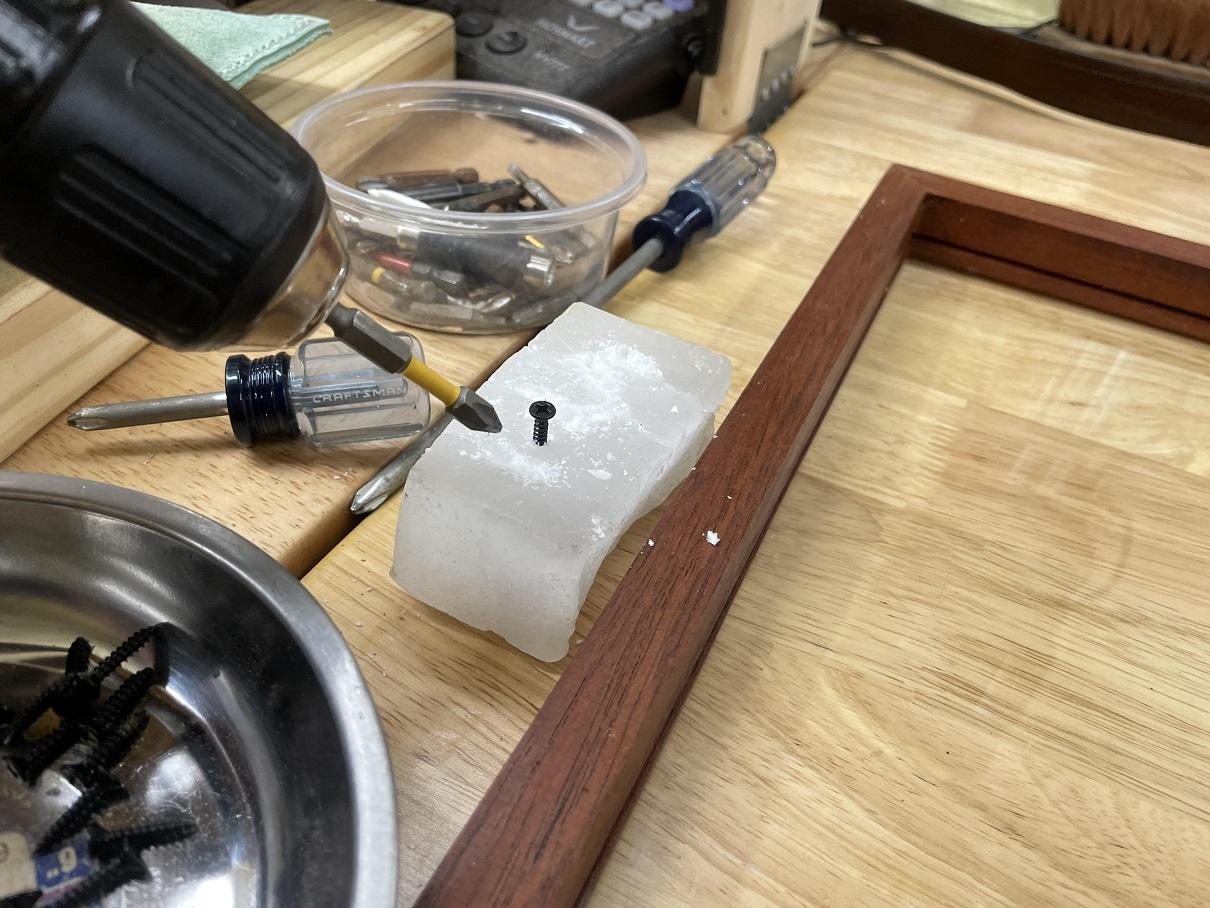
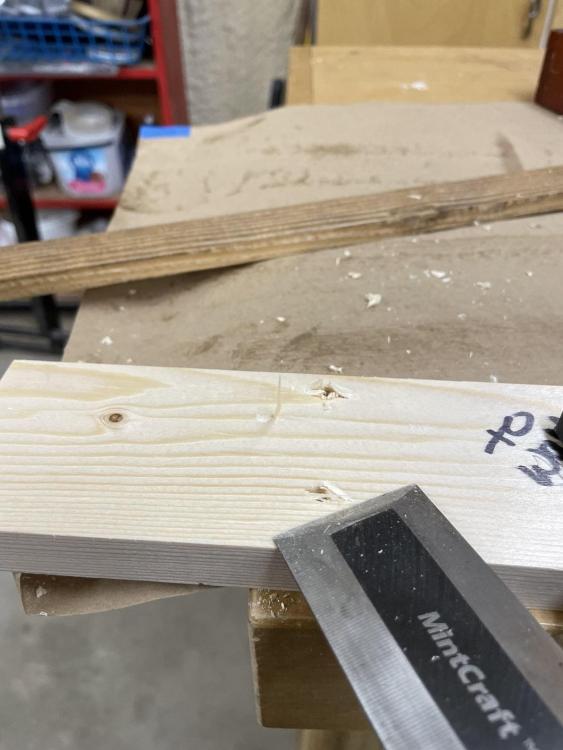
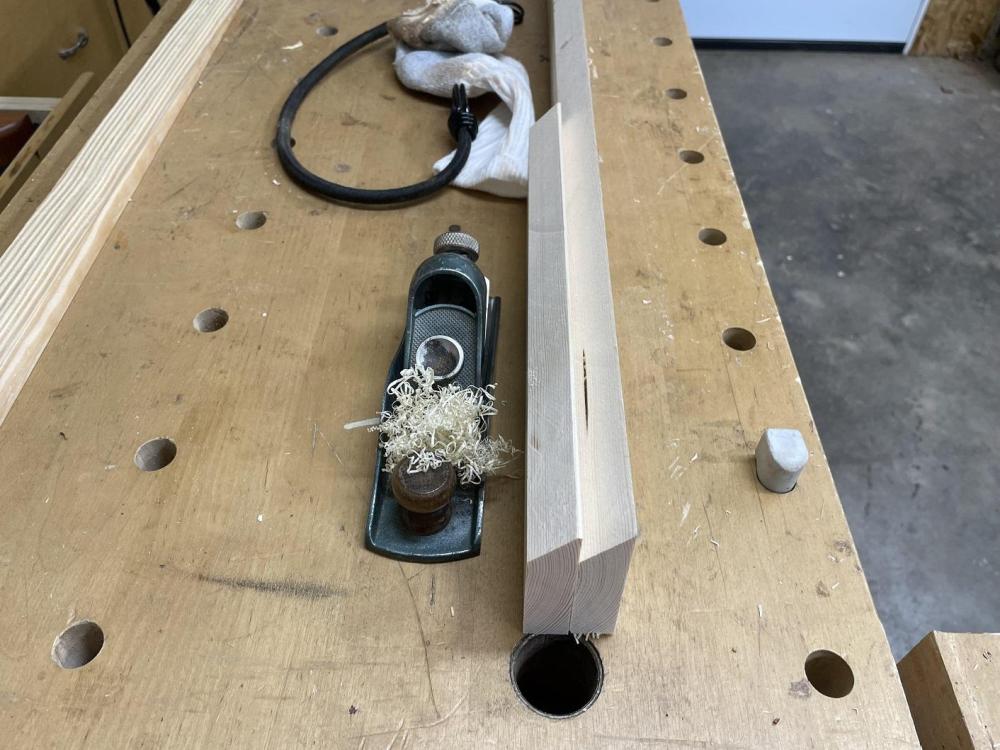
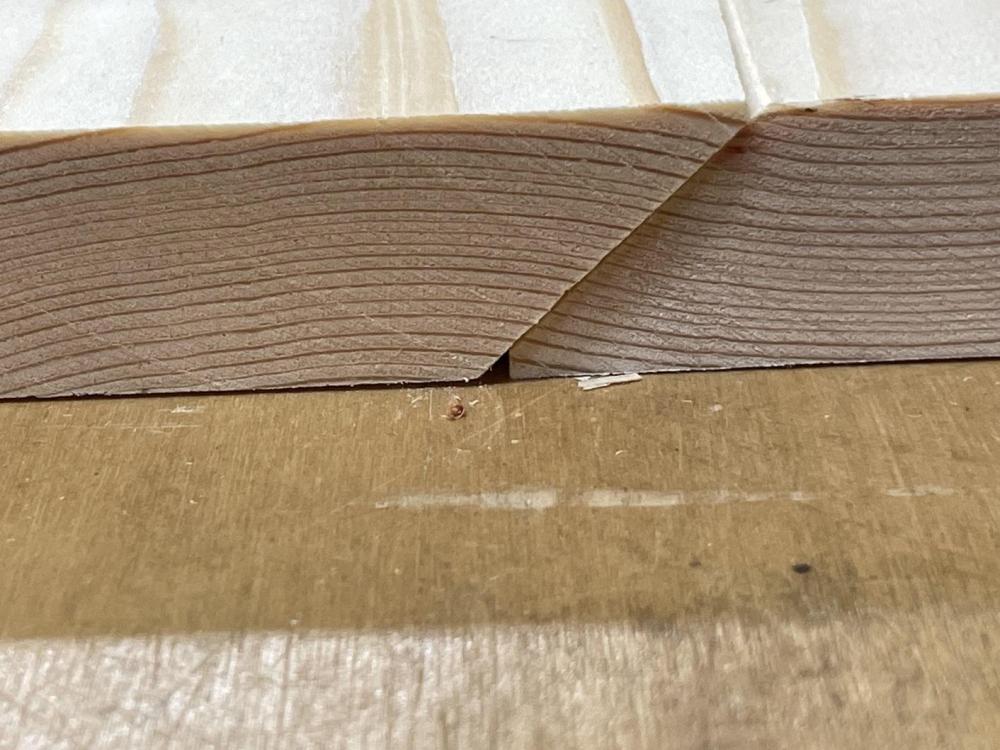
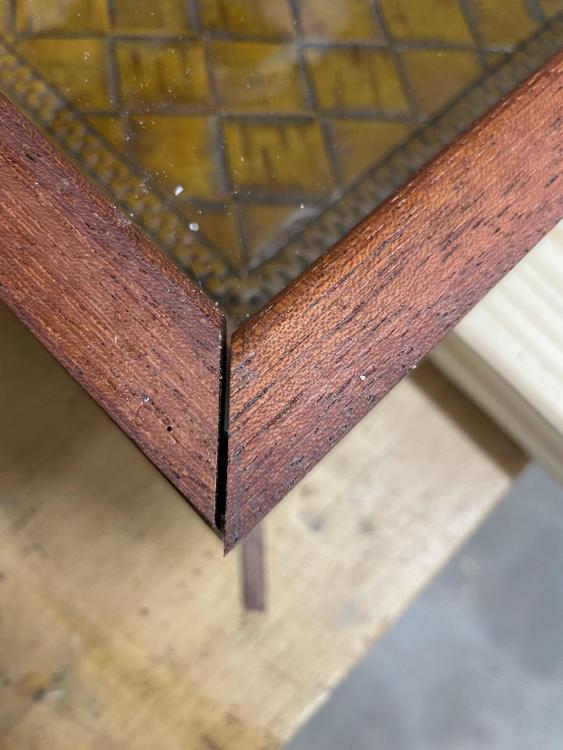
The last steps before mounting the cleats involve a sharp hand plane. The various videos suggest knocking off the knife edge from the 45 degree angle. I have just the plane and I took each of the cleats in turn and made a half dozen or so passes, taking a thin shaving off the edge each time. A closer look lets you see exactly what I was talking about. Notice that there is a clear difference in the knife edge in the two pieces. What this does is allow for a small pocket of space when the cleats join in use. If there should be dust and debris floating in the room, the razor sharp edges left unchecked could be forced up and out of contact, however this space leaves room for the dust / dirt to collect without disturbing the tight fit of the joint if the case is taken on and off the wall to clean the glass or rearrange the content. Better safe than sorry.

-
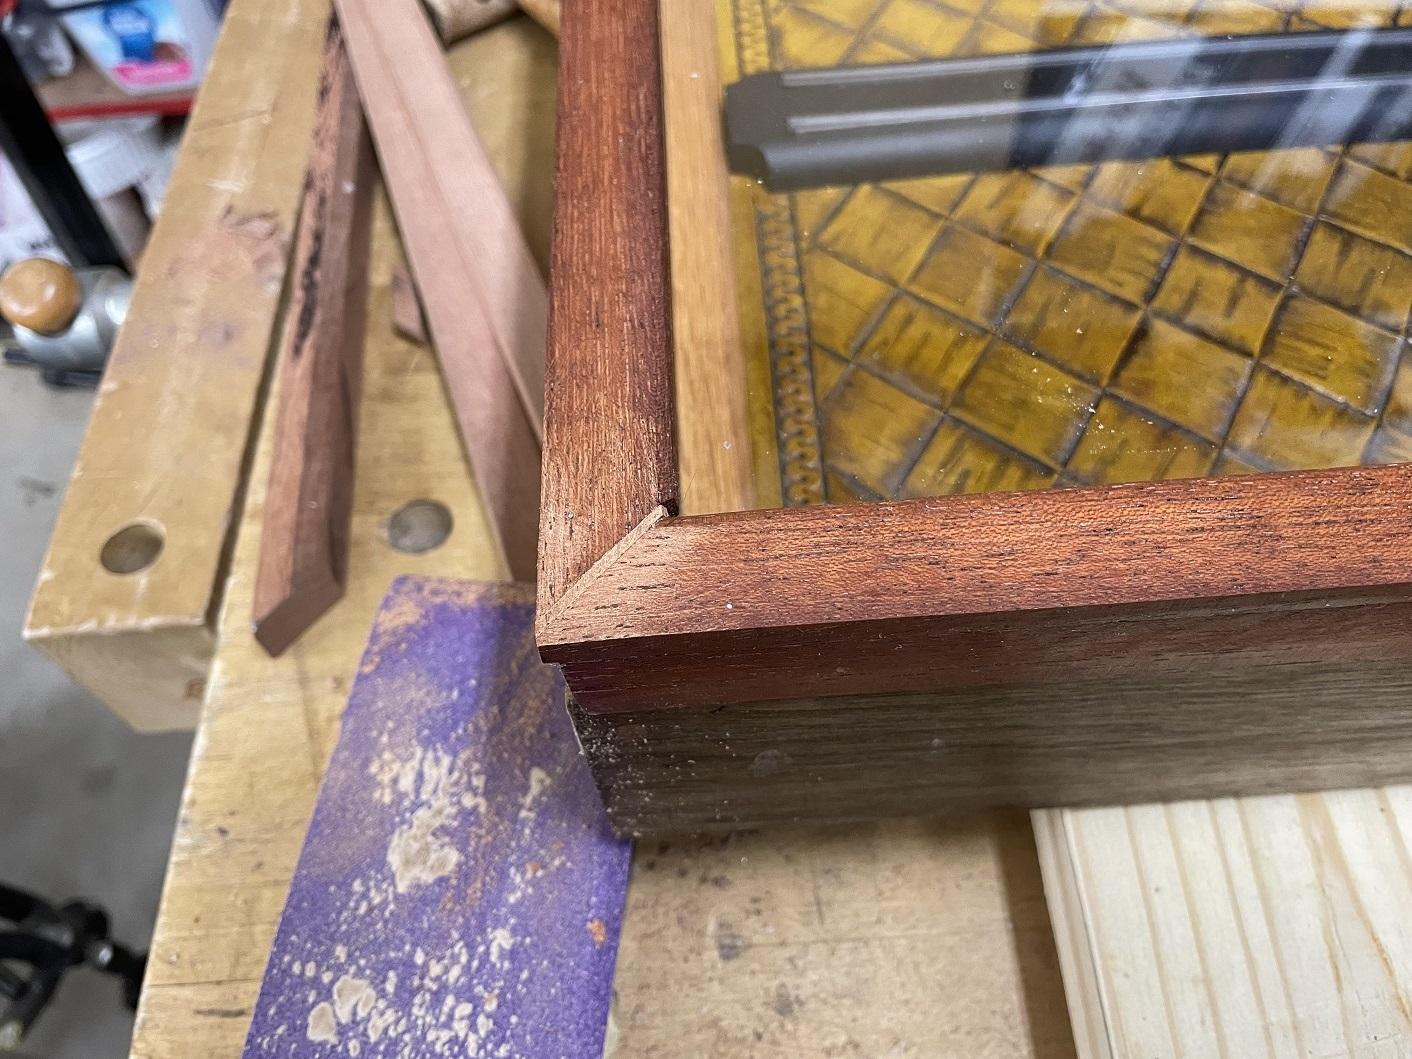
With a bit more work, I get them into shapes that are close enough that will work, since most people won't give the molding a second glance since I am only adding it to hide the cleats. Once it's sanded and stained, and the junctions between the bottom and side moldings are blended, there won't be anything to draw attention, we'll be golden.
-
I headed out first thing in the morning to mount the cleats. It's a pucker factor moment. If I screw up just a bit in some of the areas, the screws could go thru and pierce the leather. We can't have that. So, Pucker factor. I know, I hear some of you out there. Shorter Screws. Ah, the cleats are 3/4", the back of the case is 1/2". The leather is about 1/8" thick. If I only had the screws go into the back panel 1/4" that wouldn't be much holding power, huh? I decided to work on the molding and give the cleats more thought, go ahead, call me Foghorn Leghorn, cause I'm chicken. I don't like to use the router if I don't have to, so I use the antique molding planes. I use the rounding plane and the 1/8" thick pine strip I bought, and secured it to the bench. I start making passes. To roll the edges you make continuous passes, moving the plane around the edge as you go until you are satisfied. You move to the second strip and try and match the edges. They are coming along but aren't done yet.

-
Those aren't odds and ends. The two trays are used to carry tools to and from wood projects. The dump truck bed is a stackable screw tray for use on the bench. The various blocks in the tub are spacers for clamping. The wooden tray holds the bench dogs and hold downs. The wax paper is for glue ups. It all works.
-
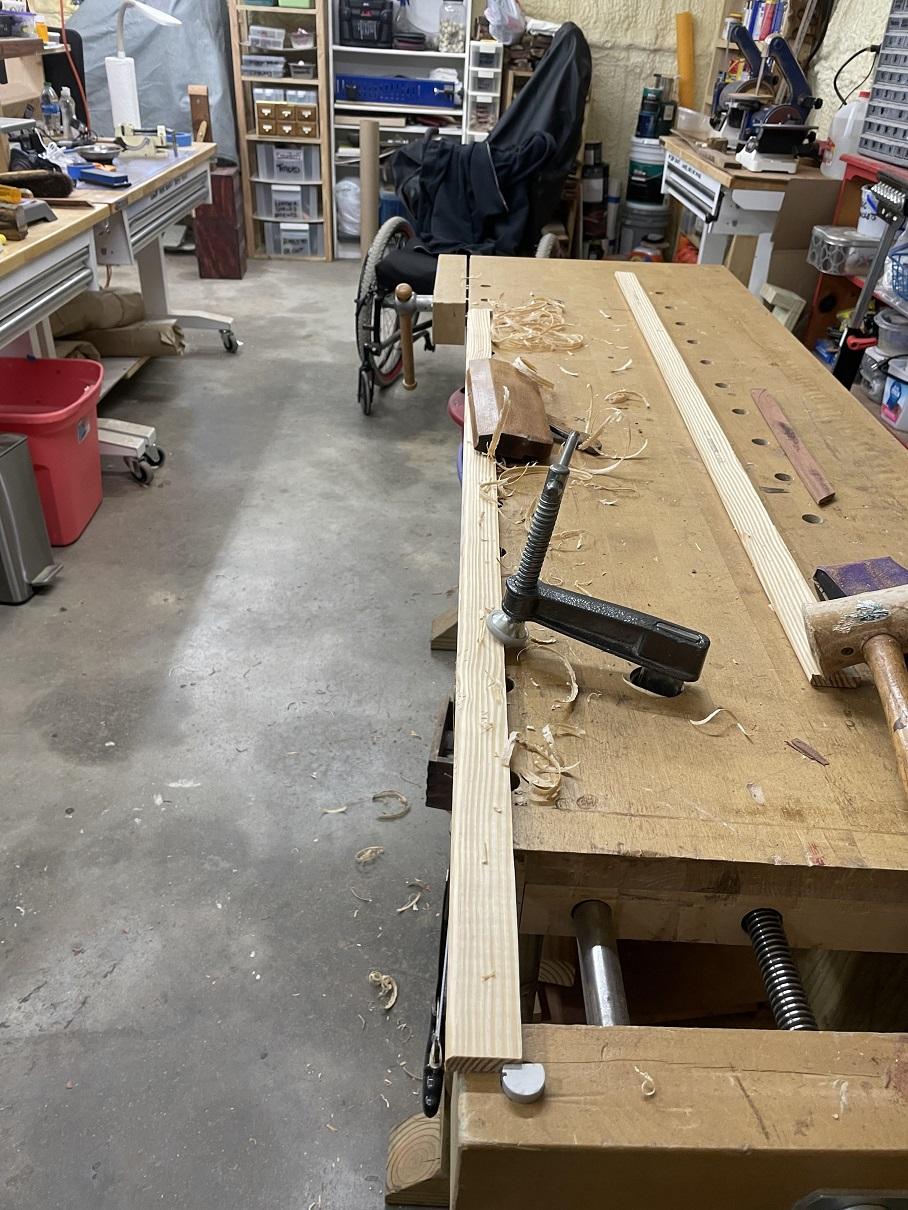
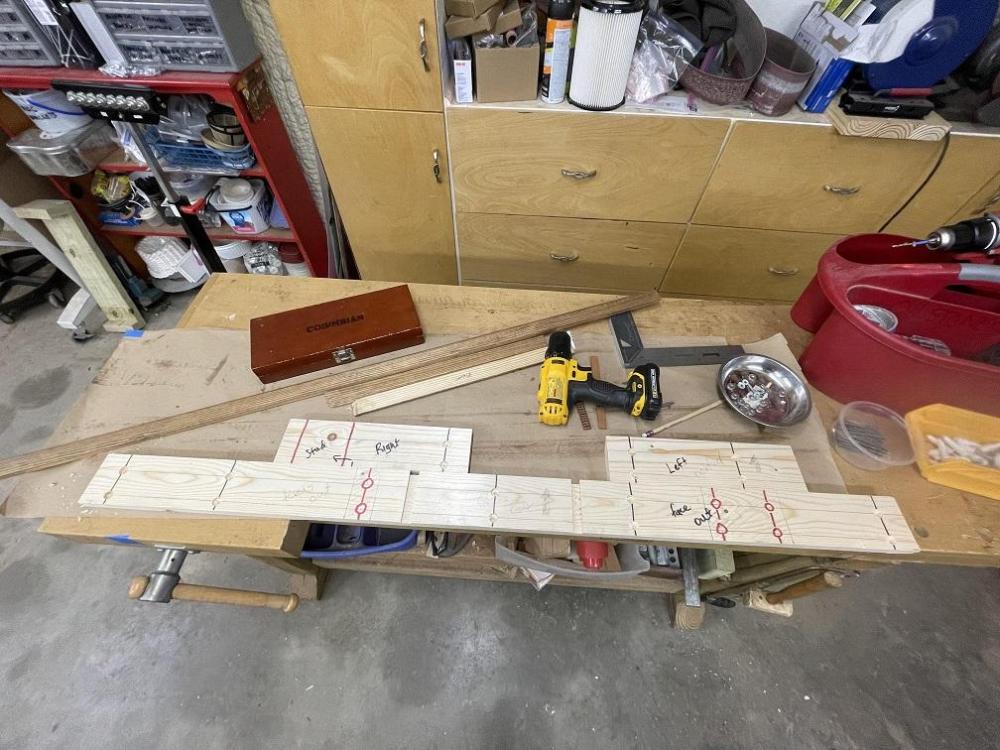
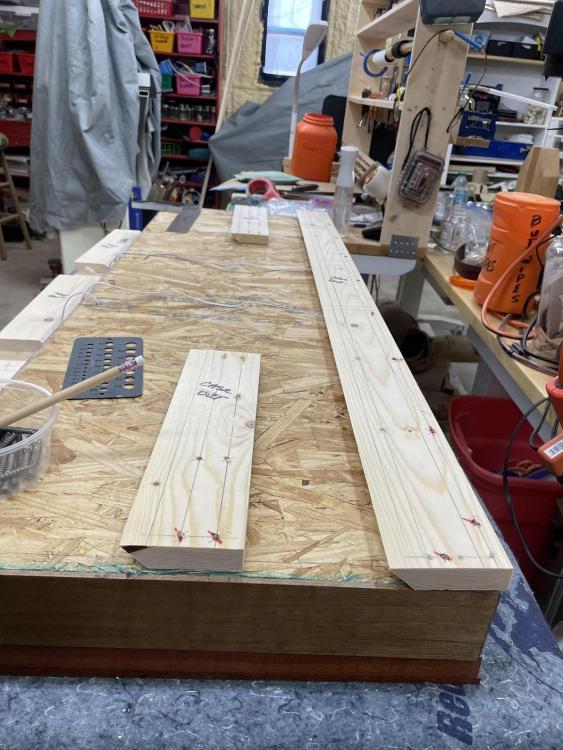
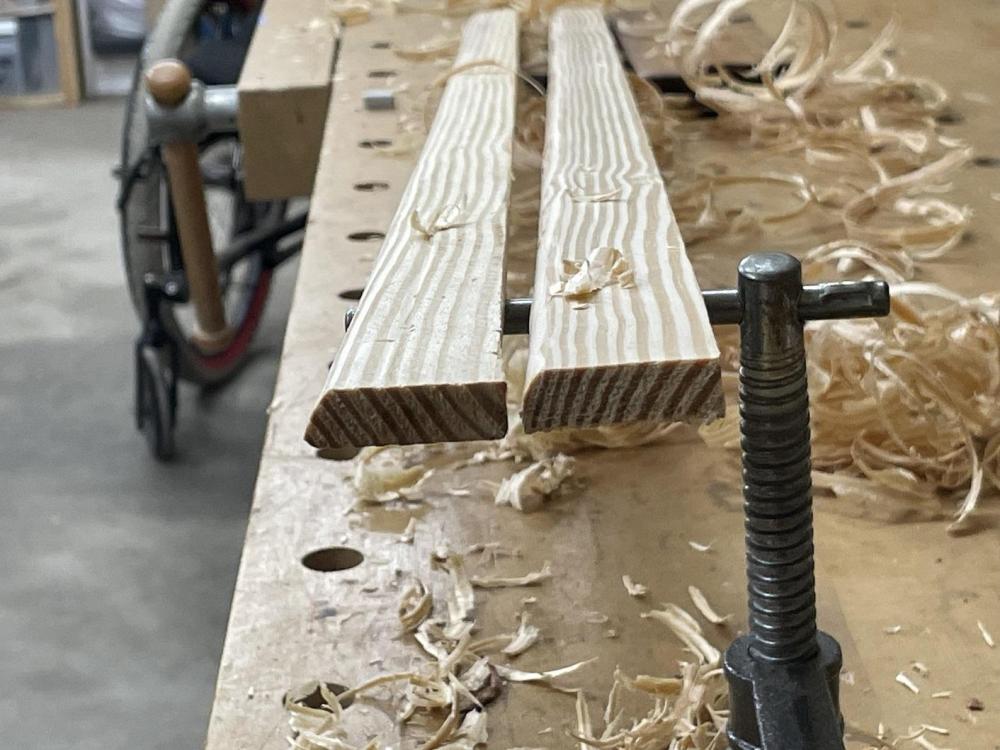
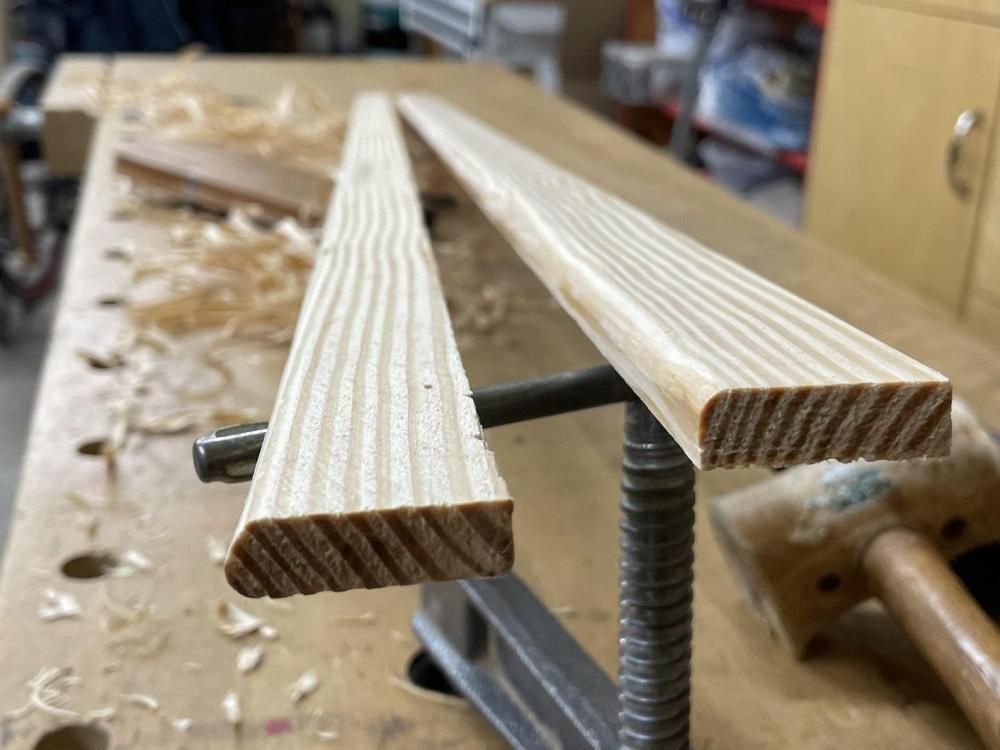
I spent a couple hours in the shop late this evening making the cleats. LOTS of work but just one picture. I had to change the blade to set it at 45 degrees, then ran the two board thru the cut one edge at 45. Then I cut 4' off both, that left two feet from each. I cut those into one foot sections. I now had two four foot and four one foot. Cleats. I cut two dados in the appropriate locations on the two four footers for the wires to sneak thru on the cleats. Got it all done and test fitted, but NOTHING is attached. Too tired and hurting. Too much time on my feet. Tomorrow, tomorrow I'll organize the wires and mount the cleats to the case and the wall. All that will be left to do is turn the small thin wood into molding.

-
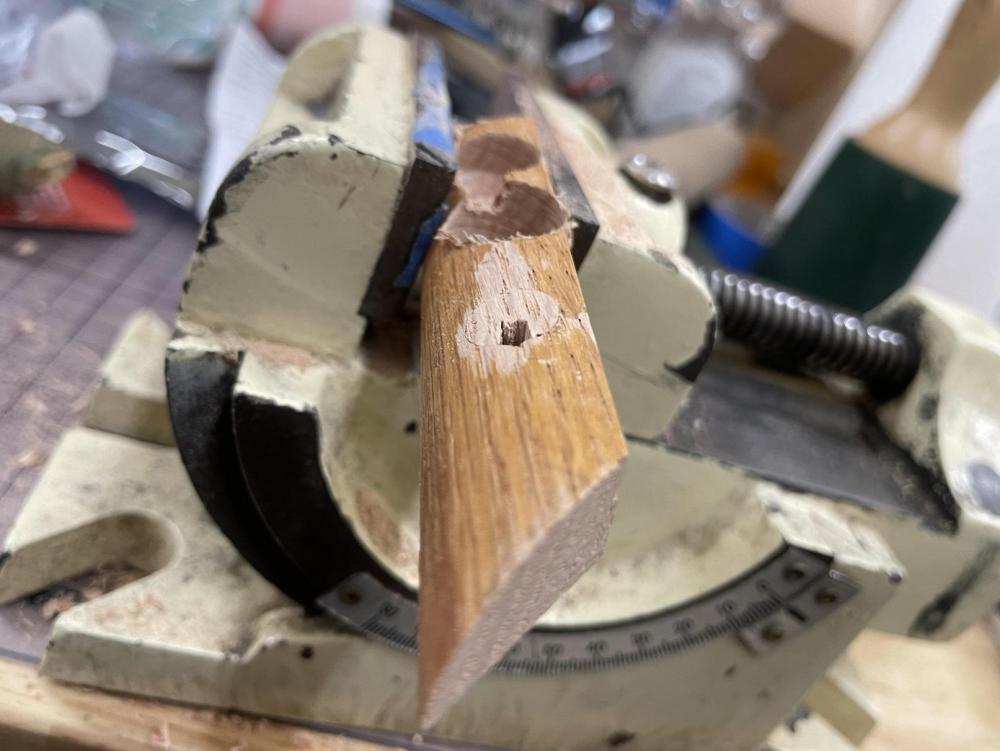
While the glue was still wet, I wiped off the excess glue, then sanded the repair to get the plug flush. Because the glue was wet, the sawdust from the sanding filling in the gaps, stayed in the gaps. Cool huh? While the glue dried, I put away the tools and cleaned off the benches and tables. This took about a half hour, and I was ready to re-stain the repair. So, Um... What Watco Stain did I use? Medium Walnut, Dark Walnut? If only there was a record of the ... Oh, Wait... I went back into the house and got a cup of coffee and read thru the narrative.... OH, there it is, Golden Oak. Boom, re-stained the repair and what do you know... a match. Next up, cleats.


-
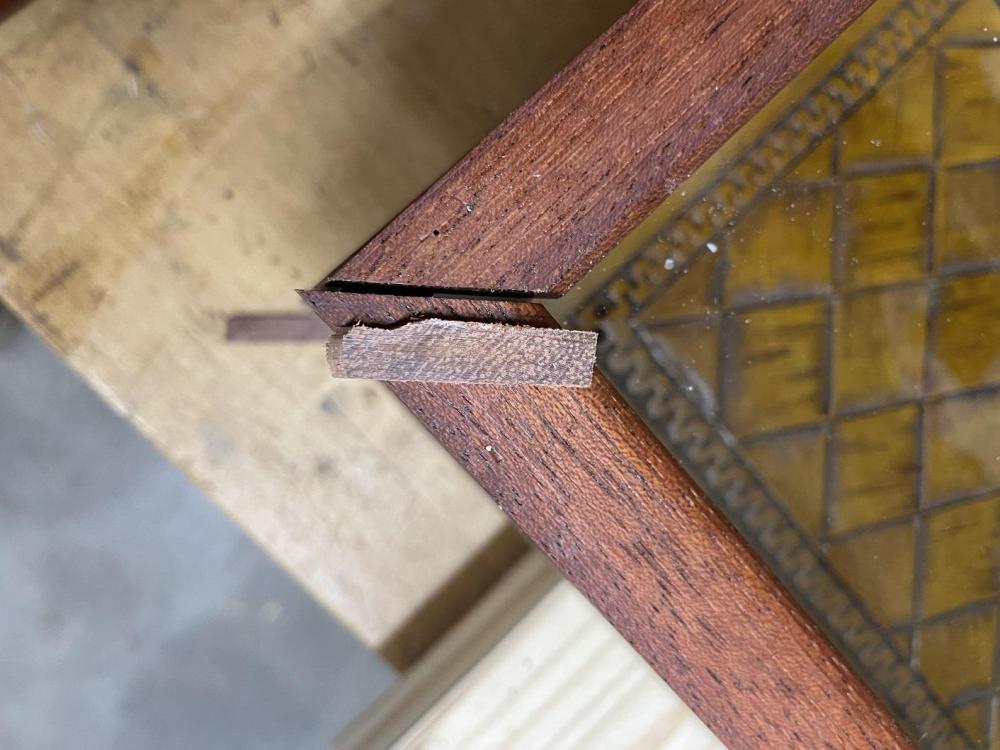
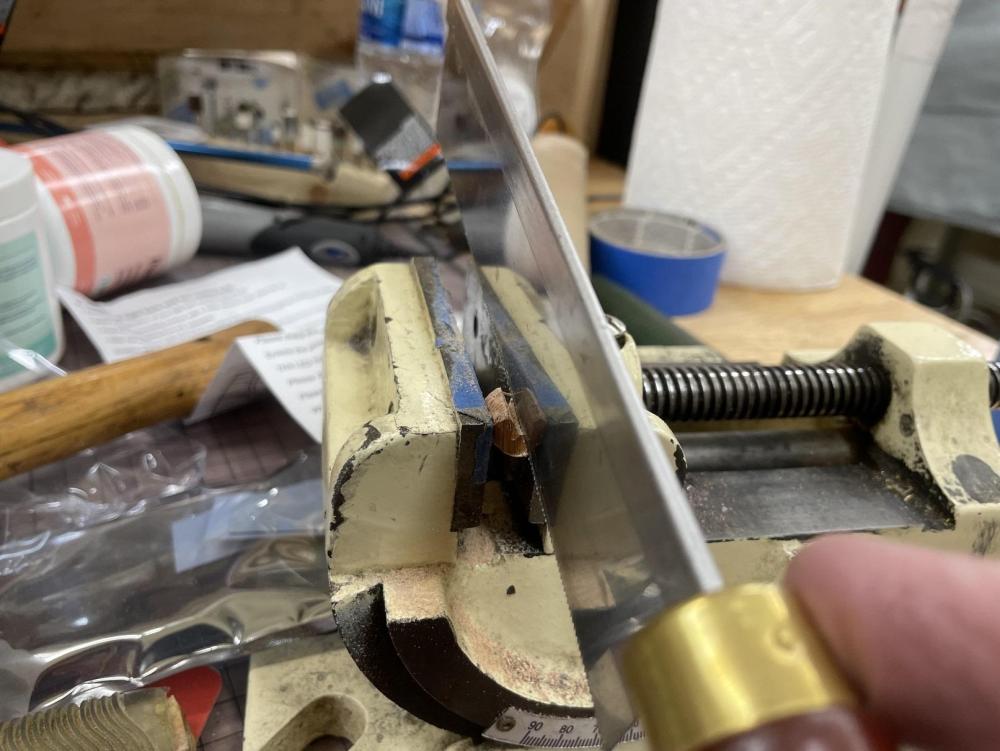
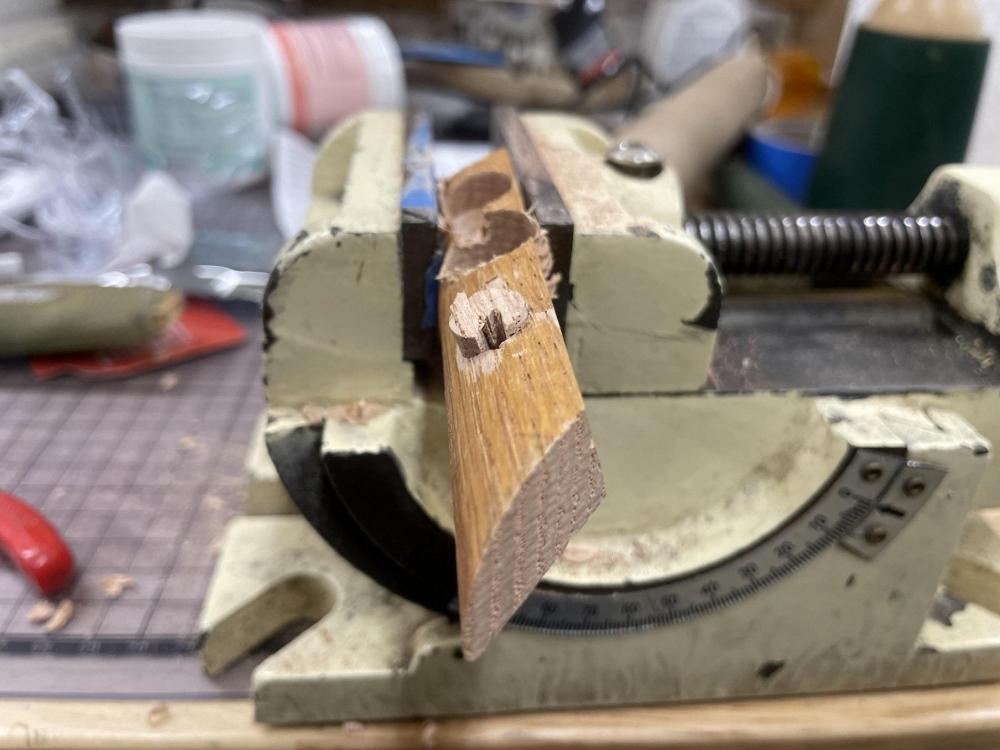
This time, it's the Gap. No, not that clothing store. Well, that too, it's not one of my shopping destinations, but in this case, it's THIS gap. I don't know if I was tired, if something slipped, or Gremlins did it. I'm blaming shop gremlins. Someone fed them after midnight. But, time to fix the Gap. I could fill it with wood putty, but to me that repair would glare every time I saw it. So, I cut a thin slice off a scrap. Too wide. Tried again. Nope, STILL too wide. One last try... That one will fit. I got a touch of glue and put it on both sides. Carefully, with a rawhide mallet, I tapped the plug into the slot. Tap, tap, tap, tap... slowly and surely got 'er done. Yup, in there. I could feel it was about as far as it would go, so I stopped.
-
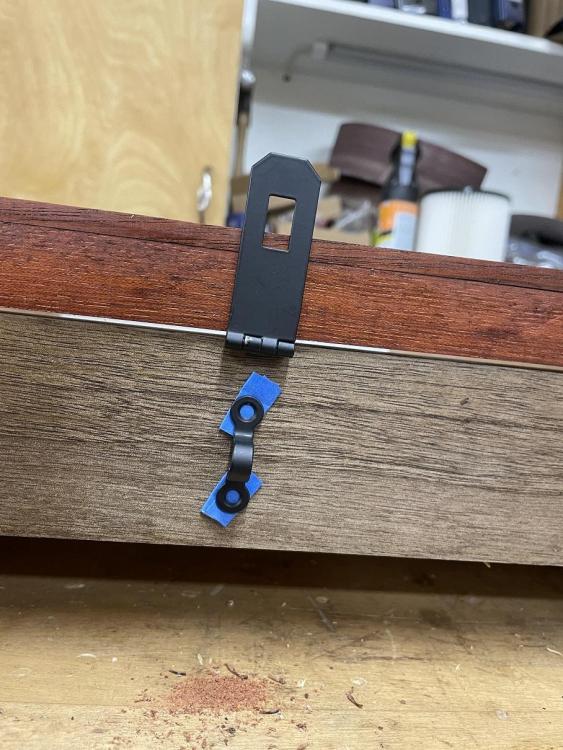
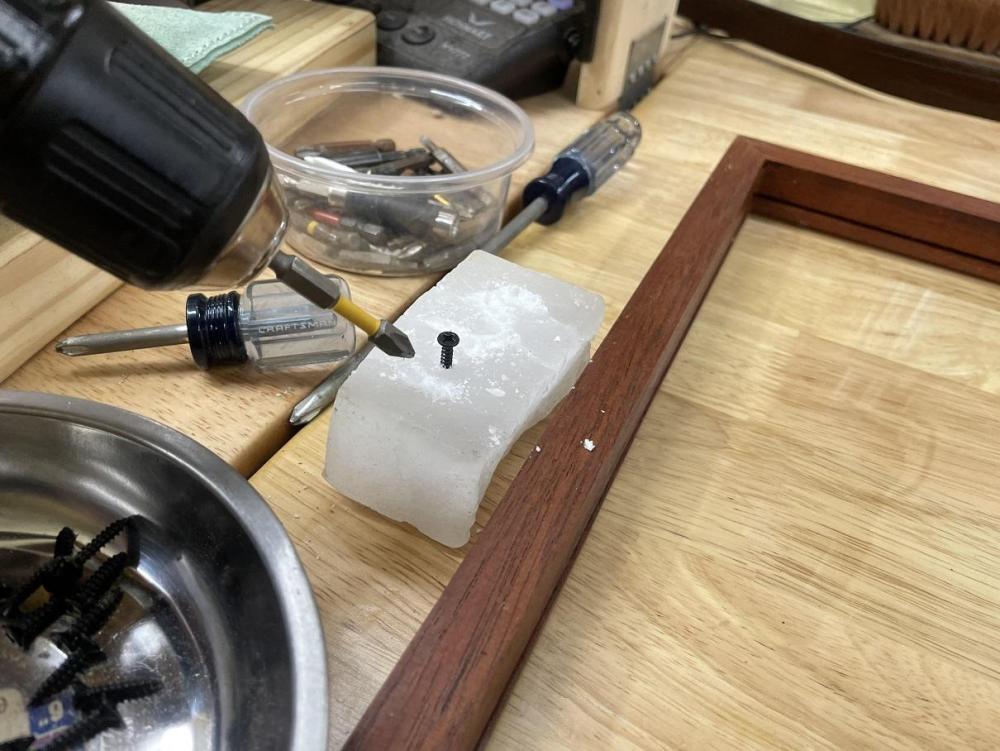
Out this morning and started by installing the latches. I installed the hinged sections on the glass door front first, using the same technique I have used throughout the project. Marked the bit with blue tape, to control depth and used the torgue set drill bit to keep the project safe. Done. The trick here is to get the loop portion of the latch properly aligned. Here comes my blue tape again, folded to make two sided tape that will BRIEFLY stick. Put it on the feet of the loop, put the loop in the hinged flap and fold into contact and press hard then lift... TAH DAH! Use the center punch to punch thru the tape into the wood, pull off the loop and the tape and drill the holes, then install. Boom, done. Time to move onto the next task for this session. I have things that bother me, others might not notice, especially from a distance.
-

The repair of the fallen hardware on the shoulder bag.
Brokenolmarine replied to pengkegu's topic in Show Off!!
Looks very nice, I'm sure they are pleased. -
With the plugs ready, I could mount the lights. I very carefully drilled the four holes on the marks made by test placing the lights on the penciled marks during layout. I drilled the holes and vacuumed away the sawdust after each cut. No chance for it to squirrel away and damage the leather later. The plugs worked out just as I had planned and the lights look good in their place. A closer look at a plug installed. No one else will look this close. We are looking good, now we need to screw the hinge to the case, install a latch on the edge of the case top, and install the french cleats. Once the wiring is secured we are pretty much done. I may, MAY, put trim around the edge to hide the cleats. So close to the end now, I can taste it. Oh, wait, that's sawdust.
-
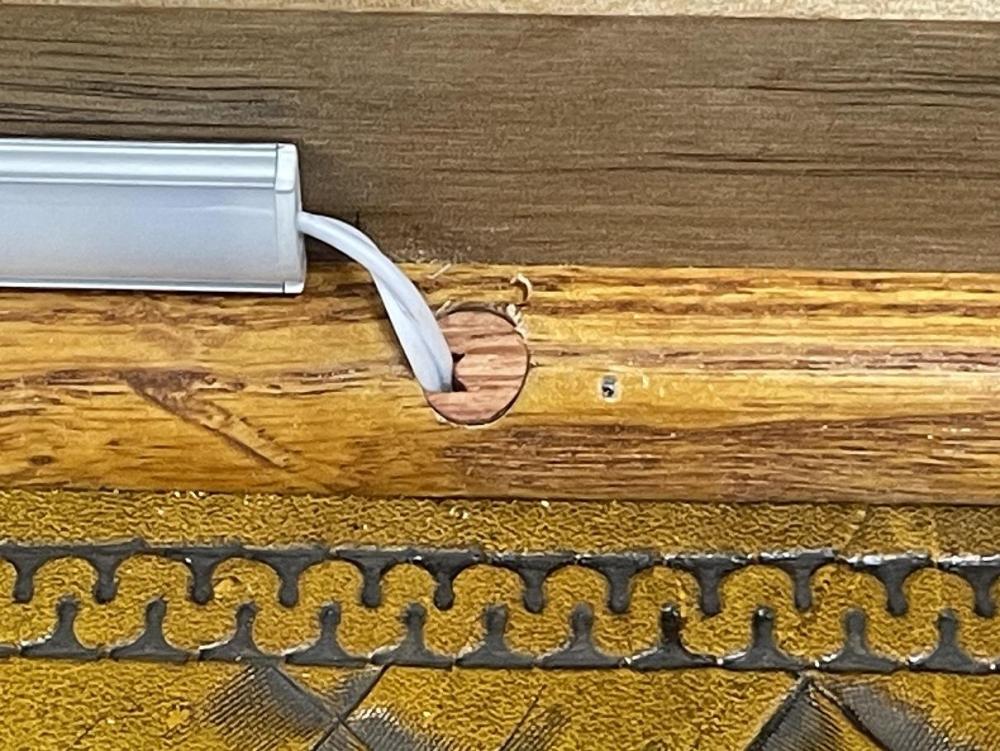
Before installing that hinged top, I wanted to install the lights. This meant running the wires from inside the case, to the back. I knew I was going to drill thru the quarter round and had been going over this process for the last week. I had decided that a brad point bit would work best, the directions for the lighting said, 3/8 bit. I decided to test the plan on the scrap quarter round. I drilled a 3/8 hole, then cut a half dozen 3/8 plugs from the quarter round to match. To allow the passage of the wire I cut a notch to one side of the plug. This worked well when I tested it on the scrap. Now, how would I trim the plug flush with the wire running through it after installation? There would be a good chance of cutting the wire with that razor sharp chisel. That would be bad. Then it came to me, I'd use the scrap with the test hole as a JIG and trim all the plugs flush in that, then pop them back out. With the JIG secure in the vise and my sharp chisel in hand, I hand manipulated the chisel and shaved the four plugs flush, slowly and carefully. I had cut the notches so that I had two plugs with notches to the right and two with notches to the left. I planned ahead. If I made a mistake or blew a plug out, I had another three feet of extra quarter round. This process, including pre-staining, took about an hour.
-
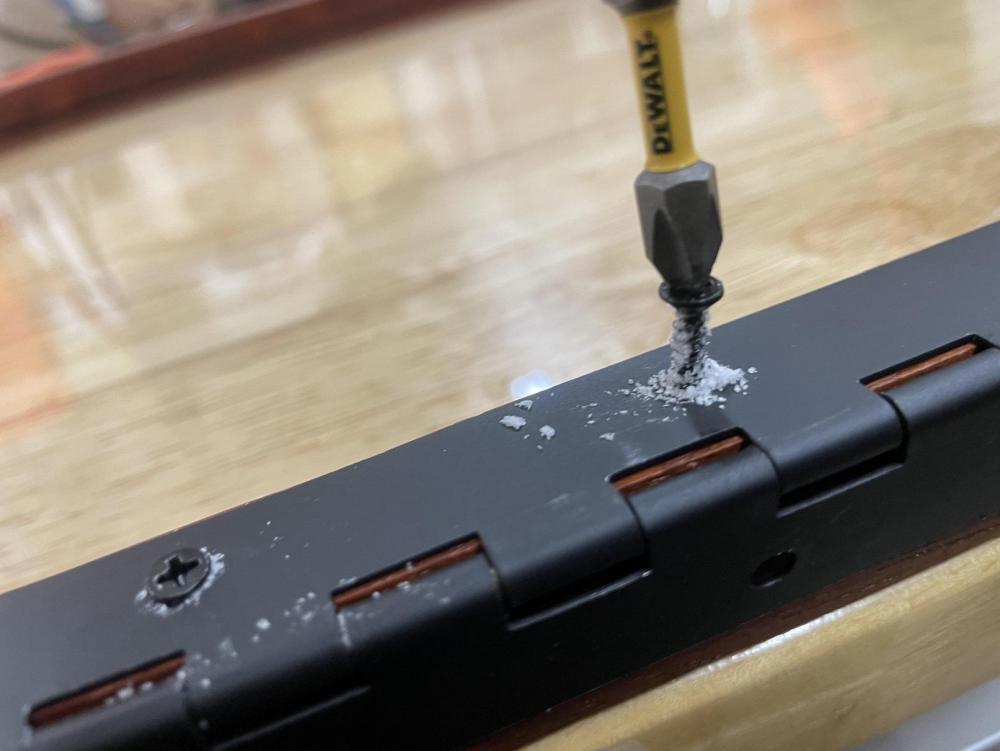
Next up, I aligned the hinge on the underside of the top with the glass installed and carefully drilled the holes. I marked the depth on the drill bit with Blue Painters tape, (As you have seen, I use a lot of that in the shop,) and predrilled the holes so the screws didn't shear off. Before screwing them in, each one was screwed into a wax block to lube the screw and then backed out. The torque on the drill was set to drive the screw in enough to pull the hinge tight against the wood, then STOP. I wanted to avoid shearing off the head of the screw OR cracking or splitting the wood. Shearing the heads off the screws is much more common if you go with a brass hinge and screws. When I do go with brass, I take the extra step of running a steel screw into each hole to pre-tap the hole, then install the brass screws.
-
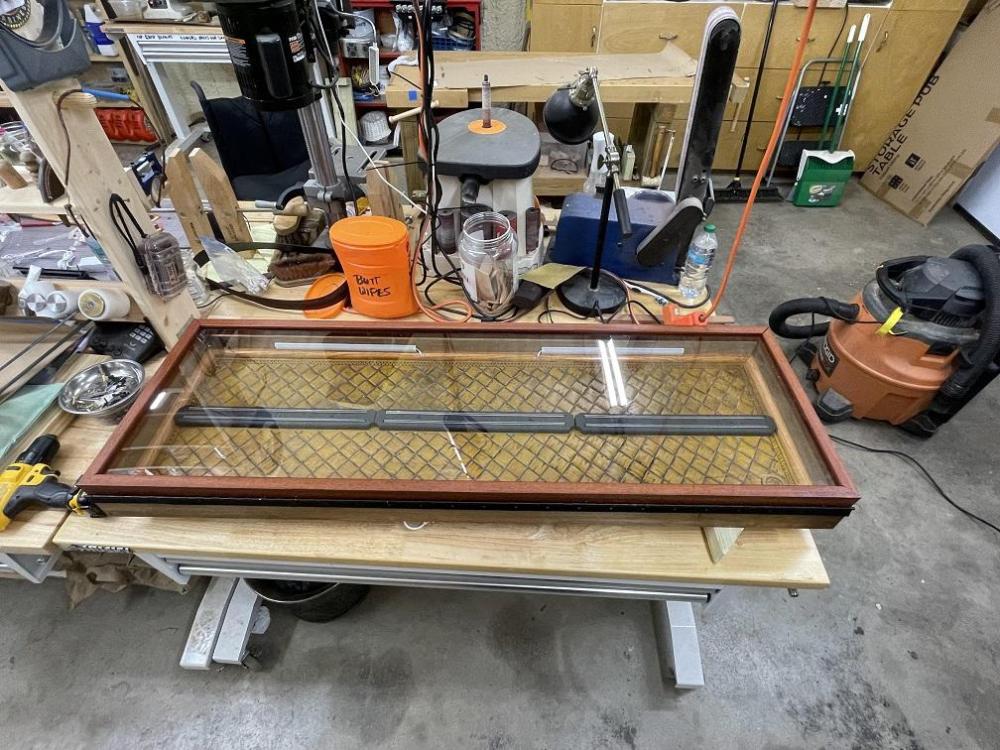
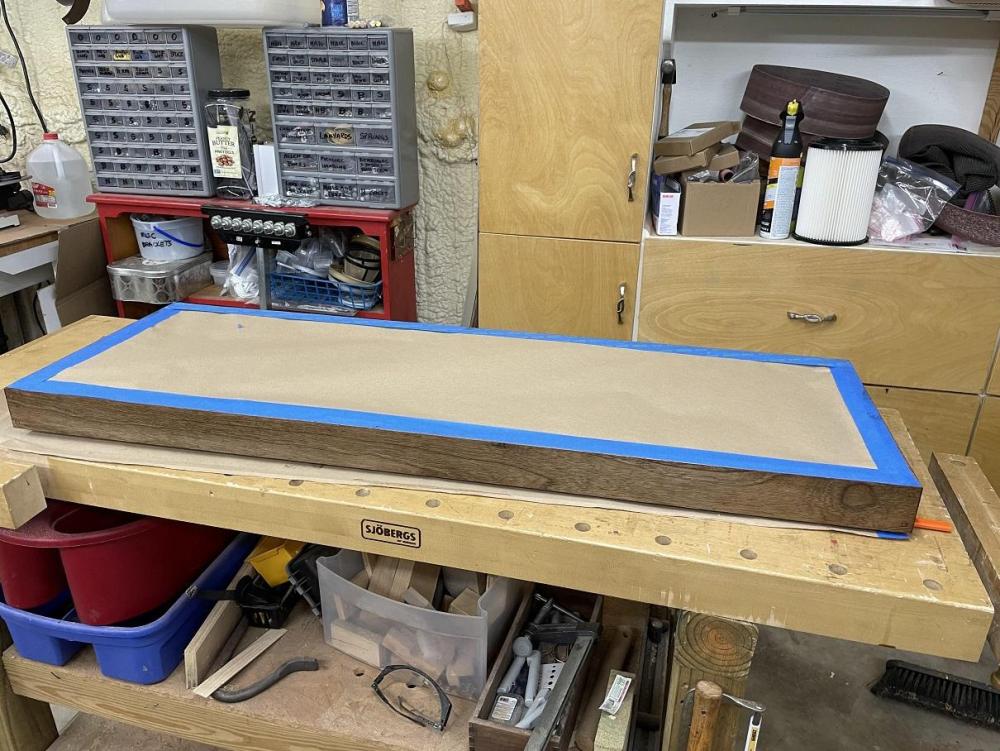
Okay, settle in, I've been busy. If you need a refill on your coffee, I'll wait. First off, I sanded off the wax, and stained the sides of the display case darker, to compliment the black cherry of the top. It looks better. I'll wax the top and the side when I get it all put together. It took about a half hour just to tape off the open top to insure there was no accidental contamination of the interior. I wasn't taking any chances. LOL.
-
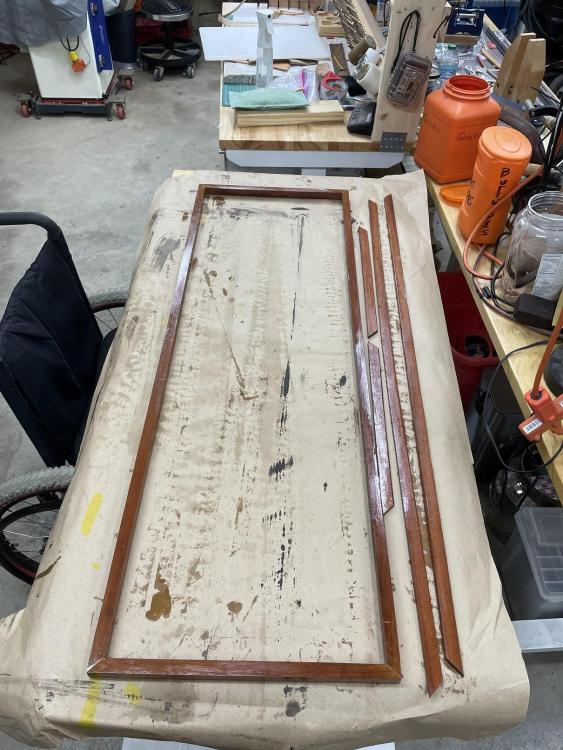
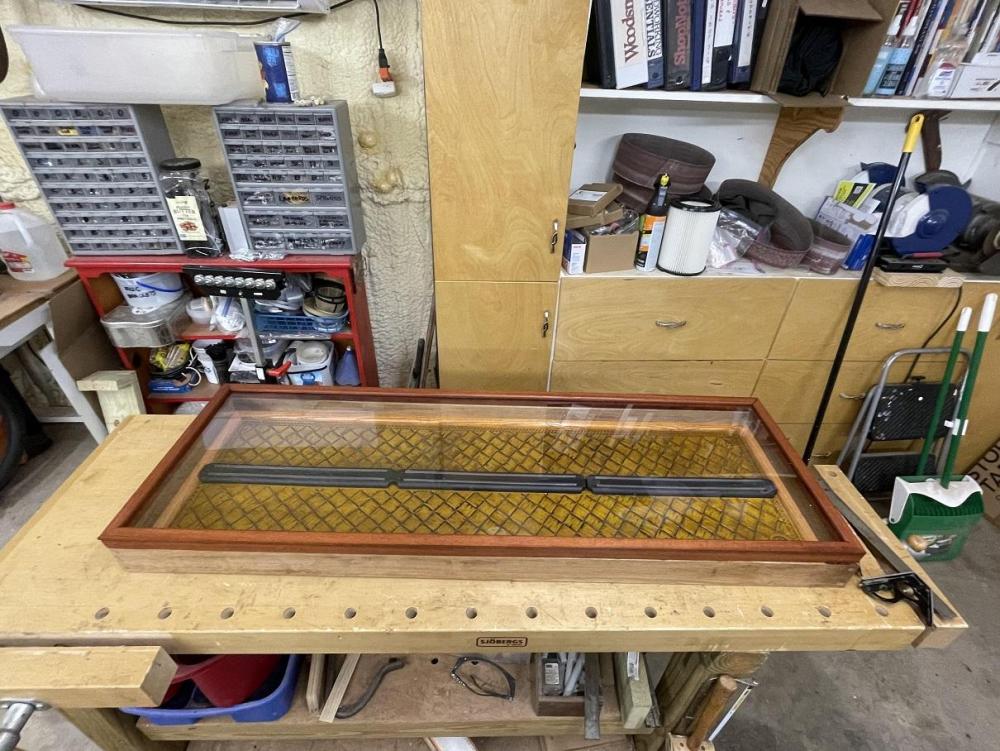
We have glass, next up, hinges and lights.
-
I wasted two work days sitting in the living room with my cell waiting for a call from the Wheel Chair service folks to schedule a visit for the scissor lift chair I use in the shop when I work at the Drill Press or the Band saw. The batteries won't hold a charge for more than a day. Used to hold the charge for a week or so. The VA called in the service contract and said they would call to schedule. My cell doesn't work in the (metal) workshop. They never called. I was NOT happy. Got out in the shop and got to work on the retention frame for the Plexi. I basically repeated the process I used to make the top for the case, so NO pics, but basically, set up the table saw, ripped two addition seven foot pieces of black cherry. This time however, they were quarter inch rather than three quarter inch. I took them over to the sander and cleaned them up and sanded away any saw burn marks. Then, an additional step, I used a small hand plane to cut a small forty five degree angle on ONE side corner of the strip then back to the sander to round over that corner. That will be the top edge on the glass side. I don't like to use the router if I can avoid it. Hooked up the Miter saw and vacuum and cut the pieces to length. Now we have the retention frame for the glass. Fits great. IN the pic below, it seems to bow slightly, but that's because they are just laying on the case, once I pin them, they will fit exactly. Time to apply some stain to the top. Prior to that, I sanded the corners and removed those small defects in the fit, and sanded the plugs one last time to insure they were perfectly flush. Once we were good, I used Watco Golden Oak Oil to apply that finish, and I am very happy. The contrast should make the Display Case Pop.... We are getting so close now. I can't wait to hang this thing and fill it. Watch this space...