Brokenolmarine
-
Posts
592 -
Joined
-
Last visited
Content Type
Profiles
Forums
Events
Blogs
Gallery
Store
Everything posted by Brokenolmarine
-
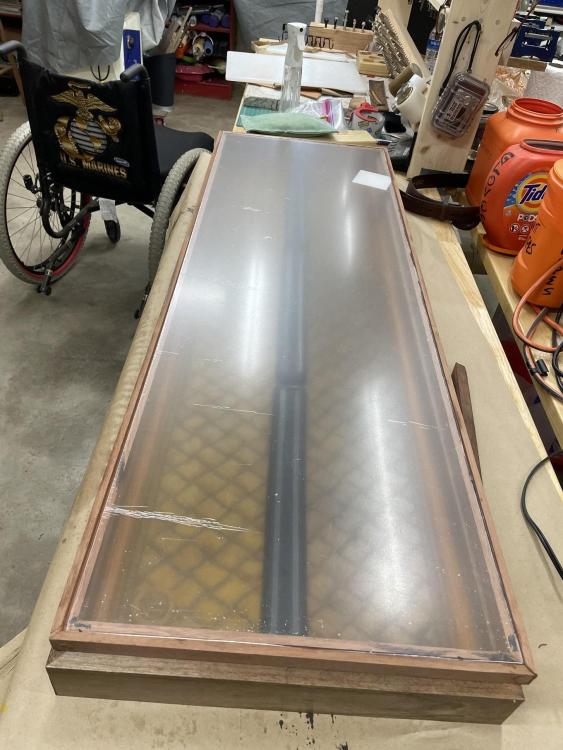
Went to Home Depot this morning and picked up a couple things. I picked up four more hanging loops, this thing is getting heavy. I also picked up a package of special blades for the jigsaw, made especially for cutting plexiglass, after watching a couple videos on "How best to cut Plexiglass without breaking it." Who Knew they had special blades? The teeth on the blades are smaller, closer together, and angle BOTH ways, opening a channel rather than melting back together behind the cut, leaving a smooth clean cut. NOT cheap, but after cutting this panel, worth every penny. It fits, and the cuts didn't need to be sanded or cleaned up in any way. For now, I have left the protective sheeting on the panel. It will come off later, when everything is done and I'm ready to fully assembly the case. Still have to drill some Tiny Holes to mount the plexi, mount the hinges and latches, mount the lights and the hangers. Almost done here. Done, for the day.
-
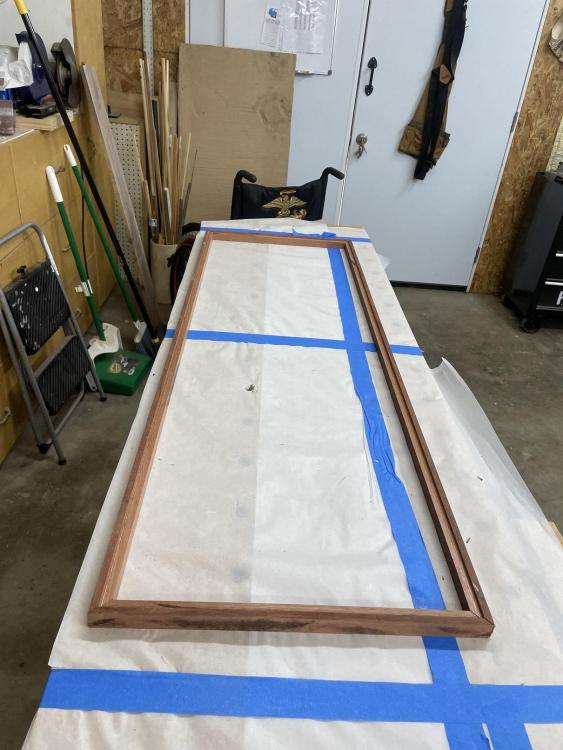
After trimming the plugs flush with the mallet and chisel, I test fitted the top frame to the case. It's looking good. I won't apply any finish until the top's edges have been shaped and I have prepped everything for final assembly. Next step is to cut the plexi. A REAL pucker factor moment. Crack that panel and it's $50 to replace the panel... We are getting close, but I have been slowed down a bit. CUT the tip of my right index finger last night cleaning a broiling pan, cut it deep. I know now why torturers start on the fingertips.
-
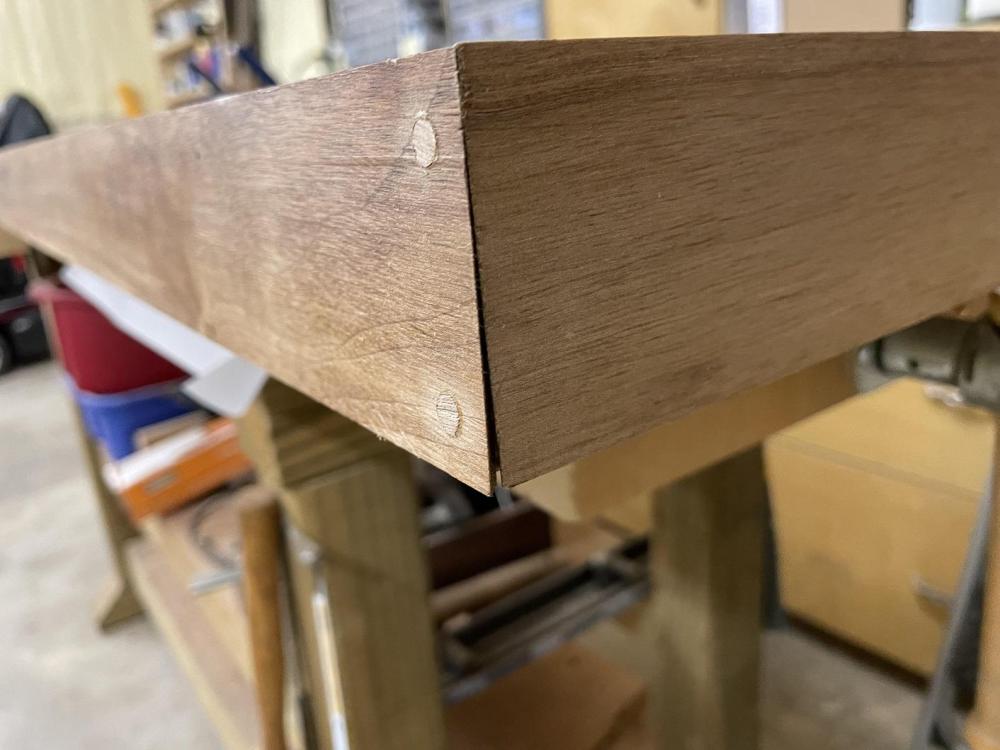
Got the case top glued up and pinned, and let the glue cured using all the same processes as the previous ones used on the case. Cut the plugs using the 1/4" plug cutting from the special tools drawer. This time I cut plugs from the leftover scraps of Black Cherry... and I cut a bunch even though I only needed four. I planned to snap them loose rather than setting up the bandsaw to cut the bottom off the scrap, so there was a chance some wouldn't break clean at the bottom.... extras are nice to have. Got them all plugged and left them to cure.
-
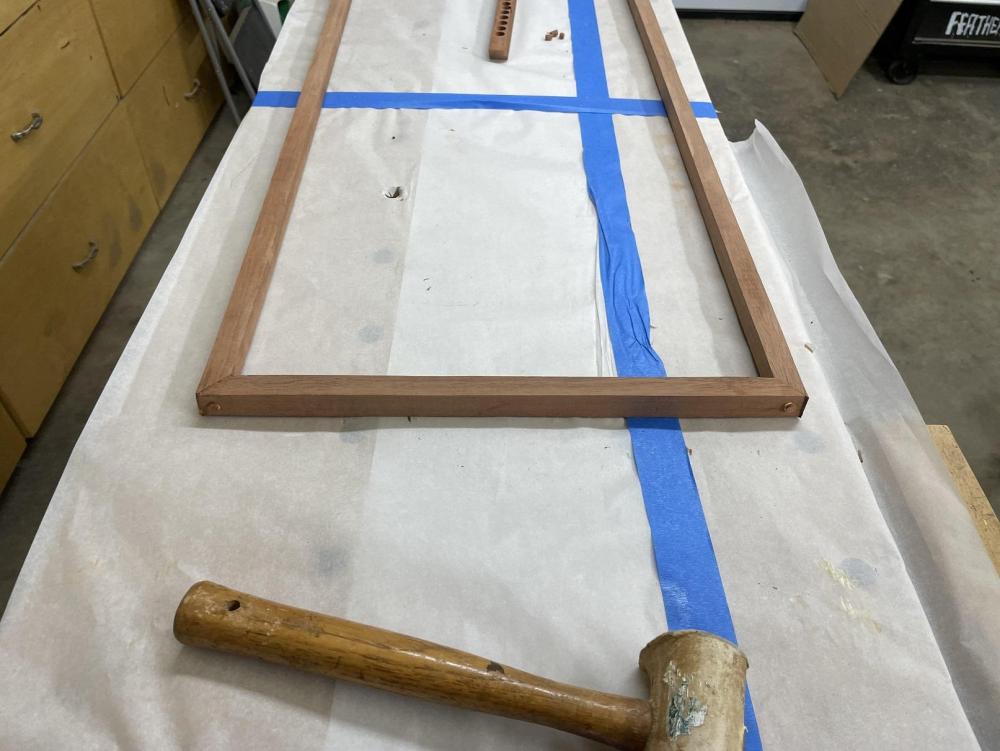
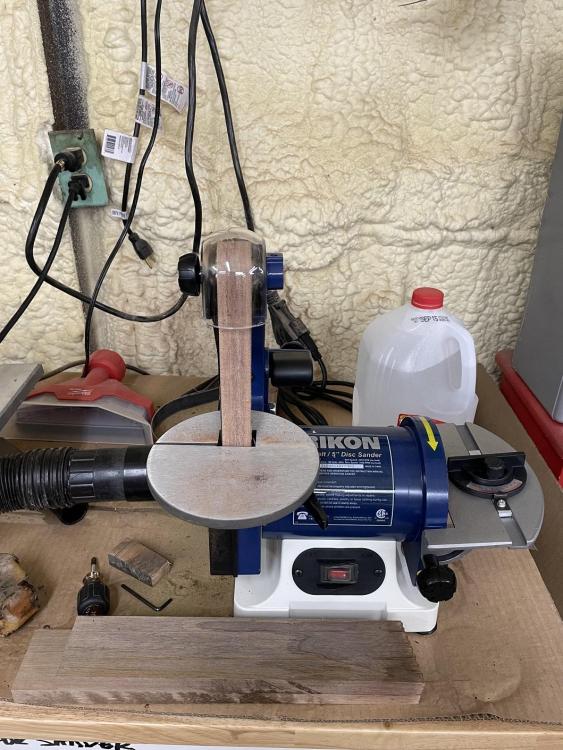
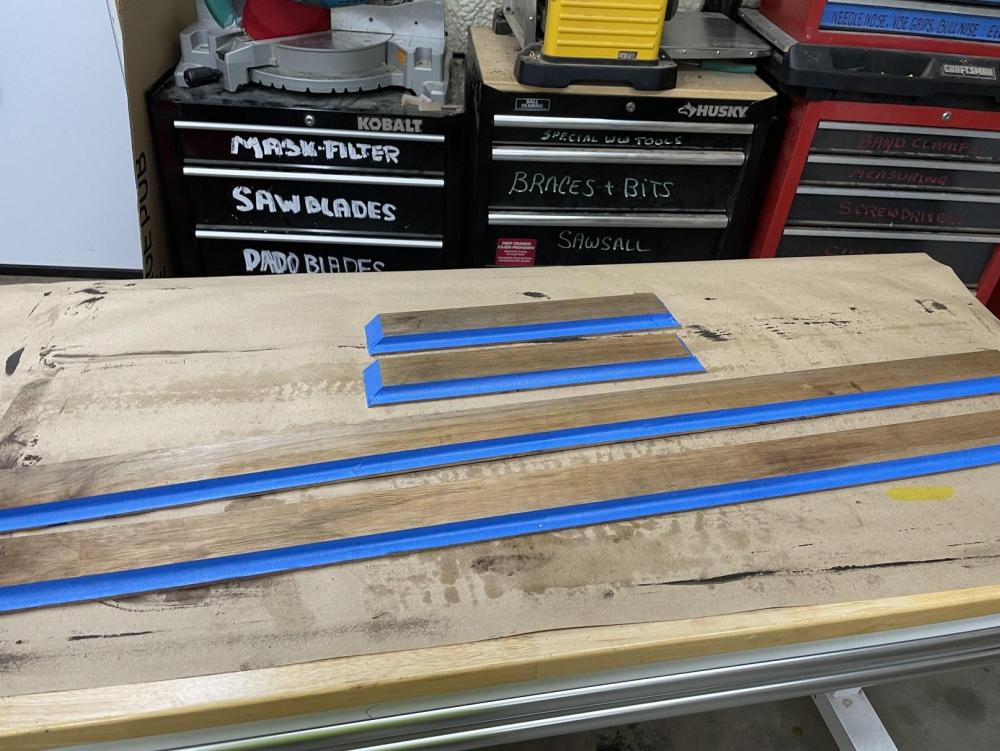
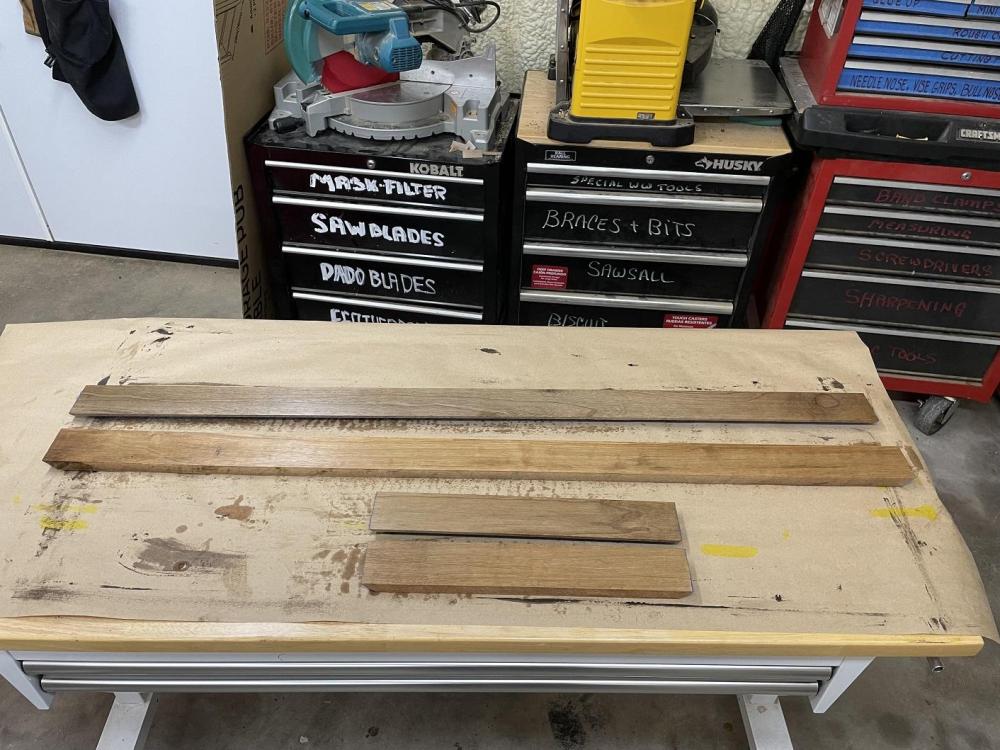
Over the last few days I have made some decent progress. I started on the case top. I was going to use the smaller of the two boards I prepped, but I was NOT happy with the look, and the fit was TOO close and might have been way too short after trimming. I went back into the woodpile and found some black cherry I liked and went thru the process. I ripped two long pieces the right width, then cut the four pieces needed to make the frame and test fitted them together. The test fit was successful, and I needed to sand away the burn marks caused by the table saw. This was caused by the density of the wood and the length of the cut. Note that the dados on these are not as wide and are very shallow. Rather than setting up the stacked dado blade, I cut these in two passes over the table saw blade. The sanding of the top frame was accomplished on the new 1x30 belt sander with the platten.
-
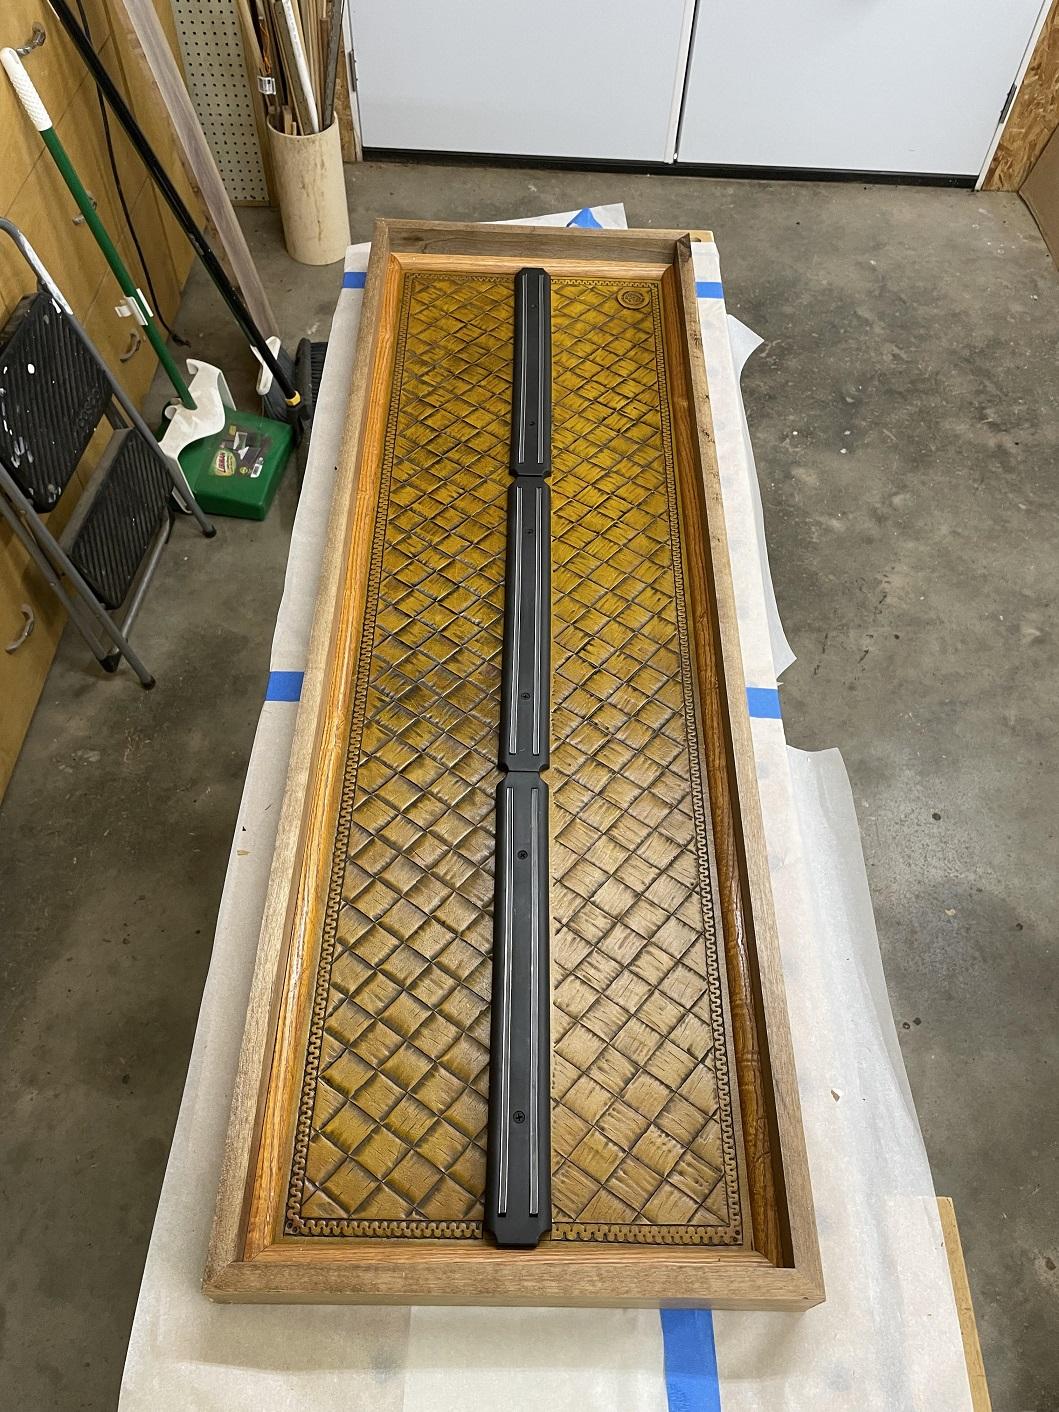
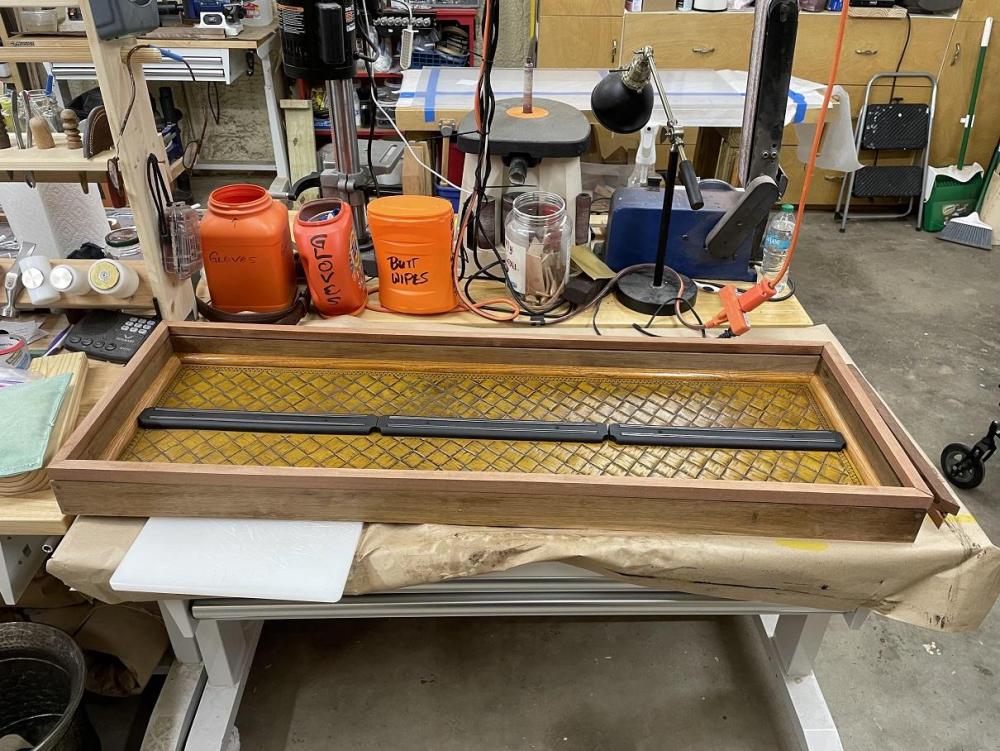
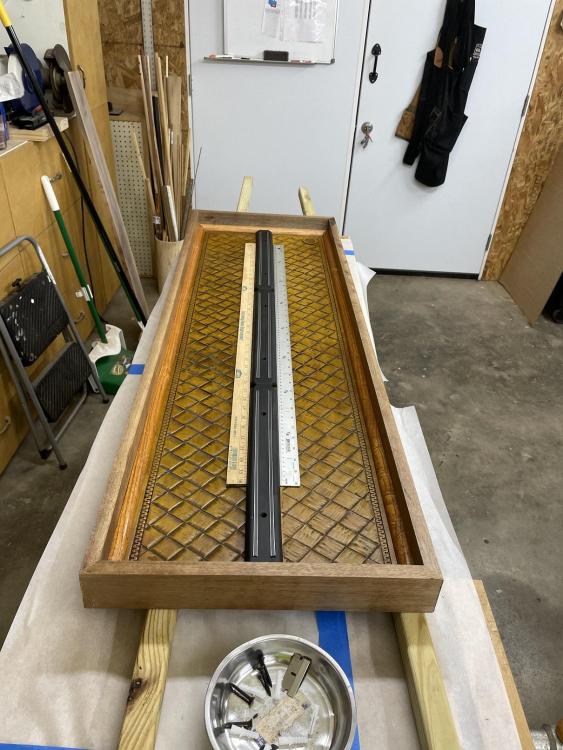
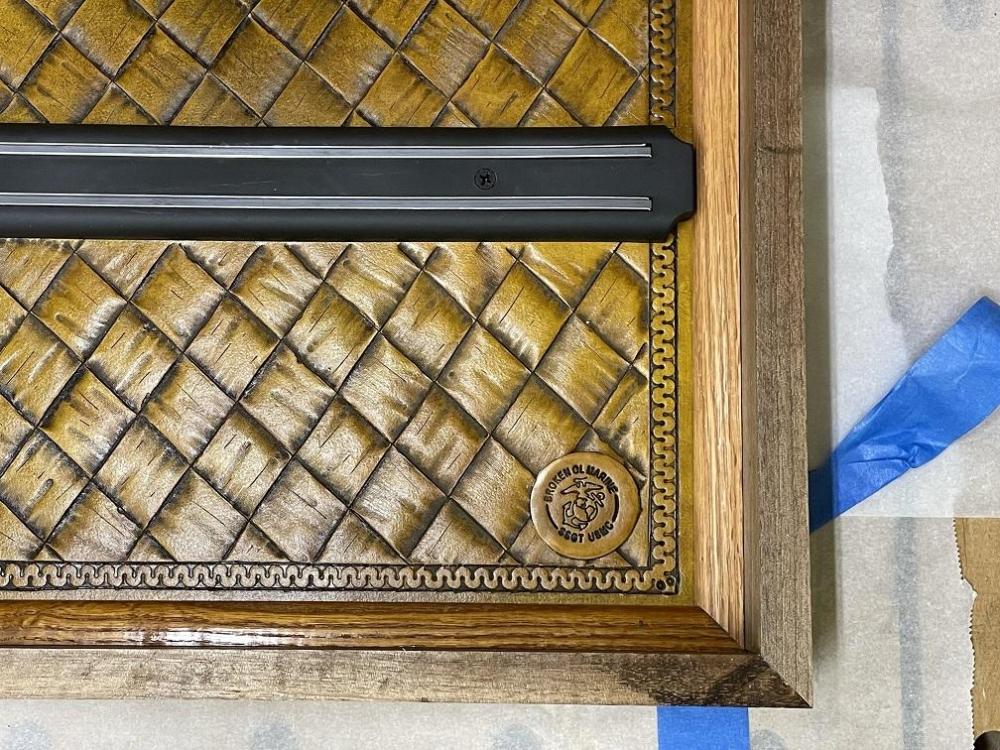
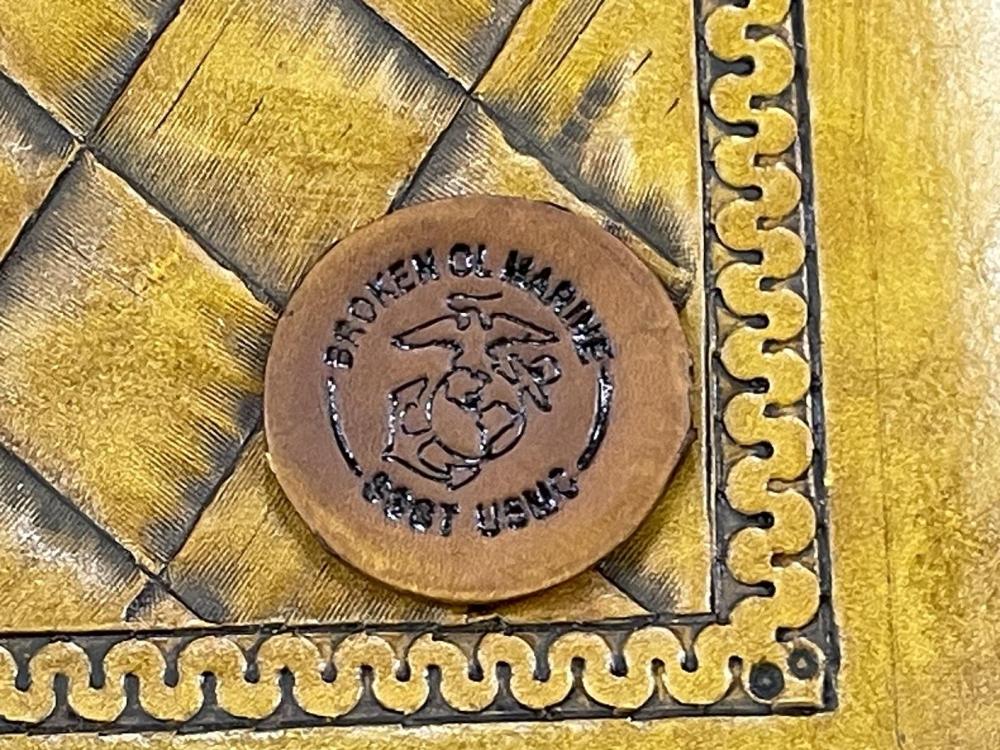
I cemented the new logo to the panel and installed the panel into the case using the quarter round molding to hold it in place. I pinned the molding down using a brad nailer, but did NOT glue the molding to the leather or the case sides, JUST in CASE. That was looking good, so it was time to install the magnets. I laid them out on the lines on the leather and insured they were aligned with one another using a pair of three foot rules. With the provided screws, I drilled pilot holes and carefully installed the magnets. I had placed the case on a pair of 2x2s as I knew there was a slight chance the screws might go thru the bottom of the case, so I wanted to be prepared. Slow and steady, verifying each position before I drilled, I got them installed. It looked good. Three screws did penetrate the bottom of the case by about 1/16th of an inch. The Dremel with a cutoff wheel made quick work of the little bit that showed thru. No worries. The new logo came out very nice as well. I'm going to love this new stamp on my leather work. Next on the to do list is starting on the lid and plexi window. Then installing lighting and hinges. Stay tuned.

-
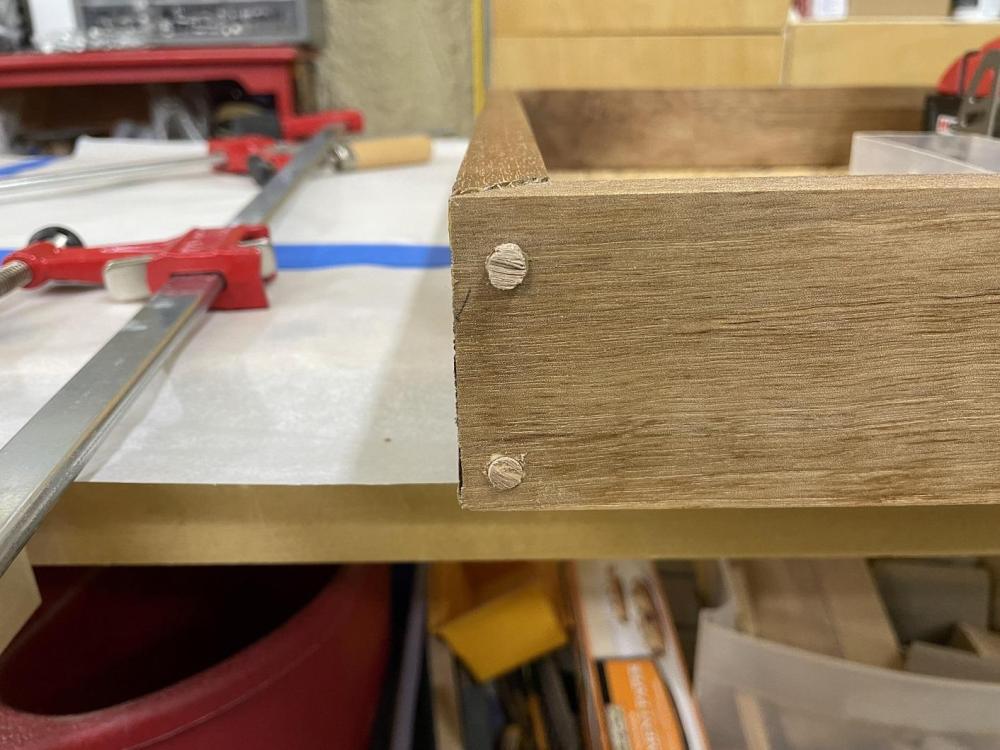
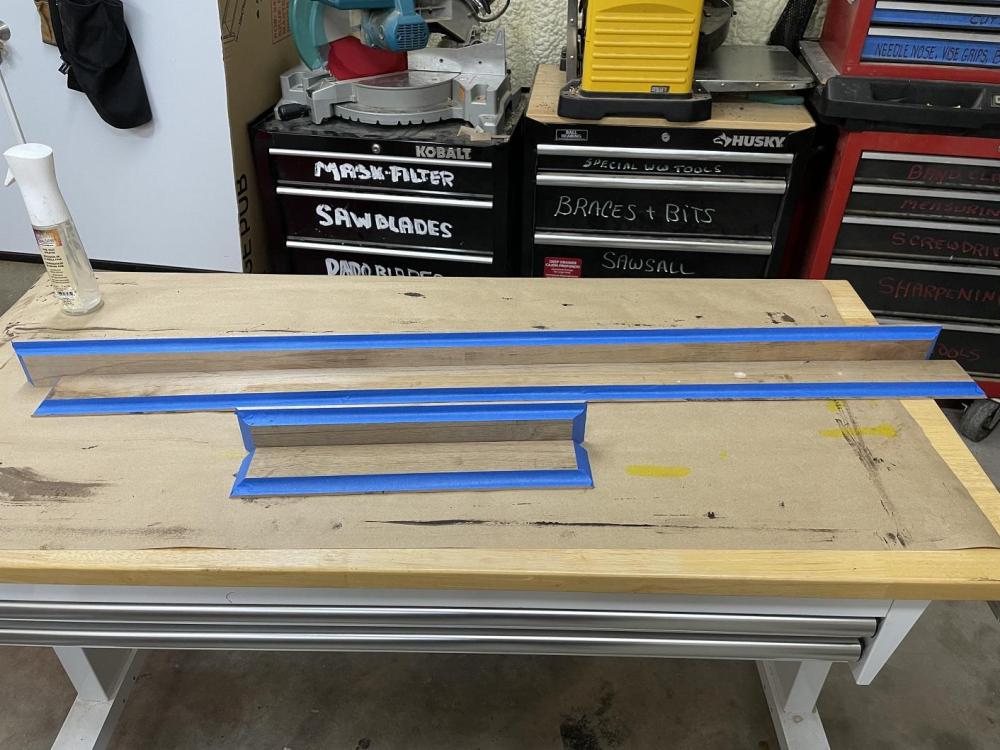
Eight set ups, eight cutting strokes, eight flush cuts. I got lucky. Touch them with Watco Oil and they come very close to matching now. After they dry and are waxed, they may match perfectly. If they don't, I'll just say I planned it that way, as an ACCENT. Yeah, That's the Ticket, an accent. Yeah.... Far from perfect, but there is still a lot to do. I'll address the corners when I finish the lid, I'll sand them all together, and close that gap. Start on that tomorrow.
-
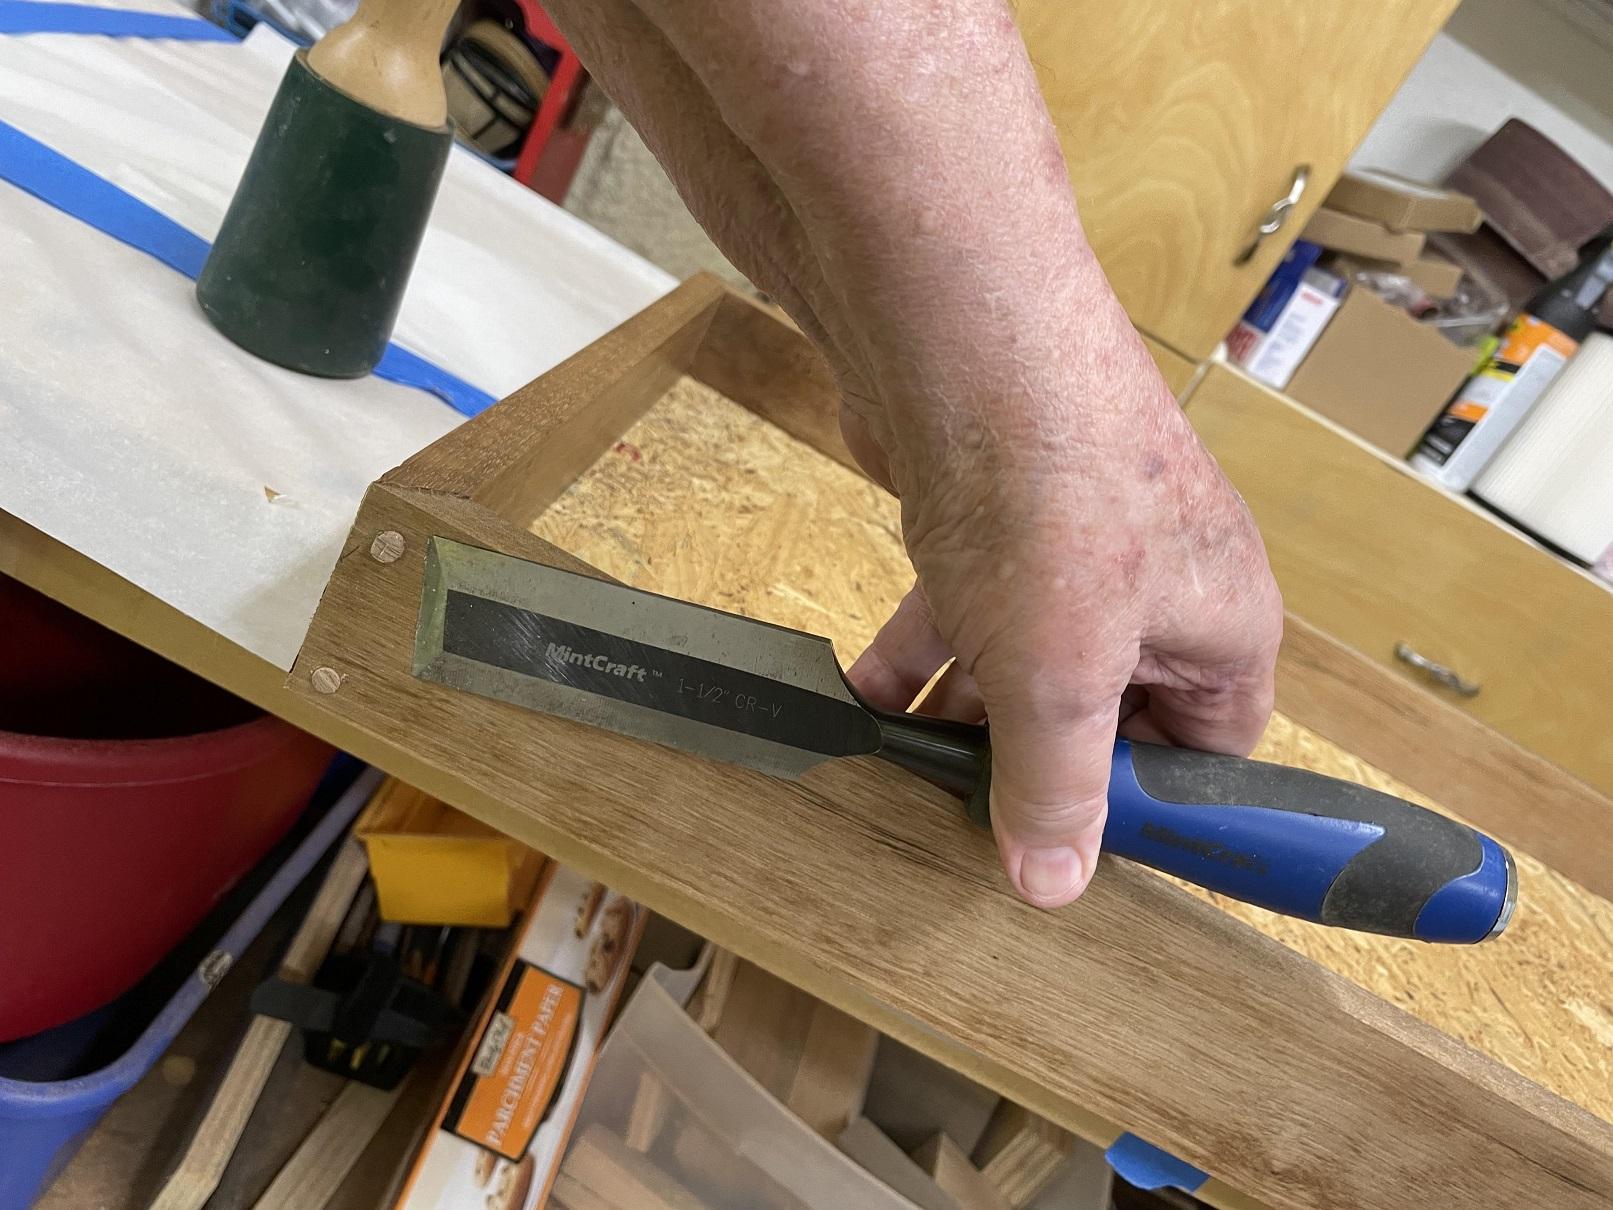
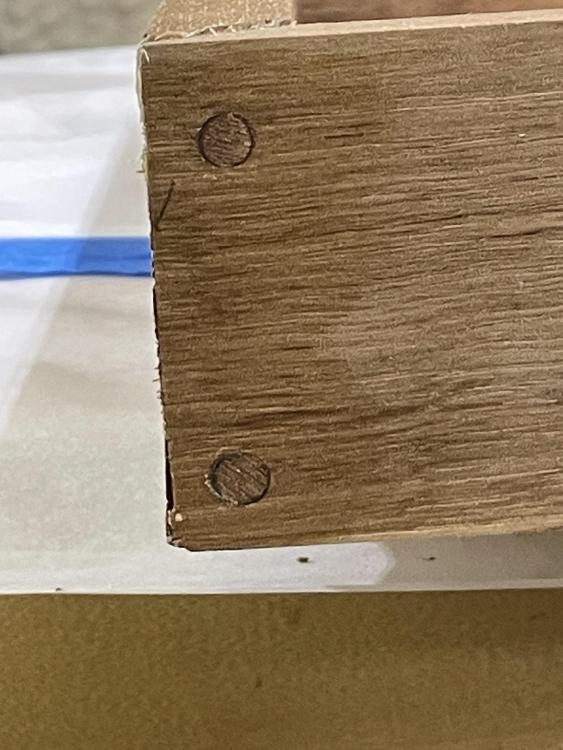
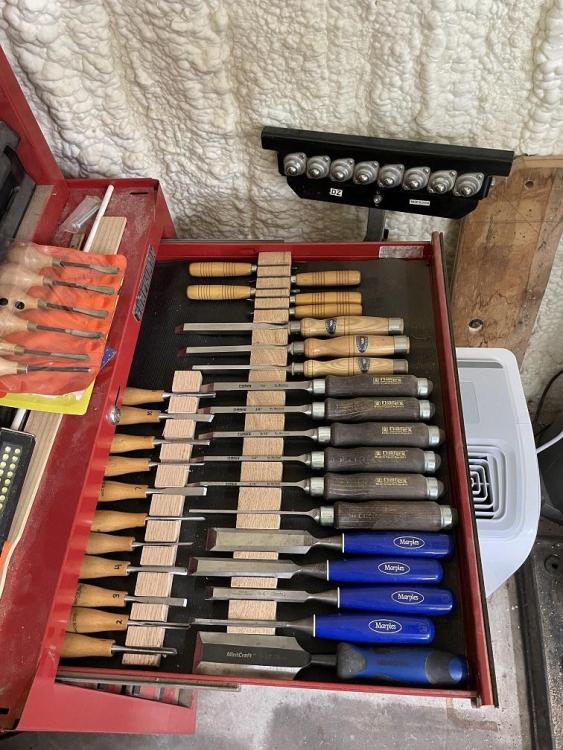
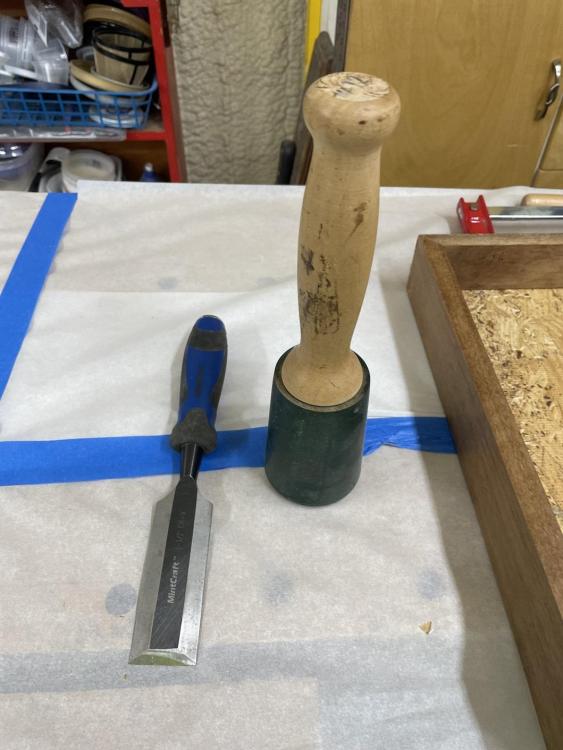
With the glue set, it's time to trim the plugs off flush. You need the right chisel and it has to be sharp. Keeping them organized and sharp is easy if they are properly stored. I took care of this one winter when I had nothing to do. I chose a wide flat chisel and my heavy mallet. The key to a clean cut is keeping the chisel flat against the surface, cutting with the grain, and a smooth even cut. If you hit too hard you'll break the plug and pull a chunk out of the countersink. I know this from experience. You get set up, tight against the plug and then a firm even stroke.

-
While the glue sets on the plugs, I play with my New Maker's Mark, to create a new one for the panel. I'll glue it over the one carved in the panel with contact cement. Three or four tries and I've got a good one.
-
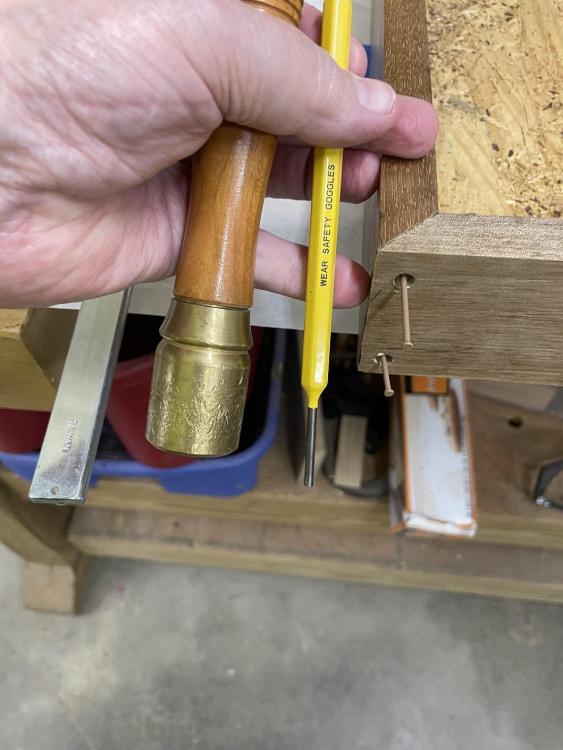
Many would use a hammer to set the nails, but I used a punch and my brass mallet and a series of light taps to seat the nails. Much more control. I have ruined a piece in the past missing with a hammer. Difficult to remove a ding from a good sized hammer. So I dip each nail in the wood glue, set it in the hole by hand, then drive it with the punch and mallet. Once the nails are set, I pull a plug from the block and using a nail, run glue around the inside of the countersink. Then set a plug with a light tap of the rawhide mallet.
-
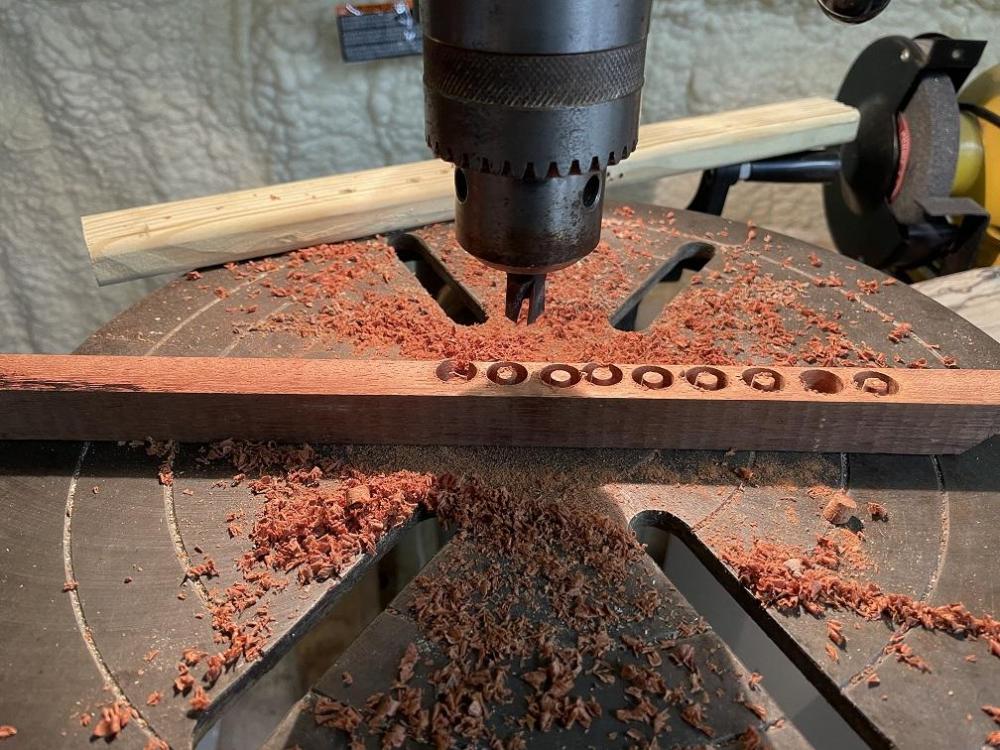
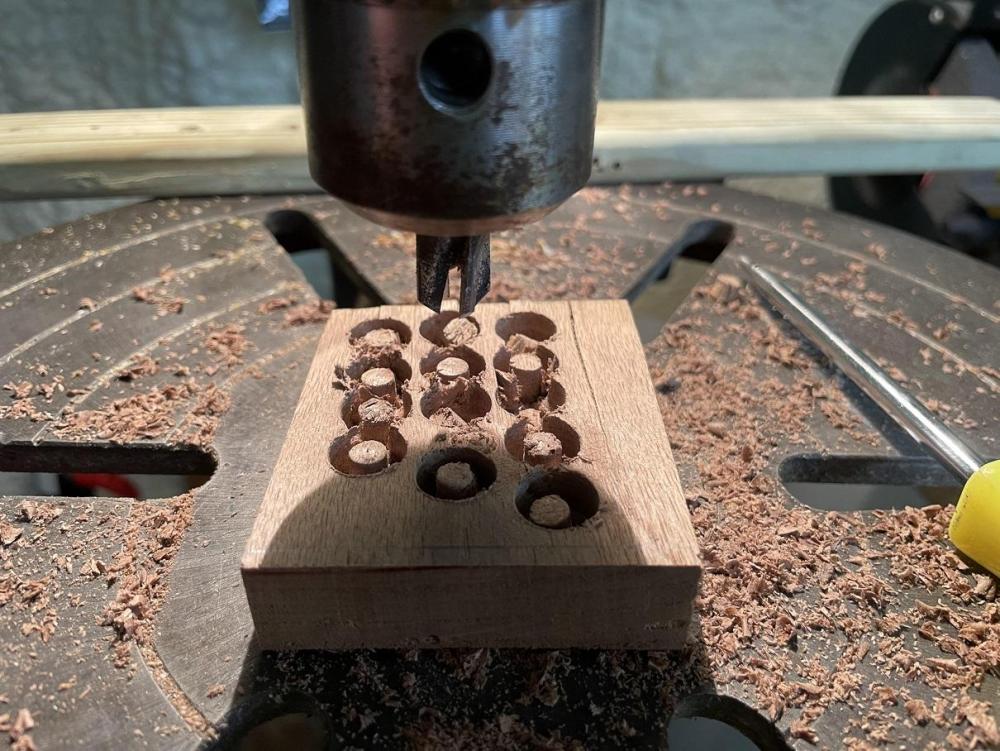
Next, while the glue was setting up, I pulled out the 1/4" plug cutter and cut a dozen plugs in a block of scrap from the original board the case was cut from. After using a mini-square to mark the locations of the holes I wanted, I used a Forstner bit to countersink eight holes for reinforcement of the glue up. Then used an appropriate drill bit to predrill holes in the countersink for eight finishing nails.
-
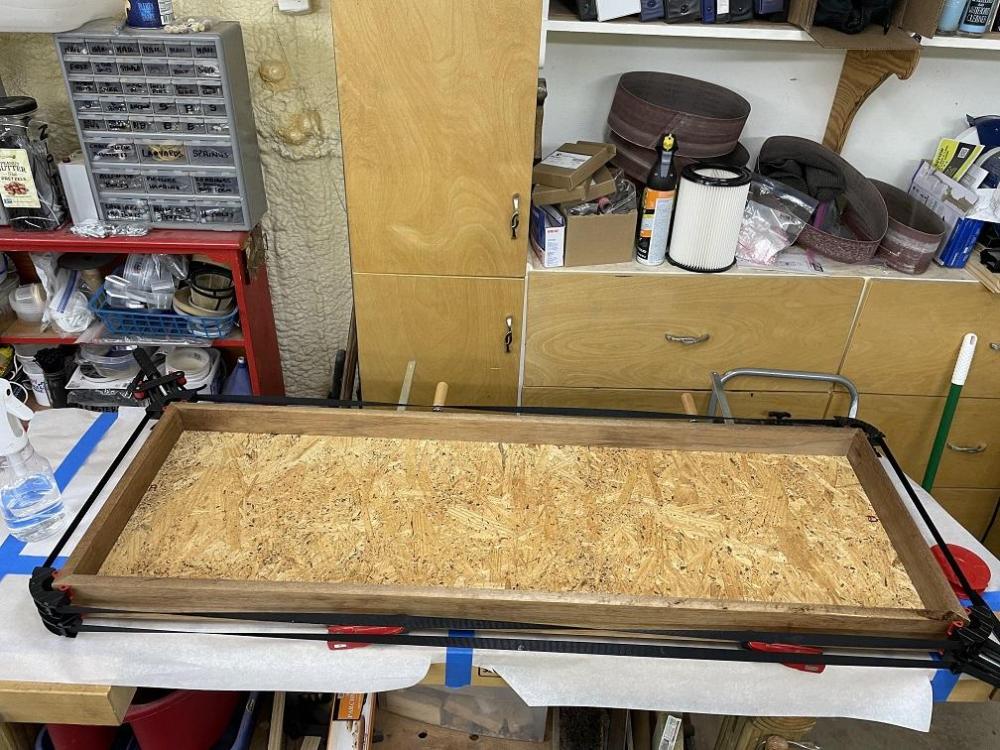
At this point I was ready to glue up, so I pulled the painter's tape from the protected areas and set up. I matched the reference markings and applied glue with the acid brush, and matched and band clamped. Bar clamps insured the middle of the long sides were tight against the bottom panel.
-
Okay y'all, fill your coffee mug, this will be a long stretch. I was busy today. So, the oil dried overnight and my first task today was to wax the boards and get them ready to glue up. I have talked in a lot of my posts about the beeswax. In this series I have shared pics of the actual products. This is the Beeswax I use. I have to say I LOVE the smell of this stuff. NOT like we used to smell the freshly mimeographed tests they handed out when us old folks were in school smell, or that dizzying smell of two part epoxy in a closed room smell. This stuff smells GOOD. It's bring back fond memories good. When I apply the wax, I have learned a few tricks over the years. I have a cheap hair dryer and I heat whatever project I am going to wax a little. I do mean a little, you don't want to overheat whatever it is and damage it, or change it's configuration. I avoid this by holding the project in my hand. Just before I apply the wax I aim the hair dryer into the can for five to ten seconds. This softens the wax, I watch and you can see a slight color change. I don't want it runny. By heating the wood, bone, etc, you also let the wax get down into the pores to better protect. I apply a coat and buff it out, then apply a second coat and buff. We are waxed here, that soft sheen. For high gloss you build up several coats and buff. You'll get there. I like the soft glow.

-
Mine is due on Saturday, USPS Priority Mail. Can't wait! If it looks as good as I expect, I plan to make a new maker's mark and cement it over the one currently on the panel for this project.
-
Here are the case sides after two coats of Watco, drying. I'll wax them, then assemble. Once the entire project is done the project will get a couple more coats of wax. The colors of the sides don't match exactly, but it's natural wood, they are all from the same slab, but different sections. It happens. I'm not concerned.
-
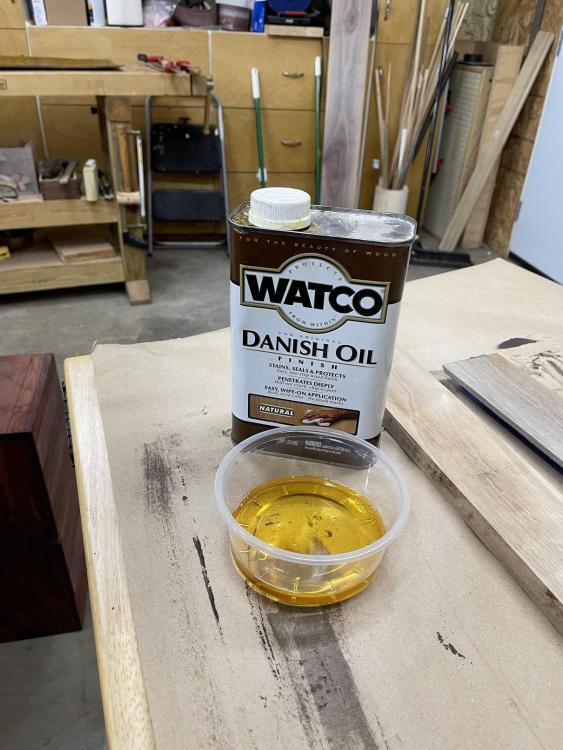
Out in the shop after brunch. Up very early and made the hour drive to the dentist and the hour drive back.. my morning was shot. I disassembled the project as planned and carefully remarked each piece to assure reassembly went well. I set aside the panel and prepped the case walls for staining. I needed to tape off any areas that would be glued or the glue wouldn't hold well after the stain was applied. (Just like leatherwork.) A real PITA, but a necessary evil. I decided to continue with the use of Watco Oil, I really like it. A great product, and easy to use. I've mentioned it a lot, and for those who haven't seen it, here is a peek. You wipe 'er on and let it soak in, then wipe off the excess and let it dry. Buff it out. I apply a second coat, follow the same procedure. Some stop here. Done. I apply a coat or three of Beeswax, or any good quality wax. The great thing about this is if it begins to look dull, buff it out or rewax. Get a ding, no need to refinish an entire area. Repair the ding, apply the oil, then wax, buff, done.
-
I was almost ready for the final assembly of the case to this point, but I had learned a few lessons over the years. I would do ONE last test assembly before glue and screw time. I wanted to insure there were no errors along the way. Every component fit, and there was no muss or fuss. Looks like I'll put 'er together in the morning when I'm fresh, then move on to building the plexiglass and wood cover and installing lights.
-
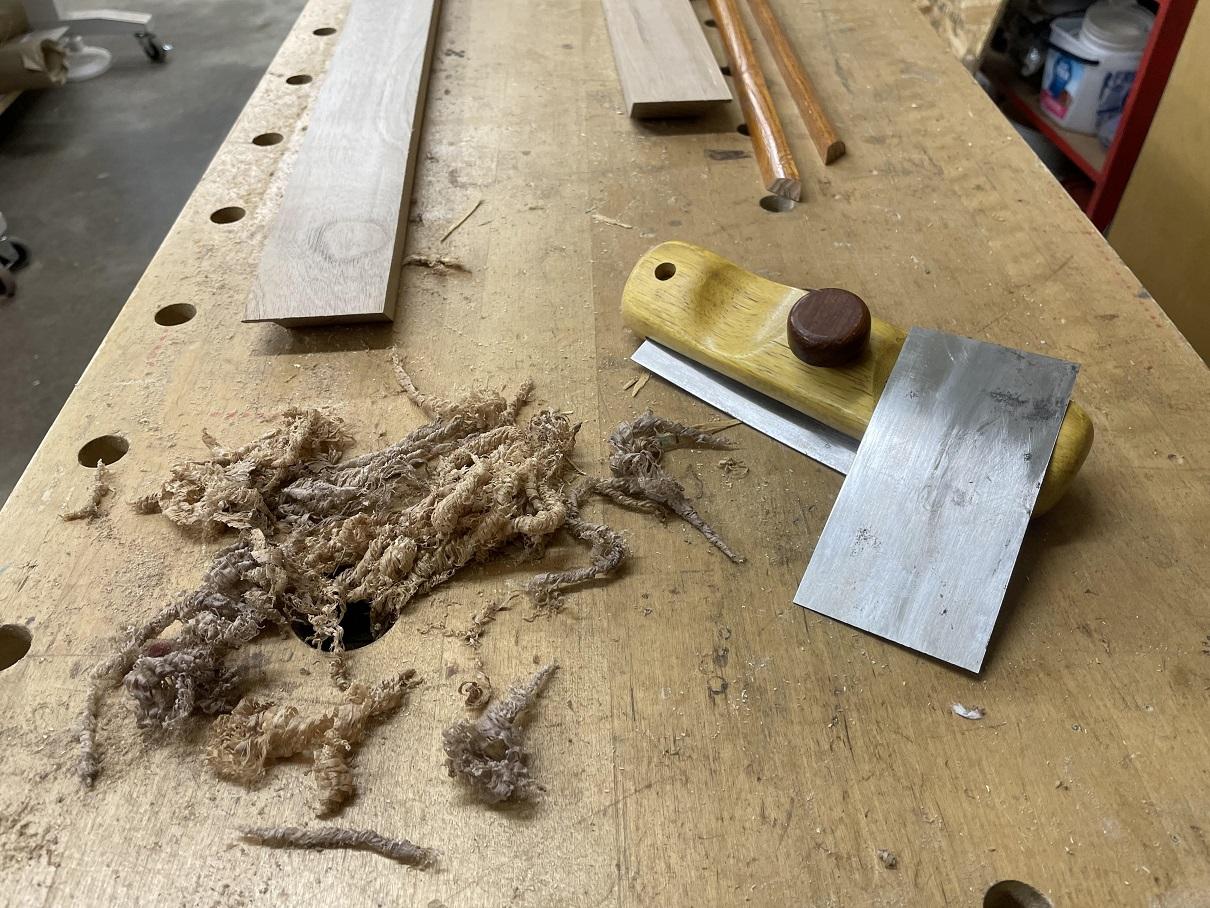
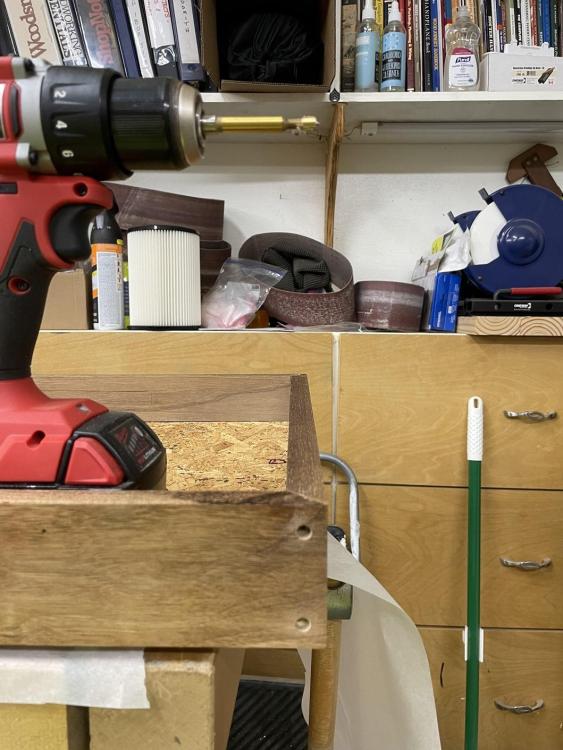
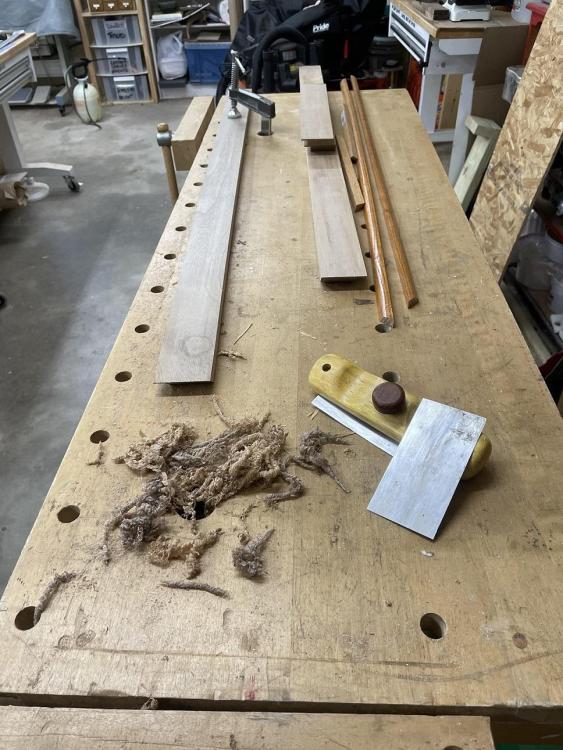
I was ready to do the final sanding on the case components and dug out my Cabinet Scrapers. I sharpened a pair of those and got to work. A sharp cabinet scraper saves a bundle on sand paper, and leaves a near mirror finish. In addition, it's quiet, just the whisper of the scraper across the wood, and no muss or fuss. Very little dust, if any. It takes a bit to learn to properly sharpen them, but once I got it down, they are my go to for large projects. Sharp ones cut fine shavings.

-
I settled on Tan Kote for the finish and went out and applied that finish. It looked good while drying so I moved on to work on the case.
-
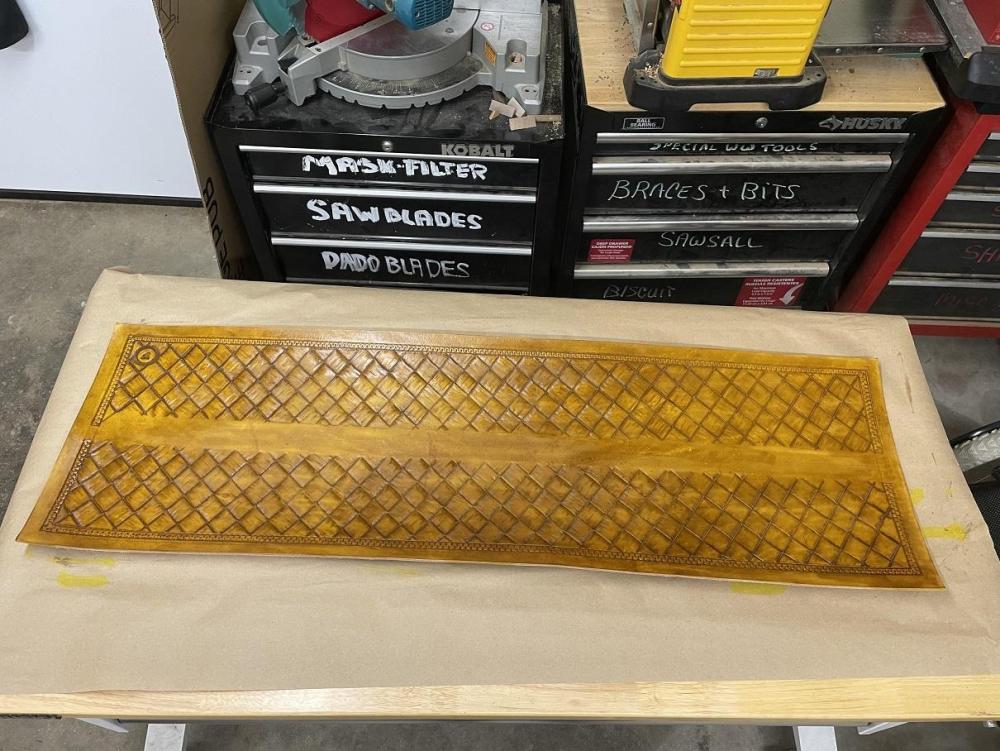
Time to antique. First I pulled the jar of Dark Walnut antique and covered the entire panel. Not a doubt that it is one way to subdue the yellow. By the time I had covered the second half of the panel the first half had started to dry. I didn't want to let it dry completely so I started to wipe it away with paper towels. The secret here is to fold the towels and keep them flat to the surface. This leaves the antiquing in the areas where you want it. I worked quickly to insure the second half of the panel didn't dry. Some people like to let it dry and then remove the antique with a wet cloth. To each his own. You can always add more antique back or remove more with a q-tip or dampened cloth later. Right up until you apply your sealant or topcoat. I am pretty happy with the final result here. The golden undertone is the result of the yellow base, and the antique highlights all that tooling. I don't think I wasted those days ... The panel will be the background for the knife case, but will still look good behind them. Better than some burgundy velvet. (Although, that would have been classy.) All that is left on the panel is to apply my topcoat of choice when the antique is fully dry. Lexol or sheen. Then wax. I am going to work on the case until then. A bit of sanding then assembly. Some holes to drill and lights to install.
-
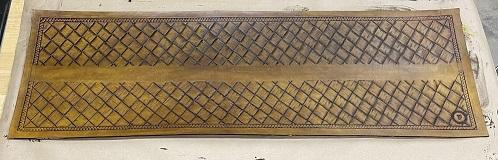
Had an errand to run for the boss this morning, the wife is still down with the flu. Before I left, I applied that Watco Oil. Sure toned down that yellow a bit. While I'm gone the oil will have a chance to dry. Once it does, we can get a chance to see how she looks after antiquing.
-
That laser engraved design is cool. I like the drop leg design that gets the head off your hip away from the pack or other gear. Have you tried it on the trail yet? Does it hang on everything, or work out well?
-
I like it. I have some single actions I'm going to be building holsters for once I finish the knife display case.
-
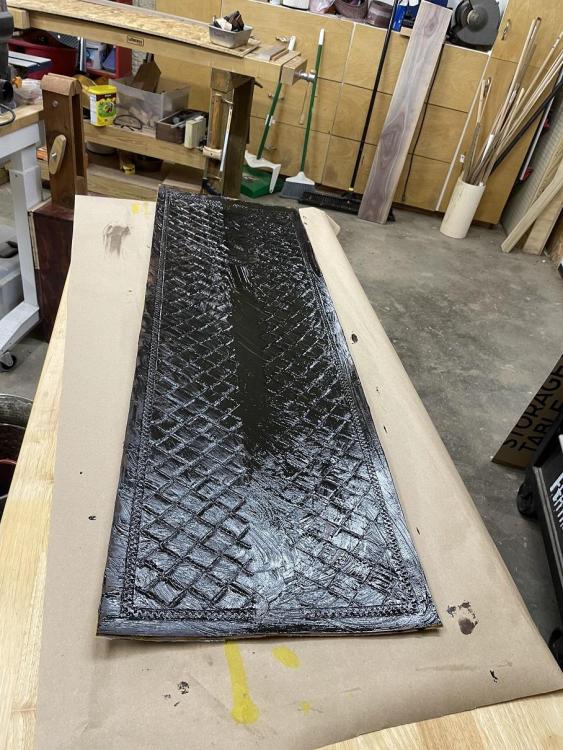
If all goes well, I can apply the watco oil first thing, then a resistor coat in the morning. By afternoon I should be able to antique it. THAT should really bring the panel to life.
-
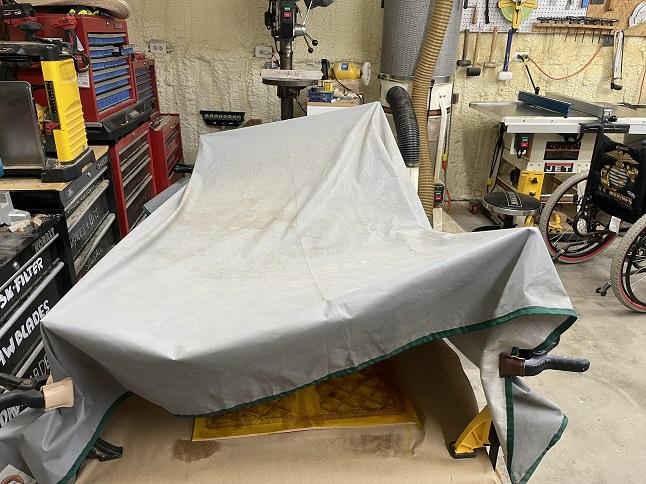
Normally, when I leave the shop, I use the dust cover from my Table Saw (Seen uncovered in the background) to cover the panel to keep dust and other contaminates off it while it dries. With wet dye on the panel I didn't want the cover to touch it. I put four clamps vertically on the table corners, stretched the cover over the clamps and then using small clamps, attached it to them. Should protect it until morning....
-
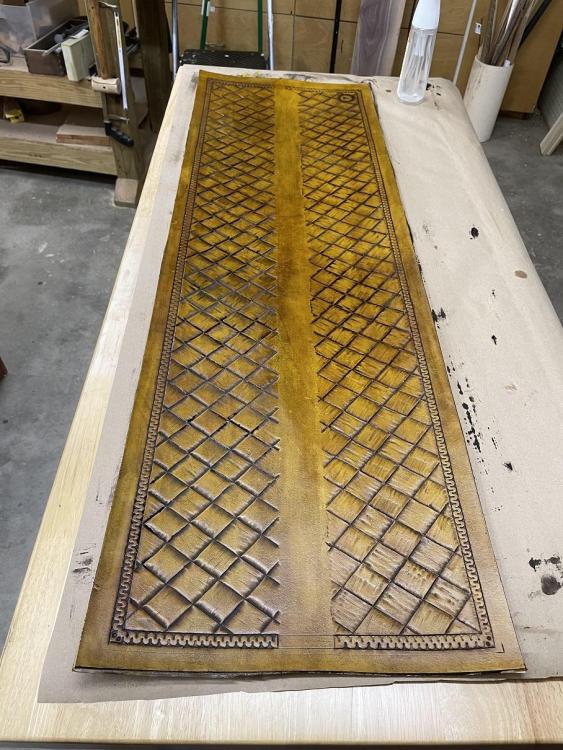
Here is the yellow dye pic, once it dries it should be even....