Brokenolmarine
-
Posts
592 -
Joined
-
Last visited
Content Type
Profiles
Forums
Events
Blogs
Gallery
Store
Everything posted by Brokenolmarine
-
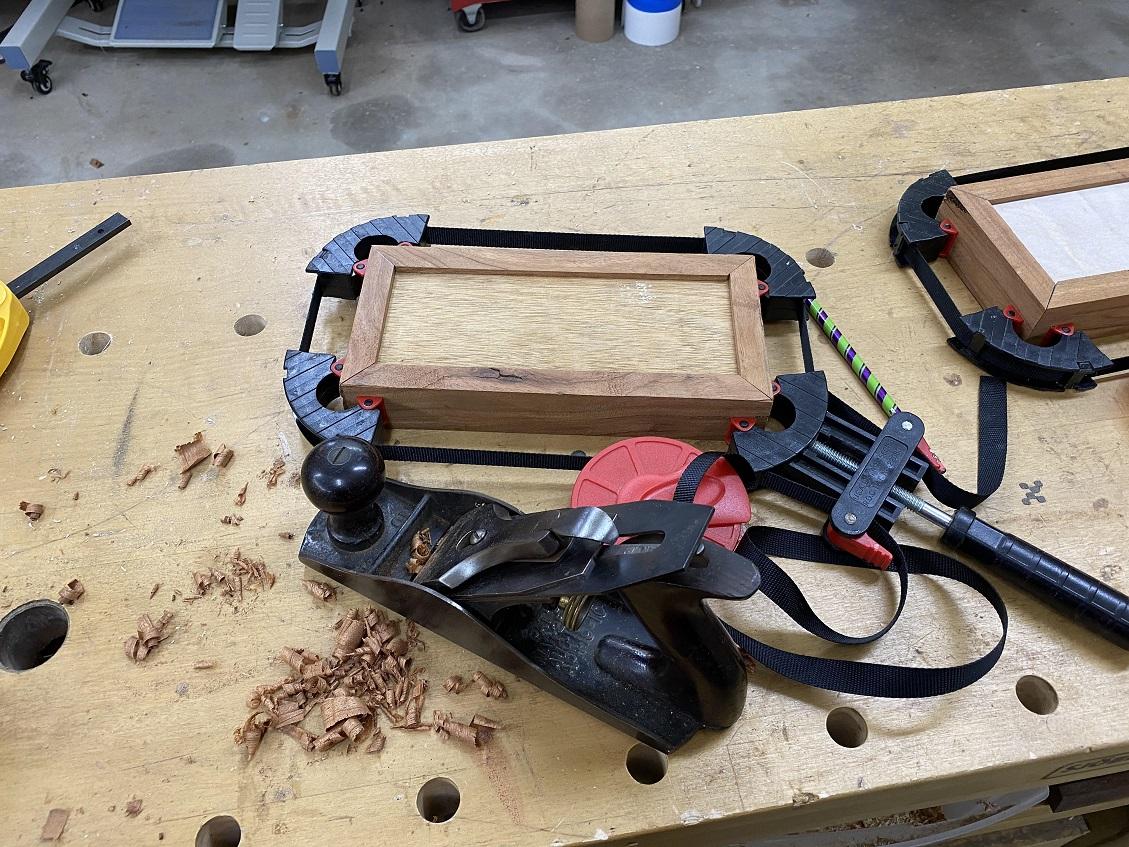
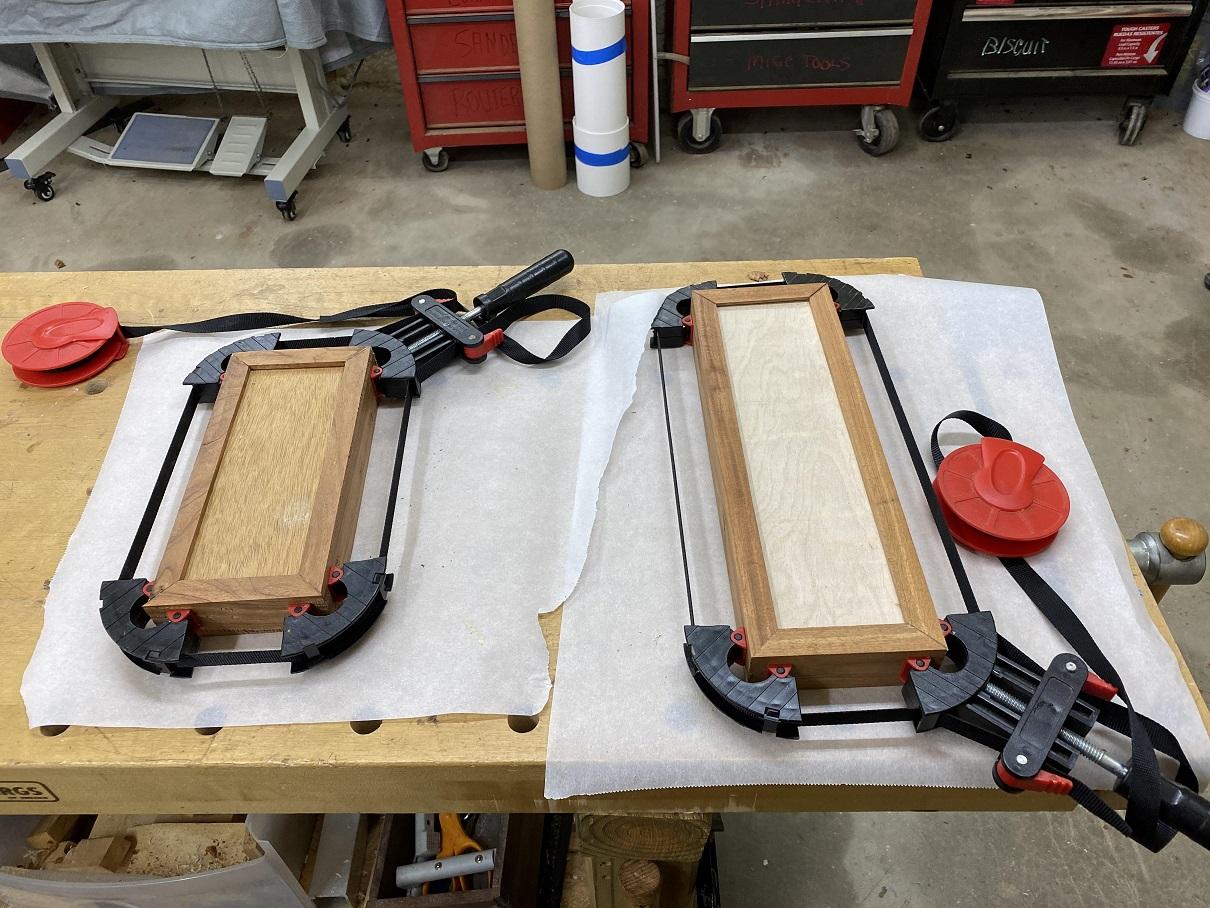
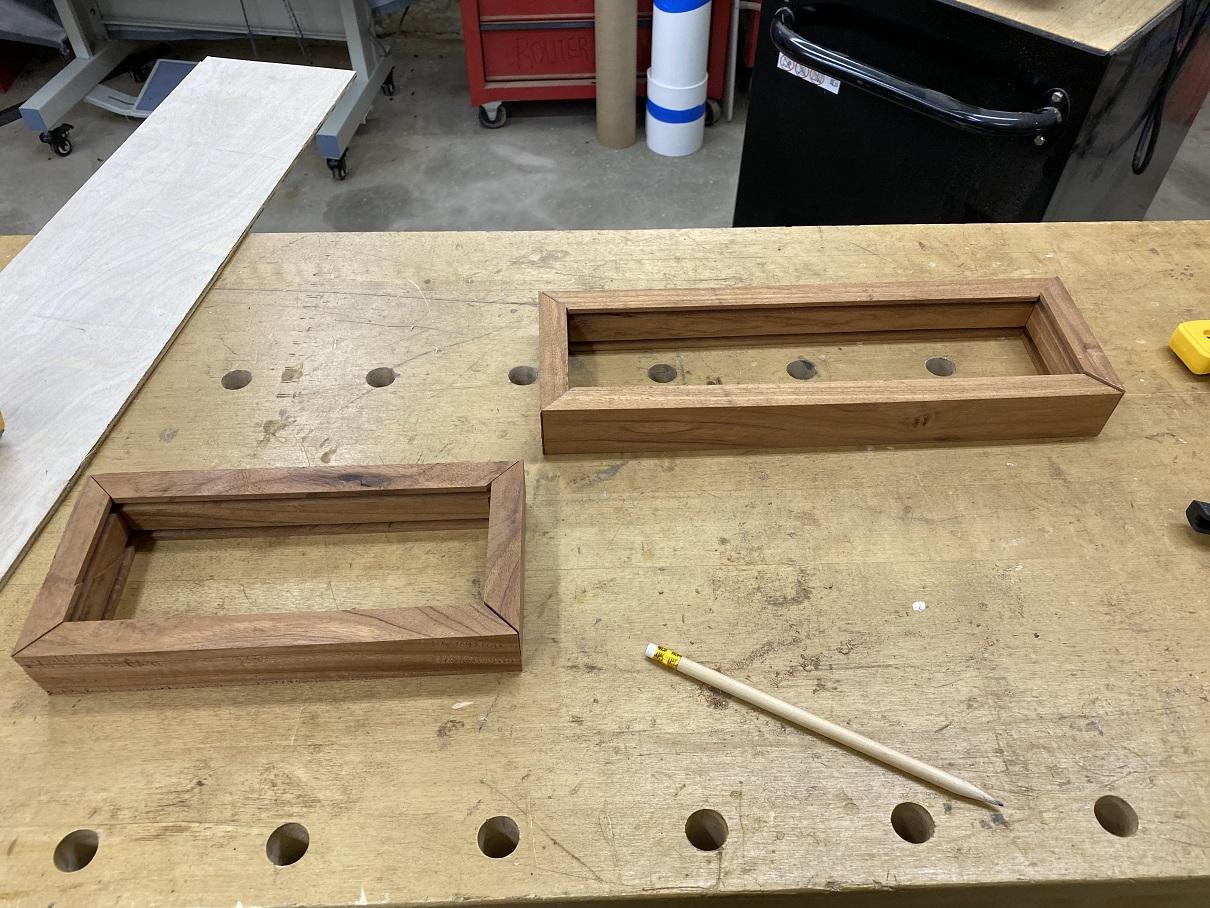
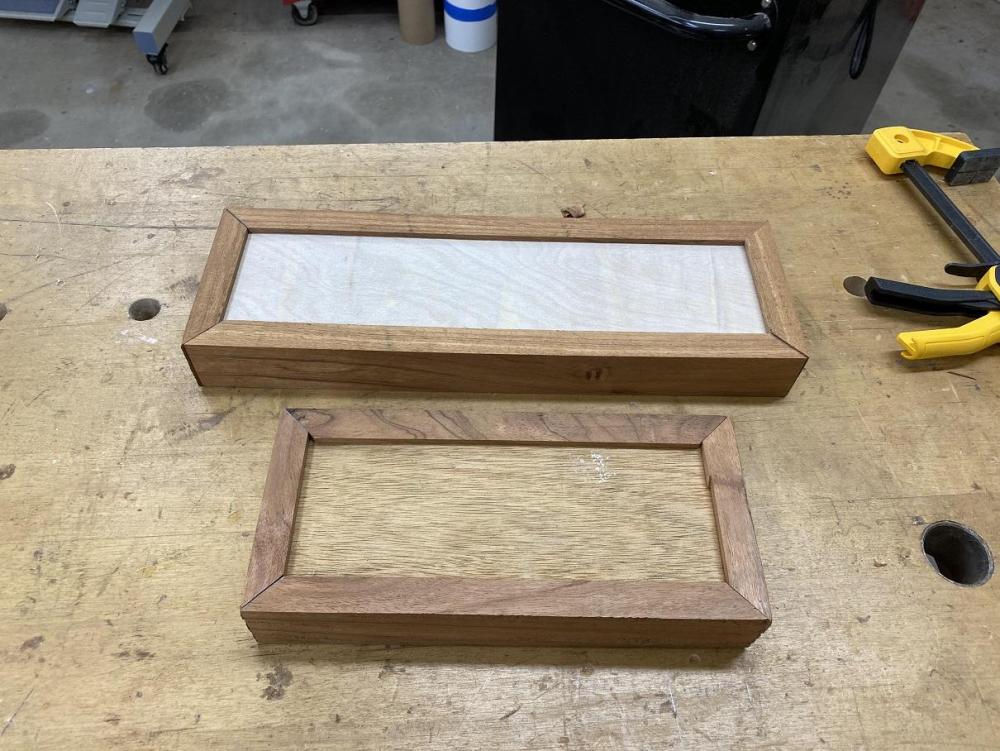
Out in the shop for a session this afternoon. I used some time fitting and planing, fitting and planing until I got the wife's box right, then pressure fitted it to insure all was right. Since this box was made from excess, the long sides were slightly thicker than the short sides and they had to be planed down to the same thickness. The thing about handmade, especially those with handtools, is that you hand fit things. Part of the pleasure of the task. The pressure fit check is important because you apply pressure during glue up. If you hand check all the joints and they look great, then apply pressure... ... sometimes they don't look so great any longer. Next up I pressure checked the Letter Box. It matches up fine. I am looking at the inside edges. The outside edges and the top edges will be adjusted (planed or whatever) after the glue up.) As you can see in the pic below, the right hand short side is a tad higher. I'll clamp the box down and plane that smooth after. Both boxes were broken down, and the pieces carefully laid out to maintain their position. Glue was applied to all eight corner contacts and ONE side of each of the panels for each of the two boxes, and they were reassembled. Once this was done the clamps were applied and tightened just enough to take the slack. Then the boxes were adjusted to square up the inside edges. Than pressure slowly applied until you could pluck the strap. They will be left in the band clamps while I work on the two inserts, give them plenty of time to set. Then the clamps will be removed and the real work begins.


-
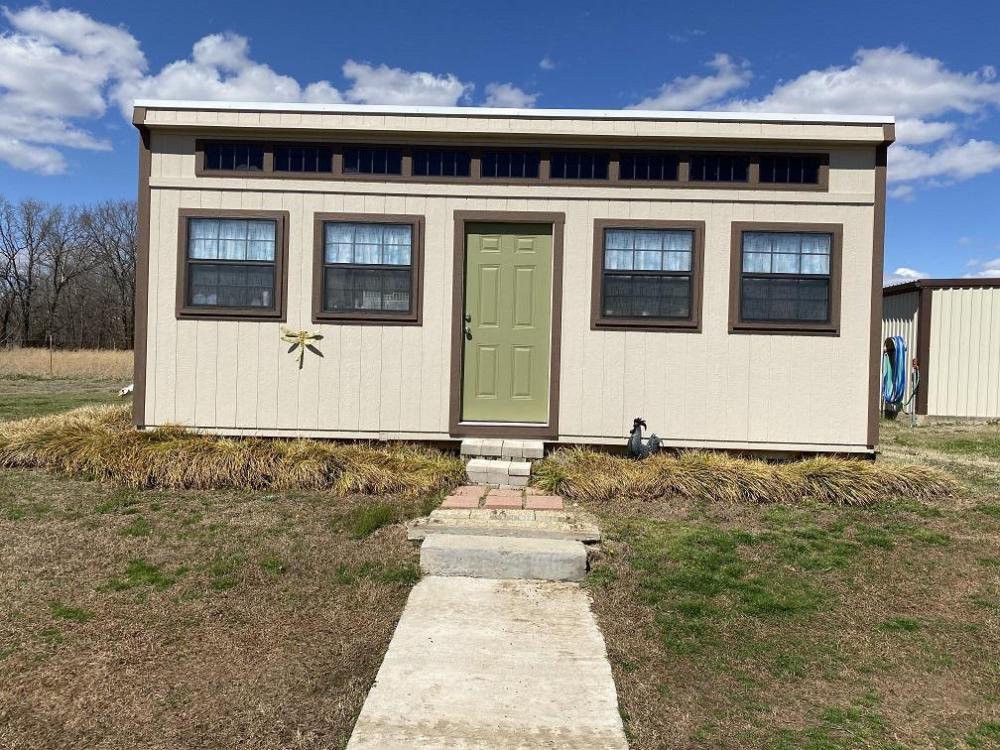
Funny thing about the She Shed... that door WAS gloss white, but when the Oklahoma sun would hit it in the afternoon... the refected glare would come right thru the back door like a laser and blind me. I told Miss T she could either live with keeping the back door and the back door blinds closed after lunch, or choose a flat dark color for the door.
-
That would be cool, inside an apartment hallway... until some punk trashed it because they were jealous. (30 years in LE, yup, someone would. )
-
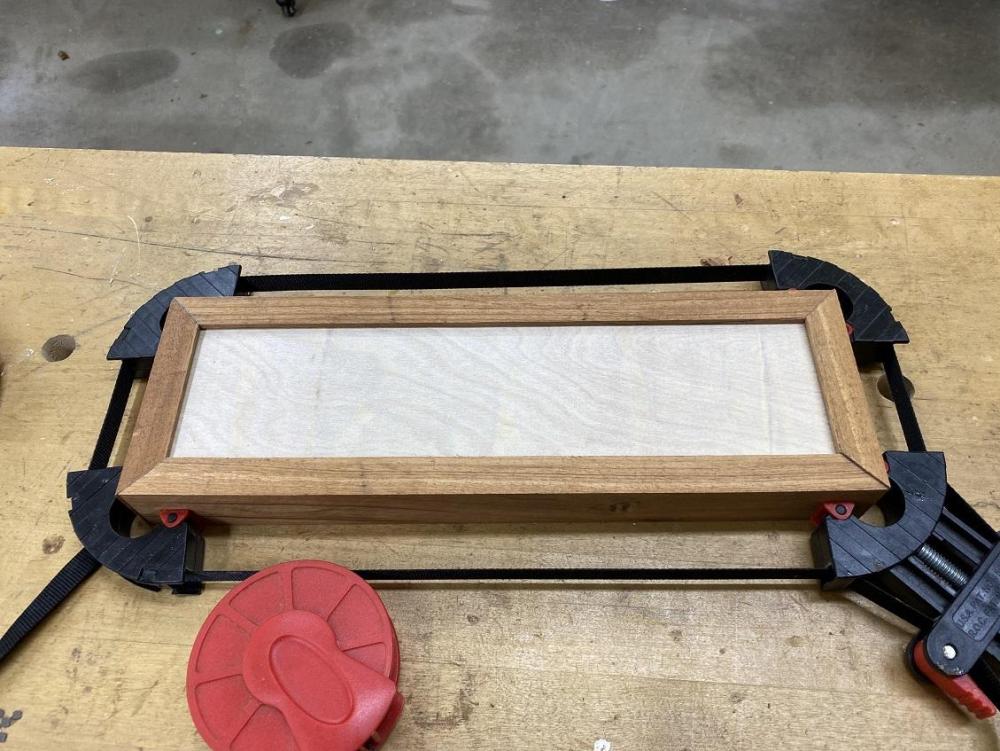
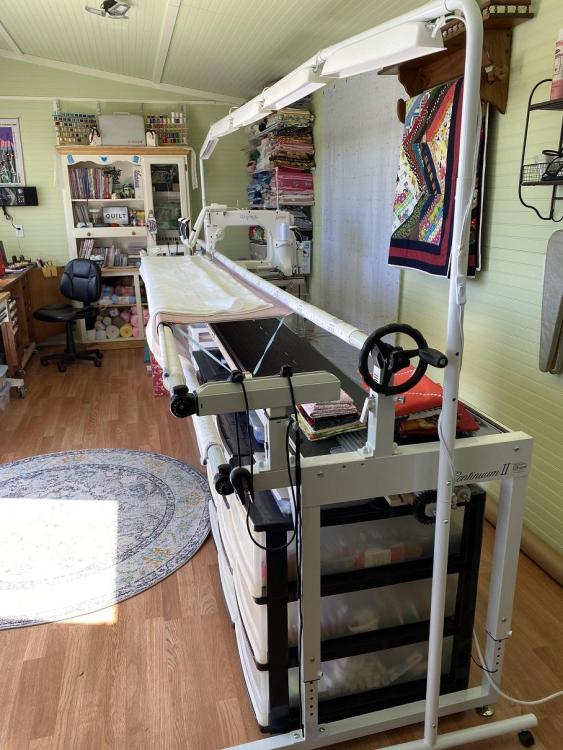
Next up was cutting the dual panels to fit the dados. The box will be glued together with the panels in place and then the shaping and sanding will take place. Much easier to do with the box whole, it's more stable than trying to do with a base and lid. Once the box is almost complete, you run the box over the table saw blade, using the fence to insure consistancy. Run the long sides first, push in wedges and tape to secure, then cut the short sides. The letter box will get a carved/tooled leather insert on top. The square-ish box will get a spalted maple insert on top and go to the wife as a gift. She can use it to keep sewing accessories in for her She Shed (or Bitch Barn as the Daughter calls it.) I have some beautifully grained spalted maple to accent that mahogany. Her shop was set up from a bare building we ordered, then finished the inside. It's very nice.
-
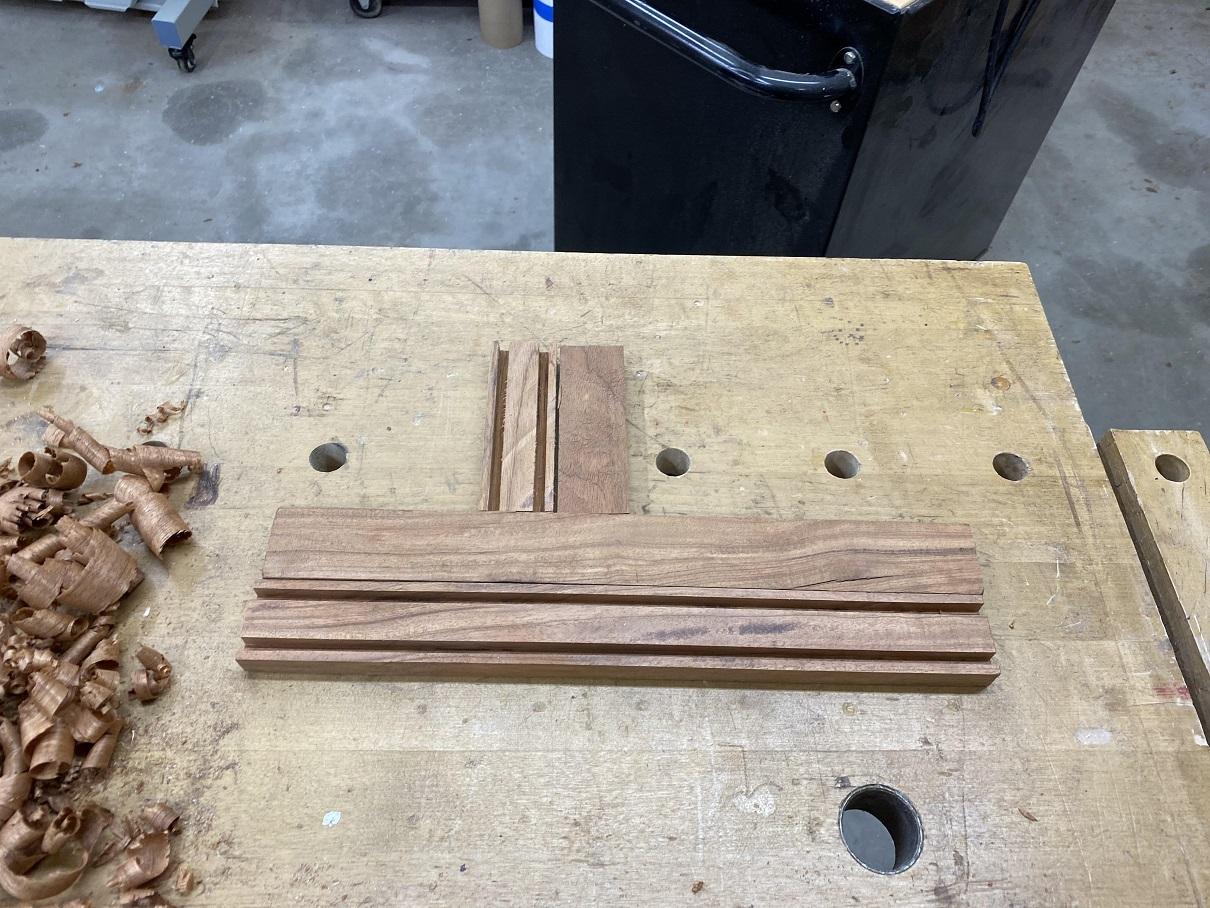
I cut a piece of the mahogany long enough to accommodate the 13-1/8 x 3-1/2 I needed. Then I set the blade depth for the dados I wanted. I ran the edges against the fence on the saw, rotated the wood 180 degrees and ran across the blade again. I had two parallel dados on one side. Now, rotate the wood 180 degrees and repeat. Now I have two sets of dados on opposite sides of the wood. Rotate the wood 90 degrees and mark the centerline down the length. Set the blade and rip down the center. BOOM, sides. I repeated the process with the leftover wood and now had sides for two boxes. I set up the chop saw and cut the 45 degree angles to make box joints. As always, I test fitted the sides. The rectangular box will be the letter box, so I tested it's fit around the letter layout. Perfect.


-
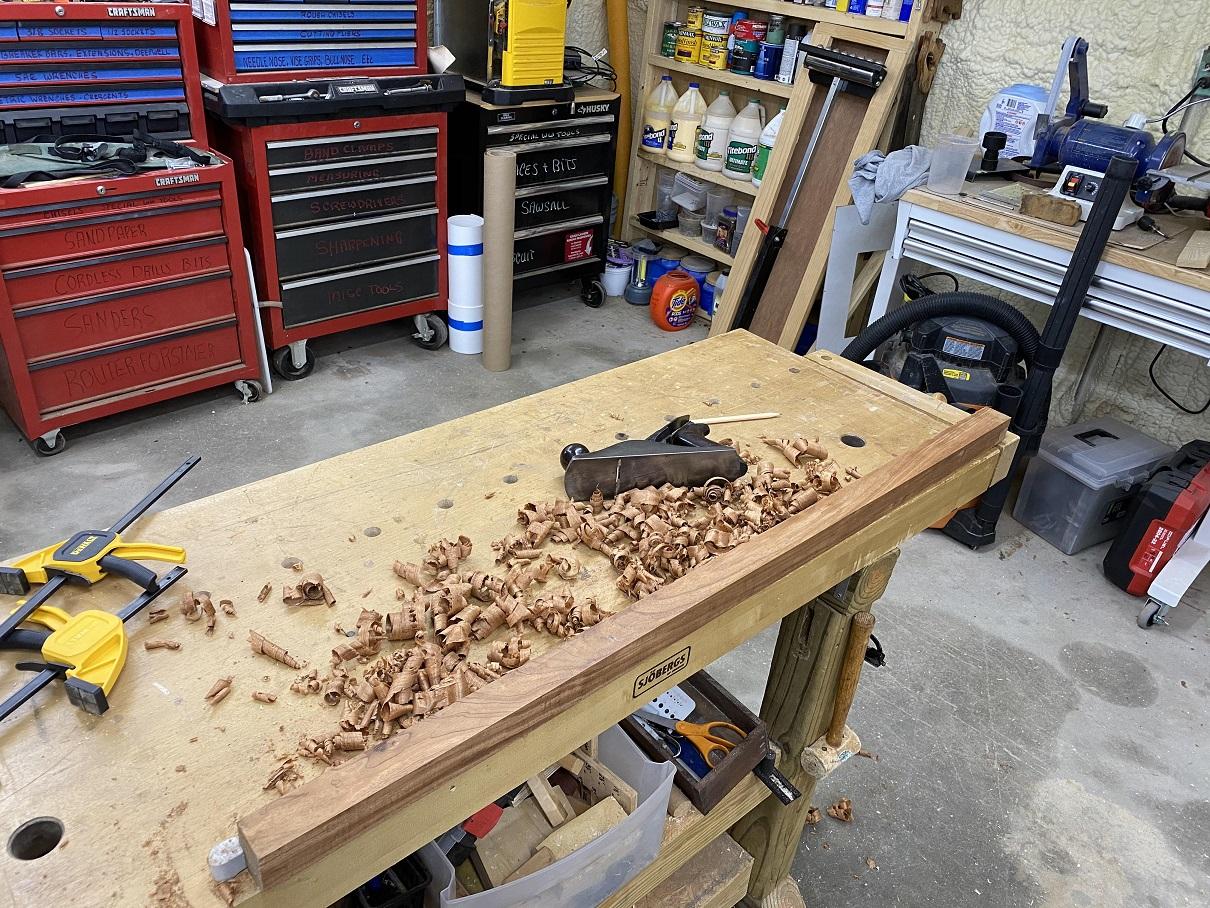
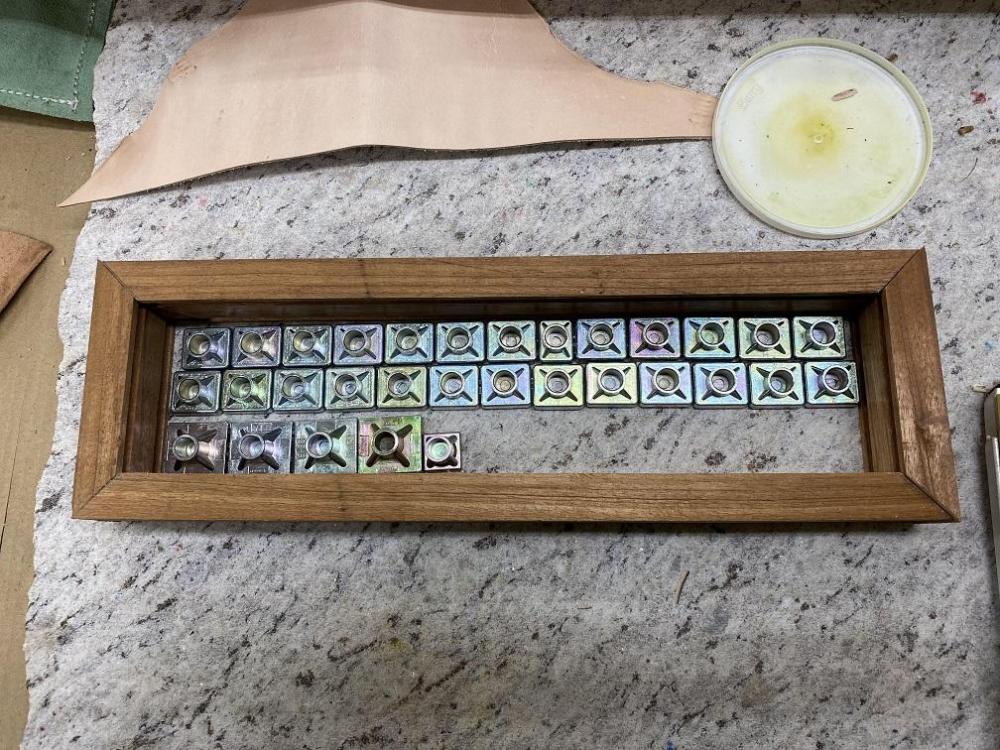
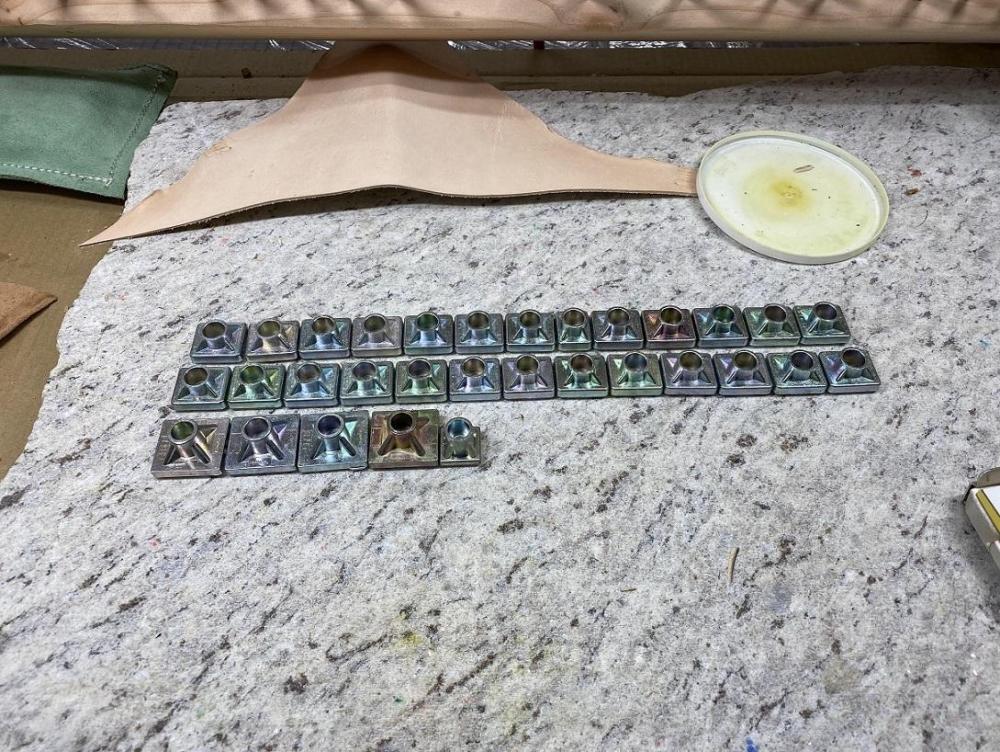
I went out to the Woodshop a couple days ago with the intent of making another custom cane, for something to do. I have a couple already, but the idea hit again after watching a few videos. I was going to make a black walnut cane with maple inlay. I found a nice 2x2 piece of black walnut and started to plane away the gunk that builds up when the wood is stored for a few (ten?) years. Then, as the grain started to appear, I was shocked... that walnut, was mahogany. I am nothing if not flexible, and I decided on the fly that this wood would NOT become that cane. Also on my project list was a storage box for the LETTER stamps for the leather bench. This would do nicely. I had been keeping the stamp heads in the factory foam tray, what a pain in the ... um... behind. I had the design in my head for a while. This would be perfect. Normally I would do nearly all the work with hand tools, but Arthur was visiting and I would add the Table Saw to the task. Since I had a few 3D stamps as well, I laid them out on the granite and played with the layout until I was happy, then measured until I knew the size I needed.

-

Holster #2 - for a CZ52.
Brokenolmarine replied to Littlef's topic in Gun Holsters, Rifle Slings and Knife Sheathes
I think it turned out really good. I like the use of the coin for a concho. Very nicely done. A few minor mistrikes, but only another leatherworker is likely to even notice. -
Local (Oklahoma City) Tandy Leather Store
Brokenolmarine replied to Brokenolmarine's topic in Leatherwork Conversation
The first thing I did when I got home was to send a thank you email to the woman herself and a CC to her store manager. Then I sent an email to Tandy corporate that started: "I know you get a lot of emails complaining, but once in a while I thought you might like to hear when someone does something right.... I took my time and outlined how she had been so helpful on my first visit, offered her card and email, and had always been there when needed." It was about four paragraphs long. I know that the Lowes I used to frequent in VA gave points for customer comments, and with a certain number of points the employees earned gift cards, even raises. What I forgot to share with you guys because I had forgotten, is that I had to go up one Wednesday, "HER" day off and she had said she would leave word with one of the other employees that I was coming and what I was after. I got there, and ... there she was waiting for me. She came in on her day off and met me at the store. She said, "I am meeting my daughter for lunch and you said you were coming up before your 11am appt at the VA and would be here at 9am, and here you are, at 9am when we open." She spent an hour helping me in the store, even sitting down at the work table in the back and helping me in my carving techniques. I left at 10am to go to the VA appt, and she left to meet her daughter for brunch. -
Miss Tina and I drove up to OKC today to run some errands. I wanted to visit my local (Pffft, local. two hours each way. Yeah, local,) Tandy Leather. Tina needed to visit HER local Bernina Store. That is a post for a different forum. I have had a great relationship with this Tandy Leather. There is a great employee there... she has been helpful from my first visit... She gave me her email and told me if I needed advice, help, had a question. Email. If I was stuck, call. She was there every day but Wednesday. I try not to be a bother, but it's a two hour drive. I have an inventory of my stamps, so I emailed her the list and told her I was driving up this week and asked if she had time would she look it over and make a recommendation in filling in the holes in my arsenal. I knew I needed a few smaller bevels, a couple smaller/larger pear shaders, a lifter or two. I could use a veiner or two more, and a couple basket weave stamps added. I would be open to whatever she suggested but wasn't interested in just buying stamps to have stamps, no one time use things, or stamps with a very narrow focus or use. A couple days went by and I got an email, coincidentally the night before we planned on going up. She had a list made up. When I arrived, she and I went over the list, and ALL the stamps I had written down were on her list, and there were an additional ten or so, she suggested I added. All would be helpful since my skills had improved and I was carving more. Then, as I had ordered a couple large patterns, she helped me find the right leather to accommodate both. A couple more items we added, and I asked about this one and that one and she shook her head. (Nope, don't need it.) That kind of service keeps me from ordering online, and waiting until I can get back up to OKC. It's the same every time. If I am in OKC on a Wednesday when she won't be in the store, I don't bother. Customer service like this will guarantee return business. You can bet bad customer service will guarantee that Miss T and I never return. It has happened a LOT... even if that store was the only one of it's type in town. We would drive an hour away to find another store rather than reward bad customer service with return business.
-
SJ - I ordered the pattern from Tandy early this week, and today we drove to OKC to pick up a few things directly from the "Local" (two hours away... pfft... local) Tandy store. I grabbed the Side of Leather to make the scabbard and a western gunbelt rig, which I had also ordered the pattern for. I have one shop project to finish and then I'll attack that scabbard.
-
I've been in the shop in Oklahoma for more than two years, still trying to get it figured out. LOL. Good job. I have a leather corner in mine, the rest is more woodworking. Nice shop, I'm sure you'll find a way to fill it.
-
I did have room, finding a dowel long enough was a problem, but Miss T found a replacement mop handle that worked perfectly. So now the paper towels and thread have a home.
-
Outgrew my shelf unit, Build Along
Brokenolmarine replied to Brokenolmarine's topic in Leatherwork Conversation
The house in VA? Backed up to the State Park, and was across the street from a State Forest. Never had to worry about development. The people across from us own about 80 acres. We have a 60 acre hayfied on one side, and 30 and 40 acre lots on the other. Our only risk for development is a property just a little up and across from us, but the land isn't suitable to build. Criss Crossed with creeks, old drill sites, and well heads, and there are several old gas lines running across the ground that would have to be removed. A gas company easement runs diagonally across the lot. The owner passed about a year ago and the family owes 100 grand on the three other lots they own, so if they sold the sixty across from us they would have to pay what they owe on the other lots before they could collect a penny. Doubt they will sell anytime soon. They leased the property to the neighbor to graze his cows on. -
Outgrew my shelf unit, Build Along
Brokenolmarine replied to Brokenolmarine's topic in Leatherwork Conversation
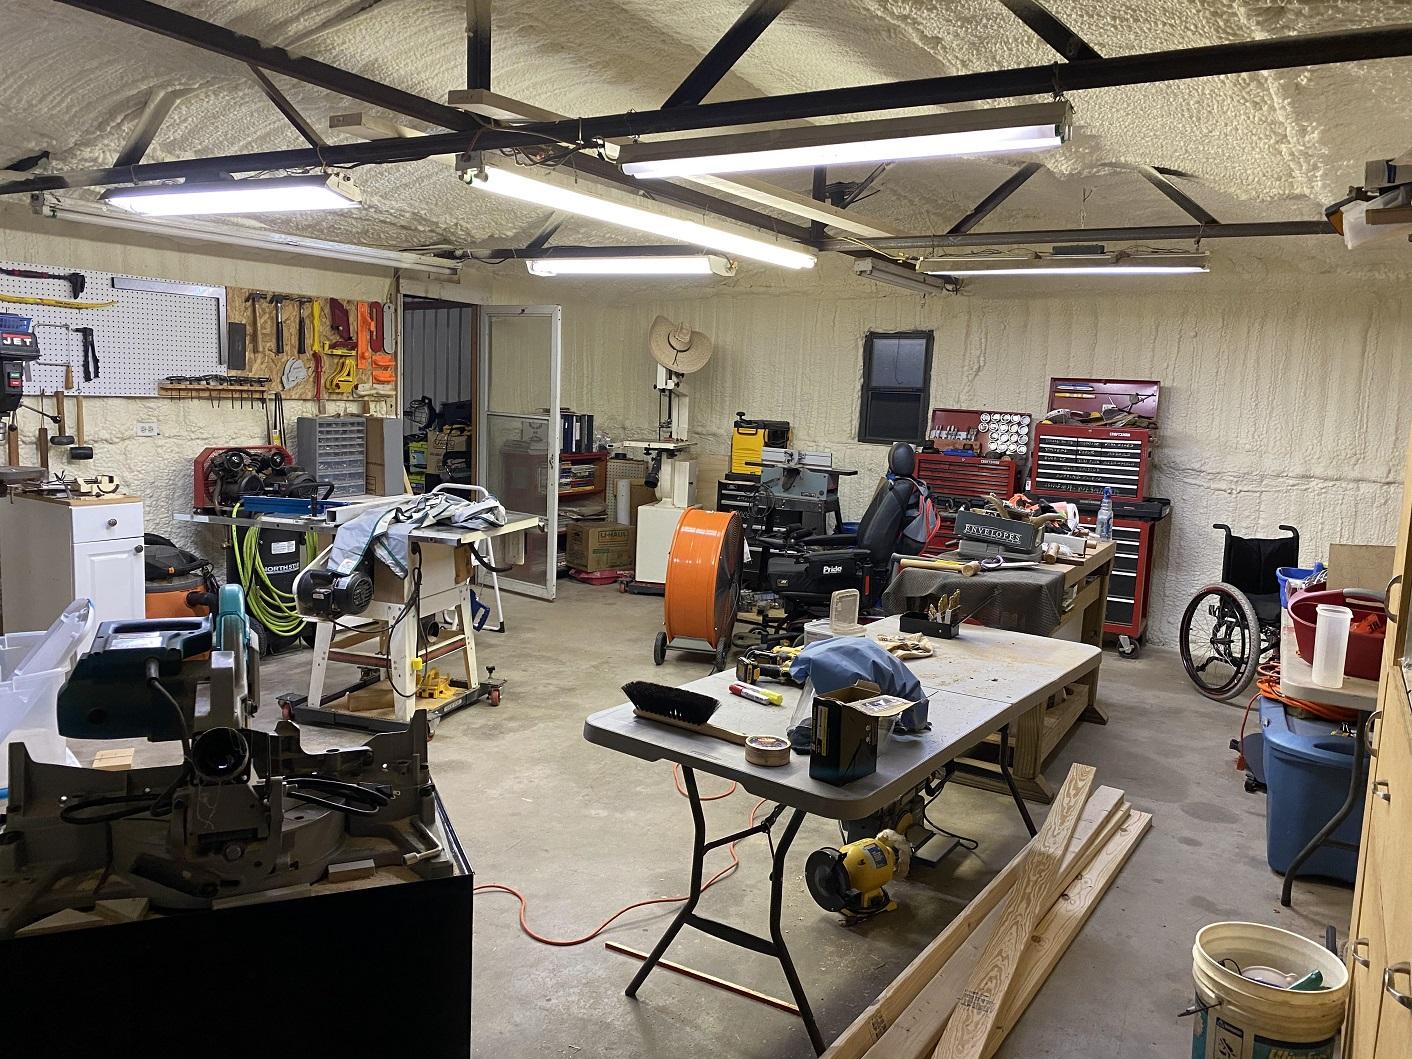
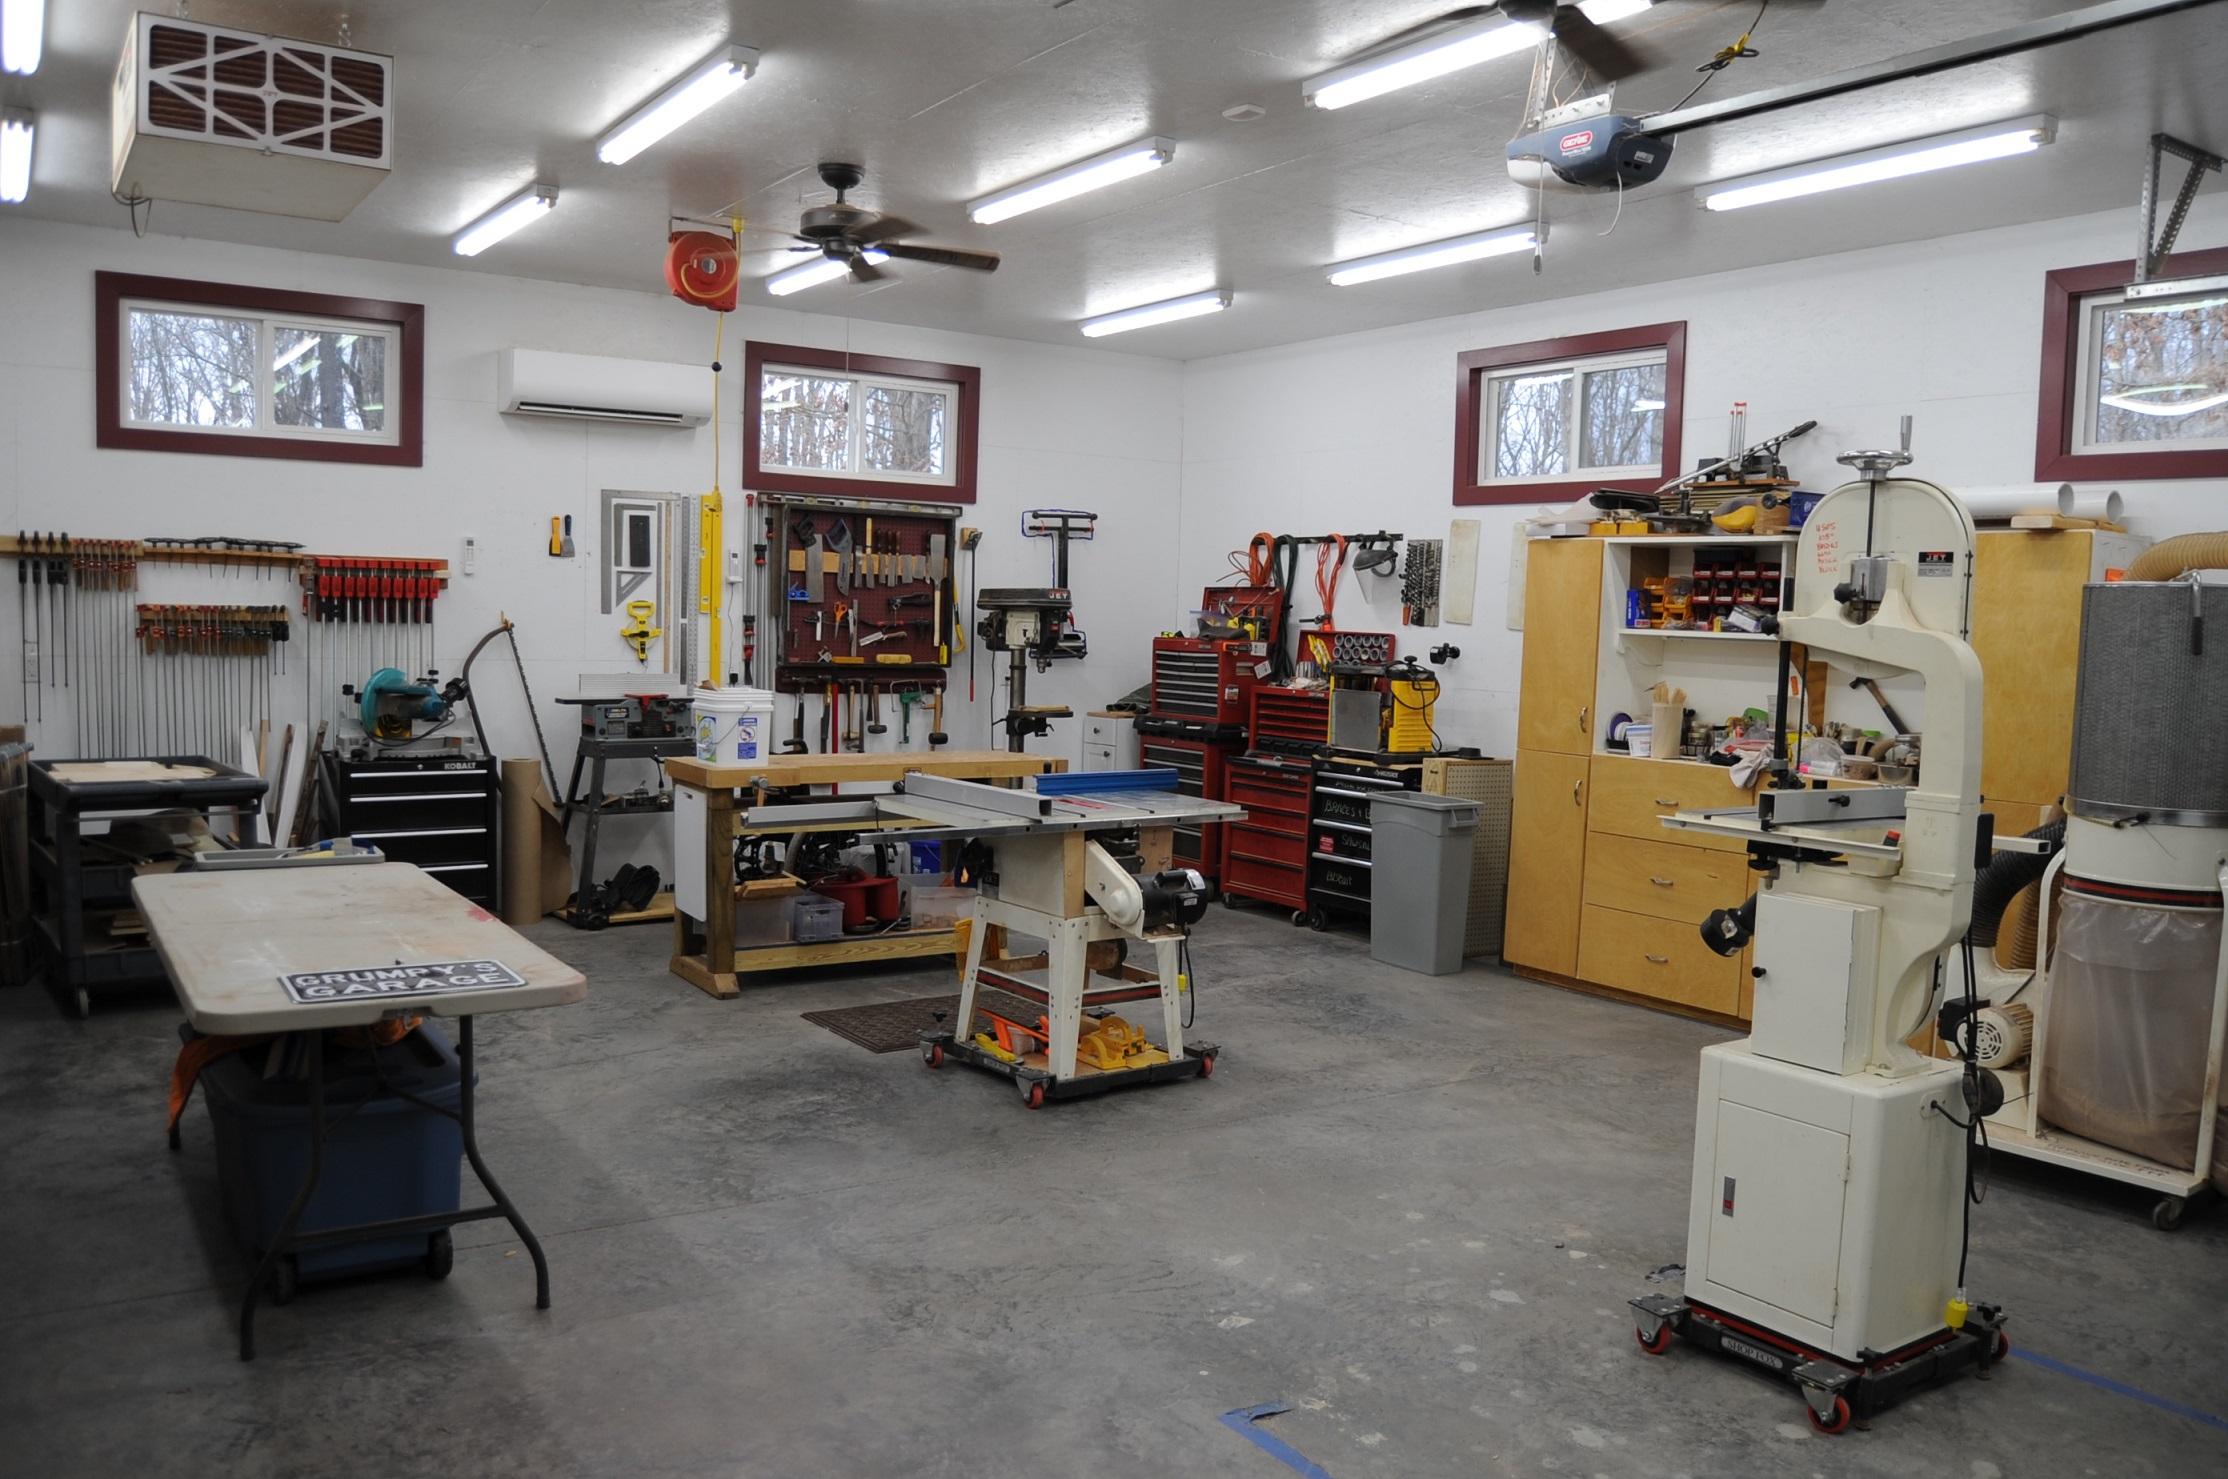
These days it's a working shop with shelves and areas set up for the various projects. I even have a table set up for knive shaping. Adapt and overcome. Both the table in the foreground and the area against the wall in the background are mainly used for shaping the scales on knives, but I can also shape cane handles and the like as well. At three O'clock in this picture you can see the leather bench, but I have since rotated it 180 degrees and moved it away from the wall as you see in the other pics in the thread.
-
Outgrew my shelf unit, Build Along
Brokenolmarine replied to Brokenolmarine's topic in Leatherwork Conversation
When we bought the place that building was dark and dreary and had thirty year old Fluorescents for lighting. Half the ballasts were dead and the light assemblies weighed about thirty pounds. The wiring was exposed and just twisted in the open. The shop was unheated, and uninsulated. I had a spray insulation done, and double on the root to combat the 100+ degree summer heat in the metal building. I removed all the lighting and it's wiring and rewired the building and added LED lighting. I wired all the connections in proper boxes for safety. Boom... you could see in the shop. Once I added the mini-split heat/ac I replaced that junk yard screen door with a solid door so the ac could do it's job. These days the shop stays at 68 degrees. I'm always working to improve the shop, but I won't build a new building. Too old and broken to spend that money... LOL.
-
Outgrew my shelf unit, Build Along
Brokenolmarine replied to Brokenolmarine's topic in Leatherwork Conversation
I waited a lifetime to build a dream shop. But I walked away without looking back due to the politics. The new shop isn't as nice but we have 21 acres in the country, and are surrounded by farms and pastures as well. It's a farm community outside a real ghost town in Oklahoma. It's quiet. Exactly what we wanted. Other than an occasional tornado warning... ... we love it here. Here is a look down on the north pasture from the top of the hay field.
-
Outgrew my shelf unit, Build Along
Brokenolmarine replied to Brokenolmarine's topic in Leatherwork Conversation
My plan is to frame in the wall from the inside. Once that's done, install the new door, cover the inside of the wall with 1/2' plywood. Then we'll roll the old door aside and remove the metal sheeting, with the insulation intact and apply it to the outside of the new wall. Once that is accomplished, I'll remove the metal framing of the rollaway door, and then the tracks. May add a small awning to insure no leakage. There is a slight gap between the carport and the barn. As we get closer, we'll draw up detailed plans and materials list and check on available door sizes. -
Outgrew my shelf unit, Build Along
Brokenolmarine replied to Brokenolmarine's topic in Leatherwork Conversation
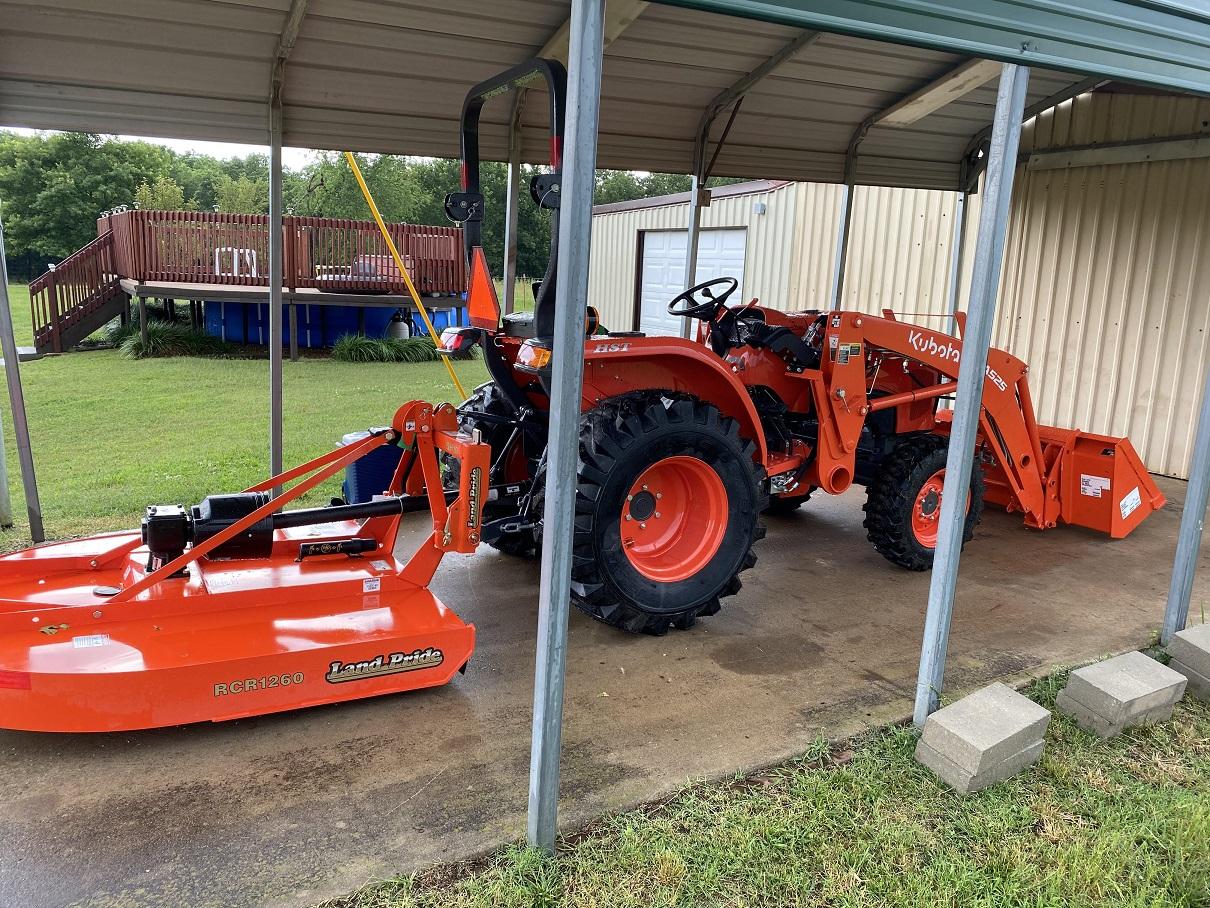
The next project for the Shop Itself? To put in climate control I had to seal the huge roll aside door. I can only stand for short periods and I use my wheelchair in the shop. It won't fit thru the side People door of the shop. I sealed the roll aside door by using six cans of spray foam around the door to keep the heat and air inside. You can tell the difference by looking at the white foam vs. the dark yellowish professionally sprayed foam on the rest of the walls and ceiling. If you look in front of the tractor in the pic below you can see the outside of that roll up door.... before I sealed around the door, it would swing in and out on the wheels it was hanging on, the lock allowed about two inches of play at the very bottom. That let a lot of air exchange, so the new Mini-split had a hard time maintaining the heat or AC. Once I sealed it, 68 degrees year round. The next project is to frame in that area as a wall, with a double door 4 to 5' opening. I can get the wheelchair in and out, and bring materials directly into the shop without having to go in thru the secondary rollup door of the boathouse, seen over the tractor above.

-
Outgrew my shelf unit, Build Along
Brokenolmarine replied to Brokenolmarine's topic in Leatherwork Conversation
I wasn't going to spend another $50,000 to build another shop so I adapted the old workshop at the new property. I might insulate the other half of the building and open up the wall to add a bit more space down the road... but I'll likely just make do. The health won't allow the size projects I was tackling in the new shop in VA... I mainly build smaller projects to use around the house and stick more to cutting boards, knives, presentation boxes, leatherwork... so I'm good. The shelf on the leather bench? I can add side tool bars if need be. LOL. -
Outgrew my shelf unit, Build Along
Brokenolmarine replied to Brokenolmarine's topic in Leatherwork Conversation
I need a bigger shop but won't build one. When we moved from Virgina to Oklahoma I had JUST built a custom workshop with everything just so. I had a custom builder come in and build it just the way I wanted. Heavily insulated, 10' walls and perfectly lit. Plugs around the walls at 4', every eight feet, windows HIGH up the walls for light but the wrong folks couldn't see in. Climate controlled, finished interior and bright white walls to reflect the light. Then, the pockets of democratic voters put a bought politician in office and we moved out. HE paid back the billionaire who bought his governership by giving away the state. I regretted walking away from that new shop and my few good friends... but ....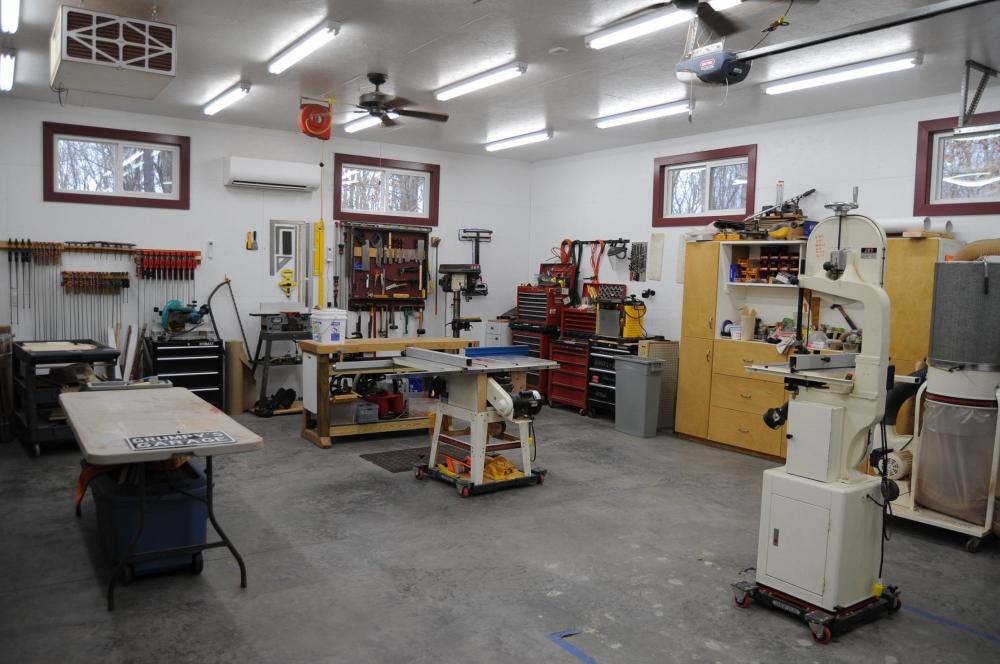
-
I W B Work in progress holster
Brokenolmarine replied to Bert03241's topic in Gun Holsters, Rifle Slings and Knife Sheathes
The color looks great, even and smooth. I'll get there eventually. -
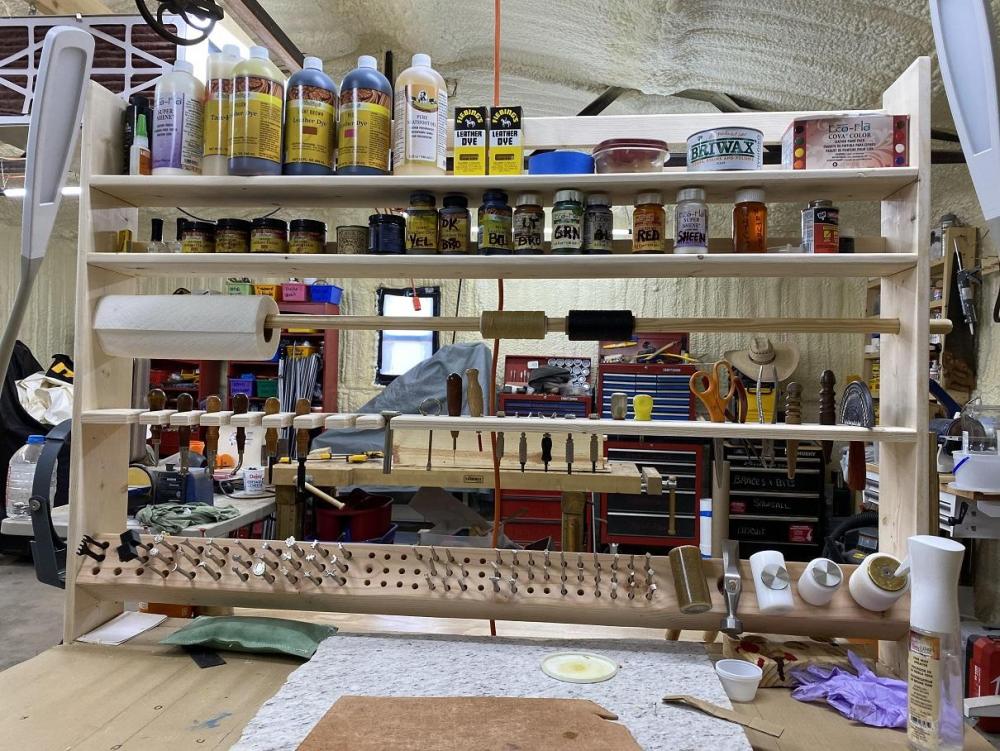
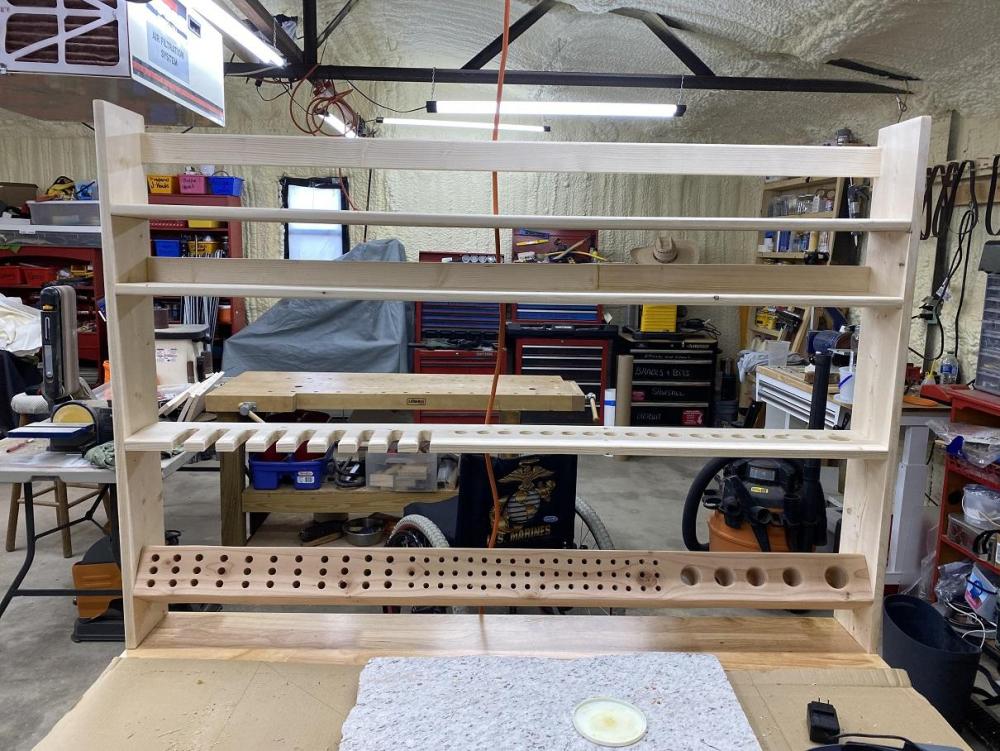
Actually, I forgot to add the rod to the design, maybe later. I'll have to find a six foot one. LOL. But here is the new updated, wider model, I finished this morning. This one is taller than the old one pictured above by a foot, wider by a foot, and has much more room. Has slots in the tool bar for the mallets, and the shelves are deeper and spaced better.

-
Outgrew my shelf unit, Build Along
Brokenolmarine replied to Brokenolmarine's topic in Leatherwork Conversation
Last view, of the side. Note that I am so anal I countersunk and plugged the holes, then sanded the plugs flush. The wife always laughs at me for this kinda stuff, but when SHE sews, quilts, or crochets, she's just as bad. If I was to stain this; those plugs would POP! I put a screw in this side to hang the Optivisor and one on the other end to hang the leather strop for sharpening the cutting tools. This will help keep the desktop clear.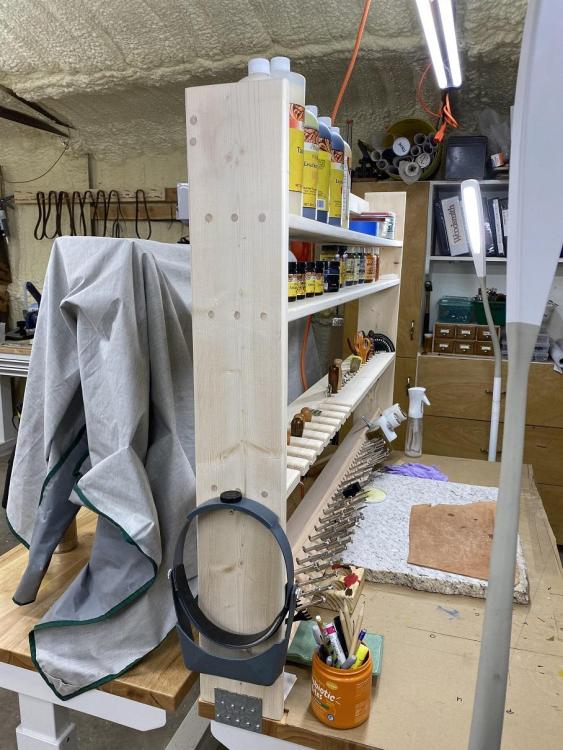
-
Outgrew my shelf unit, Build Along
Brokenolmarine replied to Brokenolmarine's topic in Leatherwork Conversation
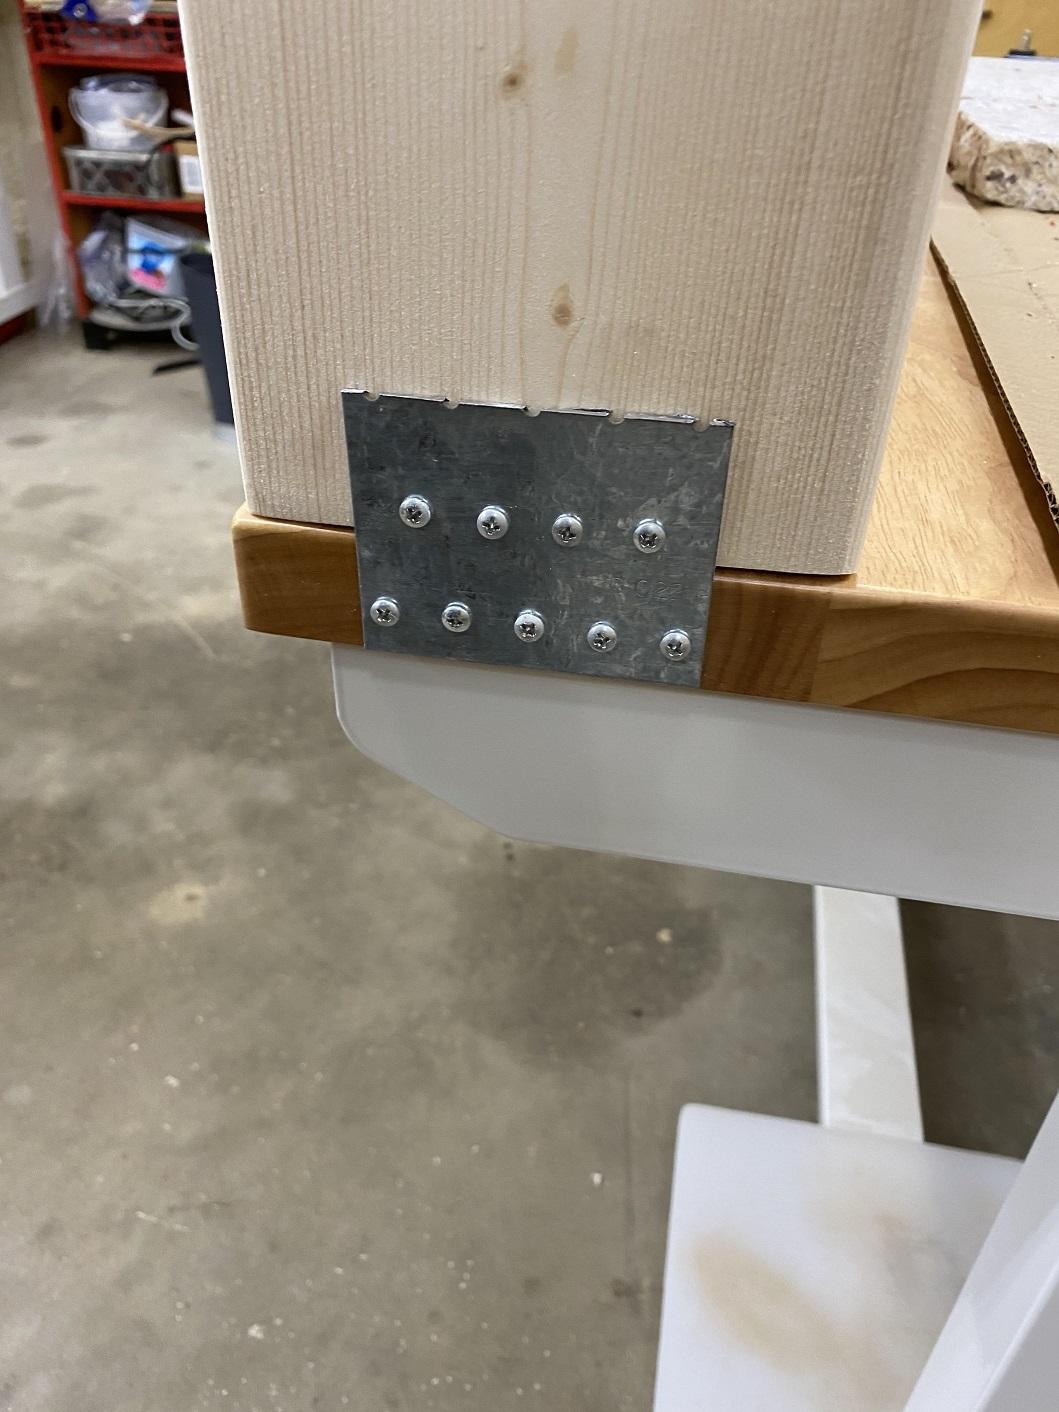
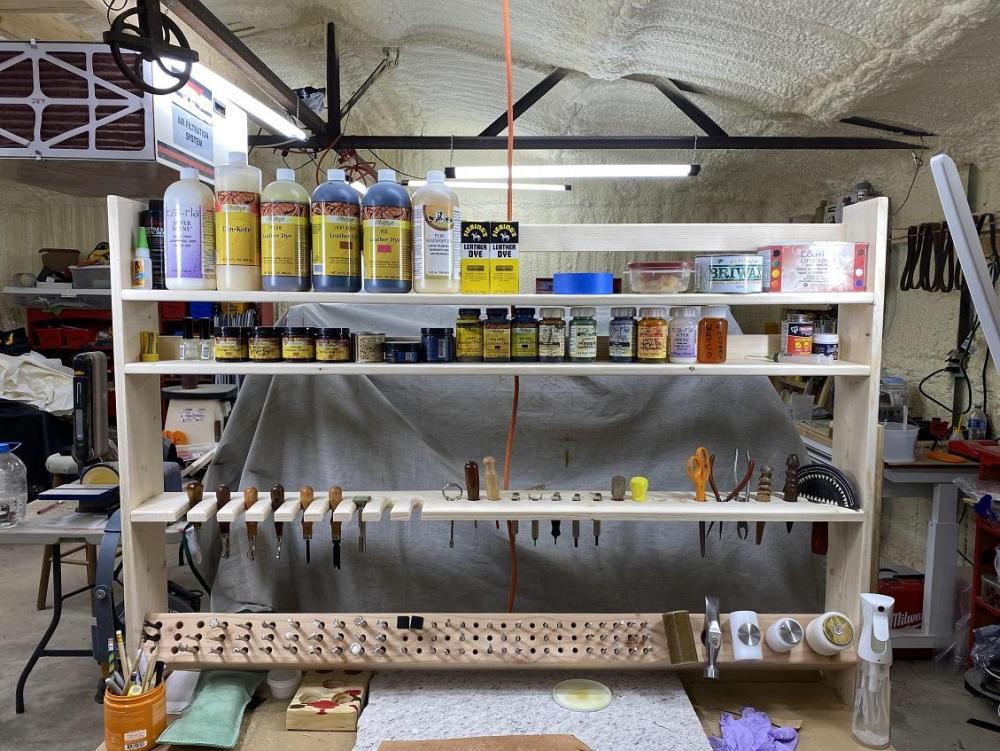
Went out this morning after all the glue had a chance to cure, and sanded down the glue lines and squeeze out. I sanded all the plugs flush. Sanded away any pencil marks I might have missed. This is a working shelf and I don't plan to put a finish on it at this time, but I didn't (CAN'T) just throw it together. I want it to look halfway decent. I cleared off the leather working bench and set it in place and then for Safety's sake I had figured out how to secure it. I cut a jointer plate in half and screwed both sides to the bench top. Now, it shouldn't be able to slide sideways, NOR tip over forward or back. If I ever decide to use the table for another application, I can fill the holes and touch them up with oak stain, they will barely be noticeable. Here is a front view of the shelf, EMPTY.... Here is a view of the shelf loaded up. Hey, always happy to share, it's how we learn. Check the website, they say how the head is attached.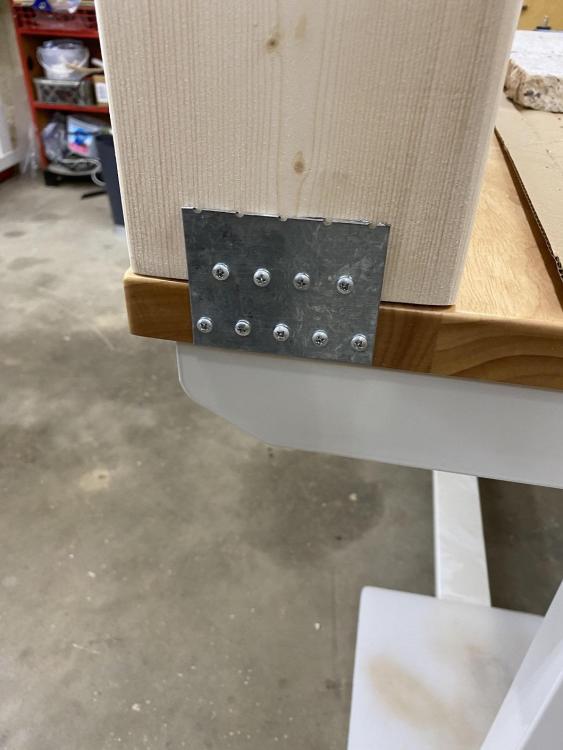
-
Outgrew my shelf unit, Build Along
Brokenolmarine replied to Brokenolmarine's topic in Leatherwork Conversation
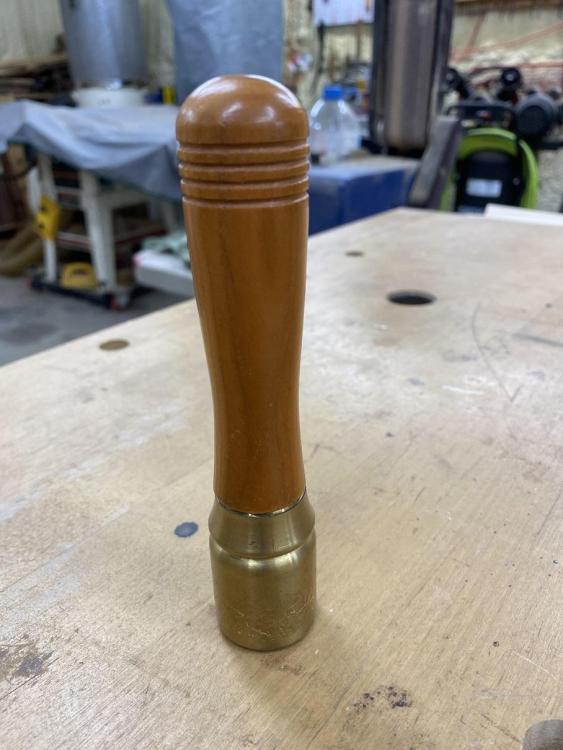
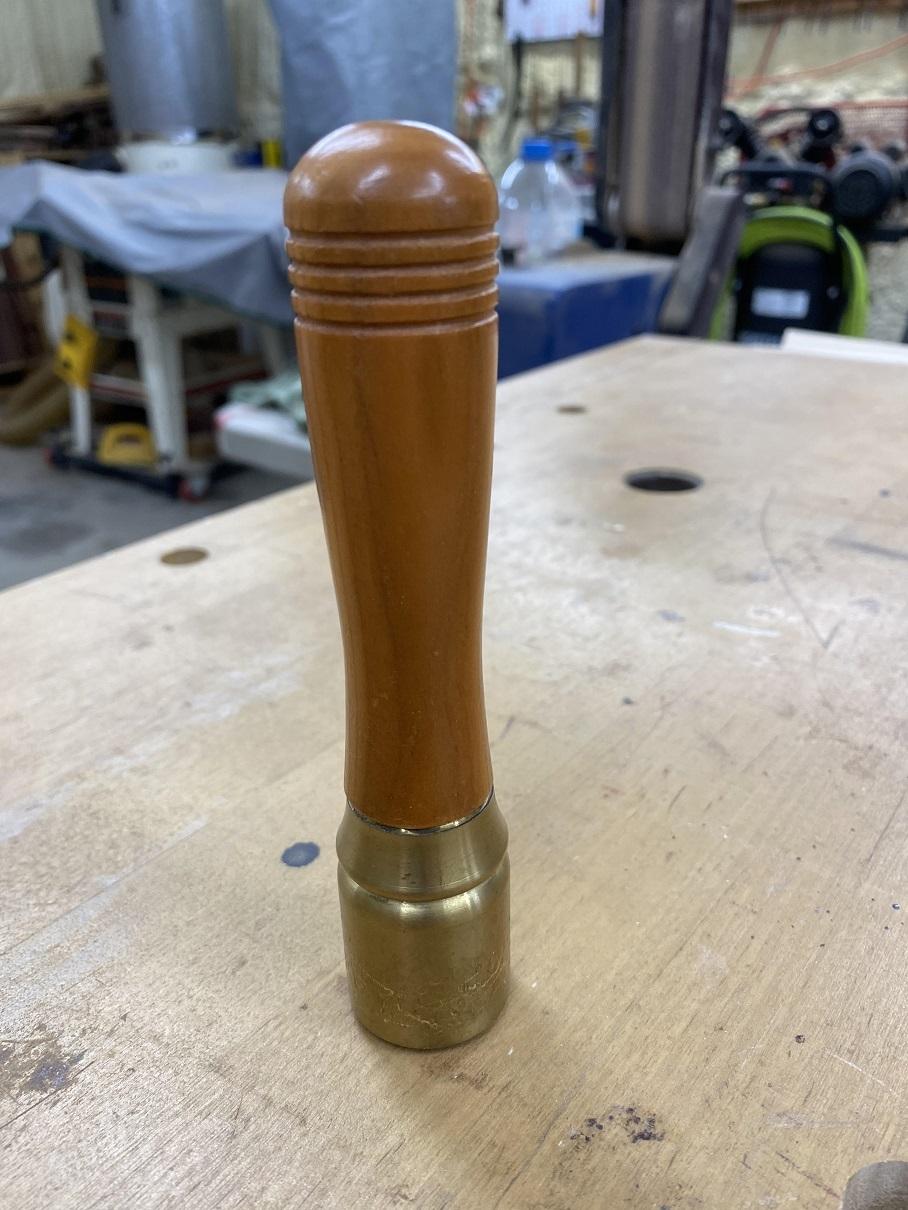
I looked it up, and I was pretty sure it came from Lee Valley Tools. https://www.leevalley.com/en-us/shop/tools/hand-tools/mallets/110896-veritas-journeymans-brass-mallets I have had mine for more than a decade, maybe two, and used it a lot. It's still a handy little tool, great for setting small nails and center punching. I use it a lot when making presentation boxes and the like. Here is a closer look. I felt it was worth every penny.