Brokenolmarine
-
Posts
592 -
Joined
-
Last visited
Content Type
Profiles
Forums
Events
Blogs
Gallery
Store
Everything posted by Brokenolmarine
-
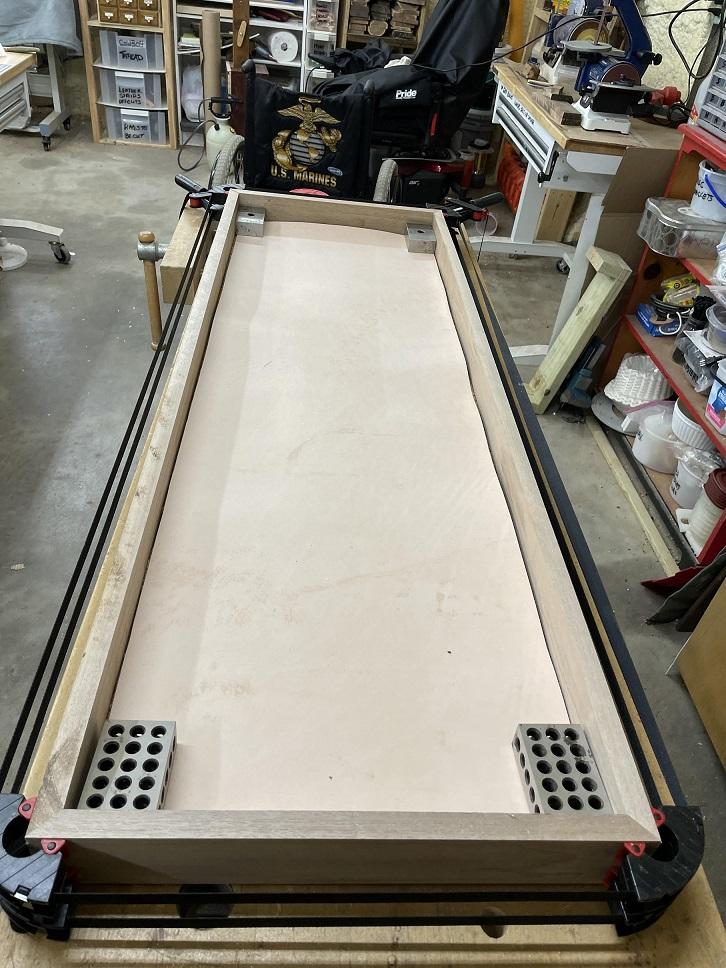
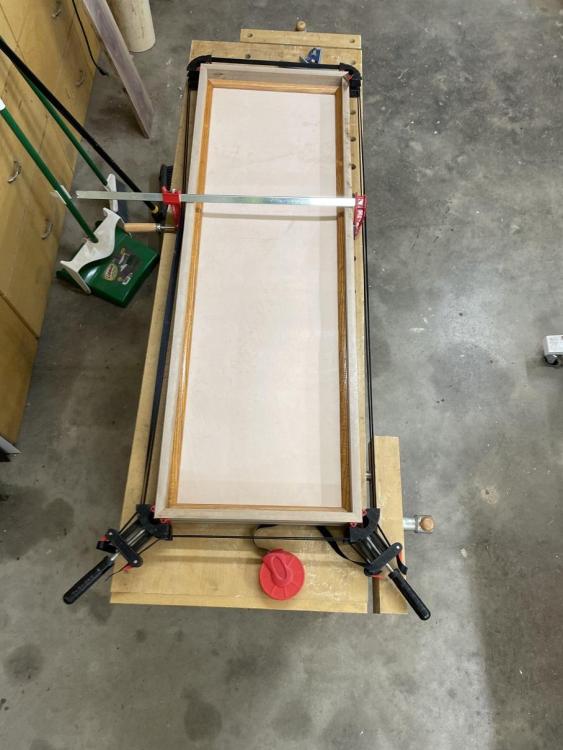
In order to properly mark a tooling window I'd first need to cut and fit the quarter round molding. So I'd first need to BUY quarter round molding. The molding was CAREFULLY cut and fitted over the leather and I marked the interior edge of the molding on the leather with a Sharp Pencil. I had my tooling window. Then I broke down the entire framework, CAREFULLY marking every orientation, every joint, a/a b/b c/c etc. The test fit was excellent. Fail to mark the joints and the glue up could be WAY off.

-
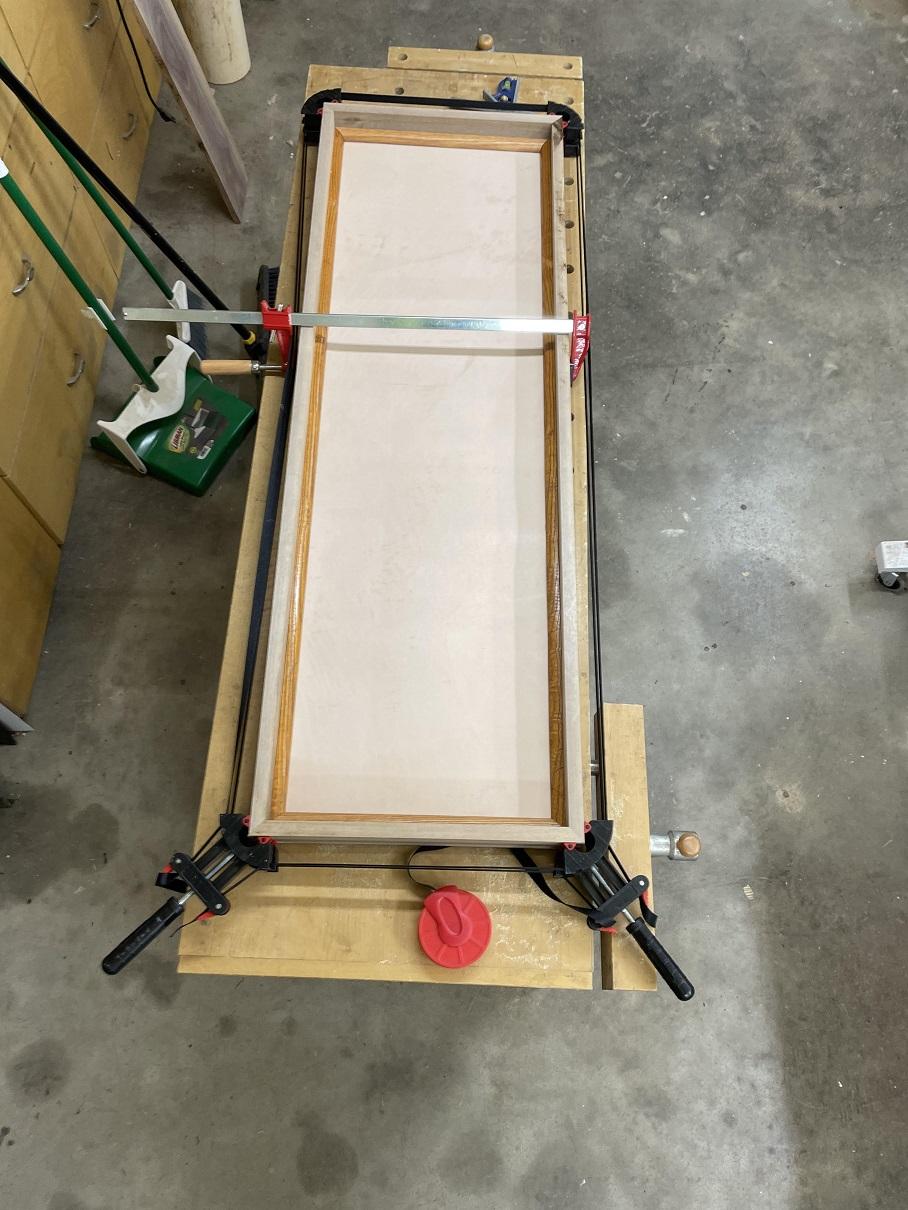
A bottom was cut and fitted, then test fitted to the frame. NOTHING is even close to being permanently attached at this point, all held with the band clamps. Too much to do before we ever reach glue up. Had to decide what backing would go behind the knives. Blue or burgundy velvet, another cloth, or ... wait for it... LEATHER? I had been making a lot of leather sheaths and thought leather might be awesome. A tooled leather background? I had to decide. The area was about 4' wide and 16" tall... lotta leather. I spent a couple days thinking it over while I played with tooling patterns for an large area like that in my head... It could work... I just needed to commit. I finally committed and CAREFULLY cut the needed piece from a nice roll under the tooling bench.

-
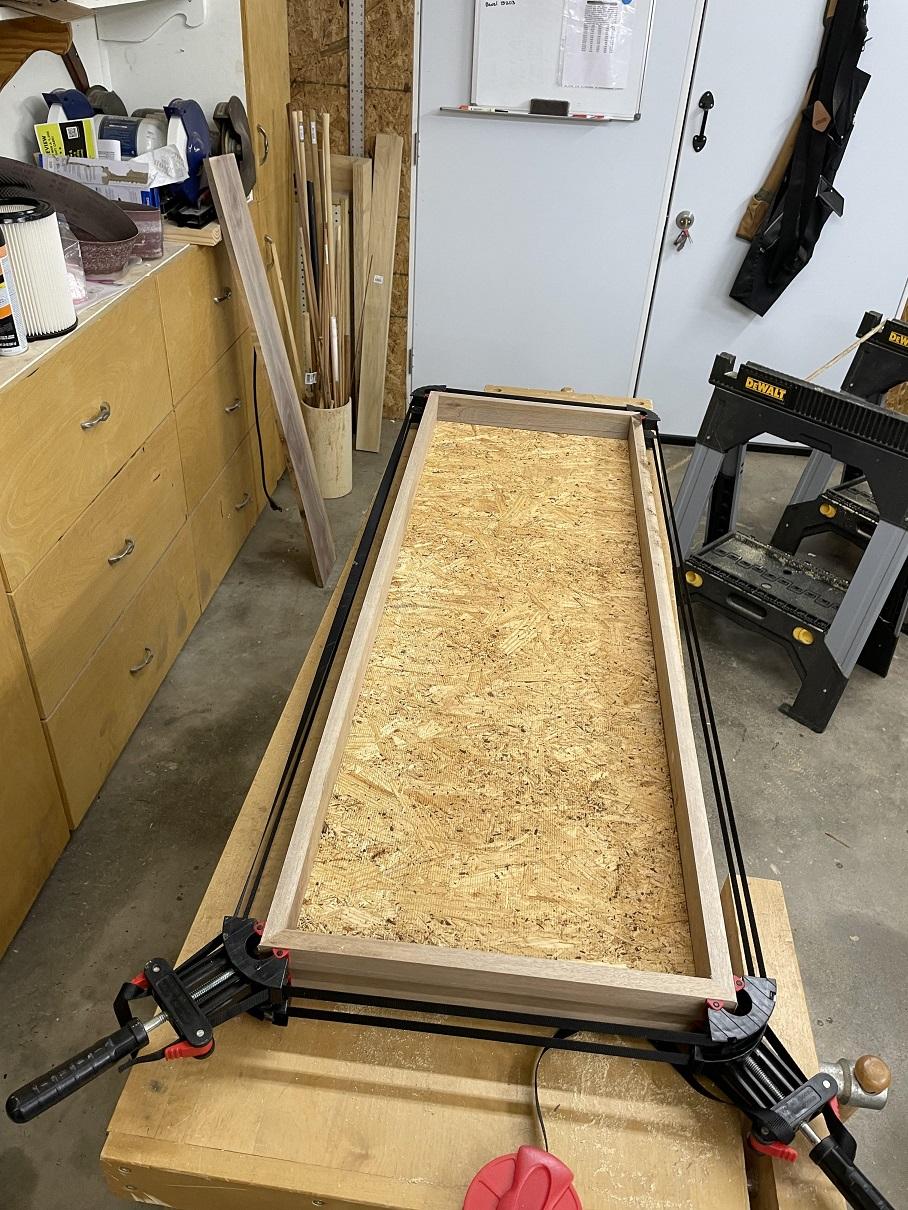
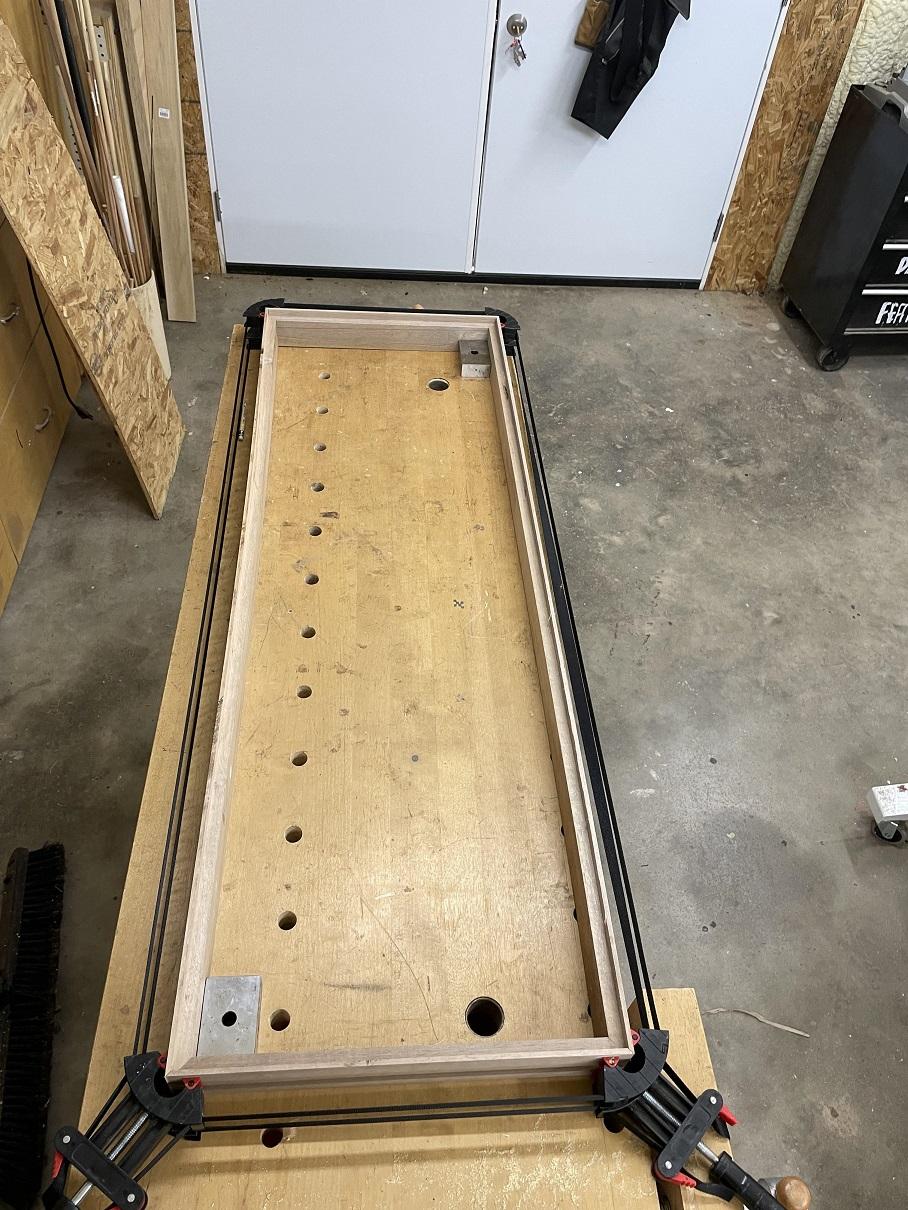
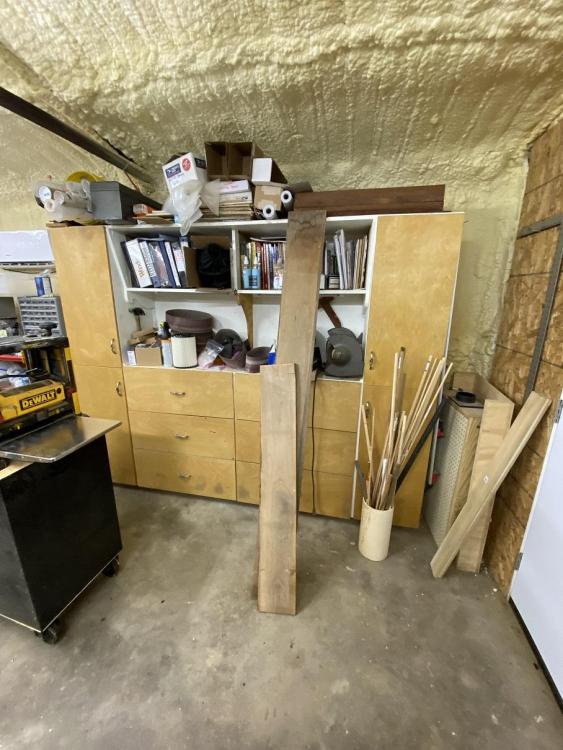
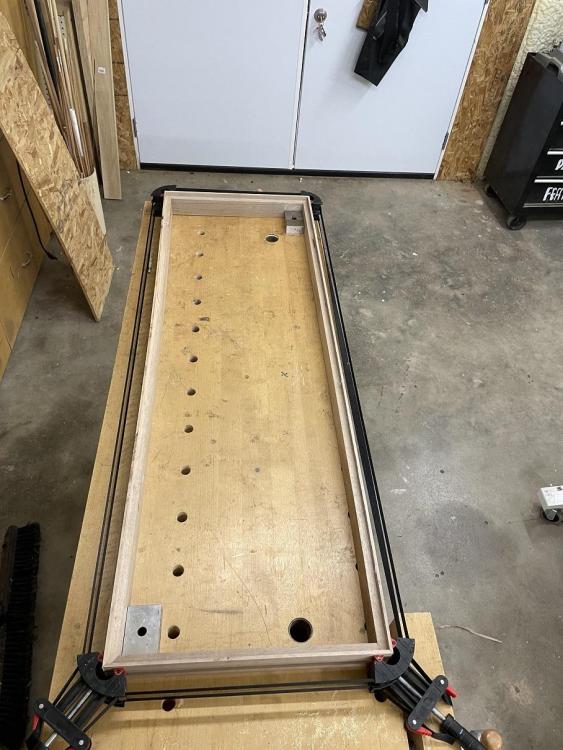
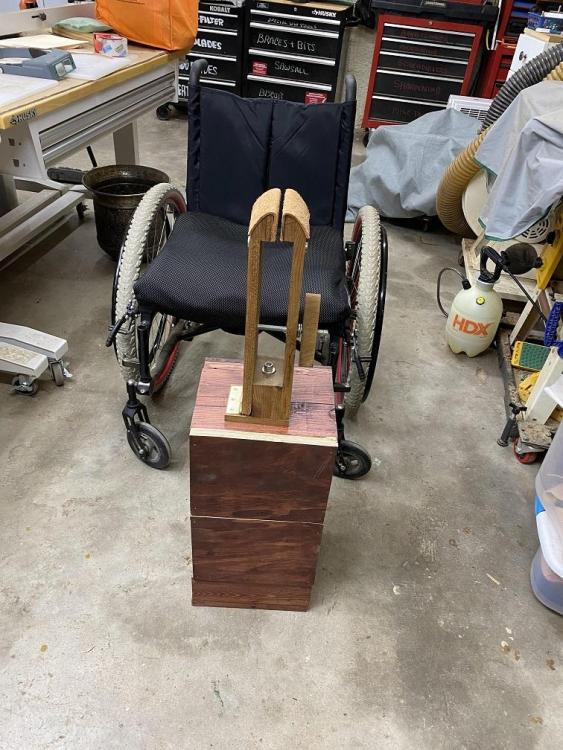
I played with designs in my head for a week, then started laying out the cut list. OMG... Have you guys seen the price of wood these days? I typed in Oak, and nearly stroked. So I typed in pine. Still was some sticker shock. So I went out to the storage side of my workshop and looked at the slabs I had, and found a few nice pieces. Thing is, it would take some work. This was rough wood, which would mean I'd have to run it thru the planer, then square up an edge then rip the pieces to the width I wanted before I could start cutting to length or adding the angled cuts to form the case. No rush, and the total cost? Zip. Just time. I have that. The raw boards above were run thru the planer, then ripped, and cut, dado'd for the bottom, and test fitted using band clamps.
-
Since a lot of my past hobbies are no longer available due to physical changes, I do a bit of woodworking, build some knives, and do a bit of leatherworking in the shop. I can also shoot or fish on the good days... (from my kayak mostly) but mainly I work in the shop, an hour at a time. Lately, I have been challenging myself, building knives. I don't sell them, I either give them to friends/family as gifts, or keep them. A table by the front door is laden with them and the wife told me I needed to build a display case to hang on the wall. "Someone could walk off with one of your knives," she shook her head, "We have service people in and out at times." "Worse yet, a guest's child could pick up one and they are RAZOR sharp. Get them off the table and in a display case where they aren't easily accessed." Challenge accepted.
-
They all look good. Your stitching looks incredible.
-

Doc Holiday Shoulder Holster (movie Tombstone)
Brokenolmarine replied to Littlef's topic in Show Off!!
I have a Galco Miami Classic I wear in the Winter months to carry my SIG P220 in cold weather. I have used this method for a couple decades, and love it. I carry a snubby in a pocket holster in warmer months. The Tombstone Rig, or just a clip on western cross draw for the SA 357 might be a great car gun for summer. -
Looks good to me, especially if you haven't carved a belt in over a decade. I keep saying I'm going too, but waiting for my weight loss to bottom out. Down 40 so far... That my be it.
-
Fredk, I normally don't go for things hanging from mirrors, and in some states, it's illegal. It was in VA, back when I was working... But for a smaller item like the mallet, I could see it. If not the mirror, the visor mount in the corner, or my gps mount on the dash.
-
wallet My First Post + Most Recent Wallet
Brokenolmarine replied to CastilloHeritageCrafts's topic in Show Off!!
I like the thumb hole, I'd put the debit card in that slot since it comes out most often, and in my electronic scan protected wallet I sometimes have to fight the slots for the contents. -
Doc Holiday Shoulder Holster (movie Tombstone)
Brokenolmarine replied to Littlef's topic in Show Off!!
I was thin when I was younger... Now that I'm old and gimpy, I'd need a lot LONGER straps. -
I could see something like that hanging from the underside of one of my workbench shelves from a cup hook, or as a Christmas decoration. Better yet, hanging from the mirror in the car... That would be a conversation starter. Nice job.
-
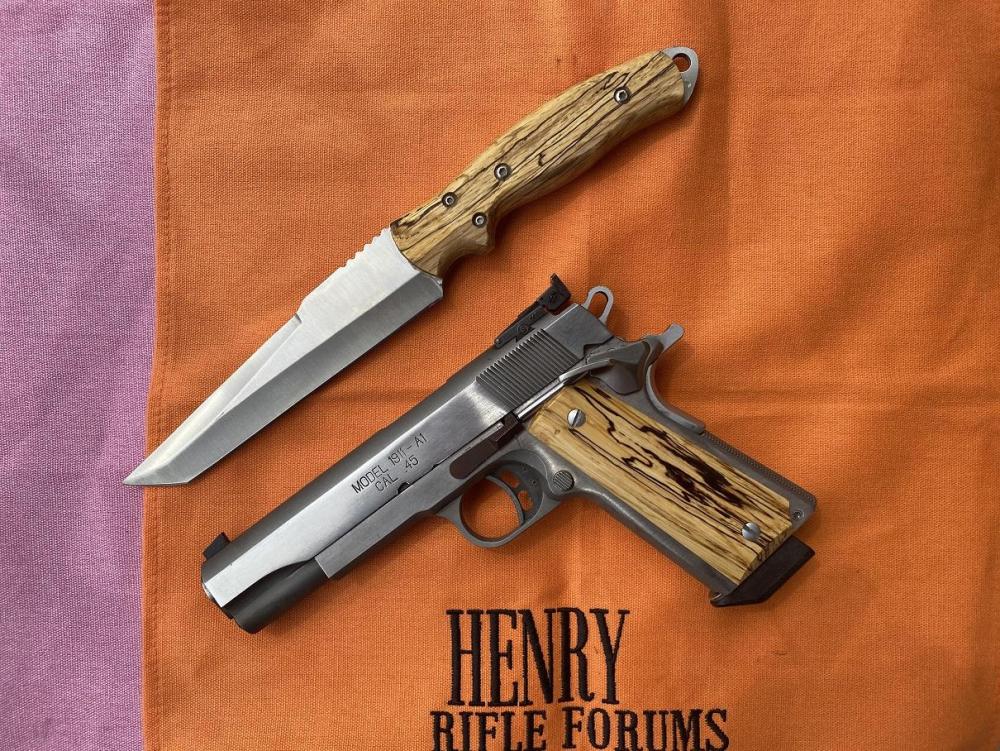
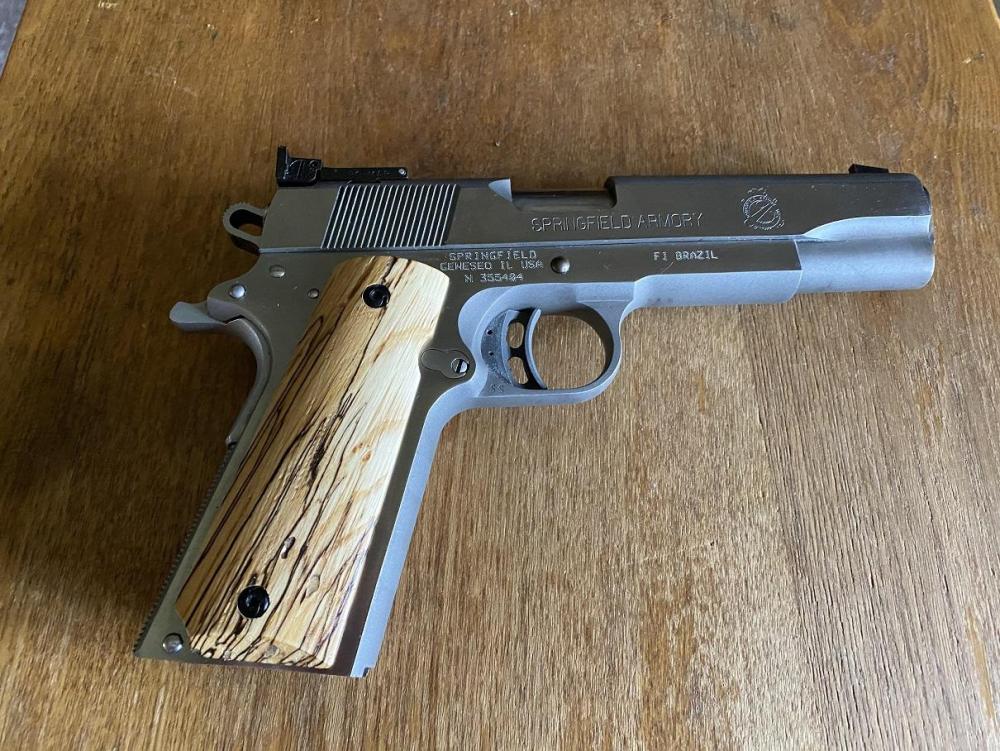
The Gun in the pic is my Match 45. It's a Springfield Armory Frame and Slide, but nothing else is factory. The rest is after market match grade built by our PPC Gunsmith back in my Competition days. Worth every penny.
-
I love stag handles on knives and guns. I had a pair of spalted maple grips made from a tree we cut down on our old farm and I seasoned for about two years. Then I made several knives from the same tree. They turned out awesome. They look almost like stag at times. Later I changed the screws in the maple grips on the gun as I thought they looked better black.
-
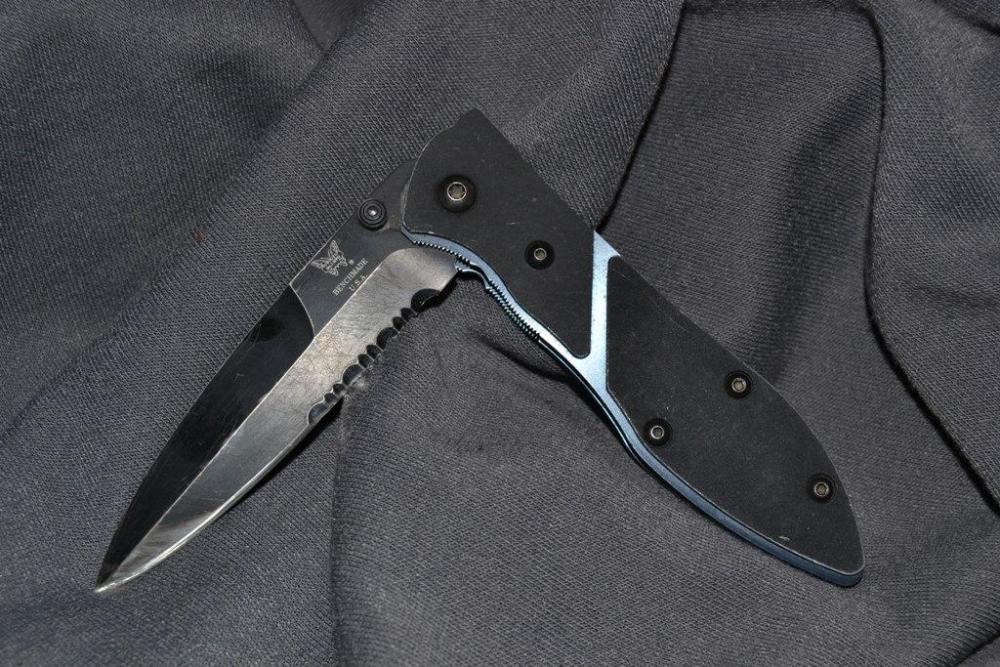
Most knives are legal in Oklahoma, switchblades included. I think ballistic knives are illegal. I owned a couple switchblades throughout my LE career, but rarely carried anything but my Benchmade folder. It was faster than a switchblade and did the jobs I needed done better. I bought it around 1995 and they are now discontinued, but It's still my Daily Carry Knife. These days it looks old, worn, scarred, beat up, and well used. Oh, wait, So Do I.
-
New here, showing off some work
Brokenolmarine replied to DoubleKCustomLeathercraft's topic in Show Off!!
Thanks, I'll give them a look. -
Craftool E294. Thanks.
-
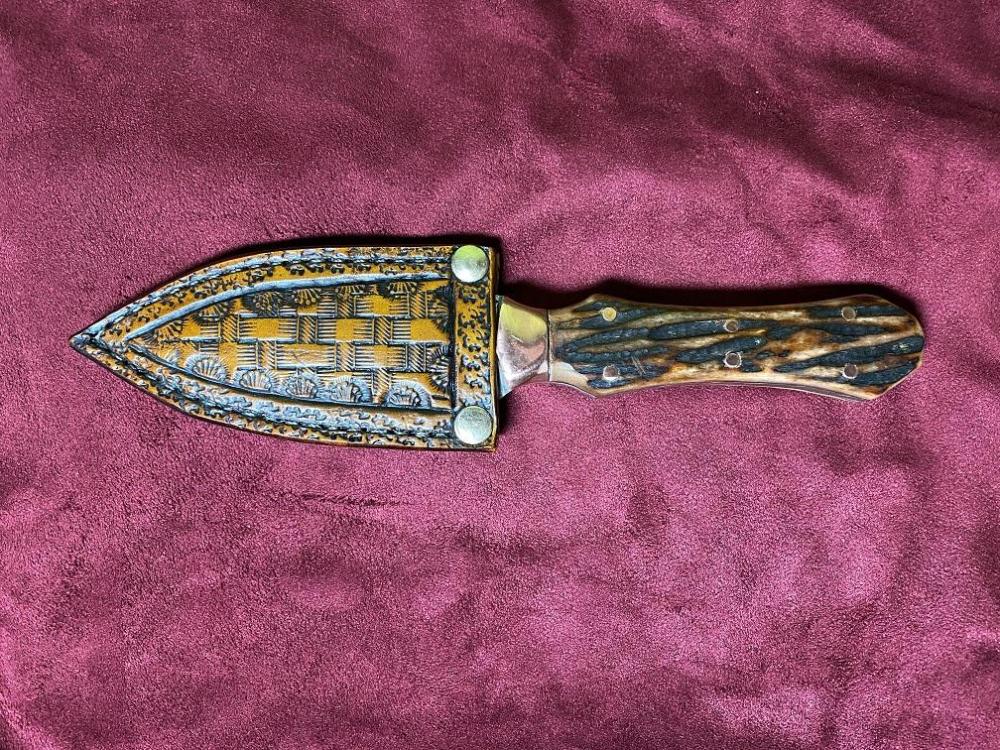
The boot knife from Jantz is their SS444 Razor Edge Boot Knife. (Pg 20 in the new catalog) The background stamp I used along the stitch line was a craft tool E294 I like this tool because it adds texture, but not too much.
-
The knife fits tightly, and the boot will provide additional pressure to hold it in place. It's hand stitched and I used my stitching pony, which I recently mounted on a base to make things easier. prior to mounting on the base I either had to clamp it to the table or workbench or hold it under my thighs. This is SO much easier.
-
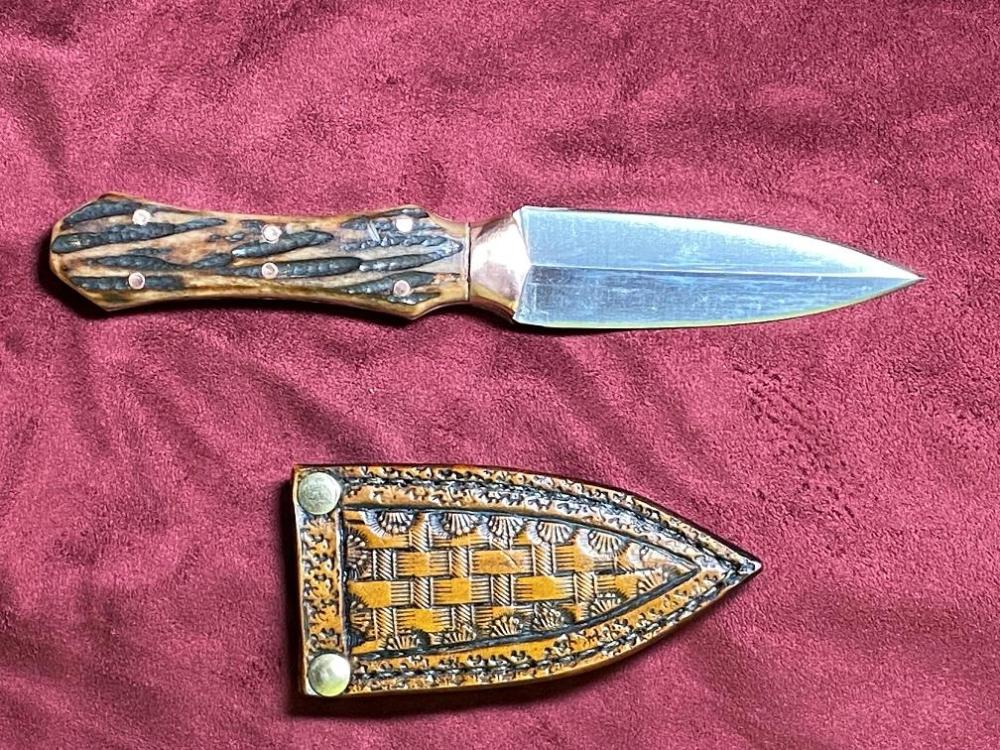
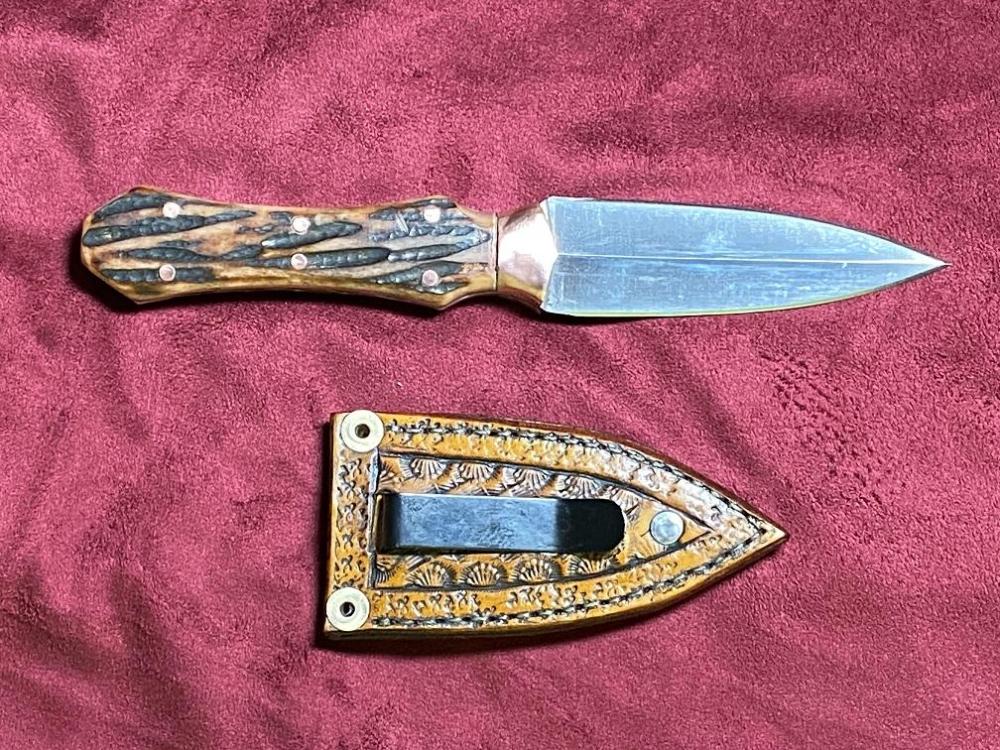
Tried my hand at a boot knife, just to see how it would turn out. New technique for me, rolled pins. I wasn't completely happy with the result, but I'll get better at those. The copper bolsters were made from barstock. The blade came from Jantz Knife Supply. (knifemaking.com) I have arthritis and can't even think about forging my own blades. The sheath will allow the wife to carry the blade as she moves around the farm doing her morning routine and checks on the coops and the barns throughout the day. She likes it. Front view: Required back view:
-
New here, showing off some work
Brokenolmarine replied to DoubleKCustomLeathercraft's topic in Show Off!!
Nice... I bought a bunch of snake skins and made a sheath with one. First time working with that. I would love to try turtle skin. Guess I'll have to check into it. I was going to buy some gator at Tandy... but they didn't have a good piece when I was in. -
One of my favorite holsters I've made
Brokenolmarine replied to DoubleKCustomLeathercraft's topic in Show Off!!
I agree it's beautiful work. I also agree that in today's litigious world, we have to be careful about every little aspect. Things that would be really cool ten years ago, or even five... ... but I like it, a lot. -
Very nice... I had no idea what custom work brings. I've been making original tooled leather custom work for family as gifts for several years and they all take it for granted.
-
You'll find the basis for this in this Video, and I added to it along the way from other videos I watched. The two important acorn sections are around 33:00 and 43:00 minutes, but it's a great video for tooling Oak Leaves and Acorns. I used it's techniques when tooling my Thumbhole Sling.
-
For your acorns, try these tips I picked up along the way. * First, using your swivel knife, cut your outlines, just a bit deeper. * Bevel the nut portion toward the inside using a thumbprint, tilted up at about a 45 degree angle. This makes the nut, look rounded. * A couple lines cut across the nut at the bottom and one crossing those is more than enough stress cracking. * For the cap, bevel around the edges, again, toward the inside, at an upward angle, giving you the rounded edges to your cap. Your hatch lines should not be straight, but curve around the cap to reinforce the idea of the rounded edge. Equal spacing from one end to the other in an arc. Then cross hatch by curving the other direction. This really makes them pop.
-
My wife just lost her milker, to milk fever after dropping a calf. Vet was out several times over three days, couldn't save her. She was a Jersey, named Molly. Beautiful work on the collar.