Brokenolmarine
-
Posts
592 -
Joined
-
Last visited
Content Type
Profiles
Forums
Events
Blogs
Gallery
Store
Everything posted by Brokenolmarine
-
Nice work, if I still lived in Tampa, I'd bid it up. I went to Hillsborough High a LONG time ago.
-
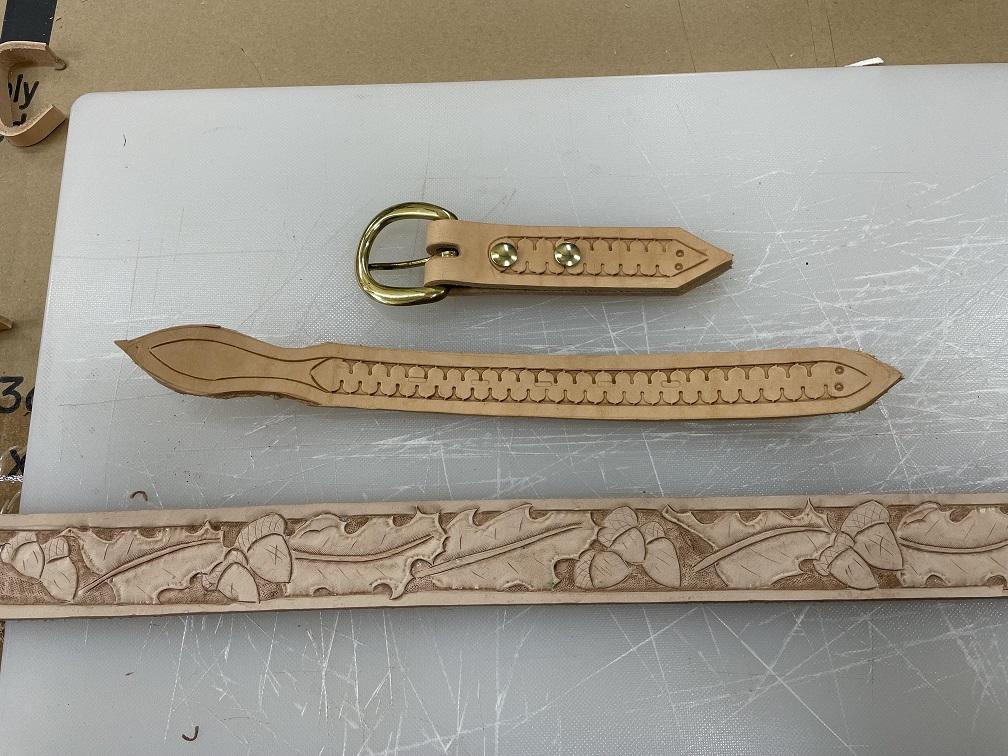
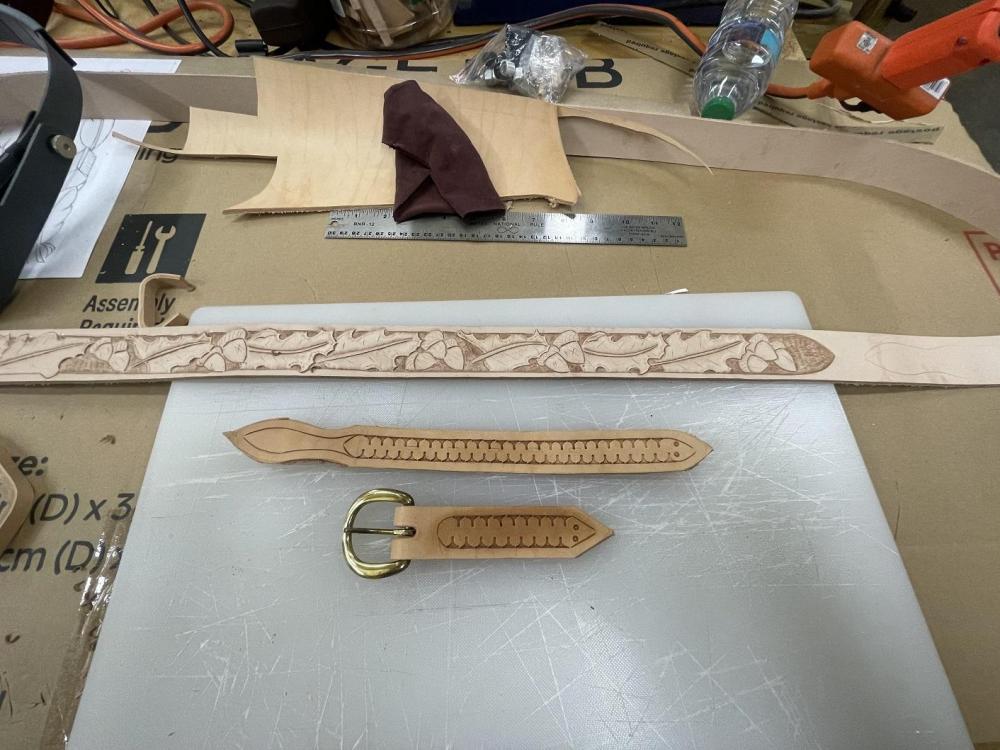
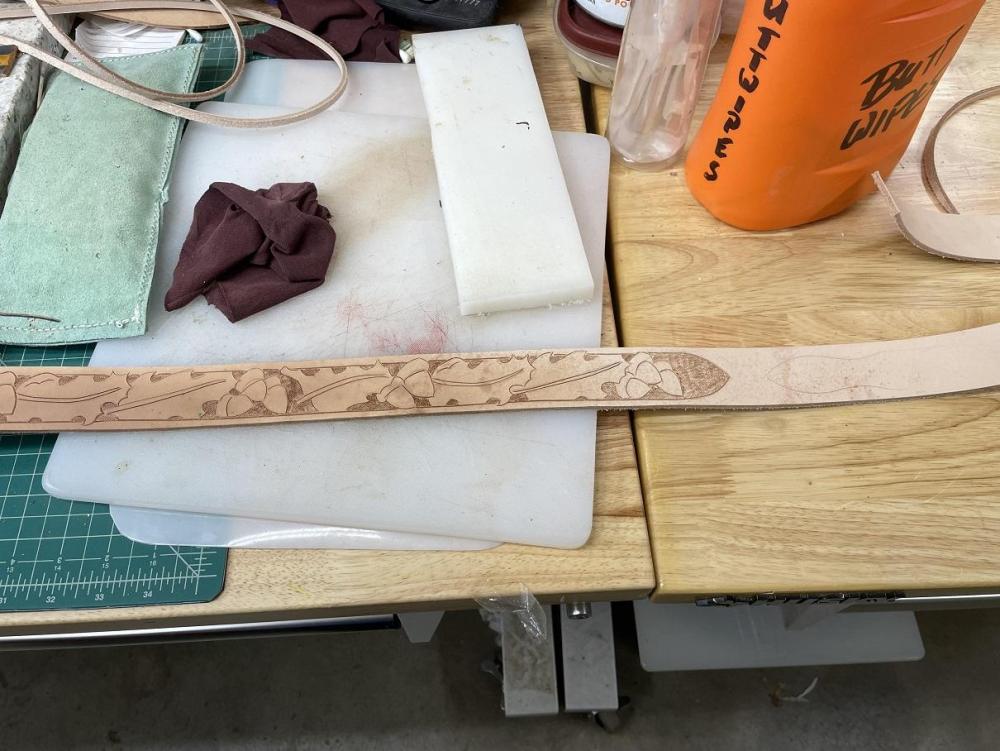
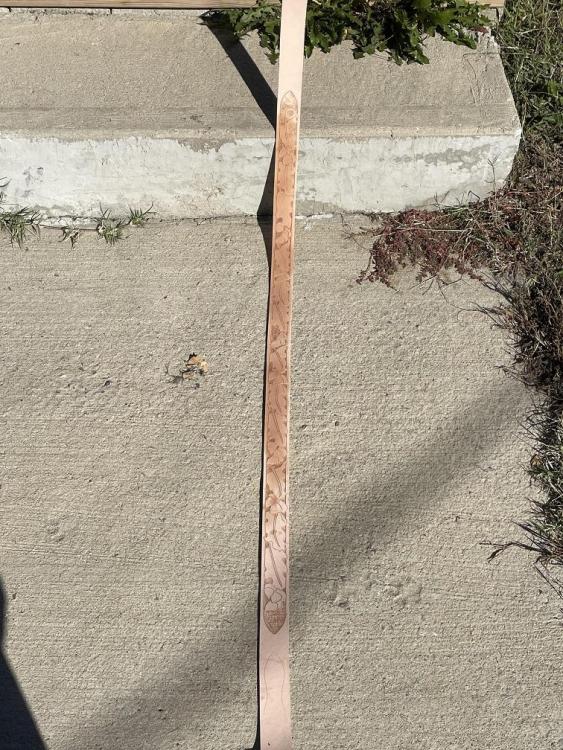
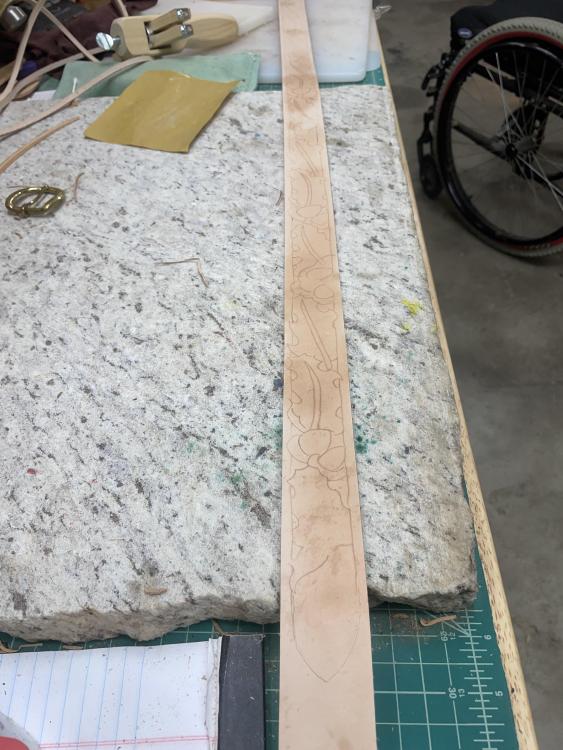
Got the holes drilled for the Chicago Screws... and we are looking good. Need to get out and burnish the sides. Then I can move forward with applying the finishes. I'm leaning toward a natural finish for the belt.

-
Thanks, as Johnny Carson would say, "I did not know that."
-
Billets? That's what they are called.
-
Back out this afternoon after Miss T got home with lunch. I spent some time on the belt working on the details, then worked on the buckle attachment and the strap that will have the holes in it. I'm sure those parts have names... but I don't know them. (Yet.) After I cut them out... I (Of course) had to add some details. I went with the serpentine pattern since the straps were too narrow for much else. When I do the cartridge belt, I think I'll go with a barbed wire pattern. (Ever notice some folks think the wire was named after a guy named Bob?) Usually it's folks who have never strung it, repaired it, or tried to get through it in a hurry (Being chased by an angry bull or an angry farmer, and met "Barbs". We are so close. I have to drill / punch holes for the buckle attachment chicago screws, and the holes where the buckle bar will go in that strap. I need to burnish ALL the edges after I have decided on stain, or natural oil... then after everything has had it's first coat, sew it all together. I also need to make two retention loops. One for the belt to slide into, then one for the buckle strap to slide into. All fun. Still, close.
-
The pattern in the video is a bit different, but the techniques still apply.
-
-
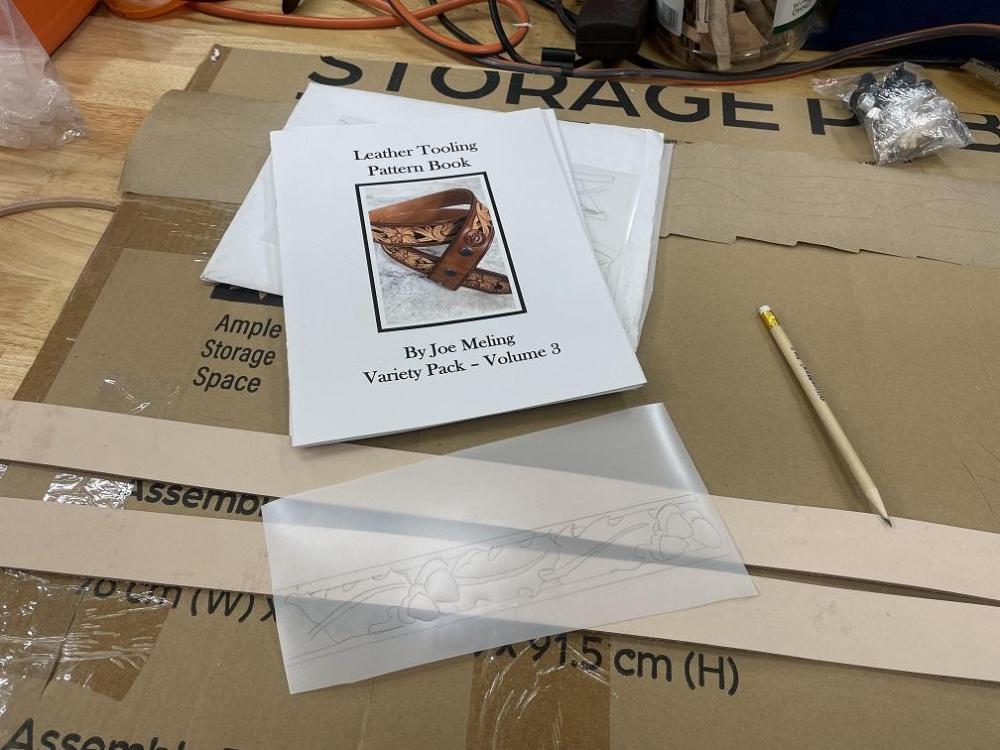
The good thing is, many of the patterns you can find a video of him using that pattern to tool IN a video. The oak leaves and acorns he tools and narrates an excellent HOW TO as he does it. It was done live so he is interacting with the comments from those watching. I really loved watching it and it's why I ordered the books.
-
The books are heavy paper, with the drawings for the patterns progressing from very basic lines, to more detail, to a finished tooled picture. There are no mylar patterns, I have a roll of the tracing stuff I use to copy the pattern. Sometimes I copy the pattern on my copier then use my backlit tracing screen to make it really easy. Thanks, me too. I have the basic idea of how I want to have the finished belt to look, but ... like many of my projects, I'm winging it here. I live dangerously. Believe it or not, I have never made a belt.
-
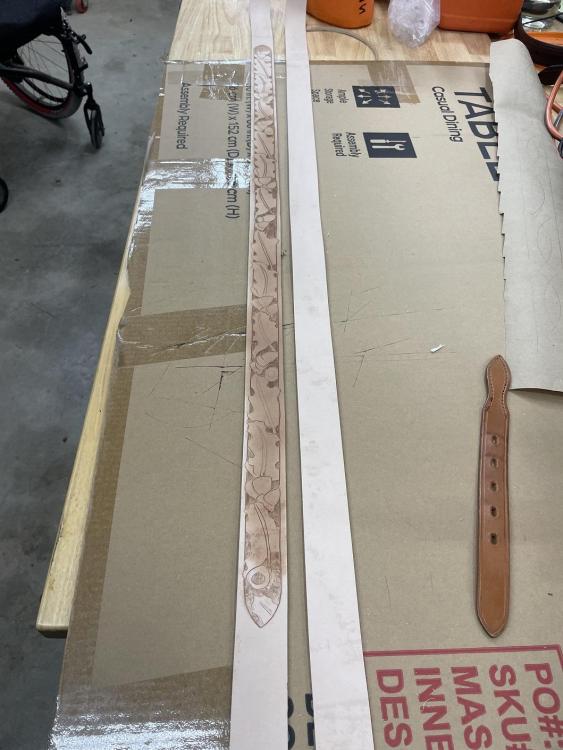
See that Strap off to the side? That came off a Gunfighter Cartridge Belt from a big name I had years ago when I started to shoot IPSC. (Started to shoot, didn't do well.) I was young and didn't have the funds for a lot of practice. I think it would have been in the Late 70s / Early 80s. It was a Bianchi piece of gear, VERY nice. I held on to it for years, DREAMING I might one day get back into it. Yeah, never happen. I finally dismantled the belt and saved certain parts for templates. I have used them often here and there. I "recycle." Thanks. I'm hoping for a good result. If not, great practice. I keep a positive outlook. (I do say nasty things in the shop when I blow it, but there isn't anyone to hear.)
-
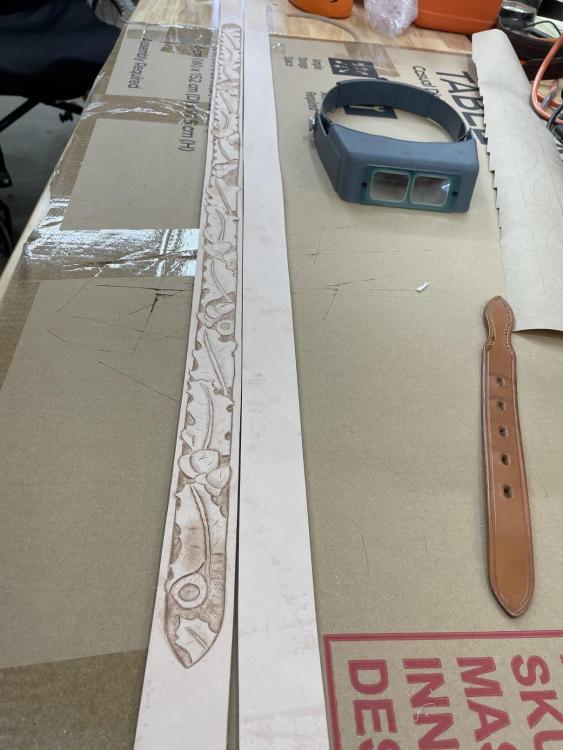
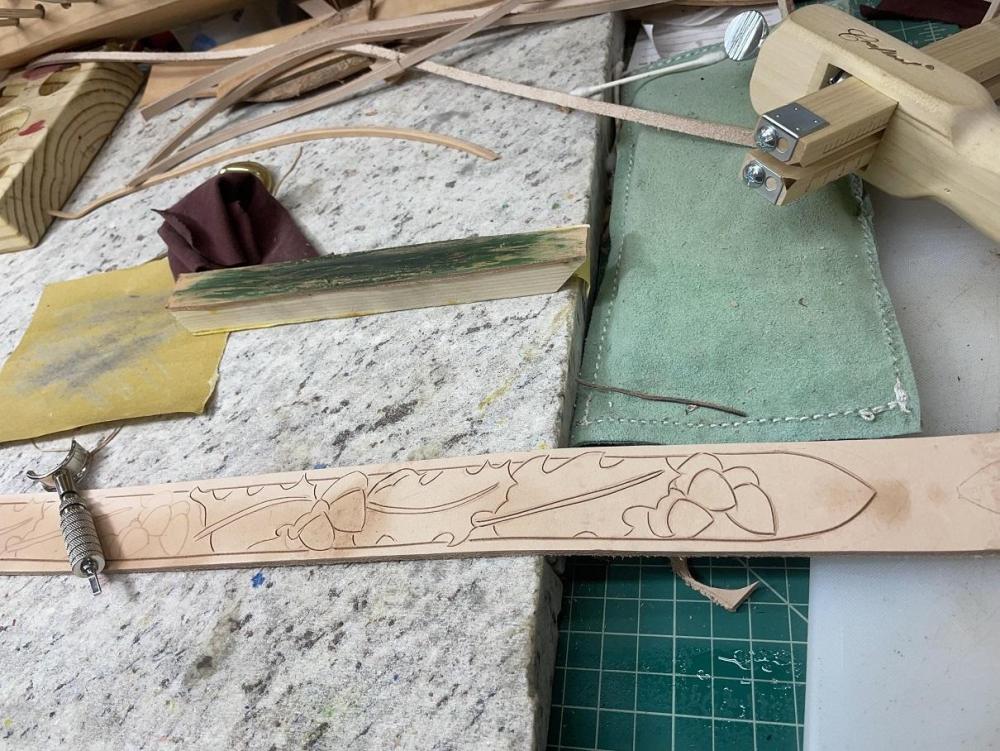
Using a steep bevel, I worked on the features, sharpening the edges of each one and beginning to define them and highlighting. Beginning the 3D effects. During a second session, I really worked hard on the effects, working to push the illusion of items diving under the edge or protruding over the edge. I had also put more detail into the leaves and acorns, but there is still more to do. In the next session, I'll work on pear shading leaves, lifting, and edge details in the leaves. All items I have had some success with, but also some dismal failures. Wish me luck.
-
MY next step is shading in the background. It helps me to define the areas and to know what is what. This pattern especially has features that are drawn to appear to go over or under the tooling window edges. I took two sessions to background the piece but it really made a huge difference. The long view gives you a feel for how it makes the design POP. Once the hands get a break, I can start beveling the edges of the features and then work on details.
-
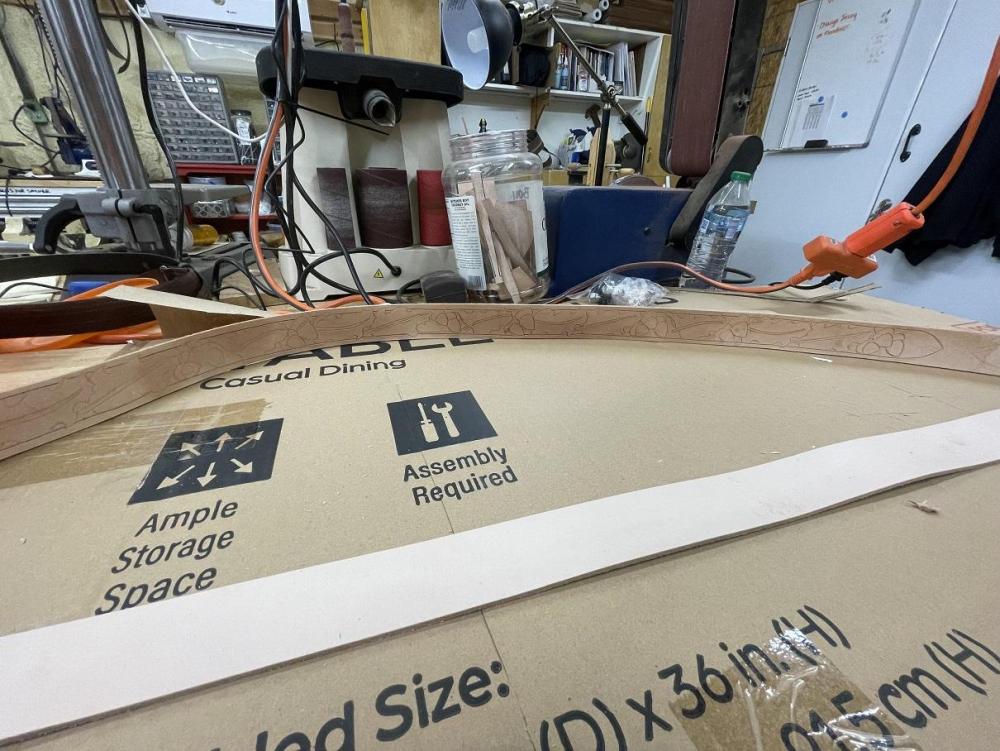
With arthritis, you can only do so much and then you have to take your breaks. I got this far, then took a lunch break. I came back after lunch to finish cutting in.
-
Using that pattern, I determined the length I needed at the ends for the buckle attachment and the attachment of the strap with the holes, then lightly drew in the defined end of the tooling window. Then I could start working the pattern from one end to the other. After I transferred the pattern, I sharpened two of my swivel knives, buffed them out on the rouged leather strope, and got busy cutting in. Fatter blade for the edge, and nice thin blade for the details.
-
Oh, Wait, that would be me. I need to work on my tooling and carving, so I decided what better way to practice than to tool a belt. My biggest problem is I don't have a butt. I have a gut, but no butt, so my pants are always trying to fall off. That can be somewhat embarrassing. Well, you know, depending on where you are. If I'm walking the dog in the middle of the north pasture, no one cares. We even got rid of the cows. They used to give me funny looks if my pants fell down, but even they are gone... so it's no longer an issue there. But, if I'm going down an aisle in Home Depot, that might be a different story. That's why I wear big ol' Suspenders. So, to get started, I cut out a couple wide strips of nice heavy leather. Nice looking stuff that should tool well. I'll carve the first belt, and get in that practice, then the second I'll put some bullet loops on for the 38/357; and use it for walks thru the woods or on my range.... at least that's the plan.
-
It's red. I just apply additional coats until I get about the color I want, keeping in mind I'll antique it, then apply the mink oil and wax, so it will darken.
-
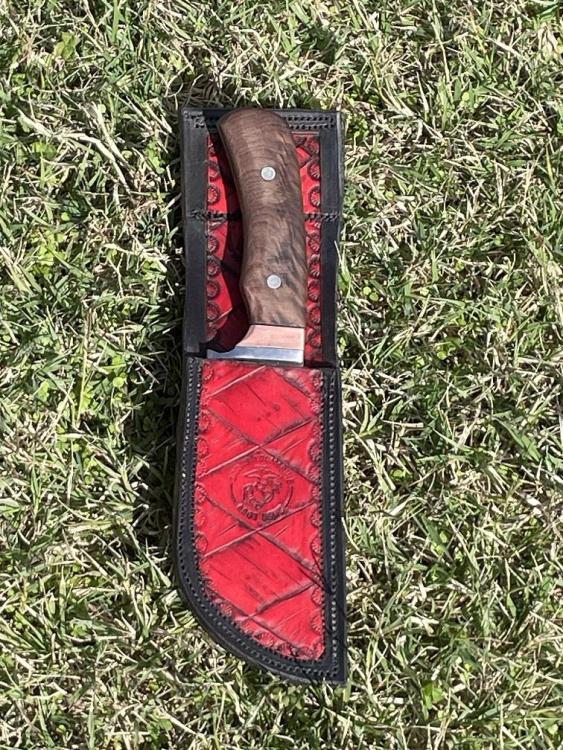
The sheath was a practice piece to let me work with the Cowboy 3200. I still am learning the machine and it can do a lot more than I can right now. The wife is a quilter and can sew like a demon on my machine, but SHE has about six machines in her shop. Phaffs and Berninas, and several other top names. I'm "Learning" my machine and getting better. I finished the sheath in beeswax as well. This might be a keeper.
-
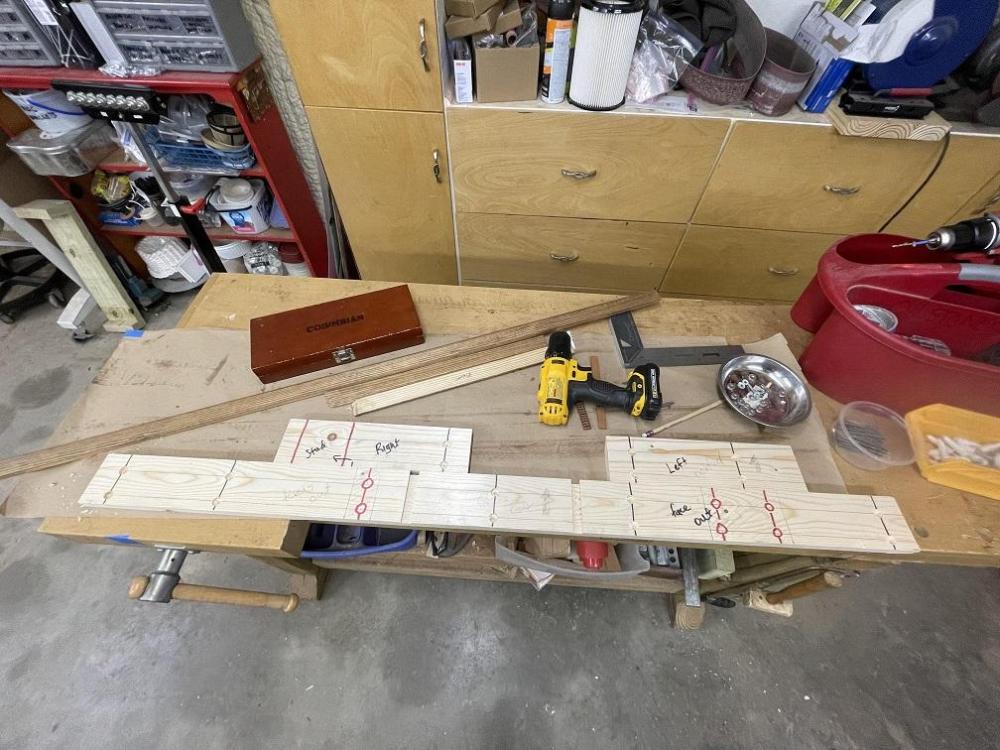
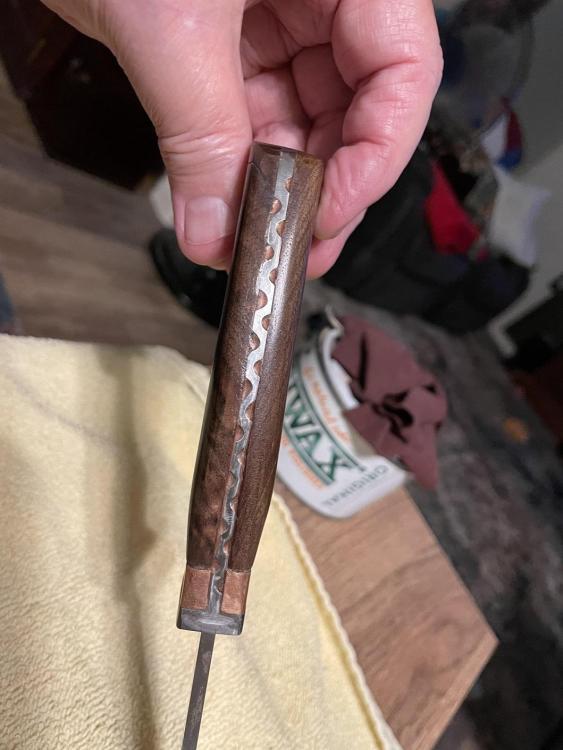
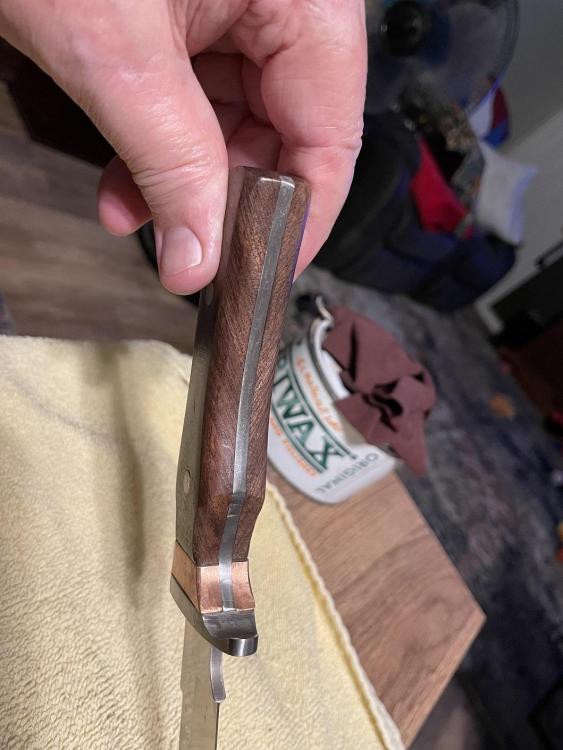
The knife is a Highly Figured Walnut Skinner. I didn't forge the blade blank, that came from my supplier, Jantz Knife in Davis, Oklahoma. They have everything I need to make them. The walnut came from my stash I have had for years. I formed the copper accent from 1" wide, 3/8" thick bar stock. The pins are Nickle Silver from round stock. I enjoy pushing my skills to strive for improvement and learn most of the skills from YouTube videos. The tooling on the spine is improving. I bought some metallic tint powder and tinted the epoxy to accent the tooling. First time I've tried that ... The highly figured walnut scales came out beautifully. I shaped them on the 1x30 belt sander then finish sanded them by hand to 1,000 grit. I love to bring them to life. I used Watco Golden Oak Oil Stain to make that grain pop with seven coats of Beeswax to finish and protect.
-
I like the knife and the sheath. Both are very well done.
-
Excellent work. Very nice tooling. Welcome to the forum. Look forward to seeing more projects.
-
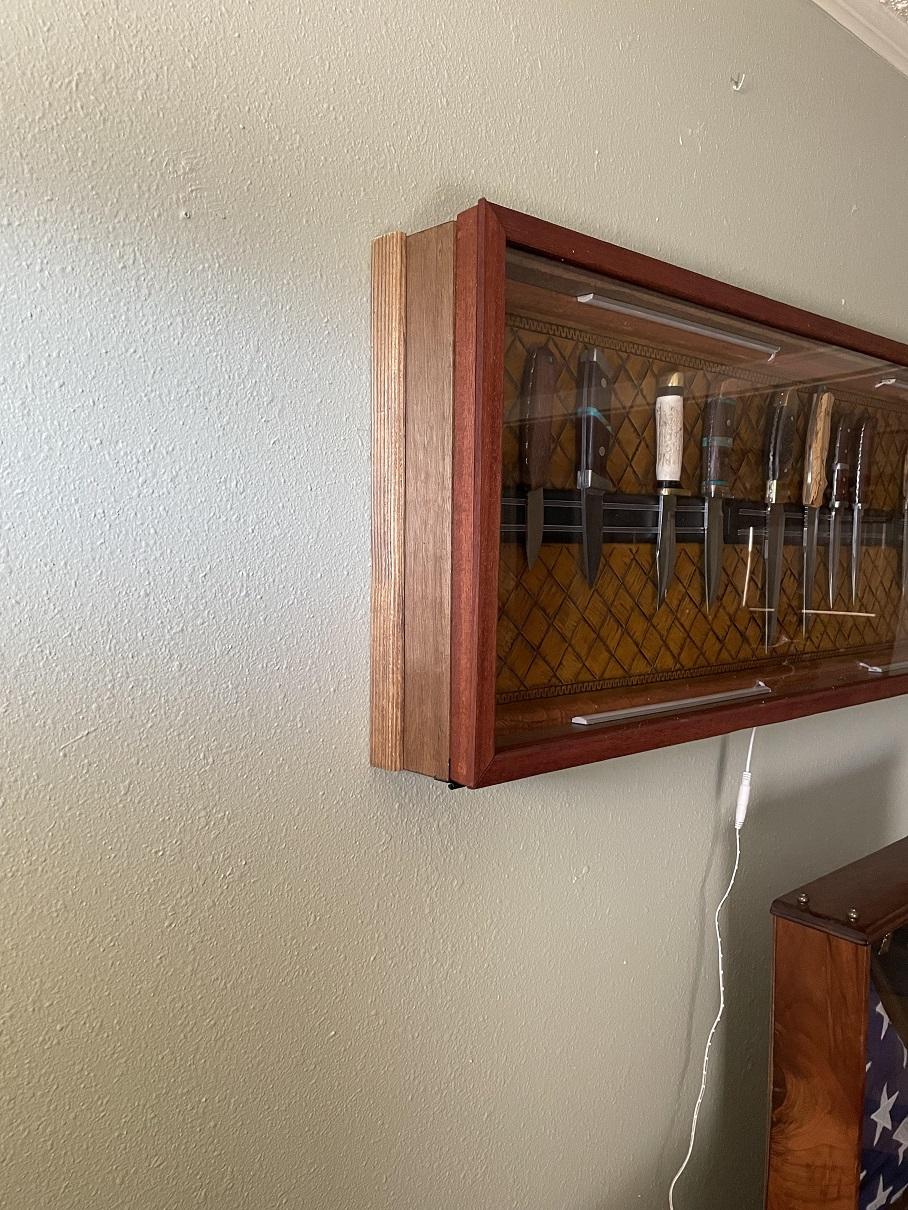
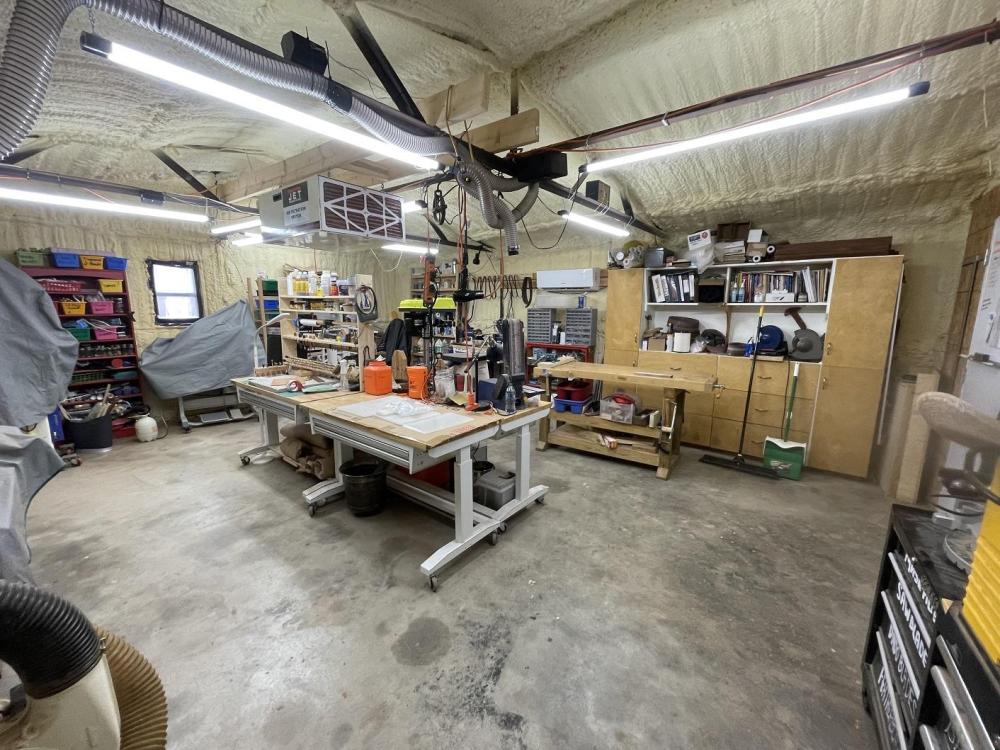
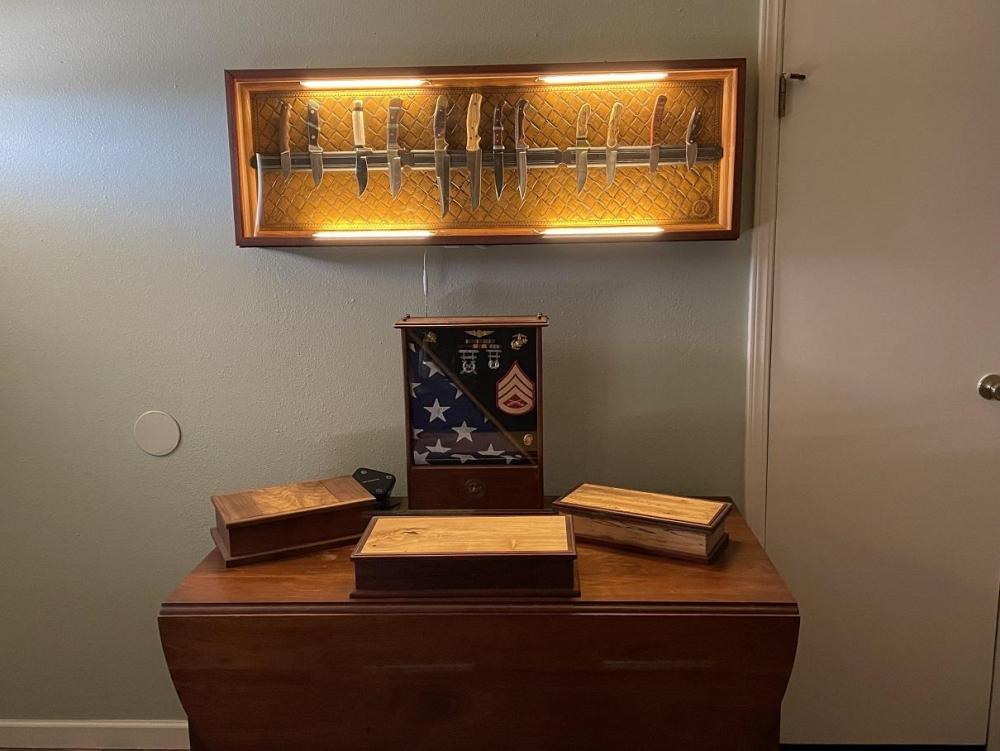
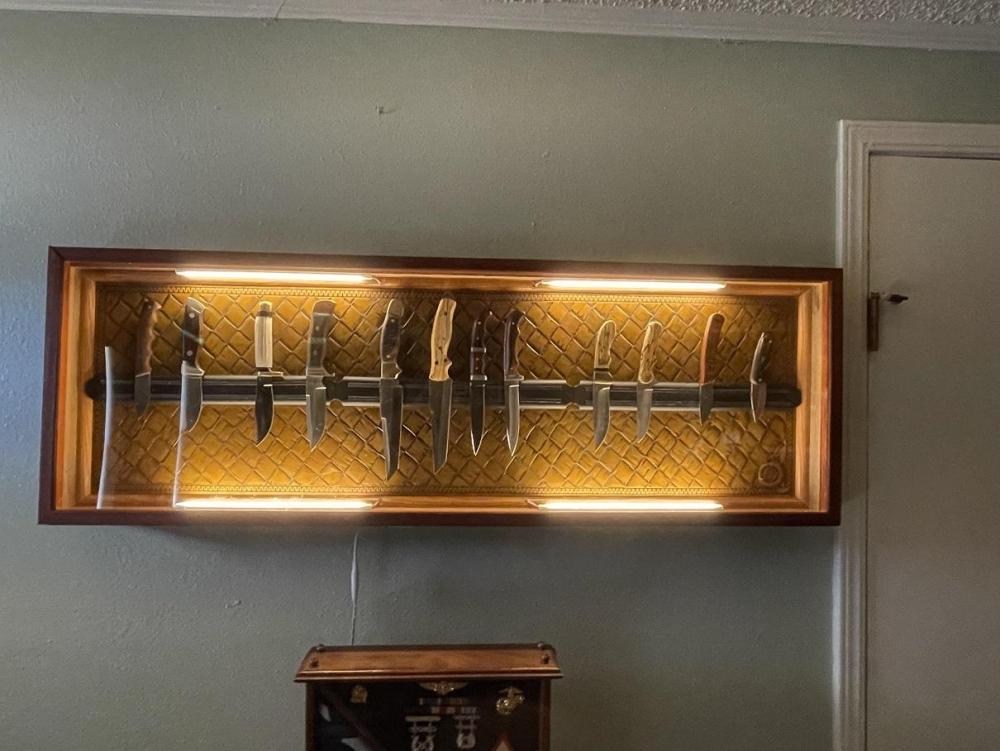
One last set of pictures.... I put some trim on the sides of the display case with the for the sole purpose of hiding the cleats from view. I didn't think they would be that noticeable as you came in the door but they really grabbed your attention first thing. The trim matched the case very well and blended right in and was hardly noticeable. THAT was my intent. I installed it with two sided tape yesterday, just to see how it looked. I brought the compressor and pinner in today and tacked it in place. Turned out well. The last pic is this one. I spent Sunday working in the shop as well... but as a maid. I did some detail cleaning on the benches, tables, and the rest. Picking up and sweeping up, putting away small items left out and throwing away trash. Then I moved some roll around tool away from the wall to sweep and discovered some mice had chewed into the spray foam. I used Tina's miracle bug spray and went around the shop and sprayed a wide stream around the perimeter. This morning I found a large number of the beetles that plague Oklahoma and one mouse. I repeated the spray pattern. Shop looks nice now, so I guess it's time to start another knife project. A stag hunter I think, then the sheath.

-
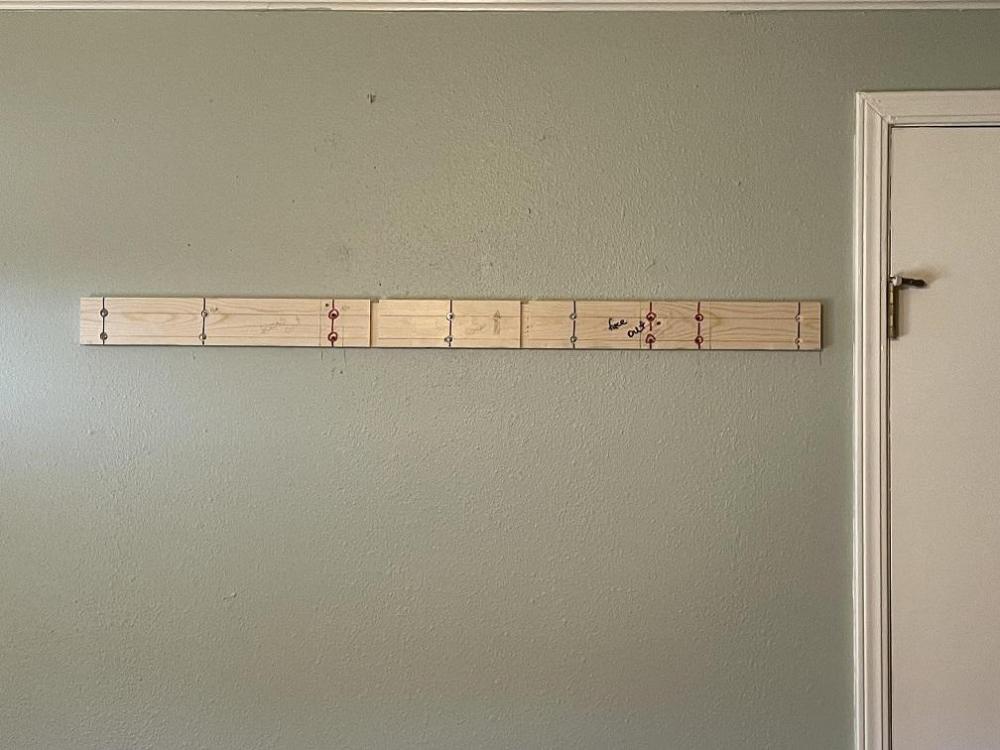
By the way, a special thanks to DoogMeister for suggesting the French Cleats. As I said in the thread, I had known about them in the past, but my anesthesia erased memory had forgotten them. PERFECT solution for hanging this Display Case.
-
Thanks all. Now to decide on the sword display.
-
Okay, here we go, time to get 'er done. I used two screws in the studs to temporarily mount the cleat, then an awl to mark ALL the hole locations. Took the cleat back down and set the wall anchors where needed. THEN put the cleat back in place and mounted it. Worked as planned, she's up there. With the case hanging on the cleat, I could slip both the bottom cleats in, and mark their location from the side, then take it all down and mark the holes for mounting, and repeat the process. All the cleats got screwed in place and we are solid. Looks good. I added the trim to hide the cleats. A closer look The project is done, the book is closed. Time for a nap. I am really happy with the way it came together.
-
Moved the table out and took down the picture, cleared the wall and marked the eyeline. Measured up 8" from that, and down. Careful measurement of the back of the display case let me mark the height of the top cleat on the wall. Using a level, I marked a reference line for it's installation. Using a stud finder, I marked the position of the studs in the wall, and holding the cleat up, I transferred the info onto the cleat. I took my time, and double checked the work. I did the same with the two lower (one foot) cleats, marking the location of the stud that fell on the right hand cleat, and the lack of studs on the left hand cleat. I took the cleats to the shop, and using the 6' metal ruler, laid out the location of the holes to be countersunk and drilled, and CAREFULLY determined which would be into studs. THOSE didn't need countersunk due to screw type. Got the countersink done, then drilled thru them all. The cleats HAVE to sit flush against the wall, so I cleaned up the slight blowout on the back. I could have avoided blowout with a scrap backer, but I wasn't worried about the looks.