Brokenolmarine
-
Posts
592 -
Joined
-
Last visited
Content Type
Profiles
Forums
Events
Blogs
Gallery
Store
Everything posted by Brokenolmarine
-
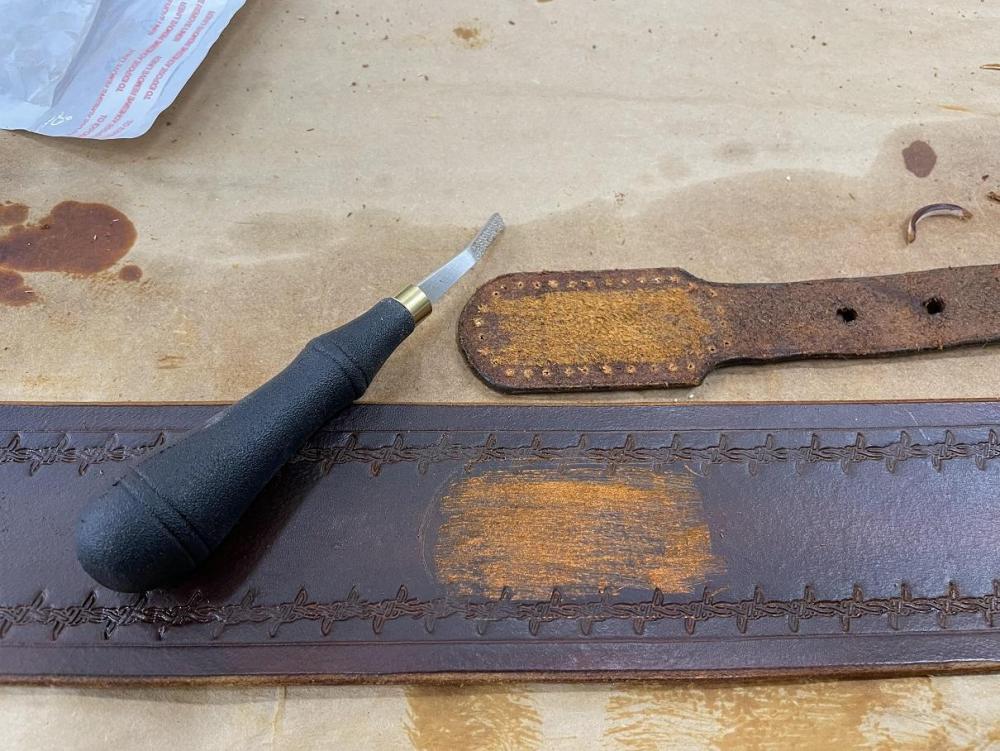
Now I put the belt around my waist, but with just a bit of looseness to accommodate the holster and sheath to come. Satisfied with the position, I take the awl and tick ONE mark at the end of the billet to mark it's position, and take the belt off. I place the billet in the position referenced by the mark, and trace reference points. We are ready. I grab my roughening tool and roughen the back of the billet behind the stitch lines and the area I marked on the belt. AFTER rechecking the position to make SURE. If you mess this up you can't go back, you can only hope you know someone who would like a belt that size.

-
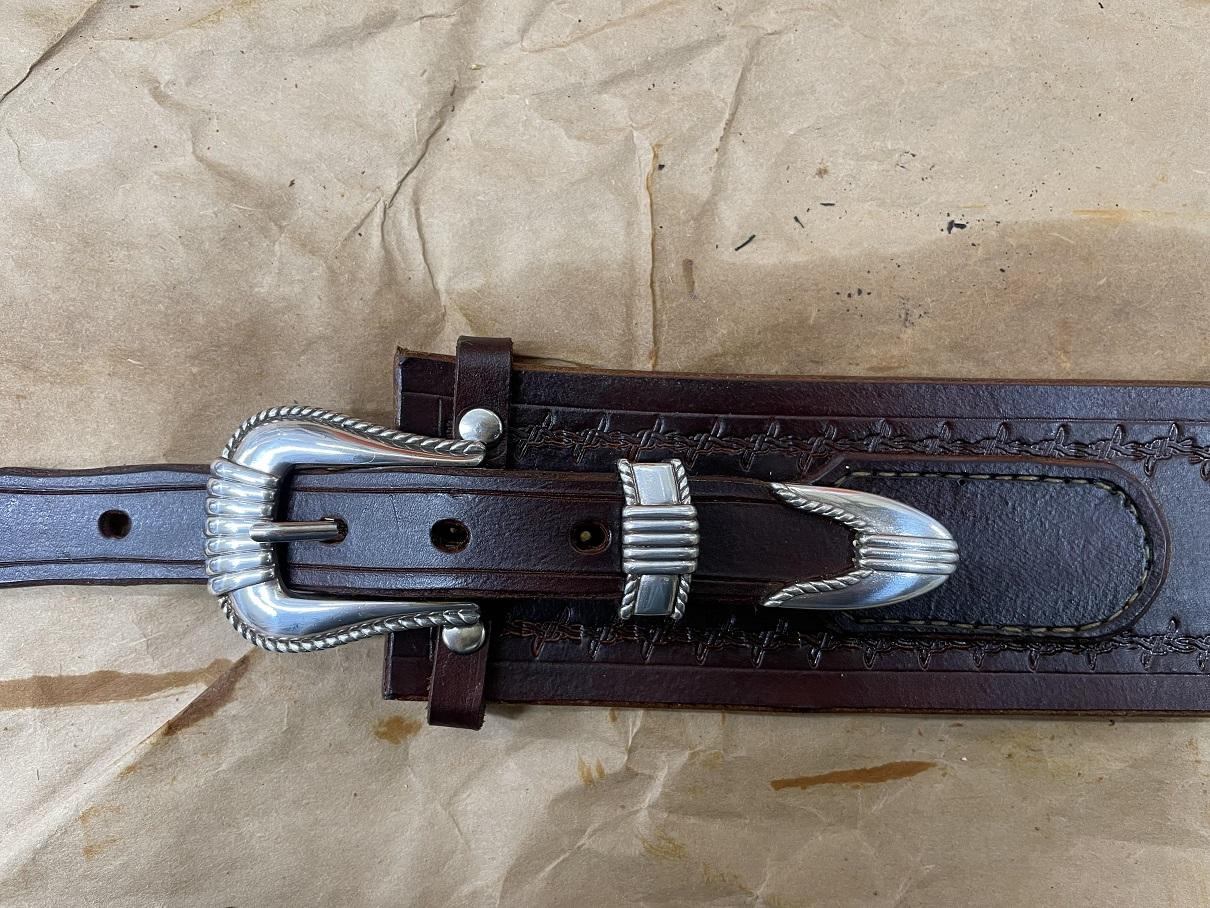
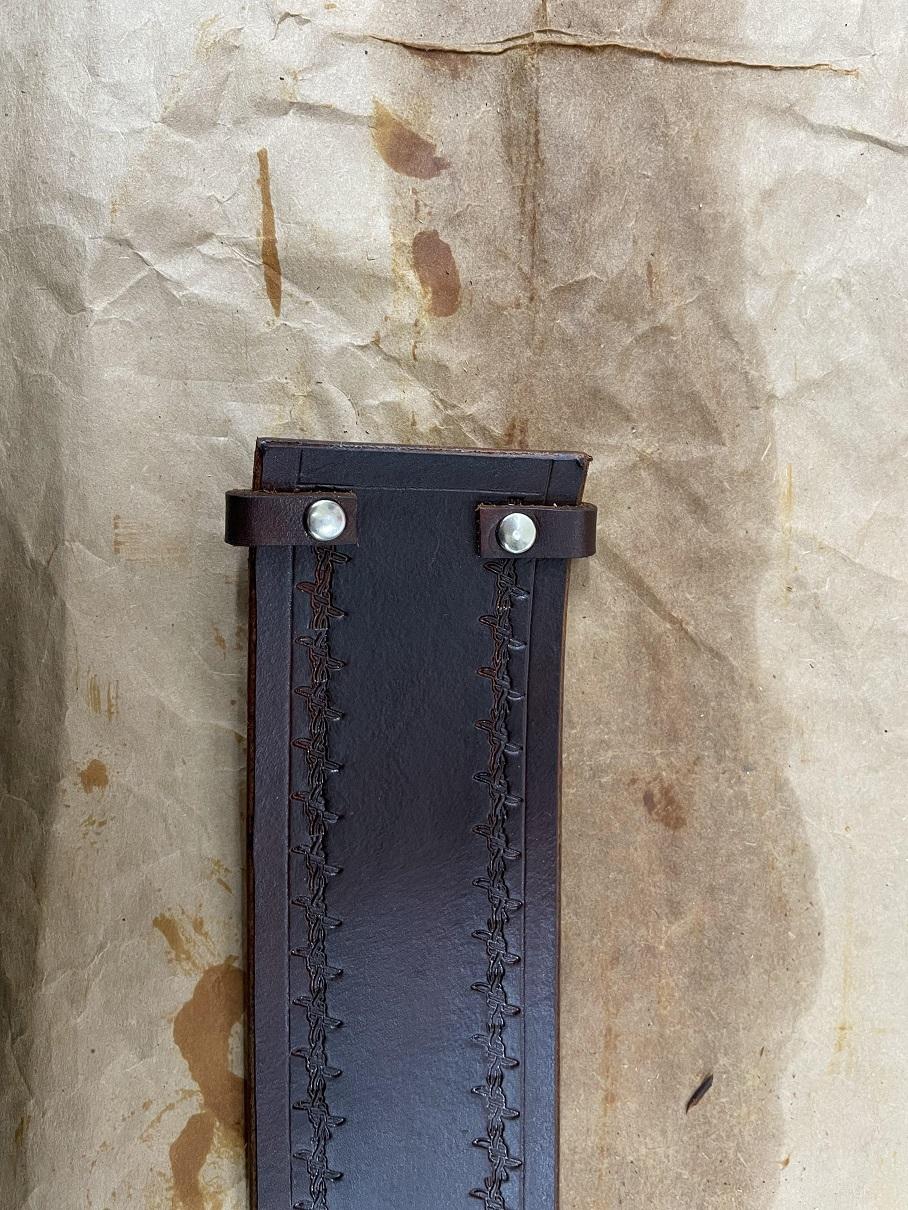
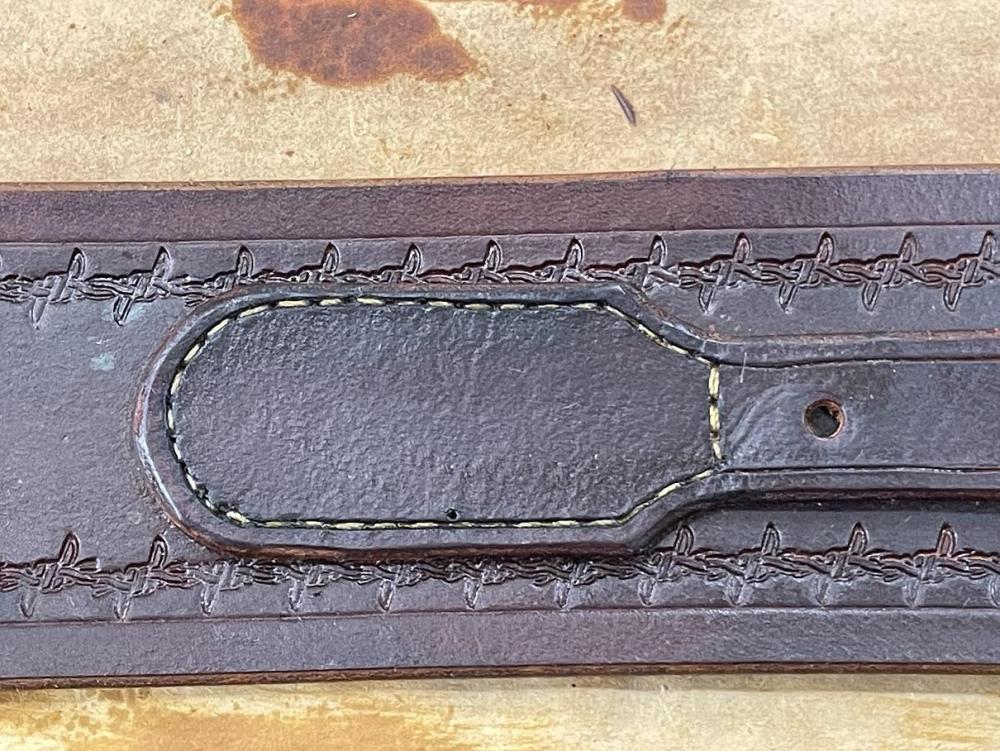
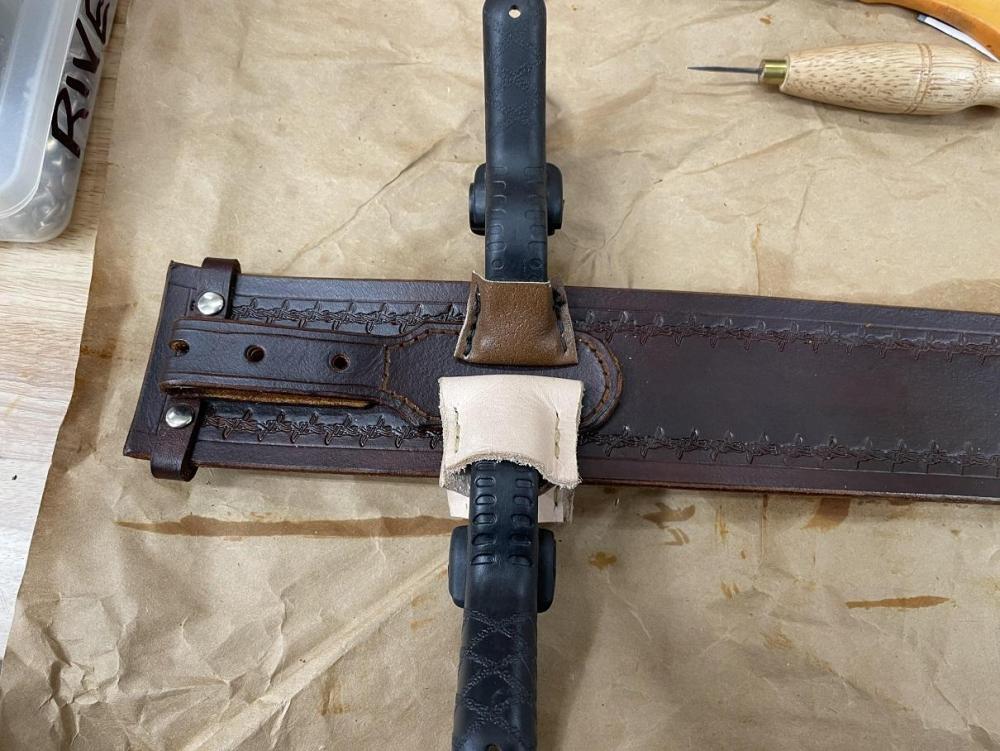
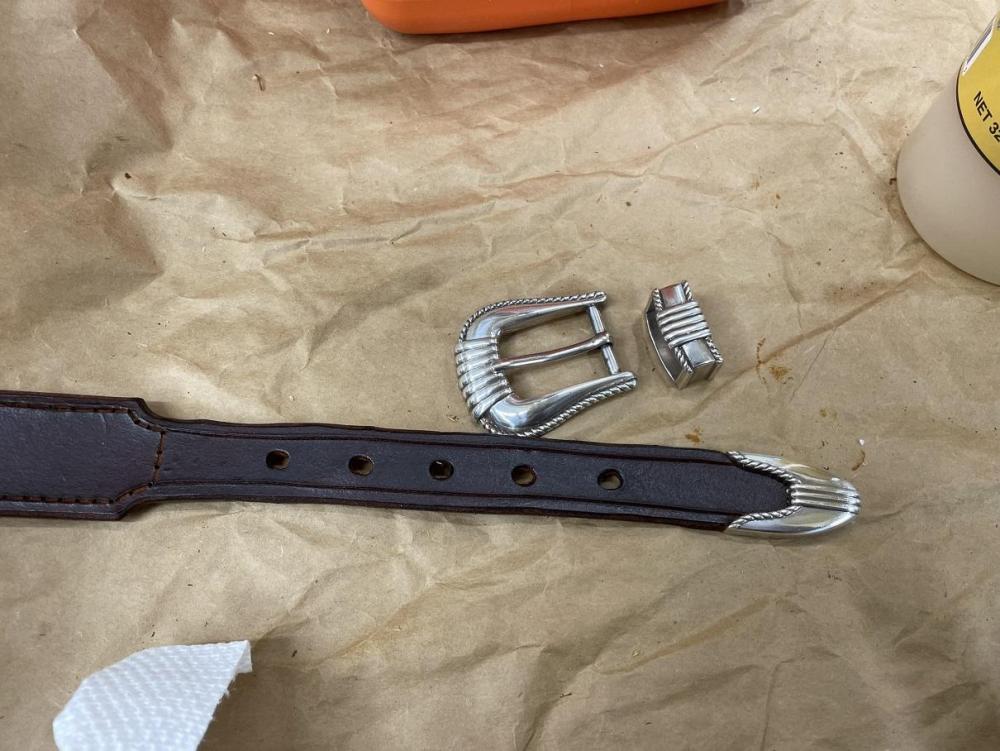
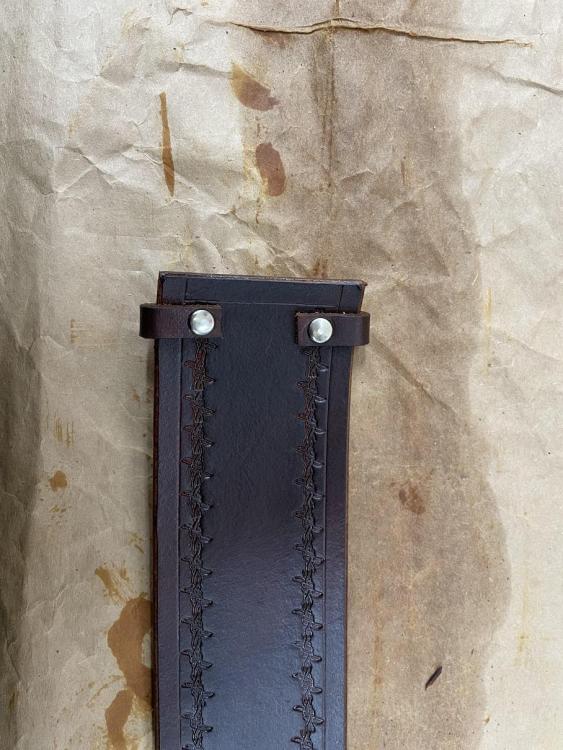
Got out yesterday and got the Buckle Billet sewn in place. I saddle stitched it down. Afterward I dyed the stitch groove to hide the raw leather and tone down the thread. I was happy with the result. Next up I got the buckle and silver belt loop assembled and riveted in place. I was pleased with the outcome. I think they will compliment the bullet loops at the back. Next step is to determine the positioning of the tip billet, or whatever it's called. So, I put the belt tip in the center hole and pull it tight in the buckle.

-
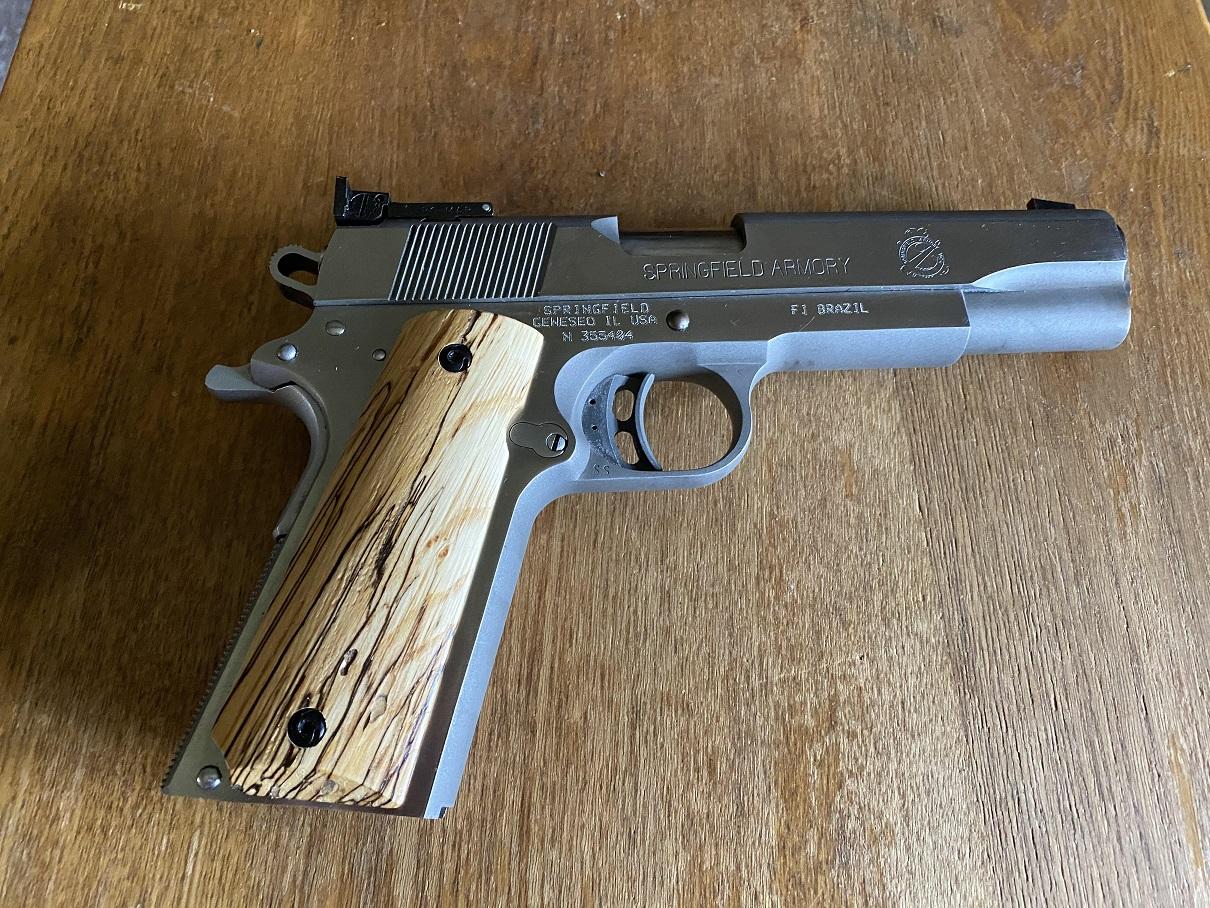
I'll keep that in mind for the rest of the belts I build. Thanks The spalted maple came from a tree on our old farmhouse in VA, planted the first year we were there. It grew from a stick they sent us when we ordered a silver maple from a catalog. Twenty years later woodpeckers and bugs killed it and I had to cut it down. When I started to cut it for firewood I noticed the spalting, and ran it thru my bandsaw mill and set it aside to dry. Still making things from that wood.
-
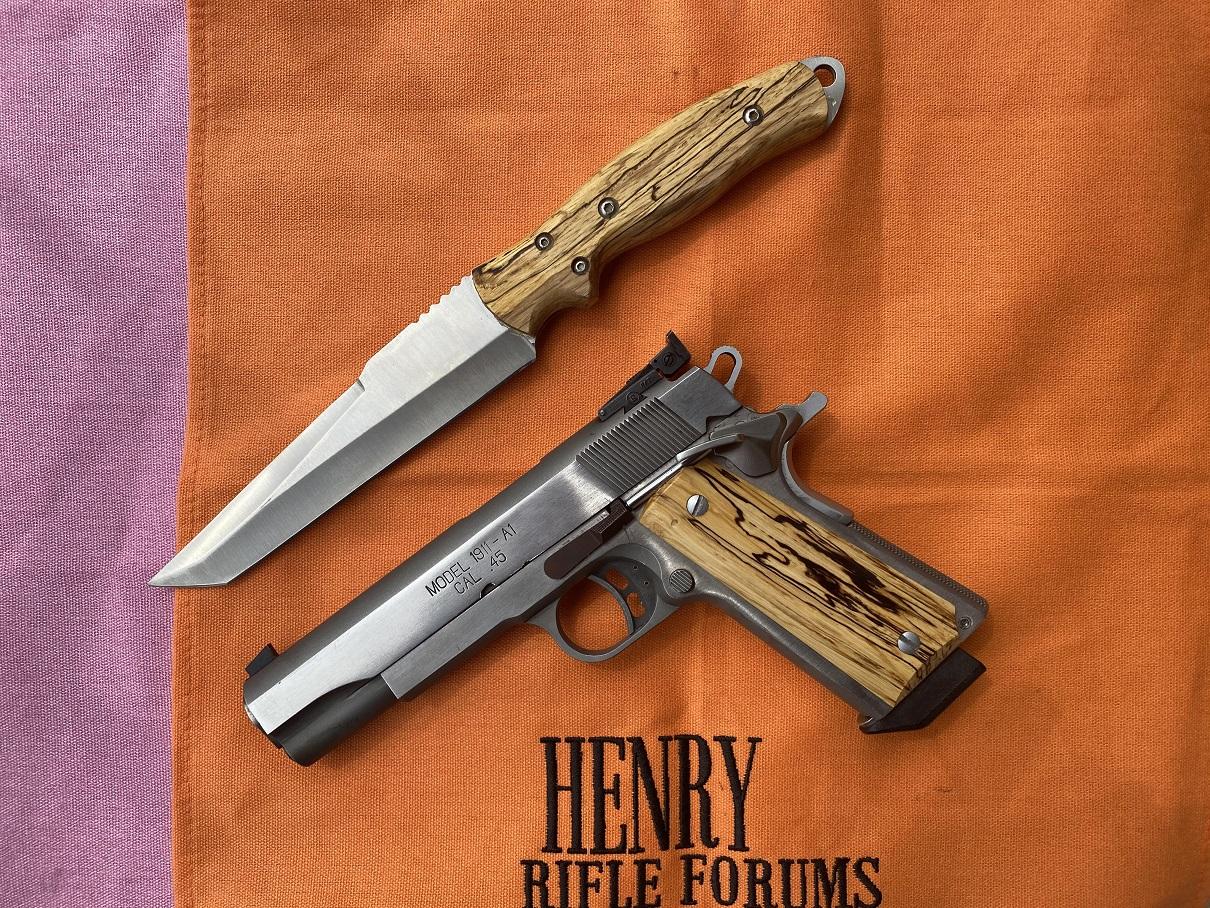
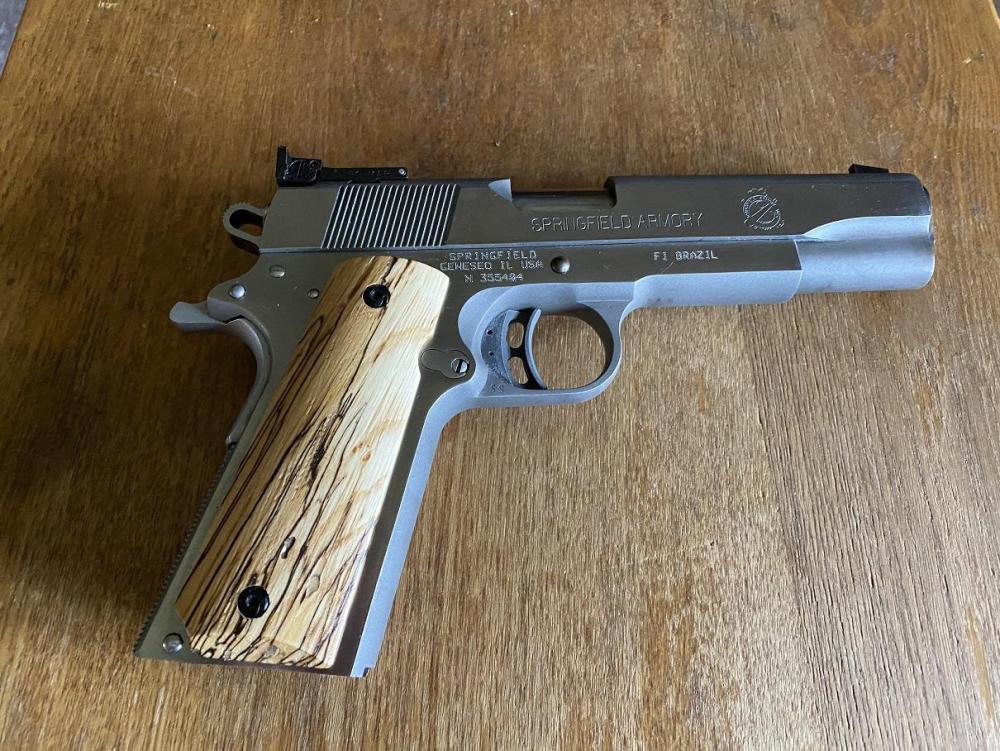
I'll eventually make a belt for this combo just for fun. One thing I did later was replace the screws with a pair that complimented the grips. That Springfield Armory Match Gun was built by a Master Pistolsmith and only the frame and slide are stock. Jerry passed a couple years ago but only AFTER being admitted to the American Pistolsmith's Guild. Quite the honor ... The .45 shoots better than I can...especially these days... but I won my share of matches with it.

-
Love that Hand Of God rig, and the gun itself. I looked into the grips, and found a few pairs, but just never pulled the trigger (pun intended) on a set. I also wanted a set of stag grips, but never bought those either. I love the single actions. I did have some spalted maple grips made for my match .45 and made a knife to match.
-
I'm going with the Uberti Birds Head 357 because I also have the Blackhawk with the same 4-1/2" barrel in the 357 / 9mm convertible and it would fit the same holster. Haven't picked a knife to make the sheath for yet, but probably a stag skinner from the ones I already made... I have a couple. LOL.

-
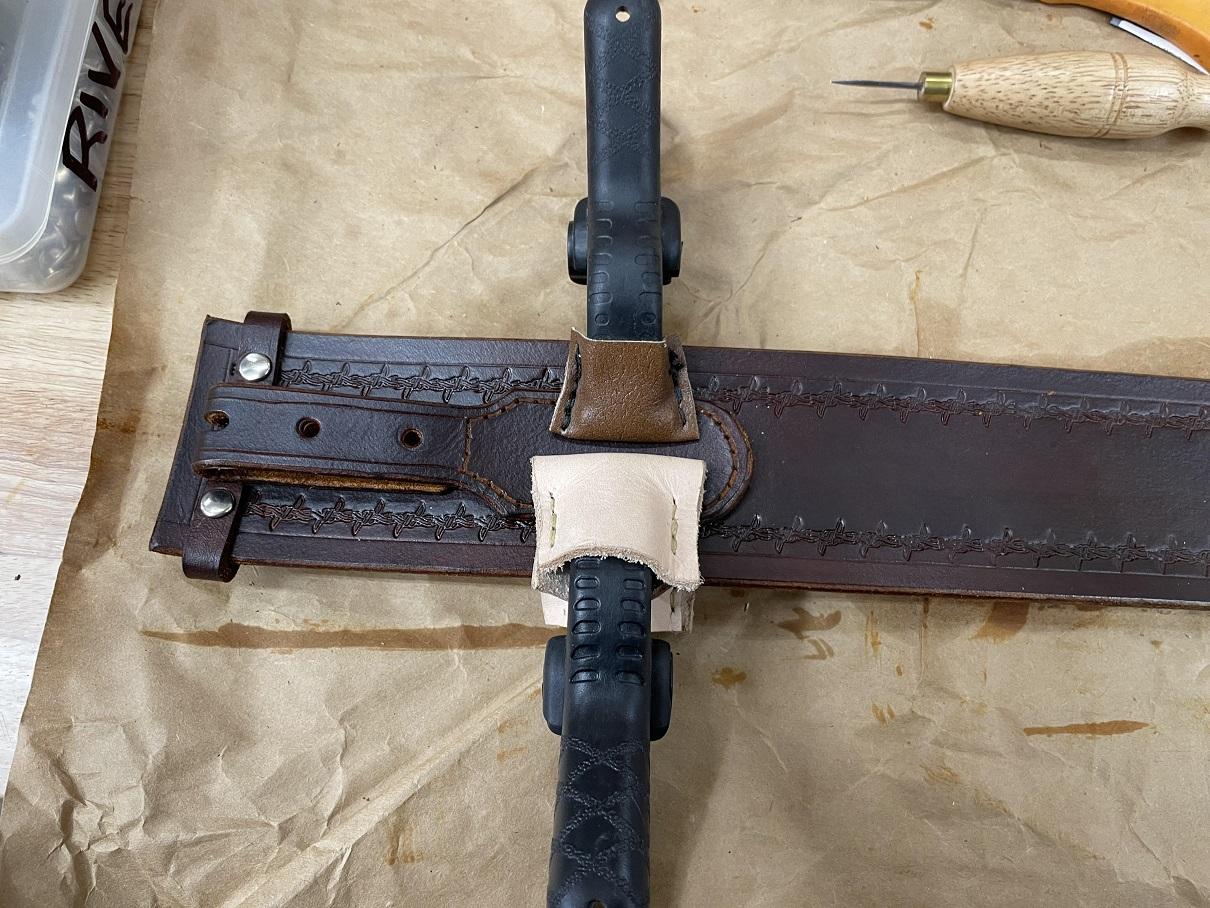
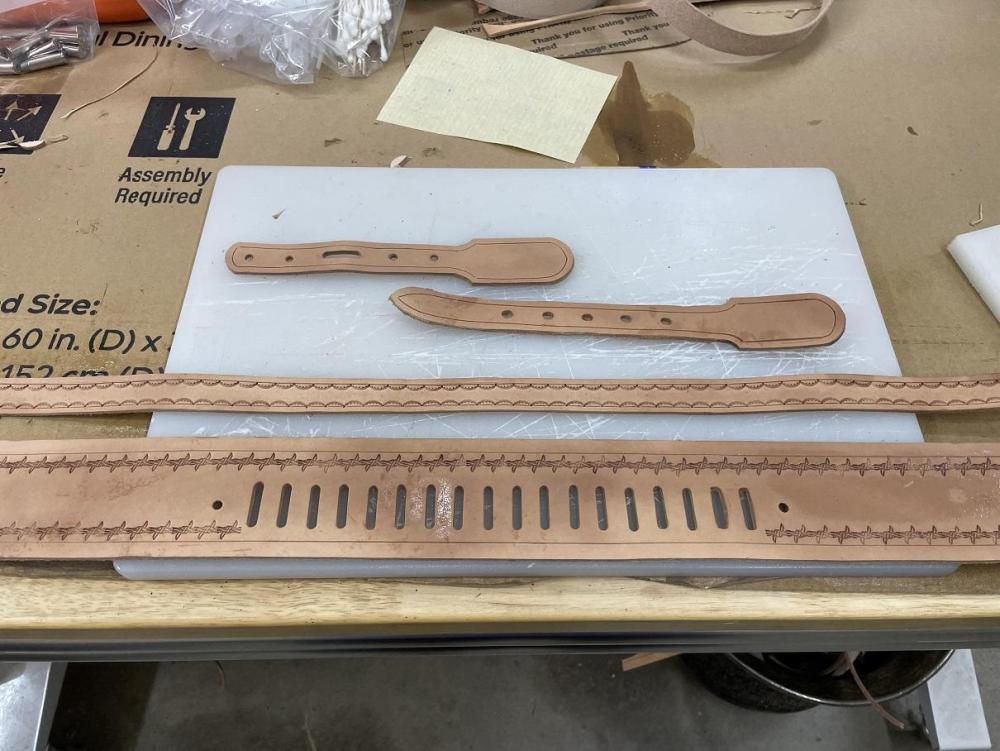
Late afternoon session. I got the holes marked and drilled in the buckle billet, then marked the position and glued it to the belt. I'll drill the holes into the belt tomorrow after the contact cement cures... and then saddle stitch 'er. Yup. I also got the holes drilled in the strap end billet, and fitted the silver decorative tip. The strap end can be positioned AFTER the buckle end is sewn into place. I have found I position mine correctly by putting the buckle in the center hole and donning the belt, then positioning the billet on the belt and marking the position. I can then sew the strap end billet into position and know it will be correct. Nearly done with the belt. Next up, the holster and sheath.
-
Last thing before taking my break was to install the large belt loop I had wet formed for the buckle end of the belt. The billet end will tuck into the loop under the end of the belt to allow the billet and the buckle to engage. I punched holes in the loop, then fitted the loop to the belt and marked the positions and punched holes in the belt. Riveted the loop in place with rivets to match the silver conchos and buckle and hardware to come. After that break, I'll mark the billets for holes for sewing, and get ready for final assembly. Can't wait to see the belt finished. Then on to the holster and the knife sheath to match.
-
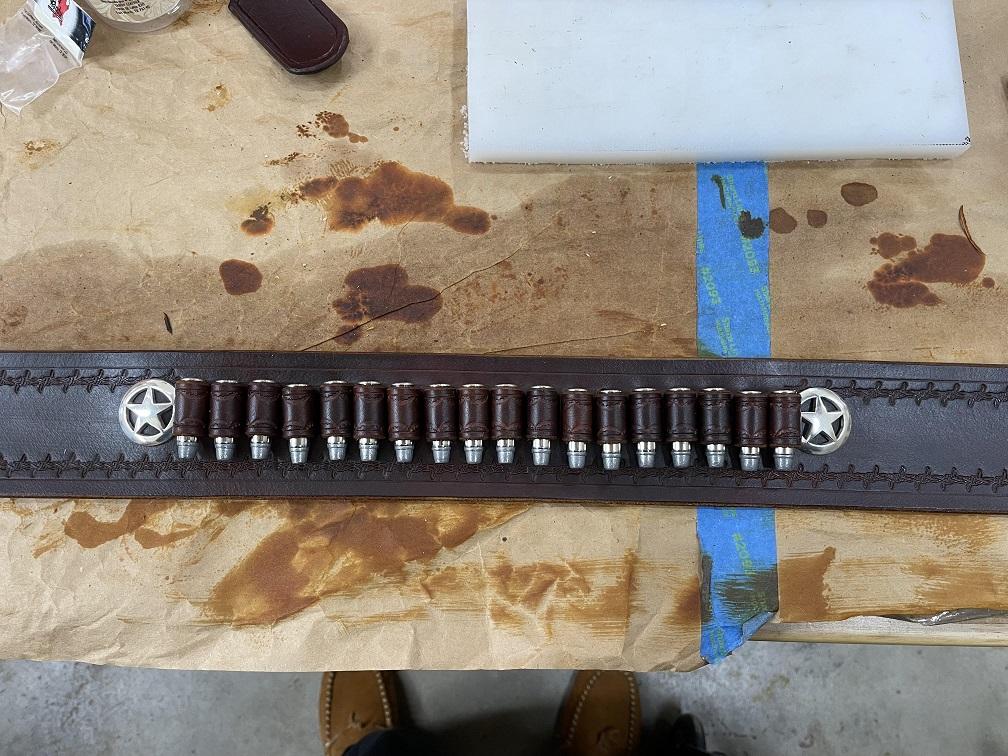
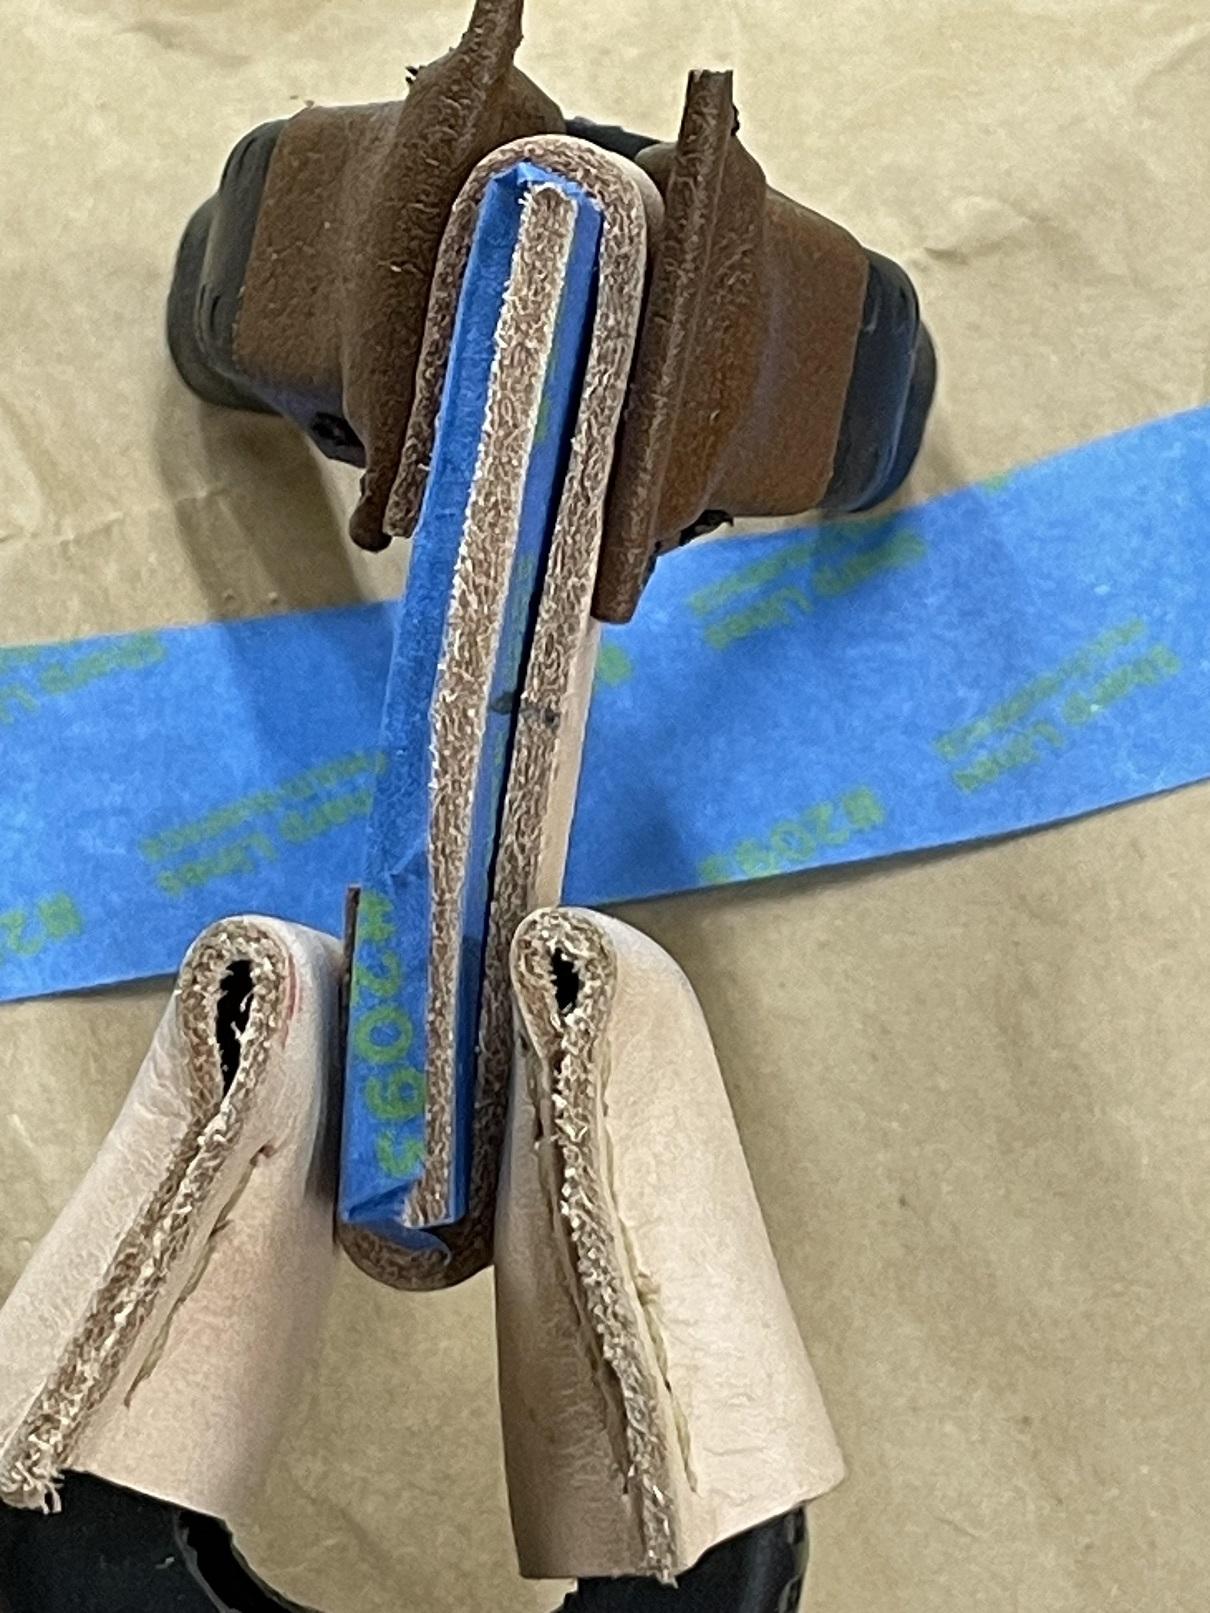
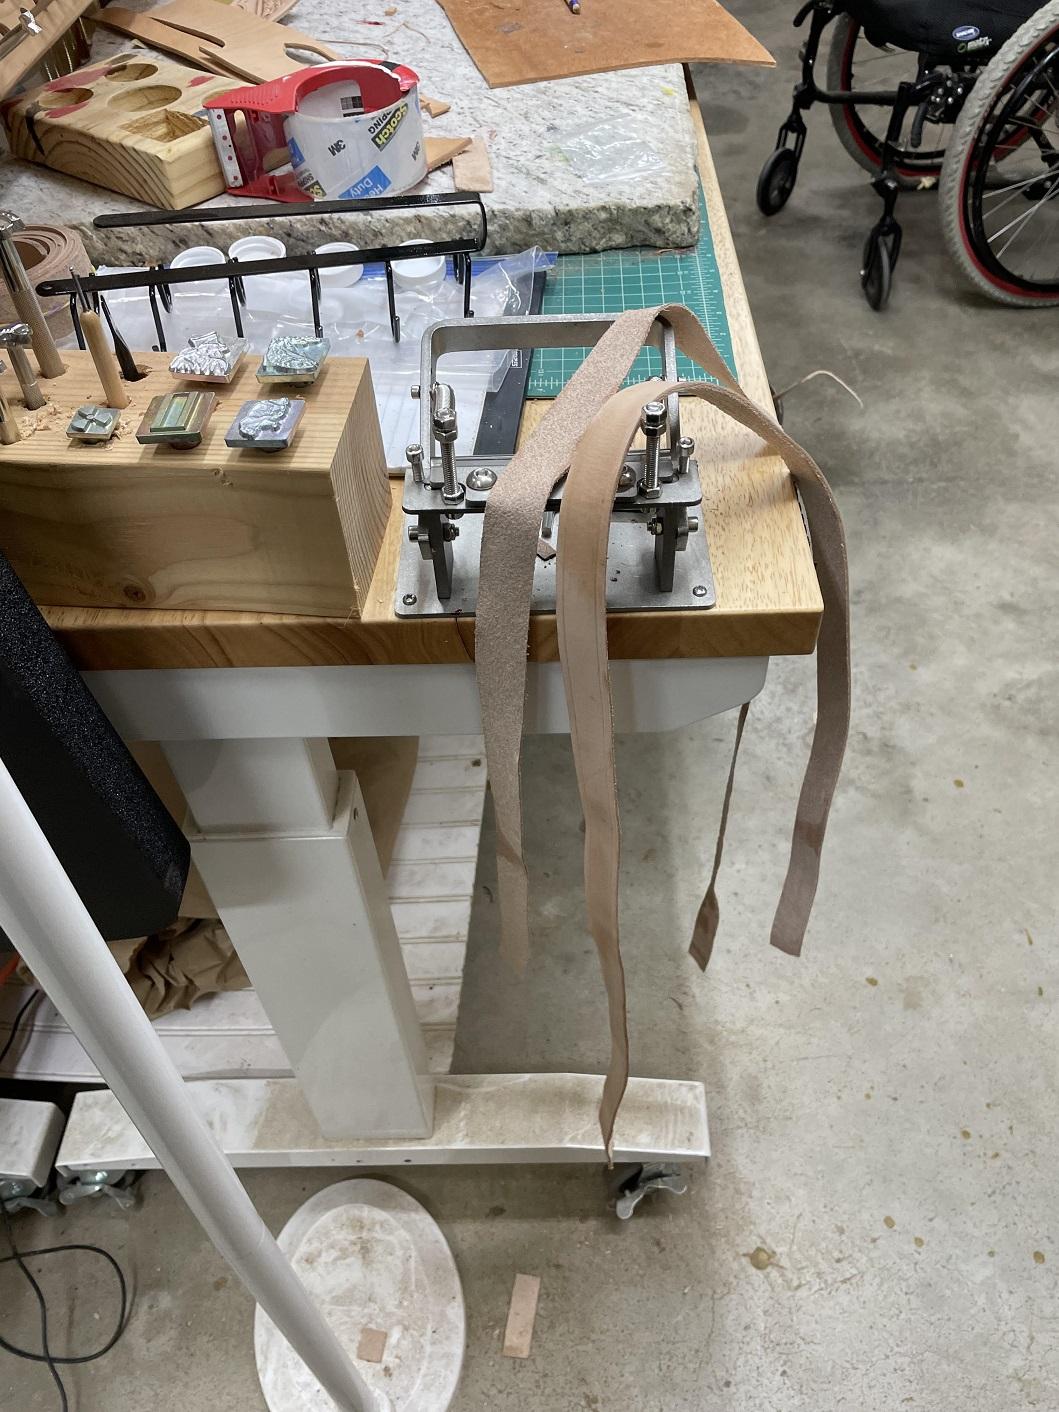
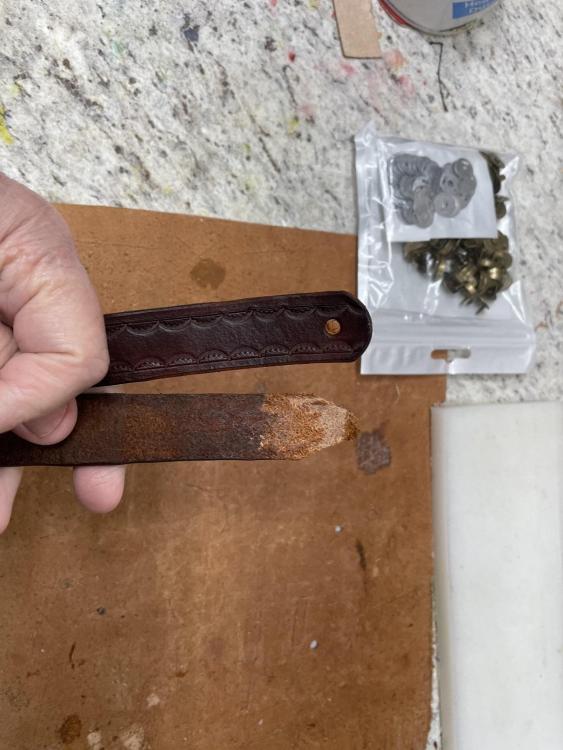
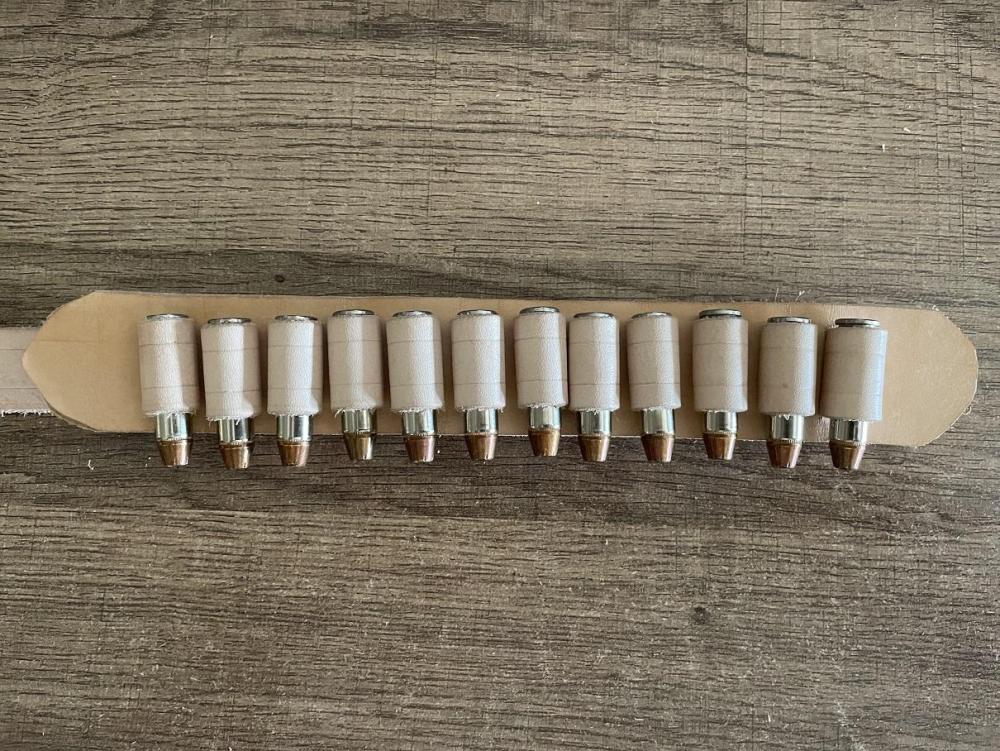
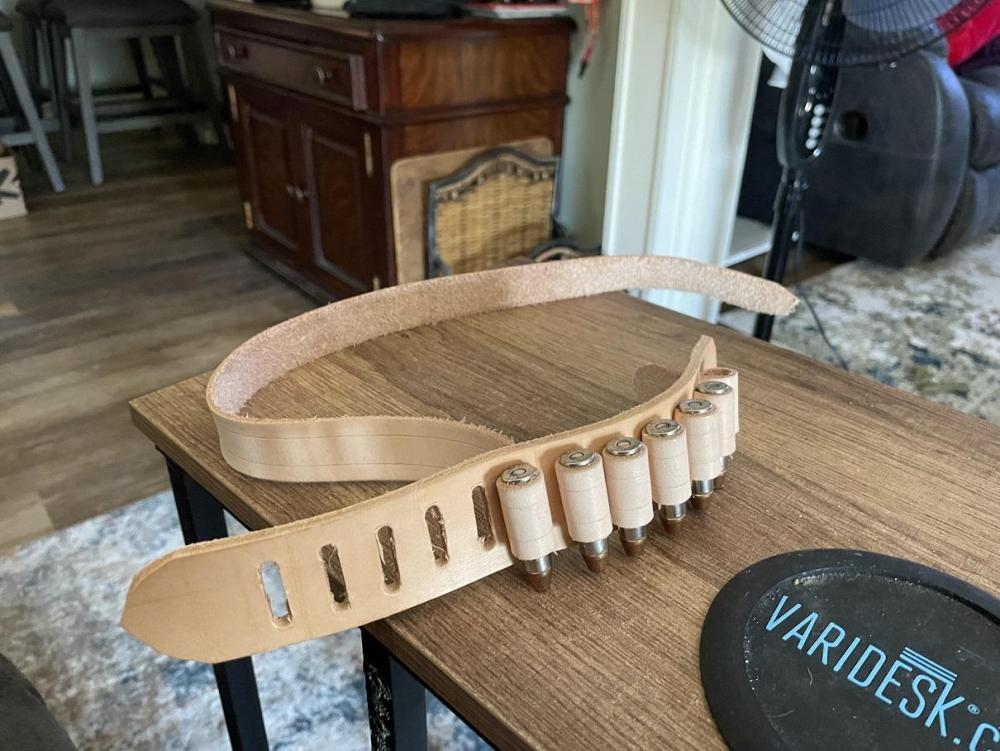
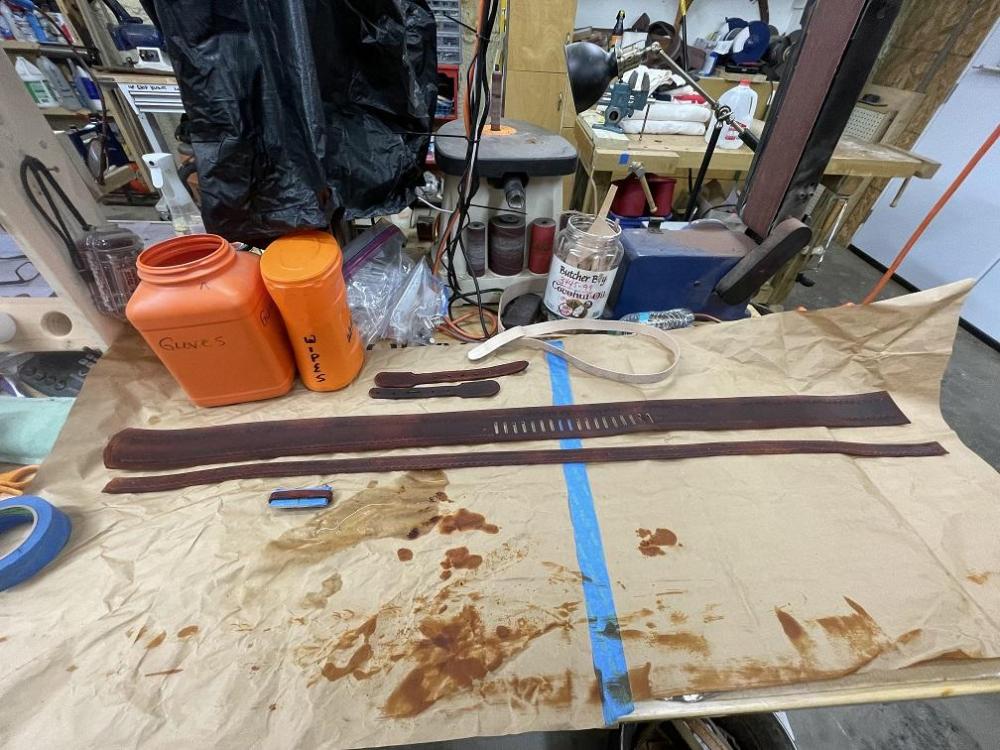
Out this morning after breakfast, and after some heating pad time on the hands. Cold and damp here and Arthur doesn't care for cold and damp. Time to start assembling this thing. First step this morning was prepping the strap that will become cartridge loops. I had already rounded the one end and punched the hole to match the hole in the belt. I cut the opposite end into a somewhat point. I used the skiving knife to thin it to make it easier to feed then dampened the entire thing a bit. I want it to shrink a bit when it dries, to make the loops nice and tight. I attached the finished end with a concho, and got busy. I took my time and insured each loop was tight. In and out, in and out. Eighteen loops. Had about eight inches left. I marked the position of the hole to secure the end on the strap, and punched the mating hole, then cut the rounded end. I even died the raw leather that was exposed by the cut. I have no idea why, the belt will be lined and none of that will be exposed. NO one will ever see it. The results were all I had hoped.

-
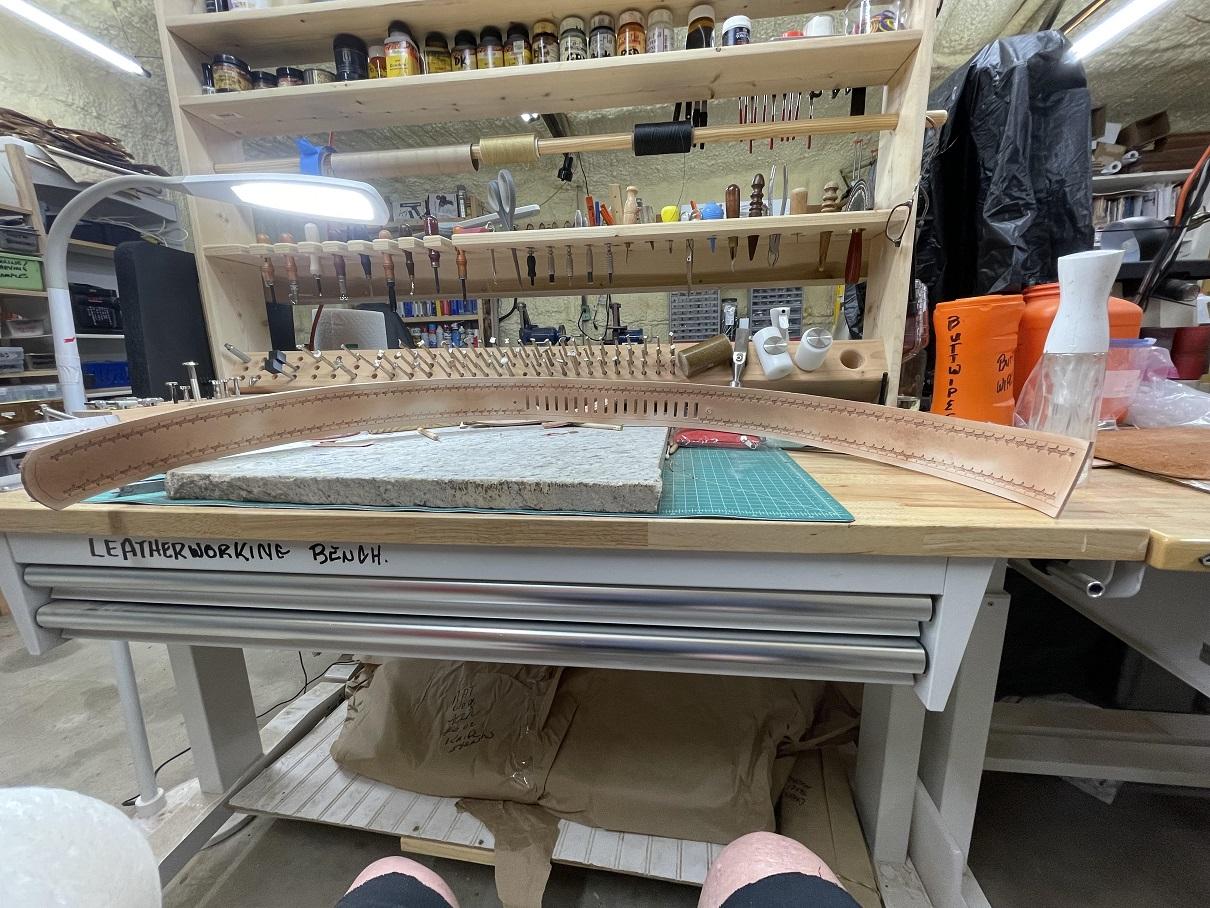
Went back out to the shop this afternoon and burnished all the edges on the pieces for the assembly. In the pic below you can see the difference. Once that was done, I applied a Tan Coat finish. That way the belt can be oiled and reoiled as needed. We are ready to begin assembly. Look at the top edge of the belt in the picture above and it's clear what the burnishing does for you. The right side is sealed and protected, the left side is open to allow the intrusion of moisture, dirt and debris... the leather would swell, crack, and rot.
-
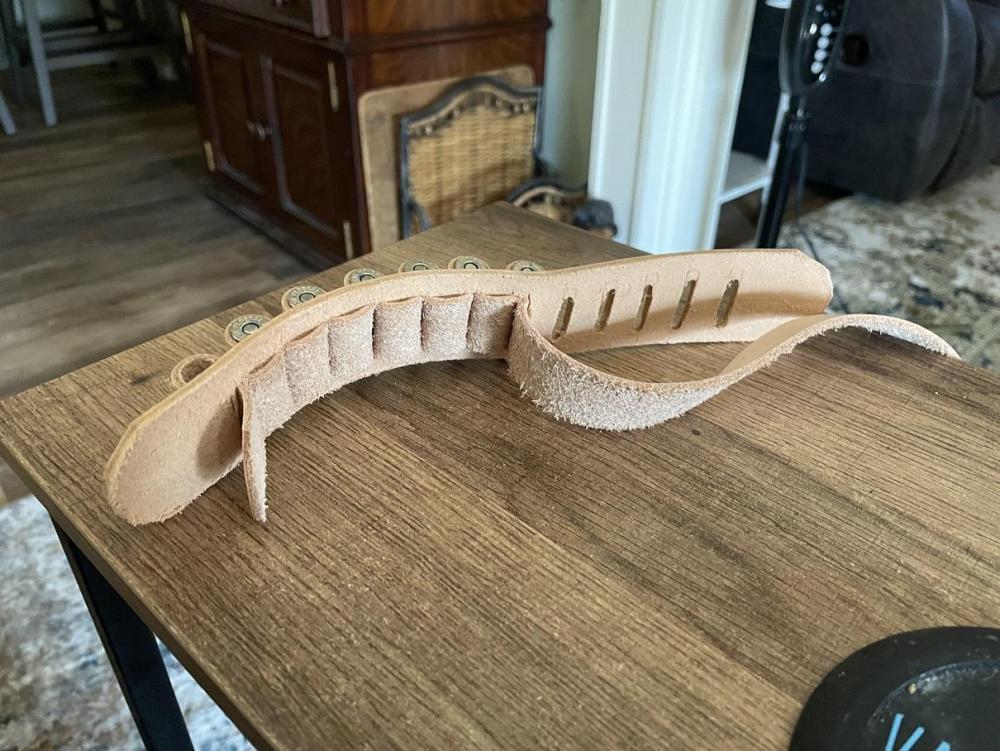
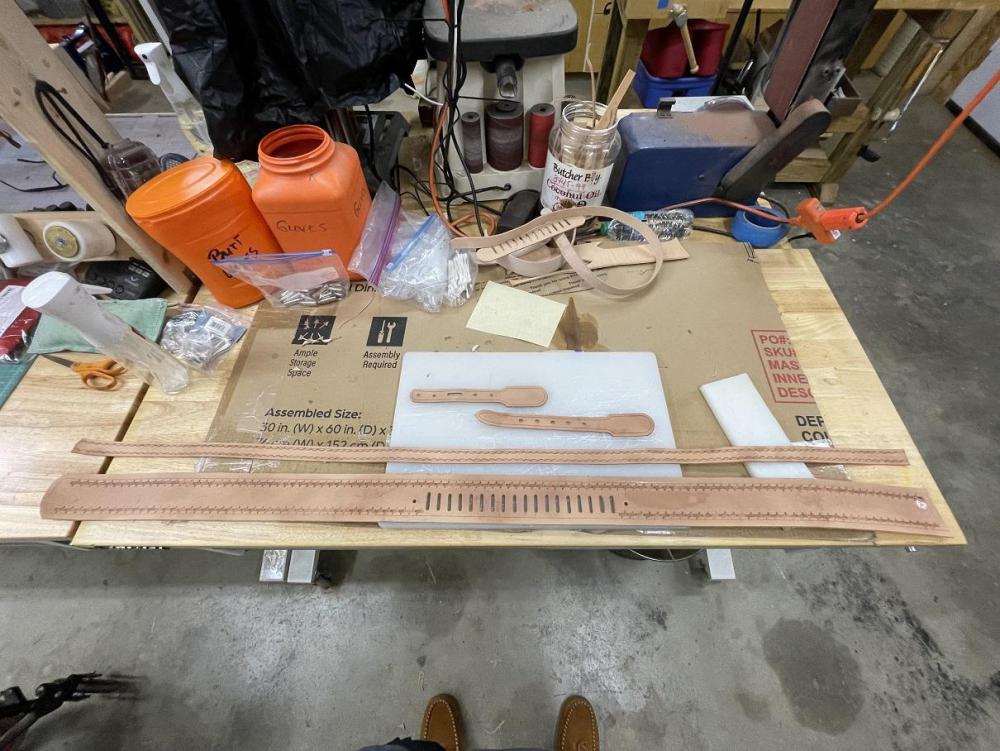
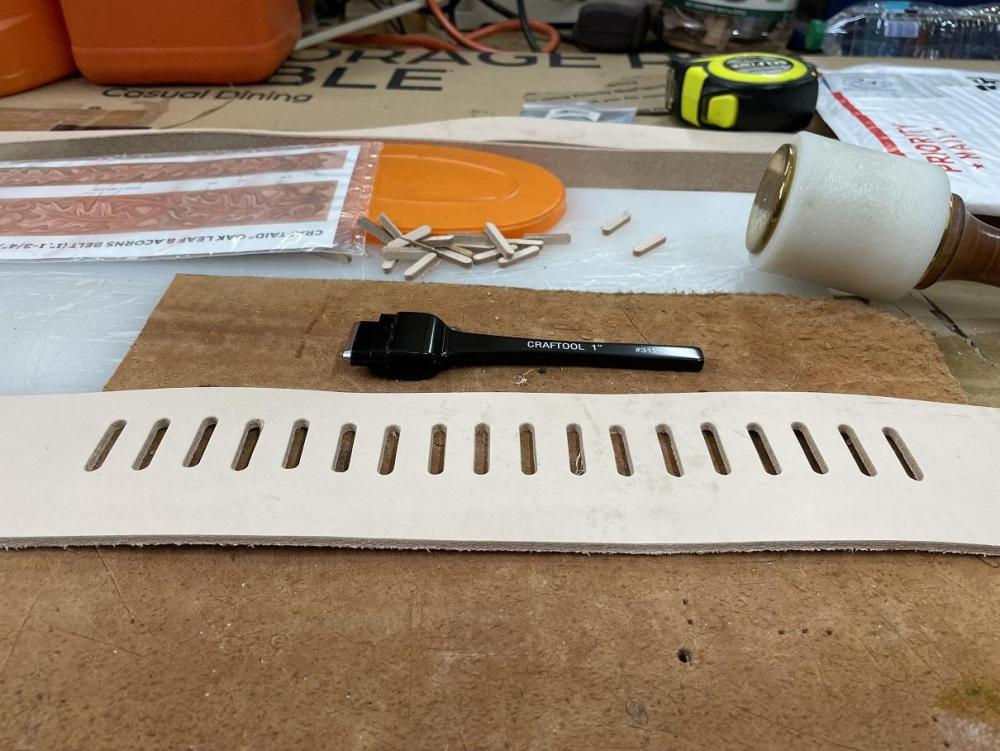
To give everything more time to dry, I took the first attempt at cutting out the slots for the cartridge loops, (failed attempt, they were very rough) and the 1" strap that got cut on my first attempt at the splitter.... in the house to practice forming bullet loops. I never toss stuff, always a use, in this case, practice. In the pic above I have started the loops, you feed the strap UP from the bottom in the slot, around the cartridge, then back down thru the same slot. Over to the next slot, up thru the slot, over the cartridge, and back down thru the slot again. Repeat. The only hard part is, there has to be a tight fit. The picture below shows the back of the belt. This practice panel was to be riveted to the gunbelt after being completed. The current belt has the slots cut directly in the belt and the back of the belt will be lined, you won't see the back of the loops. The picture below shows the completed practice strip, but it isn't really complete. The ends would normally be riveted or secured with Chicago screws and the edges burnished.
-
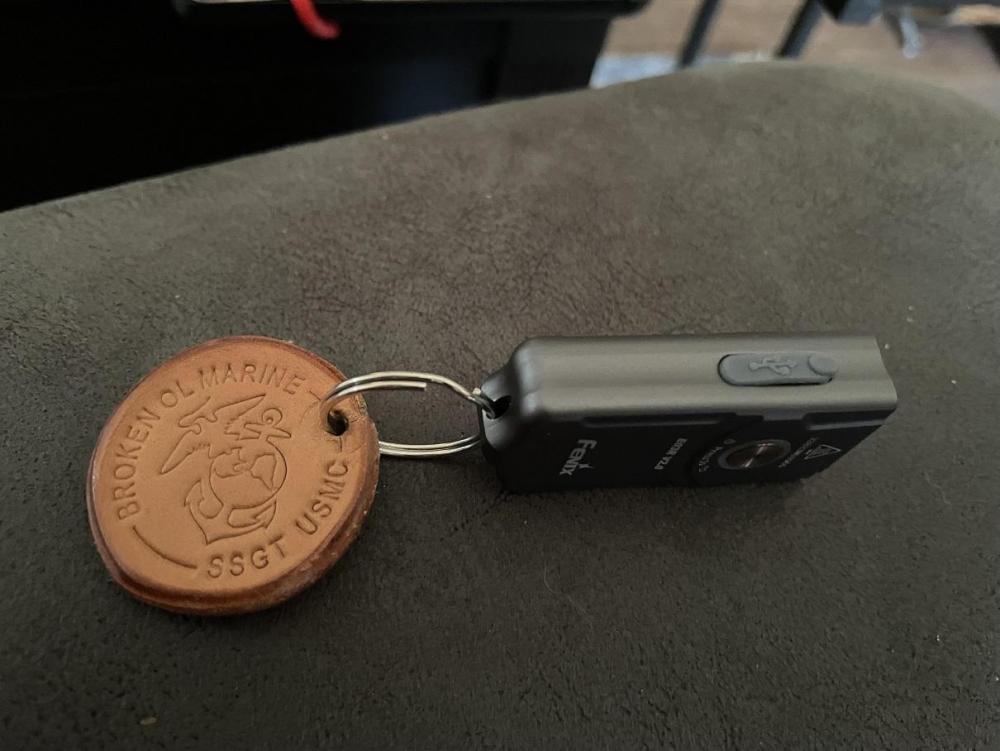
While the loop was drying after being wet formed... I dyed the rest of the pieces. Then, dyed the loop and put it back around the form to finish drying. While that was drying, I made a key fob for a nice little flashlight we got in the mail. A friend sent us a pair for Christmas. They are awesome. Since we got two, I made a fob to identify mine, and I'll make a fob for Tina's.
-
Once they dried, all the color matched and the tooling looked pretty good. I touched up a few light strikes and moved to make that large loop that will go under the buckle for the billet end to tuck into. It won't wrap around the belt, but attach at the edges with rivets.


-
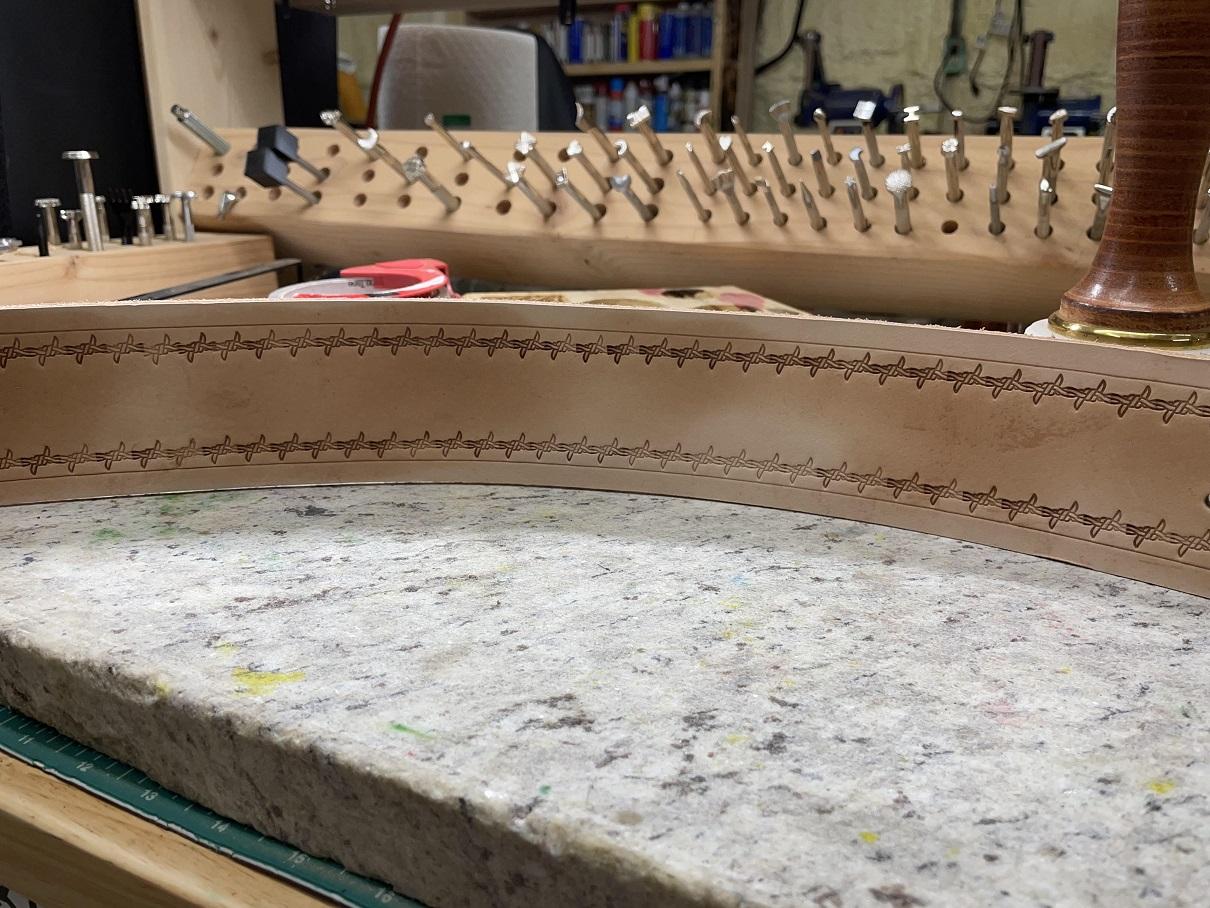
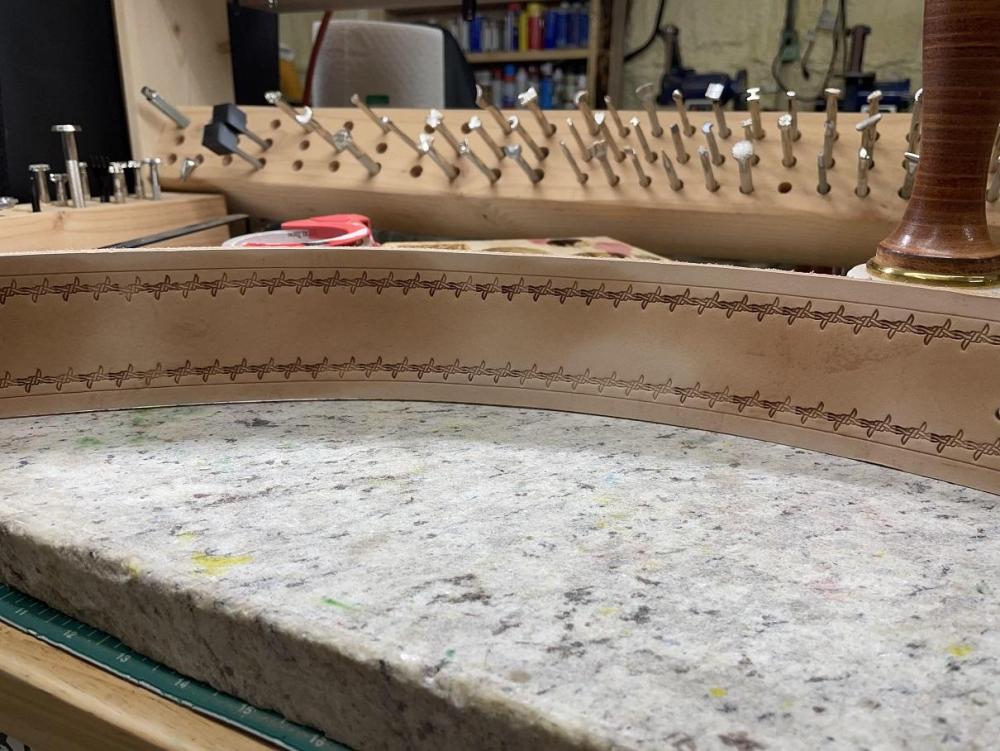
A bit closer look at the barbed wire pattern. The barbed pattern would be too large for the cartridge loop strapping so I went with a veiner stamp. On the belt billets themselves, just left them with the border accenting. bit closer look at the other tooling/accents.
-
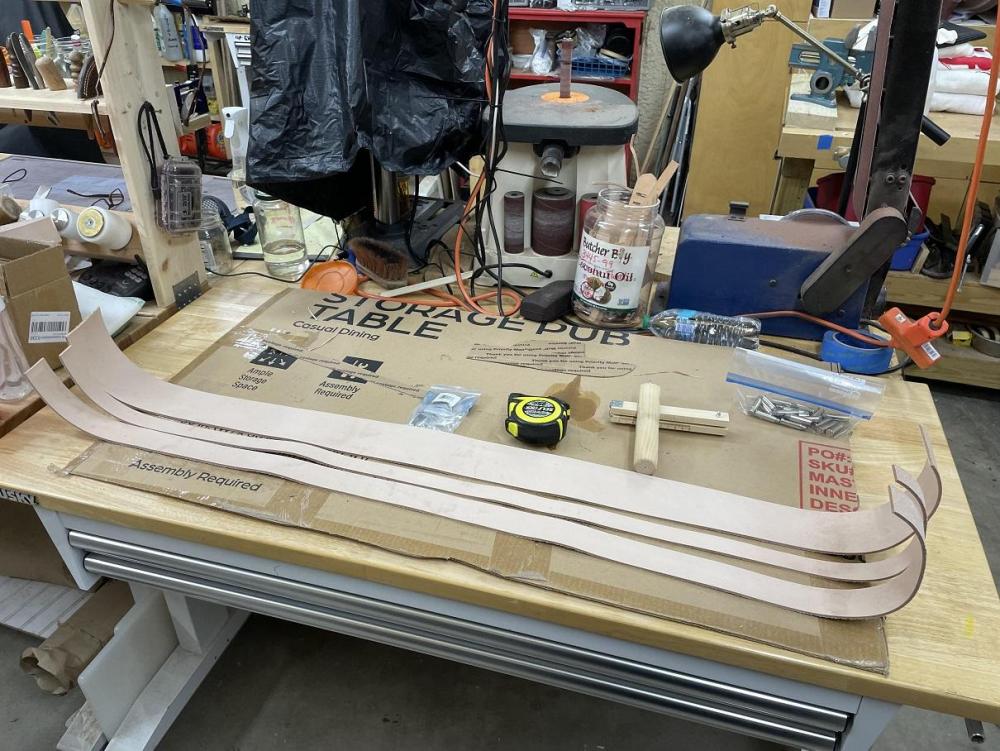
Next task was designing and cutting out the billets. I played with several designs and went back and forth. NO rush here, it's a new project for me. I finally settled on a look I could live with and and cut them out. I added some accent lines along the borders of all the pieces and was done for the day. During my next session, I had to figure out what tooling I was going to do, and which stamps I would use. I used some scrap and played with the designs. Nothing was catching my eye and then I saw the Tandy Barbed Wire set. I played with the four pieces and found the one I liked. I got to work. Each individual wrap with it's two barbs, one up and one down, is ONE stamp. That's a LOT of stamping. I didn't tool above the slots for the Cartridge Loops as they would be hidden or interfered with by the loops anyway.


-
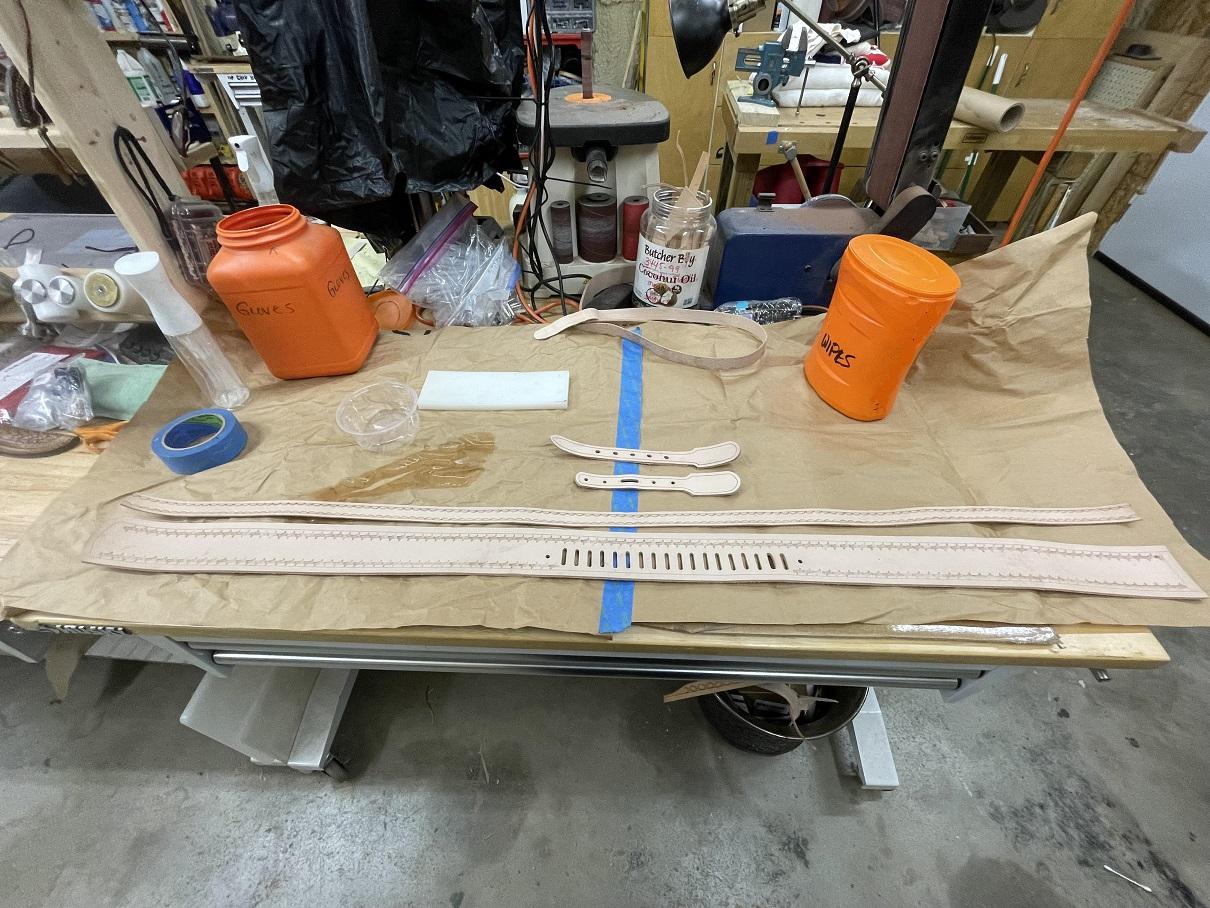
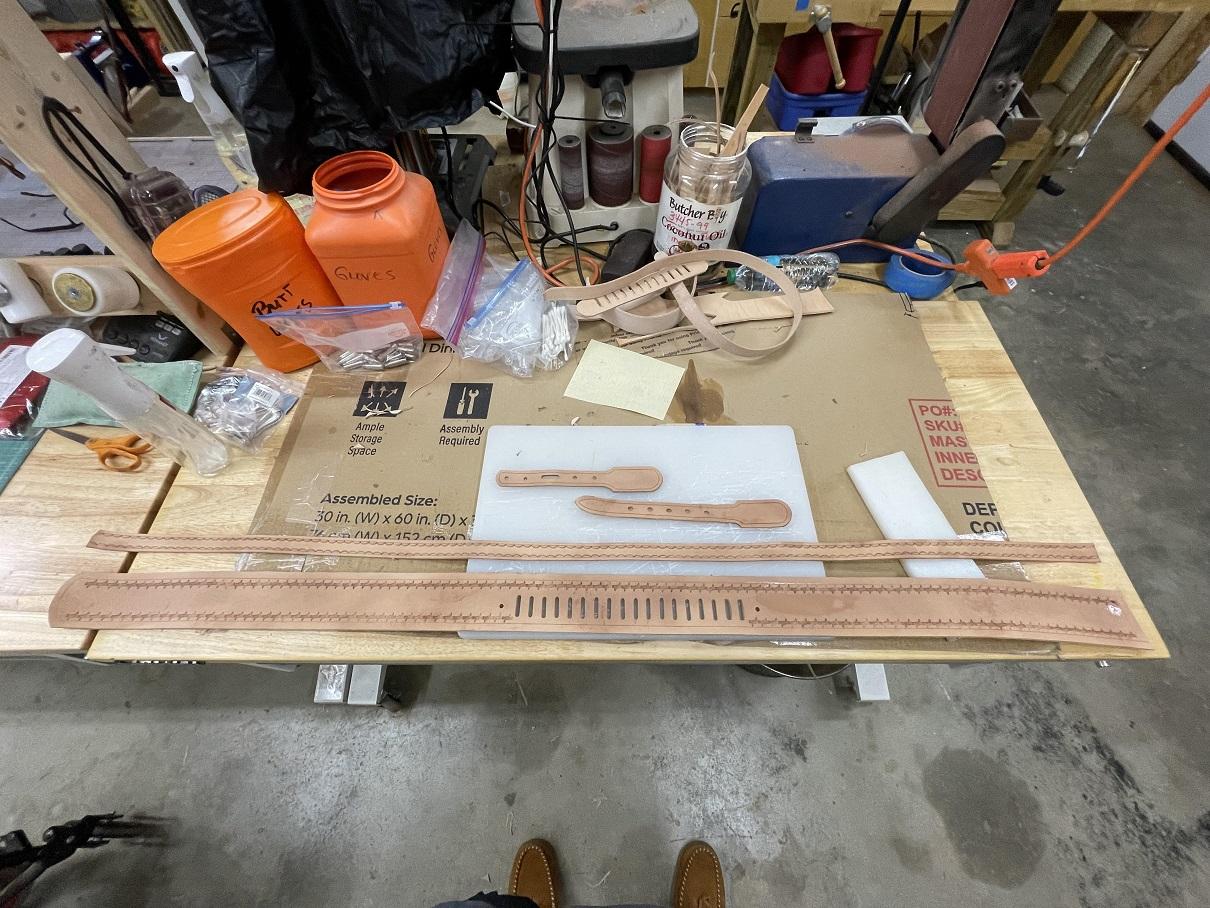
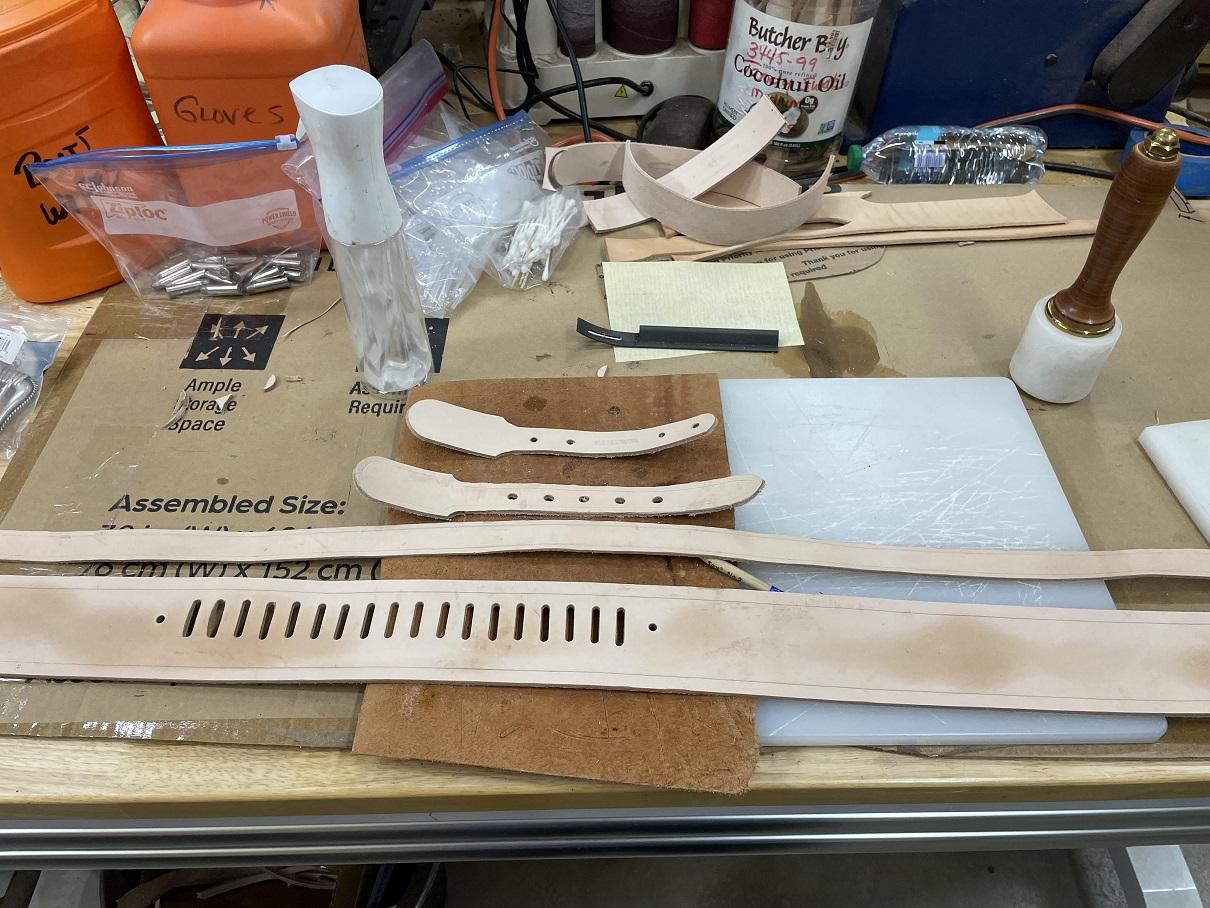
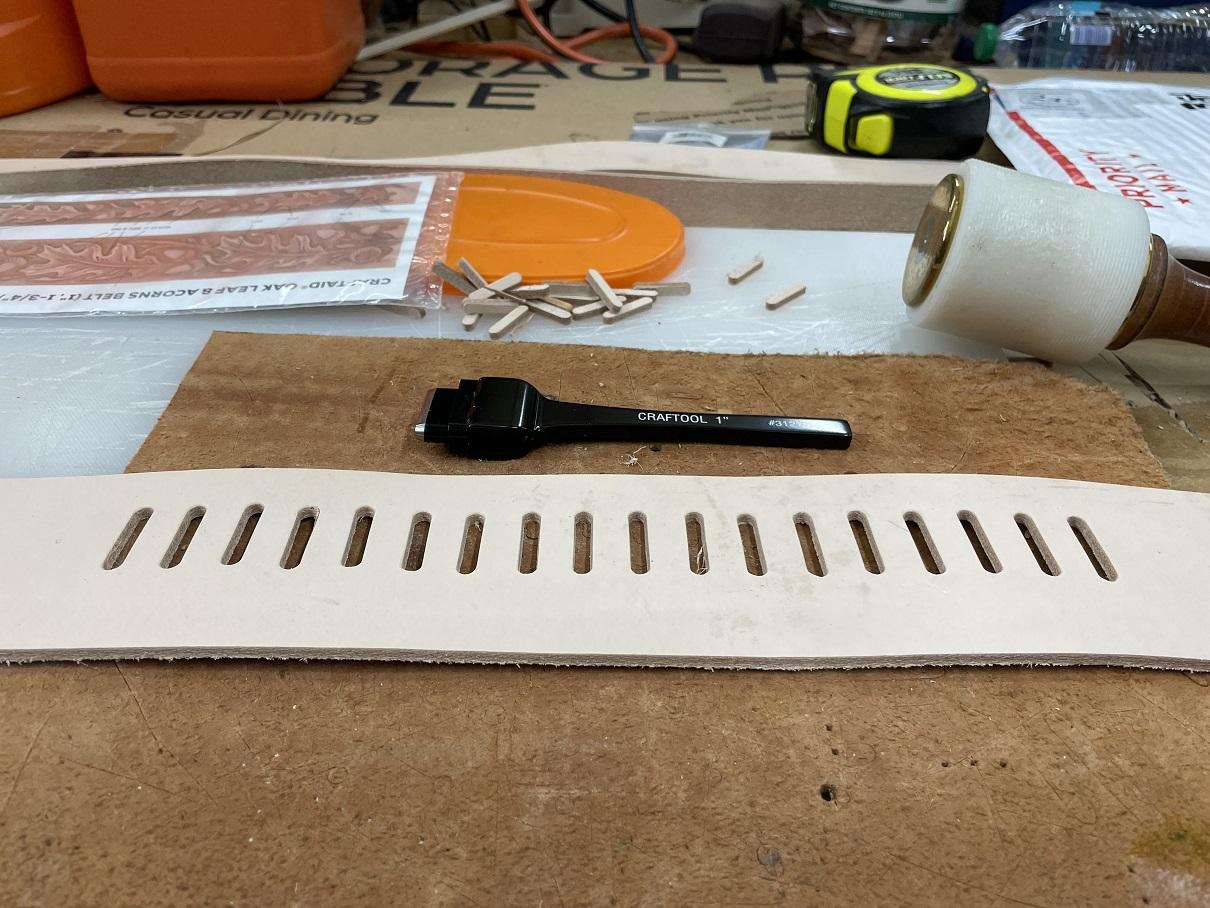
So, I got started a couple days ago on the Gunbelt, and the first step was to get out the straps I needed. I went with 2-3/4" for the Gunbelt to allow for a nice border. 1-1/2" for the billets, stepping down to and inch at the ends when I cut them out to allow for the buckles I chose. I want strength in the attachments. I cut out a 1" strip, overlong, to allow for the bullet loops. I'll cut the large belt loop I'll need from leftovers from the billet stock. I can tell you that this project is going to be designed on the fly, and is a practice project as my first. I won't be going too fancy here, not a LOT of tooling. My first decision before moving forward was caliber of the Single Action that would be holstered. I have more in 38/357 than the other calibers, so I went with that. I pulled the template and laid out the pattern for 18 loops after finding the center of the spine on the belt. NOT the center of the belt. After the layout, I VERY carefully punched them out with the 1" punch and was happy with the outcome. Next up was to thin the 1" strip I cut to use for the bullet loops. It was cut from 8/10 ounce leather and I would need 3/4 ounce. Tina had found me a nice little splitter on TEMU for under $50, a steal if it works. The ones I had been seeing ran in the $200 range to start and climbed rapidly up from there. I had been skiving leather to thin it but good luck skiving 50" evenly. I pulled that strap through and cut it in half partway through. MY error, I didn't hold the strap DOWN to the table and the leather curled UP and snip.... done. I cut another 1" wide strip and started again. This time I held the feed side down on the table so it feed across the infeed roller and the TEMU $50 splitter did an excellent job.

-
I have been planning to do a Gunbelt and holster, with a matching sheath for a couple years now, but waiting to build the skills. The two pants belts were practice, as it were. That, and dozens of You Tube vids. Joe Meling and Road Agent Leather were great confidence builders, as were many others. On one of Road Agent Leather's videos he recommended a book as a great reference for Western Gunleather, but warned that being out of print is was a bit pricey... A BIT? I looked it up on Amazon and the first hit was $90 for used in Very Good Condition. OMG, no. I started looking elsewhere. The prices ran anywhere from $75 plus $10 shipping for a well worn copy, jumping to $127 for a fair condition, into the $200 for good condition and over $400 for NEW in a protective wrapper. I figured I could live without it. Miss T told me to go back and order the $90 copy, reference materials are invaluable. It's due at the end of the month. $100 with shipping. (Packing Iron, Gunleather of the Frontier West - Richard Rattenburg.)
-
Those are beautiful. I love how well made they are. I would however offer one caution. Years ago, there was a politician's shadow (aide) who dressed in fancy suits and high dollar shoes and was forever at the number one man's elbow. He always took heavy teasing for the flip phone, pager, and BlackBerry clipped to his belt. He had a local leathersmith design a shoulder holster system for him, a la James Bond... Phone on one side, BlackBerry on the other. Now, only the pager sat on his belt, like every other exec at the time. But, during a critical event, without thinking, he reaches for his phone. County Officers, State Police, and Swat are on scene... He was NOT shot... He did get to experience something new. If you carry the phone in a phone holster that looks like an actual holster, and are around LE, before reaching for it, you might say something like ... "Just My phone."
-
Looks like my old Safariland duty belt. It screams quality. Excellent work.
-
I had to come back and look at the post again. Impressive work. I like your reply to the pricing issue. I used to make custom woodworking items... Medal and flag boxes for military members, jewelry boxes, or custom bandsaw boxes in unique shapes or designs. I'd hear, "$300, I can get a jewelry box at K-mart for fifteen bucks." The box they are looking at is made of Curly Cherry and Black Walnut, and contains no metal, no screws, nails , or staples. Dovetails and dowels. The trim is handmade. Like you, I told her there was plenty of parking at K-Mart. (The curly cherry board alone was nearly $100.) People don't understand craftsmanship. Congratulations on a piece of artwork.
-
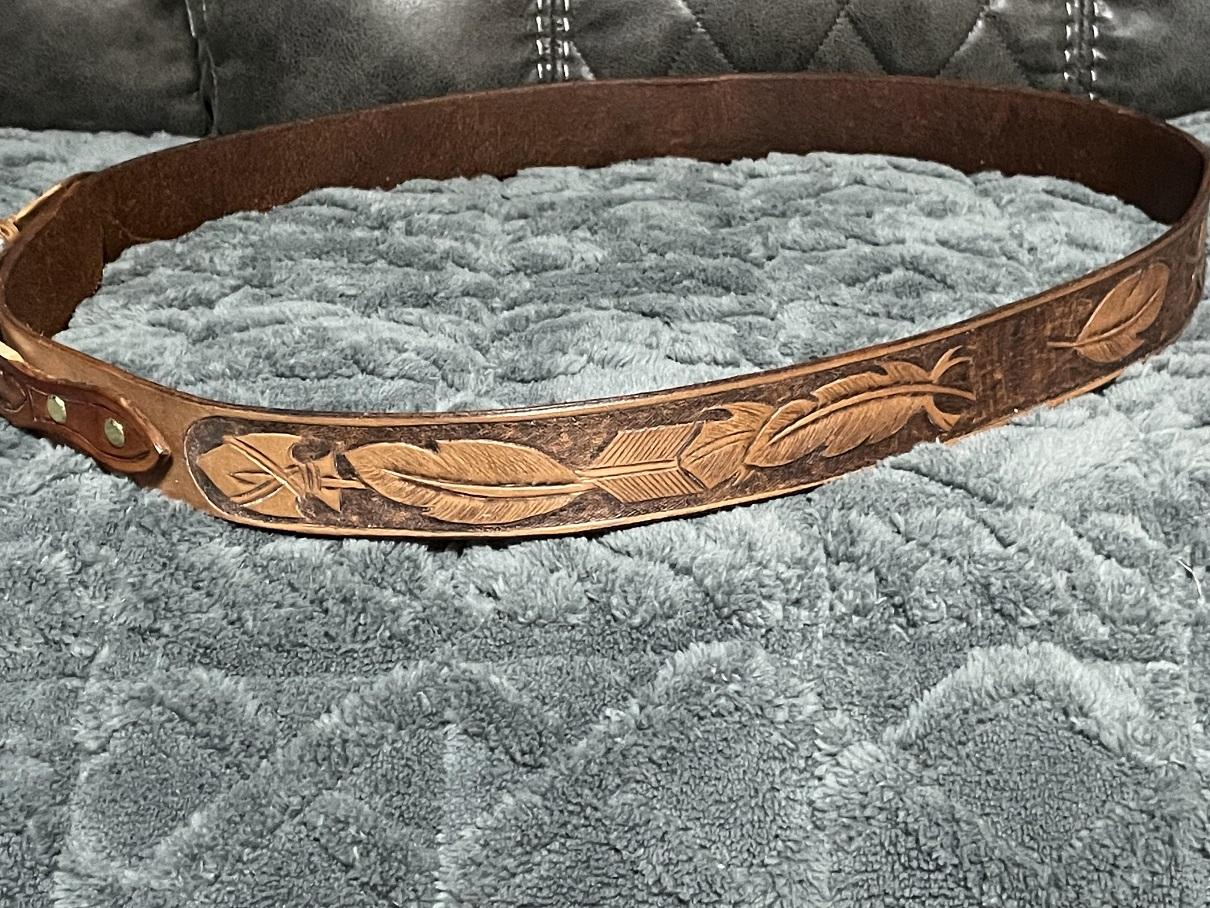
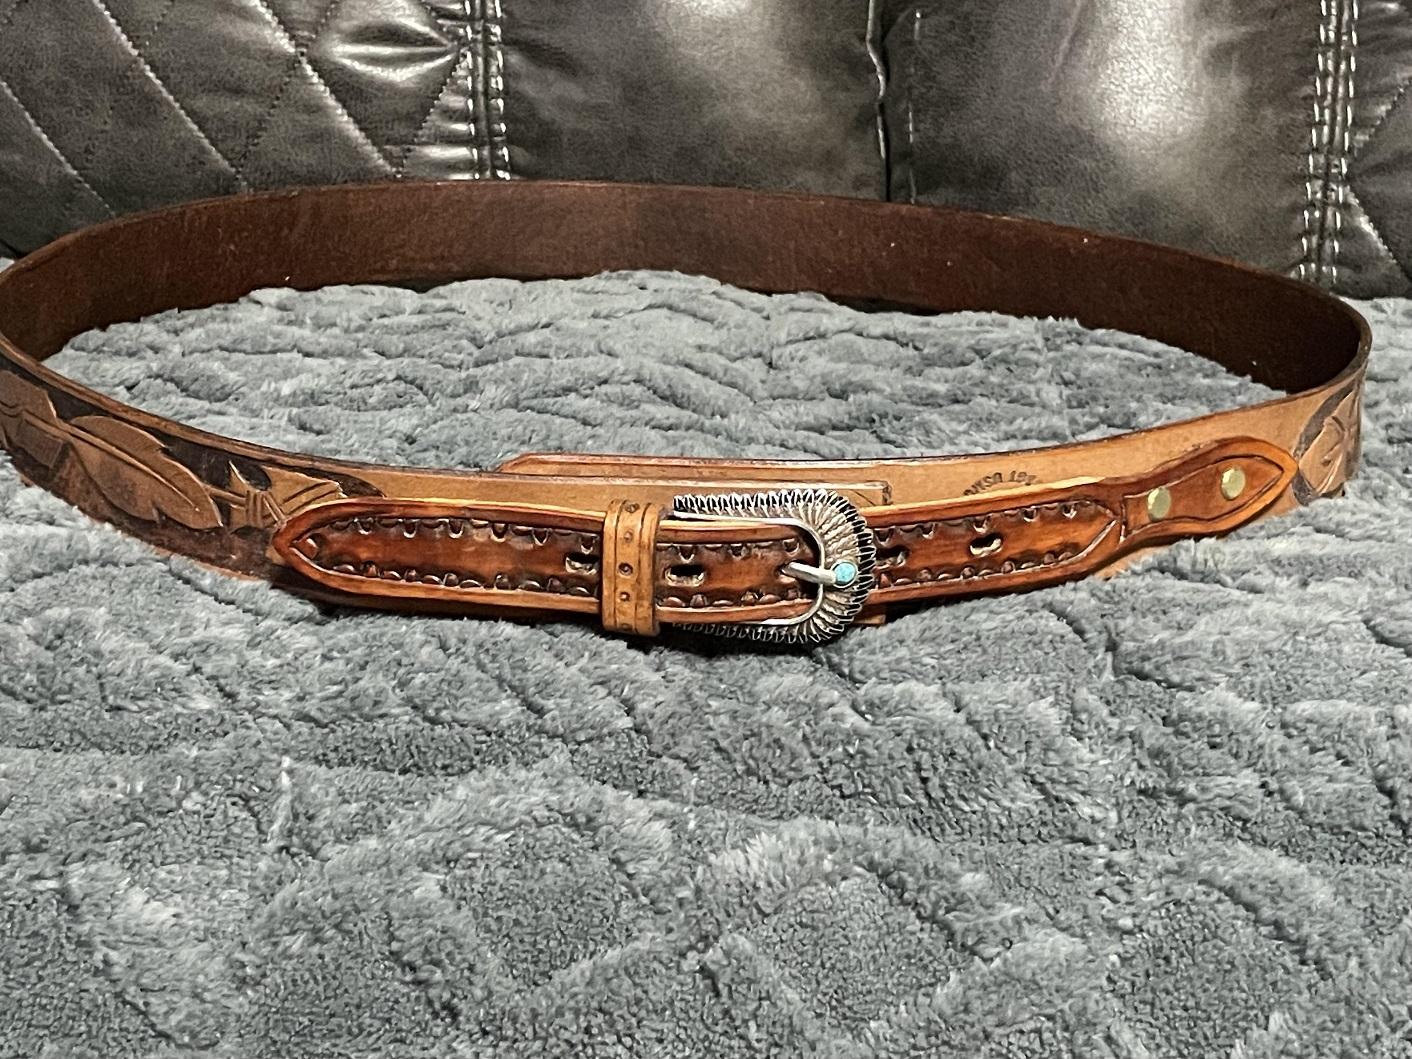
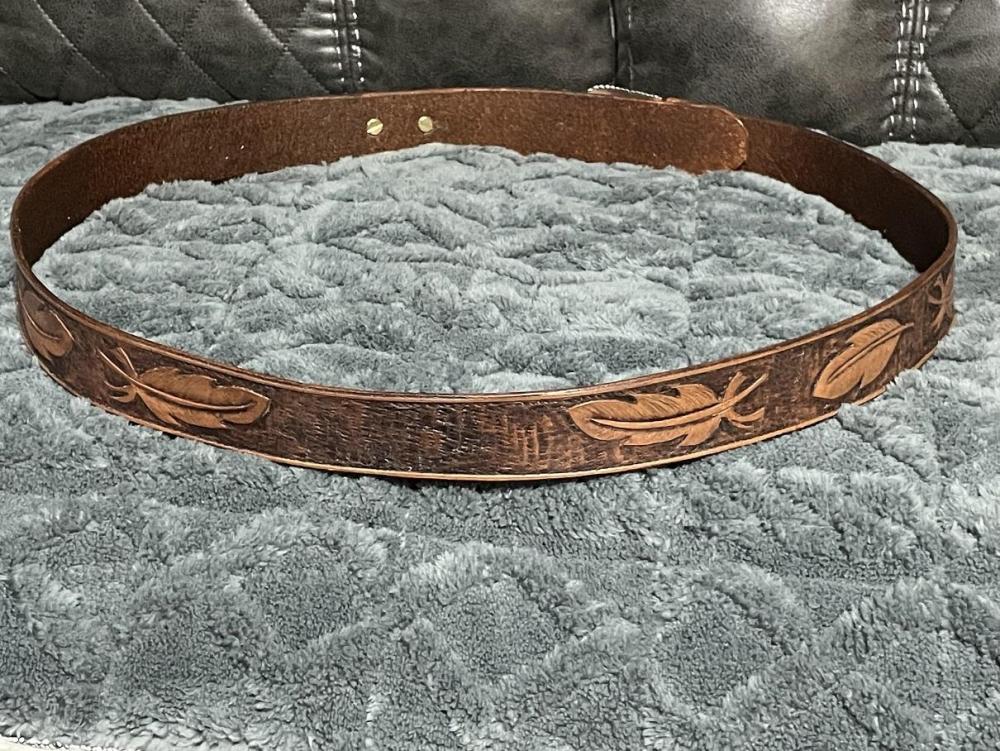
This view of the side shows the Feather and Arrow tooling where the pattern get's it's name. I am very happy with the way this first attempt turned out, and of course I learned a lot. Lot's of room for improvement in my next attempt. I would certainly make the belt slightly wider to allow for a bit more border on both sides. Overall, I'm sure I'll get a lot of use out of the belt, Miss Tina likes it a lot. Next up for me is the Gunbelt the two pants belts were practice for. LOL.

-
I got out to the shop for the last session on this project. I waxed and buffed each component twice and it's looking good, so I put 'er together. A view from the front. You get a good look at the Tandy tooled buckle with Turquoise Accent to compliment Joe Meling's Native Design. This view from the rear let's you see where I took single feather's off the pattern pack and filled the space at the back to balance my layout. I considered a concho in the middle and decided against it. I actually started to tool a buffalo in that open space but it was TERRIBLE, far outside my skill set for that small space.

-
My next project will be a Western Gun belt and making the belt loops for the 38/357 cartridges I mentioned to the wife would be much easier if I had a Splitter (skiver) but they run between $200 and $300 to start. She found one on TEMU for about $50 and it came in today... it actually looks pretty nice. The "Retail" is $189.00 so we'll see how it does once I get it mounted to a bench in the shop and try it. I'll let you know. It's basic, nothing fancy, but will beat a handheld skiver.
-
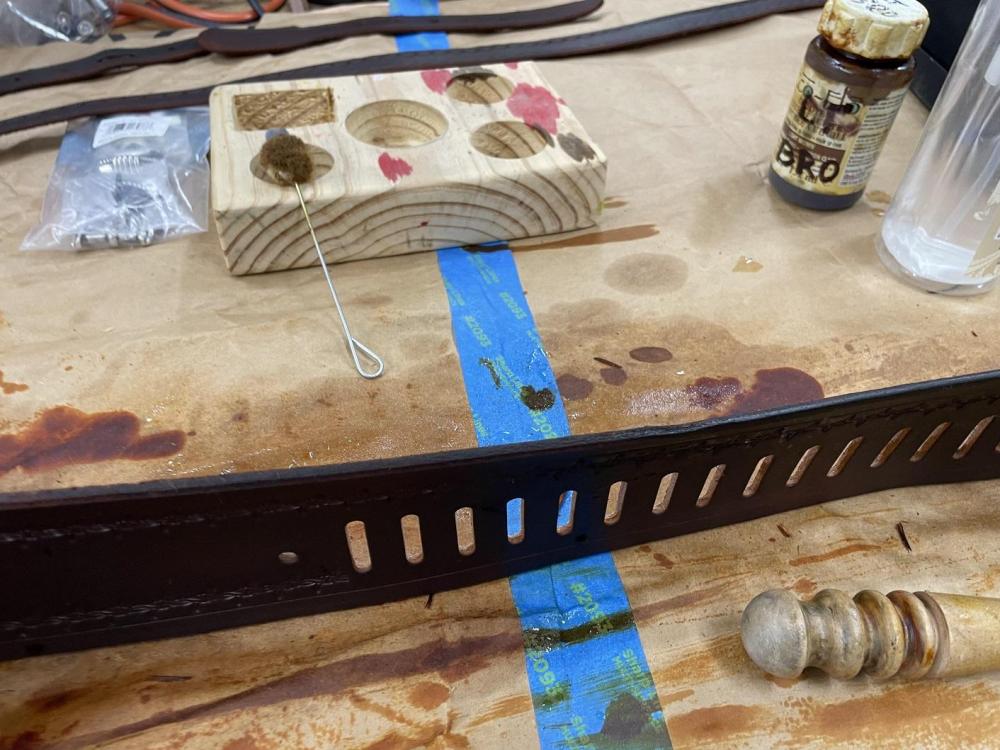
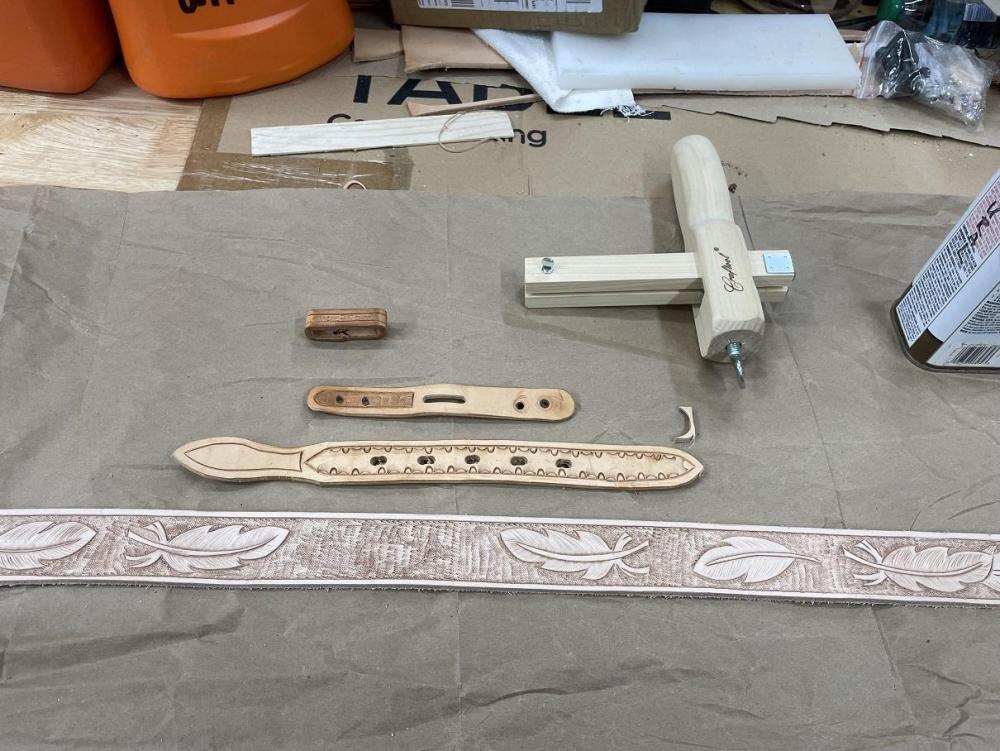
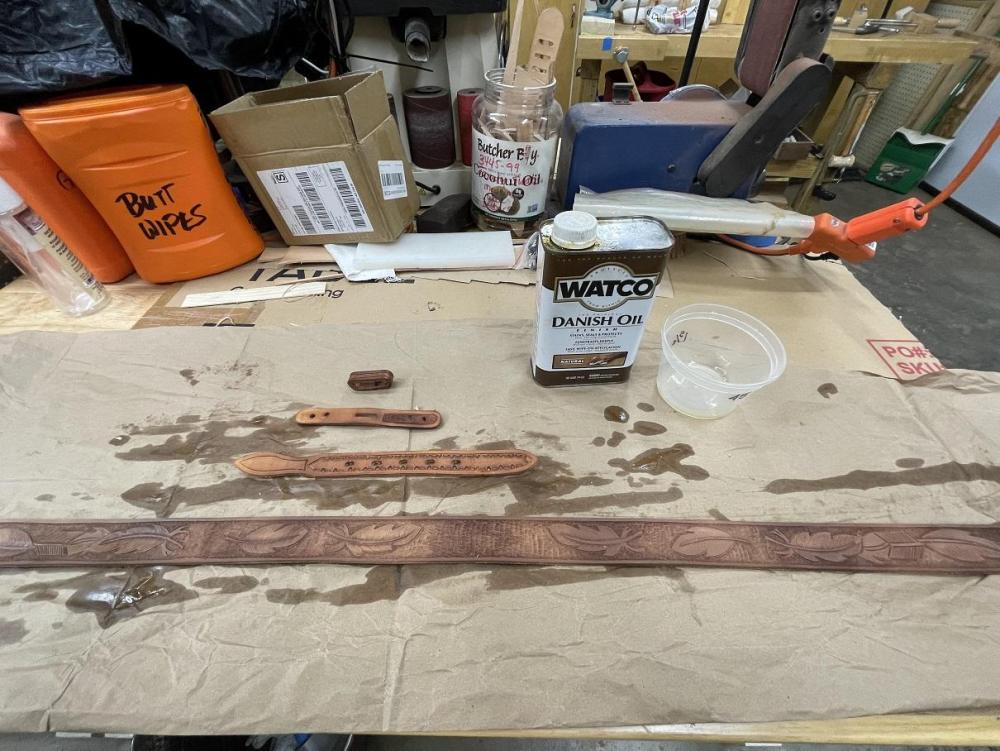
My Tandy order finally arrived so I got out to the shop and got the belt ready to stain. I tooled the billets now that I could measure the buckle placement, and I made a belt loop for the buckle end, but forgot the one for the other end. Duh... (Insert Gibb's slap here.) I then oiled the pieces with Watco Natural Oil and left them to dry overnight. Once that's done I can begin the next steps moving closer to assembly.
-
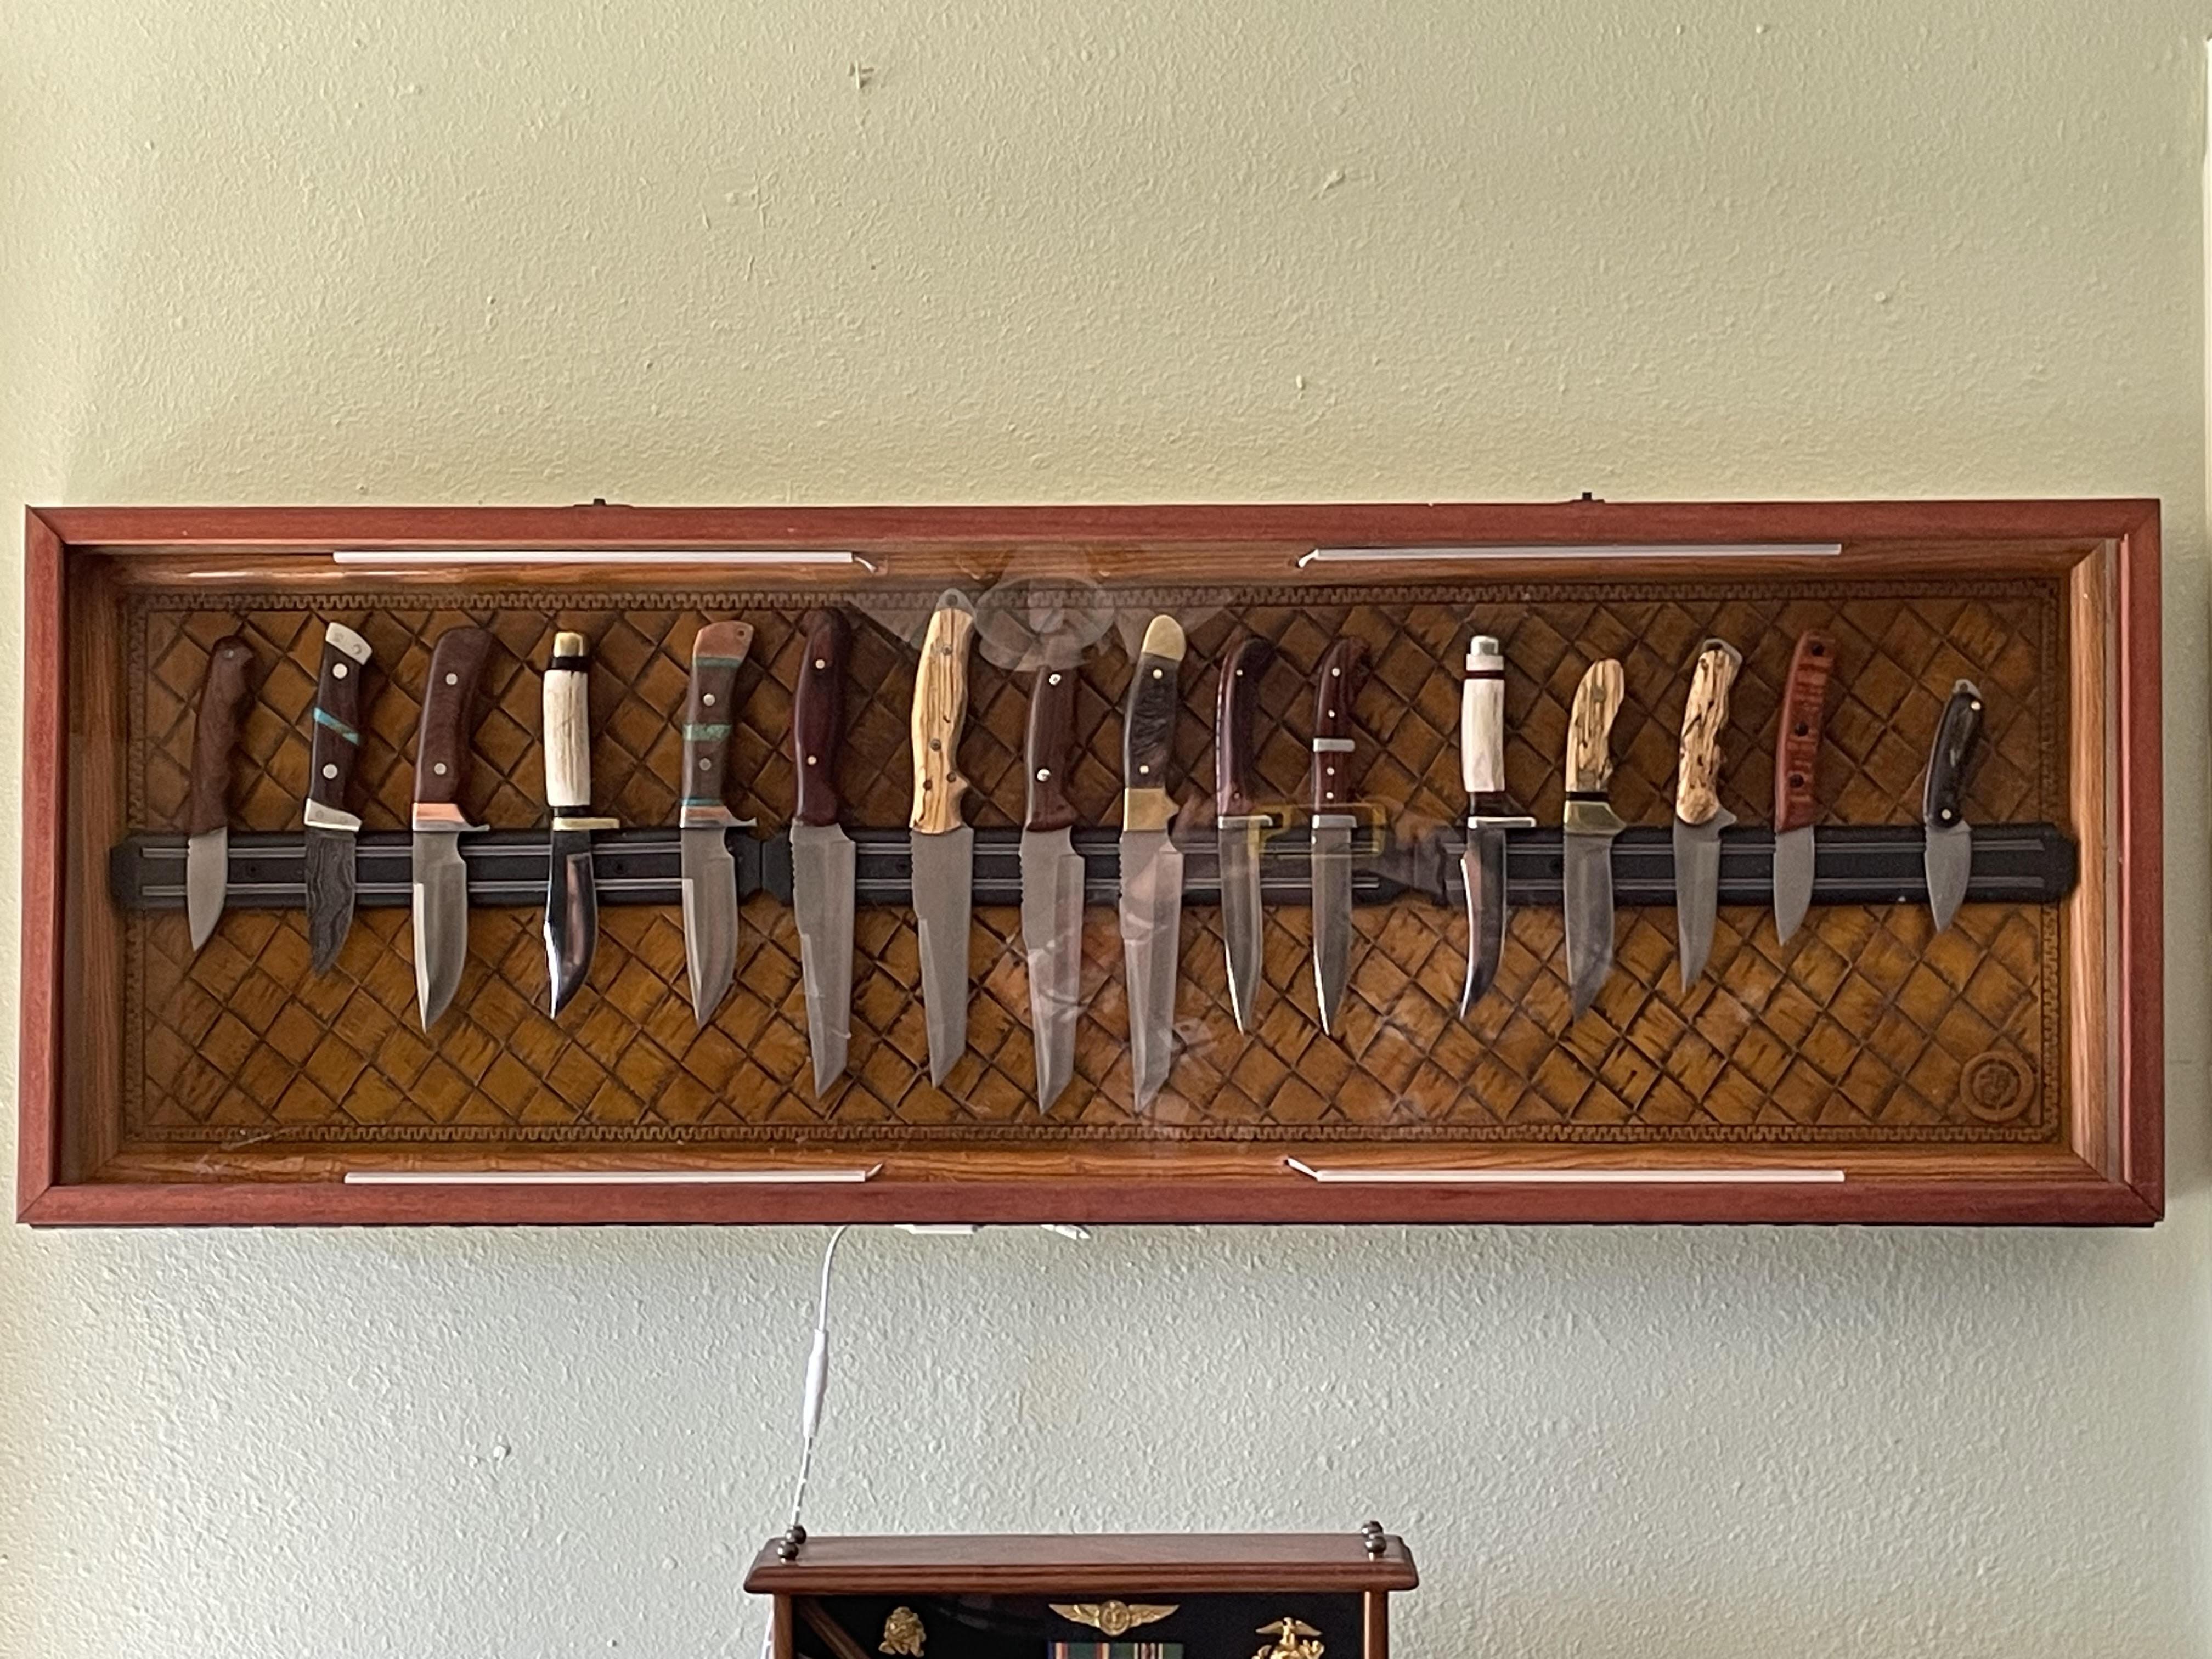
I actually gave Joe credit at the beginning of the post. I am quick to let folks know if something isn't my original work. I am good at designing the knife layouts, or so they tell me... I can't claim the same with leatherwork, yet... I keep hoping.