Brokenolmarine
-
Posts
592 -
Joined
-
Last visited
Content Type
Profiles
Forums
Events
Blogs
Gallery
Store
Everything posted by Brokenolmarine
-
Thats a Joe Meling digital download pack, $10 and worth every penny in my opinion. There is the belt pattern, a couple loose feathers, and a cluster for notebook or bible type covers. His website is 23+ I believe. Or google Joe Meling... So much there.
-
I did sneak out for a half hour or so before we left for a friend's house for Thanksgiving Dinner yesterday, and touch up the spots I had missed on the backgrounding, and then gave a little attention to the areas on the feathers and arrows in the detailing where I thought I needed it. I'll take a couple days off to rest my aching hands and relax and enjoy the holidays, and wait for the Tandy Order. I will enjoy the work when it all comes in and I can get back to this one and start on the Gunbelt.

-
You'll note that at the beginning of this thread I said I blew the pattern for the Oak Leaves and Acorns. BUT, I'm not tossing the belt. I'll still keep the belt blank and tool the pattern on the portion I don't cut up to make the vise pads. I NEED the tooling practice. I can use the cutting in and tooling practice and use the blank to test various dying or painting techniques as well as finishes ... It won't be wasted. Once done I can use it to practice sewing on the Cowboy 3200, it still intimidates me. I want to own that bad boy....
-
When I took this next picture, I thought I was done with the background work, but downloading it I spotted a couple very small areas that would need attention. Ten minutes work, and the backgrounding will actually be complete. The next step will be some dye work, burnishing the edges. I can't progress much further until I get the buckles I ordered from Tandy, and some tools as well. Big Black Friday Sale in progress. Mid Week predicted for delivery. Since Tomorrow is Thanksgiving, I guess other than knocking out the backgrounding, I'll take the day off... rest my broken old man hands. The steel plate in the left hates backgrounding. The sale at Tandy is a good one, so I order two each of the two buckles I chose. Two for pants belts, and two for gun belts. Mainly because I discovered that two buckles or four buckles, the shipping remained the same. LOL. and yes... once that last section dries from my last tooling session, the color will be even.

-
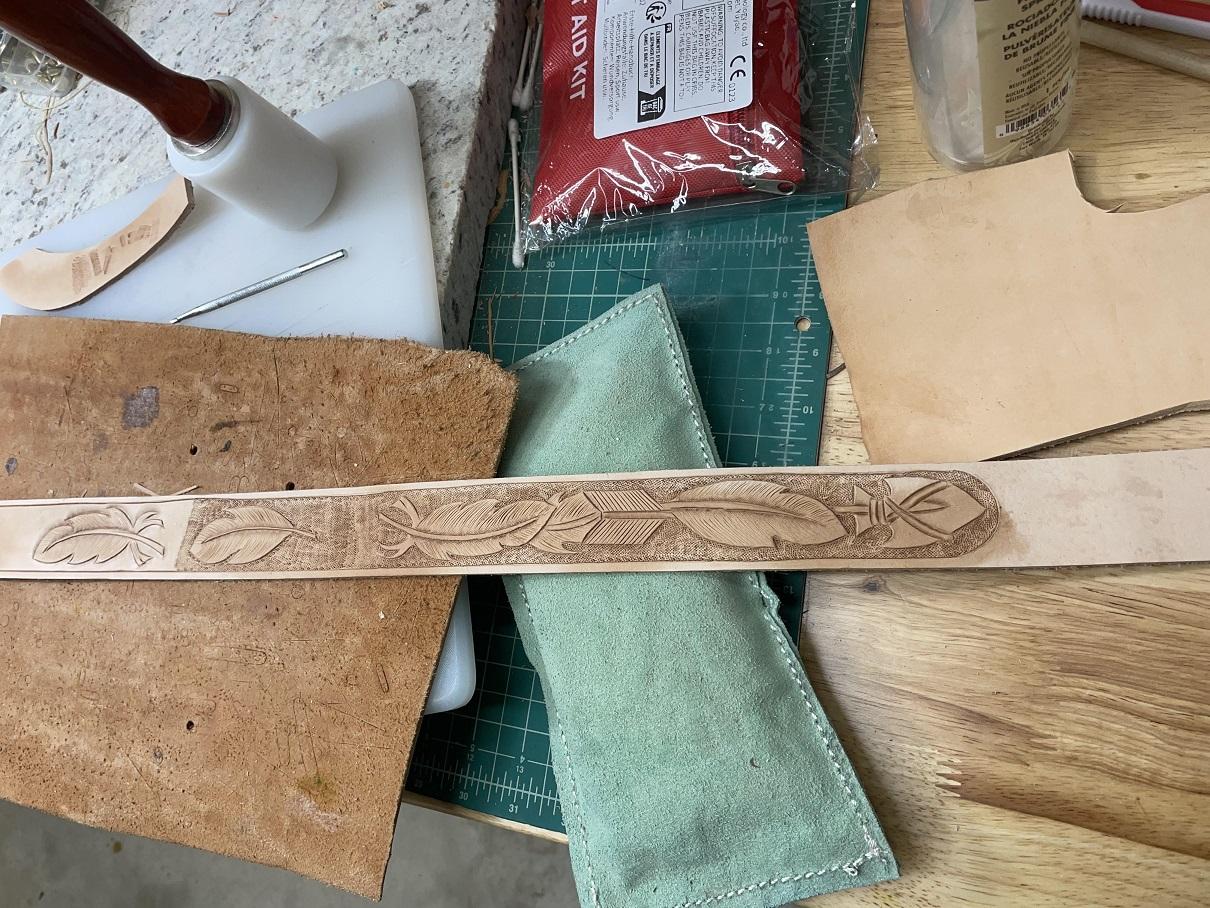
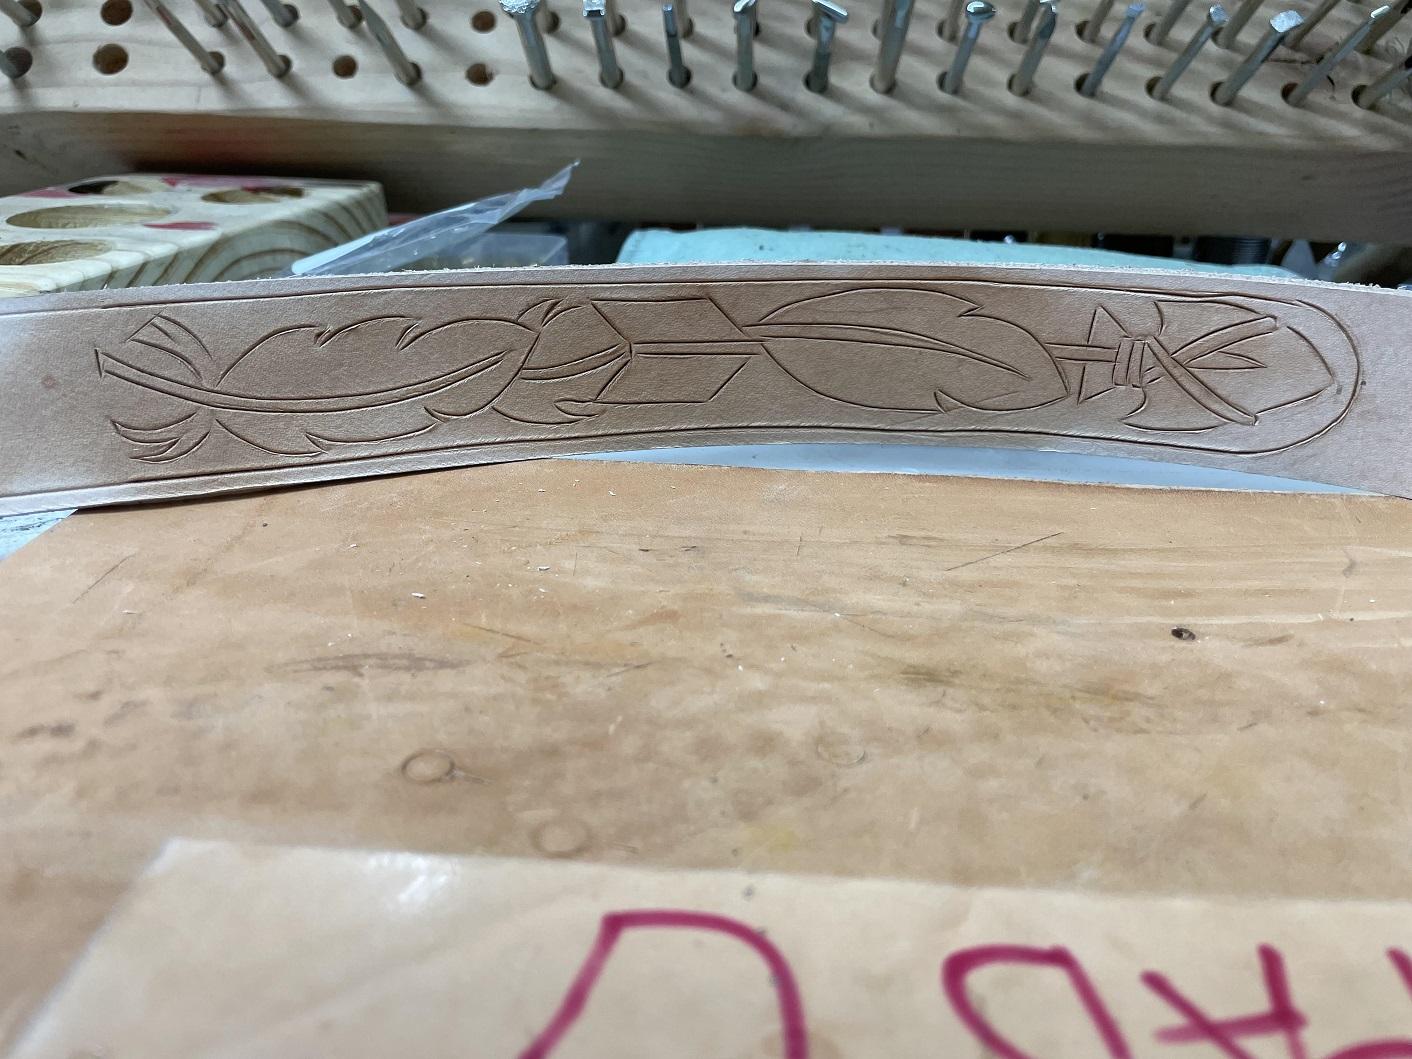
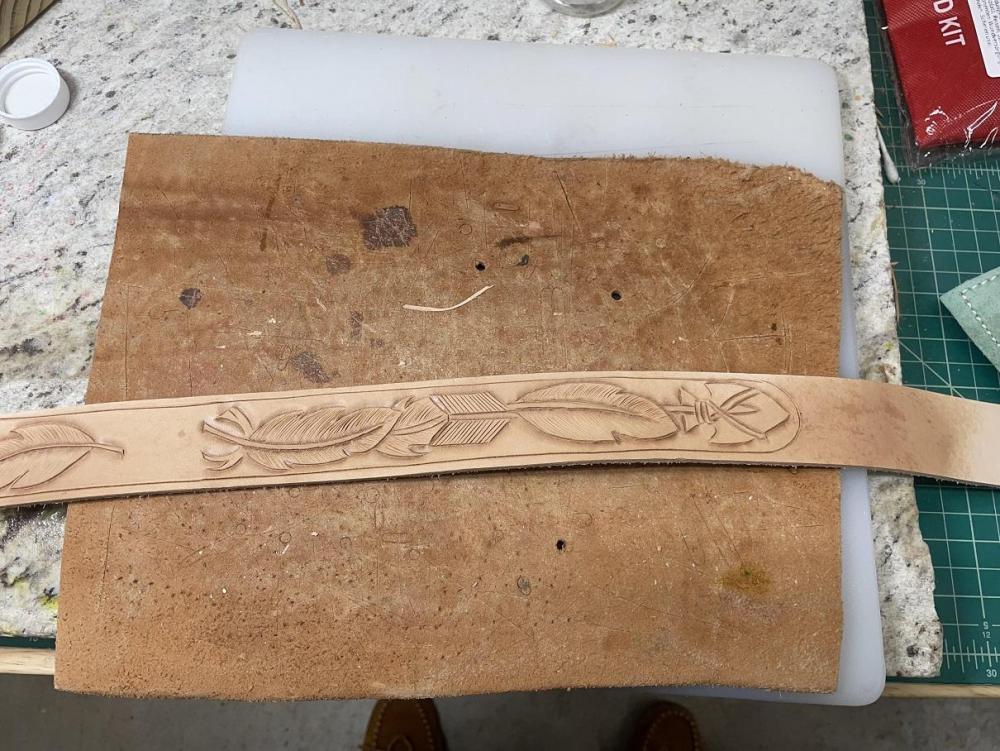
This kind of work is hard on gimpy ol Marines with arthritis, so it goes in stages. I work it in hour to ninety minute blocks, and sections of the belt. Too much time and I'll be done for days rather than sections. I'll be a lobster with claws the next day. I worked each section of the belt with the beveling until I had it all done, then switched to detailing the feathers and arrows. Starting to look like something.... I worked this in sections just like the last, until the detailing was completed. NOW comes the part that is really painful... the background shading. I love the tool I use, for the effect I get, but I use the fine checkered shader, and it's small. I haven't been able to locate a larger one, so it takes TIME. Short sections, but it gets into the smallest areas with care. After another session, you can see we are making more progress....

-
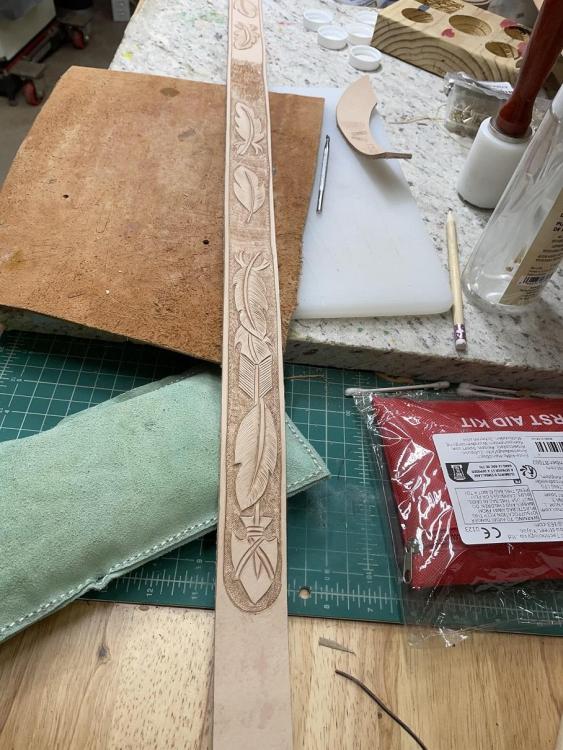
This is the Second download I purchased digitally from Joe, and it's a cool one. It has a belt pattern, plus several other feather related patterns. I transferred them using the backlit screen and then to the leather after determining the window for the pattern. She will be a beautiful belt unless I manage to slip up again. With the pattern transferred and the swivel knife sharpened, time to cut in the outline. Then we bevel to bring out the pattern even more...


-
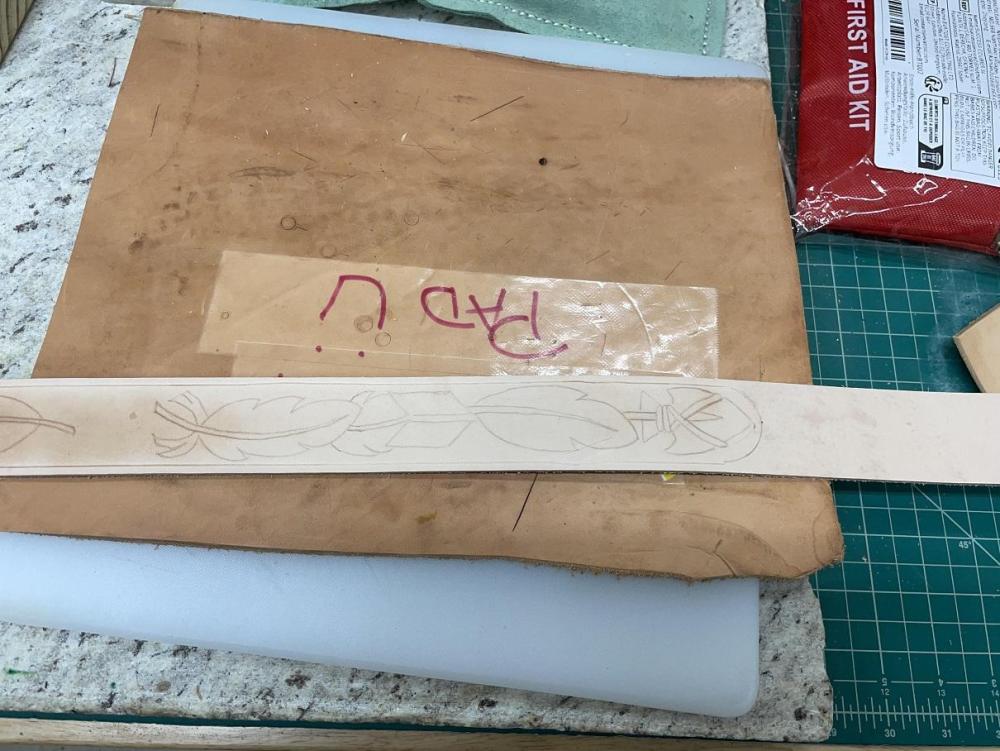
I started another Oak Leaves and Acorns belt using that template I bought as an electronic download from Joe Meling. I love his stuff and that nearly hour long tutorial I watched a LOT taught me a lot and got me excited. I used my backlit drafting board to trace the pattern to the tracing paper and was very careful to transfer that pattern several times, sliding it left as I moved down the length of the belt strapping, 1-1/2" wide, since it would be a second pants belt. Slow and steady, line for line, CAREFUL to follow each line. Am I good or what? Ah... Actually, NO. While tracing each and every line so carefully, I had forgotten at ONE point, somewhere along the way, to WATCH the reference line at the top of the pattern and the Template I made so carefully somehow slipped a bit. The pattern leaves a beautiful 1/4" border down both sides with the leaves at times peeking over the edge of the border enhancing the 3D feel of the pattern. When it slips, the pattern is nearly off the belt, creeping into the future line of stitching. I had spent about ninety minutes creating a very long practice panel, part of which I'll use to make a leather pair of sewn pads to fit my bench vise I bought to use in my knife making. Unroll the 8/9 ounce leather and cut another LONG (fatboy) 1-1/2 inch strap of leather to start the new belt. Don't feel the Oak leaves and acorns anymore.... now it's Feathers and Arrows to honor my Grandfather.
-
I'm guessing two threads, skipped stitched. Cool idea.
-

TandyPro Strap Cutter modifications
Brokenolmarine replied to DieselTech's topic in Leather Machinery
Congrats... I don't have the machine, but love to watch a mind at work. I sometimes do the same. I think, "You know, this is nice, but if you did this, it would be a lot better." In the past, the wife and I both have shared our successful ideas on line,, then with the original manufacturer. On several occasions, the various manufactures have sought more info and/or incorporated the ideas / upgrades. -
I have a Cobra 3200. I learned to sew YEARS ago from my mother when I was a pre-teen and it served me well over the years, but it was on a VERY basic singer straight stitch machine from sears. Forward/Reverse, zig/zag. The kind you sewed hems with and repaired tears. She sewed dresses for my little sister from those patterns from the five and dime. Luckily my wife is VERY talented and taught me a lot more when I got the machine. She sometimes uses it to repair harnesses and bridles for friends. She sewed a custom designed lifting harness for a friend to use in his hay business to weigh round bales to insure they were the correct weight for the farmers. 1100 to 1200 pounds. They made the harness from Jerk straps you use to pull cars out of the ditch.
-
I bought the templates for that pattern and will probably use them soon. I have a machine to sew those. I hand stitch things I'm not confident I can use the machine on, which is about 2/3 of the things I'm making right now. I need to sit at the machine and sew scraps to get better at it. BTW, that belt looks awesome.
-
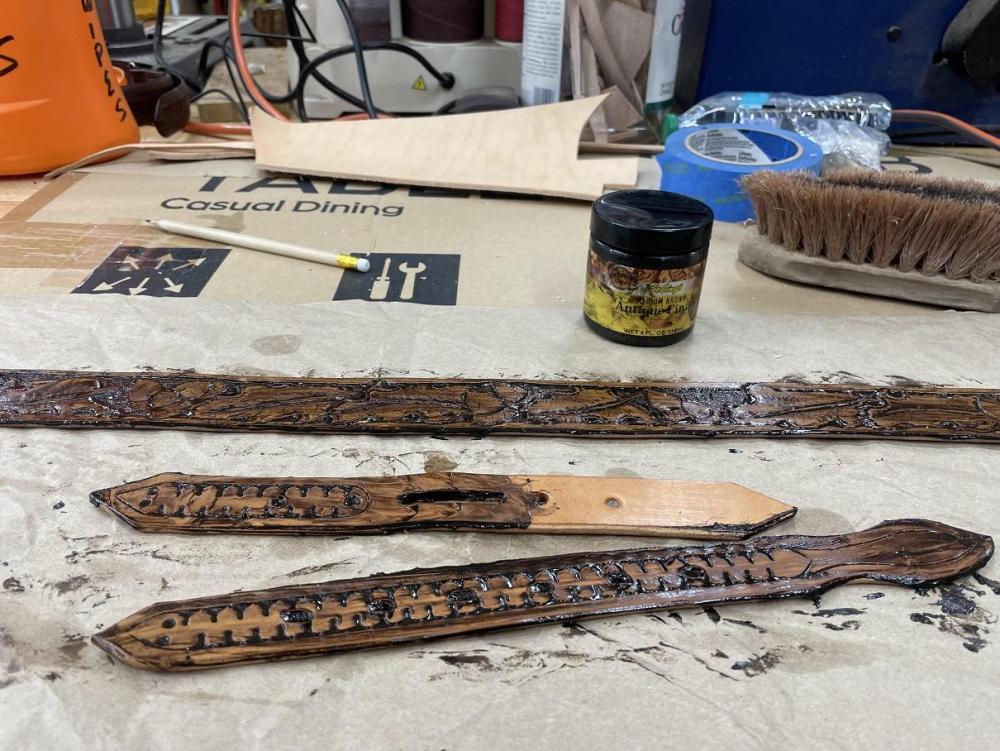
Placed the order for the finish I need from Tandy, as well as two new bevels for the edges of the next belt... and the new tub of Antiquing. Almost out of medium brown. Once the Resolene comes in I can put the finish on and the the coats of wax.
-
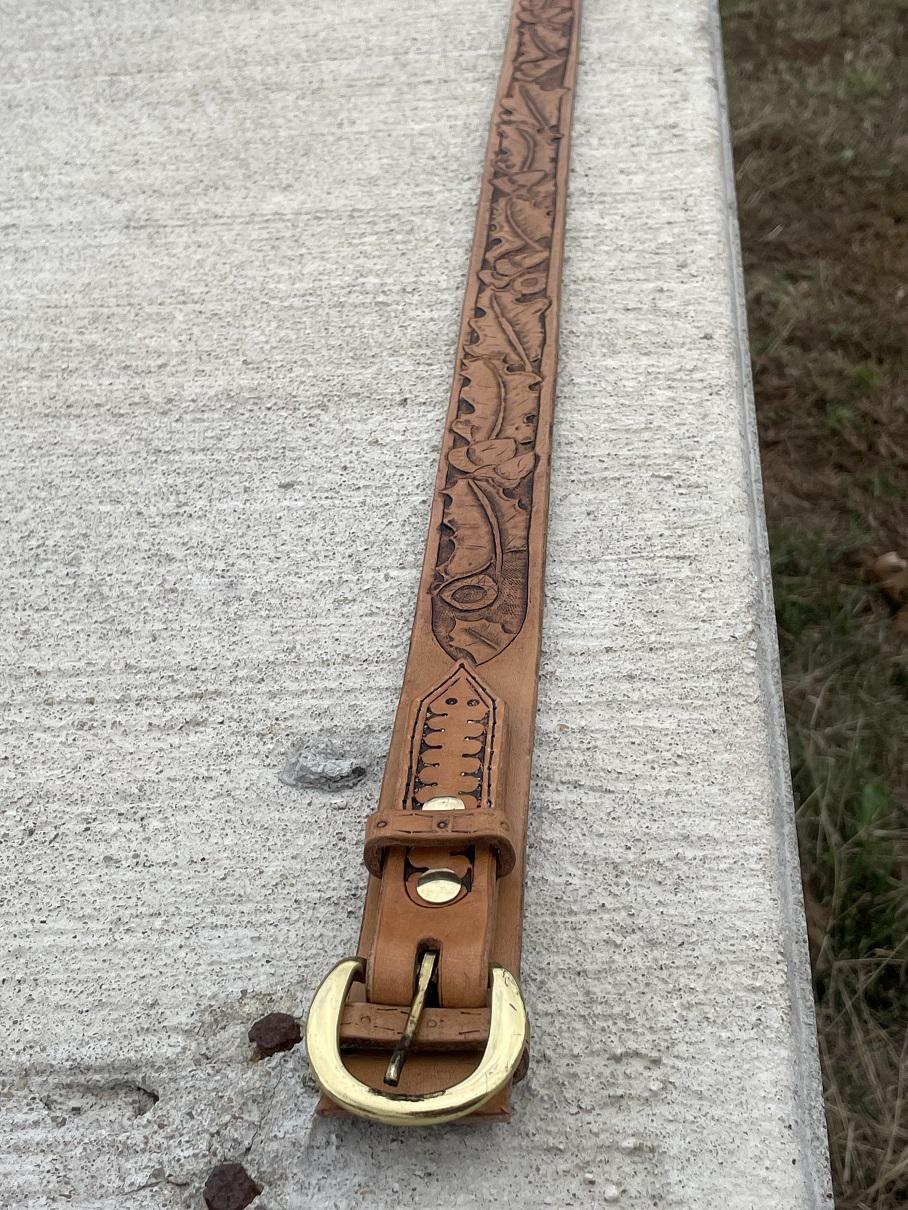
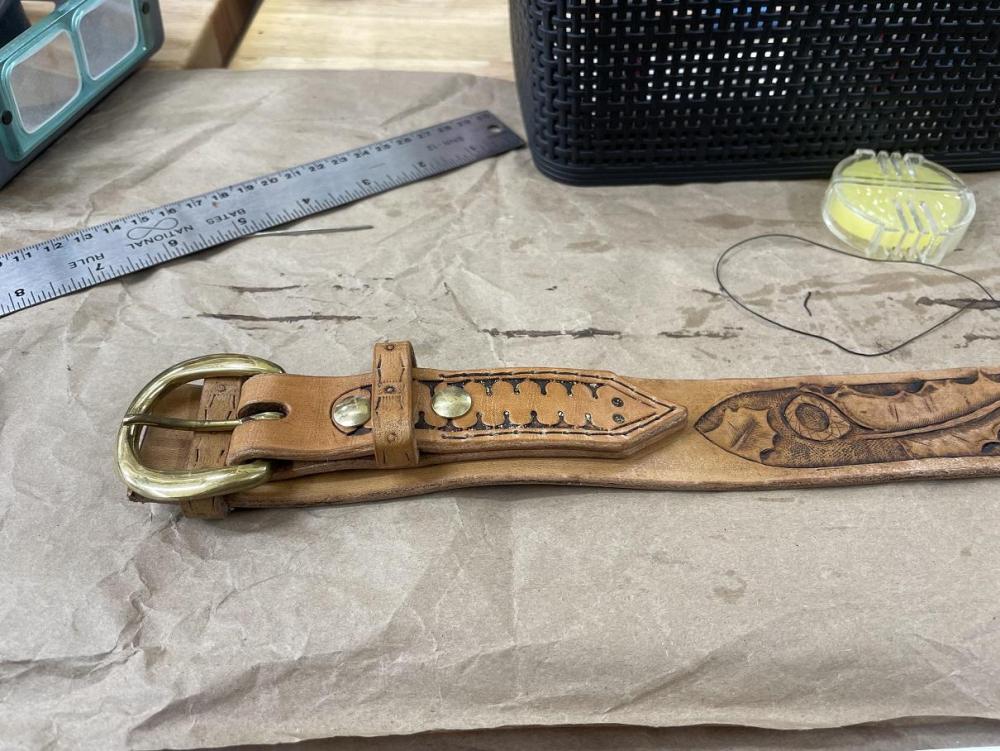
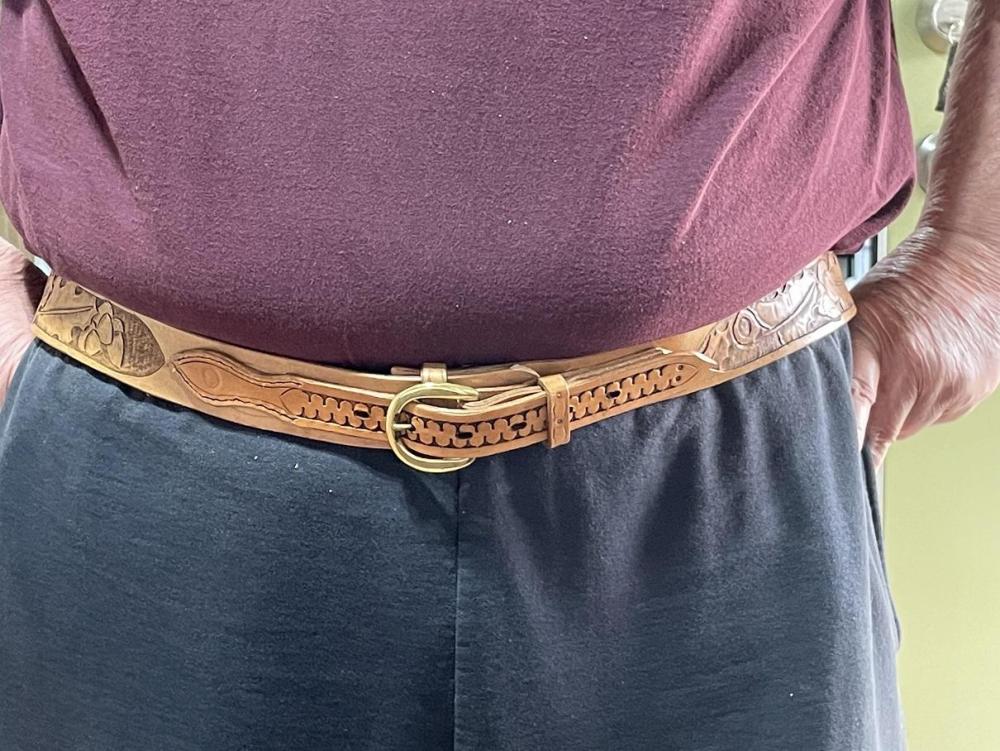
I got the buckle sewn on and it looks pretty good. I repeated the process for the opposite end, though I was able to cheat a bit and use contact cement to attach the short end of the billet where I would be sewing. I didn't have to worry that I might need to remove this portion, no buckles to change out. Once it was sewn on, the belt was basically completed, and it fit. A long view showing the detail the antiquing brought out. The belt is basically done, I just need to add a coat of finish and a couple coats of wax. Then done.
-
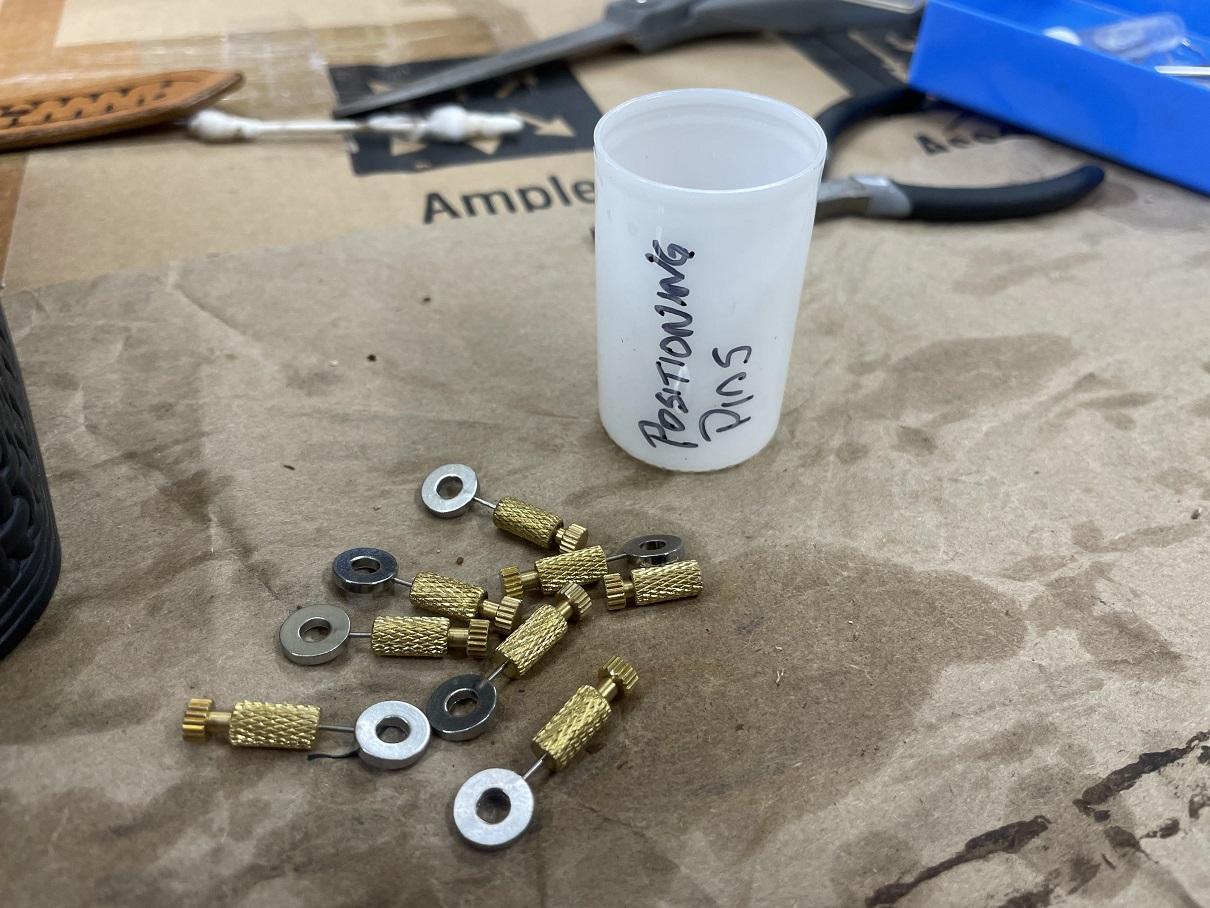
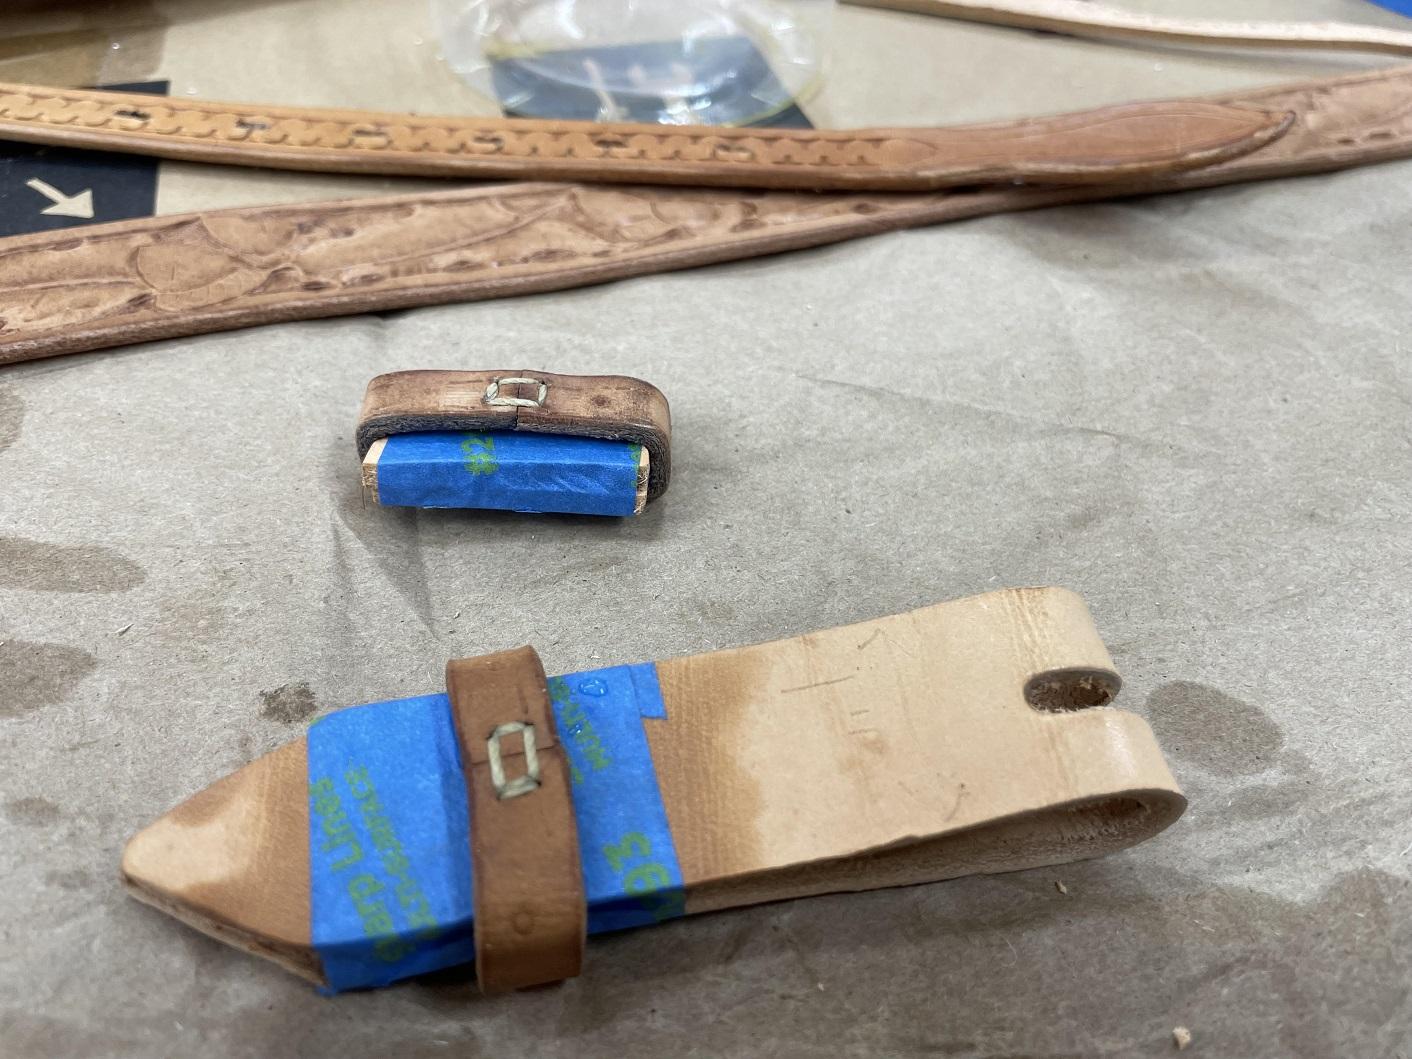
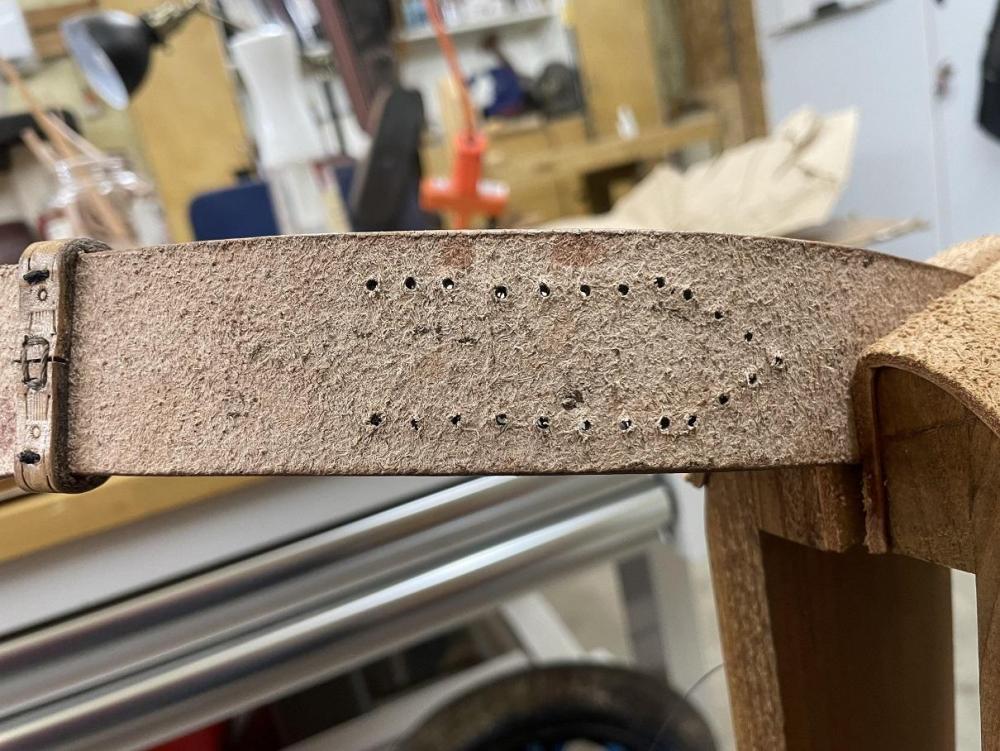
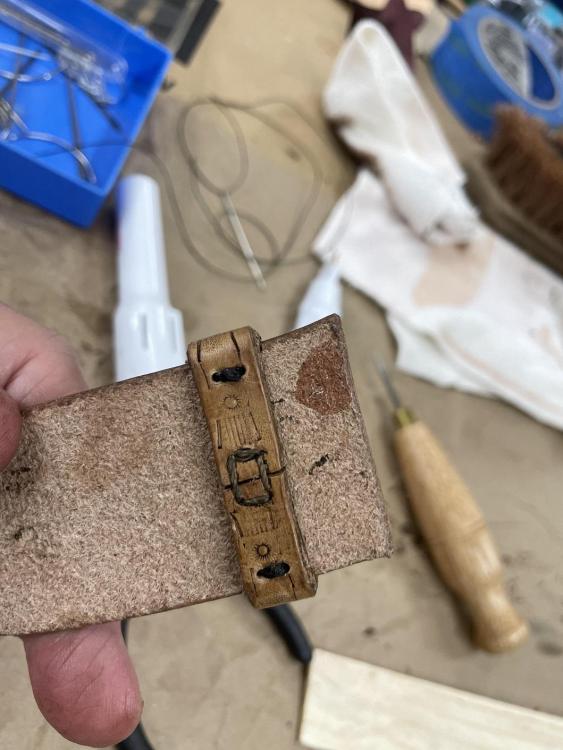
A couple tricks I used for hand sewing the buckle assembly on. First, after the holes were drilled, I know the holes are hard to see on the back side of the leather. I take a sharpened pencil and use the point to twist in each hole on front and back. It dimples the hole IN so they aren't pushing out, and on the back side the pencil leaves a graphite outline on the edge of the holes making them easier to see. Way back when I had a very hard time finding them sometimes. NO longer. Another trick is Positioning pins. These can be used to hold the various pieces tight together until you can get the sewing done. As you sew, and you approach a pin, you just remove it.

-
Before sewing on the buckle billet, I needed to sew on the belt loop for the belt itself. I drilled the holes in the loop, then matching holes in the belt. I sewed the loop on with a couple heavy stitches in each end, and tied them off. It's going nowhere.

-
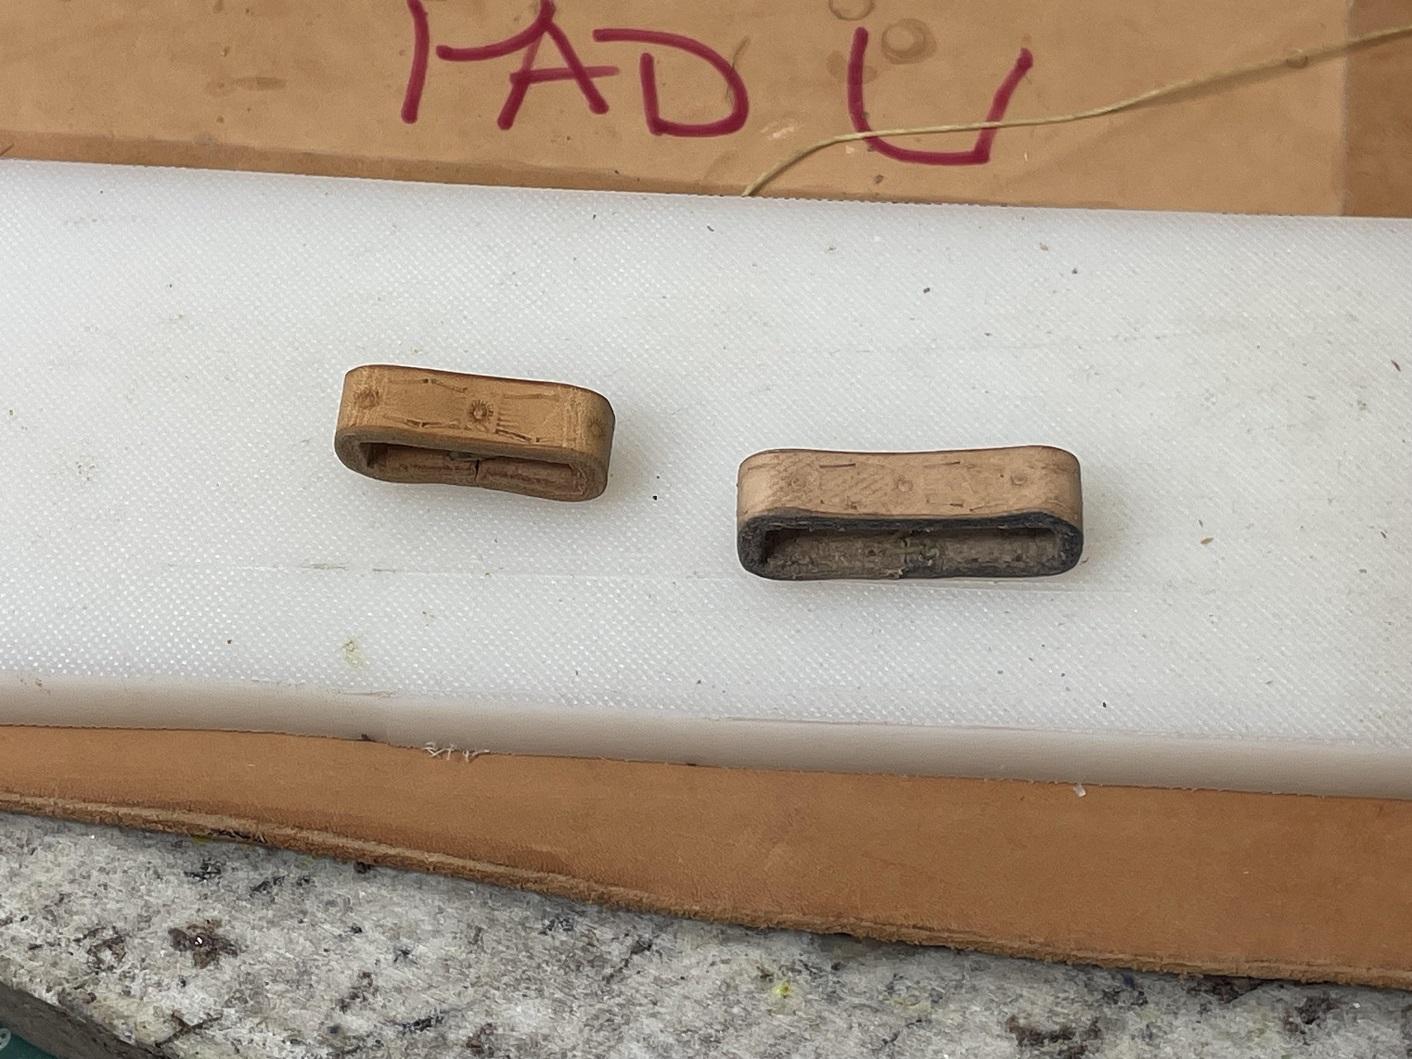
I was anxious when I got out to the shop today to see how the loops turned out. My wet forming worked perfectly, nice and squared corners and they fit perfectly on the actual application. I was pleased. So, in preparation for assembly, I antiqued all the pieces. While the antiquing set up, I consolidated the two tubs of Dark Brown into one. Glad I wore gloves, messy job. I antiqued the pieces in Medium Brown. I need to order more medium. Once the antique paste had a chance to set, I wiped away the excess with a dry cloth, then did some detail wiping with a dampened cloth until I was happy with the result. Once that was done, I laid out the stitch lines for the buckle billet and drilled those holes on the bench top drill press. I set that aside.


-
I'm going to make suspenders to match / mate with the belt. I need the belt to hang "Stuff" on.
-
New sheath for friends knife
Brokenolmarine replied to DaveP's topic in Gun Holsters, Rifle Slings and Knife Sheathes
I usually put my maker's mark on the back, but I have had friends and family tell me to incorporate it into the design on the front so they can use it as a talking point and start a conversation about their personal relationship with the maker. -
Congratulations, I hope you get an autograph. I've seen Miss Rose in a lot of movies, she's an impressive female action star. John Wick kicked her butt in #2.
-
K frame thumb break
Brokenolmarine replied to Stetson912's topic in Gun Holsters, Rifle Slings and Knife Sheathes
I like it. When I finish the belts I have on my bench, I'm thinking cross draw for my Birdshead Uberti 357 SA. I too like that color, and have used a quilted pattern, but like your extra touches. -
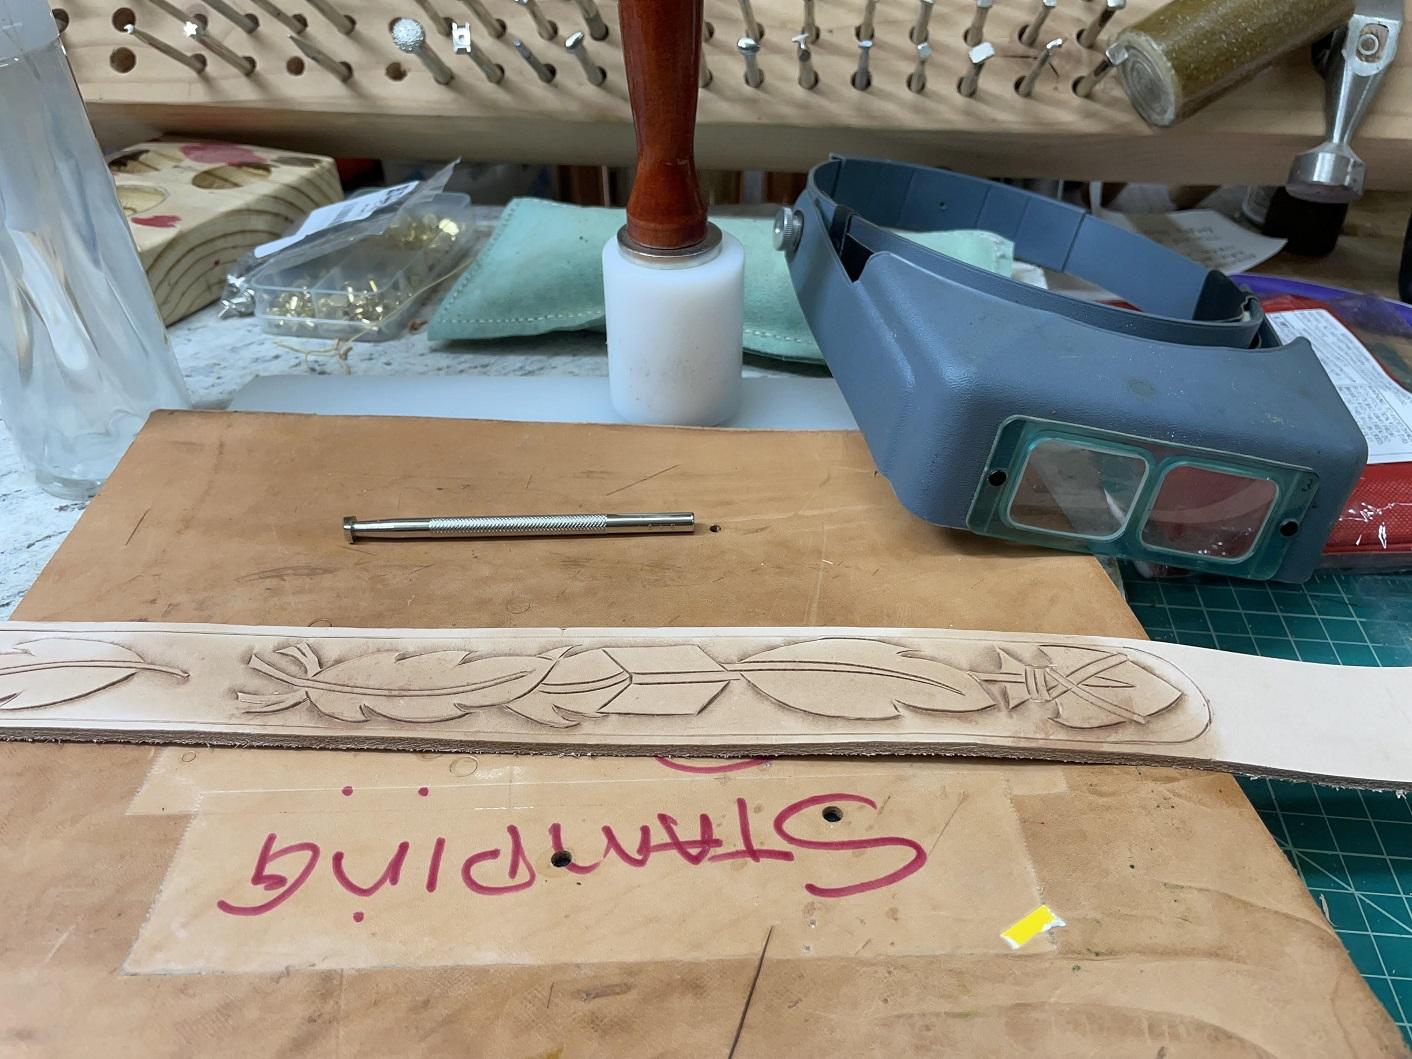
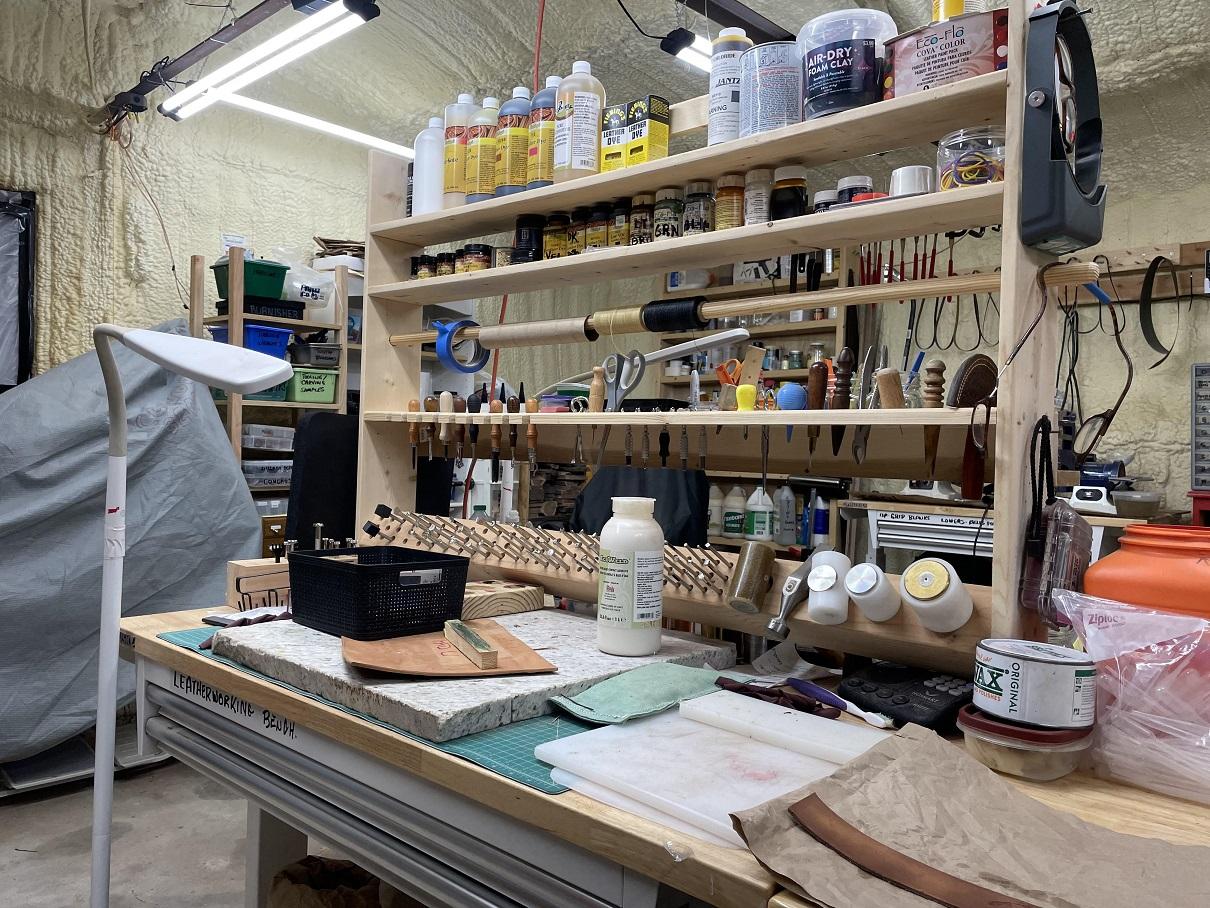
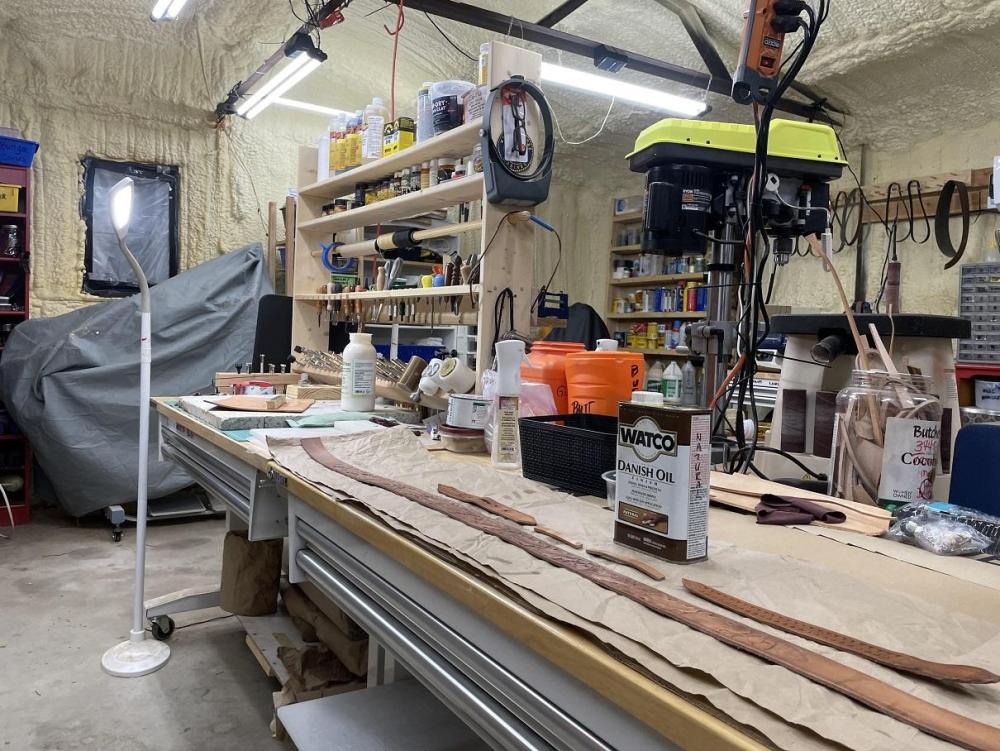
We'll be ready to start assembly soon, sewing on the billets. But, how about a mini-tour of the leather work station? Start here, at the tooling bench. I started with just the tool block at the back of the table, to keep the punches organized, then added the shelving to keep the tools out of drawers and more at hand. Oh, yeah. There are still things in the drawers, but most things are at hand. (Yes, I know I need to refill the paper towels, I just ran out.) If we back up a bit, you'll be able to see my cutting / work table. That is beside the tooling bench, and I try and keep it as clear as I can. It's nice to have it there, as I can roll back and forth between stations. Very handy on projects like holsters and sheaths when you need to trim or add pieces. If I am not on this side of the four bench set up. I'm usually on the knife side.

-
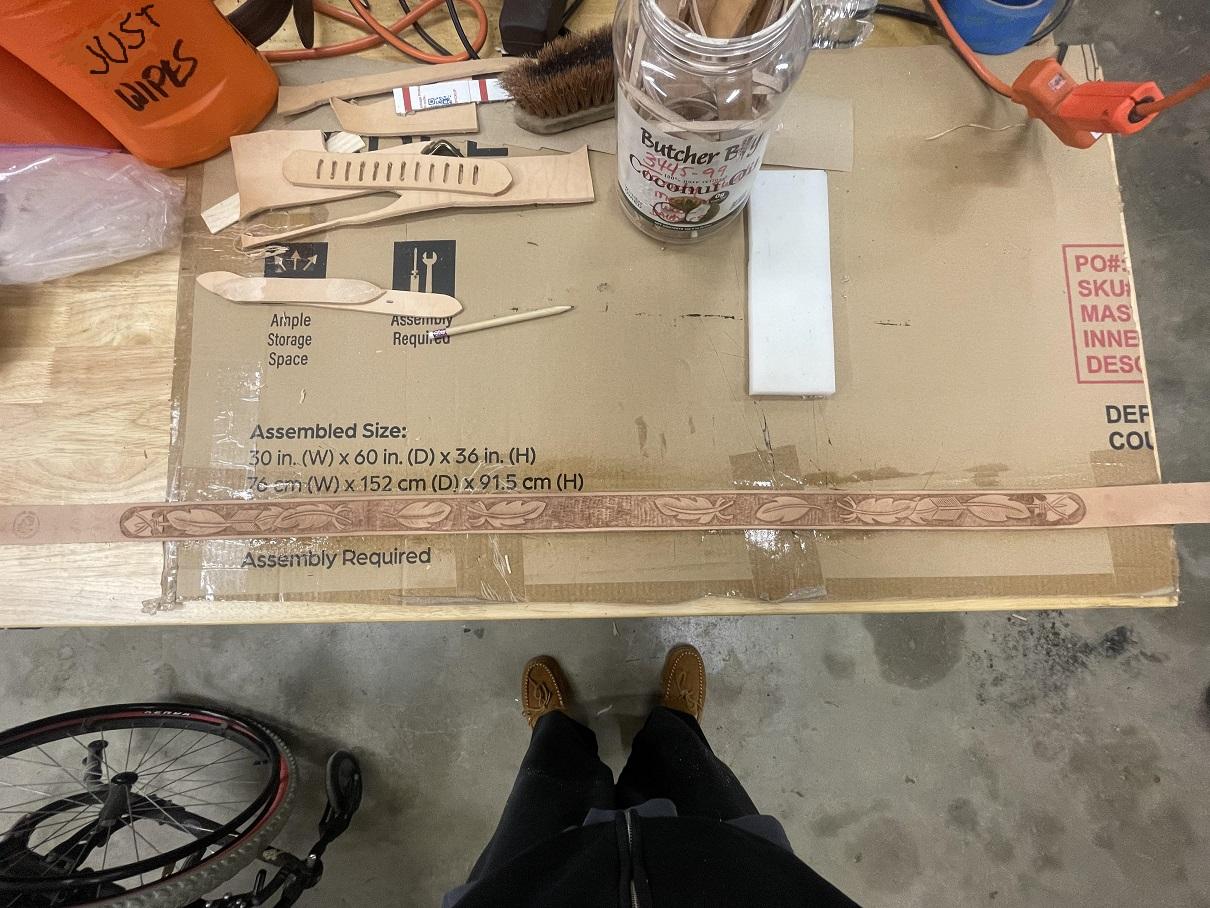
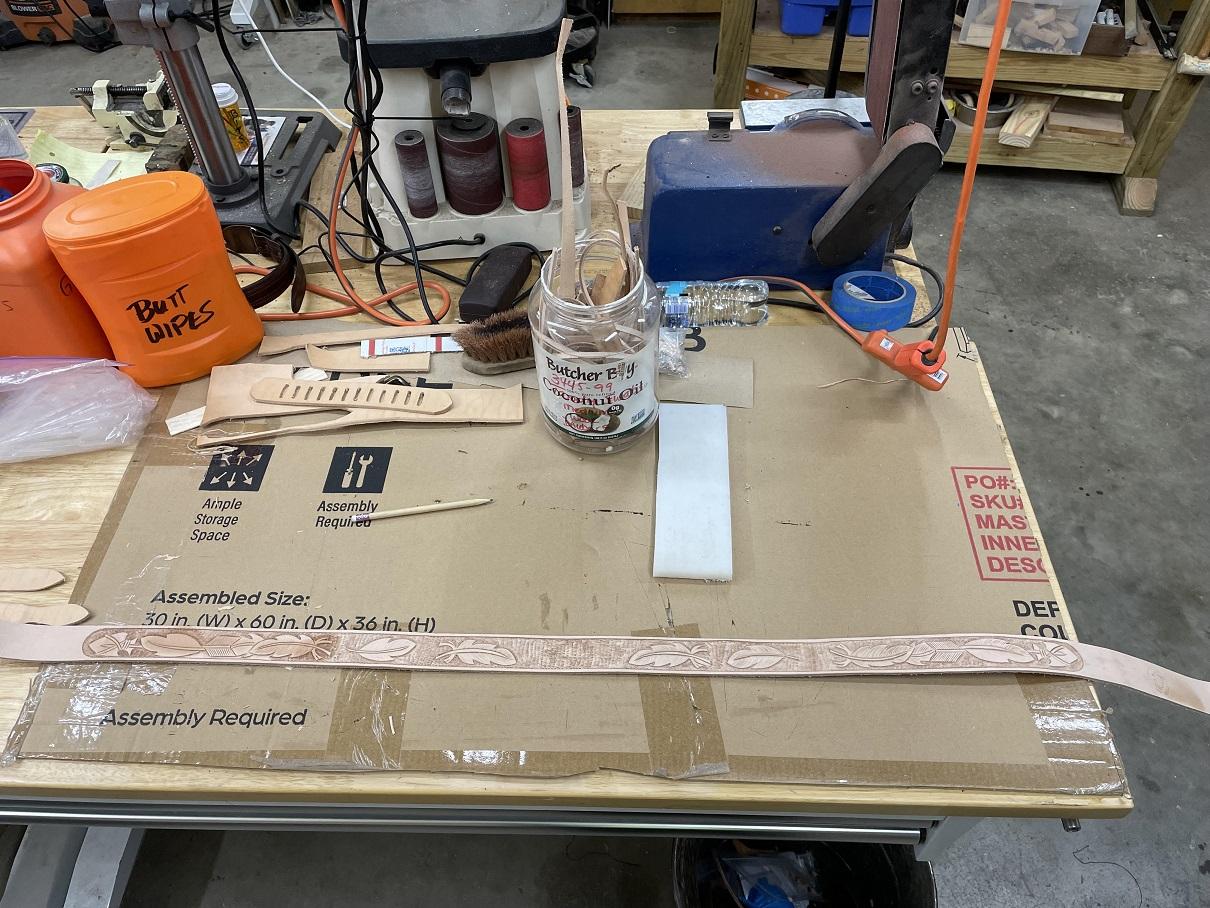
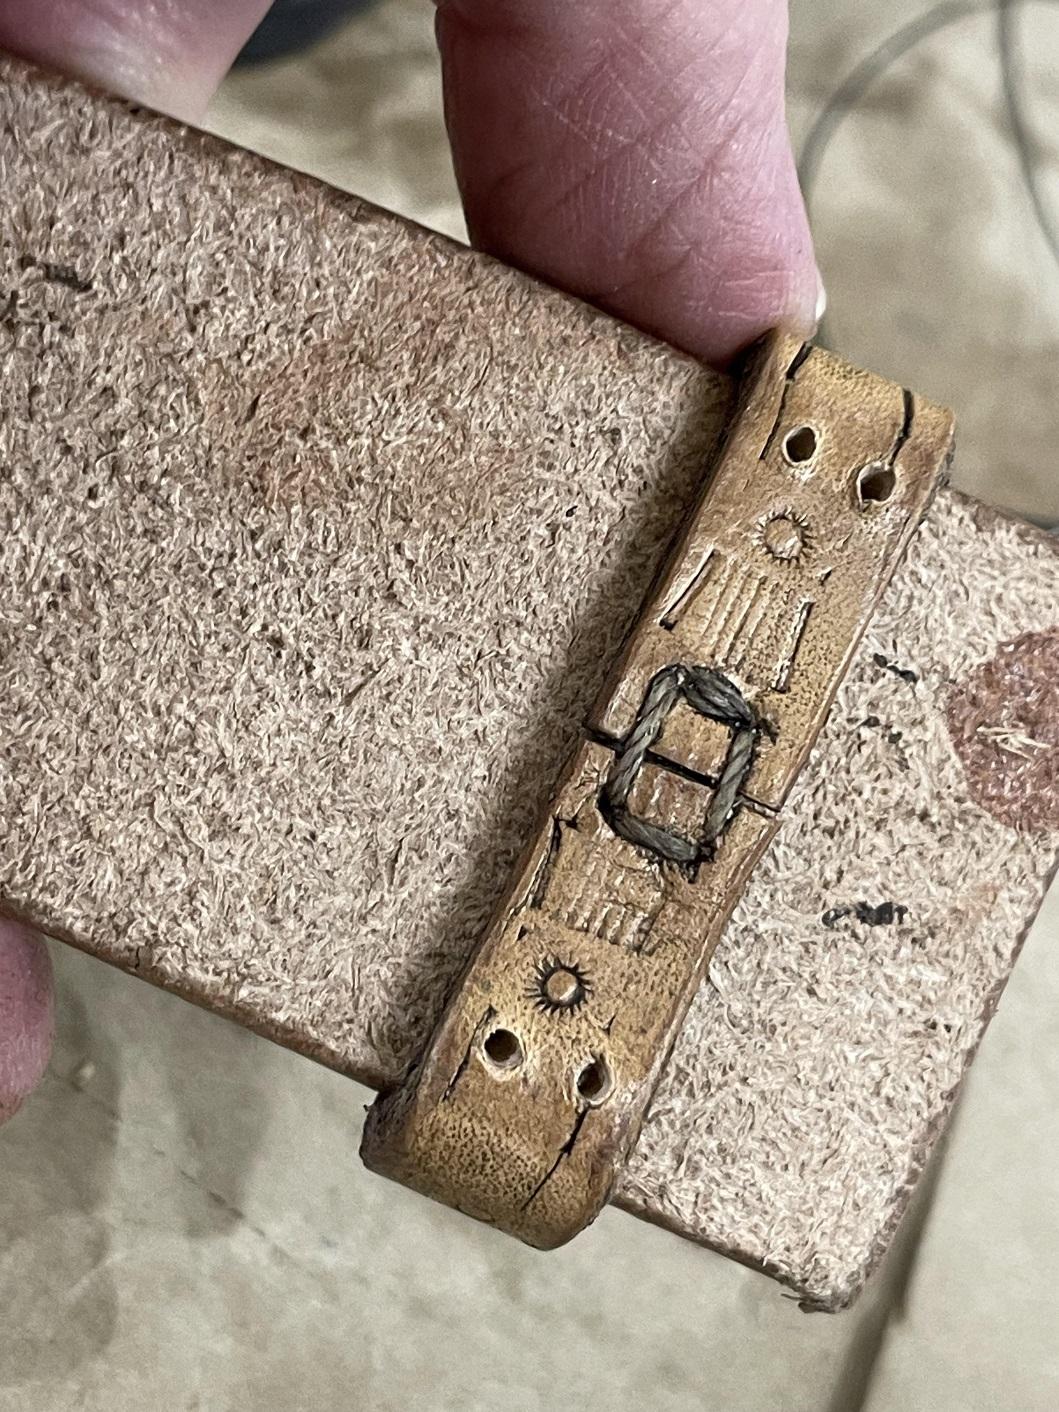
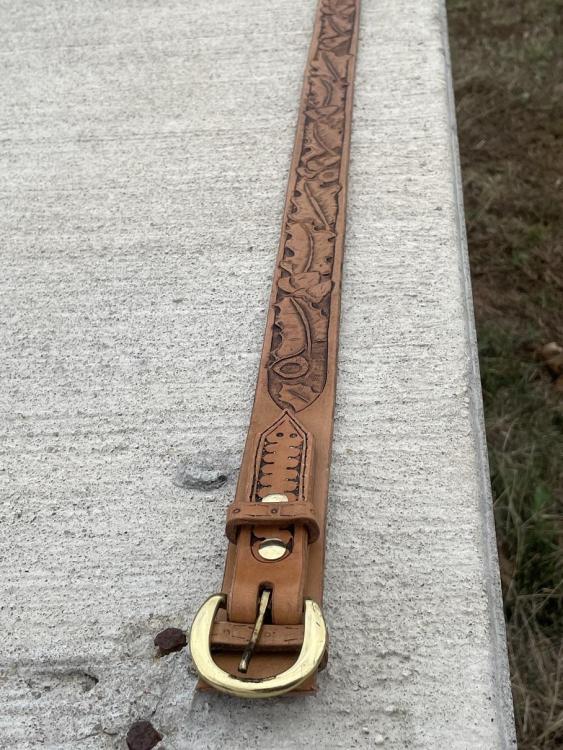
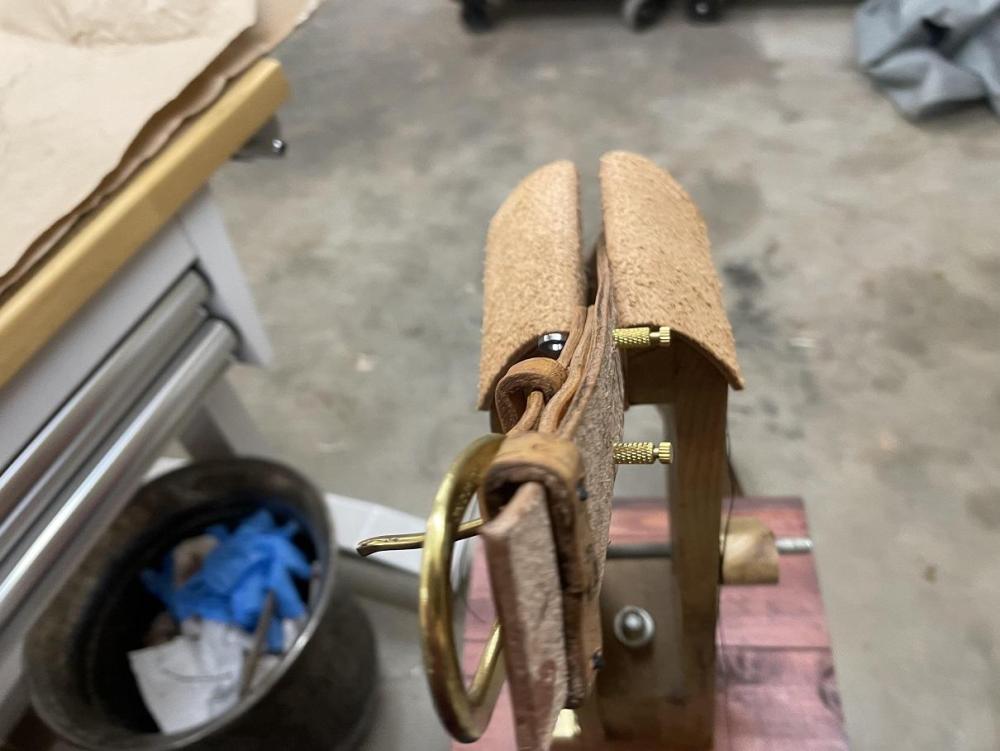
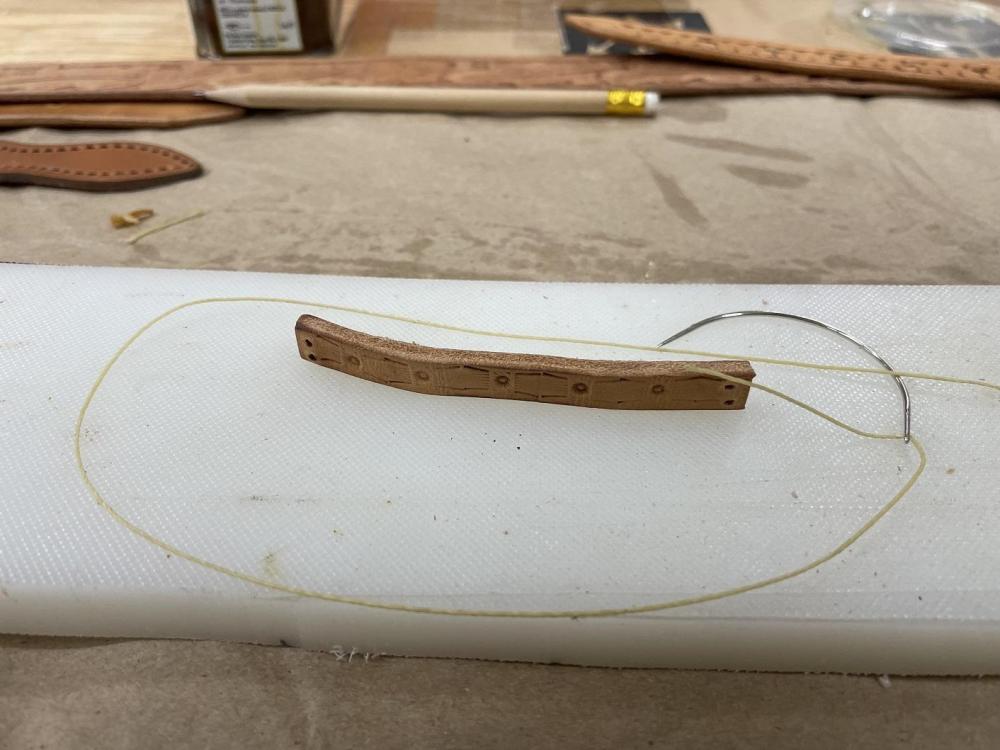
Out this morning to check the look of the belt parts now that the oil had dried. I am very happy with the color. So, first step was to mark and cut out the oval holes in the billet that would accept the buckle. I used the correct size bit to drill a hole in each end of the ovals and cut along the sides with a scapel to connect the two holes. Once that was done I was ready to burnish. I used a thin burnishing wheel in the drill press. A wise lesson learned was that FRICTION not pressure is the key here. Pressure will deform the pieces and friction generates the heat you need. Allow the time and the light pressure will cause the friction to generate the heat, without deforming the pieces. I took my time, and knocked out all the pieces. Then it was time to form the belt loops. I drilled a pair of pilot holes in both ends of each loop, then sized them with the sewing awl. I waxed the thread, taped the mock ups from scrap leather for the wet forming and got busy. After careful sewing with a curved needle, I was ready to wet form them around the mockups and burnish them square.


-
THIS is a great idea, but my copier is OLD and needs to be disassembled and cleaned internally. It leaves spotches and smears on the copies and scans, something somewhere internally. So, I just ignore them when I trace. I guess I could buy another package of transparency film. I had a box at one point when I was teaching in the academy, but once I quit Miss Tina started using them all the time for our overhead projector to paint things on the walls. NO more left and she gave the overhead to the daughter. LOL.
-
If I was going to put a backing on the belt I would, but in this case I'm not going to do that so I didn't allow spacing for it. If I had planned to sew down the side I would have allowed extra border for it.
-
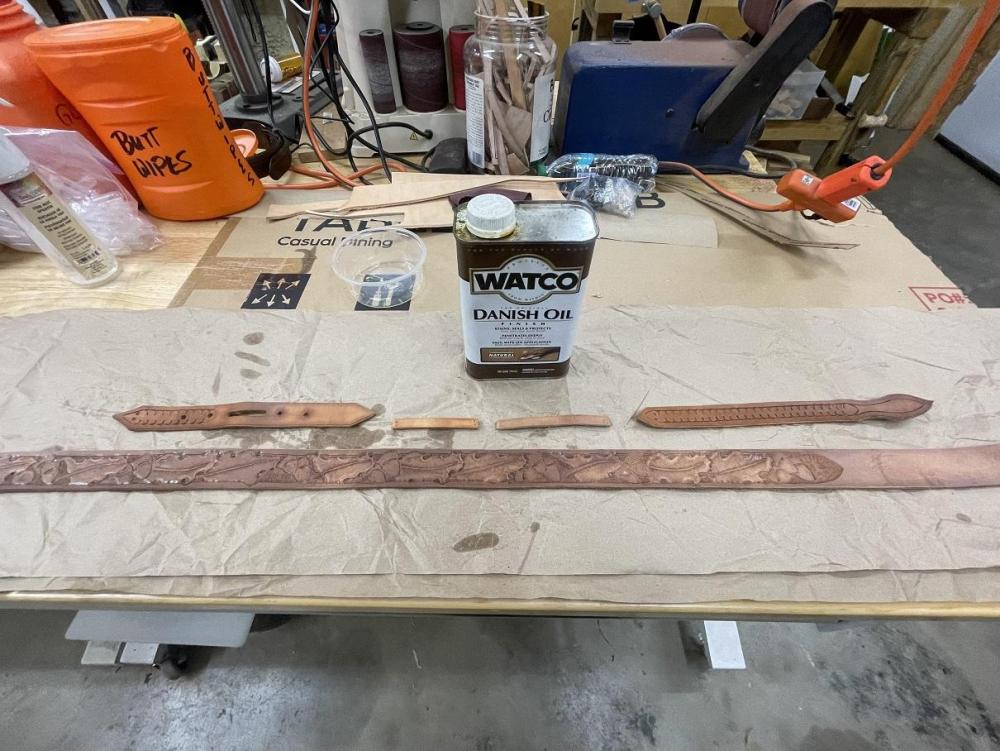
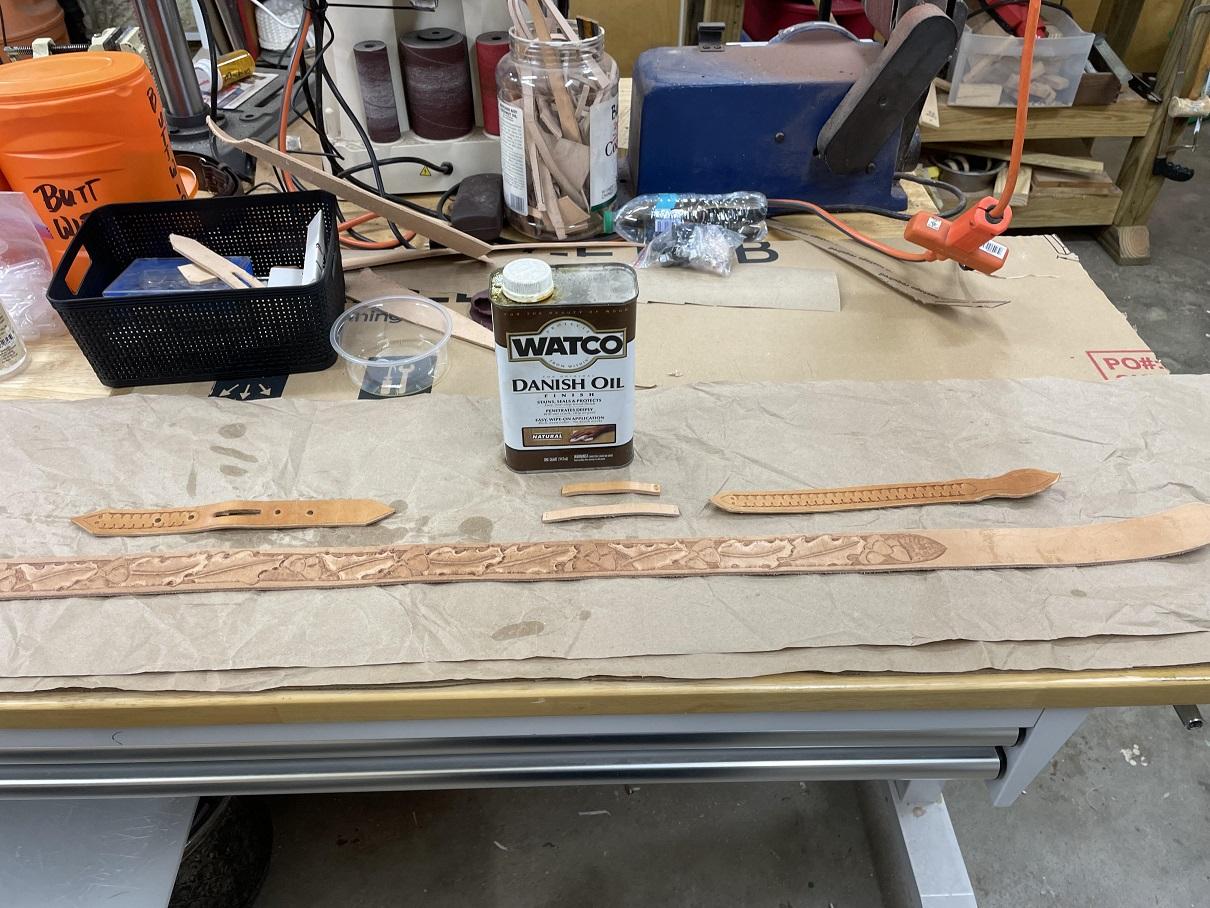
After some last trimming where needed and some sanding, I beveled the edges as appropriate, then applied coats of Watco Oil in the Natural color. I'll leave the parts and pieces to dry overnight and find out what they look like in the morning. Once they are dry, I can burnish those edges and get busy. I'll form the two belt loops and can begin the assembly process, sewing on the billets after determining the best location. We'll either have a belt or a nice sample practice piece. I'm REALLY hoping for a belt, tired of my pants slipping down.