


Brokenolmarine
-
Posts
592 -
Joined
-
Last visited
Content Type
Profiles
Forums
Events
Blogs
Gallery
Store
Everything posted by Brokenolmarine
-

Brown watch strap with orange stitching and lining
Brokenolmarine replied to Danne's topic in Show Off!!
My Seal Team Luminox took a beating, working patrol, teaching on the range, and a few years at the desk until we retired. I replaced the strap four or five times. They never held up. I bet yours do. -
Colt Python
Brokenolmarine replied to HandyDave's topic in Gun Holsters, Rifle Slings and Knife Sheathes
Love the design, just picked up a pair of 6" Colts today. A Diamondback and a Python. That carving Rocks! I would have to make a two gun rig, if I was going to carry them. They are unfired 1980s models, but not for long. . I could make a presentation case, with a dual carving on leather inside the top. -
Brown watch strap with orange stitching and lining
Brokenolmarine replied to Danne's topic in Show Off!!
Just like that. But looking at the watch again, I think I'd go with black or navy blue leather and orange thread. The watch is one of the Citizen's that you don't wind, it's powered by light, any light. Overhead interior lights, sunlight, whatever. The Blue Face, black bezel, and orange second hand would pop with the right fob. I might make a flap to cover the face to keep the scratches down. Another project for the leather bench. Priority goes to the tooled pouch for the Granddaughter, a Christmas Present "Request."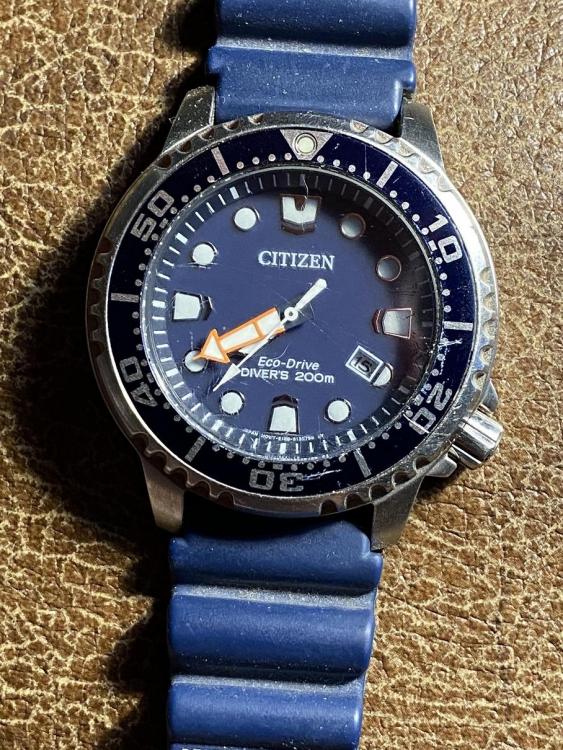
-
Brown watch strap with orange stitching and lining
Brokenolmarine replied to Danne's topic in Show Off!!
That looks great! I bought a very nice watch a couple years ago to replace my Luminod Seal Team Watch that finally died after fifteen years. Then fell and fractured my left wrist in two places badly enough they put a plate in it. Now I lost about 20% range of motion. Can't wear watches any more. Think I'll mount the new one on a fob, to carry in my pocket. Your stitch and leather combo is beautifully done, and would show off my watch nicely. -
Thumb hole sling
Brokenolmarine replied to Rossr's topic in Gun Holsters, Rifle Slings and Knife Sheathes
Went to Tandy and got what I needed a few days ago, will be starting soon. -
This would likely work, and rather than belt slot on the rear, add d-rings to the back or side as I did on my daughter's pouch. https://leatherworker.net/forum/topic/102863-my-second-22-pouch/ https://leatherworker.net/forum/topic/102408-the-second-pouch-for-the-daughter/
-
'Crocodile Dundee' inspired hat band
Brokenolmarine replied to fredk's topic in Clothing, Jackets, Vests and Chaps
"Oh, you can live on it, but it tastes like..." -
I enjoyed the thread immensely. I like to make things I need as well. But my constructs lean more to woodwork as I don't weld or have a lathe. The wife saw one on sale and commented it wasn't that expensive. I pulled up several pictures of turners corners and pointed to the tool boards beside the lathes. The lathe is just the tip of that iceberg.... With my other hobbies, I'm not falling down that well. Great job, a good maul makes all the difference.
-
I have to thank our local Tandy Leather Supply. I have to drive two hours to get to the shop, and I called on Monday to let the manager know I would be driving up on Wednesday and asked if she would mind having them pull the items I would need so I wouldn't arrive and find they "Just sold the last of that color yesterday. Too bad you didn't call." She said she was happy to, but she would be off on Wednesday. I told her I was really disappointed, as I had really benefited from her help and advice on my last visit and wanted to get her help in choosing some leather for an upcoming project. "What time do you think you will be in on Wednesday?" I told her I'd be in around noon but not to put herself out, I'm sure the staff and I would get by. She told me to email the list of items and the leather needs from the pattern: The Thumbhole sling someone posted here recently... she'd see to it. I walked thru the doors at Tandy at 1145am on Wednesday and she grinned at me from behind the counter. She said she was going to meet her niece for lunch after "our" visit. We found the Dyes I needed to replenish my stocks, she had set them aside and they were all there. She had laid out three pieces of leather that met my size requirements. I bought two they were so nice. She had put aside a nice suede for backing. In the basket. She found a tool I needed to add to the tool bar in my shop. I came close to adding a burnishing machine, but it wasn't on sale and hand burnishing will do me for now. I can't justify the cost even with the discount she offered. I managed to get out the door under $300 but I'm good for several months. I had checked on line and their prices for the dye were significantly lower for the same exact item than all the other suppliers. By swinging by while I was in town on other business, I didn't have to wait on the items to be shipped. (Free for a sale over $150) I got to inspect the leather I purchased, two large pieces of 6/7 vegtanned. 60x36 side (you know, approximate) And I had the pleasure of the manager's company. Next time I am up, I will stop in and take advantage of one of her classes. Improve my carving skills.
-
A little personal defense
Brokenolmarine replied to Gezzer's topic in Gun Holsters, Rifle Slings and Knife Sheathes
It will make a nice non-lethal alternative. You can use it to apply additional pressure to pressure points, or lift at hinge points to effect releases. It would take some training, which I used to include in a course I offered. We used Kubatons, which can be found as keychains. The students could substitute standard or large Sharpie markers, or fat metal ink pens; which no one would question being in a pocket or purse. -
I like the border, it's not too much for the rough out leather.
-
A little over a year later....
Brokenolmarine replied to Hags's topic in Gun Holsters, Rifle Slings and Knife Sheathes
Very good report, always good when someone takes the time to say something nice. Most are quick to whine but stingy with praise. -
Pancake for Ruger Speed Six
Brokenolmarine replied to Thescandall's topic in Gun Holsters, Rifle Slings and Knife Sheathes
Nice work guys. I am a wheel gun guy from Way Back. I love my 1911s, but as a PPC competitor, we shot 6" Revolvers at 50 yards. I carried a Model 64 Smith out of the academy and never felt undergunned. When we made the switch to Glocks, I bought my model 64 4" plus one of the 2" guns the Sergeants carried in plain clothes or off duty. Love the holsters. I am planning on making a Full Western Rig for my Uberti Birdshead .357 in a few weeks, a little more practice on the tooling and carving first. -
I just finished two holsters for Ruger Wranglers. Next up are rifle slings, then a gun belt, holster and knife sheath combo for a Uberti Birdshead 357.
-
Recent sheaths
Brokenolmarine replied to Simplejack1985's topic in Gun Holsters, Rifle Slings and Knife Sheathes
Nice work. -
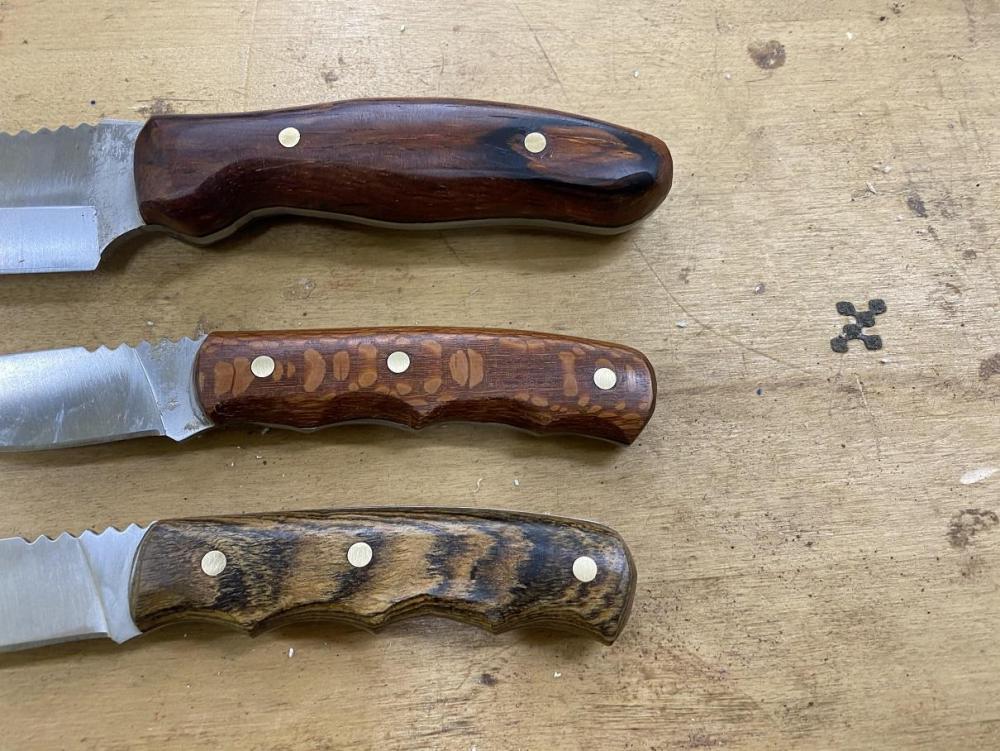
I got into leather work so I could make a sheath for a Kit knife I made for my middle daughter. I too have medical issues that caused me to look hard at the blade making process and say, "Ah, No." I buy the blades and then build the knives and give them as gifts. I make the sheaths and sometimes presentation boxes to put them in. Woodworking first, then came knives because the kid asked me to. I thought I had pics of the cleaned up knives. The above pic is of the knives after final sanding. The pic below is of them after waxing and buffing. These were Christmas gifts. The daughter chose the Cherry in the middle. The top knife matches the cocobolo grips I had made for my Match .45. The bottom was going to a Son-in-law but HE asked for something else not knowing the weeks of work I had put into his gift. The wife didn't say anything and ordered what he asked for. His loss. (City Boy - Woke.) That knife is still in a drawer in the den and will eventually find a home, or not. No matter. I will make a few more. I bought some turquoise to do inlays, that will be my next goal when I am up to it. The knives laid on the bench waiting to be finished for a full year. I had fallen and broken my wrist in two places and the surgery to repair the breaks caused major nerve damage. I lost the use of the left hand for about nine months, and then didn't have enough strength to trust use in the shop for over a year. Nearly eighteen months later, I have 80% range of motion back (Don't expect more due to the plate in the wrist,) and about 40% of the strength. That may improve with continued therapy at home and use. I am VERY cautious when using equipment in the shop. The table saw, bandsaw, and other power tools causes a major pucker factor. I use a LOT of hand tools these days, but then, I always did.

-
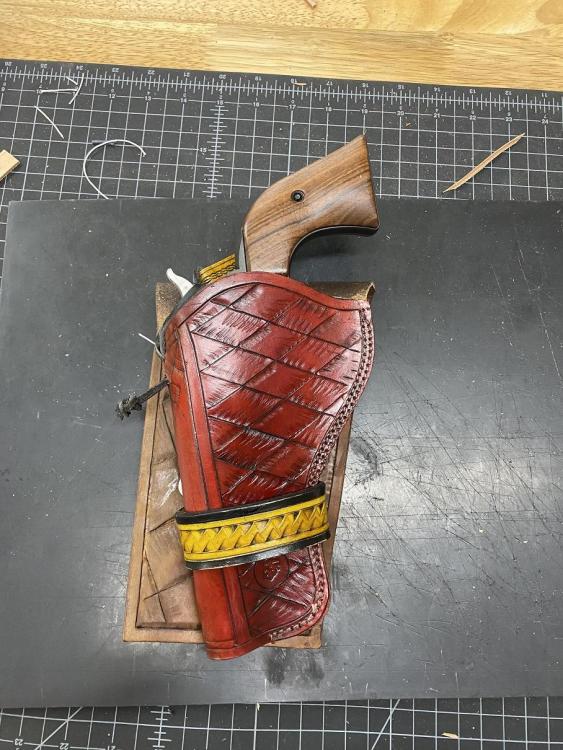
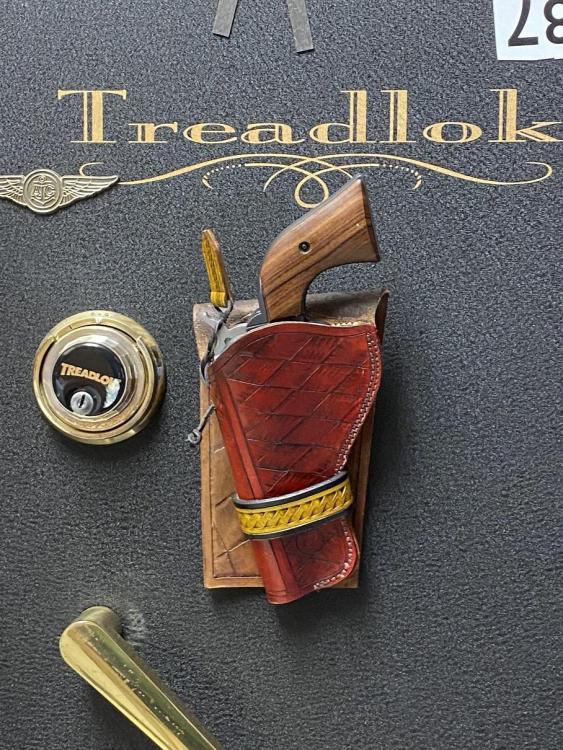
It's a Ruger Wrangler, but went with the upgrade, as it is, to get the wooden grips. Cheaper to do that and get the Factory wooden ones that add aftermarket that may or may not fit. The Wrangler isn't as nice as the Ruger Single Six, but we planned to knock it around, so... why not. I didn't do a build along here, but did take the pics if anyone has questions about anything.
-
Miss Tina wanted a holster for the Tractor, as she often encounters varmints when working around the farm. I gave it some thought and put the OLD panel I had cut out for the Ruger Wrangler and messed up the basketweave to work. She said that was fine, since it would be a working holster. I had used the back side to try and learn the LARGE format basketweave and wasn't there yet. She said, "Wax it to protect it and sew it up, I'll hang it from the steering wheel post or something." Yeah, not going to happen. I had some other ideas as well. This one had a surprise for her. It actually doesn't look bad, she was surprised. Her real surprise was behind the holster. I had mounted a Gun Magnet. Rubber coated, it wouldn't damage the paint on the tractor, UTV, or mower and could be stuck anywhere there was metal. Inside on the fender, on the hood, on the inside of the UTV door. I handed it to her and she immediately stuck it on the stainless steel fridge in the kitchen. NOT a hint of movement. Turned it sideways, nope. I warned her. "You have to slide the thing to break the hold before you try and take it OFF, you can't just grab and go." THIS thing has some grip. The magnet is about 1-1/2" by 3" but powerful. The build was a learning experience and the design changed as needed as I went. I'm happy and so is she.
-
Very nice all around. I would have had no problem strapping that to my vest just before I climbed in the helo.
-
Thumb hole sling
Brokenolmarine replied to Rossr's topic in Gun Holsters, Rifle Slings and Knife Sheathes
I have the patterns on order. -
Thumb hole sling
Brokenolmarine replied to Rossr's topic in Gun Holsters, Rifle Slings and Knife Sheathes
I like it, I could use one myself. Nicely done. I'd make one for my Ruger Ranch Rifle and put a Coyote on it. Where did you order the pattern pack? -
I'm not a gamer. But I admire creativity when I see it. Tip of the hat. Outstanding.
-
Watch Strap Repair
Brokenolmarine replied to Handstitched's topic in Purses, Wallets, Belts and Miscellaneous Pocket Items
Nice work. The key here is the guy was happy. -
Twenty nine surgeries, I got up to 280. I wasn't happy. Between the cane, walker, and wheelchair, exercise was limited. But, I went BACK on MY diet. Calorie counting... It works for me. I have dropped 30 pounds, and down from a 50" waist back to a 44" . I set my limit at 1500 a day. Not that hard once you get used to it.
-
I don't have a choice really. The wife says I have NO butt, and a gut pushes down, it's a losing battle. I often only wear suspenders, but can't get away with just a belt. So, I mostly carry in a shoulder holster.


