Brokenolmarine
-
Posts
592 -
Joined
-
Last visited
Content Type
Profiles
Forums
Events
Blogs
Gallery
Store
Everything posted by Brokenolmarine
-

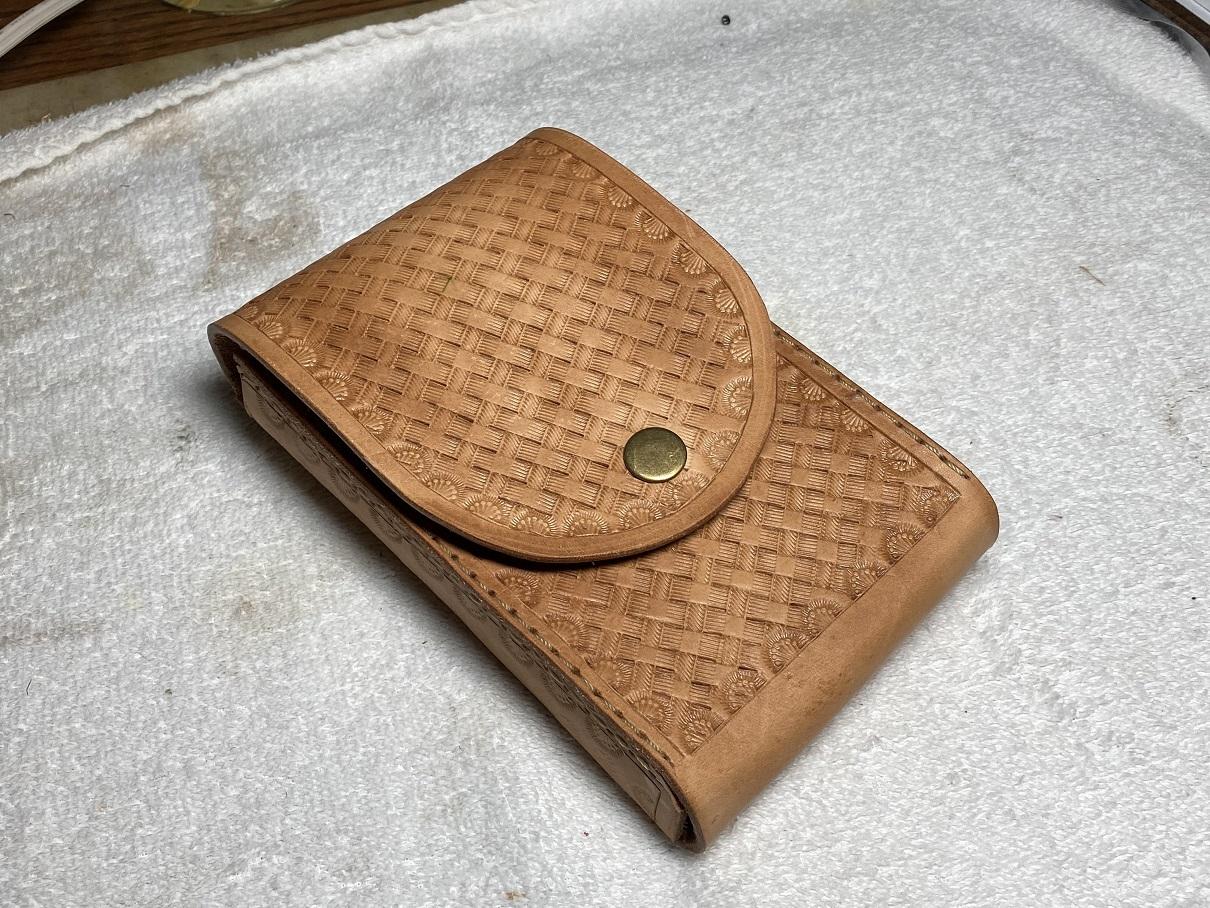
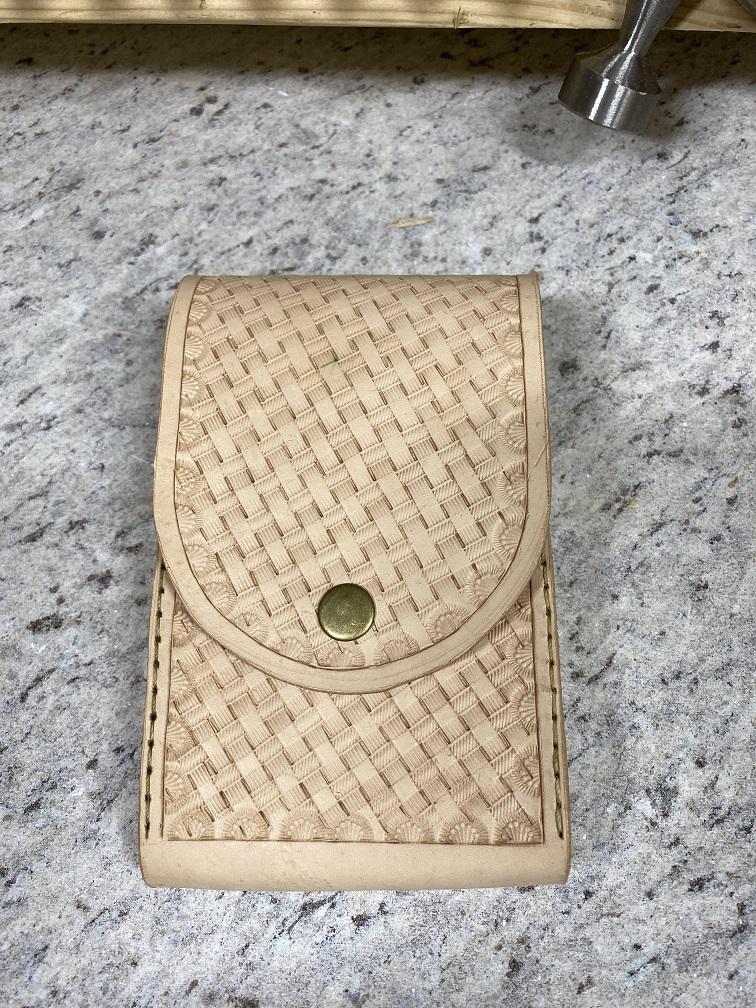
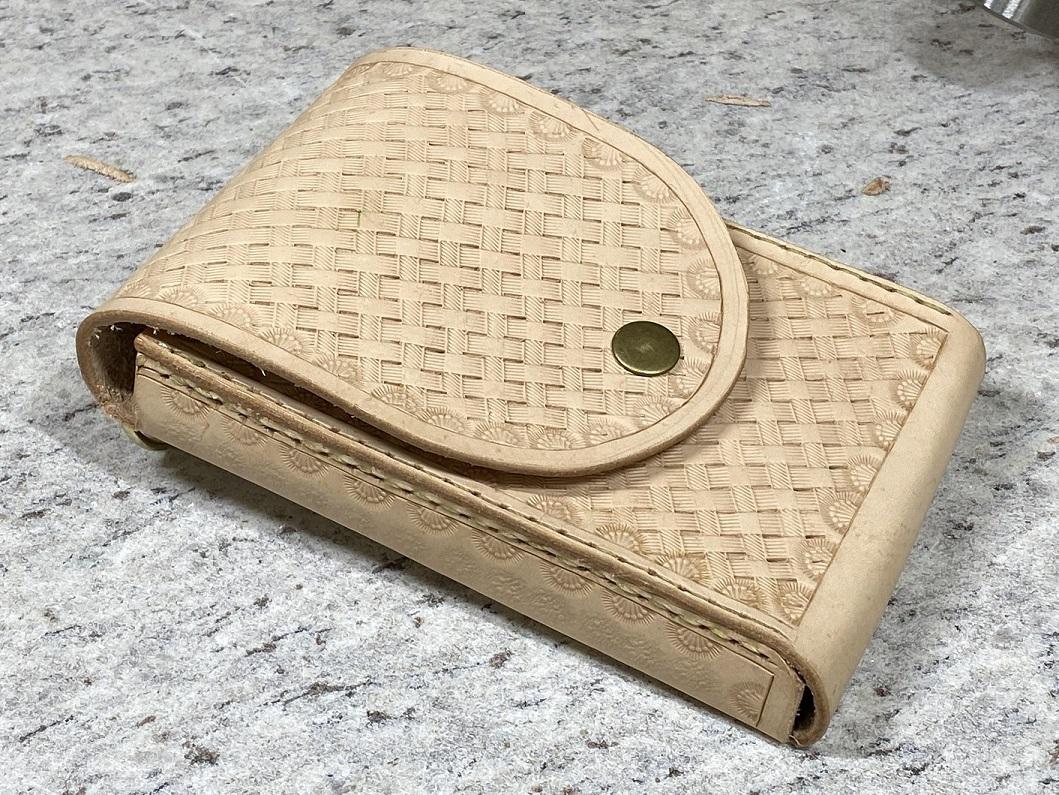
22 Plinking Pouch
Brokenolmarine replied to Brokenolmarine's topic in Gun Holsters, Rifle Slings and Knife Sheathes
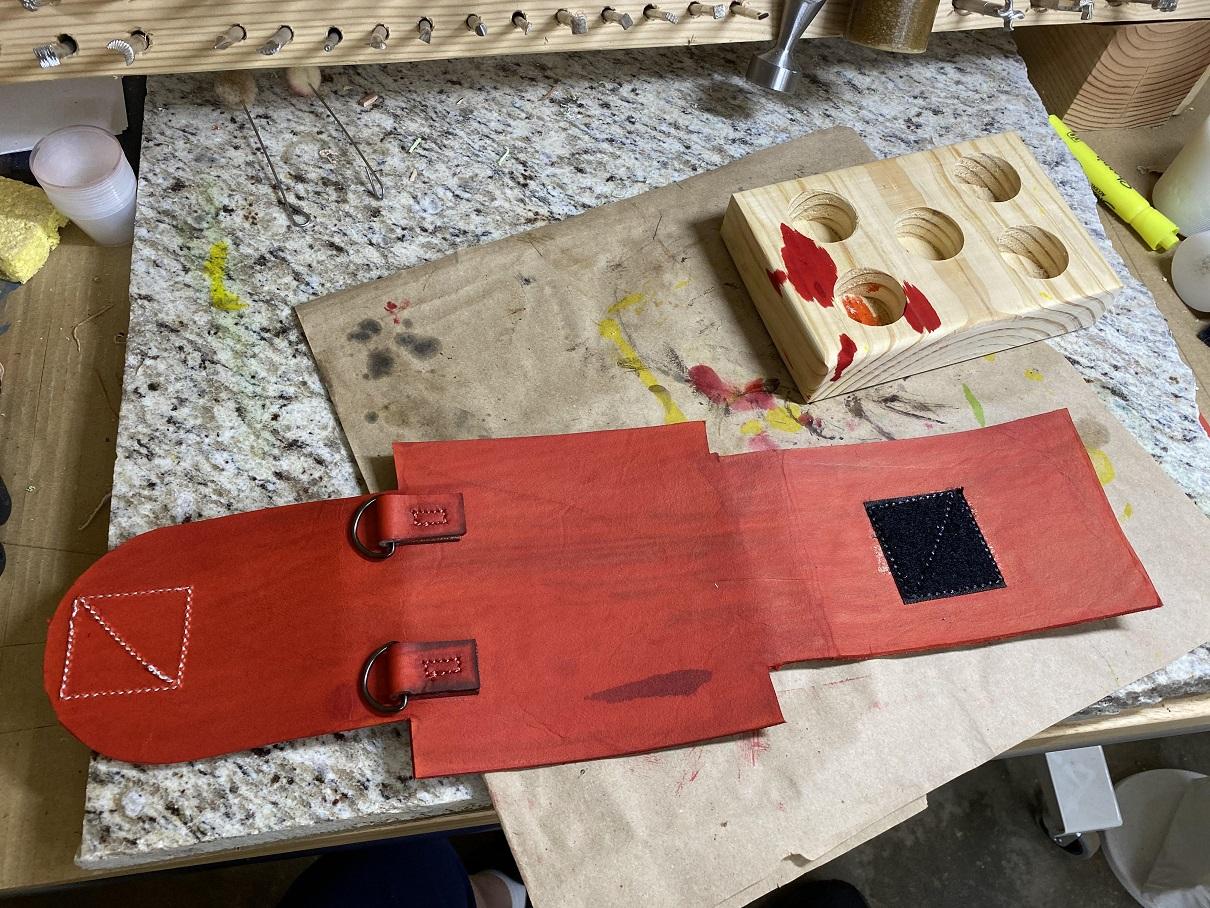
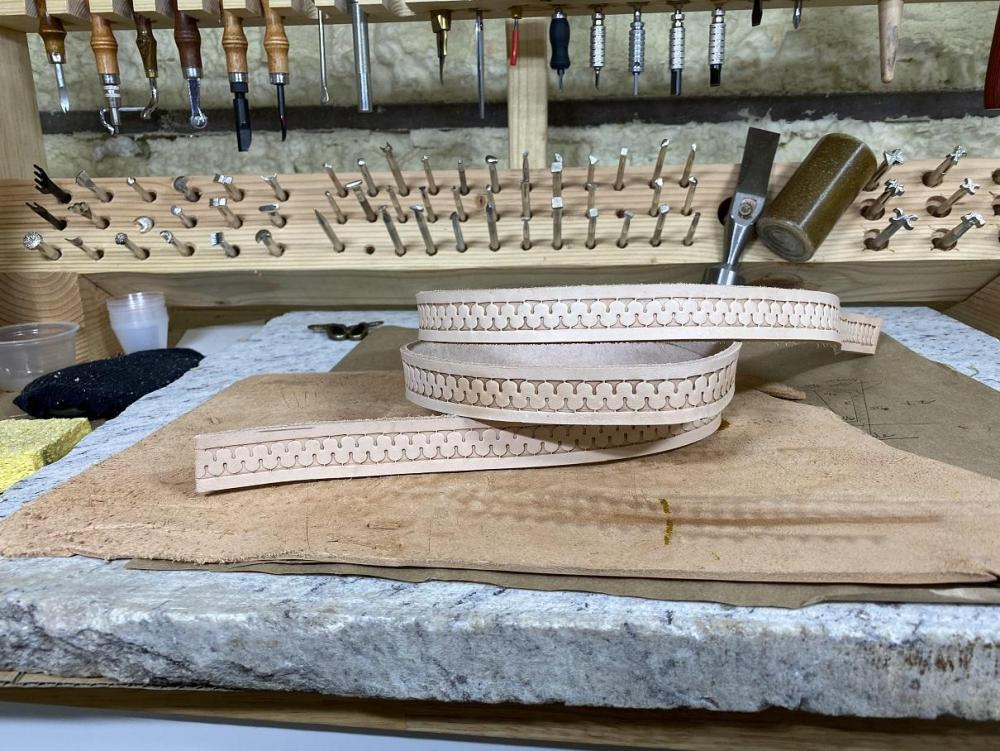
worked a bit this morning, the tooling is done on the flap and front panel areas and the border is tooled. Of course, until I apply finish and sew them in place, I will always see things and touch up. I will start on the D-ring assemblies which will be sewn in before the main project is assembled. The color will even out when the leather dries, of course. Nothing has been applied at this point but water for tooling.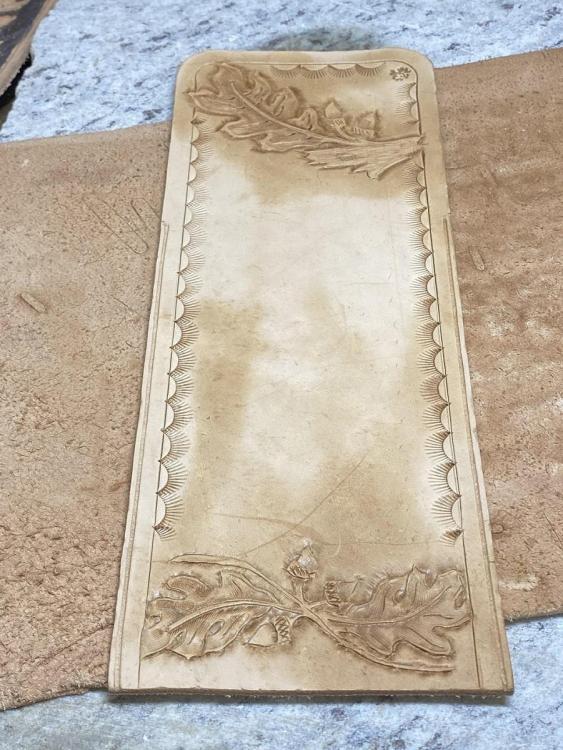
-
22 Plinking Pouch
Brokenolmarine replied to Brokenolmarine's topic in Gun Holsters, Rifle Slings and Knife Sheathes
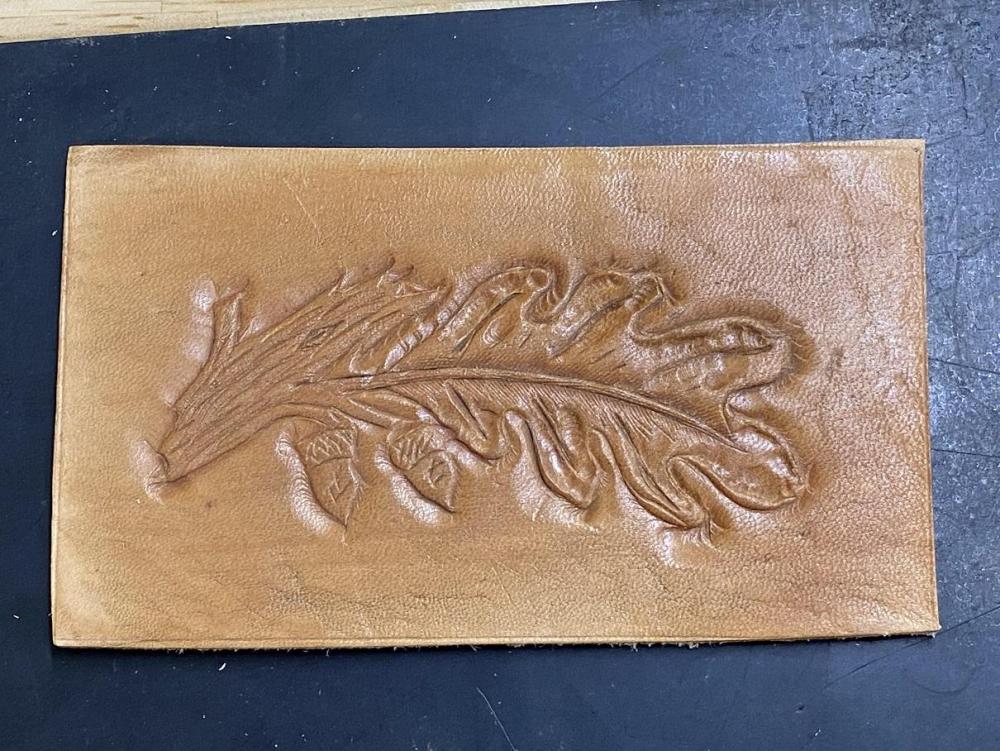
My friend would like Oak and Acorn as the pattern. Been a while since I did that carving and tooling so I started practicing. Here is practice pattern number three. I need to watch some videos and hone my technque. I can see the areas where I need lots of work. My pear shading needs a lot of attention... and the swivel knife could be much smoother. I went ahead and oiled and waxed the practice piece, for the practice. The friend liked it. What does she know. I'll get back at it and try and get the carving and tooling done. I'll probably do a basketweave on my pouch, with maybe a cowskull in the center. I can handle that.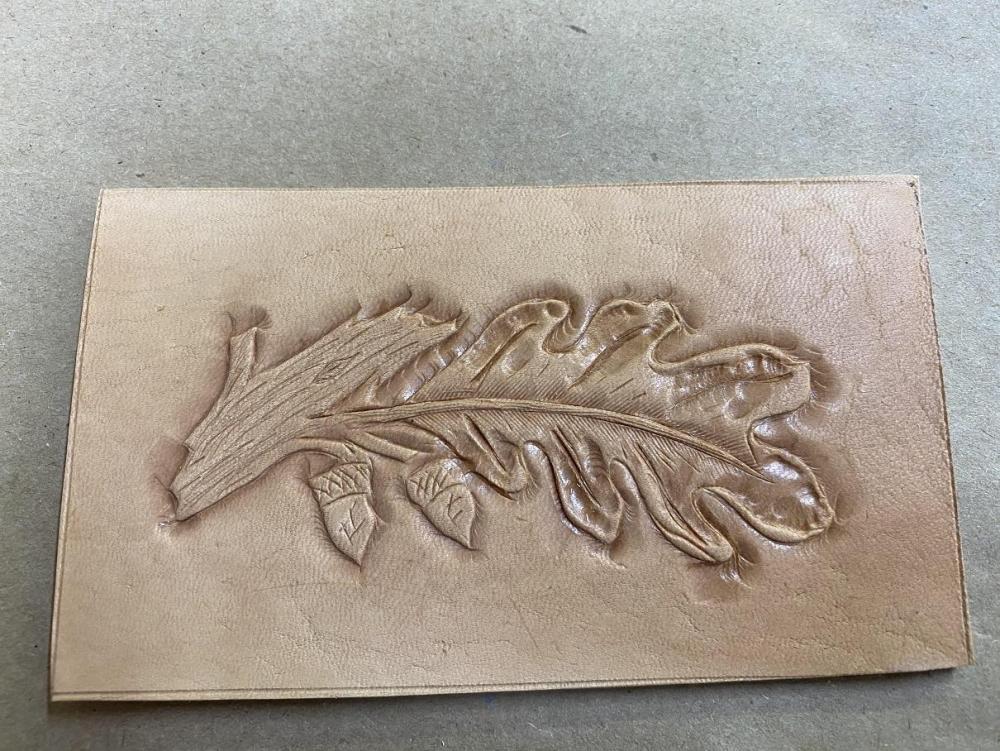
-
22 Plinking Pouch
Brokenolmarine replied to Brokenolmarine's topic in Gun Holsters, Rifle Slings and Knife Sheathes
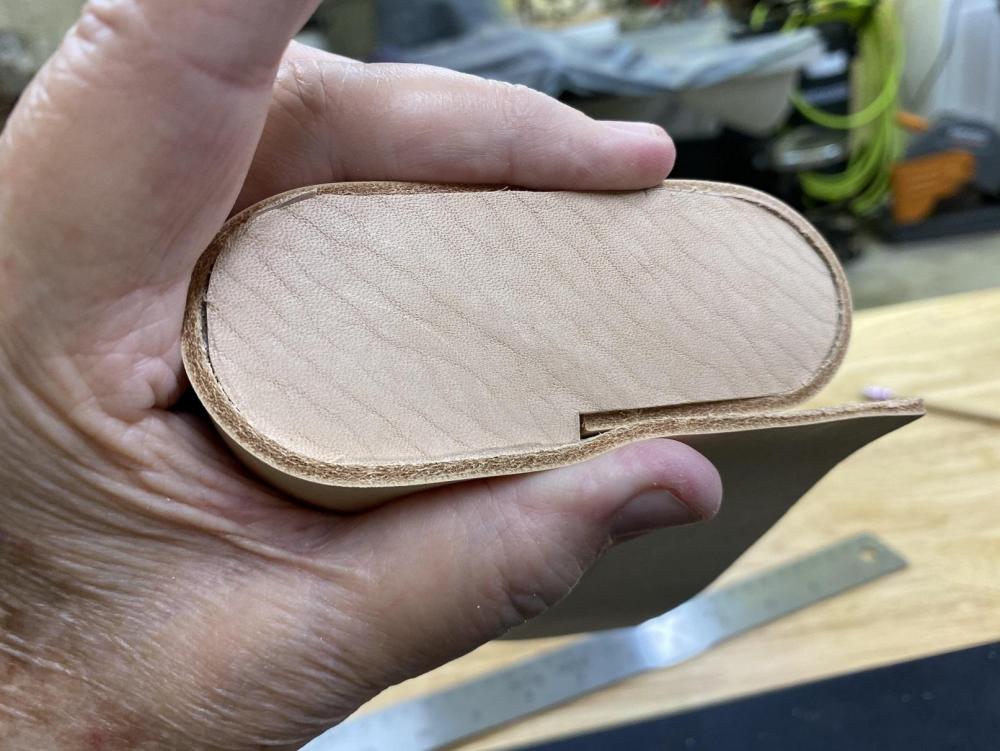
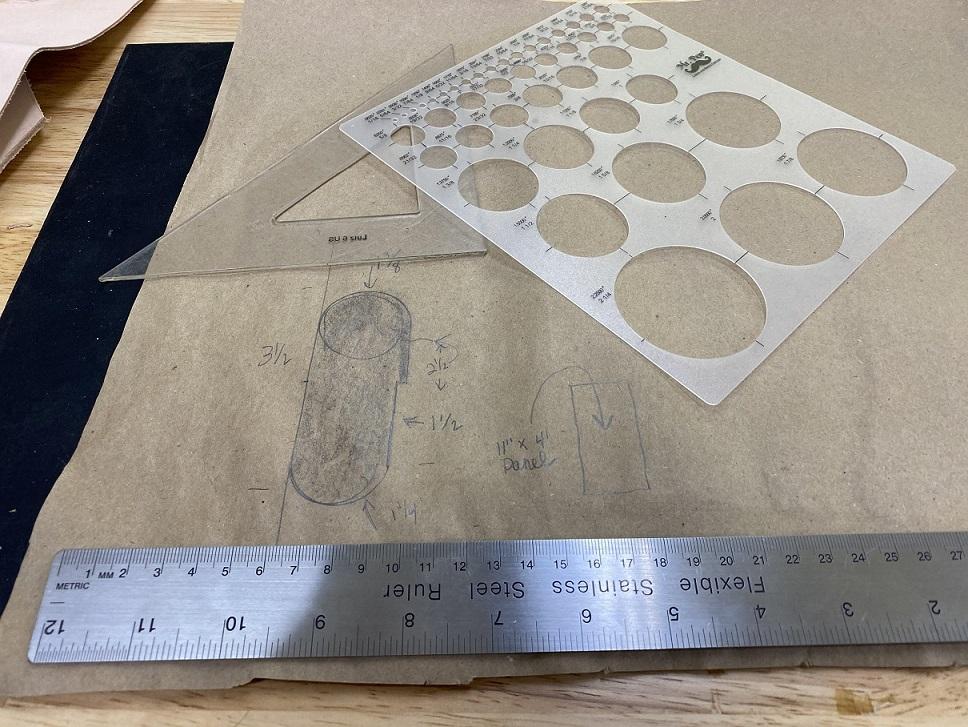
Satisfied, I transferred the design to a thicker leather stock and cut out a sample, then tested the sample with a piece of leather I'd use for the main panel. This worked out pretty well. The testing of the application gave me the length of the panel I need, and I'll end up with 10-3/4 to 11. Width? About 3-1/2 to 4" 4" for a lanyard rig and 3-1/2 for a belt worn pouch. Once the carving and tooling is completed, and I am about to start sewing, I'll trim the notch area on the side panels for a flush fit BEFORE marking and applying the holes for stitching. Until then, I won't touch the width of the gap, as I might cut another panel if errors are made and it could be thicker. (Sigh.) Been there done that.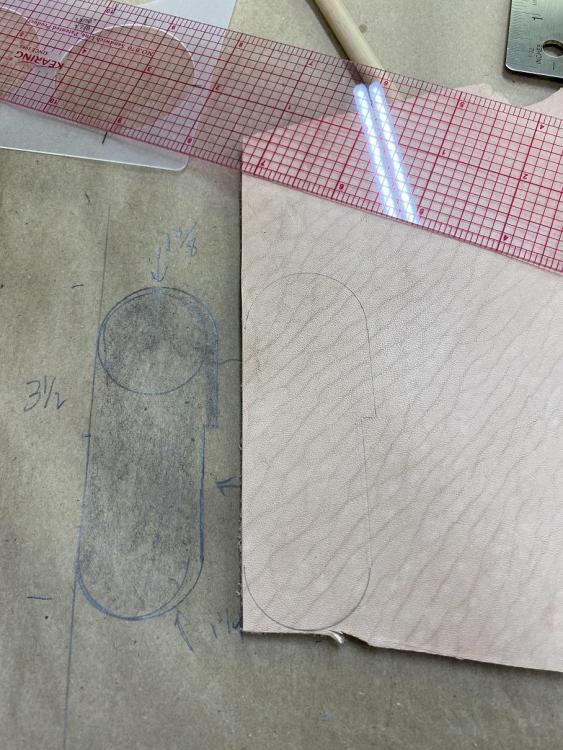
-
Busy Work and a Gift for a friend. I am designing a pouch to hold 22 ammo for walking the trails or accompanying the wife or I wandering the farm when we are carrying the 22 rifle or pistol. You never know when you'll need to put down a varmint, or decide to plink a bit. Plus I have a friend who offered up some rare ammo she no longer needs and I can't find. She is getting along in years and no longer shoots the larger calibers and sticks to the rimfire, so I offered to make her a plinking pouch as well. Mine will likely have a belt loop. Her's will have d-rings to allow over the shoulder carry on a lanyard. I started playing with the design, and rejected the first few, then realized I wanted an oval side panel with a notch, so the flap coming over the top for closure would lay FLAT on the lower enclosure. I played around with sizes and settled on this one. It should give enough depth that rounds won't fall out when you open the pouch to access the ammo, but not too deep to limit access. Should also be wide enough to allow about two boxes of 22 LR or a box of 22 Mag.
-
Thanks, but that serpentine pattern came direct from a youtube video. The only change I sometimes make to it is with a couple deft cuts with a swivel knife I'll close the end like the bottom of a heart, then add the asterisk flower center for an "eye" and boom... The serpentine pattern instantly becomes a serpent. . I like that look. I do sit and play with the various tools trying to find different borders, and save offcuts to practice borders and stitching on. Border practice can relieve boredom.
-
It should look really nice when it's all dried and waxed. She'll wear the strap diagonally across her chest with the pouch hanging over her left hip.
-
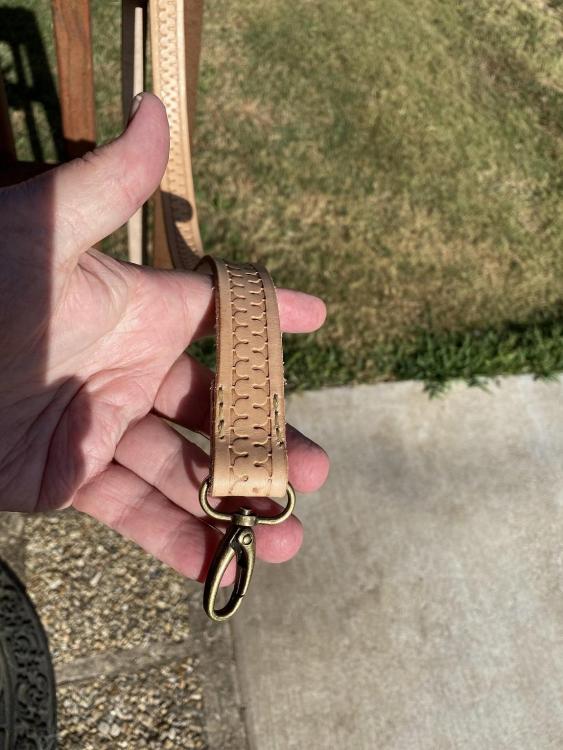
I worked on the strap for the last three days, slow and steady. I ran a serpentine (running w) up the center. Burnished the edges. Measured and marked, then folded, glued, and stitched the snaps onto the ends. The strap got a coating of Golden Oak Watco Oil as well. I used my Glass Plate burnisher on the back, then Oiled it. I'll let it hang to dry for a day or so, then wax it and the pouch with British Bee's Wax. Then the project will be done. The strap joins the pouch at the D-Rings attached to the back ....
-
Very nice use of scraps, very creative. I have met a couple other other gifted folks like yourself. One member of our fly tying group could see flies in just about anything. We were cleaning up, the dried glue drops we scraped off the table top became ladybug flies, larger drops became bettles. Yes, they caught fish...
-
Strap will 55 inches long.
-
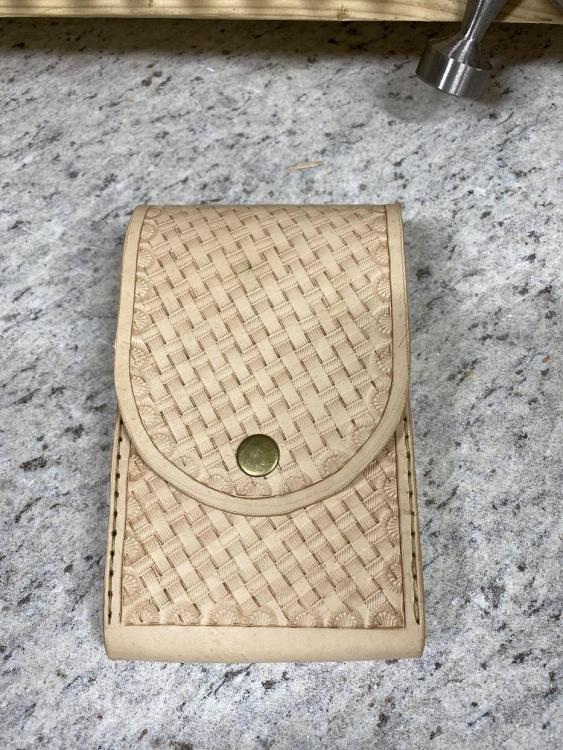
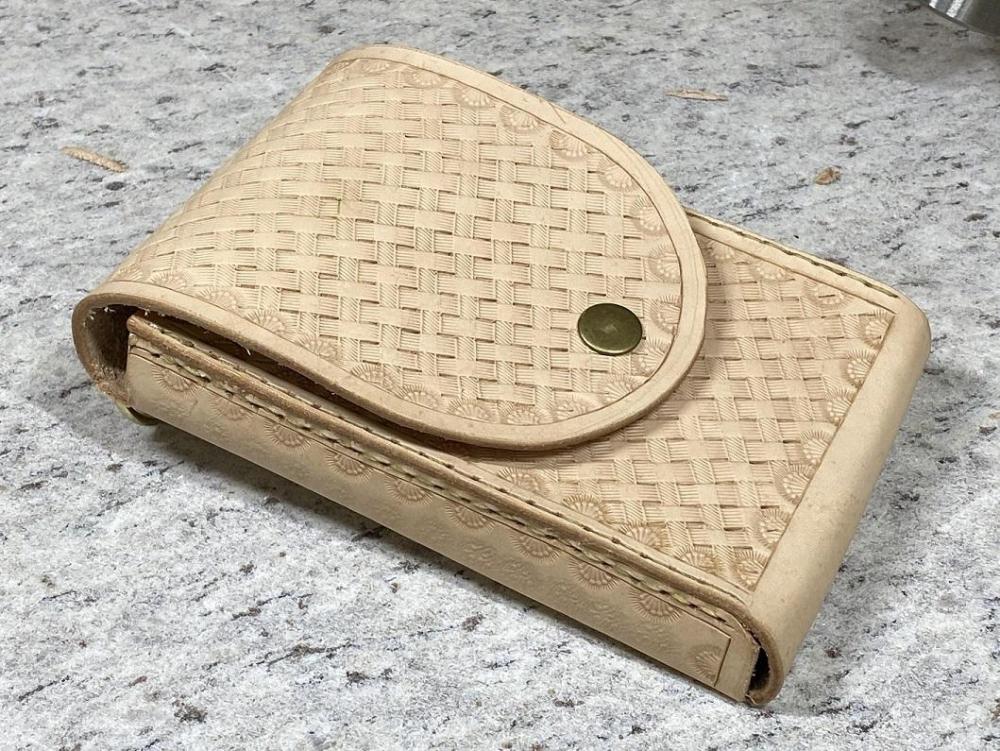
I had to go back out to the shop this afternoon to put away the tools we used installing a louvered vent fan in the wife's feed room in the cow barn, and the bench was calling. I went ahead and applied the Golden Oak. I am very pleased with the look. The finish is very even after two passes. The lighter appearance in the center is drying or the lighting of a poor photographer.. I'm sure she will love it. Once I get the shoulder strap done, I'll add another pic. I plan to run the Serpentine pattern up the strap.
-
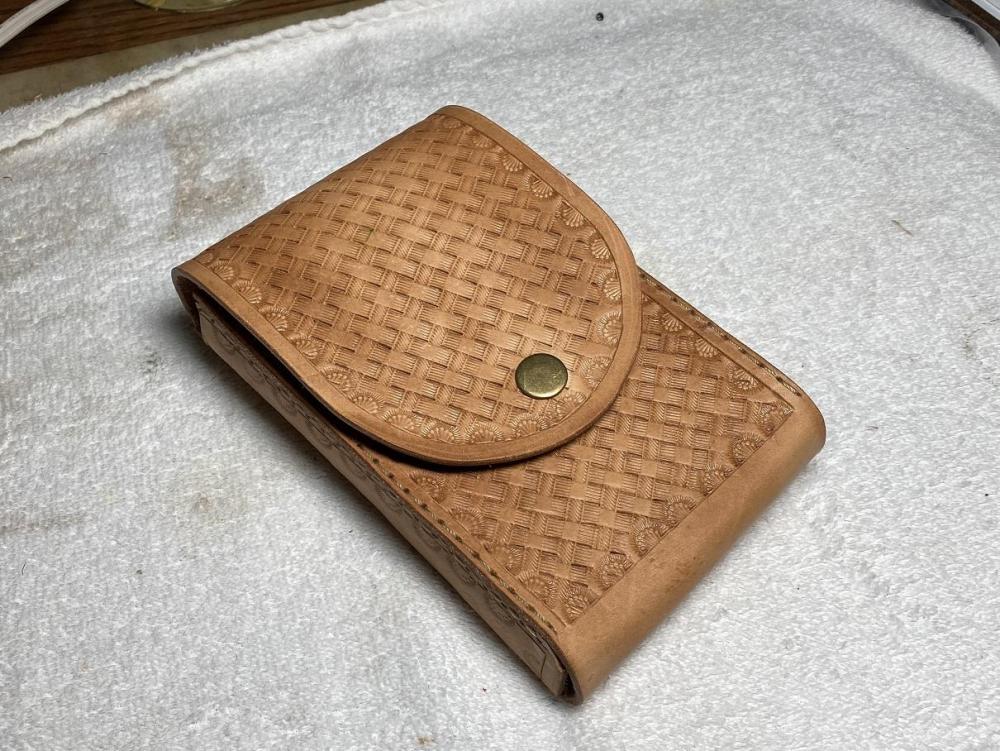
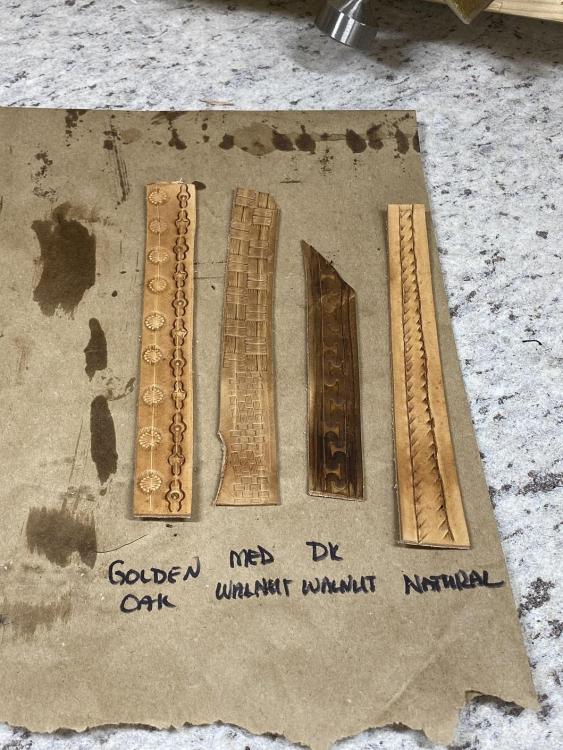
I knocked out a few strips of tooled leather and applied the four choices of Watco Oil finish to let her choose the one she liked, and texted her the picture. She chose Golden Oak. It would have been my first choice as well, with Natural as my second. I was going to wait to apply the finish, as I plan to make a matching leather lanyard with brass hooks, but couldn't wait for her to measure the lanyard for me. I wanted to see the pouch with the finish on it.
-
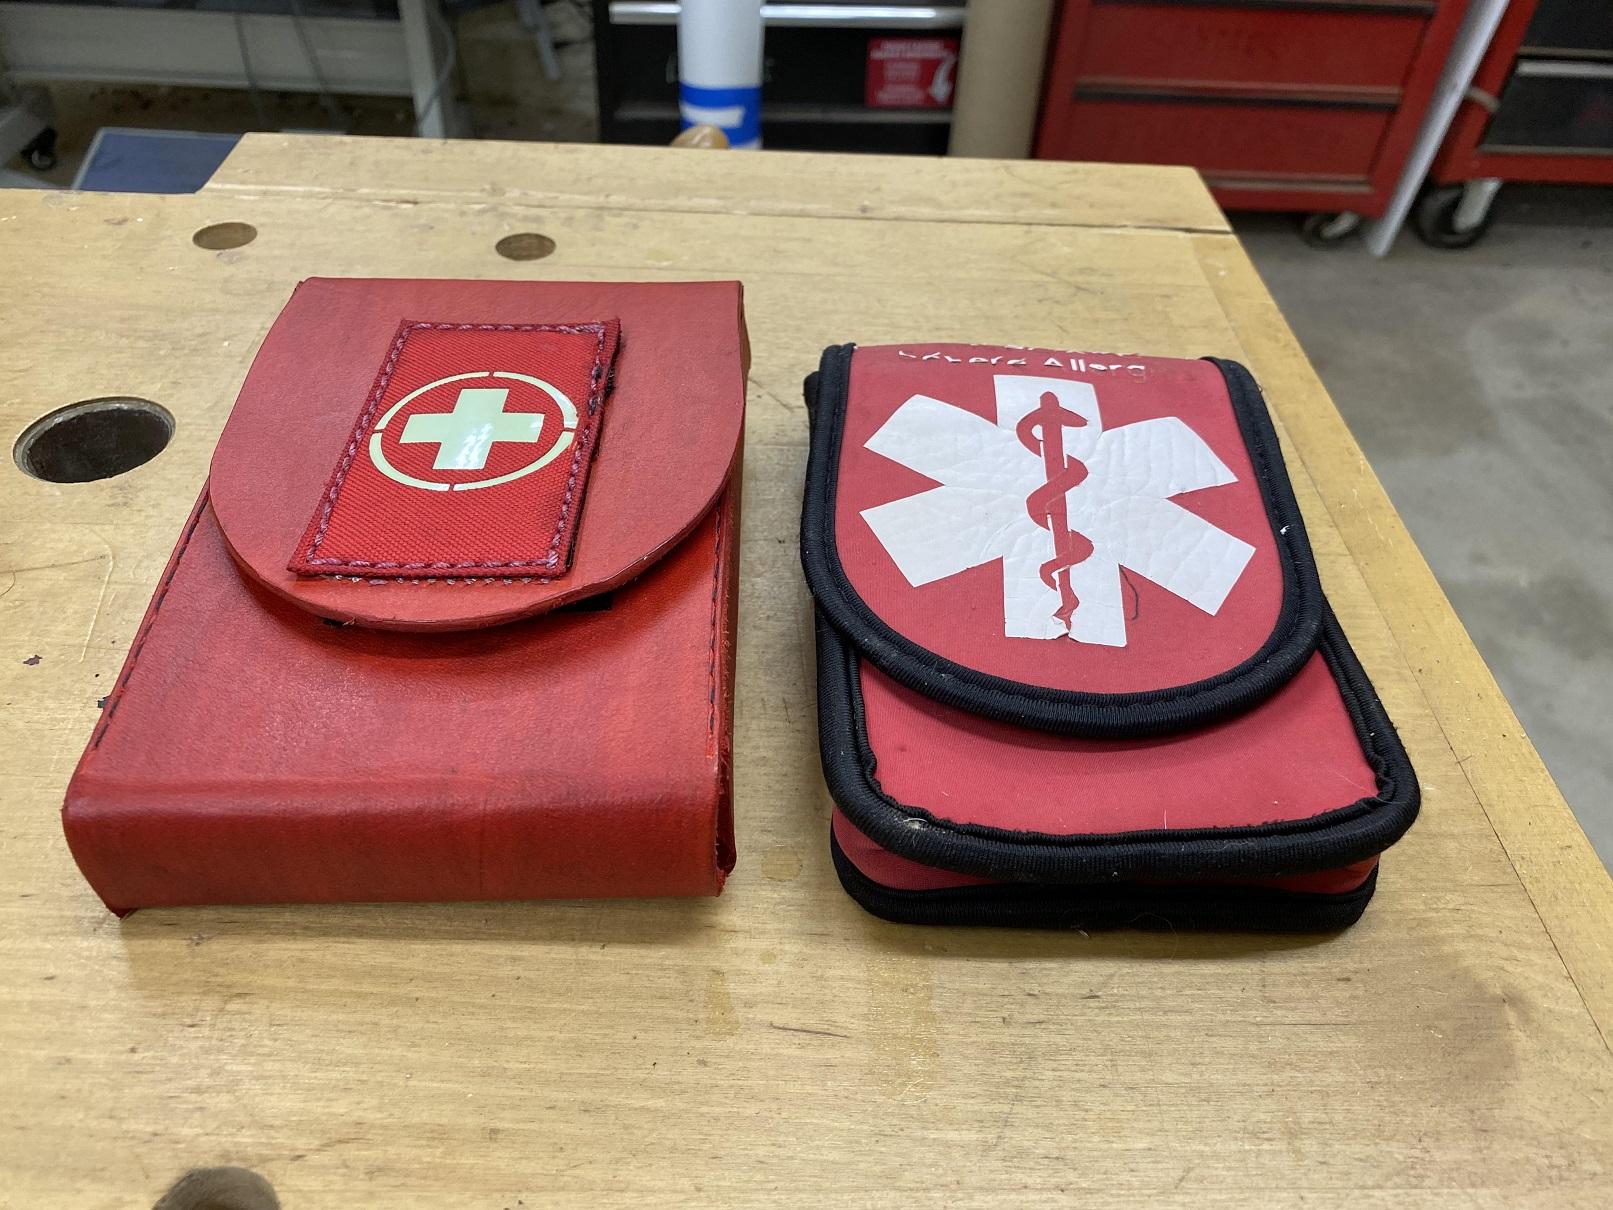
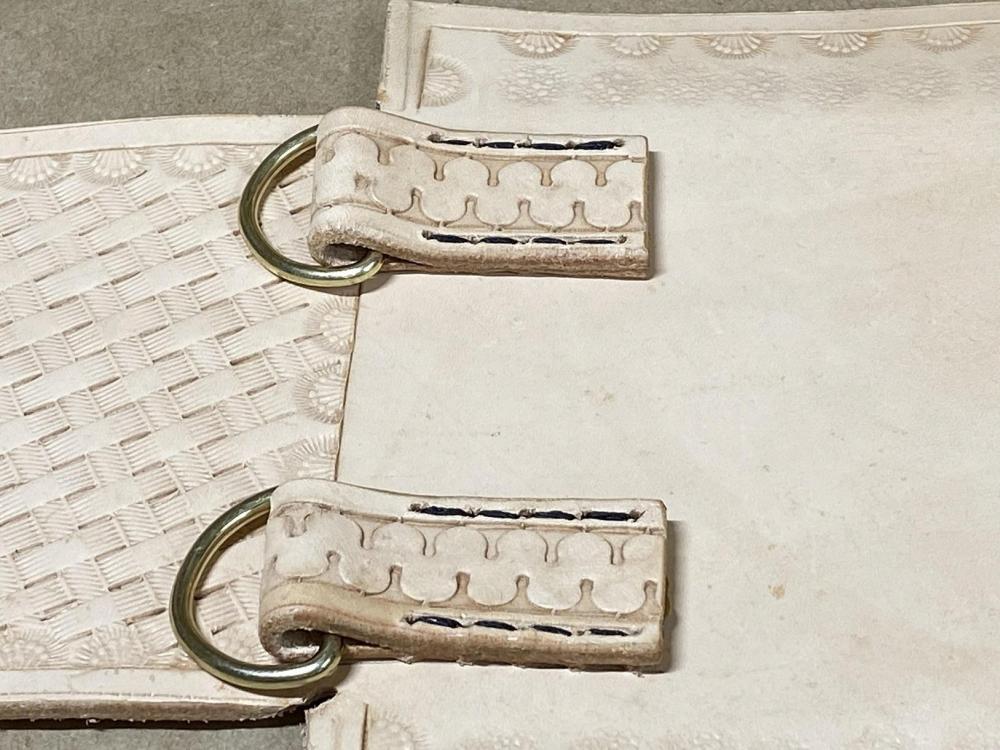
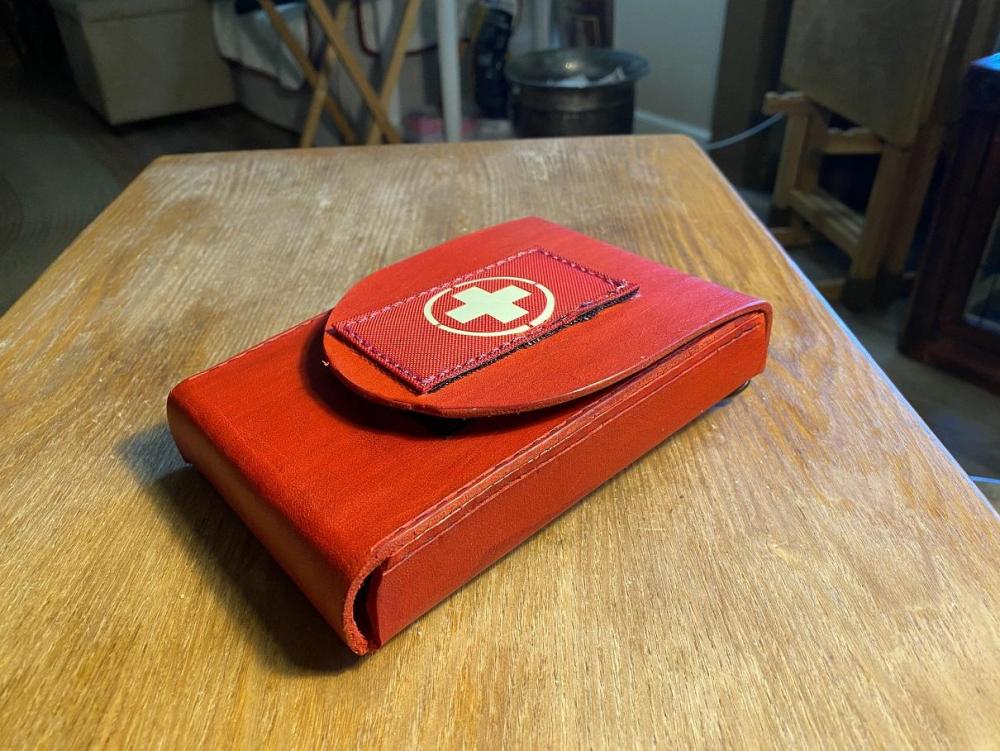
Some of you might remember I made a pouch for my MIddle Daughter here in Oklahoma who must carry the Epipens when she leaves home. Her nylon pouches weren't lasting long. It was a learning experience. I applied some of those lessons to a second pouch that I promised, and also we decided that the second pouch would be veg tanned that I could tool, giving her a Dress Pouch to use when she would somewhere nice. The lessons? First: Extreme care in alignment of the side and top holes is key to ease of sewing. Second: I drilled the holes that went thru the top, with a fine bit. Smaller holes, neater stitch line. Third: Care to insure the exit of the angled (Awled ) holes in the vertical sides, exited in the center of the edge. Forth: I used a larger waxed thread to fill the holes and improve the look and balance with the project size. Last: I took a very sharp pencil and poke it into and twisted it in, every hole, from the back side. This left a lead bullseye in the holes, so they were easy to see. NO probing trying to locate a hole. Here is the result:

-
As I said in an earlier post, I promised her a second pouch. We had decided the second would be a tooled veg tan pouch. Here it tis. It will be finished in Golden Oak Watco Oil once I make and tool a strap to match. After all, it's going to be dressy. I am very happy with the finished product, especially the stitching. I used several improved techniques I developed from the practice I got on the first one. First: Extreme care in alignment of the side and top holes is key to ease of sewing. Second: I drilled the holes that went thru the top, with a fine bit. Smaller holes, neater stitch line. Third: Care to insure the exit of the angled (Awled ) holes in the vertical sides, exited in the center of the edge. Forth: I used a larger waxed thread to fill the holes and improve the look and balance with the project size. Last: I took a very sharp pencil and poke it into and twisted it in, every hole, from the back side. This left a lead bullseye in the holes, so they were easy to see. NO probing trying to locate a hole. Once the strap is completed, you should see the project again, with the strap, and the Golden Oak applied to the pouch and the strap. Watch the space.

-
She got me started in leather work, because she needed a sheath for the knife I made her. Then she wanted a carved sheath for the knife when I redid the scales and resharpened the blade. I'm retired these days, and all I have is time anyway.
-
She liked it. Said if I wanted to do a tooled veg tanned so she'd have a "dressy" pouch, she wouldn't turn it down.
-
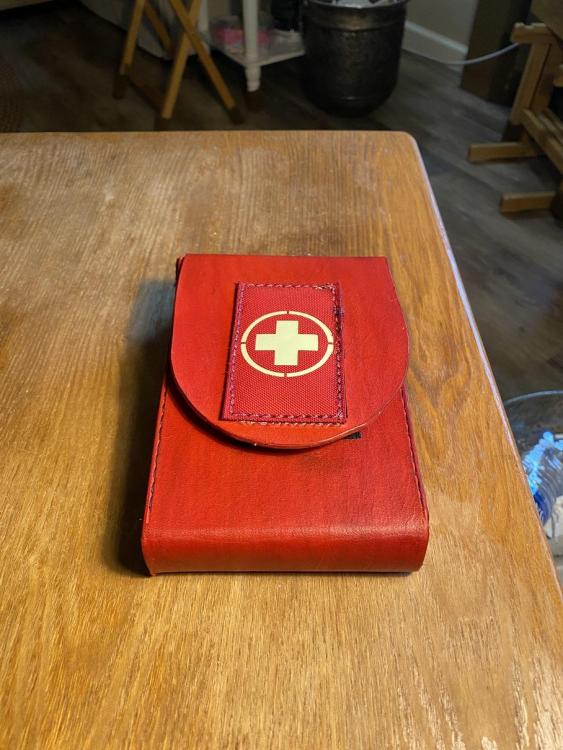
A side by side Comparison The NEW leather pouch on the left, the old one on the Right. Just so's yah know... the patch on the NEW one, GLOWS in the Dark....

-
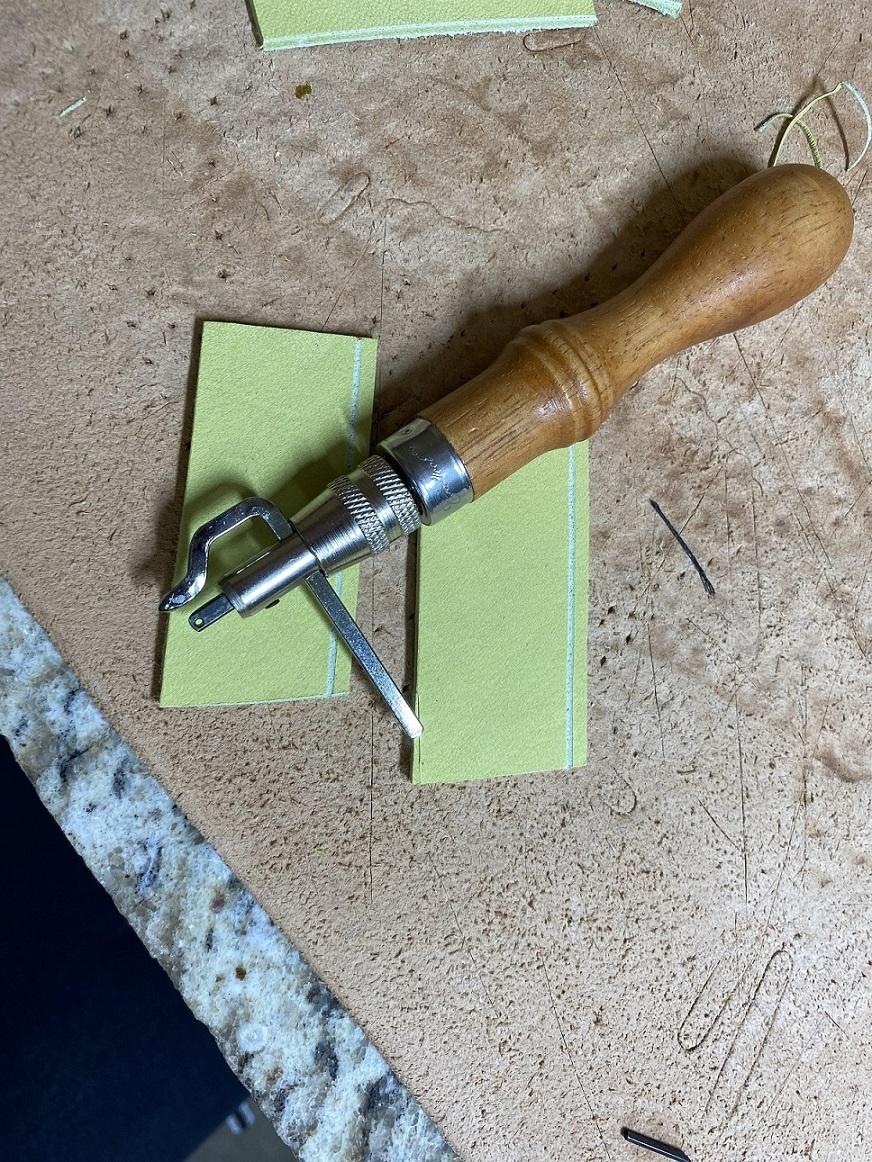
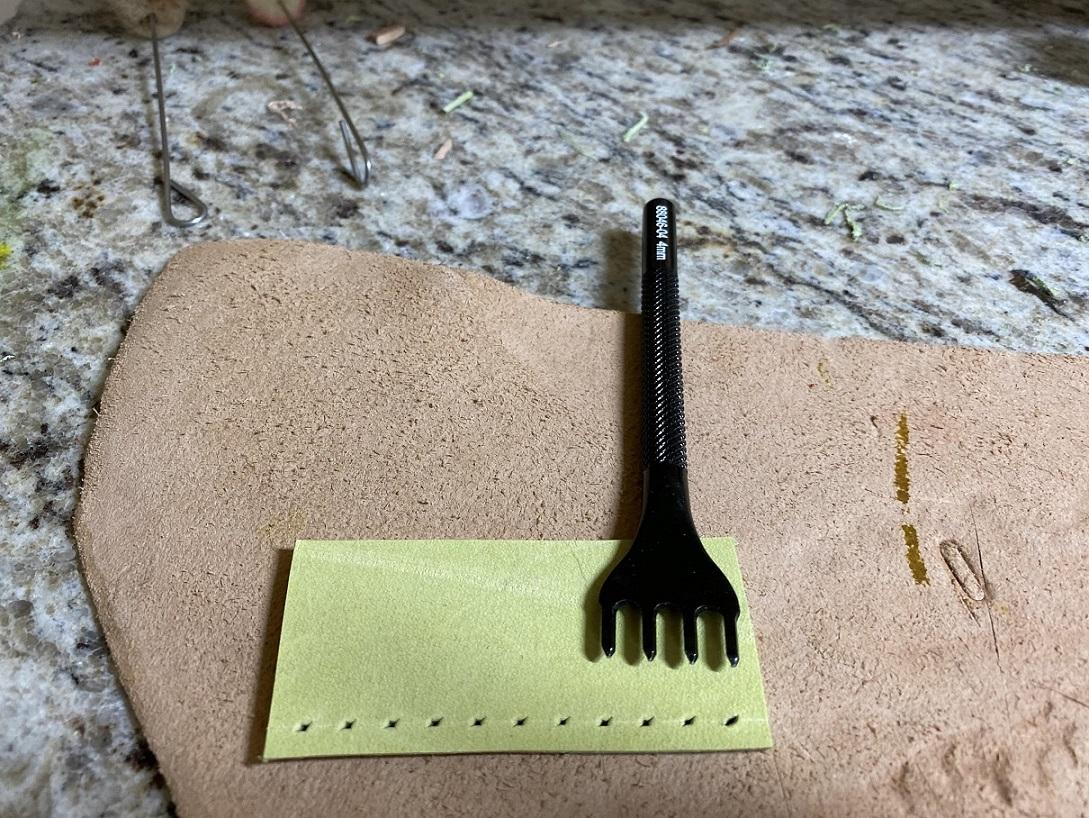
I got the stitching done today. Went out this morning and cut the grooves, punched the holes that could be punched with the fork, then the ones with the awl. 23 on each of the four locations. Then sat down and started sewing by hand. I got halfway thru the one side and had to take a break, lower back issues. While I was resting, the Dump Truck showed up with Limestone for the stalls for the barn, and the second with Dirt for the new Range Berm. Nice Break. Back at it after lunch. I got the sewing done, all thru the process, made sure to pull the stitches tight and that they tracked correctly. After the stitches were done, dyed the groove red again. I am satisfied, though I see the errors and lessons therein. I'll take the project to my daughter in the morning, we are meeting her halfway to pick up something she snagged for her mom. She can critique the new pouch. If it works, I'll start on the green one. If not, I'll cut the green one into practice squares for use later and toss the template. I still could toss the green one and cut out a veg tan so I could carve and stamp patterns on it. But for now, call this done.
-
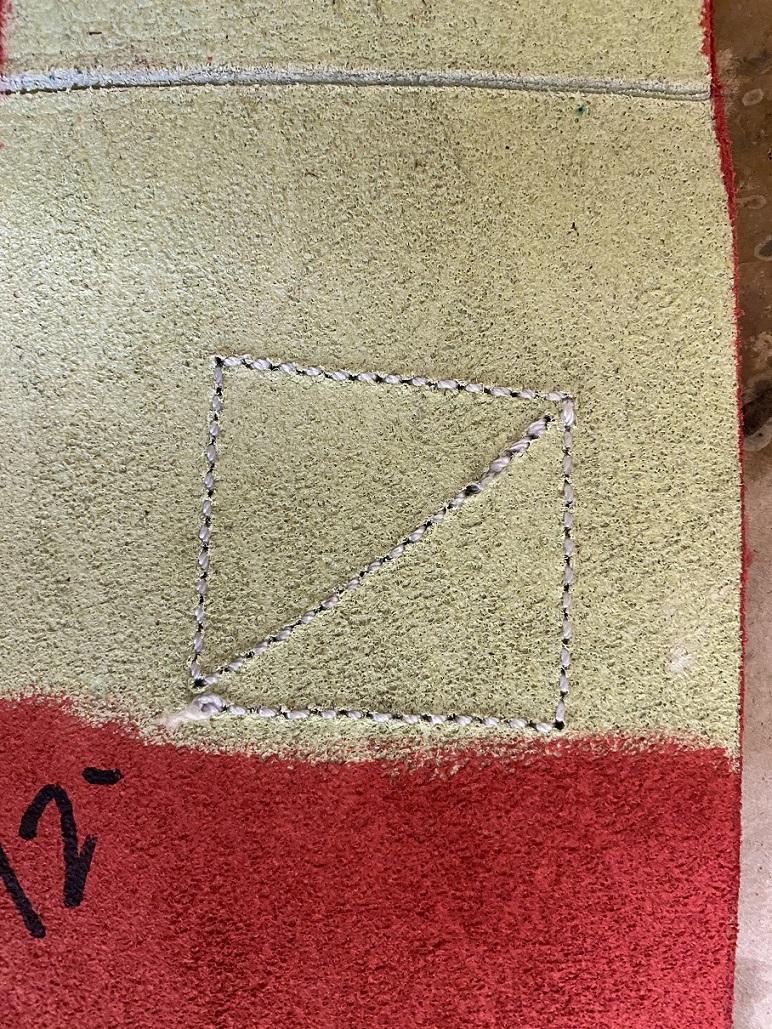
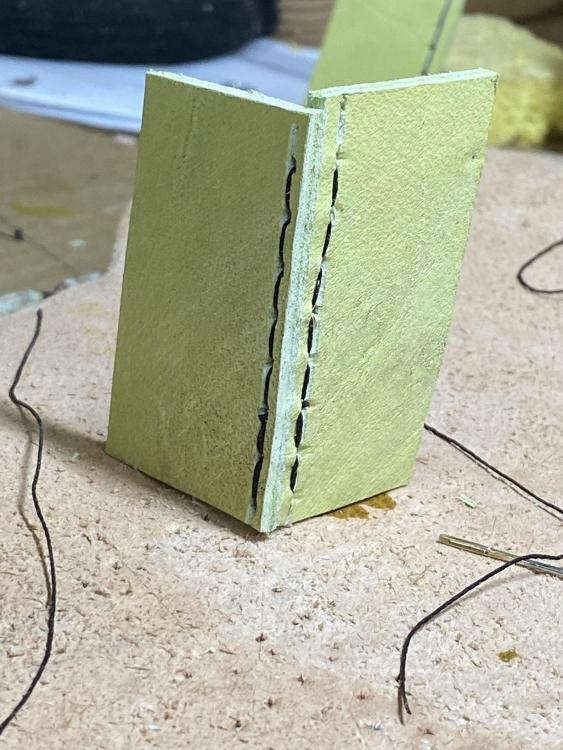
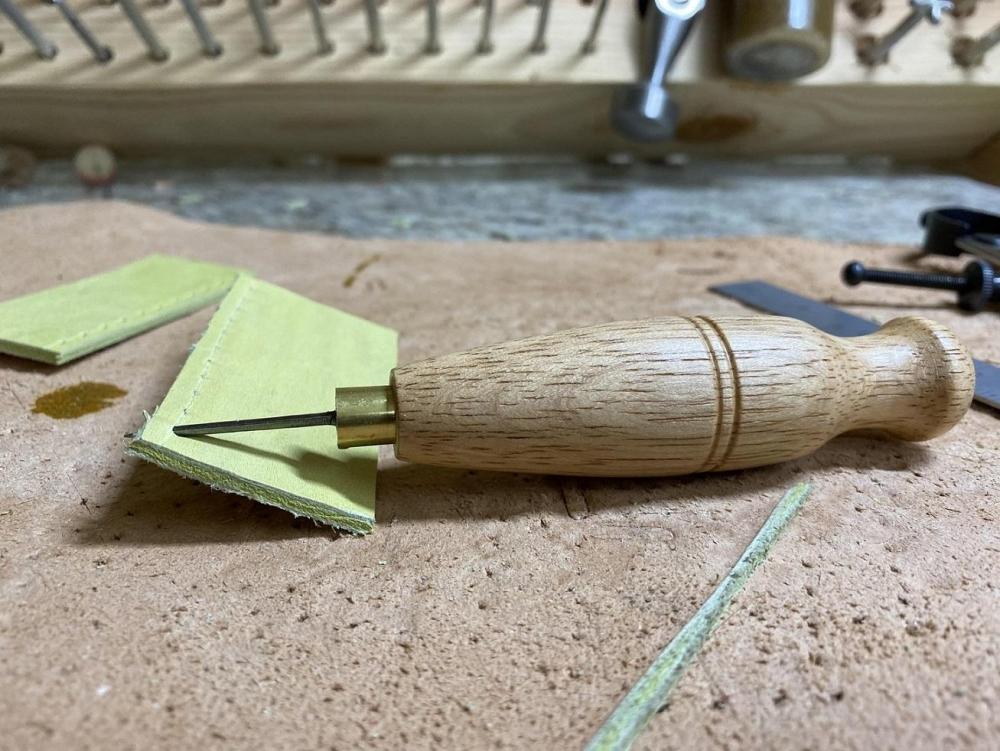
I cut stitching grooves for the next practice session and tried to make sure they were better matched. Took more care to make sure the stitches were tighter and straight. I cut both lines at the thickness of the leather. This time the stitching came out much better and the result was much tighter. Still just a bit off. I'll put the top line in the center of the thickness. The bottom will still be at the width of the thickness but the awl point will come out in the center of the edge rather than the bottom. The second practice for the day was nearly right. I'm good with practice.

-
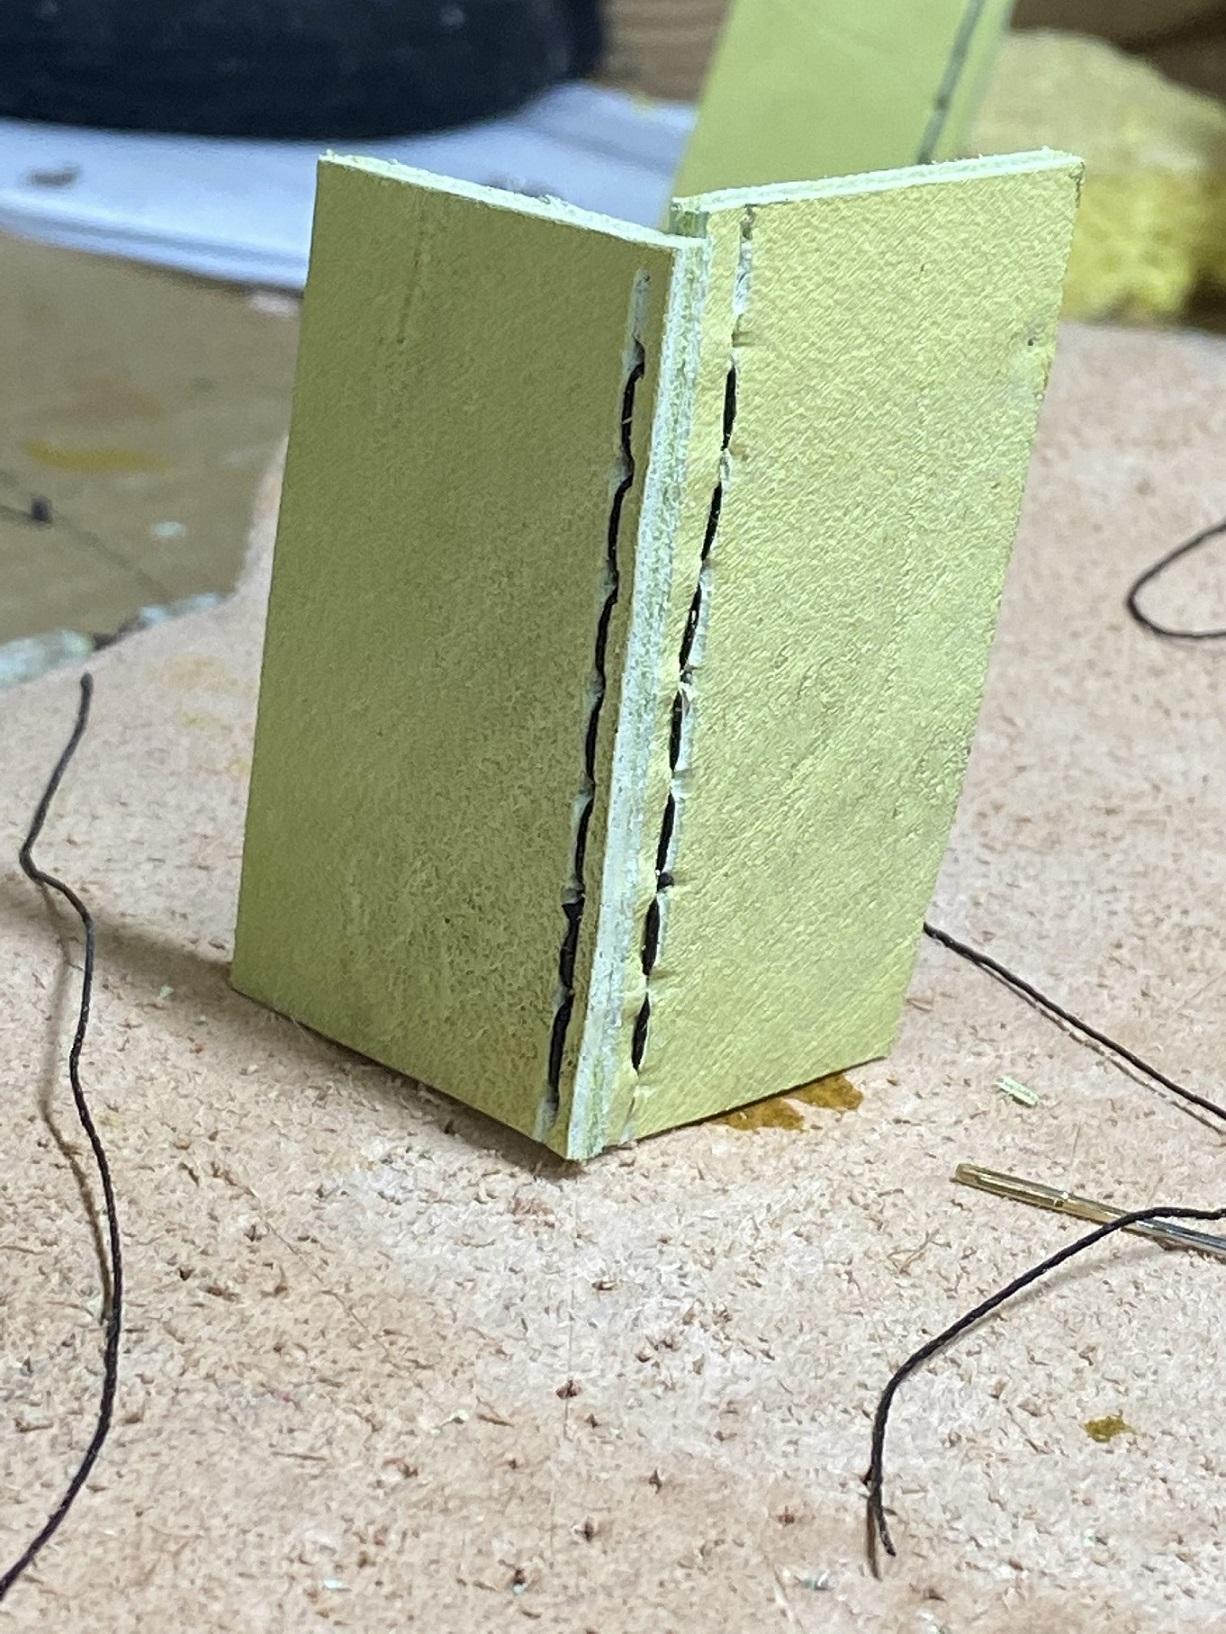
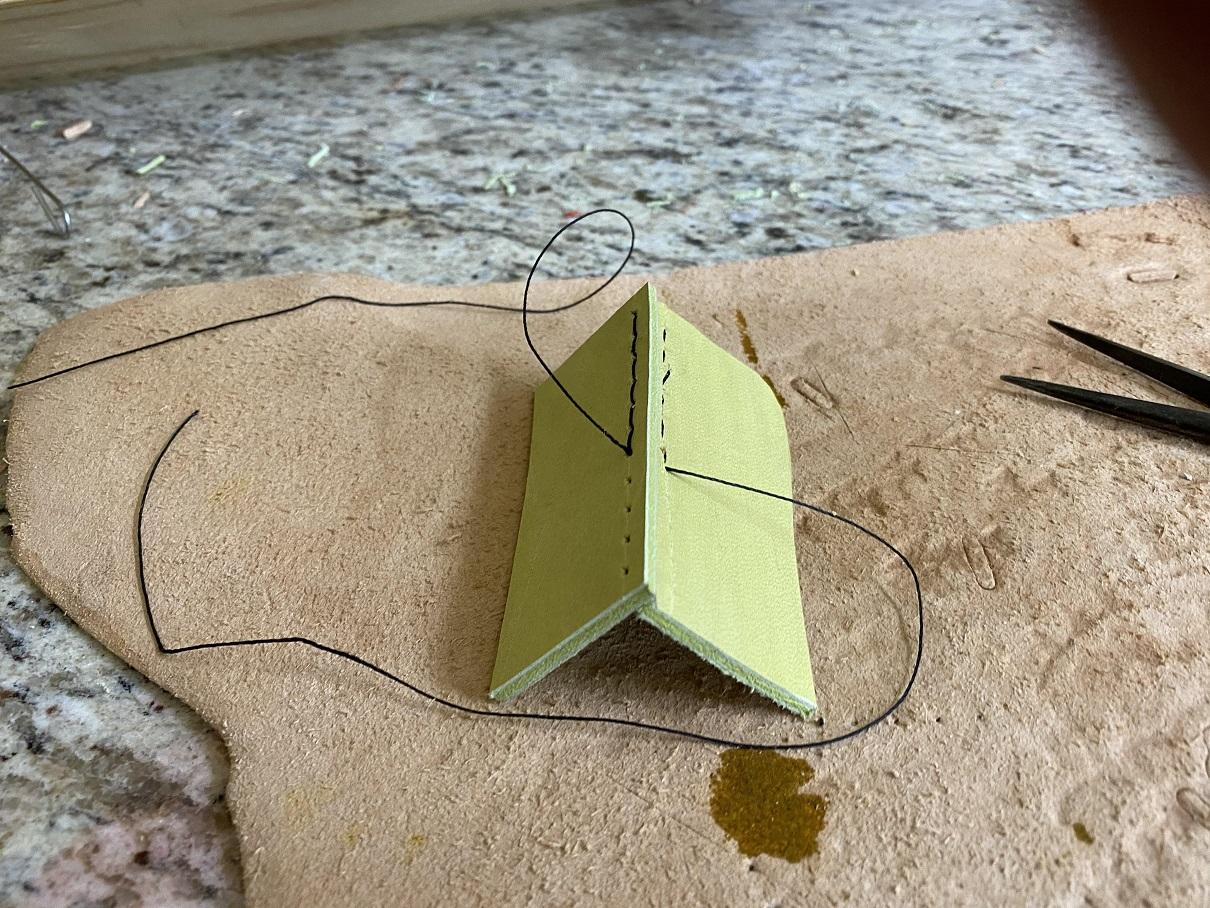
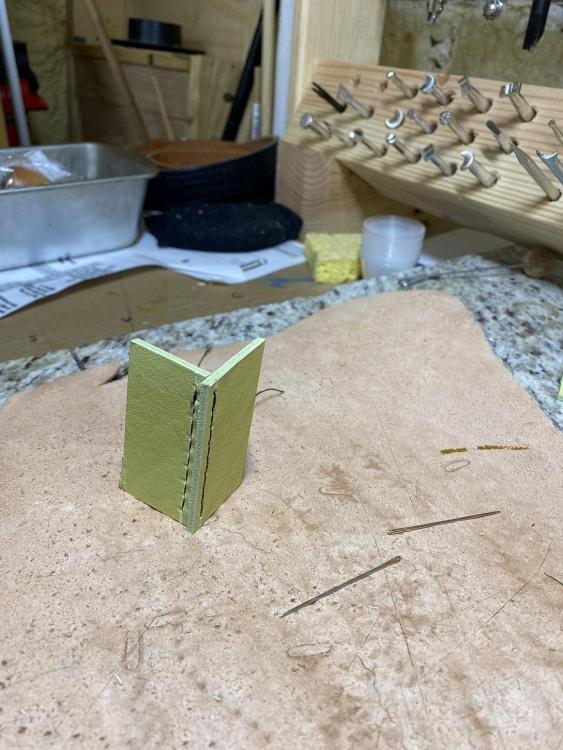
Almost time to hand stitch the piece together. A new technique for me. Box stitch. Time to practice. Mark the spacing and use the fork on the top piece to punch the holes. Butt the side piece to the top and align them, then mark the holes with the fork, but don't punch them thru. They are angled thru with the awl. The side piece is butted up from the bottom at 90 degrees. Once they are butted, you sew them together using a standard saddle stitch method. I didn't align my spacing correctly, but that's what practice is for, to learn the spacing and angles. I'll practice a couple more times before attempting the stitching on the actual pouch.


-
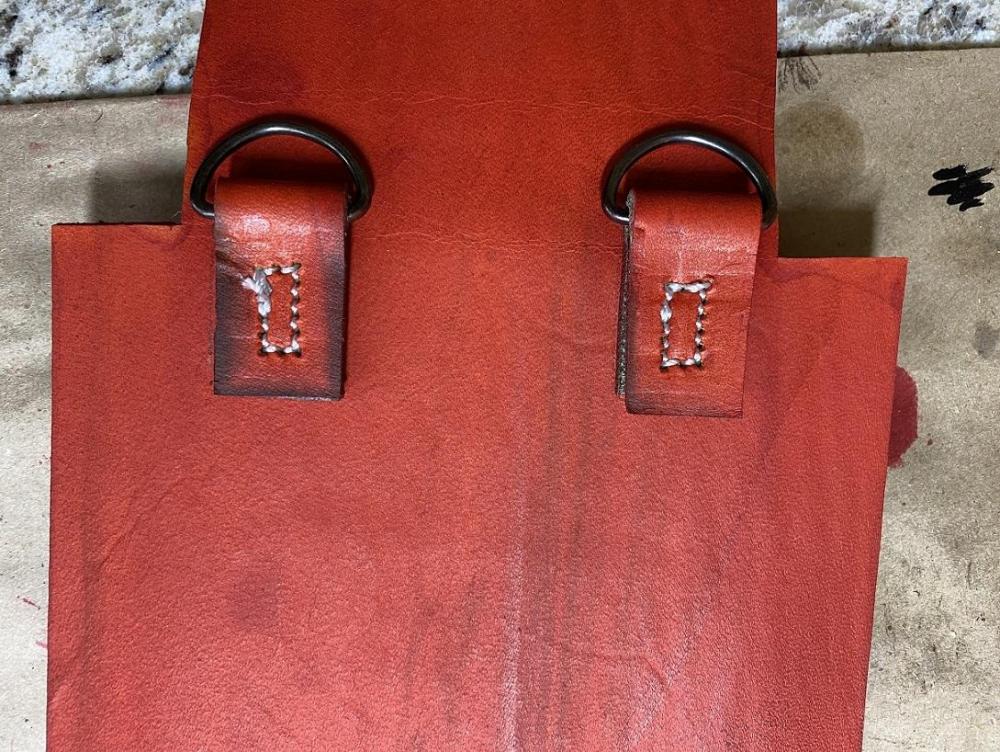
Got out yesterday and sat down at the machine to sew down the D-rings. Small space to sew, but got er done. We are getting close to the end here. Things left to do, but close. I started with the Red pouch because the kid liked the green one better. This was my first, so it was practice as well as a pouch she would be able to use if it worked. I have learned some valued lessons. Don't treat the edges with dye, it bleeds badly on chrome tan. I can only say that the sewing was harder than I expected, but it's getting there. I had the edges still to burnish and the patch arrived and I sewed that on, pics to follow. I treated the panel with mink oil after dying the thread where appropriate.

-
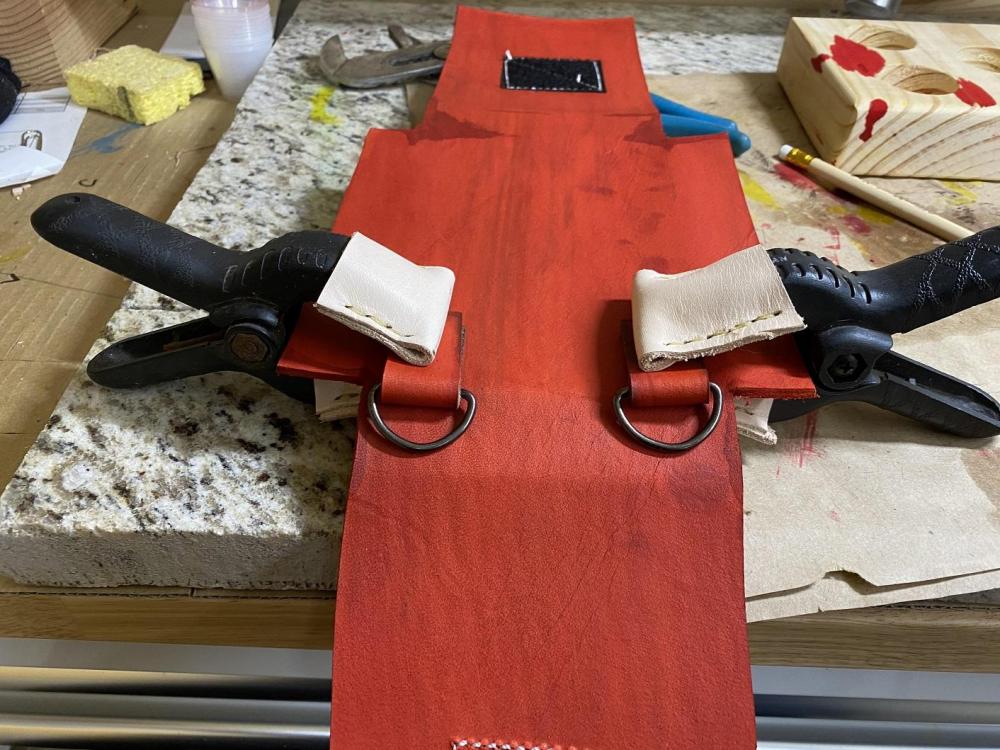
Now that the sewing on the flats is completed, I can attached the D-Ring assemblies. I waited as I didn't want them to interfere with sewing on the flap or more importantly the front panel. I marked their position and coded each one to the marking in case of (BECAUSE OF) minor differences. I then added a dab of contact cement to the pouch panel and the assembly. Clamped them, and left them to cure. I'll sew them tomorrow. Once that is completed, I will sit this part aside, while waiting for the RED CROSS patches due Wednesday, and either start on the green one or work on other projects around the farm.
-
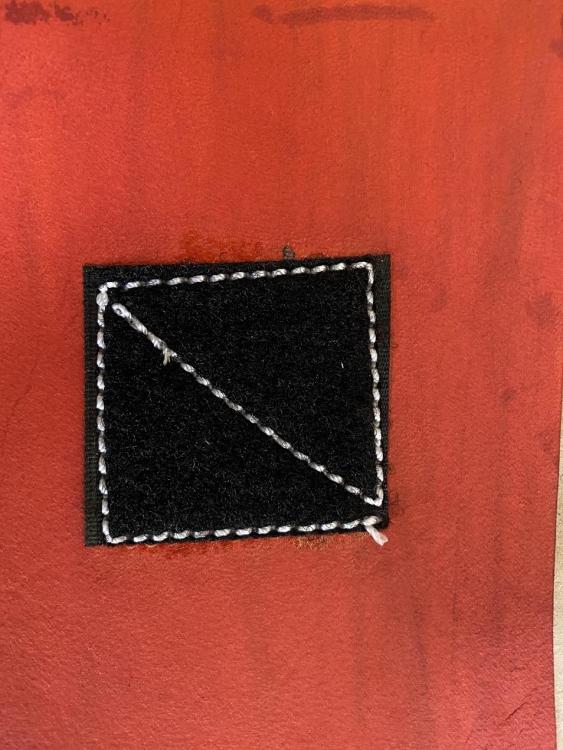
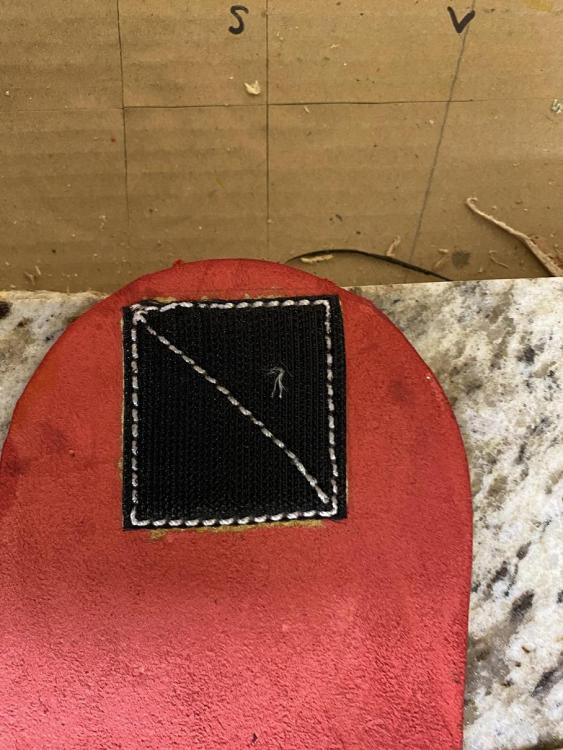
Next was sewing the velcro loops on the outside of the front panel. Again, the thread will be dyed to match when I am done with all the sewing. Inside stitches. Not too bad, but not perfect. Things I need to learn. I'll burn and trim and all when all the sewing is done. I did stain portions of the inside of the front panel, and all the edges. I didn't stain all the way down. When I am staining the holes punched for hand sewing, I may finish the inside or not. You won't see the inside but ... I have normally finished the insides.
-
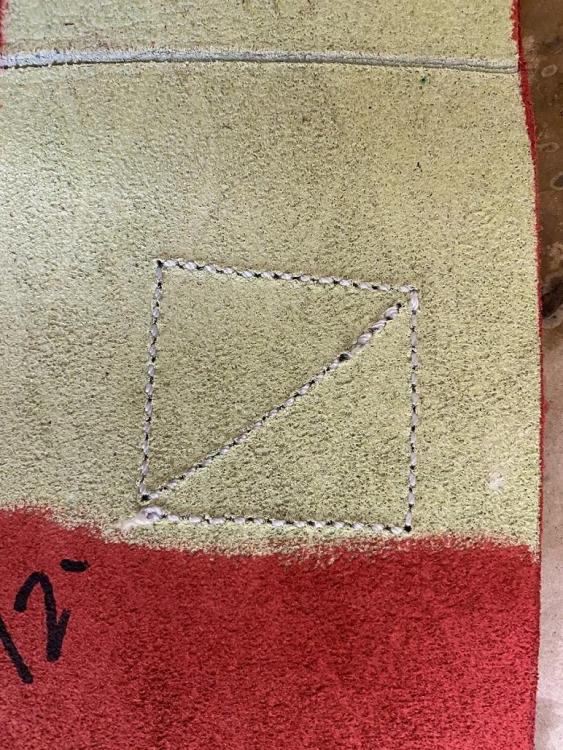
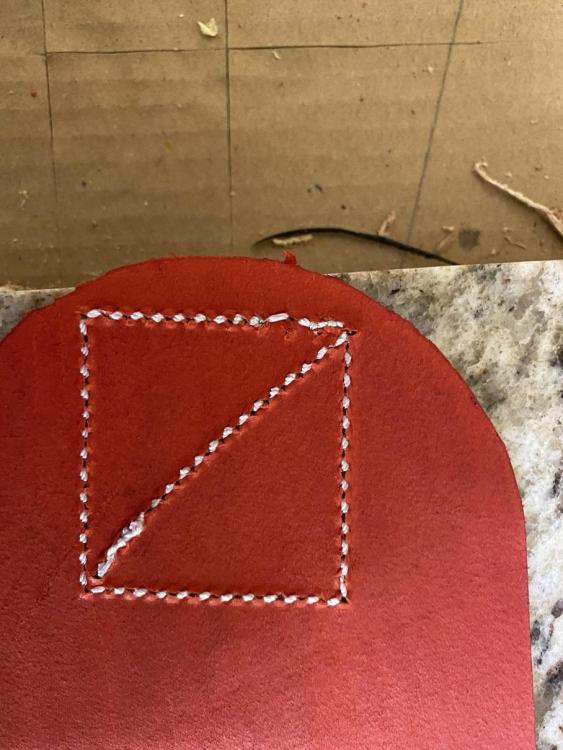
Well, I waited all day for the call, but nothing. NO idea what might have happened. At about 3pm I gave up and went out to the shop to work. I started by sewing the velcro HOOKS on the flap portion of the pouch. This way if they get weak they can be cut off and replaced. It's unlikely they will wear out before she wears out the pouch itself. This is really only the second time using the new machine... so I don't feel like it was too bad. Here is a view of the inside of the flap. You'll note that I dyed the inside of the flap as well. Once I have finished all the sewing to be done, I'll dye the stitches. I have ordered a Red Cross Medical Patch for the flap To cover the outside stitching. Once that is sewn on, I'll dye this thread black. This will be covered with a Red Cross Patch that Glows Green in the Dark to help Jess Find Pouch in an Emergency.
-
My daughter picked up a dozen reptile skins for me at a good price. Some are as soft as suede, some are a bit stiff, the two rattlesnake skins are stiff as cardboard. How do I condition them so I can work with them as inlays on a sheath, holster, and gunbelt? Then keep them pliable.
-
BlackJack,Sap, what ever
Brokenolmarine replied to Bert03241's topic in Gun Holsters, Rifle Slings and Knife Sheathes
I remember the first year COPS was on the air, the officers are dispatched to a dispute in a bar. Redneck is acting stupid at the pool table, and the patrol boys are trying to get him under control. Drunks can be as slippery as cats. To make it more difficult, his four eyed forty ish drunk gal pal keeps trying to interfere. The female Sergeant warns her two or three times to stop the slick as snot the sap appears from her slash pocket on her right uniform trouser leg, pop, perfect. Woman's glasses fly off she drops like a stone. The Sergeant returns the sap to the slash pocket without looking as smooth as a Doc Holiday shuffle. you'd think she had done it before. Then, remembering, she shoots an "Oops" look over her shoulder directly into the camera. Can't take it back, so she turns to her guys: "Charge them both," she says.