Search the Community
Showing results for tags 'cb3200'.
-
The Cowboy CB4500,3500 and 3200 narrow needle plate and feed dog set. Why was it developed? A few years back I decided that I wanted a cylinder machine that could handle a wide range of threads (particularly thick) with a large bobbin that could hold a lot. Smaller machines I have could do thread up to 138 (20m) but with that size thread in the bobbin I may only get 1 or 2 belts done before the bobbin needed loading again. Also the thickness of the job would often be more than desirable for the machine to handle. I managed to get a Cowboy CB4500 from our local dealer at the time and found the machine could do large jobs like tool pouches and such with no trouble but..........when I thought I could do smaller weight projects like wallets I was sadly mistaken. The large needle plate hole and wide feed dog allowed the job to be pushed down into the hole if I wanted to get closer to the edge than about 5mm and it would make a mess of any edging that was done prior to be stitched. I was approached by the local correctional centre about this time to make up for them an improved stronger personal alarm pouch and the numbers were pretty significant. I went ahead and designed a good pattern and proceeded to put it into production. Here is a picture of the finished article – Everything went well up until the stitching stage. The best way to do the job was to get all of the edging done first before the stitching and that is what I did. I knew when I was doing it that the job was going up and down a lot and was very difficult to control but I did not take enough notice of the edging at the time.. This picture below was by no means the worst one but just an average one after the stitching. “Golly” I said (perhaps something stronger and shorter to be honest) This was going to take a lotta fixin On a close inspection I found the reason. This belt strip shows that at the start of the strip as the needle enters the job all looks good. Then as the needle goes back with the dog foot and the dog foot descends the belt strip lowers down into the hole as well. The sharp edge of the needle plate was tearing up the edging every time the dog foot went down as it got to the back of the hole. This set me onto a path to find some way to get this machine to behave the way I wanted. After a year or more later and a good deal of development time with the new Cowboy sewing machine dealers here in Australia (Good people) this is what we came up with. A narrow needle plate which has a narrower hole in it than the original and also been reshaped to improve tighter curve stitching like gussets. The narrow feed dog gives the advantage of assisting the needle to be guided at all times through its motion whilst the feet are down. This means the stitches are less likely to miss and revering is now more accurate at lining up the stitches. Previously a narrow slotted needle plate was provided but that involved having to take out the dog foot altogether and at the cost of an unreliable stitch length at times, especially in reverse. This shows the original needle plate hole width in metric (8.75mm) and the next in English (.344 of an inch) This next picture shows the new needle plate hole in metric (5.54mm) and following that the English size (.218 of an inch) Due to file size limits on loading here I will follow this up a bit later with a link to a couple of video's I have done showing off the improved capability given with this new set as well as some practical use pictures I have taken whilst making some of our products.
-
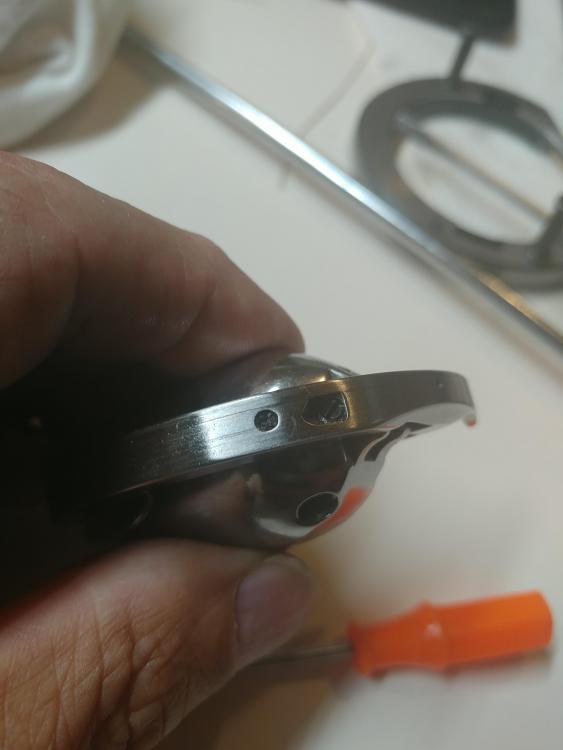
Thanks to this board and contributors. Long story, short version. I spent way too long trying to fix my machine thread jam. Spent quite a bit of time reading this forum today. Cant say which post or which person but they mentioned that "the little screw on the shuttle hook assembly can come loose over time". Well, TA DA! That was it...the screw had loosened just enough to be just a hair above the surface. Which in turn snagged the thread and jammed the machine. I won't admit publicly how much time I spent trying to figure this out... Thanks to this forum and contributors! David (Pic taken after the screw was tightened back down)
-
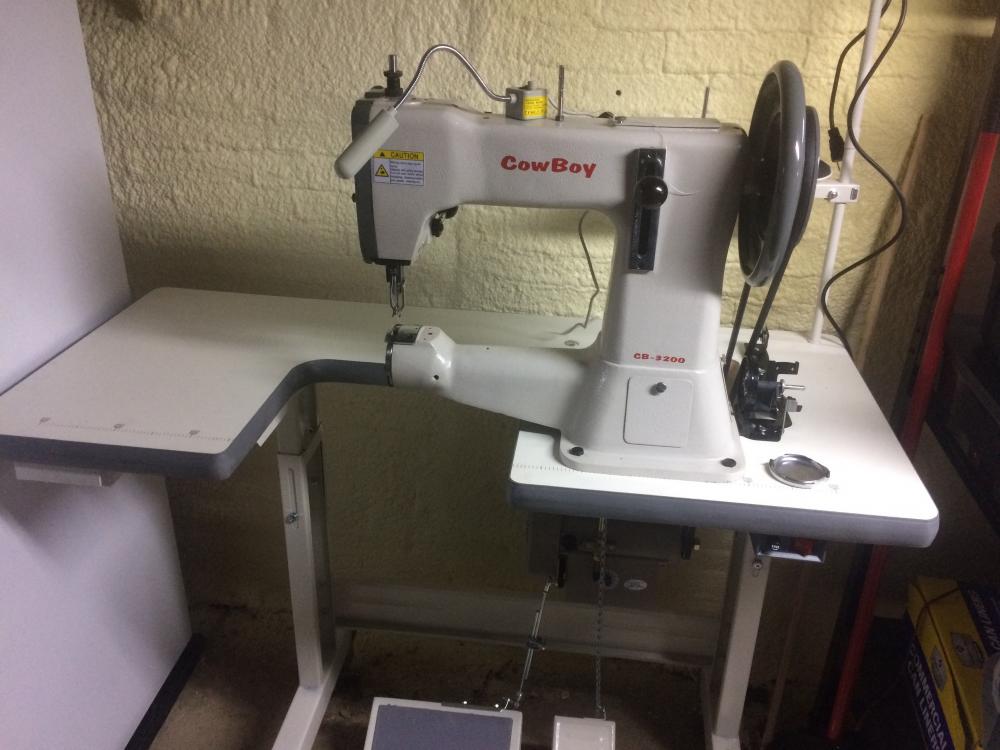
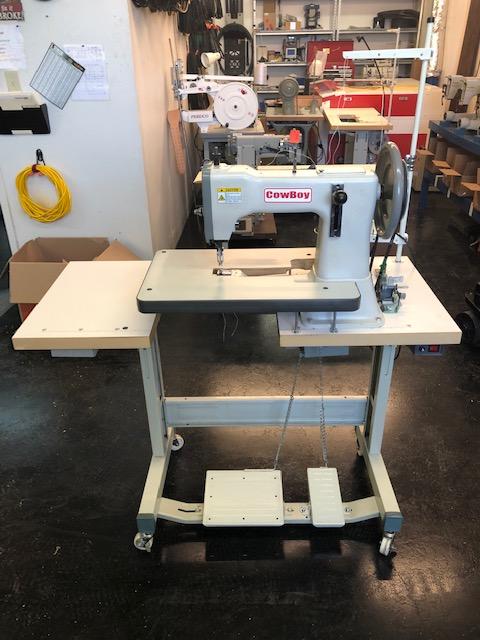
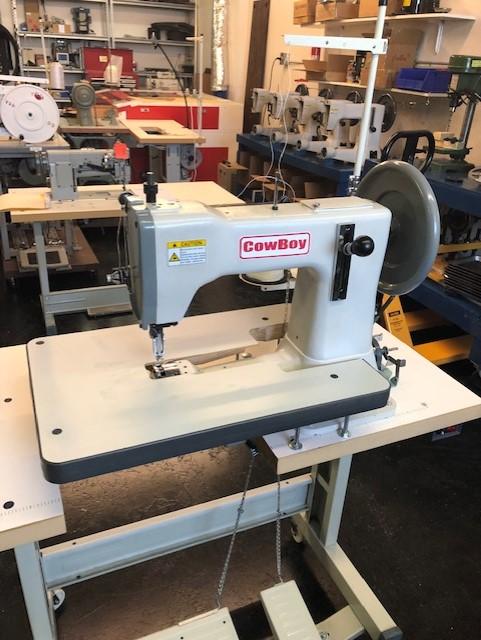
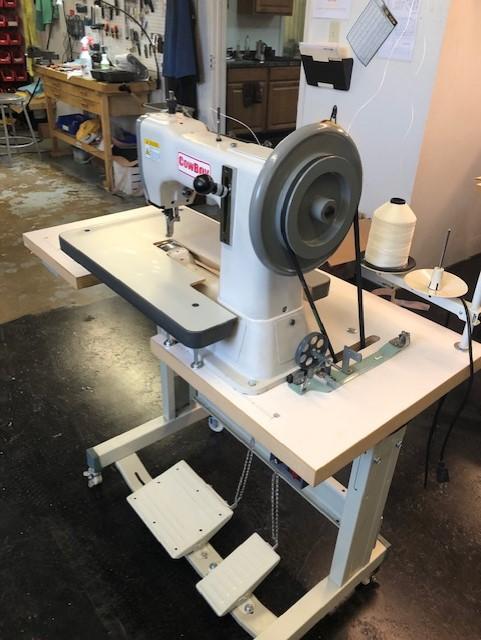
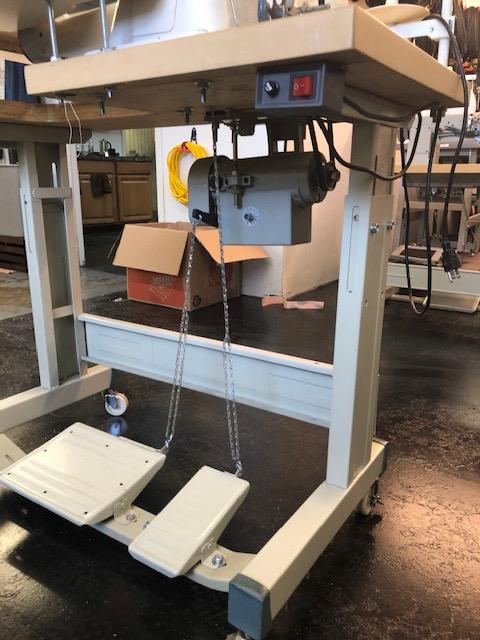
Cowboy CB-3200 Leather Sewing Machine. Triple Feed Cylinder Arm. Machine has been fully re-furbished, tested and sewn off. Working perfectly. Machine comes with stainless steel leather working feet, and smooth feed dog. Machine table includes optional Flat Top Table Attachment. Capable of sewing 5/8" harness leather. This machine is perfect for sewing knife sheaths and holsters. $1600 Firm. Brand new machines retail with all of these options retails for $2010. Comes with 30 day warranty. Machine can be seen and tested at our dealership. Please act quickly, this machine is likely to sell within 24 hours. Machine can be shipped for additional cost. Solar Leather Machines2837 Galleria DriveArlington TX 76011817-422-9151Alexander@solar-leather.comwww.solar-leather.com
- 1 reply
-
- sewing machine
- cowboy stitcher
-
(and 2 more)
Tagged with:
-
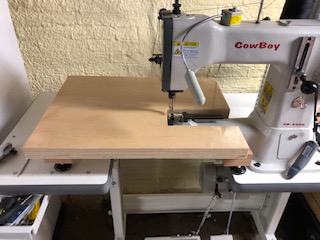
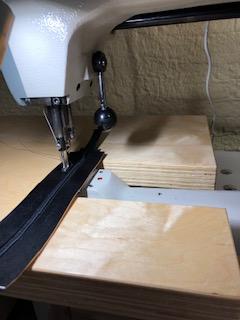
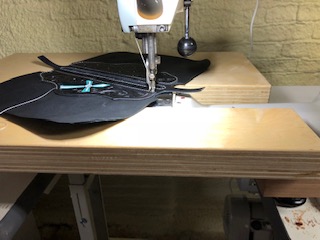
Was having a bit of trouble sewing wallets on my 3200 so I made a quick table to aid in keeping items level while I stitch. Need to make the throat a bit deeper on the table but it works as is quite well.
-
I posted these pics on a different thread but thought I'd post this here to help anyone else trying to figure out how to attach a binder attachment to these machines. I first started with a 1/4" thick plate then really proceeded to mark where the holes need to be drilled. The plus side to this machine on the cylinder arm is that it has those two holes where the guide roller goes. The most difficult part was probably just tapping the holes with the proper sized threads and not breaking the tool off in the hole. This is a 1" binder attachment from Sailrite.
- 2 replies
-
- cb3200
- 1 binder attachment
- (and 5 more)
-
The time is coming soon that I am either adding an electric machine to use in addition to my Tippmann Boss, or getting a larger machine to replace it. What I'm looking at is the CB3200 and using that for belts, knife sheaths, some of my holsters and using the Boss for my thicker holsters. Or possibly getting the CB4500 and selling the Boss. I have sewn 5 layers of 9/10oz with my Boss in the past. The only downside was I had to mark my stitch locations and lift the presser foot and move my work to get the stitch length I wanted. Will the 4500 handle that thickness without manually moving the work for 5 to 6 stitches per inch? Will the CB4500 sew thinner material like the 3200? I have used my boss to sew a few lead shot filled suede pouches to use for weights and it did just fine after I adjusted the tension lower. The 4500 package is $1000 more than the 3200 without any extras. I'm guessing I could figure another $300 to $400 for presser feet and edge guide if I choose the 3200? What would the Boss be worth being just over a year old if I decide to sell it? If I go with the 4500, I see no need to keep it, and I am pretty certain whatever I could get out of it would offset the price difference between the two machines I am interested in. Thank in advance.
-
All, I'd really appreciate some quick, constructive feedback on normal operation of the Cowboy 3200 (and other Cowboy machines I'd imagine would be applicable) It's a long story, but suffice to say I just received my machine, and instantly had issues with it which required repair. The vendor walked me through the repair and gave me the option to return the unit for a refund if I didn't feel comfortable doing it myself. I was able to complete the repairs, but having the machine partially apart, and knowing some strange ways I thought my machine was working gave me additional concerns. I raised these to the vendor and was told they didn't have time to reply to my 4 paragraph question and to just return whole unit for refund, no exchange offered. I think he was tired of the inquisition and wanted to be done with me I'm trying to determine if what I think are issues are completely normal, or if I purchased a dud and should get an exchange, or if I should expect issues and not expect customer support trying to retain its customers so should look for a different brand (which I doubt because I've read almost entirely positive reviews of the Cowboy system) 1) How difficult do you find it to rotate the drive wheel by hand? It's possible for me to drive mine by hand but it is difficult. I've seen videos online and it typically seems like people don't have much trouble with it. The repair that I had to do induced a side-load in the drive shaft which I'm wondering if it's normal or not. If it's not, this could cause excessive early wear on the internal components and I'd probably want to return it. I ran a small line of stitching on a 1/2" stack of leather and the machine seemed to have no issue with it, so I'm not sure if this is truly an problem or not 2) how difficult do you find it to engage or disengage the presser foot lever? Mine is quite difficult and sometimes even jams completely. I cycled about 100 times to try to wear-in the linkages and it helped a bit but still has some difficulties. Also I usually have to "slam down" the lever to get the foot to come down completely. If I gently release the lever, the foot will often hang up about half way through its stroke 3) is the right side foot pedal just to hold up the press foot, not completely lock it in its up position? Due to the difficulties mentioned in item #2, my pedal is almost useless. 4) I purchased the "beltmaker's" package and the guide used to gauge the stitch along an edge sits about 1/8"+ above the throat plate. This means that leather roughly 8oz or less would slip under the guide and make the accessory useless. I'm wondering if the design is bad, or if mine is bent, or if I'm missing something entirely Any feedback to help me decide whether to return the machine for a new one, buy a different brand, or be happy with what I have right now would be greatly appreciated! Thank you
-
So, was going to practice with the 3200 and some scrap to try out a technique @JLSleather had mentioned keeping the walking foot impressions off your work... , i didn't even get a few practice runs in, started one and was really going slow and paying attention to where things were lining up and noticed my thread fraying after each stitch was made when the needle was pulling back up from the bottom .....just one little length a couple of inches on each stitch. So i changed the needle, didn't help, changed it again thinking maybe i got a bad one, still didn't help...double checked size #25 Organ needle 794 that came out of the pack that came with the machine. Changed thread, changed bobbins, no joy... So then I researched some, especially here via google, re-read the manual, went over the machine and checked for dust, dirt, burrs, and did a thorough cleaning and re-oiling by the manual. I couldn't find any thing that would cause this. I did find one little burr on the underside of the presser foot toe, right side middle of where the hole starts up the side on the outside. It was enough that if thread was pulled across it with light tension it would fray and break. I don't think this is in the thread path during stitching but smoothed it off jic and still same problem. I am thinking my next step should be to remove the shuttle race and bobbin case assembly to check for anything i couldn't see or reach with the small brush but not sure whether this will affect anything? The instructions in the manual make it sound easy, but this is under the "how to adjust feed dog height" part and that's not what i'm trying to do. I don't want to do anything that will cause @SolarLeatherMachines to say..."didn't i tell you not to do this"...lol. The last thing Alexander said to me was, it's all setup with #277 thread, #25 needle to sew belts, holsters, harnesses etc (as we discussed), just sew with it and don't dick with it...(not verbatim, but marines always have a way of saying things that make the bottom line stick in your brain...lol) I did a good spray of aerosol gun oil last night to let it sit and am going to wipe it down and see if anything comes of it, but wanted to post up here for advice/ideas if it doesn't. I'll get a couple pics and a video this morning of the affected area as well and post back. I mean, it's not enough fraying to break thread, and you can't see it when something is stitched. I hadn't noticed it before last night, but it is worse on the white thread than black, stitch length didn't seem to change it, forward or reverse didn't seem to matter either. Tension loose as a goose or tightened to where the know started getting close to the top didn't change it as well. First time i've tried stitching a line and cutting along the tops of the holes on the stitch line to see exactly where the knot lands so I have learned a couple things I'm tagging(not all inclusive, as a ton of folks have shared info here that has proven valuable) a few of y'all that have provided advice on others, and saved me a headache or helped me better understand how the machine makes the stitch as well, I feel like it's when the thread comes up the back side of the bobbin case and back up through the feed is where this is happening but i can't for the life of me "see" it when it's happening. If I can't figure it out today, i'll give solar-leather a call in the morning. @CowboyBob, @Uwe, @Wizcrafts
- 29 replies
-
- cb3200
- thread fraying
-
(and 1 more)
Tagged with:
-
So after much reading here and watching tons of videos I made a decision on buying the CB3200. I gave Bob at Toledo Industrial a call made a short 2.5 hr drive up to him. He walked me around the machine showing me the oil points how to thread the needle, wind the bobbins. I also got the left and right feet with roller guide and the inline feet and a couple bobbins of thread. Got it home and set up quickly. Now time to do some practice before I figure out what the first pice will be.
-
I'm having trouble on some of my thicker pieces with the bottom stitches not pulling up through the material, leaving "loops" of thread on the bottom stitch. I'm sure it's a tension problem, but don't know where to make my adjustment. 99% of the time, everything looks great, until I get to the thickness limits of the machine or when I'm making a tight corner. Any suggestions would be appreciated.
-
Still hammering away, trying to learn this stuff. A special thanks to Particle (Adams Leatherworks)...I encourage any one eager to learn to also go and subscribe to his premium videos...they've been a BIG help to me over the past few weeks! Anyway...here's a couple fresh ones off my bench for a few side arms I had lying around: First, an IWB in Dark Brown for a Makarov 380, with a little border stamping and a FOMI clip that has since been replaced with a 1/8" black Kydex of my own design...the doggone FOMI clip kept breaking...L&L, I guess. Then, there's an Avenger-style OWB in Saddle Tan with white thread and basket weave tooling for a classic S&W 645. Immediately obvious with this one is the fact that I've GOT to get a belt loop punch :-) All of these were sewn on my Cowboy CB3200...still learning it, obviously, but its an awesome machine at a terrific price. As always, Thanks in advance for the insight! Chris


.thumb.jpg.92dc5d3bdd338136ead342614dacfadd.jpg)
.jpg.a095c98aa07ff465c329d3fdc7d1c88d.jpg)
.jpg.b1f6da4985124af78082f94699fe1f91.jpg)
.jpg.1ec62d4b58a11a01287ccda6174bd817.jpg)
.jpg.20690739baa459ef3388283454497331.jpg)
.jpg.a5295ae8211758a9635d9726330530a8.jpg)
.jpg.256c8424ff4bf2734eb2848426d1aa1a.jpg)
