Brooks125 Report post Posted July 5, 2023 (edited) I'm sure there is a fairly simple answer that I'm not seeing. How would I go about stitching a lighter, contrasting thread on a dark (black) holster, belt, etc., but still have deep, wet molding ability? I have a couple hurdles to cross. 1) I dye my holsters, usually, after they are stitched and done. 2) I suede line my holsters, except for exotic veneers, which I build finished side-in to improve absorbency. This makes a nearly waterproof side on the panels. I am working on a tan thread on black holster. On my first go around, I dyed the veg tan leather before starting and the color held up well and didn't bleed, but the leather didn't take the water well to wet mold it, almost like an exotic. Any of the pre-dyed leathers seem to be just as water-resistant. Is there a way to get better wet molding detail and still keep the contrasting colors? Thanks Edited July 5, 2023 by Brooks125 Quote Share this post Link to post Share on other sites
fredk Report post Posted July 5, 2023 Do it your normal way, but use a waste/slave* thread, then after its dyed, undo the thread and restitch with a better thread of the colour you want * in the vintage car world when we use something for temporary and its to be changed for a permanent item its called a 'slave' eg, we use spare wheels with bad tyres on them for moving the car around or when spray painting the car, those are 'slave' wheels, to be replaced with the better ones later Quote Share this post Link to post Share on other sites
SUP Report post Posted July 5, 2023 @Brooks125 for dying black, do you use dyes and then some treatment to prevent the dye running? That might prevent absorption of water. Have you tried vinegaroon? I have seen that when dyed with vinegaroon, I can still wet mold leather. Also, you can check if the thread has tannins in it. If not, it will not take the vinegaroon dye, and you can dye both together, else you can use @fredk's technique. Quote Share this post Link to post Share on other sites
toxo Report post Posted July 6, 2023 Perhaps I'm missing something? Why not just wet mould - dye - stitch - two coats of 50/50 Resolene? Quote Share this post Link to post Share on other sites
fredk Report post Posted July 6, 2023 1 hour ago, toxo said: Perhaps I'm missing something? Why not just wet mould - dye - stitch - two coats of 50/50 Resolene? I think the bit you are missing is that its usual to sew closed a gun holster then wet mould it for a tight fit Quote Share this post Link to post Share on other sites
toxo Report post Posted July 6, 2023 5 hours ago, fredk said: I think the bit you are missing is that its usual to sew closed a gun holster then wet mould it for a tight fit Ah, you mean shove the actual cling film wrapped gun in the wet holster rather than use a mould? Quote Share this post Link to post Share on other sites
fredk Report post Posted July 6, 2023 or a blue plastic gun, but the holster still needs to be sewn up tight firstly Quote Share this post Link to post Share on other sites
toxo Report post Posted July 6, 2023 We're all different I guess. A blue gun would assume not a one-off. I think I'd rather make a slightly smaller mould and do it the easier way. Quote Share this post Link to post Share on other sites
GatoGordo Report post Posted July 6, 2023 3 hours ago, toxo said: We're all different I guess. A blue gun would assume not a one-off. I think I'd rather make a slightly smaller mould and do it the easier way. I don't understand this method. Are you saying that you create some kind of mold, then shape the two halves of the holster, then dye, and finally sew? How do the halves fit together? Can you point me to a video of this method so I can actually see it? The method I use is: Dye, cut, sew, wet mold, finish. Quote Share this post Link to post Share on other sites
Brooks125 Report post Posted July 6, 2023 I typically Cut, Stitch (with lining), Wet mold, Dye, Finish. This has changed to Dye, Cut, Stitch, Mold, Finish. I thought about the slave stitch, but with the lining, I can't get it in the machine for the open portions. I think I'll have to stick to a longer soak and more elbow grease on the boning process, similar to using waterproof exotics. Thanks Quote Share this post Link to post Share on other sites
fredk Report post Posted July 6, 2023 Hand sew the second time? Quote Share this post Link to post Share on other sites
GatoGordo Report post Posted July 6, 2023 5 hours ago, GatoGordo said: I don't understand this method. Are you saying that you create some kind of mold, then shape the two halves of the holster, then dye, and finally sew? How do the halves fit together? Can you point me to a video of this method so I can actually see it? The method I use is: Dye, cut, sew, wet mold, finish. Just to clarify: I understand this type of procedure with a pocket knife or something with little detail, but with a handgun that has lots of curves and indentations, I don't understand how wet molding before stitching can capture and maintain that detail. Quote Share this post Link to post Share on other sites
AlZilla Report post Posted July 6, 2023 (edited) 19 minutes ago, GatoGordo said: don't understand how wet molding before stitching can capture That's not what he's saying. In the 10th post down, OP says "Dye, Cut, Stitch, Mold, Finish. " He'd like to dye after stitching and molding but doesn't want to muck up his contrasting thread color. Edited July 6, 2023 by AlZilla clarity Quote Share this post Link to post Share on other sites
GatoGordo Report post Posted July 6, 2023 2 hours ago, AlZilla said: That's not what he's saying. In the 10th post down, OP says "Dye, Cut, Stitch, Mold, Finish. " He'd like to dye after stitching and molding but doesn't want to muck up his contrasting thread color. I was questioning the fourth post where toxo states: Why not just wet mould - dye - stitch - two coats of 50/50 Resolene? I don't understand how to get and retain any detail if the stitching occurs after wet molding. Quote Share this post Link to post Share on other sites
caressofsteel Report post Posted July 6, 2023 Have you tried nylon thread? I have not personally tried to dye it, but nylon thread is supposed to be terribly difficult to dye. I have seen other people's projects where the leather is stitched with white nylon thread and then dipped dyed black. The thread stays white. Seems you could test this on some scraps to see if it would be a possible solution. Quote Share this post Link to post Share on other sites
chuck123wapati Report post Posted July 6, 2023 have you tried gluing it then molding then sewing. Quote Share this post Link to post Share on other sites
JustPete Report post Posted July 6, 2023 Have you tried black pre-dyed holster leather? It seems to mold well enough for my needs, but I do mostly knife sheath work and its not always AS reliant on a tight friction fit. Quote Share this post Link to post Share on other sites
AlZilla Report post Posted July 6, 2023 1 hour ago, GatoGordo said: I was questioning the fourth post where toxo states: Why not just wet mould - dye - stitch - two coats of 50/50 Resolene? I don't understand how to get and retain any detail if the stitching occurs after wet molding. Gotcha. I can't understand that either, then. Quote Share this post Link to post Share on other sites
toxo Report post Posted July 6, 2023 54 minutes ago, GatoGordo said: I was questioning the fourth post where toxo states: Why not just wet mould - dye - stitch - two coats of 50/50 Resolene? I don't understand how to get and retain any detail if the stitching occurs after wet molding. Let me first state that I don't make holsters. That being said I have wet moulded many other things. There are many examples on Y/T of getting detail into wet moulding using all sorts of tools including bone folders and fingers as the leather dries. When I pondered this problem I assumed the back of the holster would be flat, (why wouldn't it be if it lies against the body?). But now I understand that not everyone makes holsters this way. If I were to make a holster this way I would wrap the gun in plastic film, lay it down and prop it up level, then using some kind of moulding clay I would press it all around the gun to make a mould. Then using something like resin I would pour it into the mould to make a form that I could use again and again using the normal wet moulding techniques. Quote Share this post Link to post Share on other sites
toxo Report post Posted July 6, 2023 14 minutes ago, AlZilla said: Gotcha. I can't understand that either, then. There's no detail here but it shows the principle. If there were detail such as a gun it would be easy to get out. Quote Share this post Link to post Share on other sites
toxo Report post Posted July 6, 2023 Here's another showing dying before stitching. Quote Share this post Link to post Share on other sites
AlZilla Report post Posted July 6, 2023 @toxo, I see what you're thinking. Holsters can go either way, flat on the back, or not, depending on the design. Usually when I make an IWB holster, I stitch it up and wet form it in a vacuum so it's fitted on both sides. Some designs definitely have a flat back. Quote Share this post Link to post Share on other sites
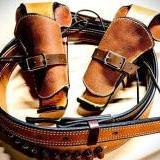
GatoGordo Report post Posted July 7, 2023 2 hours ago, toxo said: If I were to make a holster this way I would wrap the gun in plastic film, lay it down and prop it up level, then using some kind of moulding clay I would press it all around the gun to make a mould. Then using something like resin I would pour it into the mould to make a form that I could use again and again using the normal wet moulding techniques. While I have made one (almost) flat-back pancake holster, that is not the standard. Here is an image of an Avenger holster. You can see that the leather is not flat, but wraps around the gun. The leather is then molded to the gun both front and back. There is also the problem of the reinforcement panel. I have no idea how one would stitch the reinforcement panel in place after molding. Quote Share this post Link to post Share on other sites
Brooks125 Report post Posted July 7, 2023 4 hours ago, caressofsteel said: Have you tried nylon thread? I have not personally tried to dye it, but nylon thread is supposed to be terribly difficult to dye. I have seen other people's projects where the leather is stitched with white nylon thread and then dipped dyed black. 4 hours ago, JustPete said: Have you tried black pre-dyed holster leather? It seems to mold well enough for my needs, but I do mostly knife sheath work and its not always AS reliant on a tight friction fit. The thread stays white. Seems you could test this on some scraps to see if it would be a possible solution. I have not tried nylon, but I may be, shortly. If that is as resistant as you suggest, that may open things up a bit, Thanks. I have tried the pre-dyed leather. It molds a little, but not to my liking. It has too much of a "vinyl-y" feel for what I do. But thanks. ... and sorry if this post went a little off the rails. Quote Share this post Link to post Share on other sites
Doc Reaper Report post Posted July 7, 2023 What the hell guys?!?! Y’all are talking about going around your buttocks to get to your elbow. I always cut - tool - stain/dye - sew - mold - sand - final dye - polish. How in the world do ya sew a holster after it’s folded and sewn along the trigger/spine????????? Do a video so we can all see how it’s done! Quote Share this post Link to post Share on other sites