All Activity
- Today
-
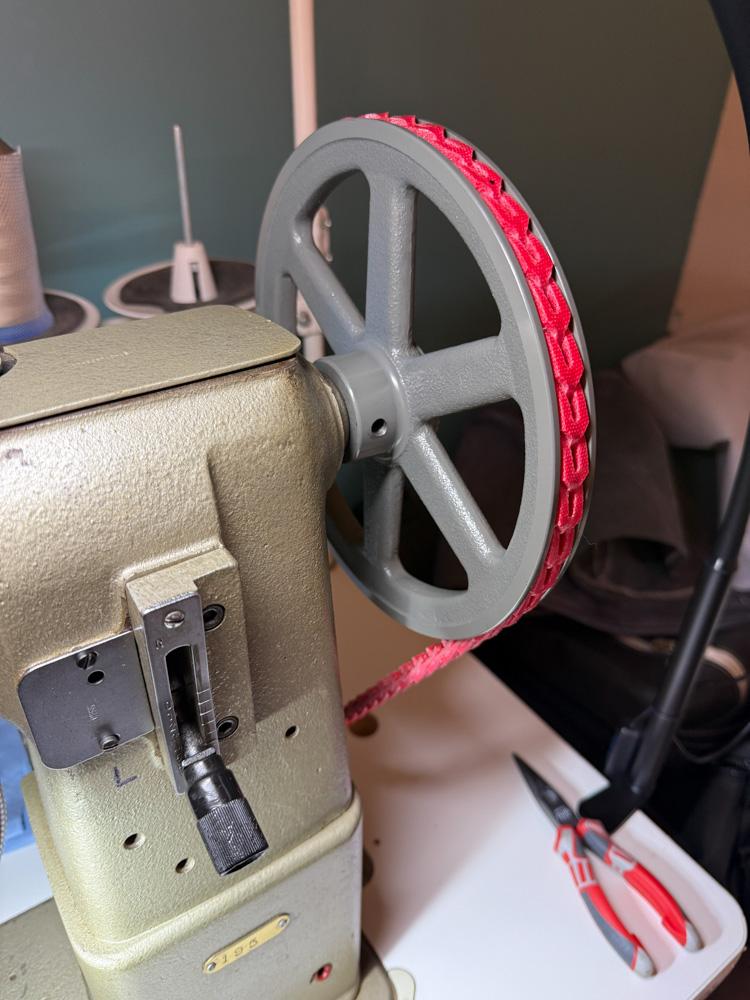
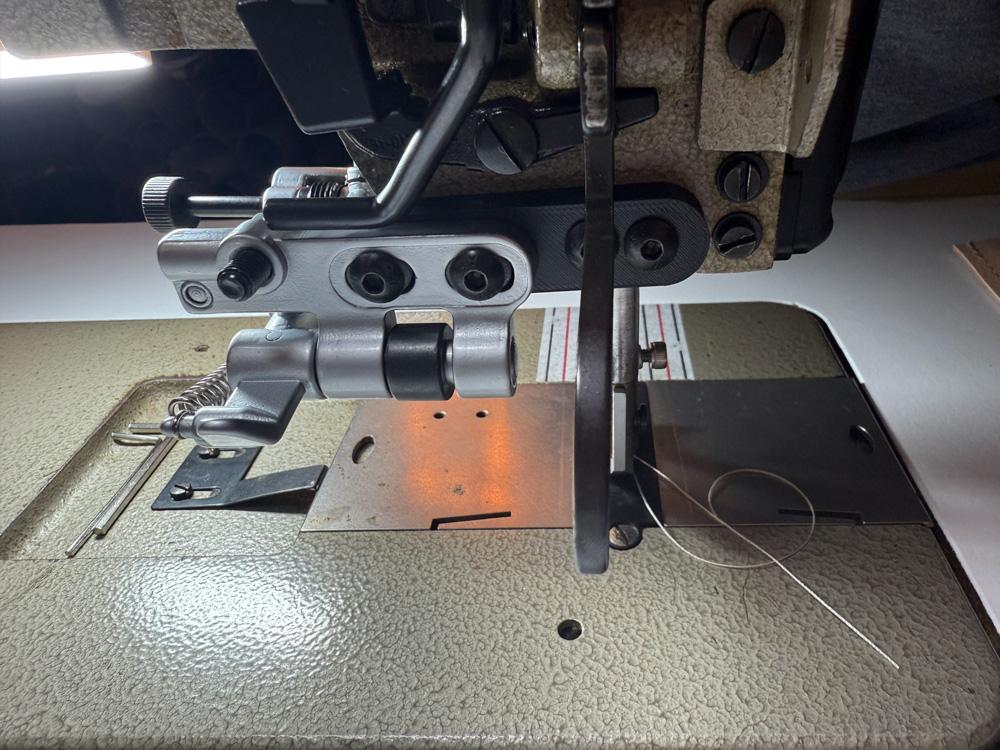
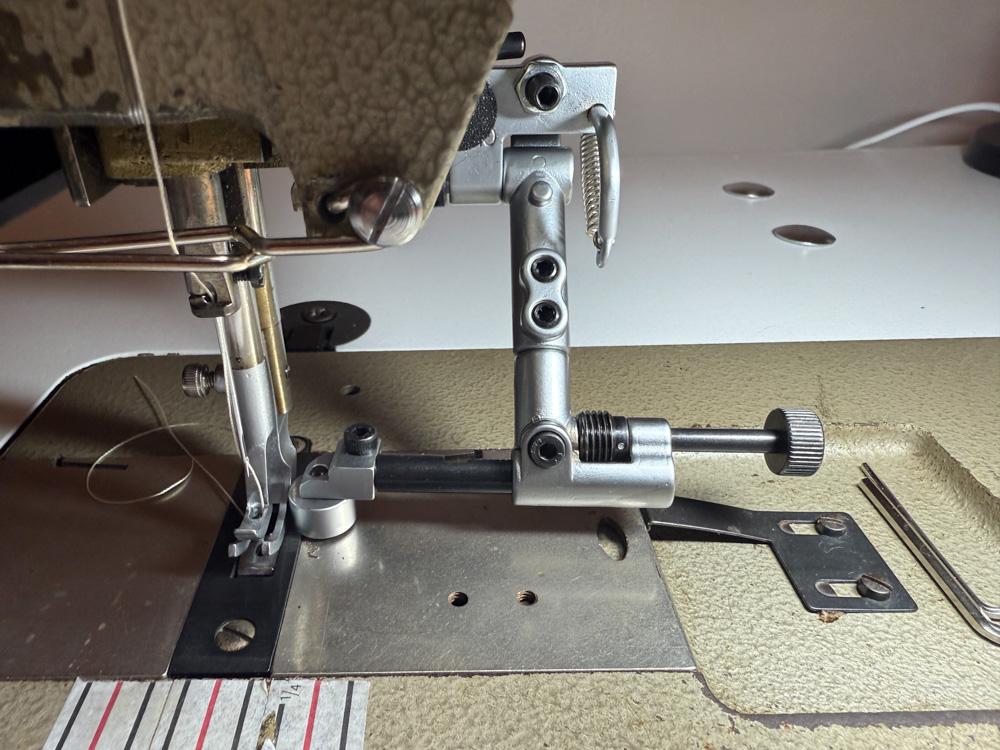
 New to the forum. A few basic 3D prints for my Pfaff machines. Basic PLA used. Collar to fit a 3/4" bore 8" cast iron pulley as a larger hand wheel on a Pfaff 195. Pfaff shaft is 0.501", just a little big for a half inch bore pulley so adapted a larger bore to fit with longer set screws. With a brushed servo motor mounted 1-3/4" pulley, I can get as slow as about 20 stitches per minute. Also, bought a generic roller guide which doesn't fit all machines directly. Printed an adapter with brass heat inserts for my Pfaff 1245. I was very happy with how easy this was. Still learning best hole sizing for the inserts. Pfaff 1245 uses M5 threads, used the same for the inserts.
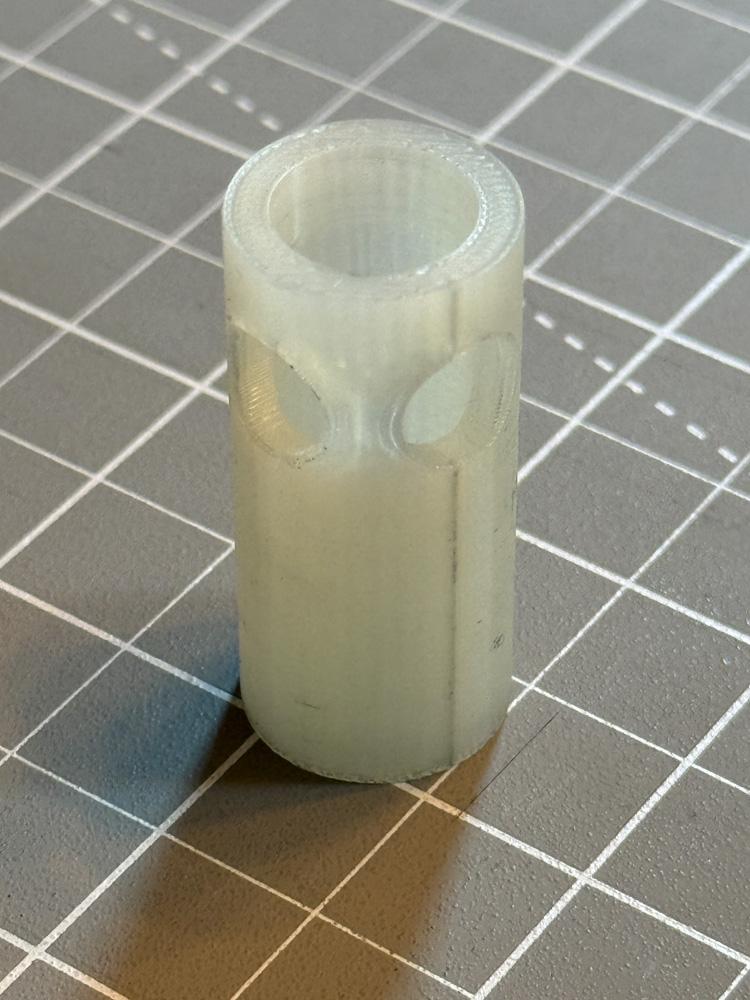

-
Thank you Everything in moderation. The aim is two fold. Even tension and to prevent any excess bobbin thread on the underside of the leather or fabric that would cause a problem. kgg
-
The basics never go out of style. When I was getting started with industrials I took the advice to "hold back hard" to heart and I was splitting the thread on the hook of my 111w. I think that advice was meant for bigger machines. Caused me a lot of frustration until I figured it out. Just gentle pressure.
-

spring flowers and good food
Darren8306 replied to chuck123wapati's topic in All About Us and Off Topic
Ya, this morning I stumbled across a quote attributed to Friedrich Hayek: The other thing is more...um...mechanical. I can have quite a lot of 'success' from grant money, but then how would I know that my work was good quality? I know a lot of people take advantage, and some of those that I know do very high quality work, but there really isn't a leathercrafting community here. The best really clear feedback I can expect is money. The grant doesn't care at all about the quality of my work. At least as far as I can tell from here. -

Starting a Seam in leather or fabric
chuck123wapati replied to kgg's topic in Leather Sewing Machines
nice!!! -
I moved your post to leather sewing machines. This is where the machine guys hangout.
-
The very basics of getting a good seam are: i) correct machine threading ii) correct top & bobbin tension iii) correct needle system for your machine iv) correct orientation of the needle v) correct needle type (ex. 135 x 16 for leather and 135 x 17 for fabric) vi) correct size of needle to handle the top thread vii) This next step is where people seem to be having a problem. Getting the seam started. You really need to hold both the top and bobbin thread as you start your seam. That can be a royal pain grabbing and holding those threads particularly with smaller sized thread like v69 and v92. If you don't hold both together weird things can happen like jams, bird nesting, skipped stitches, etc. A quick solution is: Tie both threads together by a simple knot. Chances are now you will be able to grab the threads and put consistent tension on both threads at the same time. viii) Locking the threads a) Typical method is sew forward 3 or 4 stitches and then reverse to lock the stitches then continue with forward stitching. b) More Advanced Method is start your stitching 3 or 4 stitches in and reverse sew back 3 or 4 stitches. The seam threads will be locked when you sew forward but with less thread bulk in the needle holes. kgg
-
 Calf Leather Outlet joined the community
 -
This happens with leather also.
-
I have a 545-walking foot machine I was given in pieces and I am putting it together. I am having trouble getting the pressor foot to move up to allow the material to move rearward (away from you) when it is sewn, the rest of the timing is fine I might be missing a part it has got me tossed
-
Thanks Friquant, I'm pretty sure the machine sews ok but the sound raises some concern as it only started after I re timed the hook. Also removing the timing belt is a good tip I wish I thought of when trying to find where the sound was coming from. I think it might be coming from the large timing gear and the small gear on the hook saddle although nothing I do seems to fix the sound (I've tried re timing and moving the big gear to mesh with the smaller one differently a few times to see if that fixes anything but the sound still persists) but I will try messing with the feed dog eccentric as well. I only just got this machine a couple months ago and am pretty new to sewing in general so both you and wizcrafts advice has been really helpful.
-

spring flowers and good food
AlZilla replied to chuck123wapati's topic in All About Us and Off Topic
Good call. I have some experience of grants. My motto, "If you take their money, you give them control". This applies to anyone who wants to contribute to your cause and for all values of "they, their and them". -
That turned out great!
-

spring flowers and good food
Mablung replied to chuck123wapati's topic in All About Us and Off Topic
What company formerly and what company newly, if it's not impertinent to ask? I have a dabbling curiosity (and far less than sufficient money to scratch the itch) in fedoras and bought an Akubra offering a while back. Best value for the money I could find via internet research. -

showoff Sharing one of our favorite recent projects.
Teddy Patches replied to Teddy Patches's topic in Show Off!!
Thank you very much for the reply. If we have any projects related to this in the future, we will definitely consider it. Embroidering on leather was quite challenging—the needle broke multiple times. And yes, the embroidery was done directly on the leather. -
And here is my favorite machine. I try to make more heavier projects because I can do them with my outlaw.


-
Here is the other electric machine that I have. Im guessing the answer is the same for this one as I think it's triple feed which is what makes it not a fit for a roller foot but I'll ask just in case.


- Yesterday
-
Thanks Tommy. Never even thought about that.
-
Yes to books. Be careful of the Youtube vids. Some are experts with valuable skills to share and well-presented lessons, others not so much. Amazon tool kits made of chinesium? Some of those tools work out ok, some don't. You will end up with a box full of tools that ain't worth the postage and/or unnecessary to your chosen path in the craft. A mere few that serve well enough. Better to buy what you need when you need it, and be willing to spend for better quality tools that you know you want and need. So many paths to take down the leather trail! Tooling, carving, plain. and artsy. Saddles, chaps, tack and harness. Clothing shoes, boots, purses and bags. Belts, wallets, holsters, sheaths. Furniture, wall art. Braiding and whips. 'Adult' items and kink. Choose somethin simple to start with. A belt, a wallet, something like that. I suspect that most of us started with a kit from Tandy or a craft store. Start with the most basic tools. You need a cutting surface like a plastic cutting board. A very sharp knife, a Stanley utility knife works very well and an awl. stiitching or lacing needles if needed, PVA glue or contact adhesive as needed. Build a couple simple projects first, then move on to the more complicated stamping and carving. Buy tools as needed.
-
Looks like a good book, I've added it to my collection.
-

Need recommendations for steel bar plate for work bench
dikman replied to desullivan's topic in How Do I Do That?
What are you actually going to use it for? If hammering rivets etc on it then aluminium will be too soft and will mark easily, steel plate will have to be pretty thick to avoid bounce when hammering. That's why anvils are so good (even little ones), they have mass to resist bounce. -
Well, that's......different. Excellent workmanship.
-
 Awesome!
 -
I second Wiz' suggestion to turn the handwheel by hand for infestigation. If you can't isolate the cause, remove the timing belt. Then you can move the hand wheel (and arm shaft and needle bar) independently of the hook shaft. Also check if there is anything else contacting the face of those bevel/timing gears. On my Jianglong 341, the first time I moved the hook saddle to the left (to adjust hook to needle distance) left me with the bevel gears to rubbing on the feed dog eccentric. Once I also moved the feed dog eccentric to the left a bit, it was happy again.
-

Interesting Holster Project
MarlinDave replied to MarlinDave's topic in Gun Holsters, Rifle Slings and Knife Sheathes
Thanks. The loop would be simpler. -
spring flowers and good food
chuck123wapati replied to chuck123wapati's topic in All About Us and Off Topic
lol you're right about the sneakers. I have made and worn the huarachas, made them from old tires, they are nice to walk in, I know, and my kids were kids in them, doing whatever. Maybe a viable niche for you if there are no running shoe makers in Canada, after all, you like running.

.thumb.jpg.6e903dd66163ad5672f00f144058c571.jpg)