

All Activity
- Past hour
-
All the Tandy pattern packs. They've discontinued many of them. Not enough value to retire on but worth several $$$ each Any old leather how-to-do books, especially ones on carving
- Today
-
Looks like you hit the jackpot with that hoard. It's a goldmine of useful information. Thats the problem having lots of hobbies each with a lot of tools or "stuff" associated with each. I hope we'll all be around long enough to enjoy them for a while longer.
-
Very nice sheath. I like the tooling and that welt. What a nice gift.
-
 He's a heavy equipment mechanic. They don't mind a scratch on the fender of a crane. Lol I will definitely keep this in mind! Didn't know there was such a a thing!
 -
Beautiful work as always. Don’t let the keyboard warriors get you down the bridle is just a tool like any other, in the wrong or inexperienced hands it can cause problems. As you and Jonas already pointed out it is the riders responsibility to ensure proper tack and gear fitment. Keep up the good work.
-

TechSew 2750 Pro Cylinder Arm Sewing Machine - $2000 Lots of Extras
RecentRelics replied to RecentRelics's topic in Used
The machine is sold. I dont know how to close the thread or mark this as sold in any other way. -
.thumb.jpg.6e903dd66163ad5672f00f144058c571.jpg)
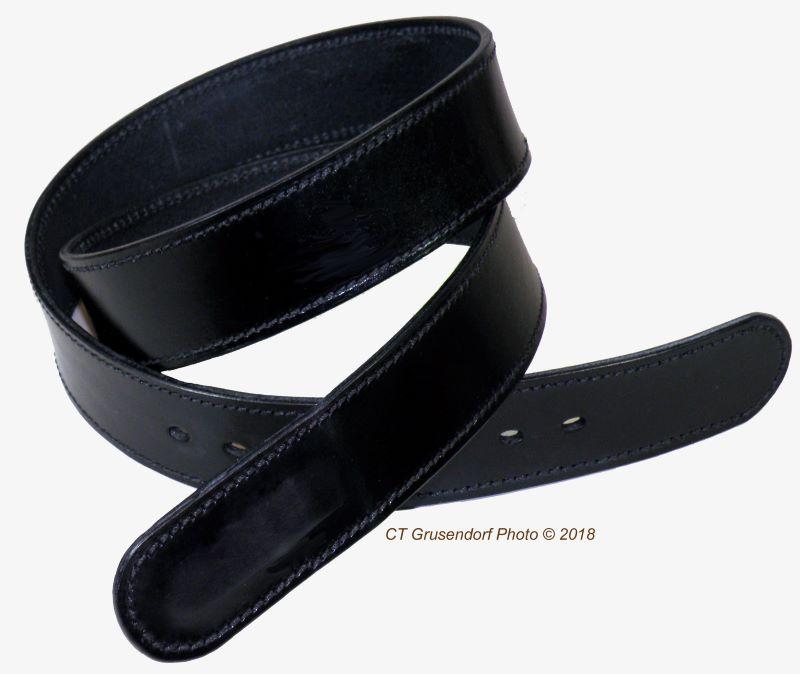
Work belt with a story
Northmount replied to KillDevilBill's topic in Purses, Wallets, Belts and Miscellaneous Pocket Items
Tandy has these 2 prong strap hooks. https://tandyleather.ca/collections/buckles/products/2-prong-strap-hook-solid-brass. The single prong "Mechanics Buckle" I got from https://springfieldleather.com/products/buckle-mechanics -
You did!
-

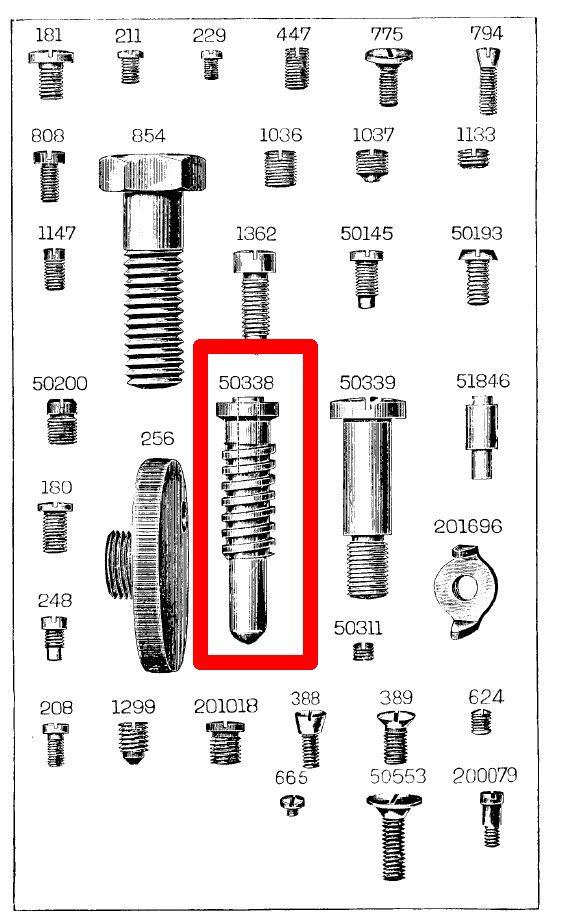
How to assemble 96k sewing machine thumb screw
depodarcom replied to depodarcom's topic in Leather Sewing Machines
I found one of my mistake and corrected.But there are still problems. I was trying to attach numarator disk(56032) without removing the screw rod(50338). First I removed 50338 from machine and then attached 56032 to it. After that insert them into machine ,then pin and spring. Now, numarator part is working but although I attached the reverse pedal connector(52409) to the fork type metal part(52408) when I try to start machine, reverse pedal lever drops down and stitch moves backwards. I think there is no suitable connection between reverse lever and numerator part. How can I do this?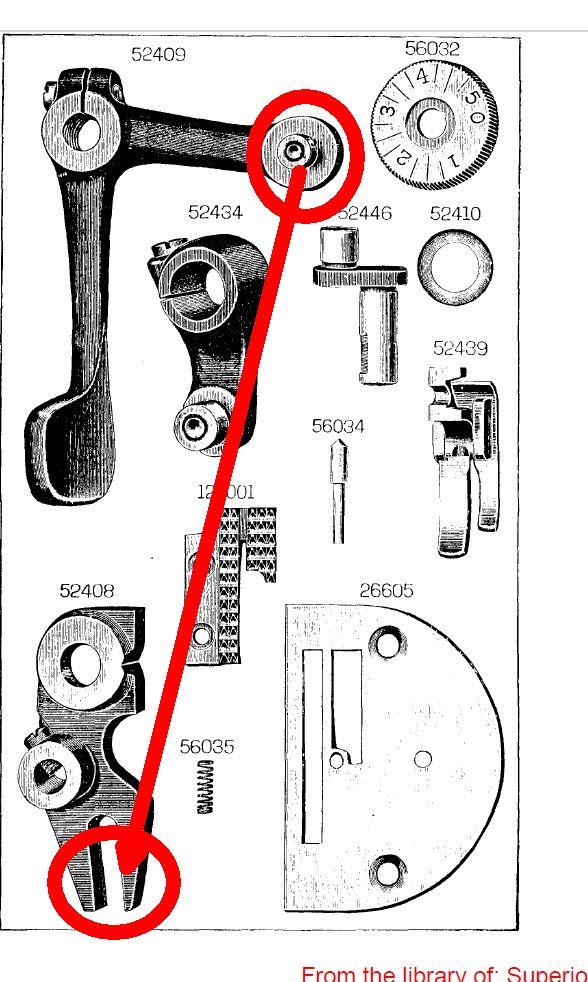
-

Singer 111w155 stitch length issues
friquant replied to Glaciersew's topic in Leather Sewing Machines
Is there a groove under that collar to set the position of the collar? -
Yes and I red that the Consew is actually a clone of the singer 153w102.
-
Thank you AlZilla
-
thank you I will! That is awesome specially when it comes down to the price. Thanks Glenn
-
How to assemble 96k sewing machine thumb screw
friquant replied to depodarcom's topic in Leather Sewing Machines
Can you post photos and/or videos? I don't have a machine like this for comparison. Perhaps by seeing the actual parts someone will be able to suggest how to put them back together. -
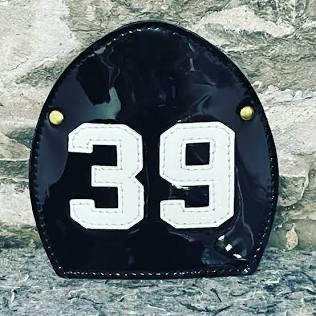
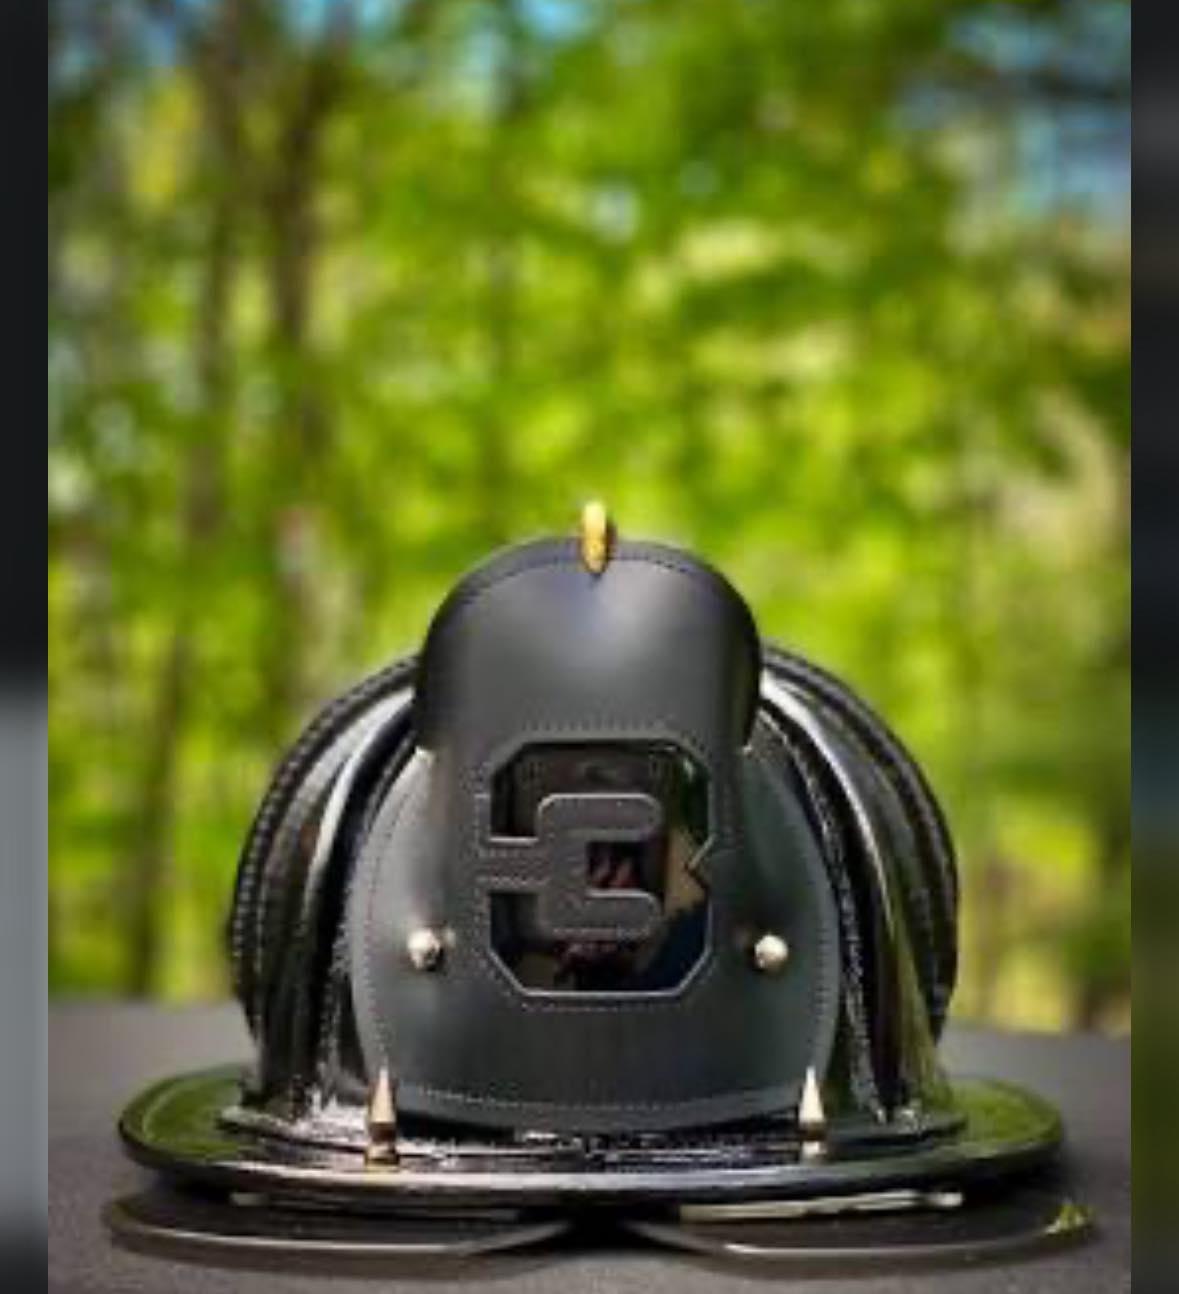
I thought it was just the outline shape of the shield as well but the image he sent as an example the top of the shield is "puckered" not really sure how else to articulate it...I'll try and upload the pictures he sent me....
-
Thank you, sorry if this was the wrong forum
-
 Thanks for all the tips, folks. I appreciate it. I'm used to just dealing with work boots and combat boots. Those just needed a couple coats of mink oil over a week or so, then polish as necessary. This is the first item I need to even consider where dye should fit into the mix and will anything I do before or after might drastically change the outcome.
 -
OK, Thanks. I'm still exploring and hadn't even seen that section yet.
-

Work belt with a story
BlackDragon replied to KillDevilBill's topic in Purses, Wallets, Belts and Miscellaneous Pocket Items
@Northmount Great catch! When I worked at Toyota in KY I have to wear that type of belt for that exact reason. The ones we used had two prongs. -
Work belt with a story
Northmount replied to KillDevilBill's topic in Purses, Wallets, Belts and Miscellaneous Pocket Items
Do a search for mechanics belt. It doesn't have any exposed metal parts the can damage fenders, etc. while working, leaning against the car to reach what you are working on. Some people also refer to them for use by people that are allergic to metal as the hook is not exposed, not against skin.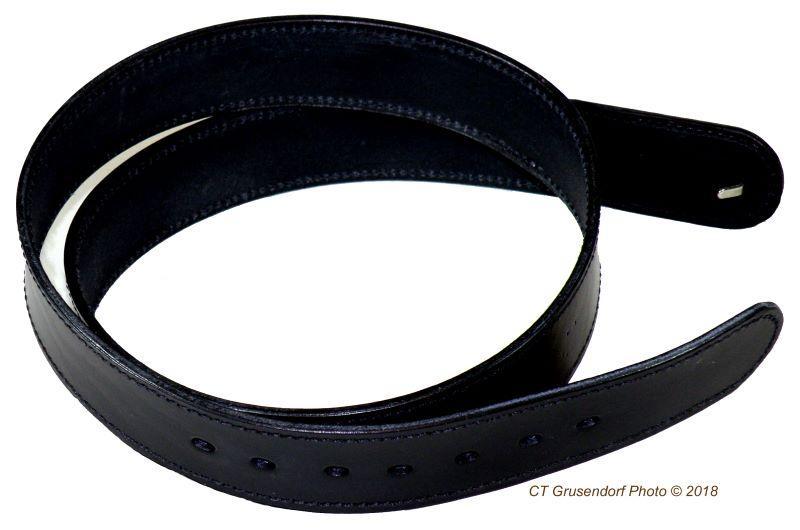
-
I looked around a bit and "Boston" seems to be the shape of the shield. I saw "Metro", "LA", "New York".
-
I moved your post to Patterns and Templates. Of all the different forums, this seems to be the best fit.
-
So this is a common thing?! Lmao 🤣
-
I moved your post to Dyes, Antiques, Stains, Glues, Waxes, Finishes and Conditioners.
-
Quick note on airbrushing with ANY type of oil. Use a respirator because oils, when atomized, can cause lung issues. When I dye it's oil, dye, buff, finish. I oil with neatsfoot oil and let it sit until the oil is absorbed. How long it sits depends on the thickness of the leather. This allows the dye to spread evenly when applied. I then dye and let it sit for a day so the dye has time to spread evenly. I then buff any excess dye off. I then add my finish, usually Resolene diluted with water 50/50 or a wax.


