Wizcrafts
-
Posts
7,804 -
Joined
-
Last visited
Content Type
Profiles
Forums
Events
Blogs
Gallery
Store
Everything posted by Wizcrafts
-
If you buy a used machine privately, you will be responsible for all repairs and adjustments. Most long time dealers will provide you with some degree of phone assistance on their used machines. All of our member-dealers warranty the new machines they sell and provide one-on-one phone or email support. If you can afford to buy a new machine, from a reputable industrial sewing machine dealer, you'll be better off. This will be especially important to you as a first time sewer. You are bound to run into issues you can't solve on your own. It will be beneficial if you can phone the dealer and ask him how to get out of your jackpot, rather than posting a question on the public forum. You outta read our Leather Sewing Machines forum. It gets really interesting there with some topics drawing all kinds of fireworks. There are members that frequent that section who have dozens of years of experience with industrial and leather sewing machines. I applaud you for coming here with your questions, and not eBay.
-
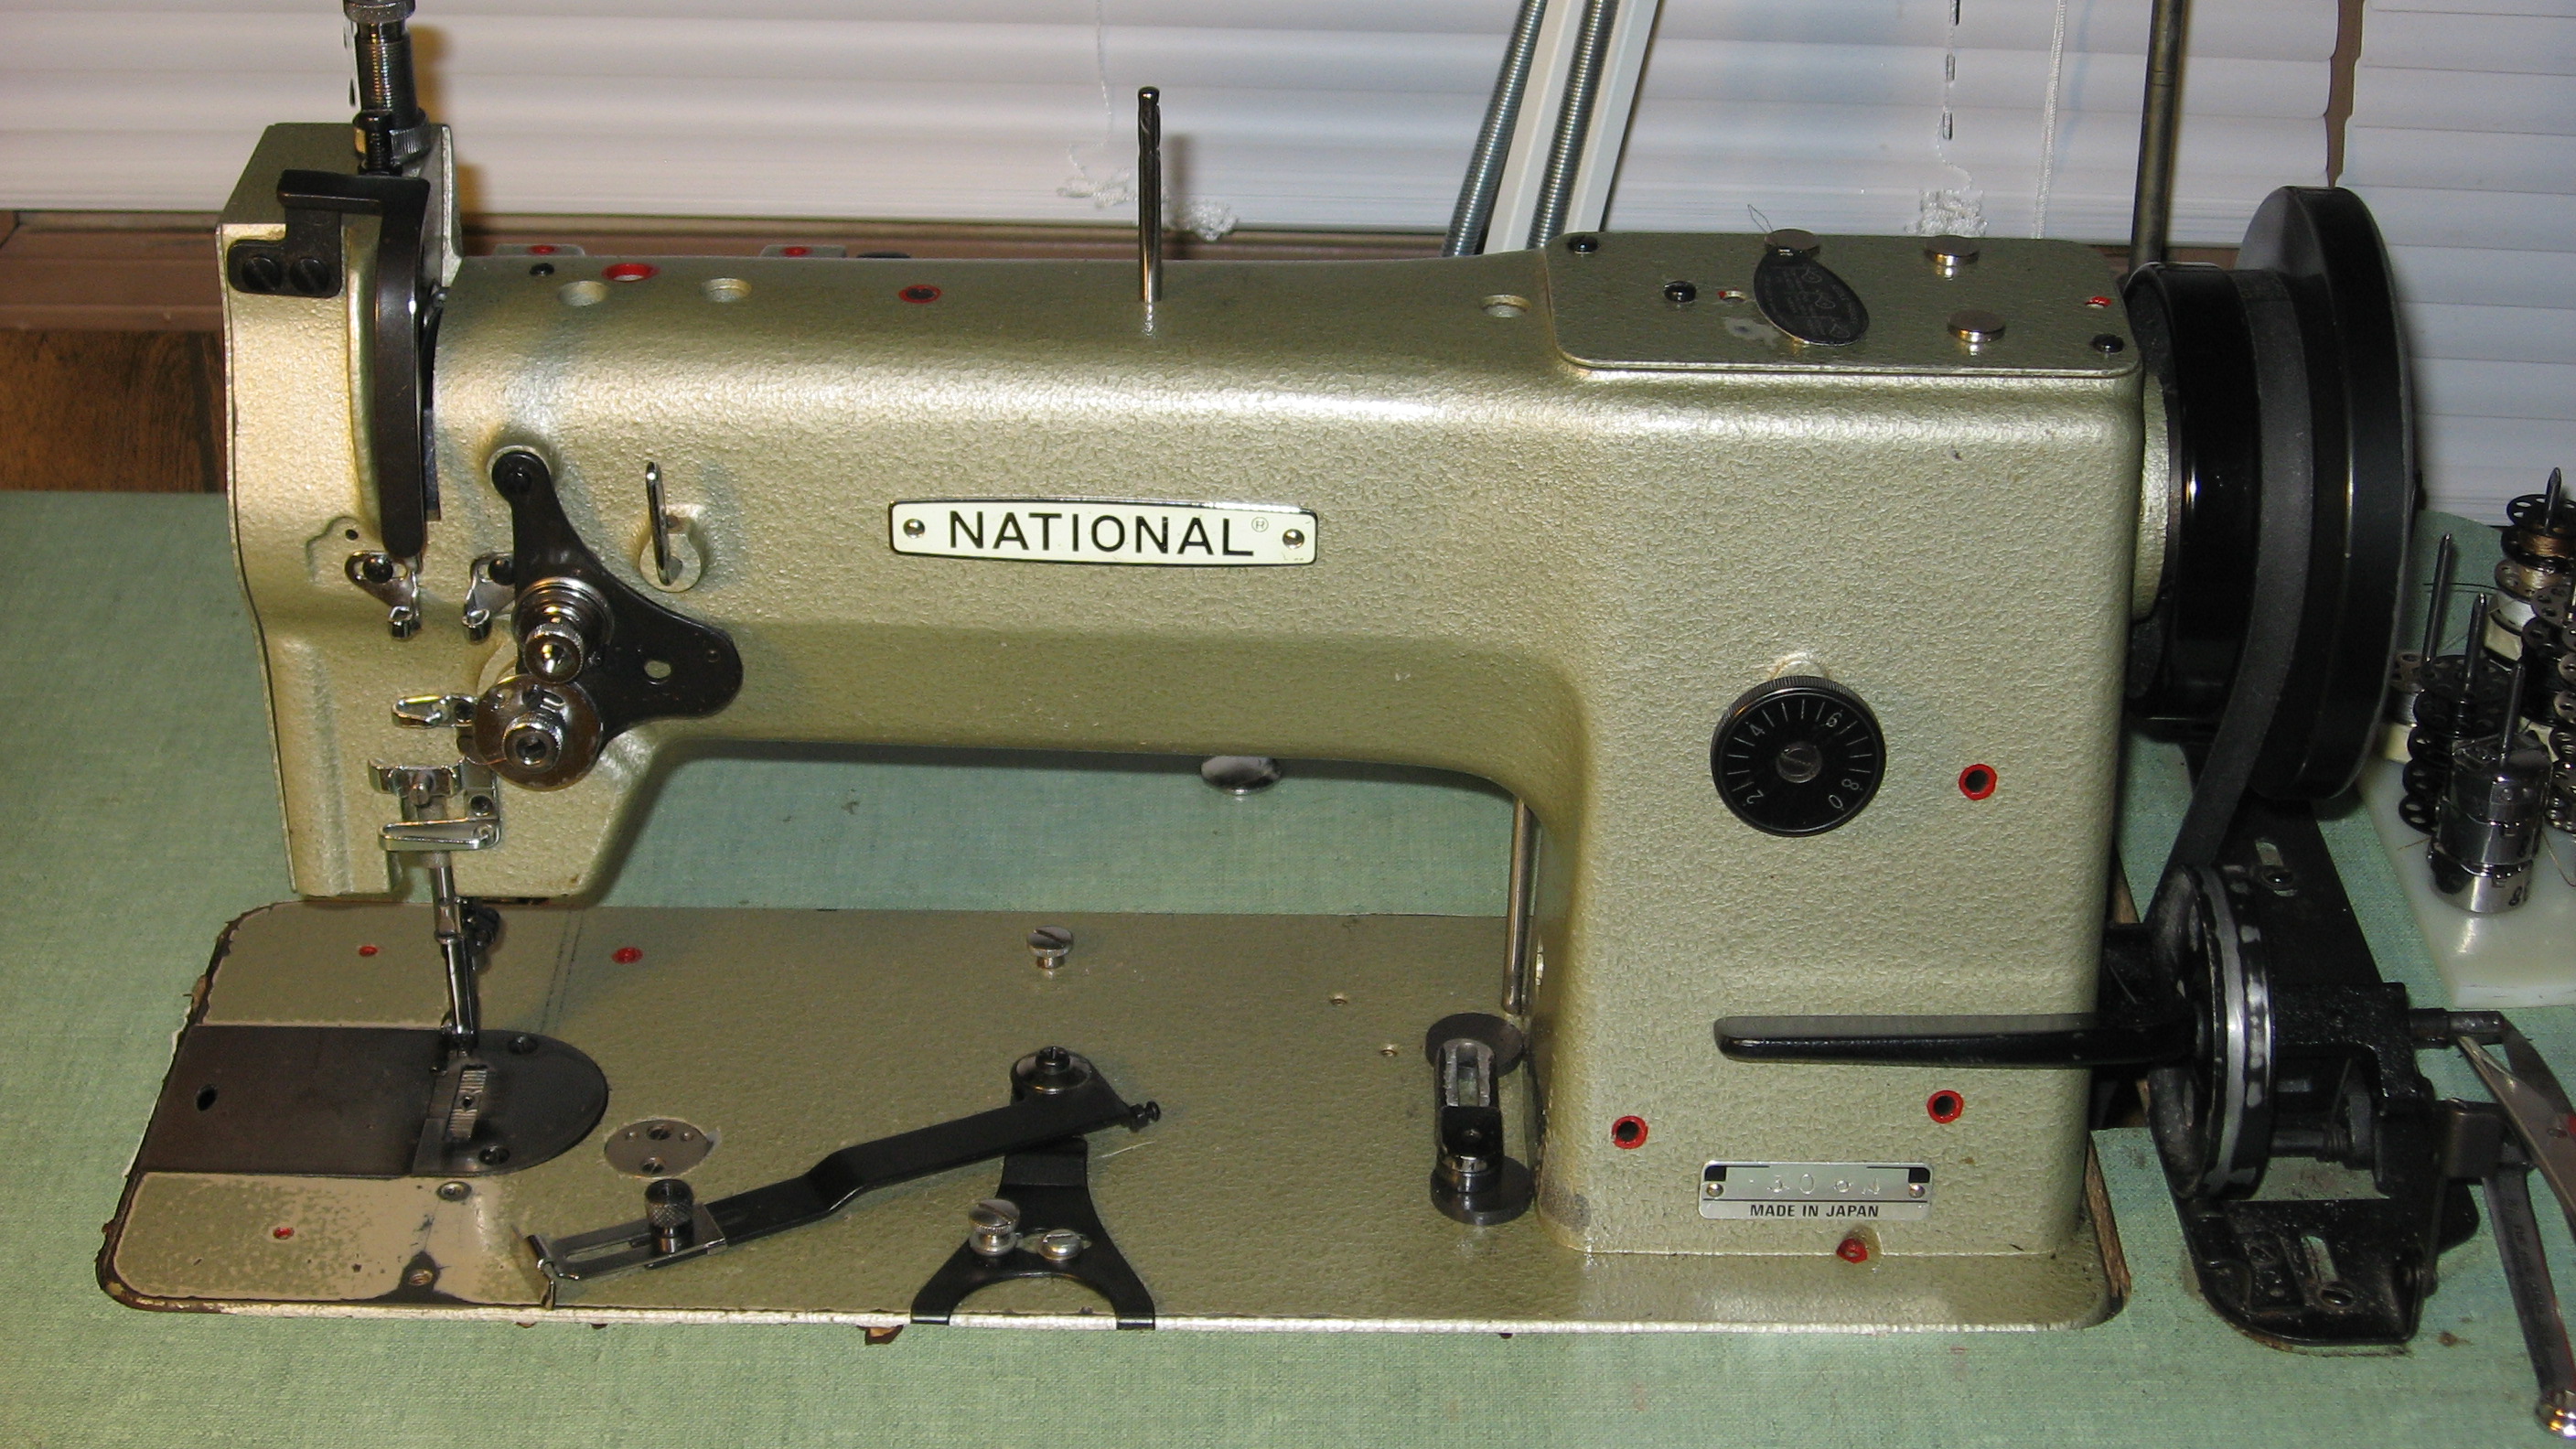
Rodeoman; Here is an example of a 16.5 inch cylinder arm leather stitcher. It has a bunch of accessories available, including a bolt on flat table. If you use a fairly small needle, say a number 22 or 23 (leather point), with #138 bonded nylon thread, it will sew chaps all day long. This type of machine sews over 3/4 inch thickness, with very thick thread (up to #415). It has large, cylinder shaped bobbins that hold a huge amount of thread.
-
A harness stitcher like mine is of no use when sewing most chaps. Chap leather is just thick garment leather. You are probably not going to be using any thread larger than #138. Any industrial walking foot machine, whether flat bed or cylinder arm, can sew up to 3/8 inch thickness, using #138 bonded nylon thread. Look for a good walking foot machine with a large bobbin and reverse lever. You will need to get one with a servo motor, or replace the clutch motor with a servo motor, to control the machine at slow speeds. It is easier to control the work on a flat bed machine, when it is large and flat, like chaps. If you are looking to buy a new machine, a Consew 206RB-5 is a very good choice. The Chandler 406RB is its sister machine and costs a couple hundred less for basically the same machine. Both have a big bobbin and can sew 3/8 inch leather with #138 thread.
-
Fixed Position For 29-4 Rotating Pressor?
Wizcrafts replied to HCL's topic in Leather Sewing Machines
You gotta realize that the Singer 29-4 machines go back over a hundred years. They have been improved along the years, including the head mounted lock screw. -
You need to define what thickness of leather you intend to sew and the size of thread you want to use. Saddle machines need to be at least 12 inches deep, on the right of the needle. Most saddlers here are using 16.5" cylinder arm machines, with triple feed. They sew with up to #415 thread. They are sold by Cowboy, Cobra, Techsew and others. Look at the banners on top and click on them to go to their websites. I have a harness machine for sale, that sews up to 3/4 inch, with any thread, with 12 inches inside the post. But, I am in Michigan and it is being sold cash and carry.
-
Fixed Position For 29-4 Rotating Pressor?
Wizcrafts replied to HCL's topic in Leather Sewing Machines
I've owned two 29-4 patchers, including one a year ago, and neither one had the stop screw. It is present on my 29k172. This is probably an addition made when the K series was started, or sometime thereafter. -
I routinely glue green foam, purchased at Joann Fabrics, onto the backs of rifle slings and weight belts, then glue suede covers over the back and foam. I use two coats of rubber glue on each piece and it does not affect the foam negatively. This combination is secure enough to hold the package solidly in place for sewing. Drying time between coats depends on the temperature and humidity. I find that on a typical day, with a temperature in the high 60's, and low humidity, a coat dries in about 10 minutes. An overhead fan helps speed this up. The green foam is sold for making seats and chairs. I find that it has just the right density for padding leather straps and camera cases. It cuts nicely with a long sharp knife, or scissors. We usually buy it with a 50% off coupon, or wait for it to go on sale at 50% off, which is like every other month. The green foam is sod at Joann Fabrics stores in thickness ranging from 1/2 to 4 inches, by the yard. Finding a cheap source of quarts of rubber glue can be challenging, but is doable. Call around your local office supply, sewing and craft stores. Also, stores that sell to schools stock quarts of rubber glue.
-
If those loops of thread are on the bottom, I suspect that either the bobbin spring is way too tight, or the top tensioner disks are not being allowed to press together all the way, under spring pressure, during sewing. Check to make sure that when you lower the presser foot lift lever, that the disks close all the way. You may need to increase the presser foot top pressure to get the mechanism to drop down under the flange on the thread tension cup, over the disks. If the lift parts are not moving freely, remove them if possible and clean them. Then apply sewing machine oil to help closing parts close all the way.
-
Where Do You Buy Your Thread And Needles
Wizcrafts replied to mlapaglia's topic in Leather Sewing Machines
I believe so. I already suggested that to someone else. The person importing the thread should be familiar with purchasing goods from abroad and doing Customs declarations, brokerage, etc. My guess is that the order would end up being for a lot more than one case (actually over a dozen). I alone commonly use at least 5 different colors of thread , in sizes 69, 138 and 277. This type of stock is in the domain of industrial sewing machine dealers. I suppose that if a bunch of members went in on the deal, the initial order might be for black, white, straw and medium brown, in sizes 138 and/or 277, or just #207 as a compromise. -
Nice catch on the patcher and awesome trike! Make sure you thread the machine properly (did cobbler show you how to thread and load bobbin?). I have a long arm version of that machine and can tell you that it sews with up to #138 thread. But, it goes farther with #69 thread. Less strain on the moving parts with #69, or even #92. Tell us where the thread is breaking and we'll try to diagnose the problem here. Might could be old worn out thread, or needle too small for thread. A close up photo of the needle area, with the cover plate open and closed will help. An open cover plate photo should be taken with the needle down and just beginning to ascend.
-
Where Do You Buy Your Thread And Needles
Wizcrafts replied to mlapaglia's topic in Leather Sewing Machines
FYI: Linhanyl thread is no longer being imported into the USA. The importer-distributor quit, leaving many bulk buyers in the lurch. The only way to get Linhanyl thread now is to either buy what's left from a dealer who is lucky enough to have some in stock, or, to order 50 pounds of the same thread size and color in a box and do all the Customs paperwork. Linhanyl is headquartered in Brazil. -
I want to wish every member of LeatherWorker.net a safe and Merry Christmas. May Santa be good to you all!
-
Fixed Position For 29-4 Rotating Pressor?
Wizcrafts replied to HCL's topic in Leather Sewing Machines
Glad to help and nice work. That's a very nice table attachment. I could use one like that. Do you recall if it was sold by a dealer, or individual seller? -
Fixed Position For 29-4 Rotating Pressor?
Wizcrafts replied to HCL's topic in Leather Sewing Machines
Mike; You could disassemble the head from the machine, along with the parts inside the head, then drill a hole, about 5/32 inches diameter, in the front of the head, about 2 inches up from the bottom, then tap it to take a 10-32 thumbscrew. Tighten the screw to lock the revolving foot, or loosen it to rotate the foot. Singer parts dealers have these screws. A competent industrial sewing machine dealer can do the job for you, if you send the head to them. -
The shredding of the thread might be from heat from friction. Slow the machine down! Get a 2 to 2.5 inch motor pulley and a shorter v-belt to match the difference in diameter from the original pulley. Or, replace the motor with a servo motor, like the one I recommended in my first reply. I use that motor and am able to easily control the speed, from way under 1 stitch per second to about 10 or 12 stitches per second. Shredding is also caused by using too small of a needle for the thread and work being sewn. Try moving up a size. Perhaps a leather point needle will penetrate the package with less friction. Or, it could be caused by the timing being slightly off. You should not move the needle down in its housing, unless you are checking for timing problems. If the timing is out and lowering the needle fixes the skipped stitches, then the needle bar needs to be lowered that amount. Or, the position of the pick-up point on the hook needs to be changed to place it inside the cutout - above the eye, as it begins to ascend and form a loop. Perhaps you will get better results with pre-lubricated thread. Use #138 bonded nylon, as that is the largest size your machine can efficiently sew with. You should use a #23 needle with #138 thread on top and in the bobbin. You might be able to sew with #207 on top and #138 on the bottom, with a #25 needle, but you already are experiencing heat related needle and thread problems. The only benefit of smoking hot needles is that the nylon thread lockstitch knots will tend to fuse together. I'm sure you can find an industrial sewing machine dealer somewhere within driving distance.Otherwise, check with our member dealers, like Bob at Toledo Industrial Sewing Machines, or Steve at Leather Machine Company (Cobra), which is in Highland, California. They both have banner ads on top of these pages, with toll free phone numbers.
-
HUH? I thought you wanted to slow down the machine, not speed it up! A standard pulley on industrial walking foot machines ranges from 2 to 4 inches in diameter. I doubt that there is enough clearance under the table to mount a 10 pulley on the motor, but, if you did, you would double or triple the existing speed! What you should do is install a 2 inch pulley on the motor, with a shorter v-belt to keep the motor adjuster in its mid-range. If the original pulley was 4 inches, this will cut the speed in half, at all floor pedal positions. Alternately, you could just replace the clutch motor with a small servo motor, like the SewPro 500GR, which has a full range of speeds from deathly slow to medium fast. This motor is sold at Toledo Industrial Sewing Machines.
-
Ditto what Art told you. If you cannot change motors, at least buy a 2 inch pulley and a shorter v-belt that matches the difference in length to center the adjuster bolt. The attachment is from Toledo Industrial Sewing Machines. It was originally a flat plate edge guide. I added on a roller edge guide that slides on the single threaded rod in the body of the attachment. I found it necessary to braze mine on the bottom of the screw, to keep it from turning when I hefted down the securing thumb screw. This isn't a problem if you only use the flat plate guide; just the roller. The left toe foot set is a zipper foot set. I have a dozen different presser feet for this machine. All are commercially available wherever industrial sewing machines are sold, including Toledo Industrial Sewing Machines (Bob Kovar). Their phone number is 866-362-7397.
-
My harness stitcher has 12 inches of clearance to the right of the needle bar and I often have to turn leather up on the right side to spin it around. I strongly recommend saving until you can afford a 16.5 inch arm machine. Some people are even buying the 25 inch arm machines.
-
Where Do You Buy Your Thread And Needles
Wizcrafts replied to mlapaglia's topic in Leather Sewing Machines
LOL I use nylon most of the time. I mostly use #277 bonded nylon, for holsters, gun belts, double leather belts, etc. I have some #346 in bonded polyester, but rarely use it anymore. It was more expensive and is a little less stiff. I bought it as a substitute for waxed linen thread, for my Union Lockstitch monster machine. -
Where Do You Buy Your Thread And Needles
Wizcrafts replied to mlapaglia's topic in Leather Sewing Machines
I bought a pound of pre-lubricated Cowboy brand, bonded nylon thread for $15, plus postage, from Toledo Industrial Sewing Machines. I posted this information in my earlier reply to you. If you prefer to call them on the phone, the toll free number is 866-362-7397. -
Where Do You Buy Your Thread And Needles
Wizcrafts replied to mlapaglia's topic in Leather Sewing Machines
I buy my needles and thread from Toledo Industrial Sewing Machines. Their thread page is here. It is available in sizes #138, #207, #277 and #346,at $15 for 1 pound spools, in 5 standard colors. You can call 866-362-7397 for pricing on their needles and bobbins. They have system 794 needles in stock. -
Darren; Can you narrow down the part or parts that are causing the timing problem with the shuttles? If it is poor casting or machining, could you replace those parts with locally machined or cast parts? It would increase the cost a bit, but would also be a plus for local buyers to know there is reliable Aussie content in them.
-
Darren, of the website: Anne Bonnys Locker, down under, is importing a Vietnamese type of rotating head patching machine. The latest version is able to use heavy thread and larger needles than other patchers on the market. Look for posts by Anne Bonnys Locker on this forum. Aside from that machine, all other rotating head machines are basically shoe patchers.
-
Adler 30-1, 30-7, 30-70, Cowboy 2970 and others.
-
Yes, and with ballistic nylon and Biothane. You may need to use a size larger needle to maintain a suitable exit hole in these materials, which tend to self-heal. When (not if) you get your 441 machine, be sure to order needles in one size above and below your expected regular size, based on the primary thread size you will be using. For leather, use leather point needles.