-
Posts
2,063 -
Joined
-
Last visited
Content Type
Profiles
Forums
Events
Blogs
Gallery
Store
Everything posted by ClayB
-
Well, satellite is a lot faster than Denise's dialup. The check showed download at 1200kb, upload at 86. So I guess at least we get something for the high price we pay, even though it's still not anywhere near what cable is for about 1/3 of the price.
-
Thanks Kate. If you check the date on the original post here, this ones been done for a while so put that popcorn down and get back to work
-
You're welcome Caroline. If you decide to do feathers on a mask, you could do them a couple different ways. You could make several feathers and attach them, or you could leave them all attached to the mask, just cutting the edges loose as you carve individual feathers. I think just cutting the edges loose would probably be easier and work better. If you decide to go that way and need any help just let me know.
-
Here's a quick demo on how I learned to make feathers. Start by tracing an outline of a feather onto a piece of cased leather. With a swivel knife, cut the center vein on the feather, gradually lessen the depth of the cut as you near the tip of the feather. With the angle lined bevelers B193 and 194 or 202L and 202R or similar tool, bevel the center vein of the feather. I used the same beveler all the way to the point of the vein because it's going to be cut out anyway. By using the angle lined beveler, you get an idea of what angle the small serrations in the feather need to go. They also make it so you dont have to cut the serrations right up to the center vein. Next we start to cut in the serrations in the feather using the multi blade knife. Starting at the tip of the feather makes it a little easier to keep the lines going at the right angle than starting at the base (at least for me). Be careful not to cross over cuts here at the tip. You can see that I didn't do very well at that on this one. Continue making serrations all the way to the base of the feather. Try and keep the angles of the cuts even. Do the same on the other side of the feather. Use a scalpel to start cutting the feather loose from the leather. Hold the scalpel at an angle so you can slice the leather very thin at the edges. You want to cut all the way through the leather. If there is a ridge on the back of the leather where you cut it loose, carefully skive it off with the scalpel. The thinner the better. Some feather have "fluff" at the base. To make this, use the scalpel to carefully slice several of the individual serrations all the way through to separate them. I like my feathers to look "weathered". To do this I slice a couple of the serrations on the feather all the way through. These can then be shaped. To do the shaping I brush on an acrylic sealer. I like X-1 but unfortunately it's not available anymore. Other acrylic sealers like Block Out should work similarly. As the sealer is drying, twist and shape the edges of the feather however you like. Once the sealer has dried, the feather should remain in shape. Now it's ready to paint however you like. If you are going to dye the feather instead of painting, I think you would have to do the dying before the sealer is added and the shaping is done. Dye most likely isn't going to soak through the sealer. These really are quick and easy to make and are a great way to use up scraps of leather.
-
Thanks Tom. I missed your reply somehow. I hate it when I do that! Here's a few pictures of how I did the long hair on the elk cow. It was all done with Bob Beard's lined point tool. I started out along the edges making impressions with the point of the tool. Continue overlapping impressions away from the edge. I made impressions with the back of the tool when at the bottom of an area that needed hair. Continue filling in the entire area. And here is what it looked like when I was finished. For the shorter hair on the elks body, I just used a hair blade in a swivel knife.
-
-
We've had satellite internet for the last few years. It's all we can get out where we live other than dial up. It's advantages are it doesn't tie up your phone line, you can use it on several computers at a time and it's somewhat faster than dial up. It's disadvantages are it's pricey, you are limited on how much bandwidth you can use, it's not as fast as a lot of other services, there is lag time while your info bounces back and forth to the satellite. Ours costs about $90 a month. If you go over your bandwidth they slow your connection speed down to a crawl so if you have kids downloading movies and music it sucks. You can't do a lot of work from home jobs because of the lag time. If we had any other options we sure wouldn't be using satellite.
-
Dirtclod, It wasn't a stupid question. When I do feathers that are completly cut out, I like to paint the back just to make them look more finished. The back isn't going to look as good as the front. It's kind of fun to see people's faces when the realize the feathers are made out of leather. Thanks Tim!
-
Thanks Ray and Tom and Storm! Dirtclod, yes, I do color the backside on the ones I do. There are a couple tutorials on here about making feathers. Jim Linnell did one and Randahl also did one. Maybe this weekend I can find time to make one up quick and show how I do it.
-
Hi Gisela, To make the hair on the body of the elk, I used a tool I got from Bob Beard. He calls it an LP1. I think that stands for lined point, size 1. It's similar in shape to a Craftool F902 but narrower and it has fine lines running the length of the tool. It was my first Bob Beard tool and I really like it for creating hair like this. You can get a similar effect with the 902 tool but you might have to file the Craftool version down so that it has a finer point. I did that to mine and it's pretty simple to do and makes the tool work a lot better. Then after you make the hair texture with the 902, you can drag a hair blade over it to give it even more hair texture. I think I took a series of pictures when I was doing this project. I'll try and find them and maybe I can post a few of them here.
-
Thanks Gisela. I haven't made any in awhile, I should do that one of these days. Caroline, I know you can do these. It only takes a couple stamping tools, a scalpel and a hairing knife. I can give you directions on how to make a simple hairing knife. They are easy to make. I bet you could do some really cool effects on the feathers with an airbrush.
-
I would dye the parts you want dyed first, then apply the paint over it. I think you'd have troubles getting the dye to penetrate through acrylic paint.
-
You don't usually need the hair blade if you use the Bob tool. It has really fine lines and it makes great hair as long as you make the impressions close enough together. 'Member that bear I did a couple years ago with the nasty ear? All the hair on him was done with just that one tool.
-
Hey Randahl, Seems like you dont post a lot but when you do, you always come up with interesting ideas and projects. The horse almost looks like a wood carving on leather. Pretty neat. I think my favorite will always be that leaf lady you showed last fall.
-
Good question Will. I've wondered the same thing.
-
Nice job Kathy, even without a Bob tool! The pointy fine lined beveler was my first Bob tool, and it's still my favorite one. It does a great job on hair. But you can do the same thing a craftool if you file it down to a sharp point. I've used that and then went over it with a hair blade with good results.
-
Hey David, You need to try extreme embossing. Breaking Out Clown!! That would be a fun picture. Now matter what the subject matter, you're doing a great job as always.
-
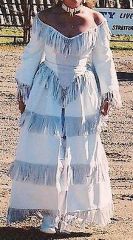
all lambskin wedding dress and moccasins
ClayB commented on broncobuster's gallery image in Our Leatherwork Galleries
-
Sorry Kathy, this working every day is really cutting into my social life! They keep saying Colorado is supposed to be sending us a nasty storm, but it's been taking a long time to get here. Maybe you could ride along with it, then when I'm snowed in next week, you can teach me how to carve horse teeth. I think the biggest reason you want me in a class is cuz you owe me a whack on the top of the head. I think the feathers on the home page are Jim Linnell's. Ok, that'll have to do for the email I owe you, I've got to go to work and you need to carve some more cool horses!
-
Hey Kathy, You never sent me pictures of the last set of horses you carved, I like them even better than the ones you did send me! The detail in the eyes is awesome! You got the look down perfectly. You did a great job on the teeth too. I'll be looking forward to taking your horse carving class someplace this coming year.
-
-
-
-
-


