ClayB
-
Posts
2,063 -
Joined
-
Last visited
Content Type
Profiles
Forums
Events
Blogs
Gallery
Store
Everything posted by ClayB
-

Copy (2) of IMG01097.jpg
ClayB commented on Polancocomp's gallery image in Our Leatherwork Galleries
 That is some really interesting carving. Nicely done!
 -
Here's Ira's contact info. It's on the bottom of the CowCreaser website too. He also sells a great headband light and magnifier! QED: 750 Enterprise Drive Lexington, Kentucky 40510 Toll Free: 800-513-2256 email
-
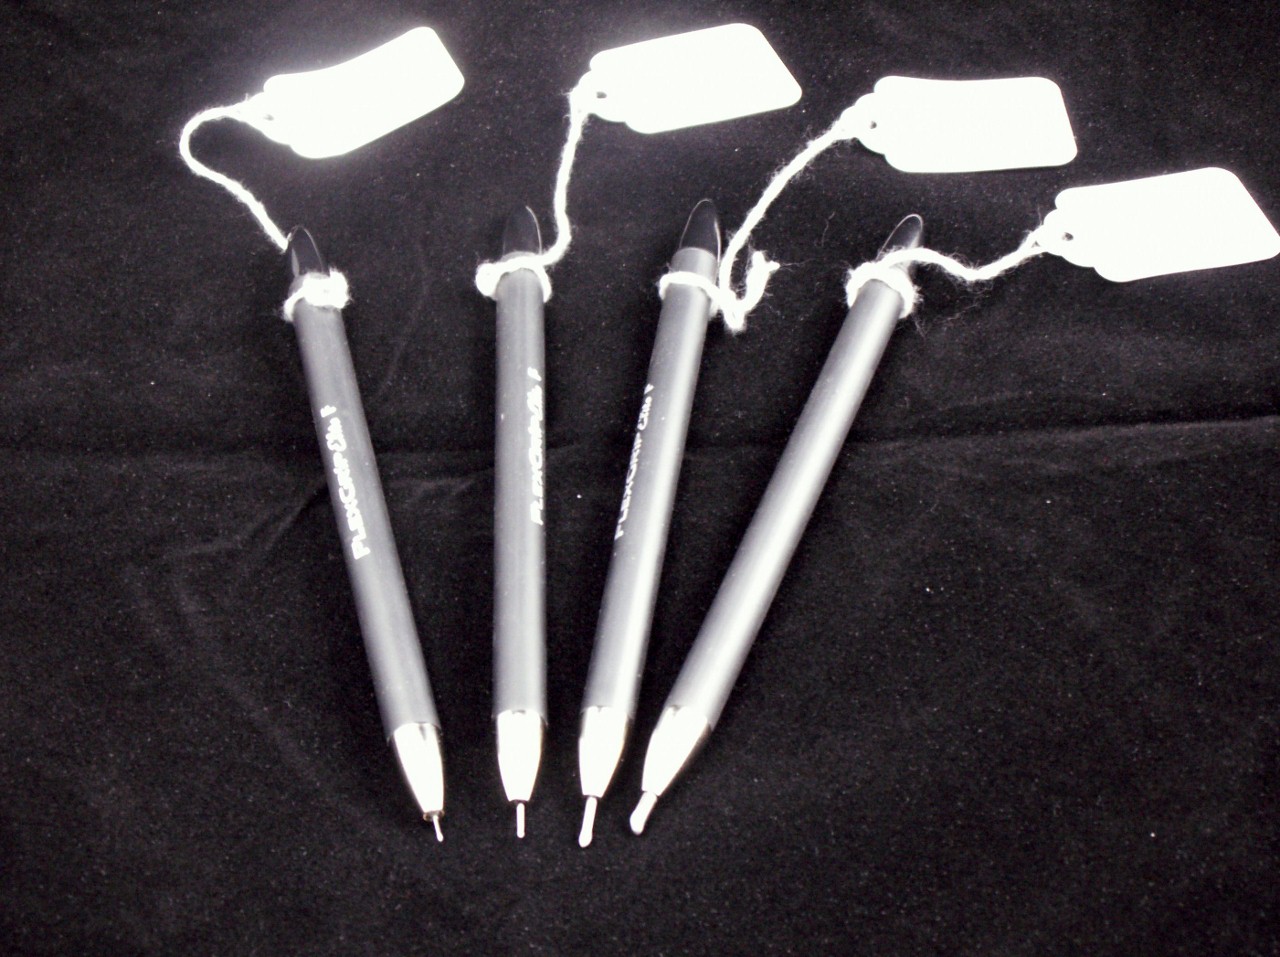
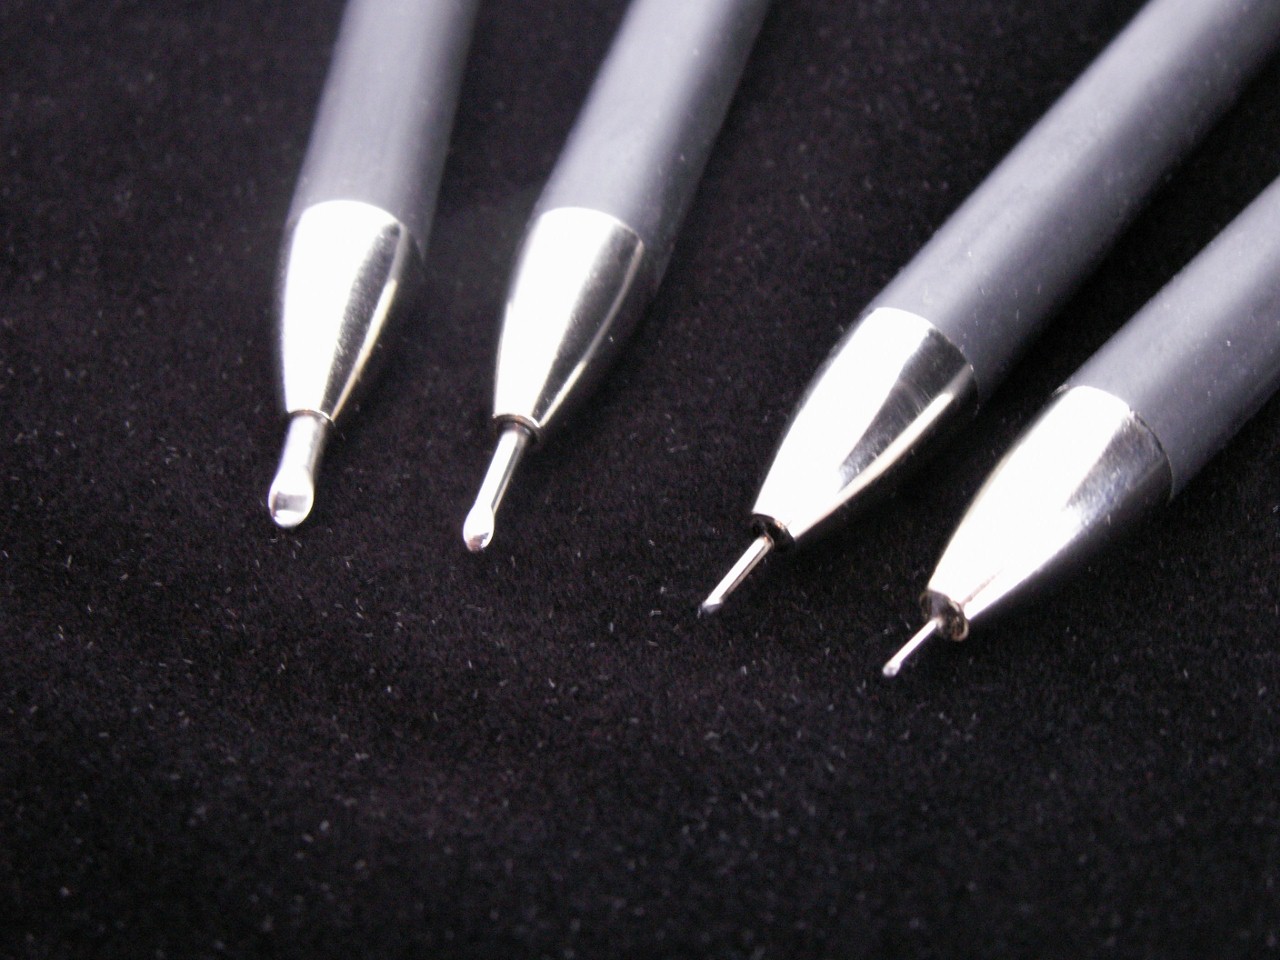
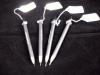
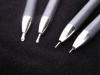
I started working on a really tiny leather carving a couple weeks ago from a pattern Silva Fox shared with me. I had to borrow some really tiny tools from friend to do the beveling. Then Kathy Flanagan (aka Yaklady) told me about some tiny modeling tools that George Gross makes. I guess Ira Cooper (who sells the mini tech light and magnifiers) sells them at his booth in Sheridan but I must have missed seeing them. I got a hold of Ira and he sent me out a set of these tiny modeling tools. There is a website for George's tools and some of his work called CowCreaser.com It sounds like George might be going to start just making one size of the tools, but Ira still had them in 4 sizes, 3/32 inch (small) .066 inch (smaller) .039 inch (teeny tiny) and .024 inch (almost microscopic) I haven't gotten to play with my new tools too much, but they look like they will really work great for the tiniest of projects and some very talented carvers have told me they really like George's tools. George did a couple articles in the Leather Crafters Journal back in March and May of 1992 showing what he does with these tools and also how he makes them. He does some pretty cool stuff!
-
I received an email from the Folklorist at the North Dakota Council for the Arts this week that said it's time to apply for the Traditional Arts Apprenticeship Program. This program gives grants to help preserve what are considered "traditional arts". Here in ND, those include such things as Dakotah storytelling, Vietnamese embroidery, Czech Easter egg decorating, Armenian copper bas relief work, blacksmithing, saddle construction, German-Russian willow basketry, Hidatsa quillwork, Sudanese music, Norwegian Hardanger embroidery, etc. The grants are available for up to $2500 with part of the funds going to buying materials and the other portion going to the "master" that teaches the apprentice. I have participated in this program twice as an apprentice and this year I am considering applying to teach my son how to build a saddle. If you are interested in learning or teaching what is considered a traditional art, check out what may be offered in your state. Many states have similar programs and you should be able to find them by doing a search for Traditional Arts Apprenticeship Program or your state's Council for the Arts. Deadlines for applying for these are usually quite early in the year.
-
Hi John, When doing your backgrounding, your leather should be on the dry side. You will need to practice until you are able to use consistent force when you are hitting the tool. Move it slightly between hits making the impressions overlap (unless you are using a bar grounder). You may need to go over your background areas more than one time to get it really smooth. Also, if you have a lot of background area on your project, you should have some sort of backing on your leather when you are stamping on it. Leather will stretch out of shape otherwise. I use a 16 ounce maul for all of my tooling.
-
And with all the new members we constantly get here, every time a question is asked over, there is the possibility that there can be a few new answers. Searching is fine, but I find it frustrating at times to even find a post I know is here somewhere.
-
Me 3. I've use isopropyl alcohol to reduce spirit dyes and oil dyes. It's always worked fine for me.
-
It's interesting how much difference the antique makes in your coloring. I always think it looks nice before, but when you're done, it's awesome!! Once again, you did a great job.
-
Embossed Buffalo Skull
ClayB commented on Leatherimages's gallery image in Our Leatherwork Galleries
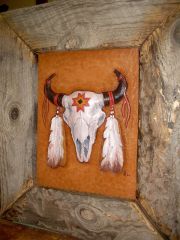 Paul, I guess I was one of those that just thought you were a boot maker. I didn't know you did so much other stuff. At least you are consistent, this stuff looks just as great as your boots!
 -
Leather covered doors and drawers for wet bar
ClayB commented on Leatherimages's gallery image in Our Leatherwork Galleries
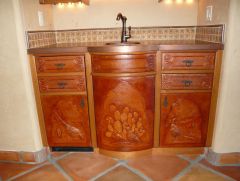 This is really cool!!!
 -
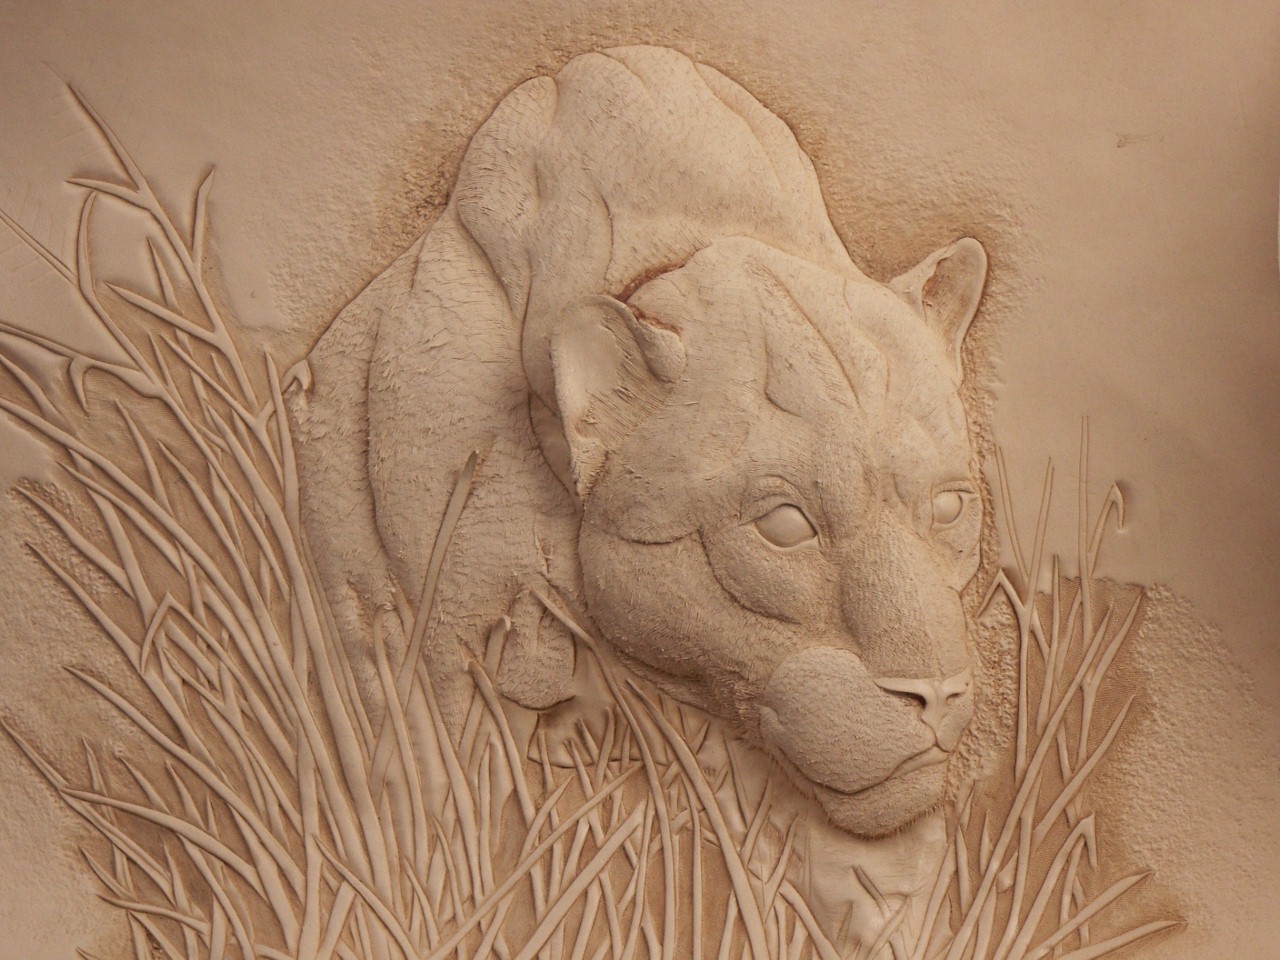
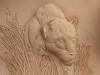
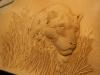
Hi Doc, You're right, this isn't a normal carving project so throw all the casing rules out the window. Before I do the first part of an embossing project, I'll quick case the leather. I usually wet it first from the back, then a little more on the front. Then I'll trace, cut and bevel the outline and do some rough beveling of the muscles etc. You will know if the moisture is right if when you bevel, you get a dark line on the back side of the leather. Then you need to wet the leather that will be stretched some more. Usually I will add this moisture on the backside again, either with a spray bottle or a sponge but only inside that bevel line. You want it fairly damp to do the stretching, but you dont want it so wet that it comes through to the front side (if some does it's ok, but you dont want it soaking wet). Once the stretching is done you apply rubber cement to the back and fill in the putty. Then I hang the picture up to let the putty dry. I usually let it dry overnight so the putty sets up and the leather is going to be completely dry again. When you get ready to start working on it again, I will just spray water on the front again to get it ready. At this point I usually rubber cement the leather to a piece of cardboard. The leather needs to be damp enough to get it to flatten out against the cardboard. The next step is to shape the leather with bevelers and pear shaders so it needs to have about as much moisture in it as for regular carving. When I cut in the hair, the leather is again pretty much dry. Now that I'm back to shaping the grass blades, I'll dampen those areas a little. So for a project like this, the leather gets wet and dried several times and it doesn't seem to hurt anything. Hope that helps. It got really nice here in ND again so I'm back to work and not sure when I'll get back to this, but I'll post a picture when I get it finished. Thanks everyone for your comments.
-
That's really nice!
-
I love what you did with your helmet Freak! Can I send you mine???? But if you made it look like that, I'd wanna just hang it on my wall instead of use it.
-
That's great Kate. I'm so excited to see how this will turn out now! (and those half done tiny horses are excited too, they didn't think I'd ever get back to them) Crystal, it's nice that someone finds the good side of our winter weather! Actually I like that part of it too, although working one day in 3 weeks makes for a lousy paycheck. But hey, it's 50 degrees warmer right now than it was yesterday morning! Sounds like this coming week is supposed to be pretty nice so not sure how much more I'll get done here in the leather shop. In the meantime, you've got time to pick up some more popcorn and I'll let you know when I get some more done.
-
Glad you both like it. It's been fun to work on so far. Remember when you said you were wondering how one of my pictures would look with some airbrush work, Kate? I could send this one your way when the carving is done and you could find out
-
Since we've been in the deep freeze for about a week now, I've had some time to work on some leather projects. I've got a few different things started, and have been having varying degrees of success, so I decided to work on something more comfortable for me. I've been wanting to try my hand at this pattern out of Robb Barr's book for awhile now. It's coming along pretty well but it's got a ways to go yet. Anyway, here's how it looks so far. The first picture was taken right on my bench like I've always done. The second I took this morning in the light booth Stacy got me for Christmas. I never realized it could make that much of a difference! There's more pictures of this project on my blog if anyone is interested in seeing how it's progressed.
-
I had a question similar to yours a couple years ago and posted it here. I got some help from Dale H that helped me figure out how to do it a little better. You can see the thread I started here I think I've got some in progress photos I took while I was doing this and I can try and post them if you think they would help you out. There's a lot of people that have joined the forum since that topic was posted so if anyone else has idea on how to do this, I'd like to see them too.
-
If you click on the link at the top of the page (right under the banner) that says "Leatherworker.net Main Page" it will take you to a page that has a lot of other links. If you go part way down that page, there is a link to "suppliers". That will give you names, websites, contact info etc. for a lot of what you are looking for. I'm not getting into what's best because I think a lot of that is personal preference. If you are looking for a lot of tools at reasonable prices, you might check out Ebay and do a search for leather tools. Do some research and have an idea what things are worth and you might be able to find some deals. As for mauls and mallets, they do serve basically the same purpose. I'd say that in general, mauls have a shorter handle and a lot better balance. Most people that try a maul really like them and prefer them over a mallet. Again though, it's a personal preference thing. If you get a chance, try one out and see what you think.
-
I think if you want to dye a background area like that, you are going to have to use a brush. What I've found that works for me is to dip your brush into the dye, touch it to the side of the container to get rid of some of the dye, then touch it to the middle of the background area. If you have the right amount of dye on the brush, it will spread out from where you touch it and usually stop when it hits a cut or beveled line. If you have too much dye, it's gonna jump the line and cross over into someplace where you didn't want it. If you dont have enough dye, it wont travel far from the brush. So it's something you need to practice with on scrap but it's the way that works for me to get into most tiny corners. I usually make a mess if I try to get the tip of a brush right into those tiny corners. This doesn't work with acrylic paint, but has worked for me with spirit based dyes.
-
I think a lot of it is "tradition". Seems like a lot of the patterns that are used in leather carving came from other forms of art. Some of the same types of patterns are seen carved in stone, wood, metal etc. I remember reading once that the old time cowboys had carved leather on their saddles, belts, boots etc as their way of having some sort of art to take along with them into places that didn't have that sort of thing available. It went along with the story that they saved labels off of canned food just to have something to read. I don't know if that was really the reason or not. I think if you start looking around into the old magazines and other places, you'll find that people have carved all kinds of images into leather. Darwin Ohlerking used to carve lots of old barns, bridges and things like that. Lots of people carve scenery and figures, human portraits etc. It does seem like floral carving is what is taught to beginners. Maybe it is that it's easiest to teach how to use the basic tools with these patterns. But once you get used to using the different tools, the sky is the limit. I remember Peter Main telling me that there isn't anything you cant make out of leather. I figured that was pushing it a little bit, but the more different things I see done, I think he was probably right. If floral isn't your thing, no problem. Decide what it is that you would like to do and do it. Then show us all here!
-
Hi Paul, It's great to have you here, no matter how long it took!!
-
Hey, not to hijack this thread, but I lived in Antelope till I was 5 or 6. We used to go to Plentywood on Saturdays to get groceries and spend our weekly nickel.
-
Red and black shoulder bag
ClayB replied to leatheroo's topic in Purses, Wallets, Belts and Miscellaneous Pocket Items
Looks good Caroline. I like the contrast of the black, and I like the look of lacing too. -
If you are close to a Tandy store, you could check out the book Belts Galore by Al Stohlman. Near the back of the book he has patterns for a few different contour belts. Maybe one of them is close to what you are wanting.
-
If you happen to have the book called "The Leather Craft Handbook" by Tony and Kay Laier, there is a page on making animals like that on page 8. If you dont have the book, it's available from Tandy