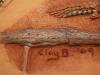
ClayB
-
Posts
2,063 -
Joined
-
Last visited
Content Type
Profiles
Forums
Events
Blogs
Gallery
Store
Everything posted by ClayB
-
Hi Charley, I found Bill's editorial. It's in the Sept-Oct 2000 issure of the LCSJ. His idea was to create a National School of Leather with a building containing 6-12 classrooms, a theater, and a kitchen facility. In the editorial, he stated that the Al and Ann Stohlman Award Foundation's by laws and purpose include the formation of a school and assisting potential students. His reasoning for having it in Sheridan was because they already has the King Musuem and the high concentration of top quality makers. I guess his idea is a little different than your idea of a leather museum or gallery, but the two ideas would sure go well together.
-
Charley, Bill had an editorial in the LCSJ a few years ago with an idea similar to yours. He talked about having a building somewhere, possibly Sheridan where leather work could be displayed, and different classes could be held year round. If I remember right, he was thinking of having different teachers come in for a couple weeks or a month at a time. Seems like he was talking about starting some kind of foundation to raise money to fund it. Don't know if the idea ever went anywhere or not. Me, I started my very own leather museum in my house so I dont have to travel across the country for inspiration. I've been collecting pieces of different peoples works that I really like. Silva, Peter, Bob Beard, Jan Schoonover, Billy Stockill, Jim L, Christine Stanley, Kathy Flanagan, Dale Hietala, Kate Dubiel, Tina Croff, Shirley Zanelli, Caroline Watson. I've got room for lots more if anyone wants to make a donation
-

Billy Wootres Swivel Knife Shoot Out Contest results
ClayB replied to Johanna's topic in Special Events, Contests and Classes
That's some pretty impressive swivel knife work Bob!!! Wonder how many more years of practice it will take till I am anywhere near that good. -
Thank you all again for the nice comments. Bert, this is actually something I'd feel fairly comfortable trying to teach in a couple days. We'll have to figure out the details. Just make sure Kathy is there to take over if I blow it! Ken, I have a digital video camera and I played with it a little last year. One of these days I'll have to set it up again and see what I can do with it. There's been talk about having videos here on the forum someday, so you never know.
-
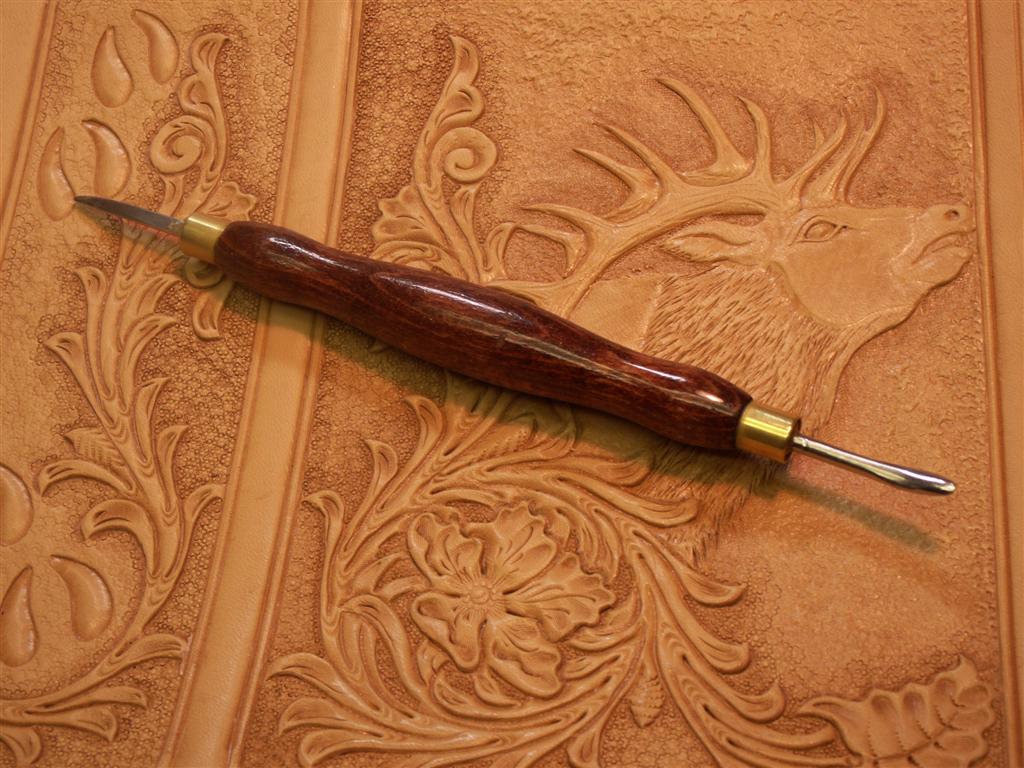
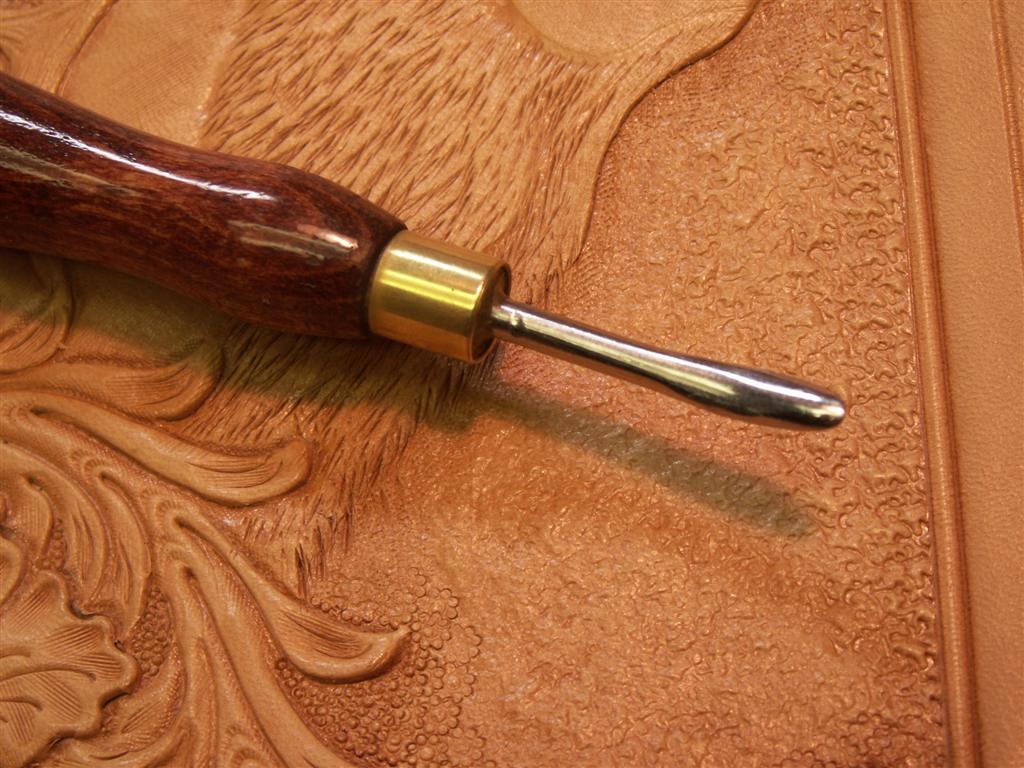
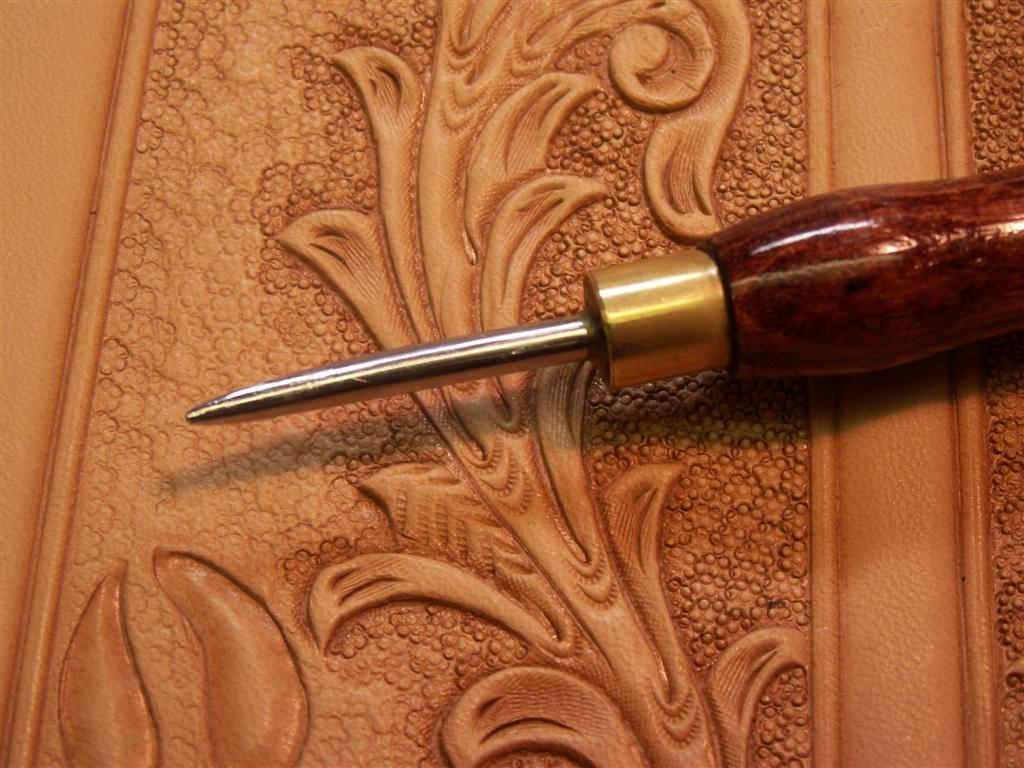
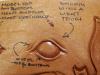
Hi Nomad, Here are some pictures of Peter Main's modeling tool. You can either PM Peter through the forum, or you can email him. Peter's tool has a little different shape than the Tandy tool and everyone that I know that has one really likes it.

-
Thanks for the comments all of you on this. It was a fun piece to do. It actually turned out better than I expected. I am wishing I wouldn't have just started it on a piece of scrap. Coloring is something I have struggled with for a really long time Bob. I am finally getting to where I like some of the stuff I paint. If it helps you or anyone else out at all, that's great, and what I was hoping for with this piece.
-
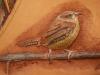
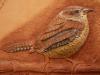
Here's the finished piece.
-
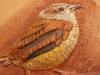
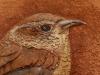
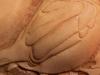
Ok, here's the painting process. I start out with a coat of Drake's X-1, an acrylic sealer. I use this for 2 reasons. First, I put it on a small area of the carving at a time, and then lift and shape the feathers with the tip of the scalpel. When the sealer dries, the feathers will remain in that shape. Second, the sealer keeps the acrylic paint on top of the leather instead of soaking into the leather. If you make a mistake with the paint, you can somewhat wash it back off if you are quick. Filling a brush with water and going over the mistake will dilute the paint and the tip of a paper towel will remove most of the paint. You can repeat the process a couple times if you need too. In the same way, you can sometimes blend the acrylic paint colors. Once the paint is fully dry, it is pretty permanent so you have to do this fairly quickly. Here the X-1 has been applied and the feathers slightly lifted. Starting with the paint. I put some Liquitex Turner's Yellow and some Ceramcoat Light Ivory in my mixing tray. I added a little of the light ivory to the yellow and painted the chest of the bird. Then I used the light ivory on the forehead and the lower portion of the head. Whenever I use acrylic paint, I always mix it about half with water to make it very runny. It may take a few coats to get the color I want, but it's easier to build up color than to take it off. It also doesn't gunk up and fill in all the carving that you have done. The body of the wren was colored with a watered down coat of Ceramcoat Raw Sienna. This color is almost the same color of the leather. Ceramcoat Charcoal was used to add the stripes on the feathers, the eye, the base coat for the beak, and as an outline for the small feathers above the eye. Light ivory was used to color the thin line of feathers over the eye and added over the bottom portion of the head. I light coat was put over the beak, then wiped with a finger to blend it into the charcoal base coat. It was also used on the thin ridge of feathers under the eye. Light ivory was dry brushed over the yellow on the chest of the wren. To do this, paint is applied to the brush, then it is wiped onto a paper towel until almost all the paint is gone from the brush. Sometimes you actually have to really scrub the brush on the leather to get any paint off the brush, but it blends very well that way. Light ivory is used to add the stripes to the tail feathers and the spots on the bottom wing feather. It is dry brushed on the rest of the wing feathers for a high light. To color the branch, I first used a very wet coat of charcoal for a base coat. Then I dry brushed over that with a very light coat of light ivory. I used my finger to wipe over the white and blend it in a little. The legs and feet were colored with a very tiny drop of red mixed into the light ivory to make a very pale pink. A light coat of very watered down charcoal was used over this for shadows and to bring out the texture in the feet. At this point, the coloring is finished. I then sprayed on a couple light coats of Plaid clear matte acrylic sealer. This seals the paint. Then I painted over the eye with Ceramcoat Gloss varnish. I also put a light coat of this on the beak and the claws. On the beak and the claw, I don't want them to shine as much as the eye so when it's still wet, I touch my finger to the varnish. It still has a wet look when dry, but not shiny like the eye. I don't put a white highlight in the eye like some people do. The varnish picks up a reflection from any light in a room and gives a realistic highlight to the eye. It will almost follow you around the room from whatever direction you look at it. Looks like I'm out of space, so the final picture will have to go in a seperate post.

-
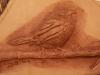
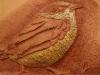
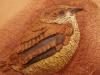
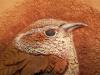
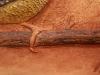
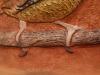
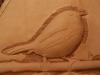
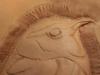
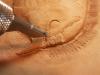
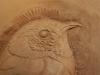
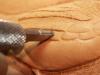
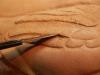
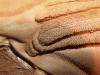
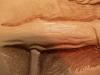
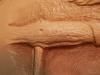
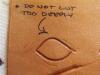
Kate shared a picture of a wren that she was carving a while ago. I really liked the detail in the pattern and wanted to try it out. She was kind enough to send me her pattern. I started on this awhile ago, but got side tracked on another project. Since ND is closed this week, I got back to the wren yesterday. I thought I'd share some pictures of my process for carving and feathering the wren. To start with, I cut the outline of the wren with the swivel knife, beveled it, emobssed the leather from the back side and filled it with putty. I didn't get any pictures of those steps, but I've covered them before in some of my other projects. I think I put a little more putty on the backside of the wren than I should have. It was a little difficult to get the background to set back down, but with quite a bit of work, it did lay down. In this first picture, the project has been rubber cemented to a piece of cardboard and back grounded to flatten the leather around the bird down. The next step is to start bringing out the details in the feathers. I used a figure beveler for the wing feathers, and a modeling tool for the smaller feathers. Beveling on a project once it's been embossed and filled with putty is different than on a flat project. You dont have a hard surface under your leather, so it may take several passes to get some depth. Your beveling can also get pretty choppy and you may need to use a modeling tool to clean it up and get it smooth. Rough bevel in the tail feathers. Now I've moved on to the head. The eye and beak are beveled in with a small figure carving beveler. The eye isn't taking shape very well yet. Most of this work is done with the leather dry, but to get some detail into the eye, it's going to have to be wet a little. The different areas of feathers are put in with a modeling tool. I use the pointed end of the modeling tool and kind of jabbed the end into the leather to get a ragged edge to the different feather areas. I wasn't real happy with the look, so I went over these areas again with the end of a pointed beveler making the impressions as close together as possible. Here's where we're at so far. Now we're ready to start the feathering. A lot of the feathers on this bird look almost hair like. So I decided to put them in with the multi blade hair knife. You could do something similar with a regular hair blade, they just wont stand up like they do with the multi blade knife. I started at the beak, pushing the tips of the knife into the leather and pulling them up. This makes really tiny hairlike texture. I made this same texture on the forehead. Then use the multi blade knife by dragging the blades in a forward stroke to make the tiny hair like feathers over the eye. In this picture, the eye has been wet and shaped with the modeling tool. It is rounded and smoothed out. The multi blade knife was used to make hair like feathers on most of the head and onto the neck and chest. A scalpel is used to slice into the leather, creating small feathers. The scalpel is held at a very shallow angle and the slice just goes slightly under the leather. On the larger wing feathers, a center vien was drawn in. This can be done with the back side of the scalpel blade, or with a modeling tool. Then the multi blade knife was used to cut in the serrations on the feathers. Then a scalpel is used to slice slightly under the feather to seperate them. Texture is added to the feet and the tree branch with a modeling tool. On the branch, I first put in texture by rubbing some horizontal lines in with the modeling tool. Then I took the tip of the modeling tool and pushed in some small holes, and roughed up the modeled in lines.


-
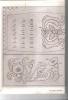
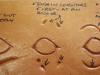
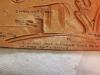
Hi Brent, I dont think they were actually filigree tools. I'm not sure if they are sharp enough for that or not. I have most of a set, but have never played with them. Here's a couple pages on them. One is an advertisement, the other shows a couple patterns done with the tools. Hopefully they'll give you an idea of how they were being used.
-
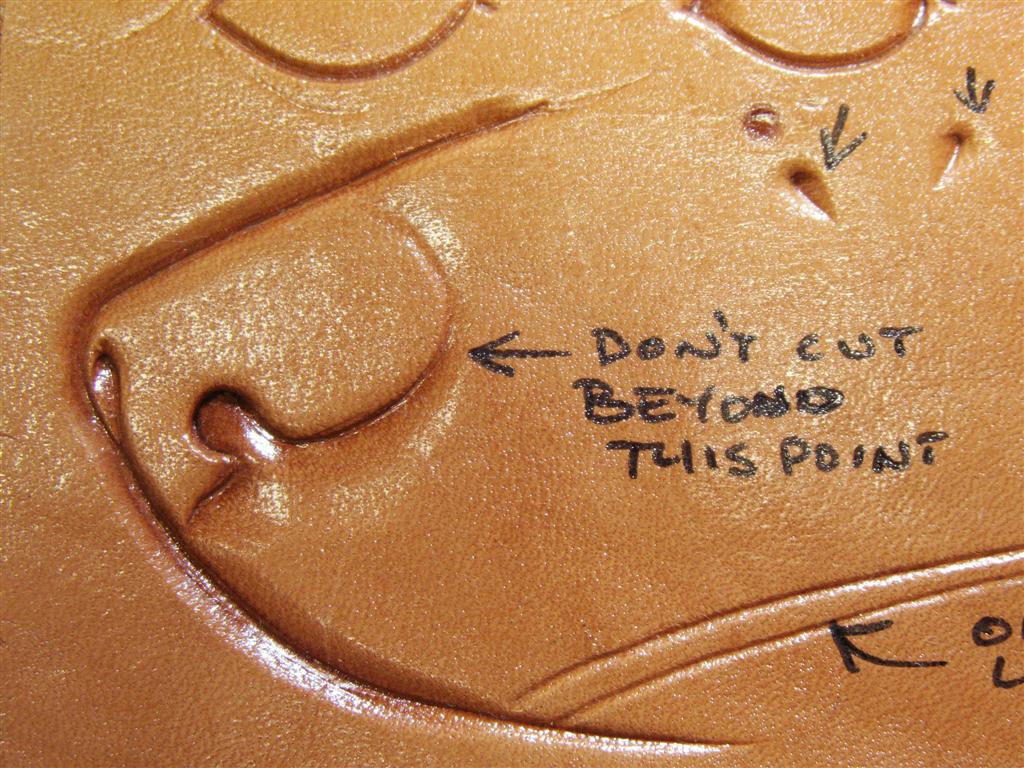
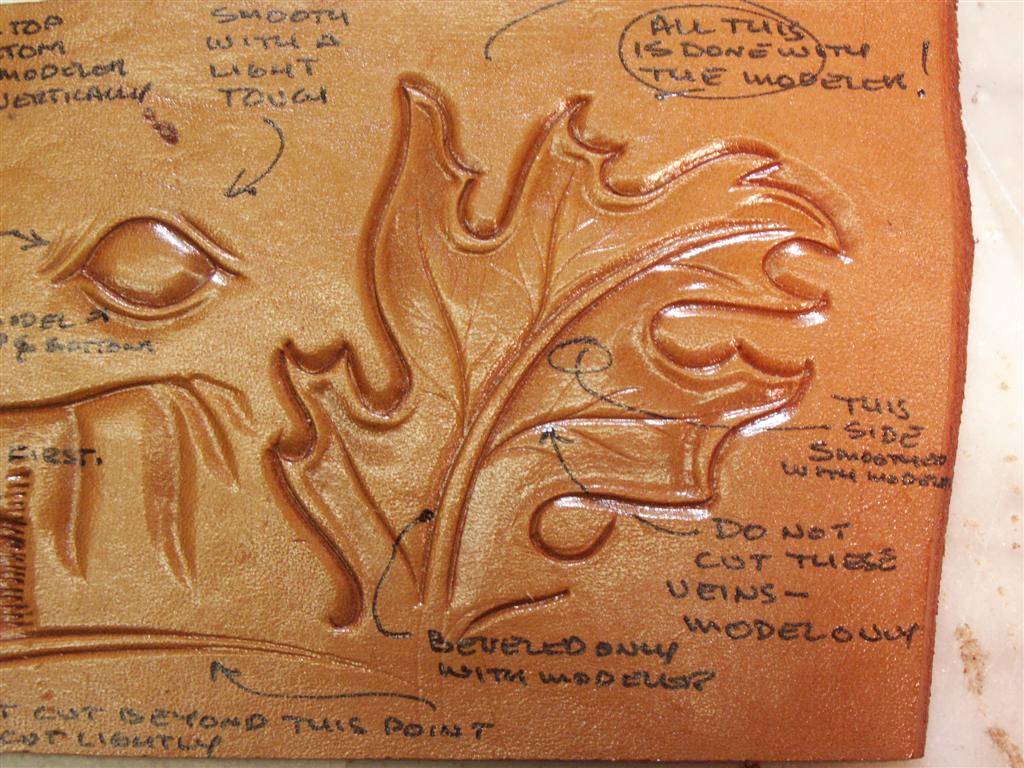
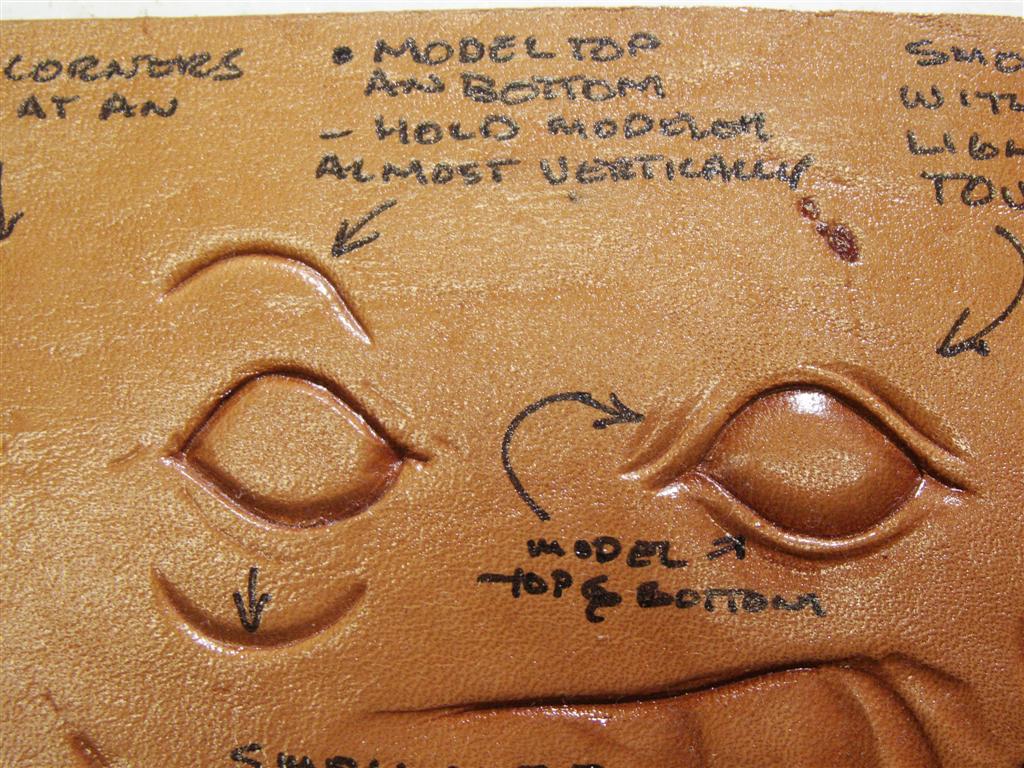
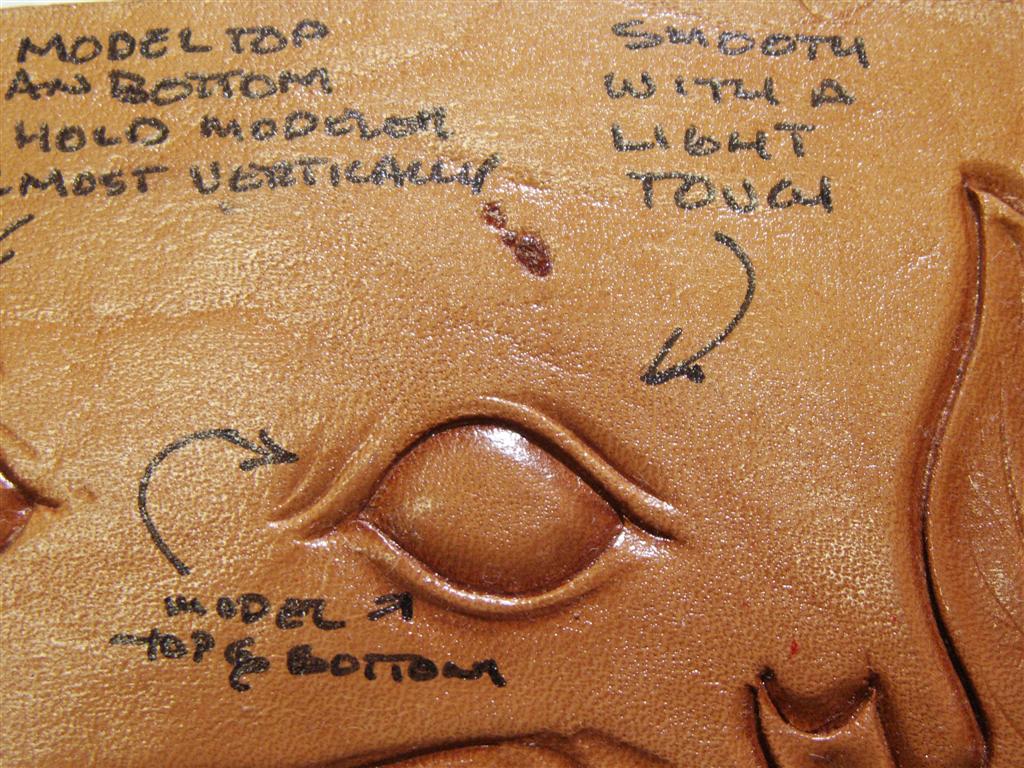
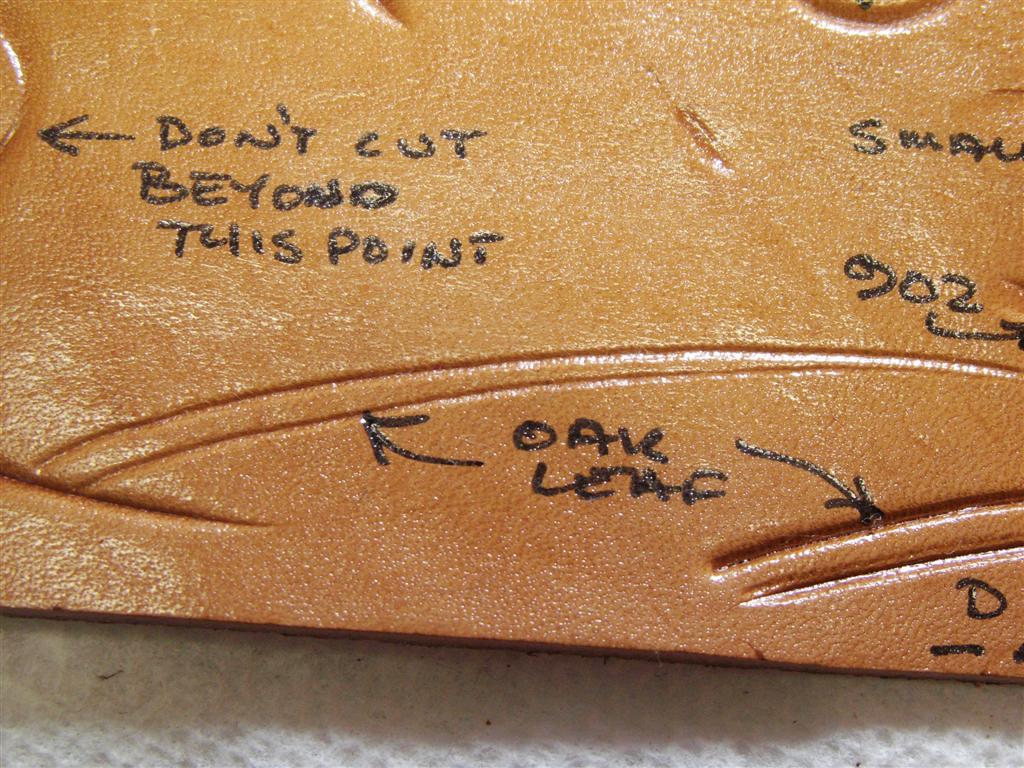
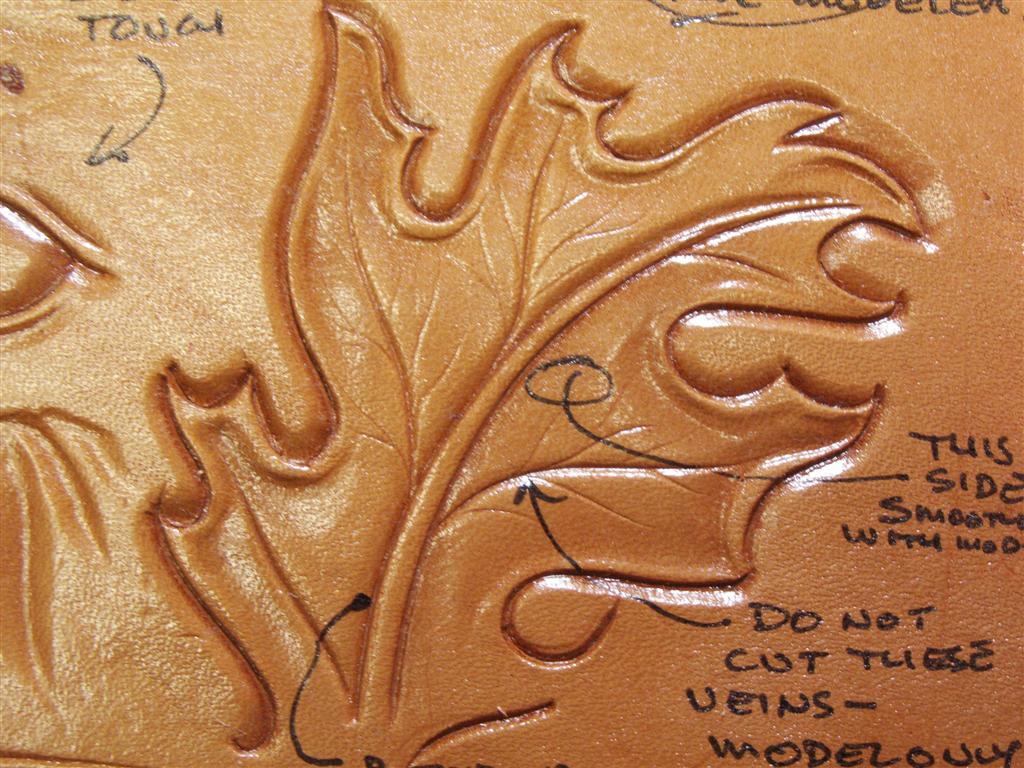
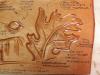
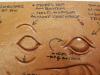
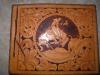
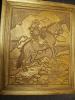
Hi Bob, I think you're right about the modeling tool. The modeling tool is probably my most used tool. It can be used for so many different things, from cleaning up beveling, to doing actual beveling. I use it to add details, shaping, certain textures, and so much more. My favorite modeling tool is one that Peter Main makes and sells. When I got mine from him, he sent along a piece of leather showing me some of what he can do with a modeling tool. Here are some pictures from that scrap of leather.


-
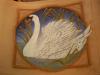
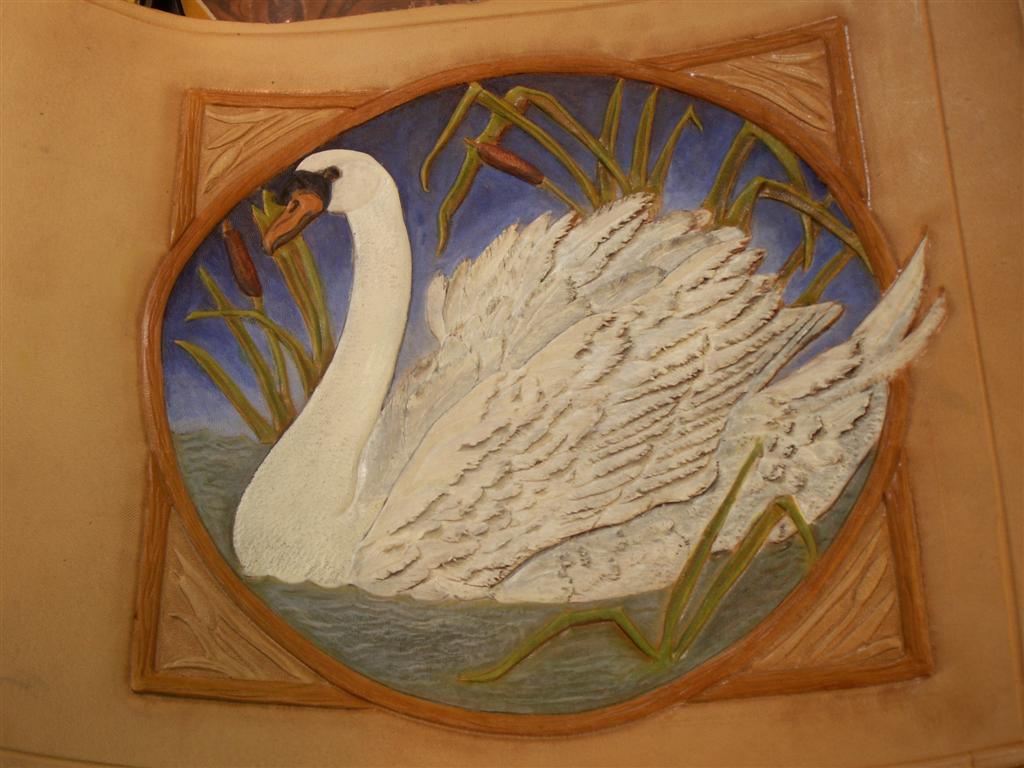
Hi Crystal, I always like everything you do, and there is such variety. On the baby album, I like how you put the flowers over, and under the border. Gives the carving a lot of depth. The different size letters add to that too. The coloring and the flower centers bring it all together really nice. On you PIF flask, well you know what I think about that. You must have had to throw out the magnifying lenses and get out the microscope to do the carving on that! It turned out great, and the lacing on the back is a nice added touch. Not sure that 64 oz can still be considered a flask, can it?????? I'm sure it made a great gift. The reflection on the letters is a cool touch. You should have taught me how to do that before I colored the swan. Guess you have to add that on yourself
-
Lots of things come into play when you want smooth beveling. Your leather should have proper moisture content, not too wet or dry. That's something that is really hard to explain, but the more you tool, you'll figure it out. When it's just right, you'll get a nice burnish (darker brown color) to your stamping. For beveling, you only want to move your tool 1/3 to 1/2 of it's length between strikes with the mallet. It's called a "walking" tool which means you keep moving it and tapping it at the same time. With practice, you'll figure out how to get even force with each strike of the mallet. If you are using a smooth beveler, you can follow up with a modeling tool to "erase" tool marks by gently rubbing them over with the modeler. You can do this with the beveling tool also. Just hold it in your hand kind of like a pencil and drag it over your beveled line to try and smooth out the tool marks. If you use a checkered beveler, there will be less chance of leaving as many marks, but you'll probably still get some. There are some really good free online lessons at Paul Burnett's Painting Cow website He goes into detail on proper moisture content, how to walk tools, and a whole lot more. It's worth spending some time studying his lessons. I just hold my leather down by resting the hand I hold my tools with on it, but some people use weights. Some of them are made by sewing bags out of chap leather or deer skin or similar soft leather and filling them with lead shot or other heavy material. Just be careful not to use metal objects directly on leather as they react to damp leather and leave black stains that can be hard to remove.
-
Happy Birthday Kathy!!!!!!!! It's funny, I've known you for a few years now, and you haven't aged a bit. Those 29 candles must be getting pretty short by now. Hope you have a really great day today, and a great year too!!!
-
Hi Hammerhead, I was just thinking last week that we hadn't heard from you in a while. Your latest strap looks really good. As always, I'm impressed with how you get the small details to work. I tried one of your patterns, and I couldn't get the face to turn out nearly as well as you do. I too will be looking forward to seeing this one finished.
-
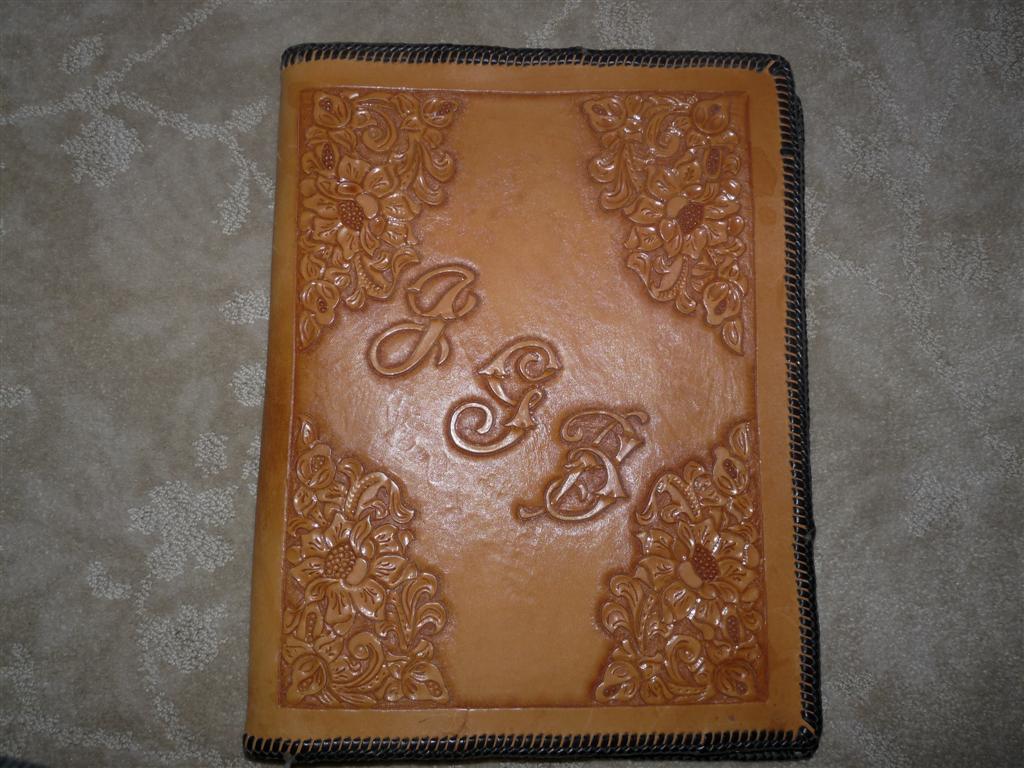
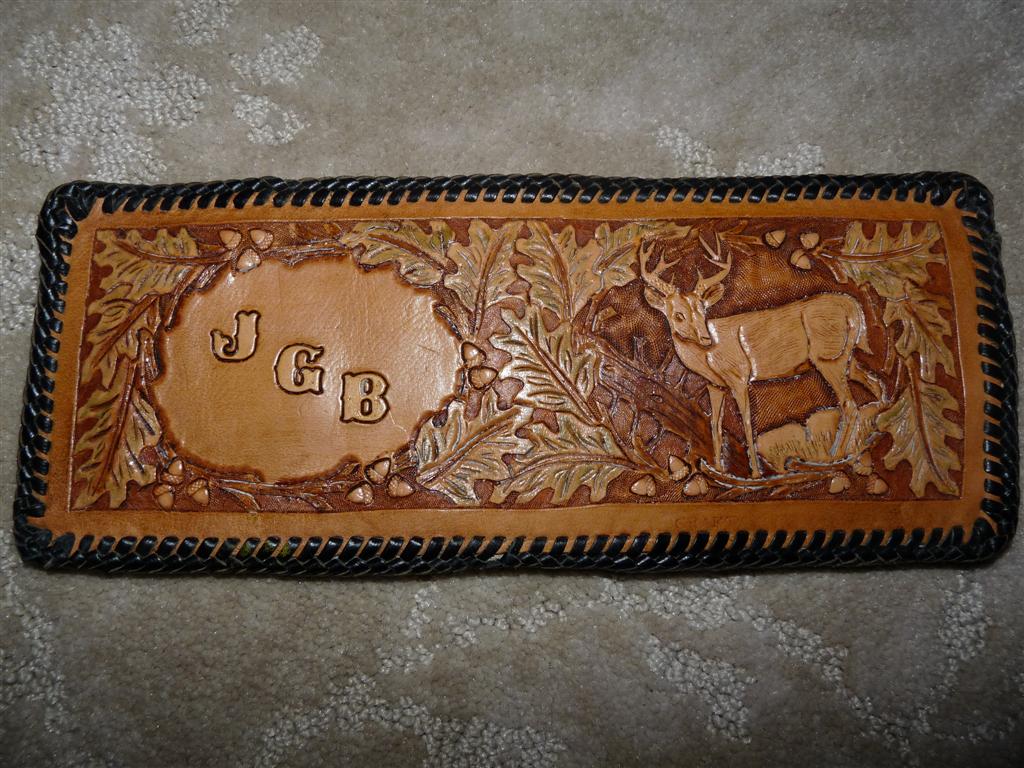
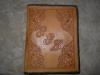
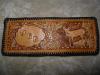
Ok Suze, I had hoped you would forget about this topic when we talked about it, but it looks like you didn't. Most of my earlier projects were given to my parents, and it looks like they have kept them all. I know there were some coasters too, but my mom must have realized that NOBODY should get to see those!! These may not have been the very first projects, but they are all 30+ years ago, or close. This scrapbook cover was one of my first figure carving projects. Notice all the dye spots on the carving from trying to dye the background. The back has a spot the size of a dime spilled on it. This one is a legal size notepad holder made for my dad. I'm glad I learned to splice lace since then. I don't even remember making this billfold. I shouldn't have to list all the mistakes made in it. And finally, a picture that I carved for my grandfather. Lots of lessons learned on this one too!
-
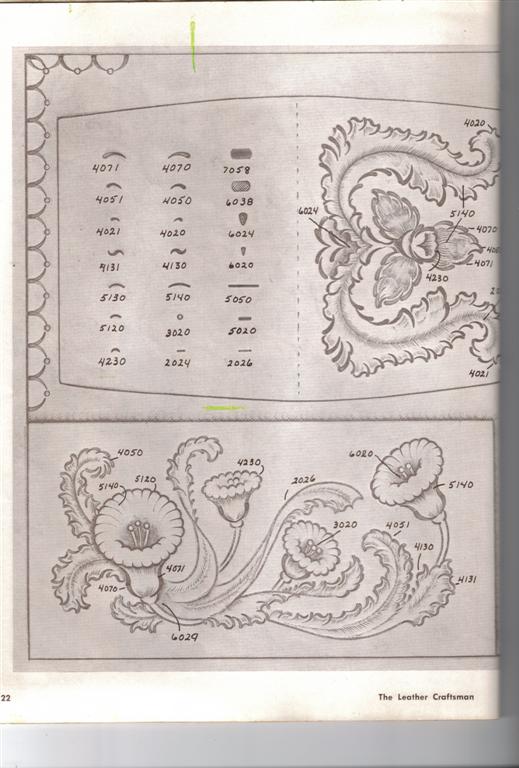
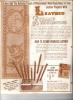
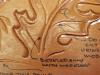
If you want to unload them, let me know. Craftool made these in the early 60's, maybe even in the late 50's. They called them stamp engraving tools. They were designed to be used on soft metals like aluminum and copper. You could stamp designs in in metal them similar to leather designs. A lot of the curvy shaped tools were used to stamp the edges of leaves and flower petals where we would generally use a swivel knife and a beveler. There are quite a few articles in the Leather Craftsman magizine in the early 60's that showed how to use these tools on metal, and then Al Stohlman started using them along with regular Craftool leather stamps for some really neat, different designs. If I look around, I should be able to find a catalog with the impression sheet and prices on it. There was at least one doodle page with these stamps in it. I have a few of these tools and most of them have more of a gold tint to them than the chrome colored leather stamps. It looks like you might have an entire set, and I bet there are a few tool collectors out there that put quite a bit of value on them.
-
To keep your sanity
ClayB replied to anne newkold's topic in Purses, Wallets, Belts and Miscellaneous Pocket Items
Hi Anne, Looks like you have been very busy, and your projects are looking really nice. Every time you post something, I can see the improvement. I'm glad that you have this to keep you sane in these tough times. Also hoping that things get better really soon!! -
Cardboard is to prevent stretching while tooling. I use pieces cut off cereal boxes because I have an abundance of cereal boxes. Other people use things like X ray film, or packing tape. They say packing tape doesn't leave glue residue like rubber cement will. That can be a problem if your project wont be lined. There have been several discussions on the forum about this, you can probably find them by doing a search. When it comes to carving, you want a solid surface. Most people use marble or granite. Your steel plate will work as it is solid, but steel has a big dissadvantage. Wet leather reacts with steel causing it to turn black. Sometimes the black marks can be removed with lemon juice, sometimes not. It would be better to not let the leather come in contact with it. I think you are going to get better definition in your stamping with something really solid like the marble or granite than you are with the plastic floor tiles over plywood. If you have the time, go through some of the topics here on the forum, starting out with the "how do I do that" portion. I think you will find some lengthy discussions on a lot of the questions you have. If you don't find your answers, just ask.
-
My Brothers B-Day gift
ClayB replied to BearMan's topic in Purses, Wallets, Belts and Miscellaneous Pocket Items
Hi Ed, You did a great job of customizing this case for your brother. The wrenches turned out looking really nice. Neat lac can be tricky over certain dyes, but it gave it a good look. I also like how the wrench comes over the top and around the post, neat touch. -
If you look at my oak leaf tutorial here it shows a few different basic background patterns. When you background, your leather should be fairly dry, usually when the rest of the tooling is finished. I try to turn the tool constantly while hitting it so it makes a real random pattern. I dont want individual tools impressions to be visible. You can go over the area several times if you need too to get good even looking background. You need to practice striking the tool with failry constant pressure to avoid areas that are deep and areas that are not. Also be careful with really small tools as you can pound them right through the leather. And one final tip. It's usually a good idea to have your leather backed with packing tape, or rubber cemented to cardboard or plexi glass or something when tooling. Especially projects where you have a lot of background. Otherwise, your leather can stretch out of shape when you compress areas with the tooling. Hope this helps a little.
-
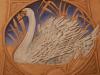
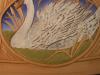
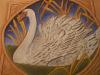
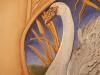
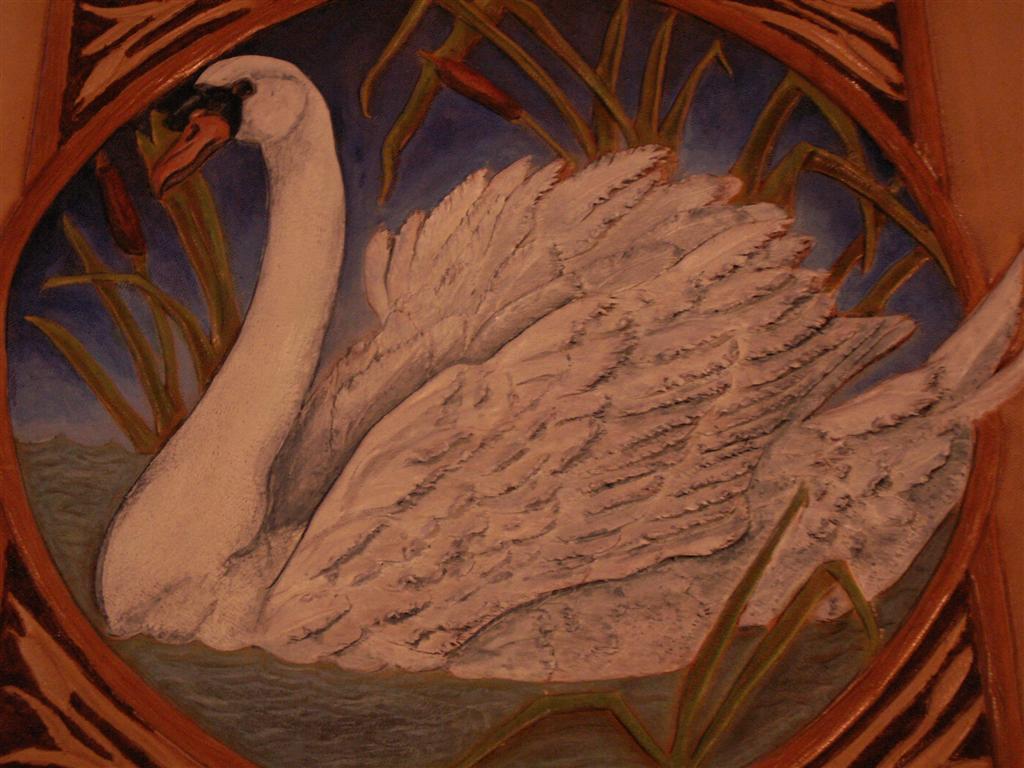
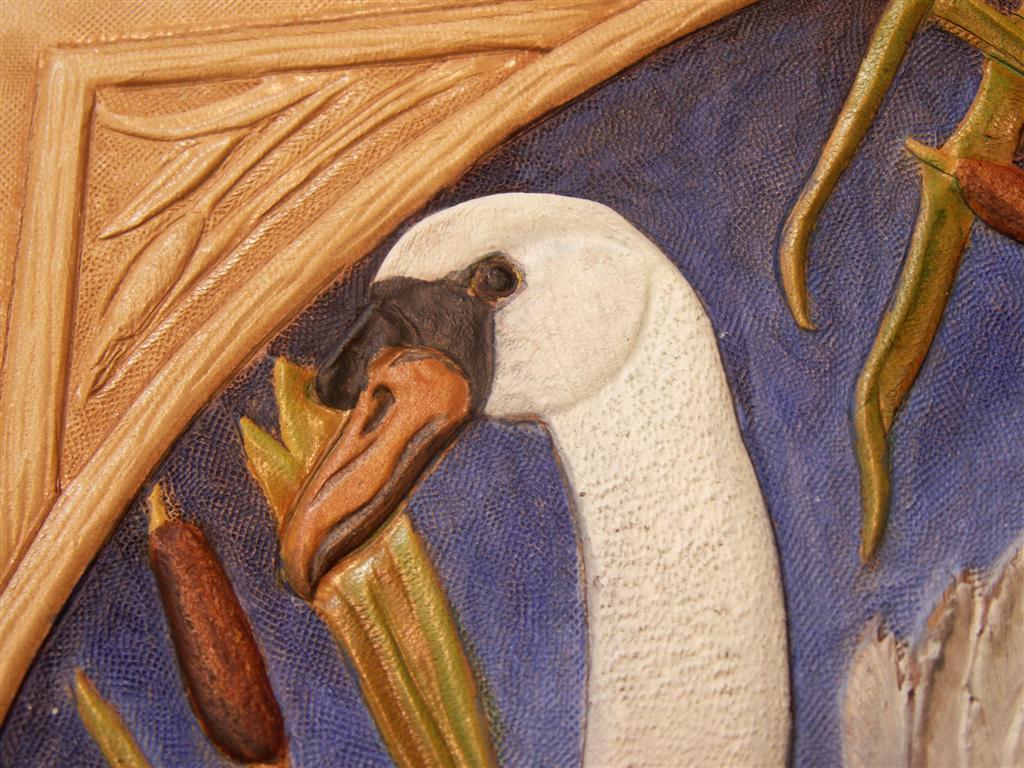
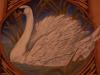
I've finally got the shading on the swan to look what I had been seeing in my head. I put some white paint in my tray, dabbed in some water to make it pretty runny, then just dipped the tip of my brush in payne's grey. I mixed that into the white, and went over the areas of the swan's feathers and head that I wanted shadowed. Then over this, I went back to stright white, really watered down to just blend in the dark colors a bit. I dry brushed striaght white very lightly on a couple spots of the black part of the head. And I think I'm happy with the swan now!

-
Denise, It might be on it's way north, FINALLY! We had -25F one morning last week with windchills close to -40. This week it has been 30 to 40 above and they say it will be in the low 50's this weekend. Water is running everywhere here. It's gonna take a while for all this snow to turn to mud. It's been a lot of years since we've had this kind of snow, so seeing the dams full and running over and having mud is a real treat for us. Hopefully it'll get to you real soon!
-
Kate, Are you starting to doubt my abilities?????? If you are, you're not the only one. I keep waiting for that big that I can't cover up. So far so good. That is a good idea though, if I can find an address for Lora. I've used a couple patterns from her now and they really work well on leather. Not sure when I'll get my next chance to work on this, dang nice weather. Now I have to actually go to work. I'm really looking forward to when it's close to done and I can put the high gloss varnish on the eye and beak. That's when most of the animals really start to look alive. I'm glad you like how this is going so far. I'll keep you posted.
-
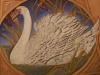
Okay, I messed around with some more color all afternoon. First thing I found out is that I wont use blue behind white if I ever do something like this again. First coat of white made for a pale blue swan. Second coat of white made it a little better. Took about 5 coats to make him not look some shade of blue, and by then, all the shading was gone. Then I moved on to the water. I decided to try it the way Al Stohlman did it in an old doodle page. He started out by painting the water with green spirit dye. I used eco flow instead. I used a few drops of green with a drop or two of blue mixed in. That seemed a little pale so I added several more drops of blue to the mix. That didn't help darken it up much. So I went to painting over it with some straight diluted blue. That gave me the green color I was looking for. In the last picture, I also started to color the cat tail leaves. I did this the same way I did the bigger cat tails on the back side. Started with a coat of diluted yellow over the whole leaf. This was followed with some diluted tan to give some shadow. Then diluted green mixed with yellow was used over the whole thing. The seed head part of the cat tail was then colored with acrylic just like the bigger ones on the back. Now on the water, I dry brushed a light coat of acrylic white followed by a light coat of very light blue. The beak I colored with acylic. I mixed red and yellow to make a pale orange. Then I used payne's grey (really close to black) for the area in front of the eye and whatever that growth over the beak is supposed to be. Also to shadow the beak and nostril. For the eye, I started out with a coat of yellow, then dark brown leaving a small outline of yellow, then filled in most of the center of the eye with black. Here's what it's looking like at this point. I went back and added a small drop of black to some white to make a pale grey and tried to add some shadows again. I'm still not really happy with how it looks. Needs some more shadows behind the neck. If anyone has any comments or suggestiongs at this point, I'd sure appreciate them! To finish up a little more on the back, I went over the border areas with a mix of tan and yellow eco flow dye. Then I went over all the colored areas except the cat tail seed pod things (what ever that part is called) with Block Out. I put on several coats. Then I went and carefully dabbed Fiebings medium brown antique into the small corner areas, and even more carefully wiped it out. I think when I get closer to being finished, I'll use the same antique over the whole outside area of this album cover. That's it for now.