ClayB
-
Posts
2,063 -
Joined
-
Last visited
Content Type
Profiles
Forums
Events
Blogs
Gallery
Everything posted by ClayB
-
Hi Shirley, It's looking really good. It's nice to see you posting again. We've been missing you!
-
I received my Sheridan show booklet in the mail yesterday so hopefully any one else that has been waiting for it has either gotten it or will be getting it really soon. They have the entire booklet on thier website now too including the class schedule, descriptions, teachers bios, evening events etc. Some of the regular classes have different teachers this year. And they aren't having a banquet on Saturday evening, just a reception and the presentation of the Stohlman award winners and the announcement of the winners of the World Leather Debut.
-
Those really are beautiful pictures Ray. It's funny how much some of those look like they could be taken in some part of Wyoming or Montana or even parts of Utah. I would have never thought that Scotland would look that way. Kate, you owe it to Kansas to take some pictures for me. We drove through there when I was a kid every year coming up to ND for the summer. Mostly what I remember was the smell of cow poo from all the feedlots and really twany old country music on ALL the radio stations. Oh, and a sign as you came into one town. I dont remember what town it was, but the sign said "Welcome to ********, home of 102 friendly people and a couple old crabs".
-
Hi Tina, You have done a great job on this one too. I really like the grapes clusters, vines, leaves. I need to figure out something to use that pattern you drew up for me on. I also really like how you tied all the different parts together. The little seperate areas for the different design parts is a neat touch. Your coloring is fabulous as always. It's so neat to see how you are making something special for so many people before you go back home. It makes me wish I was a relative too so I could get one of those special gifts too. Oh wait...... I already did! I know that Sweeden isn't any farther away than Michigan from my computer screen, but the thought of you moving so far away still makes me a little sad. Just don't ever forget about all your fans here and that we need our "Tina fix" on a regular basis.
-
I just checked the Leather Crafters and Saddlers Journal website and they have a form to sign up and pay for classes in Sheridan. They dont have any info on the actual classes such as who is teaching them, dates, times etc. but you can pay for them. Hopefully they'll have more info soon.
-
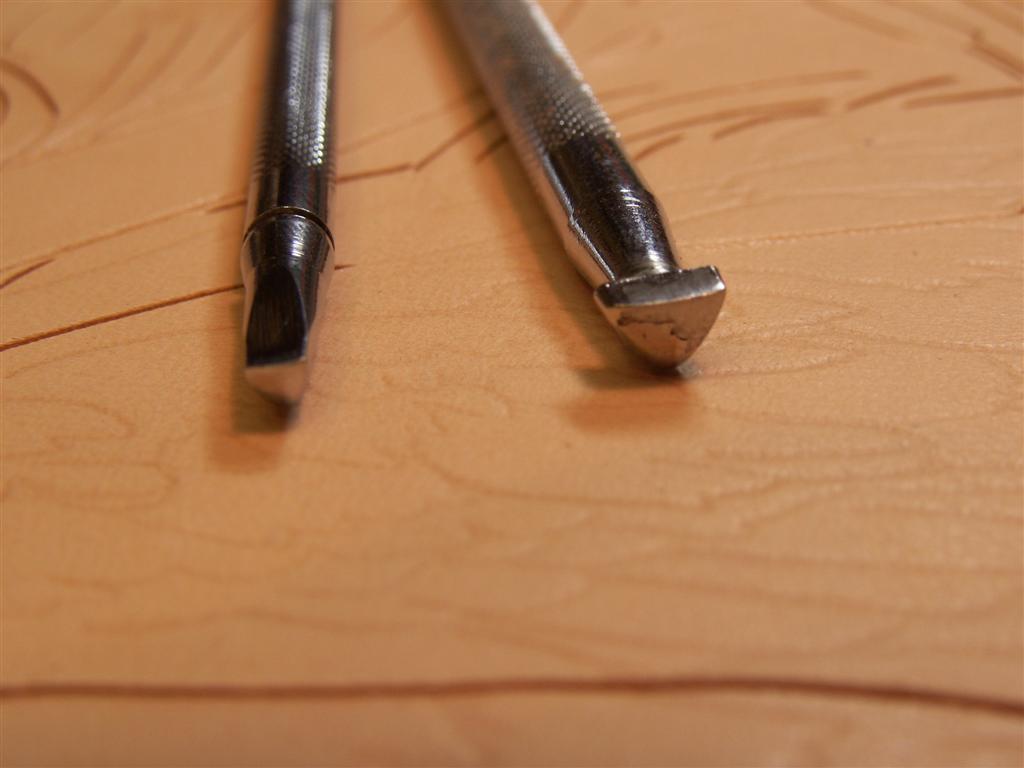
Crystal, I think you did a fabulous job on your swan!! There are a couple things I have to tell everyone about this project. First, Crystal had some sort of phobia of trying to carve hair and feathers. She better be over the feather one. I'll have to work on the hair one next. Second, when Crystal started working on this project, she told me she didn't have the figure carving bevelers, so she improvised and used what she had. They worked out just fine. Then when she got to the feathers, she didn't have the pointed figure beveler that I used to do the tips, so she took out one of her stop tools and a dremel and made herself what she needed. It seems to have worked great too! Along the way, she made a boo boo or two, but that didn't stop her. She did what she needed to do to fix them or cover them up. She also didn't follow my instructions to the letter, but tried some things on her own (like the neck texture) that worked out great. I have to say Crystal, I am really impressed with the job you have done on this, and so proud of you for tackling something that intimidated you!!
-
That's really purty Bert! You need to talk that slave driver boss of yours into letting you have more time off to carve. At least when you do get the time, you put it to great use. I like that pattern a lot.
-
WOW Kathy, I can't even think of anything mean to say as a joke. I'd have never thought of painting the horses white either, but they look great. There's something about the faces that really draws you in. I think it's the eyes. I really like the background colors too. The pattern seemed a little busy to me before you colored it, but the color really makes everything come together.
-

My take on a fanny pack
ClayB replied to ValinorKings's topic in Purses, Wallets, Belts and Miscellaneous Pocket Items
Ok, ants seem like a strange things to carve on leather, but you did a really nice job of them. SO many of them. It does look pretty neat on the bag though. I was thinking that's probably the first time I had seen ants carved in leather, but then I remembered a piece Peter Main did a while back with some ants on it that was interesting too. Thanks for sharing this. It's always fun to see the different ideas people come up with to put on leather. -
That turned out really pretty. I bet she's gonna love it.
-
Tina, I think the yaks look good in this pattern too. Kathy told me she didn't expect anyone to actually carve this pattern, that she just drew it to pick on me. I might just have to try it though. I think she was trying to see if she could get even more "squiggly" lines in it that you did in the last pattern you helped me with. It'll definately be a challenge, but it might be fun. I'd love to see what you'd do with it too. So maybe even if it isn't an official challenge, I hope some people will consider trying it out.
-
Wagon wheel: Cowboy Cuffs Finished up
ClayB replied to jbird's topic in Collars, Cuffs, Leashes and Leads
I'm not a fan of meanders either, mostly cuz when I try it, they meander in all the wrong directions! You've done a nice job of it Josh, and in a circle to boot. I'm impressed. The cuffs look great. -
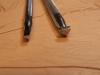
For the moisture part, I do the same as Tina. I keep a fine mist spray bottle on my bench and as I work, I'll add moisture to the edges with the spray bottle as they dry out. If the leather isn't cemented to cardboard when I'm tooling, I'll also add water to the back once in a while. Whenever I take a break, I'll give the whole piece a light spray and then cover it with plastic until I come back to it. I'm not as organized as Bob. Figuring out where all that plastic would go would be a little too complicated for me, but it sure sounds like it would work well. For embossing, I also push out the leather from the back, then fill in the cavity with leather dust mixed with rubber cement. To push the leather out, there are several things you can use. Some people like setting a marble under the leather and rolling the leather over it to start the embossing. I found a set of tools off of Ebay that have different sized metal balls attached to handles that work really well to work the leather from the back side. Wooden dowels or deer antlers can be shaped to make tools that work too, or you can just use the back end of a stamping tool to push the leather out. The thicker the leather, the harder it is to stretch, but with enough moisture and pressure, you can do it.
-
Eyeglasses case, a simple one
ClayB replied to TomSwede's topic in Purses, Wallets, Belts and Miscellaneous Pocket Items
Hey, I have one of those senile strings on my reading glasses. It's so I can find them. Of course it only works when I have the string attached to my neck. Otherwise both the glasses and the string are lost somewhere. That's a cool case Tom. I think I need one of those too! -
Hey Bert, Maybe it's like kissing a frog. You go first, kiss the yak and see if it turns into a beautiful fairy. Come on Bert, I dare ya!!!!
-
That's not at all what I envisioned a yak to look like
-
I had a couple other ideas, but one of my new years resolutions was to try and be nice to Kathy this year (at least in public)
-
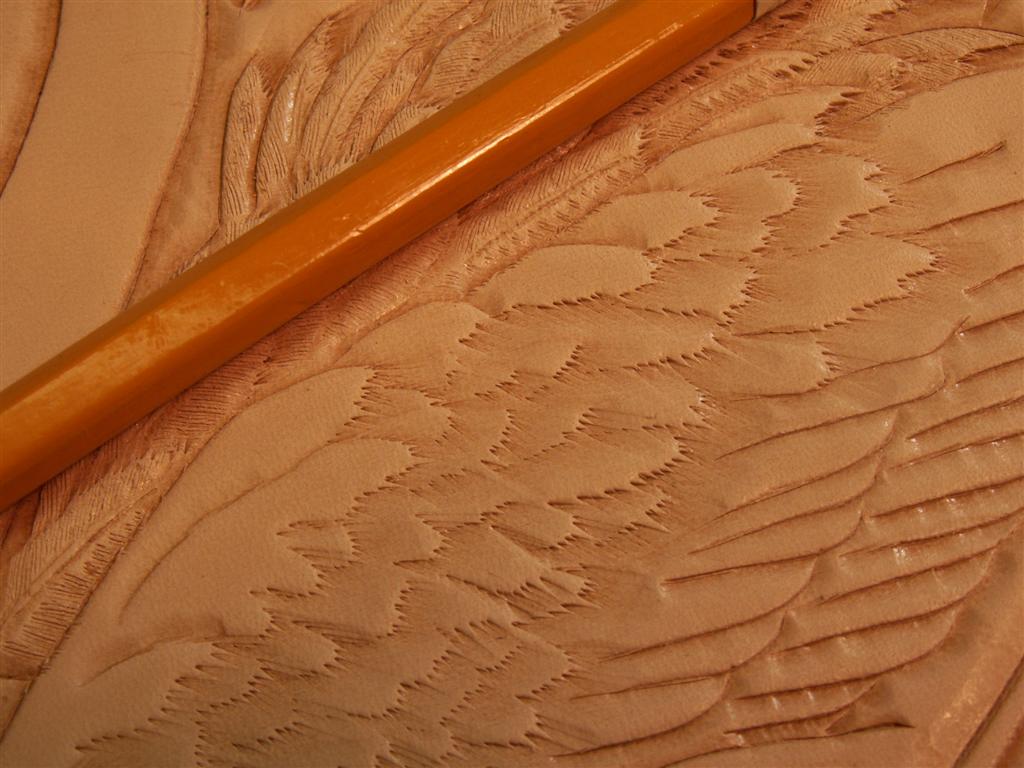
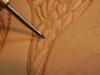
Thanks all of you again for the nice words. I hope that these tutorials can give you some ideas. One thing Jan Schoonover always tried to get across, and I am FINALLY getting it, is that this shouldn't be a lesson on how to carve a swan, but a lesson on different techniques. The techniques can be used on all sorts of projects with feathers, and maybe some without. For me, so many times when I would go to a class, what I'd take home was "you use this tool to make this mark in this spot" instead of "here's a technique that you can use to make this texture in a spot like this, but it will also work in lots of other places". Crystal, I didn't get any residue from the tape. It actually gives the coolest almost suede-like feel to the leather. It worked best if you always use a fresh spot on the tape when you put it in a new area. I tried regular tape and a couple different kinds of carpet tape to see if stronger tape would do more, but it didn't really seem to. I'm going to play with the tape more sometime to see what kind of uses for the texture I might be able to find. I used around 6 oz. leather on this project, but you could use anything from 3-4 on up. The swan could be finished at the point it is here in the lesson, but if you want it to be where I started the coloring in the other post, you need to go a couple steps farther. I ran out of room in the second post yesterday, decided to take a break, and never finished it up. The next step is to take a scalpel and cut the edges of the feathers loose. To do this, hold the scalpel at a very shallow angle and stick the tip into the leather about an 1/8th inch. On these feathers, I started on the bottom front of the feather and then follow the edge of the featjer to the tip. You can go around the tip and up to the top side, unless there is a feather overlapping it on top. Then just do the bottom portion of the feather. j Then if you want even more definition in the feathers, take the scalpel and cut the serrations. When I do that, I make a lot cuts really close together. When you add the sealer (explained in the coloring lesson) feathers finished up with these last to steps can be shaped because they are loose from the background leather.
-
It'd be pretty dang tough to make juice boxes look that cool Kathy!! You always do the coolest things with horses. Only thing that would have been better is if you could have done the pattern with yaks.
-
Go to the "teaser" page here on Leatherworker and you'll find links to a lot of awesome leatherworkers. Then you can decide for yourself where to get inspiration from. For me, Peter Main is up there at the top, but he shares it with the likes of Robb Barr, Jan Schoonover, Silva Fox, Robert Beard, Jim Linnell and a few more. I think all thier links can be found on the teaser page.
-
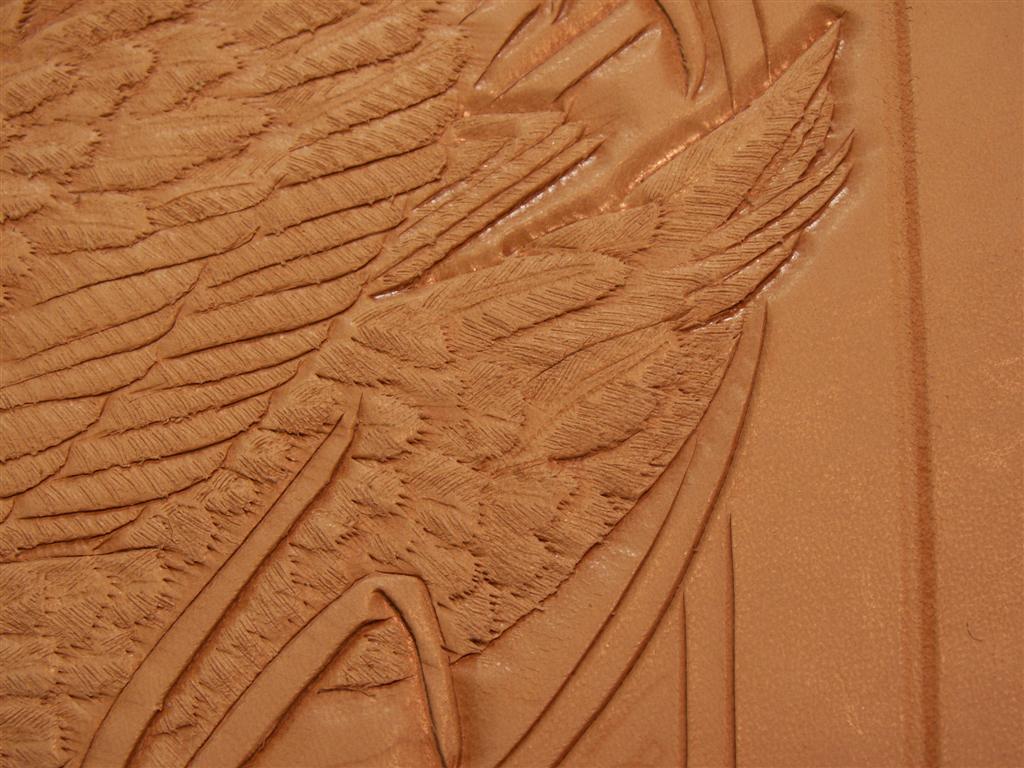
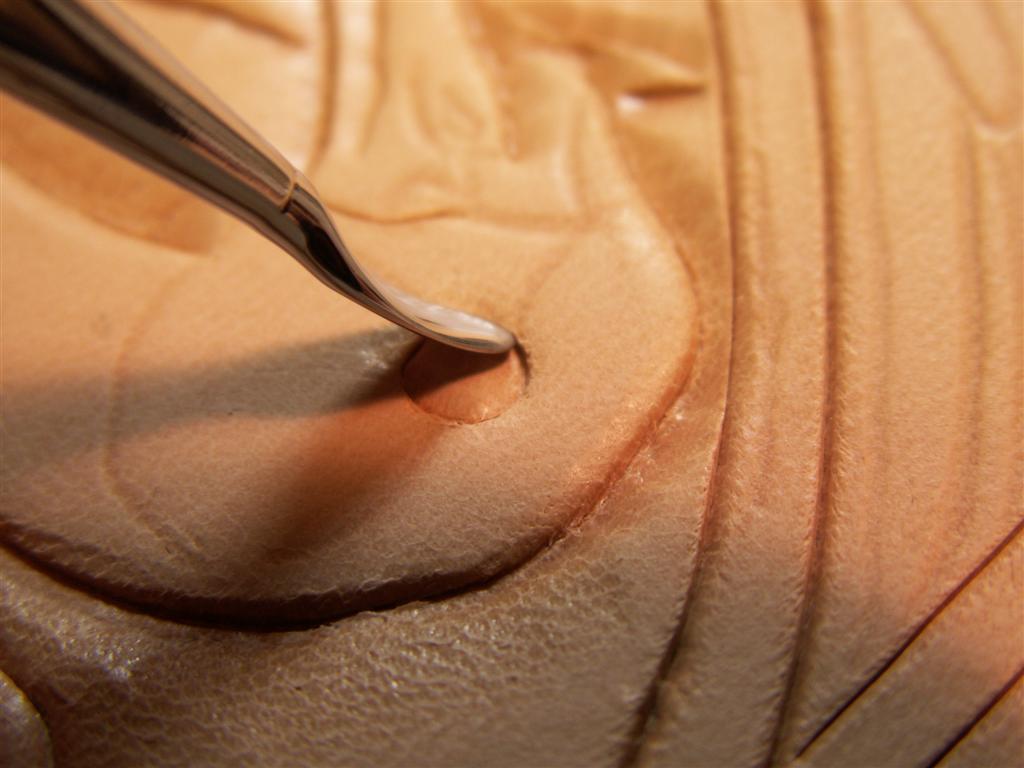
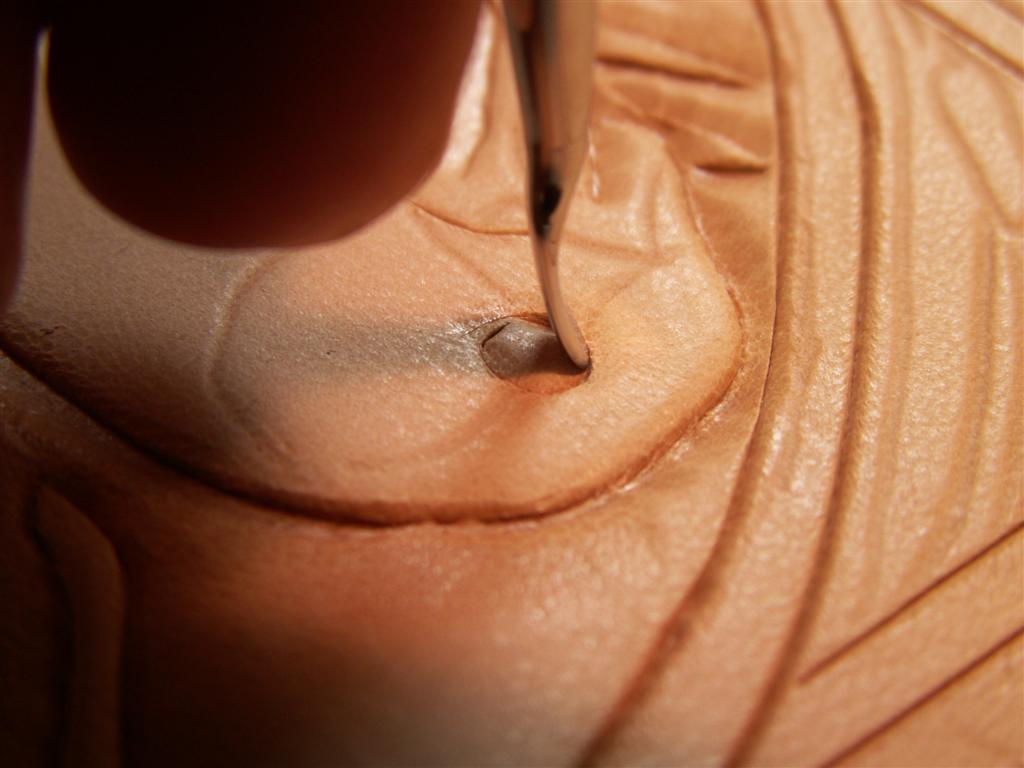
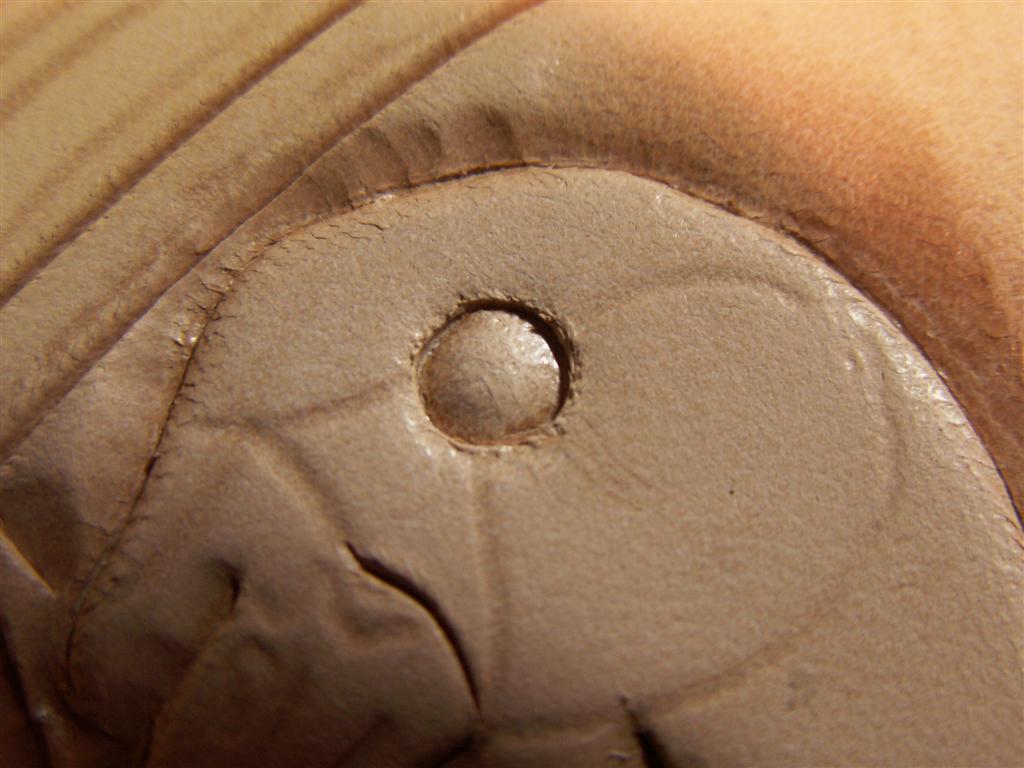
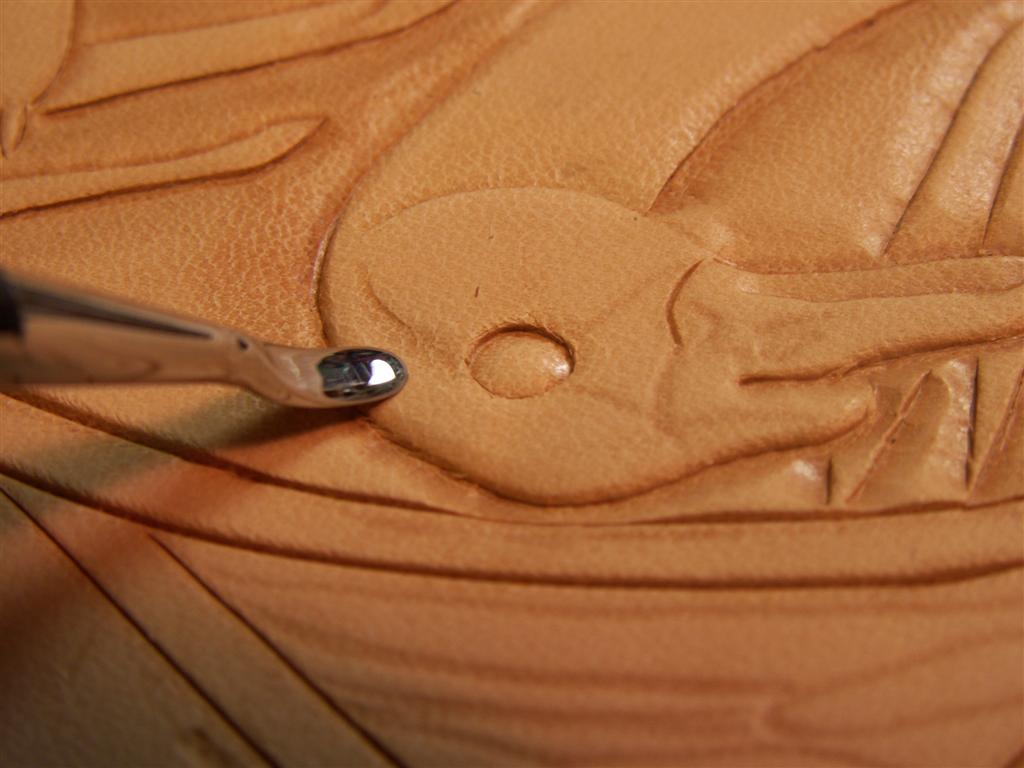
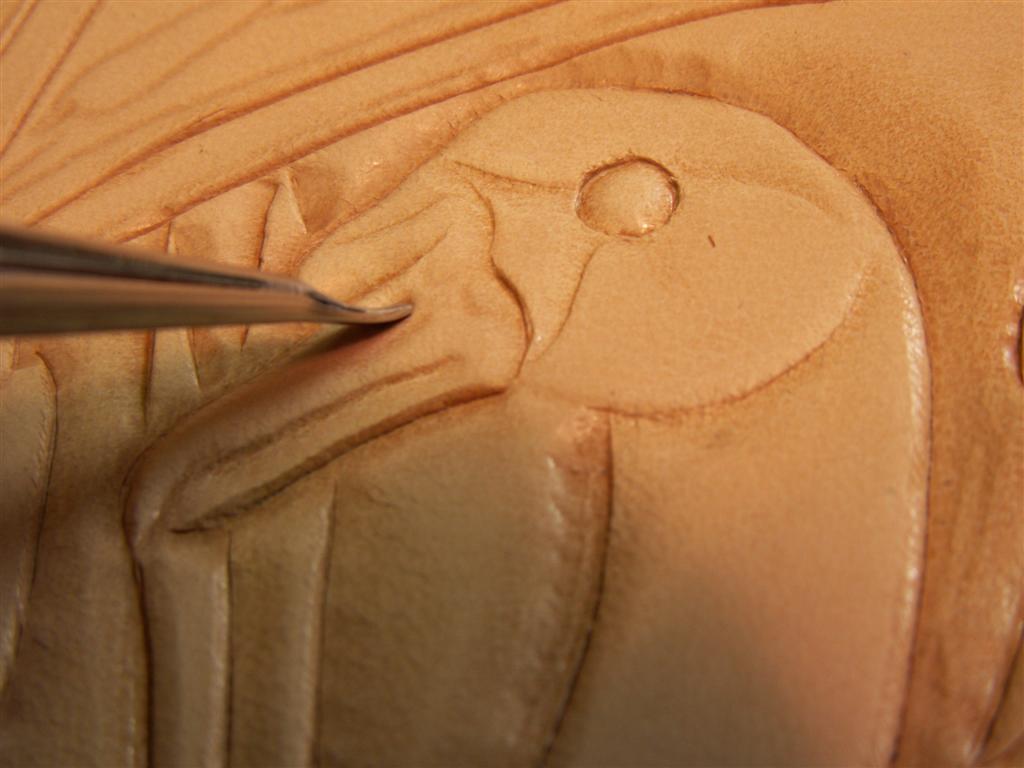
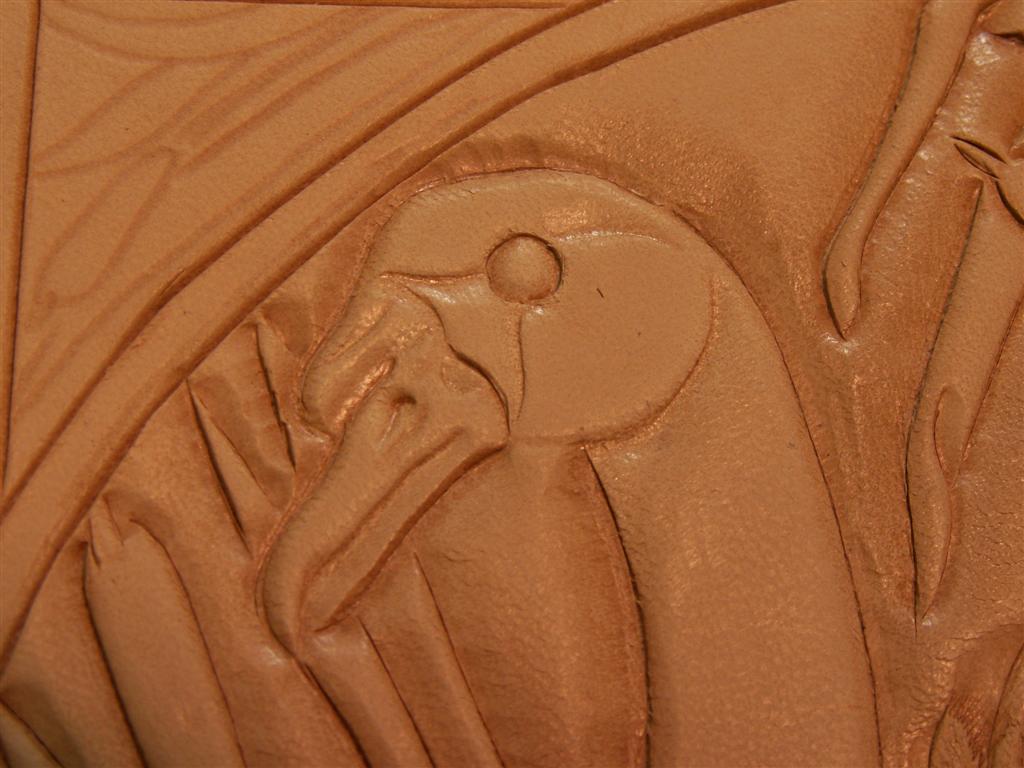
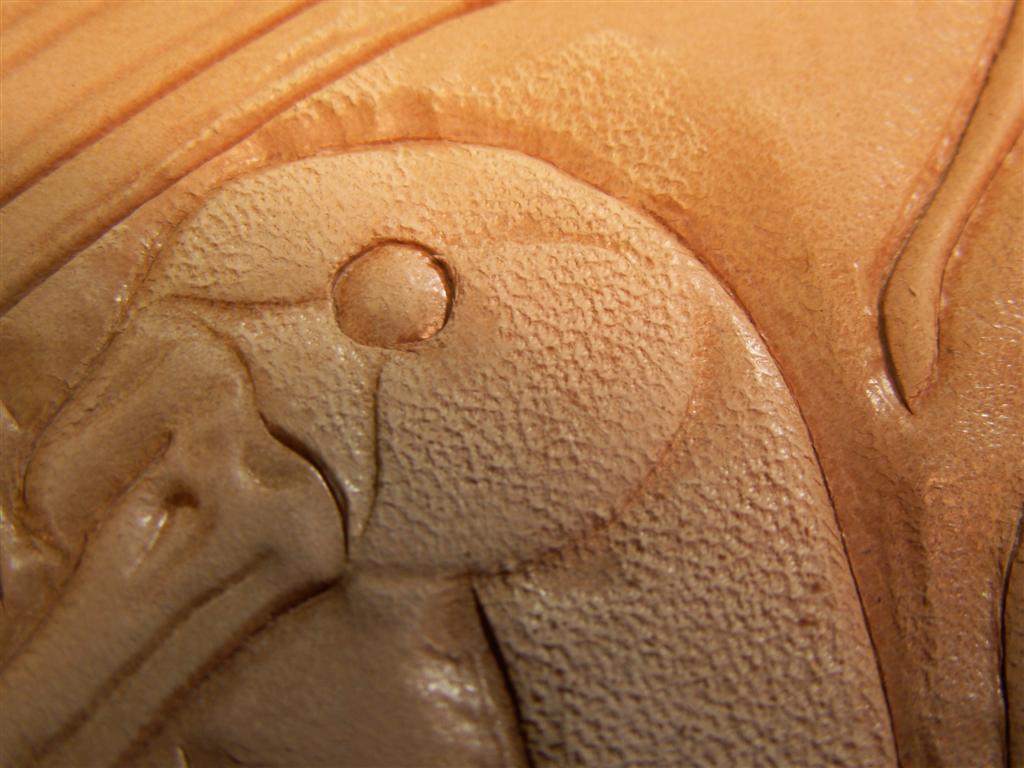
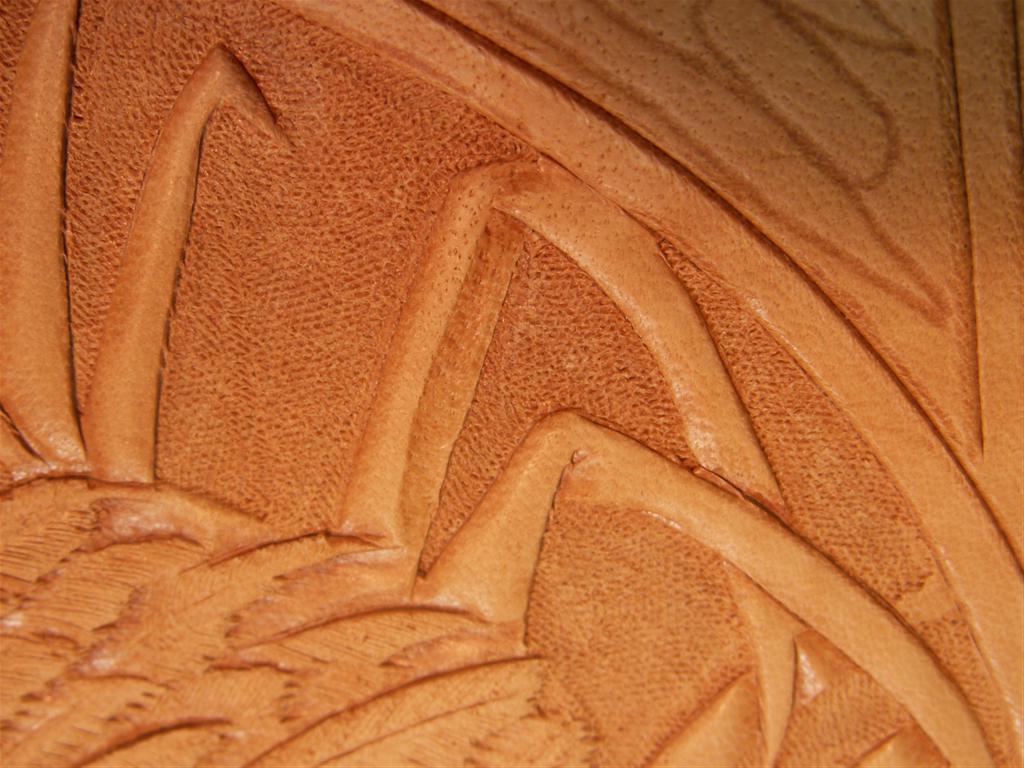
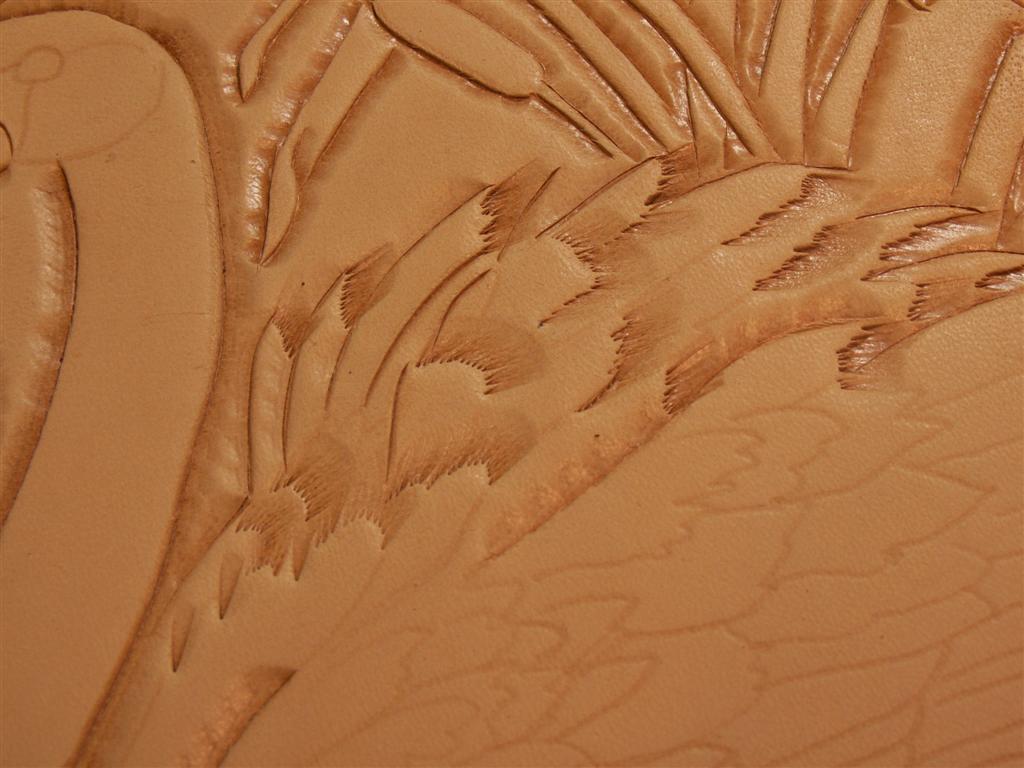
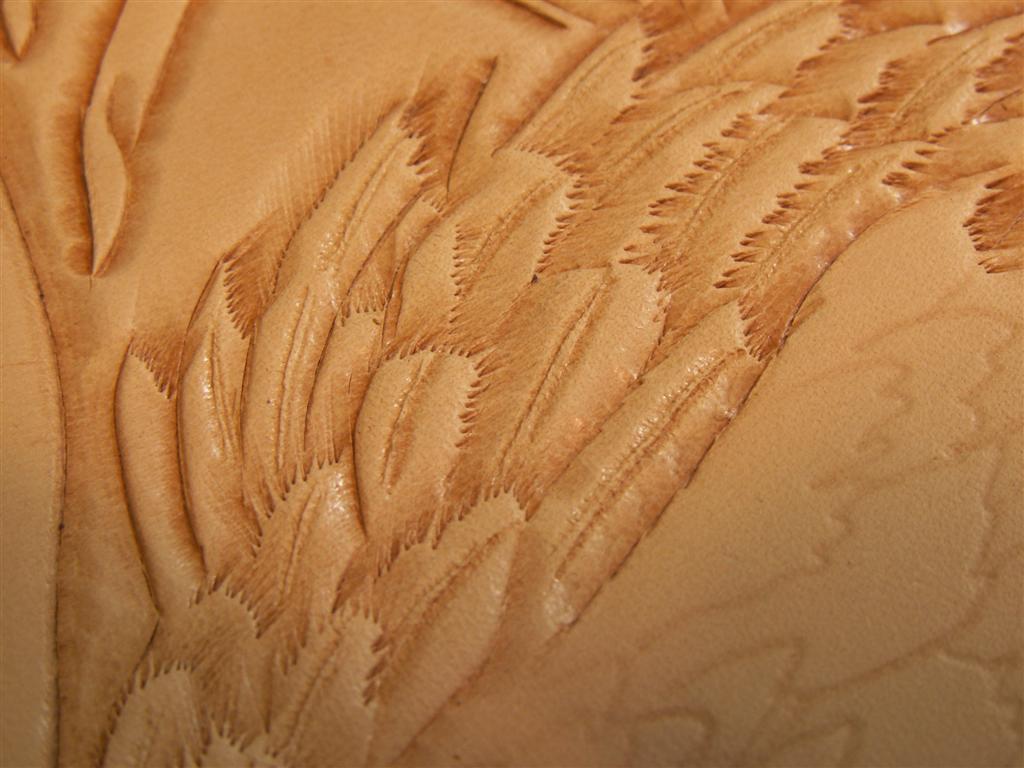
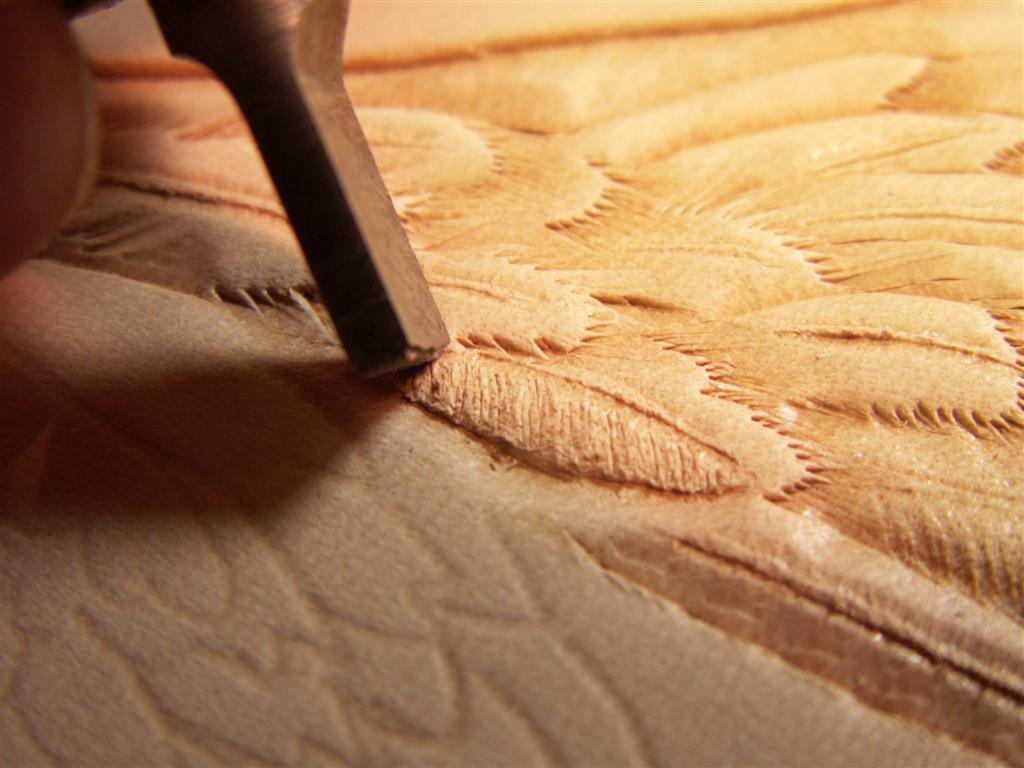
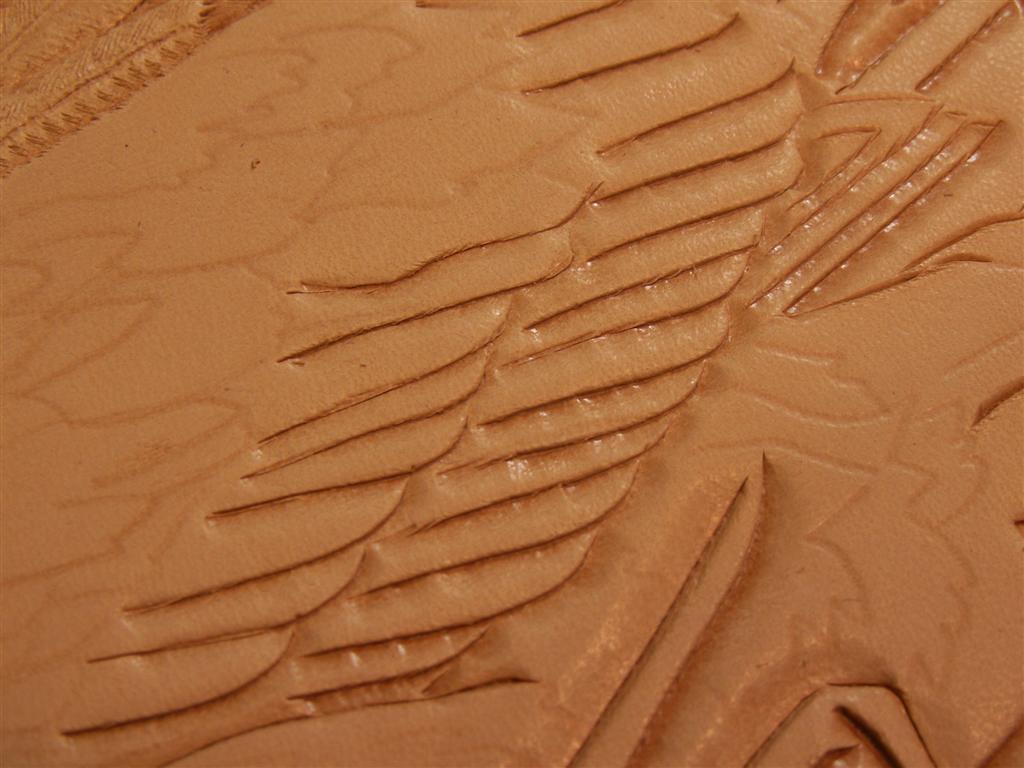
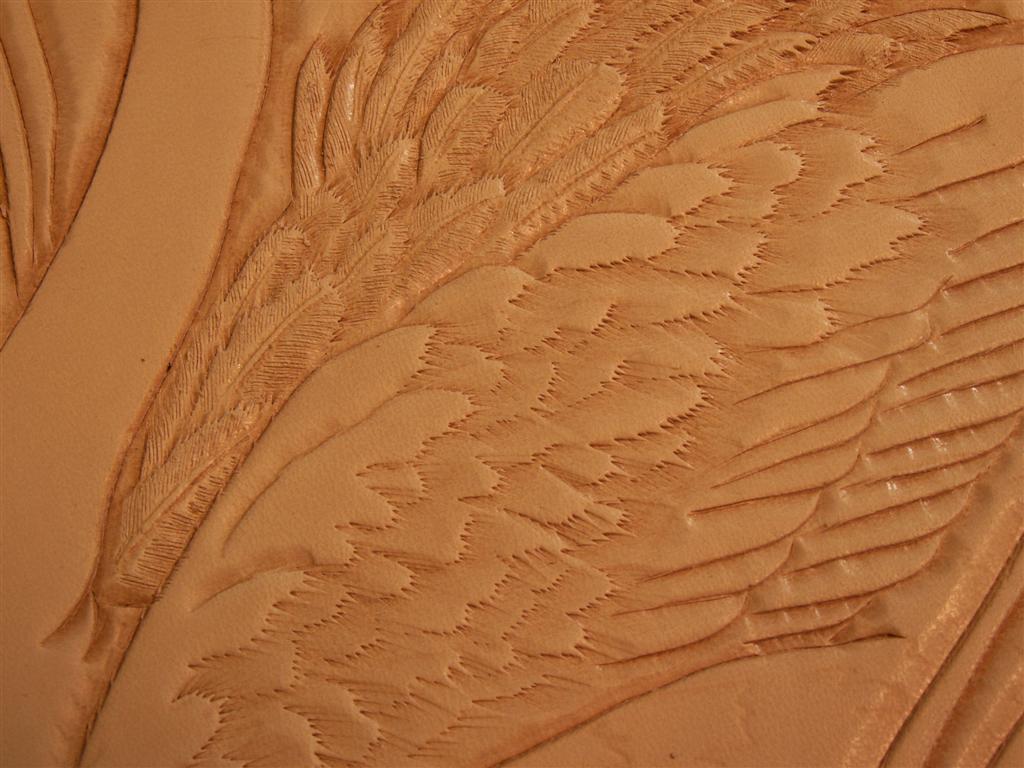
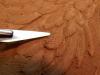
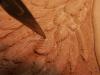
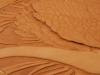
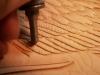
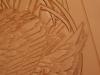
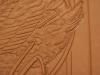
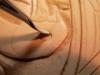
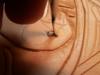
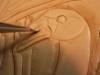
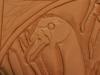
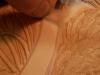
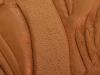
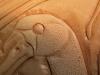
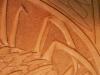
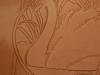
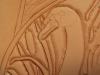
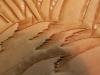
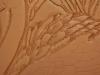
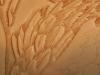
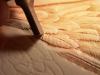
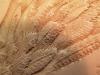
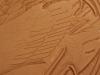
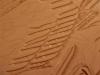
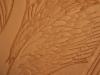
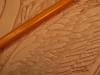
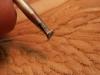
Here's what the wing line looks like after the undercut beveler has been used. Now we go back and add serrations to all these wing feather we have been working on. Add a center vein and serrations to the rest of the feathers the same as we did before. Continue working towards the back of the swan making feathers in the same manner. Now we are ready to start on the head. Carefully cut the eye with the swivel knife. This is a very shallow cut. Take the spoon end of a modeling tool and place it on the cut line of the eye. We will form the eye by pressing the tip of the modeling tool down against the line. Be very careful to hold the almost upright so you aren't mashing down center part of the eyeball. Start to shape the head of the swan with a modeling tool. Press in the line at the bottom of the head. Work it smooth with the modeling tool. Work in the lines behind the eye and in front of the beak with the modeling tool. With the tip of the modeling tool, press in the nostril. Shape the beak. On the first swan I did, I put the texture on the neck with the multi blade hair knife. I did this my pushing the tips of the blade into the leather and pulling it up, making very short hair structures. Not everyone has one of these tools, so I decided to try something different on this one. Someone suggested that a piece of tape placed on the leather and pulled off creates a fuzzy texture. I tried that, and it does make a neat texture that might work here. The only problem I had is that if you rub your finger over it, it will flatten back out. I think it might help to spray a sealer over it, but I am not ready to do that yet at this point. I'm going to show a couple pictures of how it looks, even if that isn't the way I decide to leave it on this project. Now we are pretty much finished carving the swan. At this point I do the background. Then we will start cleaning up the carving and add detail with the modeling tool. On this carving that mostly involves the cat tails. More shape can be added to the long cat tail leaves with the modeling tool. The edges of the leaves are also smoothed out and rounded.


-
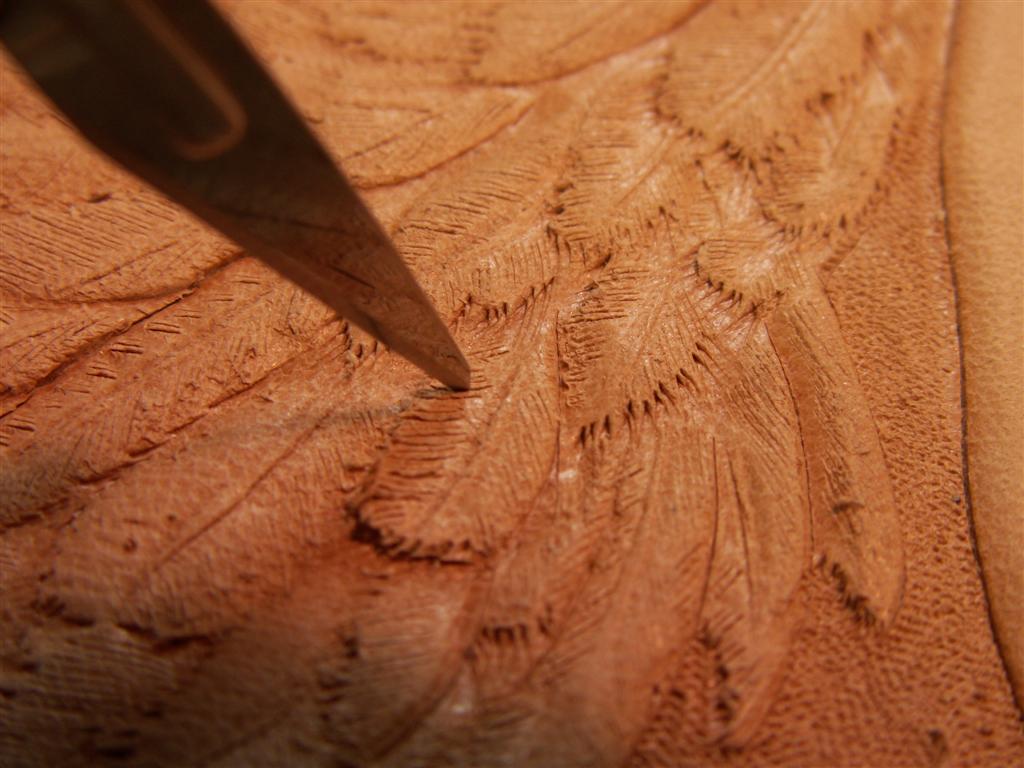
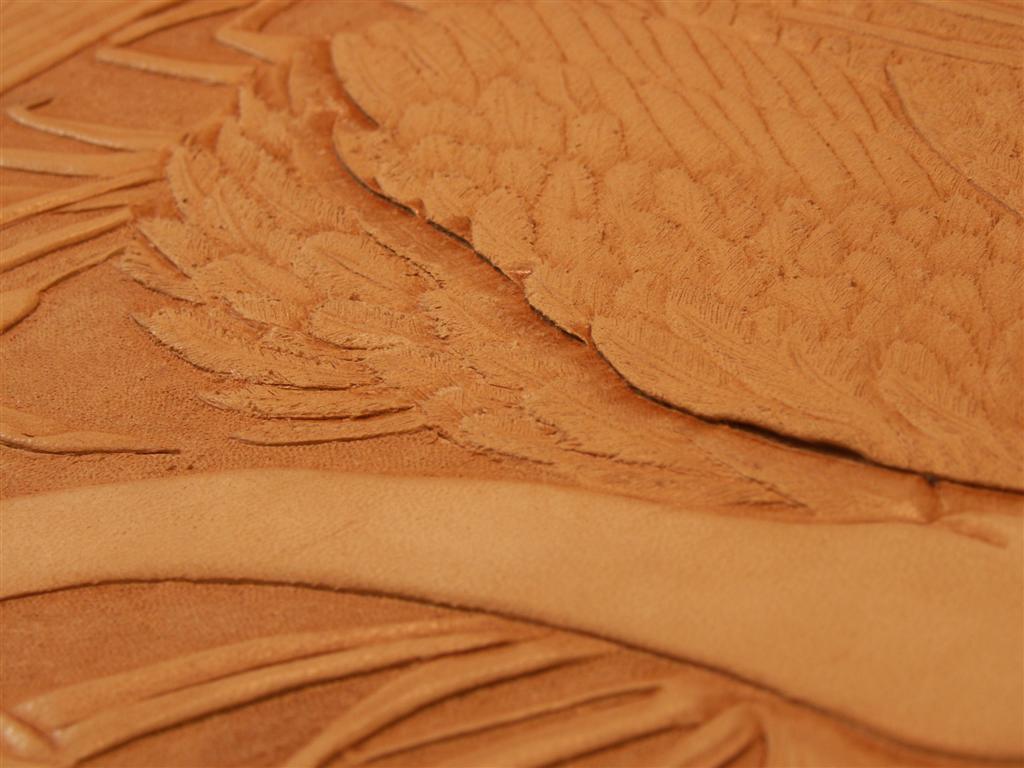
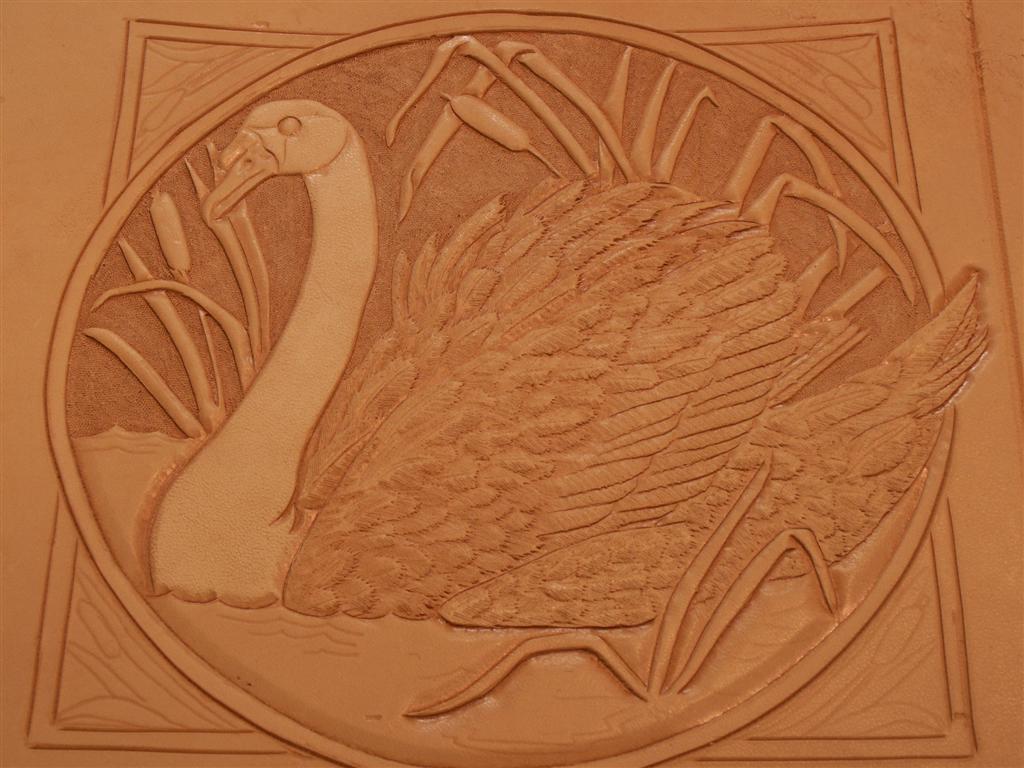
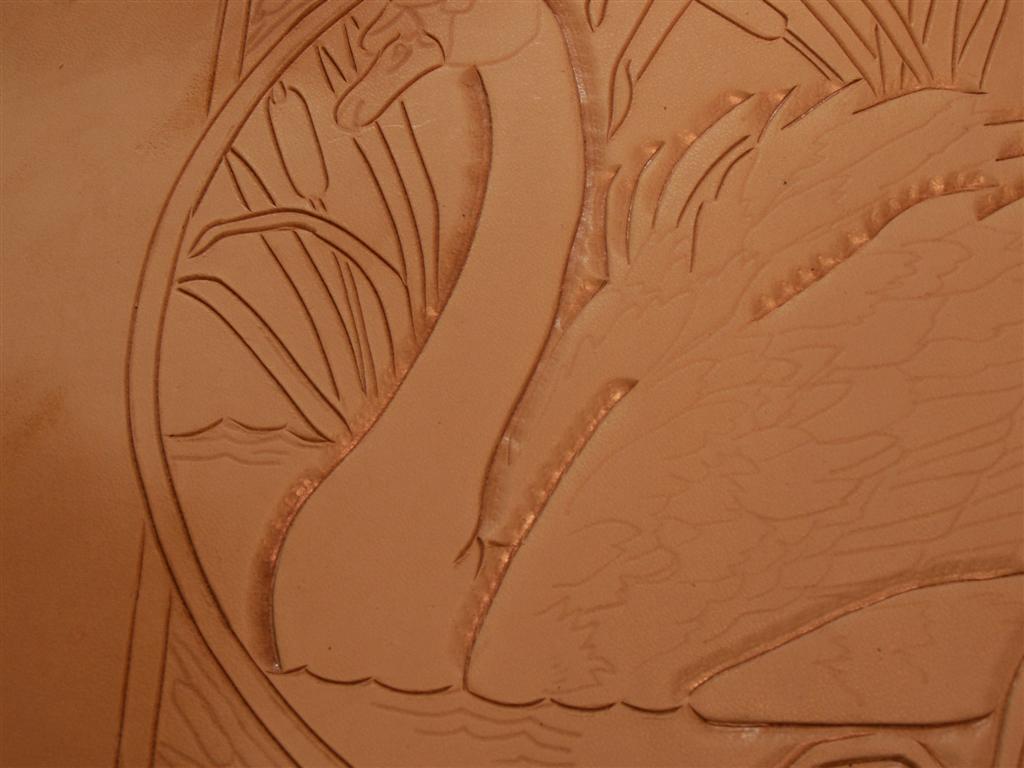
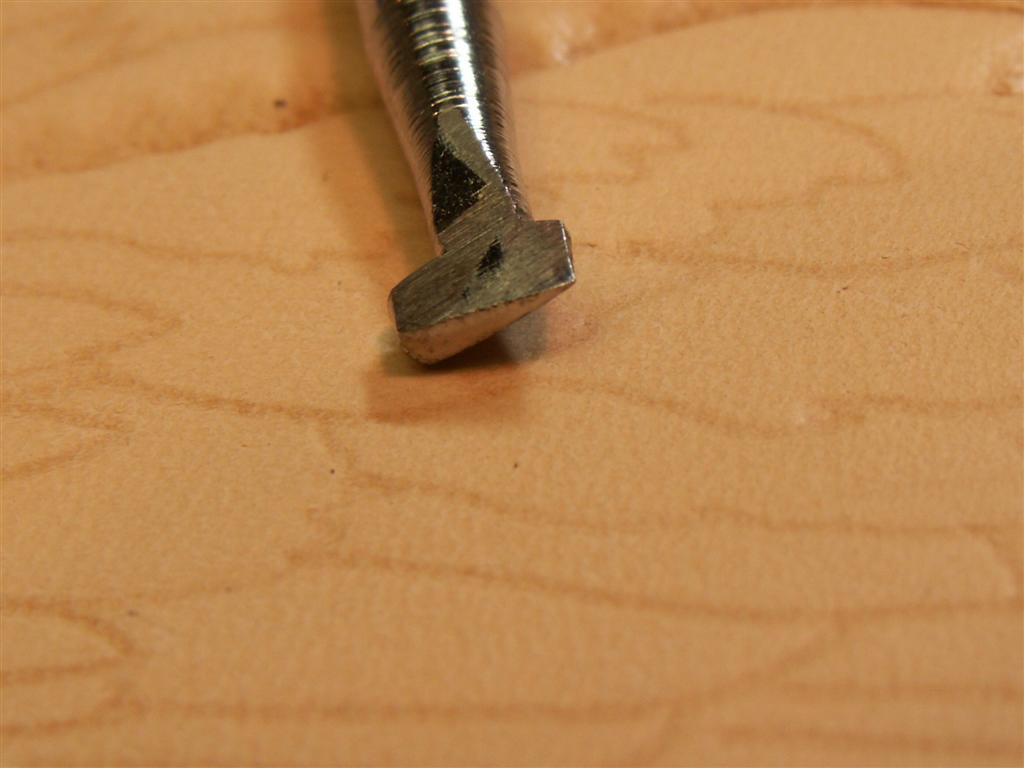
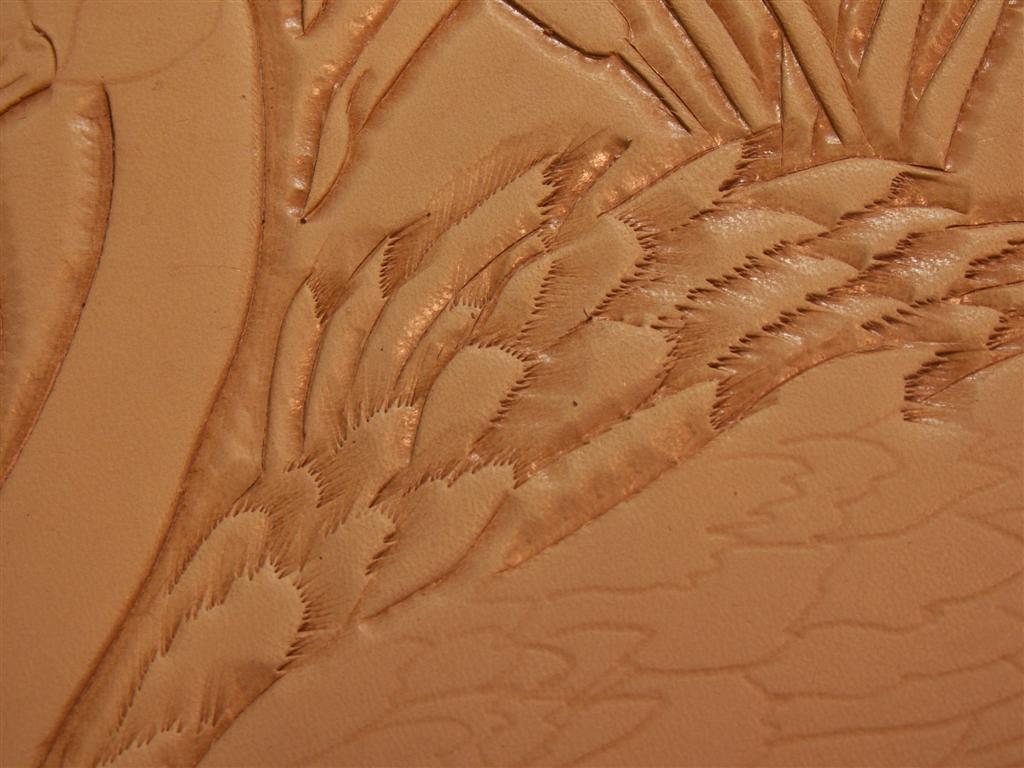
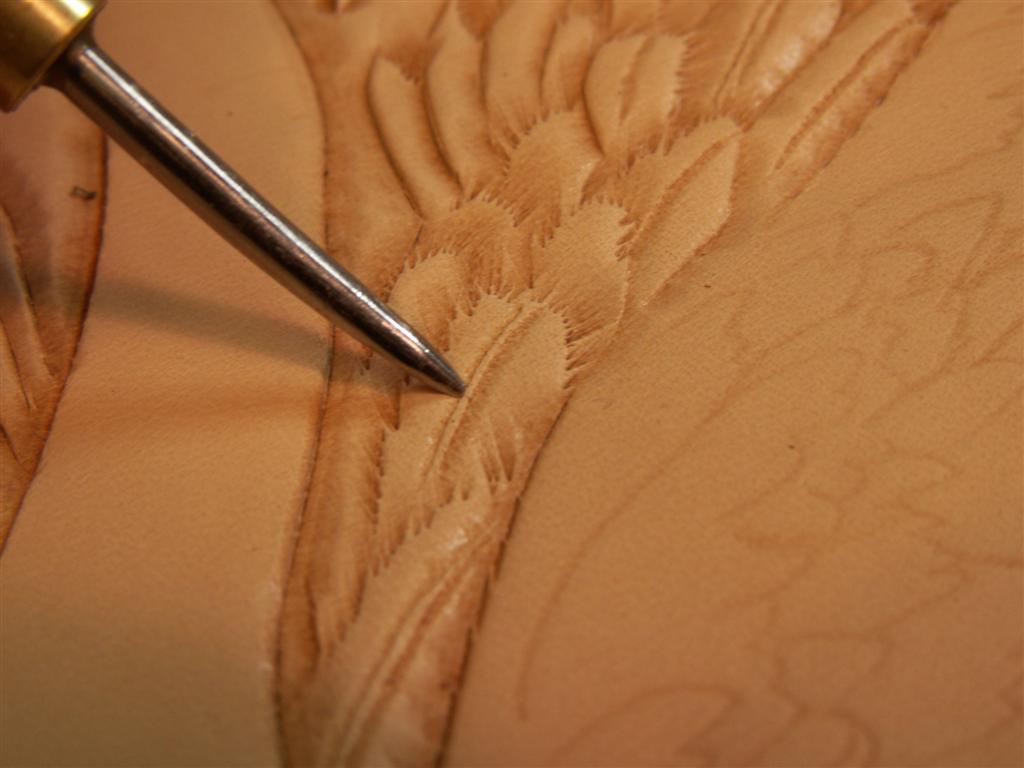
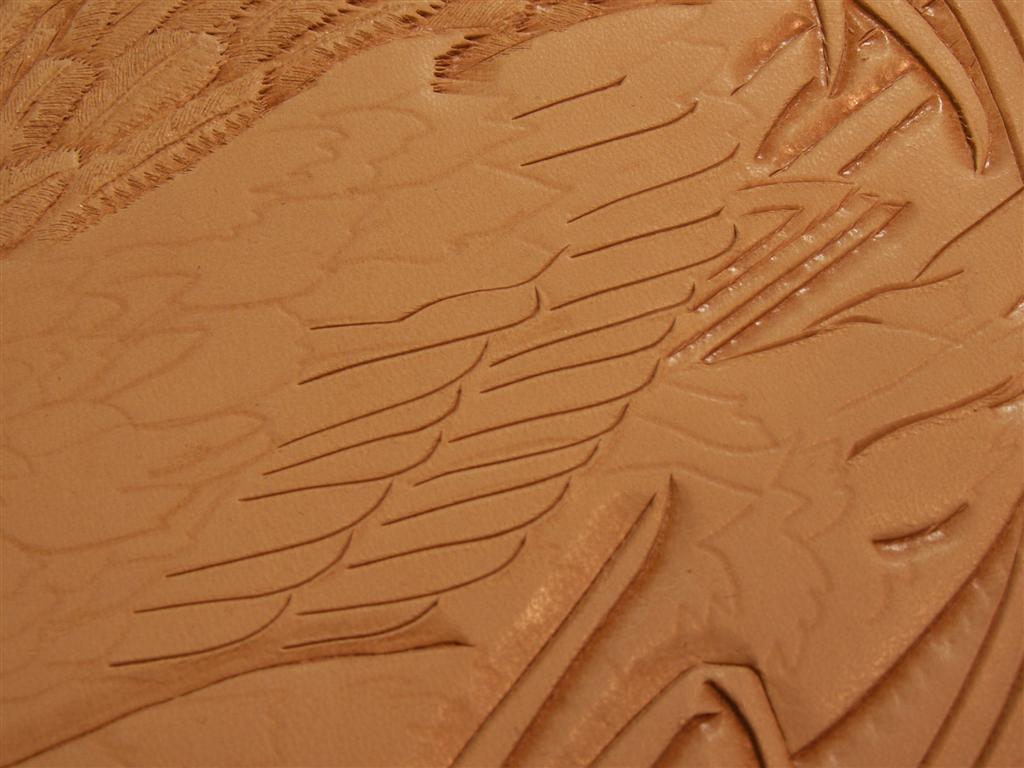
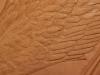
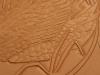
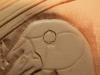
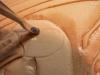
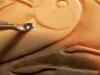
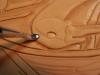
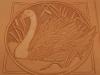
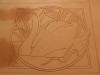
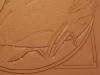
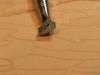
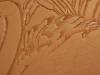
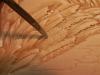
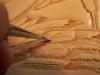
In another post I showed the finished carving of a swan and how to color it. Well, I was supposed to be doing a lesson on how to carve it, but hadn't taken pictures as I was going because I really had no idea what I was going to do or if it would turn out. So, now I have carved the swan again and taken pictures and notes so I can try and tell you how I did it. I have tried to use only tools that are easily available (no custom tools) or tools that you can easily make yourself. I started out with a piece of cased leather. For most of my projects lately I am using regular carving leather from Tandy, nothing fancy. I have found that if you case it properly, it works just fine to carve on. I wet the leather on the back side by quickly passing it under the faucet with warm water running. Make sure it is all covered with water. Then I turn it over and quickly wet the front side the same way. Then I set it down and let it sit for about an hour. If it start to dry really unevenly, I'll either spray more water onto it, or you could wipe more water on with a damp sponge. When the moisture has evened out and the leather has almost returned to normal color, I trace the pattern onto the leather. Then it's time to start carving with the swivel knife. Start by cutting the border lines. I used a ruler to keep the straight lines straight. The circle lines were cut freehand. I finish them up to look like a piece of branch, so they dont need to be perfectly straight. If they did, I'd use some sort of a template. We aren't going to cut a lot of the parts of the swan. I started out cutting the neck and the outline of the head but not any inside details. Then I cut the straight lines of the feather on the top of the back wing, and the lines between the front and back wing. Cut the tail lines. Then cut the water line where it meets the sky and where it meets the body of the swan. Cut all the cat tails, but don't cut the lines that represent the shadow in the water. At this point I will rubber cement the piece of leather to a piece of cardboard. This will help keep the leather from stretching as we do the tooling. To bevel the swan, I am going to use the figure carving bevelers F895 and F891. I started by beveling the neck and the cut lines on the feathers. Then start beveling the cat tails. Bevel the head and the beak. Lots of the beveling at this point is looking pretty rough. That will all be cleaned up later with a modeling tool. Now we are going to use the F902 pointed smooth figure beveler to define the feathers. Some of these tools will have a blunt tip on them when you get them. I have taken a file and filed the tip of my 902 to a sharp point. This is quick and easy to do. The metal isn't very hard and it doesn't take any special files. We are going to stamp a lot of impressions very close together to make the ragged, jagged edge of these feathers. It's easier to do this if you quickly move the tool along as you are tapping it, instead of moving and placing it between each tap with the mallet. This might takes some practice to get used to. We use this method to shape all the feathers on the wings. You can refer back to the pattern to see where feathers should be. Once I have all the feathers on the back wing defined, I will draw a center vien in the larger feathers. This can be done with the tip of a stylus, modeling tool, or even the back (dull) side of a scalpel. The next step is to add the serrations in the feathers. How you do this depends on how much detail you want in your picture. You can draw these serrations in with the tip of a modeling tool, with the point of a needle, with a hair blade, or even with a scalpel. Each method has advantages and disadvantages. The tip of the modeling tool fits into tight corners easier than using the hair blade.Here I show how they can be drawn in with a modeling tool. Here I show them being carved in with a hair blade. With the hair blade, it goes a lot quicker as it makes several lines at a time instead of having to draw in each line. It also spaces them closer than you can probably do with other methods. Once all the feathers on the wings are done, I start on the front wing. I cut the bottom line of the back feathers and beveled them. Then the F902 is used to define the rest of the feathers on this wing the same as was done on the first wing. As you go lower on the wing, the feathers get smaller. Then the line seperating the front and back wing is rebeveled to make the seperation stand out more. This can be done with the figure beveler, or for more definition, you can use an undercut beveler B892.


-
until· May 9 - 10, 2009: Miles City, Montana teaching a workshop in Jim's home town. This workshop will be hosted by the historic Miles City Saddlery. Jim states, "I'm very excited about doing this one because this is where I got infected with the leatherworking bug 42 years ago. The leatherworking roots in this town that go back much farther than that. In fact, Ken Griffin once worked at the Miles City Saddlery. Anyone leaving early to go to the Sheridan Leather Show should plan on spending the weekend in Miles City soaking up some of the rich leatherworking heritage that comes from this town." Leon Sevier is organizing the even and is who you should contact for more info. Notes from Leon: The weekend before Sheridan we will be carving and coloring the bison scene on the cover of the TLF catalog. Jim would like to be able to do the whole job - right up to having it ready for framing. It looks like it will be Saturday and Sunday, May 9 and 10 from 8 a.m. to 5 p.m. each day. In order to complete the project, Jim will be bringing the pattern pre-traced and ready to transfer to the leather. ·· Cost: $75 ·· Tools List needed: Found on page 137 of the TLF catalog, as follows: A98, A104, A104-2, B936, B701, B702, C709, E294-00, F918, F916, F902, F796, F890, F891, F895, F898, F899, F900, N363, P368, P234, P215, S931, S705, S706, U858, V707, V715, V462, Modeling Tools - 9039-01, 8039-04, 8039-06, Hair Blade Tool 88013-00, Swivel Knife. ·· Participants will be responsible for furnishing their own tooling surface - stone, Masonite, etc. ·· Leather, dyes, finishes, bowls and sponges will be furnished. If you are planning to attend, please contact me so that I can let Jim and the staff at the Saddlery know. Also any questions from those interested can be directed to me
-
To trace your pattern onto the leather, your leather has to be damp. This is called "casing". There has been a lot of discussion on different casing methods on the forum, and if you use the search function, you should be able to find them. The simplest way is to wet the leather with a sponge, or dunk it quickly in a bowl of water. Then you have to wait until the water spreads evenly throughout the leather and starts to turn back to it's original color. When the leather has proper moisture, you are ready to transfer the pattern. You can use a tracing stylus or any dull pointed instrument like an empty pen to trace the pattern onto the leather. There are a couple problems with tracing it directly off of a piece of paper. The first is that paper gets damp and can start to tear. The second is it's hard to tell if you have the pattern centered on the leather correctly, and if you have all the lines from the paper copied onto the leather because you cant see through the paper. You can buy tracing film from most stores that sell leather supplies. Tracing film is transparent so you can see through it, and wont fall apart when it gets damp. There are other things that can be used instead like velum, wax paper, or putting your pattern in a plastic page protector before starting to transfer it to the leather. As you are transfering the pattern, make sure it doesn't move around. Lift a corner of the pattern to check and make sure you have all the lines copied before you take the pattern off. If your leather is too dry, it will be hard to impress the lines into it. If it is too wet, the lines will not work either, as the leather dries out, the lines will fade away. If your moisture is right, it will take the impressions easily without much pressure and they will show as dark lines that will be easy to see. Hope this helps some.
-
Well, like everyone else has said, even your boo boos look good. I really like the coloring on the leaves on the branch. The hint of green in the shades of browns looks really natural. I love the way you have pieces of the leaves missing too. That really helps make it look more realistic. Then the leaves on the ground that are more shades of browns, to me that looks natural too. Once the leaves finally fall off the tree, they dry up and lose the rest of the color. The tall grass is all dried up too. It all looks planned to me. You're going to have to try harder than that to convince me there's a boo boo in this one.