ClayB
-
Posts
2,063 -
Joined
-
Last visited
Content Type
Profiles
Forums
Events
Blogs
Gallery
Store
Everything posted by ClayB
-
Hi Tom, I think this is looking really nice!!! It all goes together so well, and the colors look great together. Cant wait to see the final piece.
-
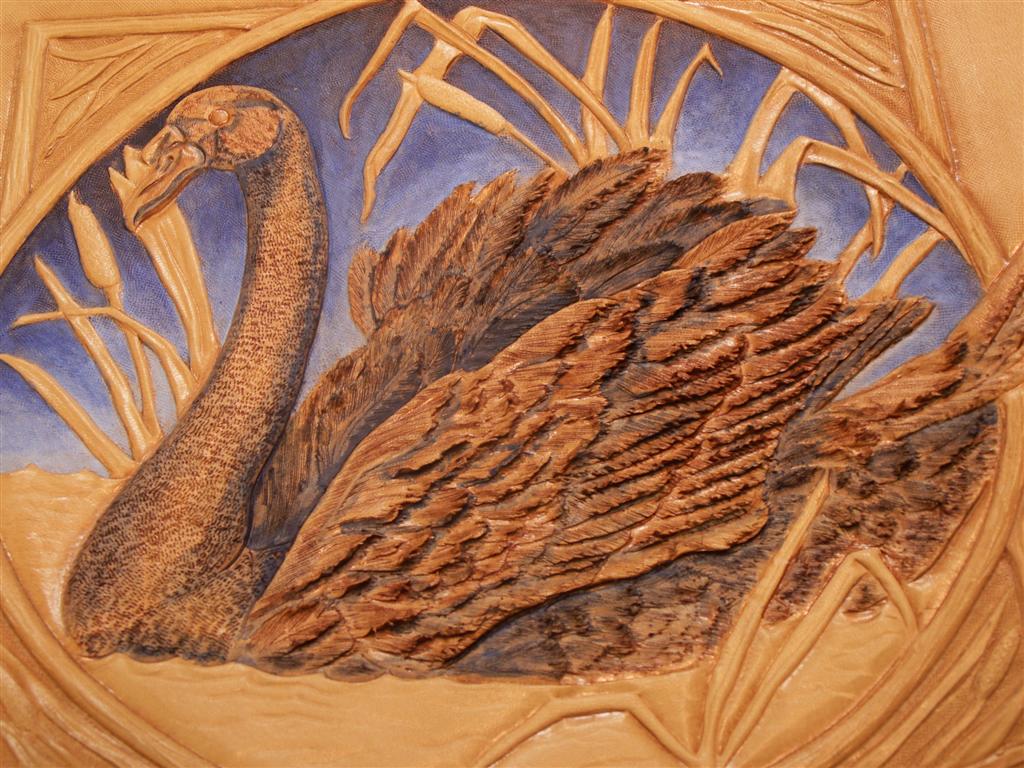
I'm glad you like it Crystal. Hope I dont dissapoint you before I'm finished with it. I had thought of just leaving it the way it is and calling it "Blue Duck". Lonesome Dove fans will remember him The sky is something I saw Bob Beard do once and I really like the look. The shading done this way is what I learned from Silva Fox's Dazzling Color video. It really helps to get nice looking shading without mixing a lot of colors, and it's pretty easy. I'm anxoius to add the white today and see what happens. As for the water, I'm curious to see what I do there to! As I mentioned to Kate, I really have no plan, just trying things as I go and hoping for the best.
-
Here is the impression sheet Ellis sent me of some of the other tools he is making out of the 1018 tool steel. The prices of each stamp is written above it. As you can see from the prices on these tools, the introductory special he has been offering is a REALLY good deal.

-
I got this set of stamps from Ellis for Christmas. I've been using them quite a bit and I like them. They make nice crisp impressions. The bevelers in the set are smooth and they have a nice shape to them. They really walk nice. I think they'd be a nice beginner set and there are several tools in the set that will work for Sheridan style carving. Ellis is making a lot more tools out of that tool steel, and the prices on them are anywhere from $25 to $85 each, so the price on this set is REALLY good. Haven't used any of the Crown brand tools so can't comment on them.
-
Thanks Freak and Panther! If I decide I really dont like the straps, I could make some black ones. They probably wouldn't stand out so much that way. I was just trying to keep all the tooled leather the same. I'll have to live with them for a while the way they are and then decide. I can just picture you in these Freak, with the arm sleeves. But if you tried welding in them, I think you'd be taking more chances of catchin on fire than Spider on his bike! Stacy said I have to tell you that the saddle isn't in the living room, that's the downstairs family room/storage room for finished leather projects that have no other home. (There's a couple more saddles around the corner) Panther, that cat in you avatar looks like it might make a great pair of chaps too!!!!
-
Thanks for the extra pictures Roger. You've really got the details on the tiger's face down. The little paw prints are a neat touch too. And once again, I really like what you've done on this one!
-
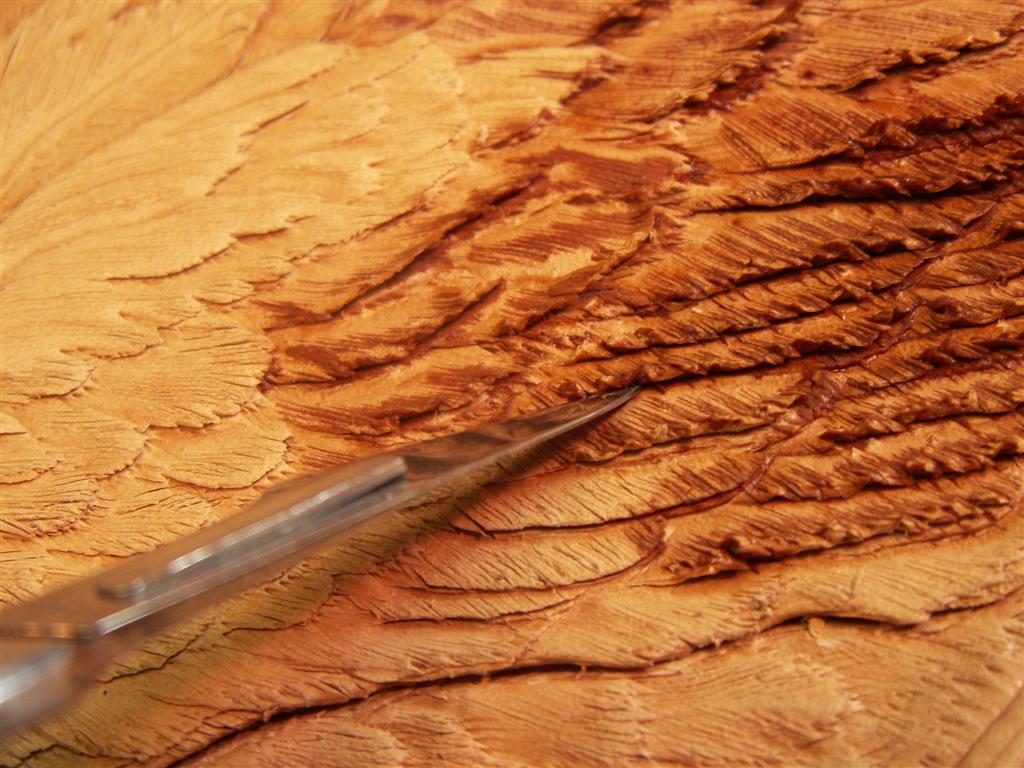
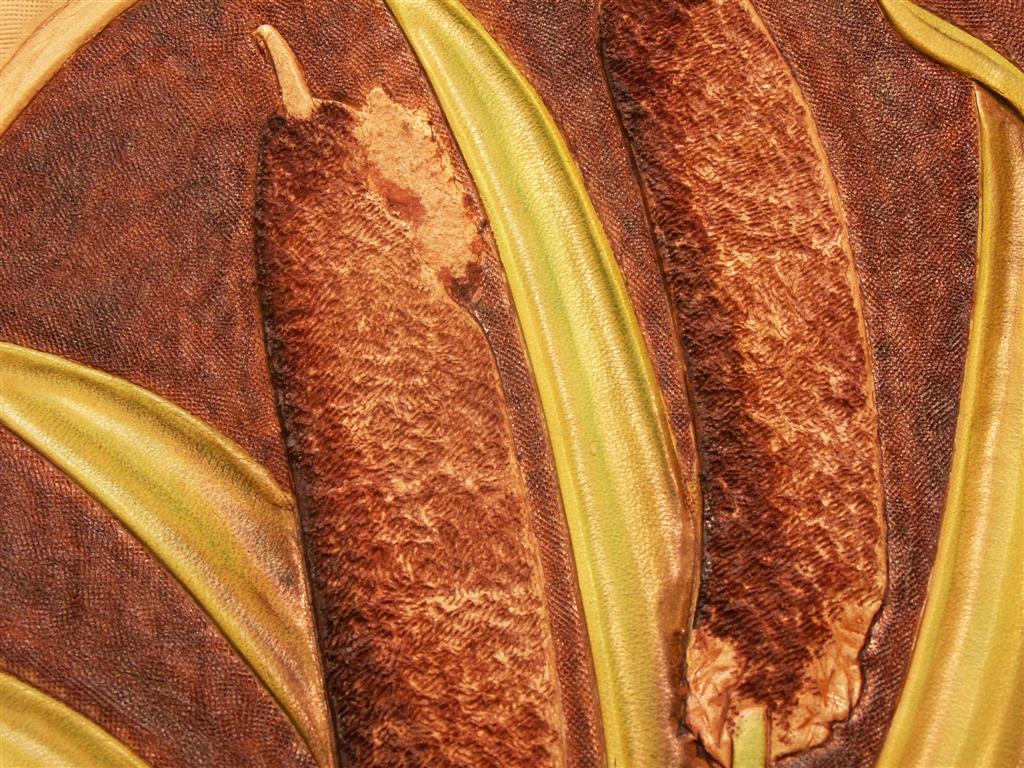
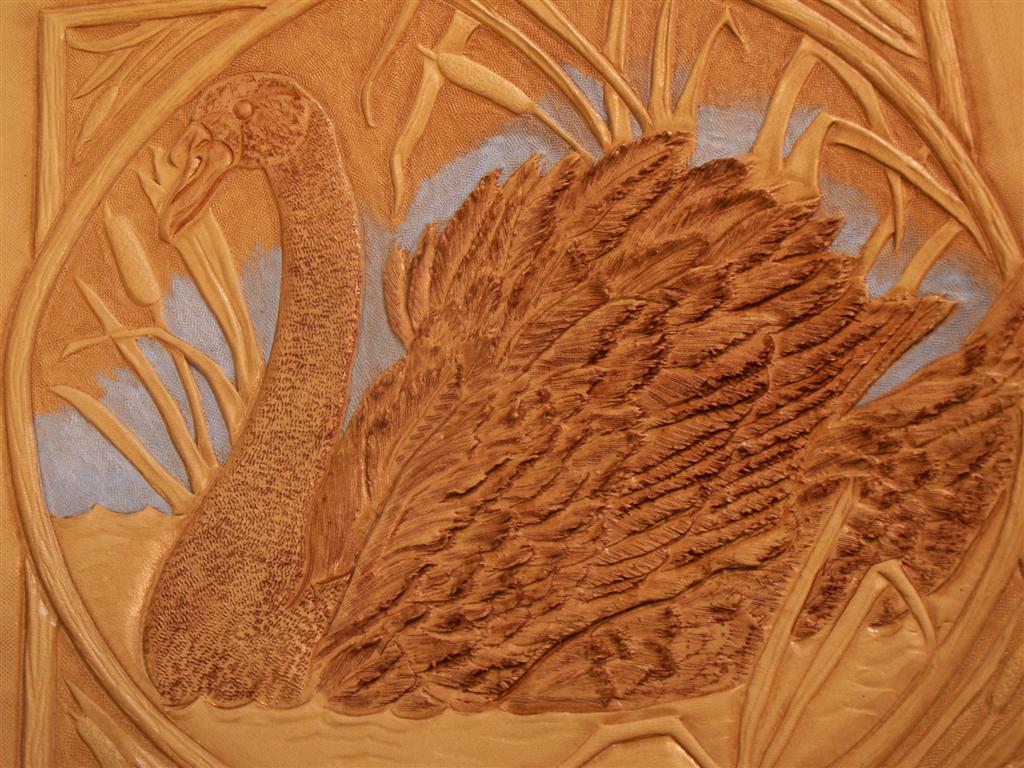
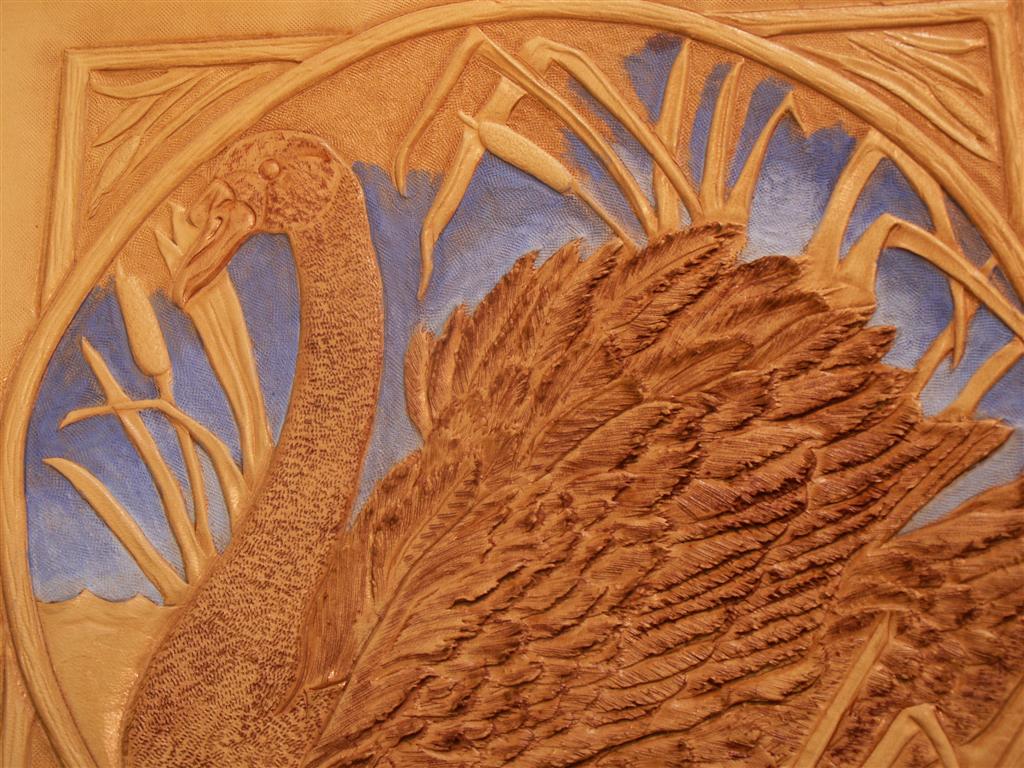
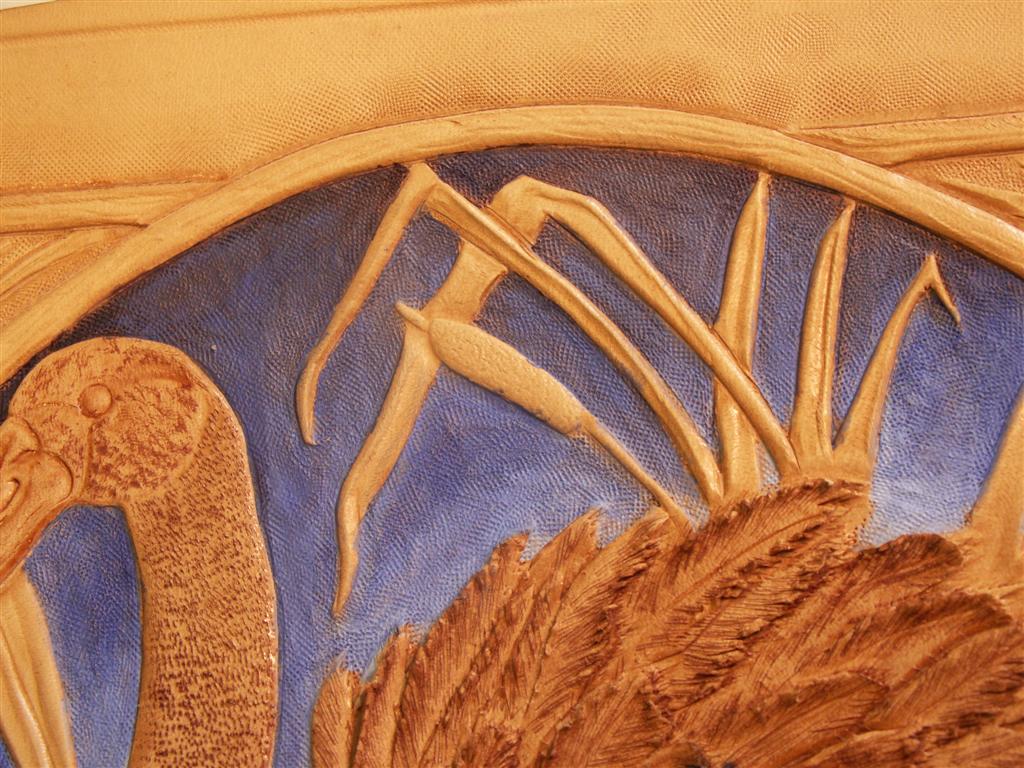
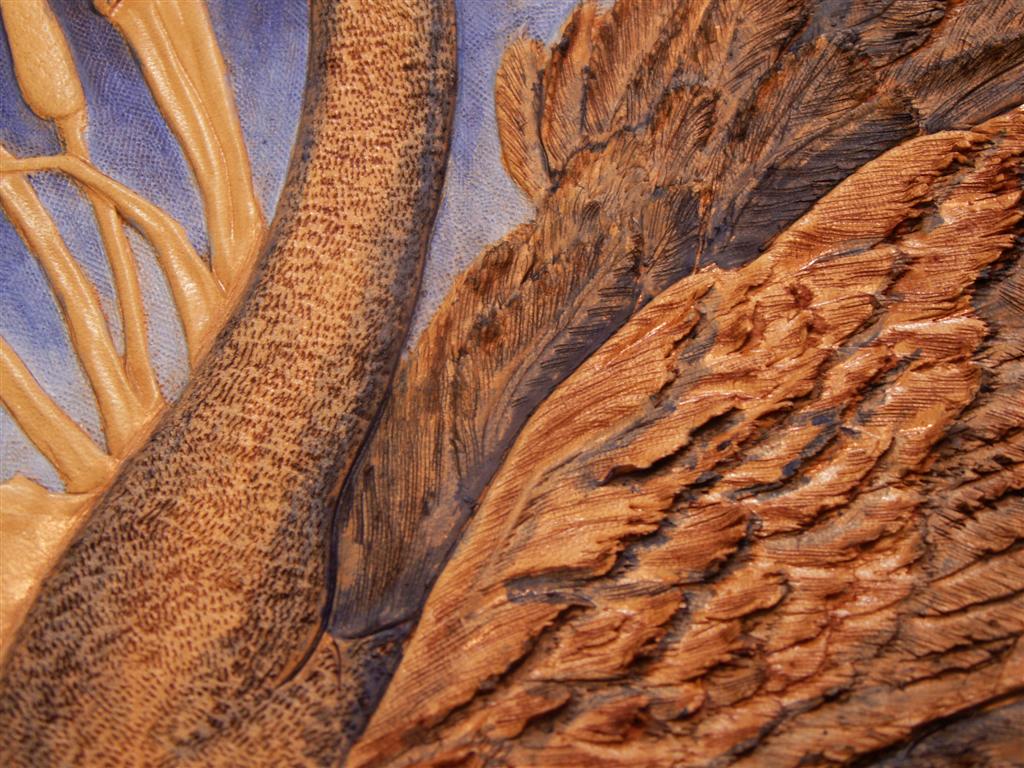
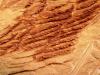
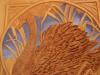
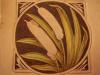
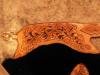
Thanks Tom!! Here's today's progress. First thing I did was paint the cat tails with Drake's X-1 leather dressing. This is an acrylic sealer that I use to stiffen areas that have been cut and lifted. I put it on the cat tails to make sure the "fluff" didn't settle back down when I painted it. When doing this, I put the X-1 on a small area, then lift the area with either the multi blade knife, or a scalpel depending on what it it. Here I used the multi blade knife. Just push the tips in and pull up to lift the fluff back up. When the sealer dries, the fluff will stay in that postition. Since I had the X-1 out, I decided to apply it to the feathers on the swan at the same time. Again I apply it to a small area, 2 or 3 feathers at a time and then lift and shape the edges by picking them up with the scalpel. After the X-1 has dried, I painted the cat tail with acrylic paint. For this I used Liquitex in burnt umber and burnt sienna mixed about half and half. Then I diluted this mixture about half with water. I like my acrylic paint pretty thin so it doesn't cover the leather heavily. I can build up the color by adding more coats. I used this mix on the shadow areas of the cat tail. Then I went and added stright burnt umber to the edge of the cat tail in the real heavy shadow area. Then I mixed a some burnt sienna with a drop of yellow. I used this on the rest of the cat tail, except for an area in the center that I left uncolored as a highlight. Next step was to paint the background around the swan. For this I decided to use acylic again. I mixed some ultramarine blue with titanium white to make a pale bue. I used this around the edge of the swan and out about a half inch. Then I added a couple more drops of the blue to the mix for a mid tone. With this I went out from the lighter blue about another half inch. Finally I mixed some blue with cadmium red about half and half to make a purple color. Dilute again with water. I used this for the top of the sky. Then carefully start to blend the areas where the colors come together. This can take awhile using the different color mixtures as needed. The next step is to add the shadows to the swan. For this I decided to use shades of blue. This is going to look pretty strange, but it works. Use full strength blue for the deepest shadows, the add more water diluting the blue for lighter shadows. Here's how it looks with the shadows all painted in. Tomorrow I'll try and add the white to the swan.


-
Hi Kate, You think I actually have a plan????? You should know better than that by now. I really like the look you get when you antique over your paint/dye. I think Tina does something like that too. It seems like it helps with the blending, and after this had set awhile, the blending doesn't look as good as it did when everything was still wet. My problem with antique would be that I think it would really "gum up" in all the cut and raised texture areas like the cat tail or the feathers on the swan. Not sure if you can apply antique in certain areas and not in others??? On the cat tail, my thoughts are to seal it with X-1, then probably paint it with acrylics. If I use the eco flow dyes on it, I wonder if it would flatten out the "fuzzy". If I apply the X-1 and lift the fuzzies while it is wet, it will dry that way and seal the fuzzies in that position. Not sure if the eco flows would do if applies over the X-1. I dont think they penetrate it, and dont know if they'd stay where I put them either. I know how acrylics will react there so that's my safe alternative. Mostly I'm just thinking out loud here (so to speak) but I always enjoy hearing your thoughts on coloring. I have a bunch of things I should be doing today, but I really want to work on this some more, so maybe I'll have more to show later.
-
Now that's the second really cool tiger project I've seen today. I'd love to see some of your work in person sometime. You do such a great job with color. It's hard for me to tell how much of the depth is from the tooling, and how much comes from the coloring, but it all goes together so well, I'm just really impressed.
-
Roger, that is REALLY cool! You do have to get more pictures of it. It's such a neat idea.
-
Thanks again you all for the nice comments, and the sewing tips. If I ever do another pair of these, I am going to have to try the tape tip. Johanna gave me the same tip, but just a little late. Kathy, I do think that the Yak hide would probalby make a great pair of chaps. You should make a pair and let me know!!! Chris, I'd love to see pictures of the anqueros you make. If I had any of this sheepskin left, I'd make a set out of it. Another thing to add to the list.
-
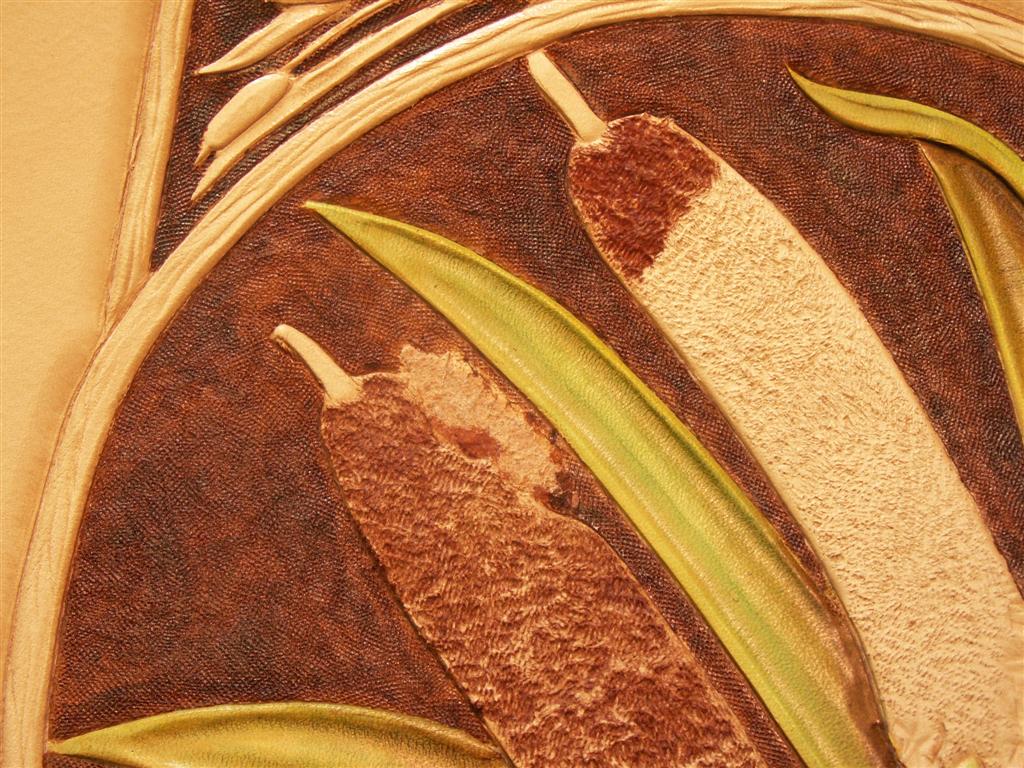
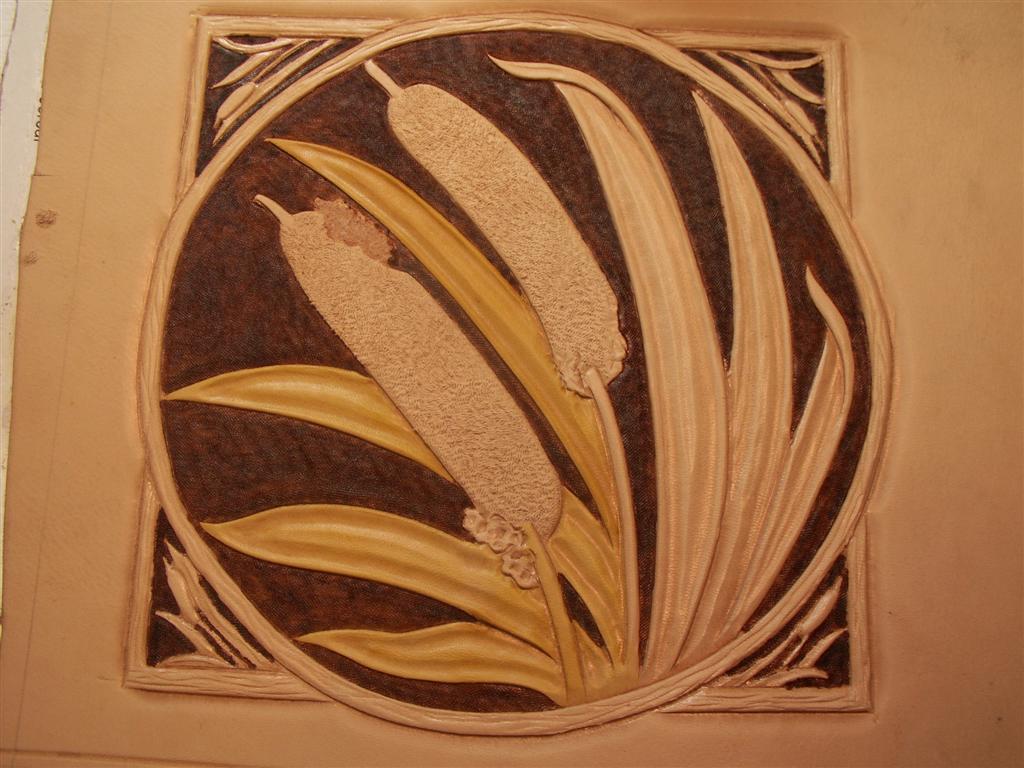
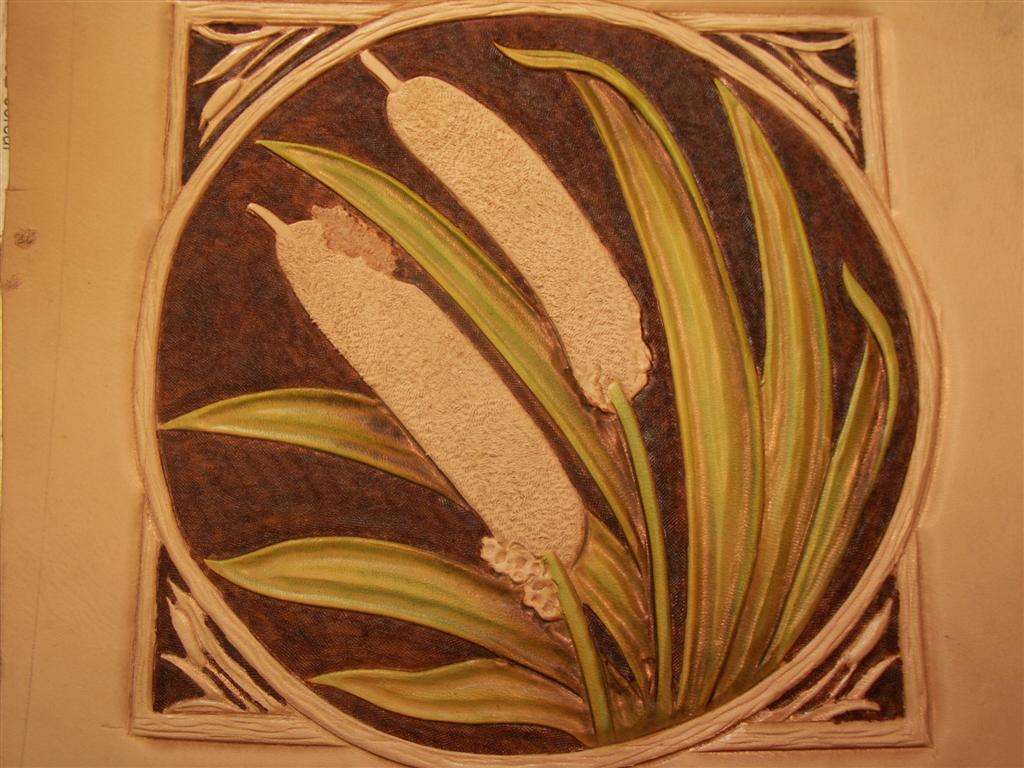
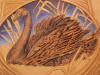
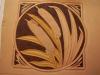
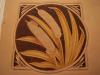
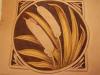
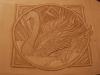
I've pretty much finished up the carving on this and decided to jump right in to coloring it. I started with what I figure will be the easiest part. I decided to take some pictures here as I go, and depending on how it goes, I'll post them I started out by painting the background with medium brown Fiebings spirit dye. I like spirit dye in the background because I can get it to flow right up to the cut lines easier than trying to push acrylic paint in that close. For the leaves on the cat tails, I decided to use Eco Flow dyes. I started by mixing some Sunshine yellow about half and half with water. I like to dilute it down, and then build up the colors if I want it darker/brighter. I just paint this over all the leaves fairly heavily with a brush. I make sure to go over the edges and into the cut lines. If you missed any area of the background right close to the cut lines, this will help cover that up. Then for the next step, I mixed some Tan canyon half and half with water. I use this to start putting in the shadows. I put it in all the lower spots, and the edges of the leaves where there would be a shadow, and under the turned over parts. Next I added a couple drops of Dark Cocoa Brown to the tan mix, and darkened up some of the areas of heavy shadow. You can go over these areas several times if you want until it gets as dark as you want it. When I was fairly happy with the shading, I added a drop of this brown mixture back into the yellow I started with, and went over all the leaves again. It seems to help blend everything together a little better. Then to add some green. I mixed Emerald Green half and half with water, then added a few drops of yellow to it to dilute it down some. I put this over the whole area of the leaves, but fairly lightly over the areas that are yellow. In the areas of heavy shadow, I went over them a few times with the green to get it to show some over the browns. At this point I'll quit, let everything dry and see how it looks. More to come later.
-
Hey Marlon, that's another good idea I didn't think of. I used to tape tracing film to my leather so I know exactly what your talking about. I was always trying to figure out how to get rid of that fuzzy look it left, now maybe there is a use for it!
-
I dont know of anyone that makes them anymore commercially. Jan Schoonover modifies a regular Tandy swivel knife to accept the exacto blades and has them for sale for people that take his classes. I can send you a phone number if you are interested. I'm pretty sure he'd sell you one if he has any made up. I think he gets around $60 for them. Bob Beard told me that when he and Robb Barr were making a lot of leather feathers, they would just use a piece of wooden dowell, drill a hole in the end and epoxy several exacto knife blades into it. He said you could just hold it like a pencil and that it worked just as good.
-
Thanks Hilly, Pete and Kate! Pete, I've used sand paper to give texture to things like land, but by rubbing the back of the sandpaper. (trick learned from Bob Beard). I never thought of actually rubbing the leather with it. That sounds interesting. I'll have to try that out. Kate, maybe we're going to have to put feathers and cat tails on the list of things to play with when we get together. You'll have to bring your air brush with too. When I finsih up the practice piece, I'll do another one and take some pictures to show you how I did it. It probably wont turn out nearly as well!
-
I'm really glad you all like these. Thank you all for the comments. Viking Gaucho, I really like that description Bree. Spider, they are mostly black so they'd probably work on a bike. If you lived up here, you could ride later in the year too! (of course you might need tire chains too) If they did catch on fire, it'd look really cool for a couple seconds, and smell TERRIBLE!! Kate, I never thought of wetting the hair. It would have looked like a big drowned rat..... or cat.... hmmm....opps, sorry. Someone suggested covering it with masking tape, and that was probably a really good idea, but too late now. If I ever try something like this again, I'll have some ideas to try. Glad you aren't going to laugh Tina, but one of my inspirations to keep working on these was to hear you giggle with a Sweedish accent! I dug through all my scrap bins to see if I had any extra pieces of this stuff, but no luck. I'm sure you could have made something really fun out of it. Crystal, back in the 70's, Larry Mahan used to wear a woolie hat. I think he even sold them in his western clothing line. I saw one a couple years ago, and Stacy said "NO!" Too bad, I always thought they were pretty fun. Bert, I'll bring these along next time I come down, but you're right, I think they'd be a little short for you. Maybe we could add some nice long fringe? Bruce, it's supposed to be be 45 degrees warmer this afternoon than it was yesterday morning, all the way up to 23. It's a heat wave, cant believe you and Rundi dont miss springtime up north!!!!
-
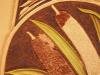
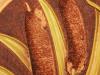
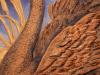
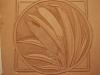
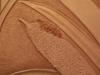
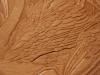
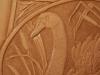
Thanks Caroline, Crystal, and Josh. Glad you like it. It's kind of fun to do stuff sometimes that I would never have picked myself. When I started this, I decided to cut the leather big enough to make it into a photo album if it turned out. Yesterday I started on the back. I used parts of another pattern by Lora. I really wanted to create the velvety fuzzy look of the cat tail. Couldn't figure out how to do that with a tool of any kind and then thought it's a lot like really tiny hair. So, the multi blade hair knife! Jab the tips of the blade into the leather and pull up. Repeat this about 100,000,000 times, in several different directions. Looks kind of neat! Then for the part where the thing explodes and seeds go flying out. I tried beveling in texture, the hair knife again, then Stacy said how about leather putty? Well, neat idea, but it has to be fluffy, not smooth. So I decided to just put some rubber cement on the spot with a paint brush, and then sprinkle on some leather dust. It gave it a fluffy look, just what I was hoping for. I added a couple layers to get it higher than the rest of the cat tail. I am not sure how well it will hold up, or what it will look like after sealer and paint, but it's looking kind of neat so far. Thanks Joe. If I inspire you ( or anyone) to carve more, then it's a good day!!
-

what should I use?
ClayB replied to pete's topic in Dyes, Antiques, Stains, Glues, Waxes, Finishes and Conditioners.
Hi Pete, I haven't used the Fiebings acrylics, but I'd suggest using some sort of acrylic spray sealer to "set" the paint. I just use a matte finish from Krylon that you can get anywhere. If you are going to "daub" anything on, I'd be really careful not to do any brushing from side to side as whatever you use might move the paint around. Get a piece of scrap and try out whatever finsihes you have and see what might work best. Hopefully Tina or someone that uses a lot of acrylics on purses and stuff has some more ideas for you. -
Thanks all 3 of you, I'm a fan of all of your work, so your comments mean a lot to me!
-
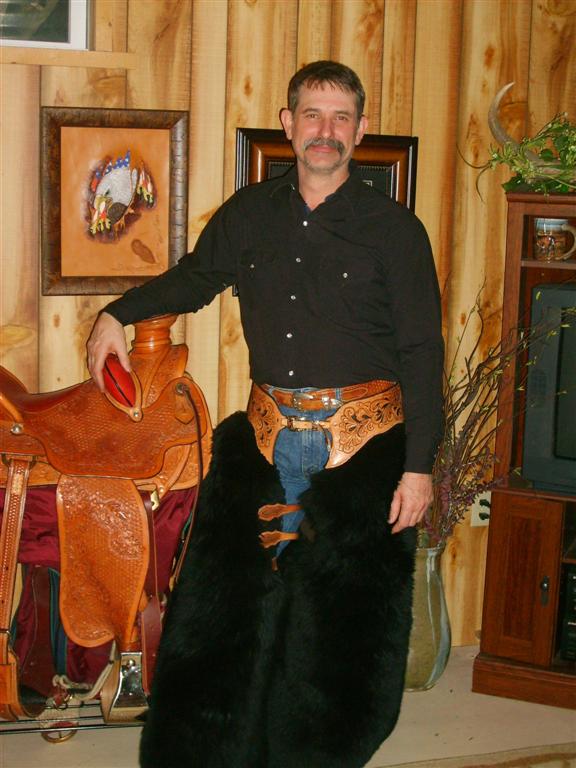
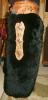
Here is a project I have been working on for awhile. Does 5 years qualify for awhile? Anyway, I found these Icelandic sheep skins in a shop when we were on our way to Glacier park for a vacation and they were just begging to be made into a pair of chaps. Like I said, I started on them way back then, but couldn't really decide how to put them together. I don't make a lot of chaps. Finally this winter I decided it was time to finish them up. I learned a lot of things while working on these. The hair on these things is about 3 inches long and is magically attracted to thread. It finds it's way under every stitch and it really likes to crawl through the holes too! One of the best lessons I learned was to make sure you sew the right top piece to the right leg (not the left one!) Sewing them together the second time wasn't any more fun than sewing them together the first time was. One thing I am really not happy with is that the leg straps show from the front. These hides weren't big enough to wrap around any farther around the leg, so there wasn't a lot I could do there. I think if they did wrap around the leg, it would have made it really uncomfortable to sit on to, unless the hair was all trimmed off. Other than that, I was pretty happy with how they turned out. Seems kind of fitting that I finished them up right now. People around here are getting into calving full swing, and this morning it was -21 degrees. If I had to be on a horse, I think I'd like to have these on!

-
Crystal showed me a pattern by Lora Irish that she wants to try carving sometime and asked if I had any tips on how to carve it. Well, I decided to give the pattern a try and see if I could do it. I didn't really know what I was going to do when I started so I didn't take pictures as I went, so I'll probably have to do another for a lesson.
-
I tried a pattern with dogwood flowers on it a couple years ago. Got some help from a lot of the forum members with it. You can see the pictures of what I came up with in this topic
-
I think it's a water based acrylic sealer, similar to the old Highlighter. I use it quite a bit to seal leather before painting with acrylic paint, or as a stiffener when lifting hair or to shape feathers.
-
A friend of mine called a few days ago and told me he would like to find a new home for his set of Leather Craftsman and Saddler's Journal magazines. The set includes magazines from 1998-2008. There are 2 issues missing at this time but if he finds them, they will be included. The missing issues are July/August 2002 and July/August 2008. One more magazine, March/April 1997 will be included. We'd like to try and sell the whole set together for $325 plus actual shipping cost. If there are no takers after a week, we'll then consider selling them in sets by year. If you are interested, send me a PM or email me If you are interested in what's in these magazines, you can check out the back issue section at the magazine's website here
-
If you are dyeing the background with spirt (alcohol) based dyes, you can either dye it first, or oil it first, but do it before the Neat Lac. The dye doesn't penetrate the Neat Lac. Once the background dye has dried, then oil if you haven't already. Then once the oil has evened out, apply the Neat Lac. I like to apply it with a piece of sheep skin and rub it in well. Then when that has dried, apply the antique, and finally when that is dry, finish with Tan Kote. When ever you are trying out a new finishing technique, it's a really good idea to practice it on scrap first instead of taking a chance on ruining your finished piece.