BAD HIDE
-
Posts
119 -
Joined
-
Last visited
Content Type
Profiles
Forums
Events
Blogs
Gallery
Store
Everything posted by BAD HIDE
-
Just to add another option. I'm handsewing thin material that flops over, I glue it up and use a punch like this.
-
Where Do You Buy Your Your Thread For Hand Sewing
BAD HIDE replied to capsterdog's topic in Suppliers
Agreed, pre-waxed, but only 150 yards. I use 6 strand Barbour's linen thread from Campbell-Randall. It's $50, but it's also a pound of it - 916 yards - and that'll last you years even if you sew all the time. They didn't have natural and black available at the time, but it looks like they do now, and those are even cheaper. Doesn't take more than a minute to wax and set up thread, and pre-waxed thread is usually over-waxed, so it's not as white when you pull it tight. -
Sharing or selling your designs is entirely up to you. Personally, I'd share my patterns with most people. Nothing I make is all that complex, and I wasted a few good pieces of leather getting things right. I'm not worried about competitors, because my main competition is big box, big headed designer, cheaply made crap, not other leather workers. The pattern isn't special - what it's made of, how it's finished and assembled is what makes it unique. People asking for patterns are either the experienced craftsman looking to expand or improve his line or the DIY weekend warrior. The first guy probably already has something very similar he could adapt, he's just curious about yours, and is trying to save some time and money. If he really has a need to make and sell multiple copies of the pattern, he'll buy one from you, rip it apart for the pattern, and make 100 anyway. If you give him the pattern or not, he's still going to figure it out and make a decent product. The second guy is looking for a cheap holster, or to fill his hobby quota for the month. Chances are, he'll spend more making that one holster than just buying one from you, his won't look as nice or hold up as well, but he's happy. He'll make a few for his friends, but eventually, they'll all come around and buy a better one - possibly from you.
-
I'm considering making some footwear and I have some questions before I start buying stuff. I have a sandal pattern I found in an older book and basic tools, just not any machines or cobbler's tools. How hard is sole leather? Can it be handsewn? Would soaking it help? Should I be doing a hidden stitch on the bottom side or will a deep saddle groove suffice? Or should I just glue and use cobbling nails 1" spacing around the perimeter? If I use a rubber soling sheet for tread, can that just be glued on? Any answers would be of great help, thanks in advance.
-
Help Designing Makers Stamp
BAD HIDE replied to Mechanical Cowgirl's topic in Leatherwork Conversation
I'm already hitting it with a 3 lb sledge and it takes several strikes, then I also have registration issues if the placement is a hair off. I've thought about getting a press, but this is the only thing I'd need it for atm. So I'll try a redesign, I'm not going to change much, just the letter thickness or font or something. I think it'd help with finishing too, the wide areas of the letters don't hold antique like the the little letters do. -
Help Designing Makers Stamp
BAD HIDE replied to Mechanical Cowgirl's topic in Leatherwork Conversation
It's not that much, you can put a lot on a maker's stamp and the engraving will punch it all really clear. If you're using the oval "maker" template, they all come out really clear. If you're designing your own, I'd condense it down some, either dropping your name or location, or both. I have to redesign mine, the lettering is too thick to set easily by hand - there's a good pic on my website home page. The bottom 'Leather Works' prints beautifully, but the BAD HIDE top letters are much wider and take a lot of force to indent properly. I have to put the leather on an anvil and strike it with a heavy hammer several times to get it to set. I need to either use a thinner font, or an outline that will sink into the leather easier. -
What Type Of Leather?
BAD HIDE replied to Julius's topic in Purses, Wallets, Belts and Miscellaneous Pocket Items
I make my wallets with 3-4 oz tooling outer shells, 1-2 oz lining pig, calf, or goat for the interior. Skirting leather is for saddles and mostly comes in weights above 12oz. I'm unfamiliar with W&C, so it could be it's a different tannage if they're offering it in lesser weights, but it's probably the same thing. -
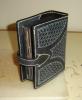
Nope, it's acrylic paint, so it dries really fast. I actually was wetting the rag I was wiping with to clean it off better. If you look at the top front, I actually tried to do too big of a swath and it ended up more silver than the rest of it because I didn't wipe it fast enough. And WV, it's handstitched. I don't have a sewing machine. One of these days, yeah, but for now it's all by hand.
-
By 2 years, most leather is just getting good and broken in. I wouldn't want the design I spent so much money on all faded and scuffed off. Carving doesn't fade. I'm working on developing techniques to tattoo leather, but I'm actually tattooing it with actual needles and high pigment inks, not just printing on the surface. My point is, I make things to last 5-15+ years of daily use, not 1 or 2. I'm sure most people on this forum are the same way. I can see the appeal to some and the value in the technology, but in the two pics you posted and the competitor's link you provided, the work is butt ugly. Printing fabric patterns on leather is one thing, but just random celtic skulls that you pulled of Google image search, or in the case of your competitor, abstract crap and some flowers - it's just gaudy. You got the technique down, but did you ever stop to think what you were printing and what the finished work would look like? It's just not good designs. Plain unadorned leather has a beauty all it's own, especially as it ages. Carving and dying work harmoniously with the material instead of against it. Eventually, someone will figure out good designs to print on leather, but I'm not gonna waste my time.
-
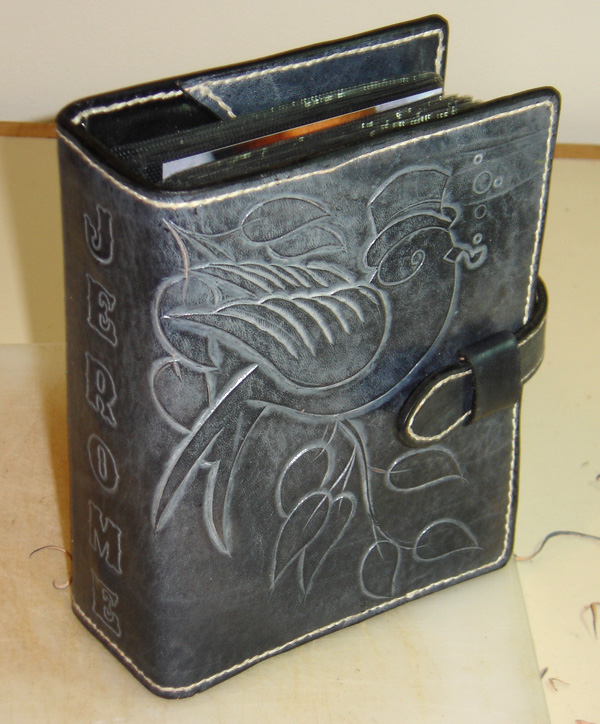
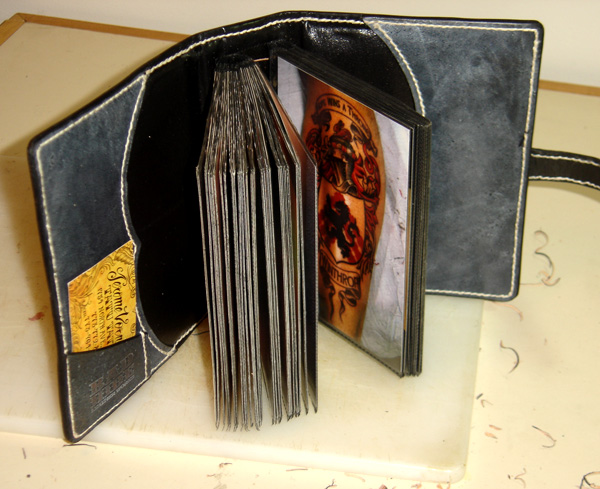
I've been meaning to make a cover for a tattoo portfolio for a while, just never got around to it and my little Walgreens album was looking pretty ragged on the outside. I ripped it apart, took the stiffeners and interior out - 'cuz it was still in good shape, and set about making a proper album. I did something a little different with the finish, I dyed it black, then rubbed silver paint on as an antique and rubbed it off, leaving it mostly in the crevices. It gave it a nice look.
-
I'm using some of the same stuff, but I'm not seeing any problems. It takes oil dyes nicely, so airbrush it with a light brown or something to get the effects you want. I've found it's almost too white when using colored dyes - I have a few green and red items that are almost too bright. I've taken to dirtying it up a bit by dry rubbing a darker color over it to give it some depth.
-
Sewing Machines
BAD HIDE replied to bagabon's topic in Purses, Wallets, Belts and Miscellaneous Pocket Items
Well, it really depends how much sewing you want to do and how thick you're going to go. If you're going to sew leather in any quantity, you need an industrial machine. A regular home machine, or even a "heavy duty" model isn't going to get you very far when you start feeding leather into it. Leather's just too tough to be punched by plastic parts, and it needs heavier thread than a regular sewing machine can throw. It's possible to get by for a while on a heavy duty machine, but it's not going to last long at all - it'd kinda be like taking the family's SUV and actually taking it offroad through mud, rocks and mountains and expecting it to come out alive. Suede is a bit easier than anything with a top grain, but that's going to add up fast once you start doubling it up. When you're dealing with heavy stuff, a walking foot is essential, and most light machines will have just an addon part instead of a true walking foot. There are walking foot upholstery machines that are relatively inexpensive, but those are geared more towards vinyls, canvas and those types of materials. If you're doing anything with veg-tan or sewing over 1/4" seams and welts, imho, you need a dedicated leather machine. Sometimes used ones come on the market, but expect to spend at least $1000 for anything new. Or you could just hand sew everything, like I do since I haven't saved up for a bigger machine yet. Awl and two needles, or if it's flimsy material, diamond punch the stitch line and sew through the holes. I'm only churning out a few big projects a week, so the time a machine would save isn't as much as if I was really doing production. If and when my needles can't keep up with demand, that's when I'll order something big, shiny and powerful. -
It's going to take a while for business and customers to transition from 800 numbers to cell numbers, print catalogs to website. I guess it depends if it's worth the cost to keep it. I'm all websites and cell phones, I don't hesitate when it comes to calling 800 numbers or not, since I'm getting charged for minutes anyway. I don't keep catalogs at all, I even do what I can to stay off mailing lists just so I don't get more junk mail. I almost always look on the websites for the latest deals and prices, and since I live on odd hours, it's easier to just order online than call.
-
I don't think vaseline would be wise, as it might gum up or react with whatever finish you use after that. I haven't tried it, but possibly some sort of wax based top finish or conditioner. If anyone has any real success with this process, I'd really appreciate any input as to specifics. It's tempting to play with it, but I haven't had time or the products to experiment with. And as to why, tattooing is what I do. Carving and stamping has limits, pyrography works but lacks color, painting might work, but it lacks the finesse and control with line and shades I can get with a tattoo machine.
-
Just to add a little to Jim's response. 1. what type of leather you're using can change with each project. If you're using a chap or oil tanned leather, then you don't have to dye or finish it, but you're limited in the colors that you can get. If you're using blank veg tan tooling leather, you can dye it any color you like. Other properties of different kinds of leather can vary, and you'll want to lurk and shop around. If you can, go to a leather supply shop and touch and feel everything. Until you get it figured out which types of leather you want to work with, it'll be a lot of trial and error. 2. Kangaroo is strong, but it's also thin and I haven't seen too many whole hides up for sale. It's great for lacing, but cow is just way more plentiful. 3. Lining keeps things clean, and depending on the item, some customers won't like having unfinished insides. I use upholstery fabric for some things just to class it up a bit. It also allows you to sew pockets and hide rivets and snaps so they don't show on the outside. 4. Stitching is usually structural, some cases it's decorative, but usually it's done to keep layers from coming apart. Glue holds good, but it won't hold up on it's own. 5. There are many kinds of thread for many kinds of leatherworkers. I'm still handstitching everything, so I use waxed linen. But when I get a machine, I'll be asking the same question. 6. I'm no help here either.
-
Just out of curiosity, does anyone know of any books or pattern packs that have old styles of briefcases, backpacks, messenger bags and the like? I have the Al Stohlman series, but there's a few classic styles of duffels and bags that I see all over, but I don't have any good patterns for them. Are there any patterns out there, or does everyone come up with their own versions, and if they do, is anyone willing to share? I haven't been doing this very long, but I'm starting to get tempted myself to put together a few patterns of what I do, simply because there's so little out there for noobs like me.
-
Cutting Side Into Straps, Or Precut?
BAD HIDE replied to Ryan Barto's topic in Leatherwork Conversation
Well, you're right. It is more cost effective, but there's 2 things you have to consider. You're going to end up with a lot of straps, which depending on how busy you are might take you a long time to use up. And you're gonna have odds and ends material that isn't suitable for straps. Me, I don't mind it. I've bought a few pre-cut before, but it was only on that rare occasion when I didn't have money for a whole hide but needed a strap or two to finish a project. Now that I've got a good selection of hides, and I set aside hides specifically for straps and belts, pre-cut just doesn't cut it. -
I was raised to learn metric. I have wrenched on late model cars that require you to take both metric and SAE with you or you're screwed. However, I still think in inches and ounces. When laying out a pattern or measuring, I still talk fractions of an inch, because that's what I'm used to. I'd love to switch to all metric, and I should just switch all my patterns over to it, it's so simple and logical. 36mm is much simpler than saying 1 7/16", now how long does it take to figure out half that? I come up with 18mm a lot faster than 23/32". It's just one of those confusing factors of society that we not only cling to old ways, but we've actually made it much harder to switch cold turkey. If we had forcibly switched over 30 years ago when I was a kid, there'd be much less stuff now that isn't metric. Even if we stop saying things are one and a half inch, it doesn't instantly make all the 1 1/2" belt buckles any bigger than 38.1mm. 'course it'd be easier to order 38mm or 39mm buckles, and from there forward, we could stick to those sizes, or just make it an even 35mm or 40mm. I seriously wish there wasn't 2 systems, it's going to be a hard long slog to fight it out, but imperial isn't going to come out on top. Oh, and imo machinists using thousandths of an inch is just a calibration away from using thousandths of a mm. By using thousandths instead of fractions, it's an admission that decimal systems are superior to fractions, and from there, it's just taking thousandths from a different unit.
-
I make a few things with garment leathers without a sewing machine. I sew using a 4 prong pointed punch, then hand sew. I haven't tried it, but a glover's needle might work for some of it too, but an awl isn't practical when the material isn't stiff. If I had a machine, it'd make it much easier, but I don't have the money or need yet to buy a big machine and don't care to fiddle with a used one not optimally suited for it. The thing with garment leathers is it looks better to make bags inside out, use welts, and roll all your edges, much easier if you have a machine. I use it mostly for sides and panels and in conjunction with veg tan trim and carved panels. I'd disagree that it's a different setup - just a different construction approach. There's no tooling or finishing, just cutting and assembly. Selling anything of this nature is a problem, but not out of the ordinary for this business. People can go spend $500 on a designer bag made of expensive chrome tan, or they can go out and buy a stylistically similar $30 bag made of cheap chrome tan and fabric. It really comes down to your style and the way you market it. I can't build a decent bag for less than $100 and still make it worth my time, so I'm already out of a lot of people's price range. I try to make my stuff unique enough that I snag the market that wants something extra, but doesn't care about designer names. You can't compete with China or the designer labels, so copying them is pointless. Just remember that you can take cues from them, but you have to do your own thing and really stand out.
-
One thing I love about leatherworking, if you're just starting out and don't have sewing machines and lots of tools, you can do acceptable work on any table or in any space. I started out just pounding away right in front of my computer, just move the keyboard and get to work. I now have a 2 bdrm apartment, and besides one corner for oil paints, I have the majority of the room to work, and the neighbors below me haven't complained about the hammering yet. For a cutting table, I use my drawing table swiveled flat and up against the wall, and push the roll against the wall or drape it off the backside. I really only see about 1/3 or 1/4 of a full hide at a time. Need more room occasionally? use the floor or commandeer the kitchen table. Other than that, most of my work is done on the same 4' x3' sturdy table in the middle of the room - one side near a wall, but I can walk around 3 sides. For storage, I have 3 track shelving strips with 2 long brackets on top and 2 shorter brackets each strip - basically 4 shelves without actual shelves, mounted high on the wall so it's out of the way. I toss all my rolled up hides and even belt blanks across the brackets. Smaller pieces go on a shelf or in a box. I have 2 metal shelving units as well, and store most of my tools in various boxes or hung on a peg board. Stamps are in leather cups, dyes in squeeze bottles. For protecting surfaces and keeping things clean when doing finishing, I use a roll of red rosin builder's paper, available at any home improvement store for like $12, and it also makes decent test patterns. Using up scrap before you make more scrap is half the battle. If all you make are larger things, you'll have lots of scrap lying around. Having a varied assortment of patterns on hand so you can turn small pieces into bracelets, card holders and whatnots keeps the scrap box low - and if you do any sort of craft shows, that's the things that sell. Ugly pieces? make it look ugly on purpose. Dying clean leather solid colors is nice, but leather with character is a whole new ballgame. Dye it one color, then rubbing a mostly dry dye rag over it with a darker color and you get some crazy cool things going on. I've even taken a framing hammer to leather, getting a grid pattern with every strike, to really ugly it up. Too small for even a key fob? I take all my un-oiled, un-finished veg- tan scrap and dump it right in the compost bin. It takes quite a bit longer than the banana peels, but it does work. Chrome tan and finished leather probably would compost too, but it'd take a lot longer so unfortunately that goes to the landfill.
-
Ok, this is kindof a follow up question. After getting those white stitches in there, how do you keep them that way? I've noticed on things I've carried for only a few months that the stitching got a little fuzzy and dirty in wear areas. When I started, I did all my finishing before assembly, and then nothing on top of that. I've been experimenting with my materials and order in which I do things to see if I can protect my stitching better. I've tried doing my dyeing and 1 coat of acrylic finish before assembly, 2 coats after to go over the stitching and seal it, but wax + water doesn't mix, so I'm doubtful it's really doing anything more than sealing the holes and not the thread. I've also started trying clear-lac in the same 1-2 coat manner, but I've noticed a little dye bleeding into the stitches, especially if I apply with rag or brush - which is usually how I apply finishes. So what's the professional's method to long lasting white threads?
-
I've used the 5 cord and 6 cord, and there's not much of a noticeable difference. I like the 6 cord a little better because it fills the stitch groove a little more evenly, The downside is when you stitch closer together, it looks a little bulky. 6 cord at 5 stitches per inch is about perfect in my opinion to fill the groove and not look bunched up. Smaller cord, more stitches per inch, larger cord, less stitches, but unless you're going wildly out of scale, either one will do the job just fine.
-
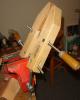
Prewaxed is fine for starting out, and I still use it for colored threads. They usually overdo the wax, so rub it with a piece of brown paper bag a couple times to take some of the wax off and even it out. Other than that, I stitch pretty much just like the book, harness needles and awl in hand. For a makeshift stitching pony, I actually use a Jorgensen wood clamp with padded jaws, and clamp it in a bench vise, and spin it sideways, like so: I angle it towards me to keep the threads from winding around the screws, and it's tall enough to stitch standing up or sitting on a stool. I'll be making an actual stitching pony when I get around to it, but this has been working so well for most of the stuff I make, and it was practically free since I had the vise and clamp already, so I'm in no hurry. When you're up to getting linen thread, here's where i get mine. I use 6 cord, left twist. $42 sounds like a lot, but 1000 yards goes a looong way.
-
Way too fast. I have a variable speed router and the lowest setting is like 10,000 RPM, and I can't imagine any other router would spin slower. Sanding drums should not exceed 2500 RPM, and the fastest you need to sand leather is more like 1000 RPM. You're more likely to make the sanding drum explode apart before you even have to worry about burning leather. If you want to mechanize the sanding part of your edges, you could use the table and use a regular motor with pulleys to spin the drum, or even better would be a spindle sander. As far as burnishing, I'd think you'd want the spindle horizontal so you can use different grooves for different size edges without reseting the table depth.
-
Springfield is selling it as it's Goof Proof antique stain. The bottle I got has "Springfield X1 Leather Dressing" right on the side. So you use it over a tooled and lightly dyed piece? I guess I'll give it another shot, more experimenting on the way....