


Bob Blea
-
Posts
1,771 -
Joined
-
Last visited
Content Type
Profiles
Forums
Events
Blogs
Gallery
Store
Everything posted by Bob Blea
-
Very neat design. I like it.
-

2 New Belts Finished
Bob Blea replied to Dwight's topic in Purses, Wallets, Belts and Miscellaneous Pocket Items
Really nice belts Dwight! And thank you for the tips! -
Rocky Mountain Leather Trade Show...
Bob Blea replied to Mark842's topic in Leatherwork Conversation
I'll be there at least Thursday and Friday. -
That's pretty cool!
-
Stewart there is nothing wrong with the way you are doing it. The first functional thing I made in leather was a check book cover and I wanted a floral carving but didn't have anything in the books or craftaids I had at the time that fit the space or looked like what I wanted. I 'adapted' a carving pattern for a small case by photocopying it and tracing parts of it till it fit the space. I was able to put it together so it sort of worked together. Before computers a lot of camera ready artwork for ads, flyers and posters was created this way. If you don't have the ability to draw (and some people just don't, their brains aren't wired for that activity) the way you are handling it is a creative solution that creates an artwork that didn't exist before you came along.
-
I hear you there! I never could paint people that looked close to proportional. I haven't been able to carve them either. Human brains are so hardwired to recognize faces that any little oddity stands out to us. Even Al Stohlman's carving of people look a bit creepy to me. I stay away from carving people, but anything else is fair game. It gives me great respect for Renaissance artists who painted or carved human forms so spectacularly.
-
That is a first class holster and packaging! They are definitely going to be wowed!
-
I draw all my own floral designs these days and I'm even learning to draw Celtic knots, though more complex designs for things including traditional animals are a bit beyond my skill level at the moment. I'm an example of what @Sheilajeannewas saying. I had previous experience painting in oils and acrylics before starting with leather carving, and that previous skill definitely helps. But I started off working from Stohlman designs and Craft Aids just like everyone else. When I first tried painting in high school art class, after some basic lessons in shading and blending colors, our teacher had us pick a picture from a magazine (pre Internet days) and do our best to duplicate it on canvas. We drew a grid across the picture to help us draw the picture on the canvas and then mixed and dabbed paint right on the picture to get the color shading right. It was literally doing our best to make a color photo copy of the original picture (the goal was to try and make a realistic painting) but it was also a huge learning experience in how to paint in oils. That's the way everyone has to begin, duplicating what you see either in a picture or a still life. Even if you start off with a Stohlman pattern or a craft aid or some line art your downloaded from the Internet, you are bringing some part of yourself and your style to the piece. At first, it's not much of yourself because you are still learning, but hopefully over time you develop your skills more and your own way of using the tools or producing effects that become your style. I still look at the works of leather carvers and incorporate elements from their designs into my own. It's how I grow and develop. I do see a lot of leather items for sale that have some of the original Stohlman / Tandy designs on them with no improvements or their maker's own style. They look dated and nothing makes them stand out from the crowd. I'm driven to improve my designs because I don't want to just blend into that crowd.
-
WyoSheen is a lacquer and I've been told that 'Brushing lacquer' from your local hardware or woodworking store will work the same way. I've never tried it myself but the people I've heard this from are pretty good leatherworkers so I trust them. But try it on some scrap first. Bob
-
Ha! Don't feel bad. I had many years of antique job 'surprises' before I saw someone else post the idea about using the sponge. It didn't ever occur to me either. Much improved on the beveling in the latest piece. That looks pretty cool.
-
"Another" latest holster
Bob Blea replied to alpha2's topic in Gun Holsters, Rifle Slings and Knife Sheathes
Nice work on both of those. -
@Boriquabrought up a good point that I forgot to mention. I let my resist coats dry at least overnight before applying a second coat or trying to antique. I found that rushing this step just leads to problems for me, but I have heard of others that apply a lacquer resist, let it dry briefly and then antique with good results. I prefer not to take the chance. Also, Boriqua mentioned letting the Feibings pastes and 'waiting for it to set up'. My experience with the Eco Flo products is to apply and then wipe off as soon as possible. If you leave it in my dry climate it will dry quickly and not want to come off, but also the longer it sets the more it penetrates and colors your leather.
-
Lets talk about WOW factor in leatherwork.
Bob Blea replied to immiketoo's topic in Leatherwork Conversation
WOW is a tough goal for any of us to reach. I see lots of really fantastic carvings online now, particularly out of Asia. Some of the artists there are doing really incredible work. I see makers who have perfect stitching and beautifully clean lines in their assembly. Like @YinTx it gets to be overwhelming for me because I know I need to work on my hand stitching, my edges, my carving skills, my dyeing skills, etc. It does seem like there isn't enough time in life to learn all I would need to know to really master anything in this craft. But I also believe that the way we look at our work is different than how the average person looks at it. We look at all the technical details and they see the overall item that doesn't look like anything they have seen in their modern mega-mart. For me the WOW factor comes from custom making items for people. Most of the work I sell is commissioned and they have something very specific in mind. I get the WOW from them because I spend time to find out exactly what they want and take the time to make it to their imagination as much as possible. The final product isn't flawless and I see lots of things I want to improve, but if the customer is thrilled then it's a success. I was in a Robert Beard class once where he said that he wasn't paid for the QUANTITY of his work, he was paid for the QUALITY of his work. I've always kept that in mind when I'm making anything for a customer. Seemed like good advice to work by. Bob -
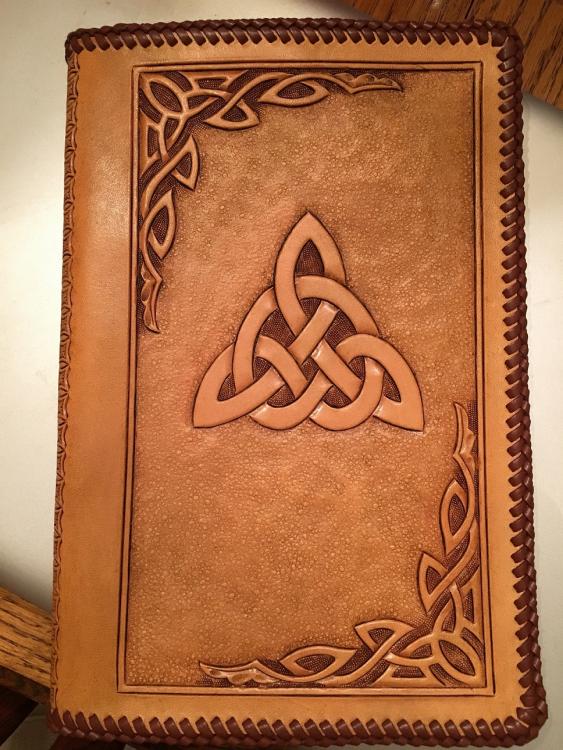
Hi Gabriel, I use Eco Flo antiques and I've had some success with them, but not without a few mistakes and projects that needed to be salvaged along the way. With some work they can be good ways to antique a project. I never had any luck using Resolene or Super Sheen or Satin Sheen as resists though. The antique always seemed to penetrate them. I've settled on Wyo Sheen (now sold by Barry King) as my resist of choice which is a lacquer based product (like Neat Lac.) Still I have to put at least two coats on and I test the piece with a damp sponge before applying antique. If the leather darkens at all then the antique will penetrate the resist and it needs another coat. Finally if I do see streaks or unevenness on the leather I found that baby wipes work really well to remove those streaks. Not sure what is used as a soap in them but it turns out to be really effective on streaks even when it's penetrated the resist. I have saved a couple of projects using these and now always have a package handy whenever I antique. Looking at your example, I see a bit of blotching in the untooled areas that is probably the antique getting through the resist. In your bevelling the antique is highlighting marks your beveller is leaving. It looks like you might be tilting your beveller more to one side because in places it always looks like the left side of your beveller is leaving more of a checkered impression than the right. The antique is designed to be captured in the checkering of the beveller so its going to show off those imperfections. Practicing smoother beveling will help with that. Running the baby wipe over your Celtic knots might make them look more even by removing the discoloration. I frequently do that on mine just to take off some of the antique and give them a lighter color than the rest of the project. Finally, one other tip. Tan Kote By Feibings can also clean up antique mistakes. I have seen it used on both Feibings antique paste and Eco Flo products where it removed streaks from the project and make them look much more even, much like the baby wipes. I haven't tried it myself but I watched it being applied and it seemed to help on a project long after the antique had dried. This notebook is one I made with all the techniques I mentioned above. The darkened area at the upper right is because of my lighting, not darkening from the antique. Overall this one came out very even.
-
I think you did pretty good. Letters can be a challenge. For my lettering I use figure bevellers and I usually need my smallest ones to get smooth beveling in the tight corners. Also, you will probably want to use a modeling spoon to smooth everything out and touch up any imperfections. For letters like your blue ones I would then matte down the leather around the letters to remove the beveling halo. It makes the letters look like they stand up above the leathers surface. Spend a lot of time on this and get it as smooth as possible for best effect. If you are going to background like you did around the HV, I would still use my smooth figure bevellers to carve the letters and then I would use whatever background tool I wanted. How you do that area is up to your style, and what you did around the HV looks OK. I would probably use a checkered backgrounder around the letters and gently fade that out as I moved away from the letters, but that is just my preference. What you did works too. Hope this helps, Bob
-
 Thanks Stetson! There are a lot of good sources out there. One of the best is the book 'Sheridan Style Carving' by Bill Gardner and Clinton Fay. Tandy carries this book but you can get it other places as well. It is a great resource on what kinds of tools to use and how to use them. If video is more your thing Tandy has some videos in their Premium video library (I haven't seen them) but Chan Geer sells quite a few videos that I have seen and he is a really good teacher. And of course Tandy has the old Al Stohlman books on carving that really are good places to start. Also, if you ever get the chance to go to one of the leather shows, either the one in Prescott, AZ or to the Sheridan show, take some of the classes. Some of the best carvers in the world teach at those classes and you will really learn a lot. I looked at your recent piece you posted in the Floral Carving section. You are off to a good start. I wouldn't agree that it would help you to use smooth bevelers or shaders. One of the key components in carving these days is the use of checkered tools so they can capture the antique you apply later and add depth. It's a matter of taste though and some really good pros have moved to using smooth tools. I do think your beveller has too coarse a checker on it, and your shaders are probably too big for the petals you are using them on. If you are looking to upgrade any of your tools I would start with your bevellers. Having good bevellers can make a world of difference in your tooling. I'd also say your leather was probably too wet when you were tooling it. Let it dry to where it almost seems too dry, then if you hit the leather with your shader and it noticeably darkens, you've got it just right. Finally, study the works of the pros you really like. As you get more experience you will be able to look at their tooling and you will be able to tell what kinds of tools they used and how they used them. That's where you will really start to excel and to develop your own style. Hope this helps, Bob
 -
That looks great Rohn! Very professional.
-

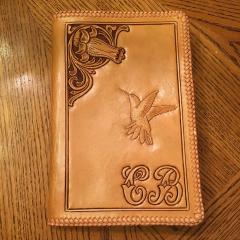
From the album: Hummingbird Notebook
Find similar items or custom order at my Etsy site: C and B Leathercrafts Fort Collins, CO Visit my shop at http://www.etsy.com/shop/CandBLeather?ref=si_shop -
From the album: Hummingbird Notebook
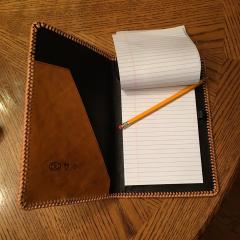
Picture of the interior of the notebook. The notepad is removable. -
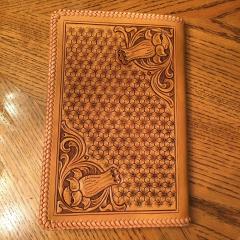
From the album: Hummingbird Notebook
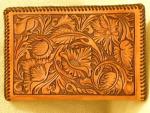
The back of the notebook with floral carved corners and a cool geometric stamp across the middle. Find similar items or custom order at my Etsy site: C and B Leathercrafts Fort Collins, CO Visit my shop at http://www.etsy.com/shop/CandBLeather?ref=si_shop -
From the album: Hummingbird Notebook
Find similar items or custom order at my Etsy site: C and B Leathercrafts Fort Collins, CO Visit my shop at http://www.etsy.com/shop/CandBLeather?ref=si_shop -
Composition notebook cover
Bob Blea replied to Jack1970's topic in Purses, Wallets, Belts and Miscellaneous Pocket Items
That finished up nice! -
Bible Cover started last October
Bob Blea replied to YinTx's topic in Purses, Wallets, Belts and Miscellaneous Pocket Items
I think it looks great. You got really good depth in your tooling and your basket weave is really spot on. -
Laser-cut Birkin Bag
Bob Blea replied to LatigoAmigo's topic in Purses, Wallets, Belts and Miscellaneous Pocket Items
That looks pretty impressive. It's a lot of hand stitching. -
Composition notebook cover
Bob Blea replied to Jack1970's topic in Purses, Wallets, Belts and Miscellaneous Pocket Items
I don't see anything wrong with your basket stamping (its really nice and straight) except maybe the balance point already brought up. But that really is just a matter for the artists point of view. Looks good! Bob
