-
Posts
1,771 -
Joined
-
Last visited
Content Type
Profiles
Forums
Events
Blogs
Gallery
Store
Everything posted by Bob Blea
-

Master Saddler and Professional Saddle Fitter
Bob Blea replied to MasterSaddlerKate's topic in Member Gallery
Welcome to the site. We would love to see some of your work. -

Hair on clutch purse.
Bob Blea replied to farns005's topic in Purses, Wallets, Belts and Miscellaneous Pocket Items
That looks fantastic! Your intern will be proud to own that. -
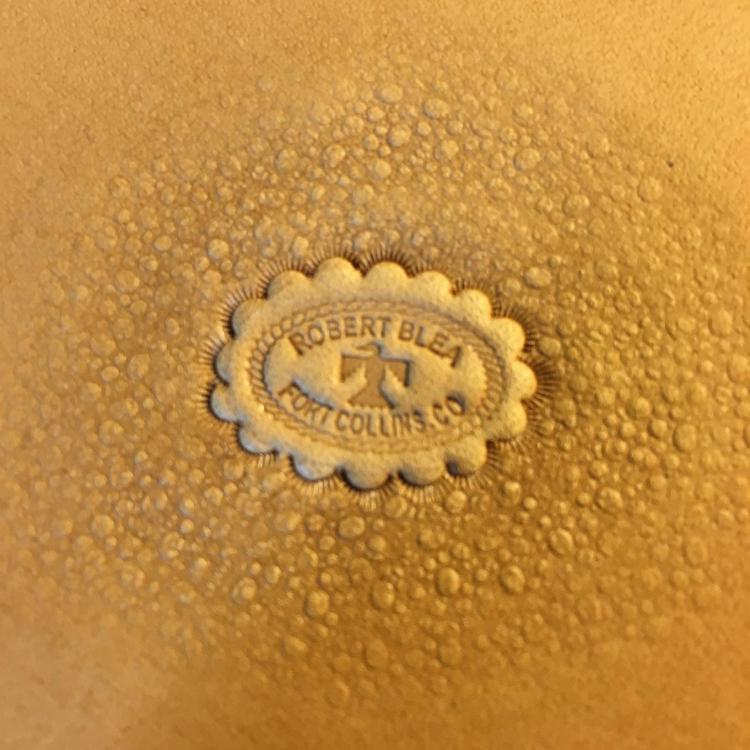
When I do something like this I just use a clear plastic circle or oval template (like you would find at an office supply or art supply store) and trace the size of oval I want. Then I cut the oval with a swivel knife and bevel that along the outside of the oval. Then I will pick whatever cam or border tool I want to use and stamp it by starting at opposite ends of the oval and working the stamp towards each other. As you get close to meeting (say the last three or four stamps) you can use the tool to space the impressions without making marks and figure out where to place them so they look even. Once you see the spacing that looks best you go ahead and stamp them in. It sounds complicated but it's really not. You just eyeball the last few stamps to they look even with each other. Practice it a bit and you'll get the hang of it pretty quick. It's the same way you run a border stamp around the edge of any area and make the stamps come out looking fairly even. This picture is of me doing basically the same thing around my maker's mark. I didn't bevel the border of the oval in this case. I just stamped the cam tool around the line of the oval I lightly drew on the wet leather. If you look closely on the left side you can still see traces of the line inside of the cam impressions in places. This mark is only 3/4 of an inch across so this view is pretty magnified. It's not my best effort at doing this as I messed up a little on the lower left side and didn't get them even, but it's the only picture I had handy. Hope this helps
-
Thank you for sharing! There is a lot of good information in this write up. I probably won't go to all the trouble to duplicate the hardware but I would like to try and make one of these bags someday soon. Your bag looks great.
-

Handbag for the Wife
Bob Blea replied to Reegesc's topic in Purses, Wallets, Belts and Miscellaneous Pocket Items
It's a beautiful bag. Love the lining. -
Hi Kelly! The hair on the hide was that length when I got it. I didn't have to trim it any. I did skive the hair off along the edges where I was gluing it down, but I had to be careful not to trim too much or you might see the bald spot once the inlay is glued in. So there is a little bit of hair glued as well. I left a pretty big flap of skived hide all around the inlay so there is a lot of glued area holding it in place. My original plan was to stitch it all the way around the inlay too but I made the border too narrow between the inlay and the basket stamped area to allow for stitching, so I left that out. I'm not worried because the contact cement does a fantastic job of gluing leather and the inlay is also firmly glued to the liner behind it. Hope that helps, Bob
- 15 replies
-
- leather wallet
- inlay
-
(and 1 more)
Tagged with:
-
Thanks! Making sure the leather is well cased and dry enough that it burnishes well is important. The leather should be almost back to it's normal color and that point is usually drier than you think. Experiment a bit and you will get the idea. But part of the contrast you are seeing is coming from the antique applied to it. That highlights the impressions. Having a good stamp helps a lot too. This one is a Barry King basket stamp.
- 15 replies
-
- leather wallet
- inlay
-
(and 1 more)
Tagged with:
-
That looks fantastic!
-
Thanks from me too! This was very informative as I am getting into bags that use this kind of reinforcement too.
-

dog collar Finally done! Carved dog collar
Bob Blea replied to YinTx's topic in Collars, Cuffs, Leashes and Leads
That turned out great and your stitching looks amazing! -
Thanks for the tip! This has popped up at odd and always inconvenient times and I'm still working to correct it. I appreciate the help!
- 15 replies
-
- leather wallet
- inlay
-
(and 1 more)
Tagged with:
-
Thanks Rohn, I though the same thing myself when I did the notebook several years ago and never got around to trying it again till now. I'm again thinking I need to make another like it!
- 15 replies
-
- leather wallet
- inlay
-
(and 1 more)
Tagged with:
-
Thank you! Yes, there is a plug under each piece. I just took the part I cut out for each inlay, trimmed it down a bit to allow for the hair on hide, and then glued it on the back of the inlay. There is a lining behind all of that and when I glued that on, I clamped it all down to help form the inlay and bind it in place that way.
- 15 replies
-
- leather wallet
- inlay
-
(and 1 more)
Tagged with:
-
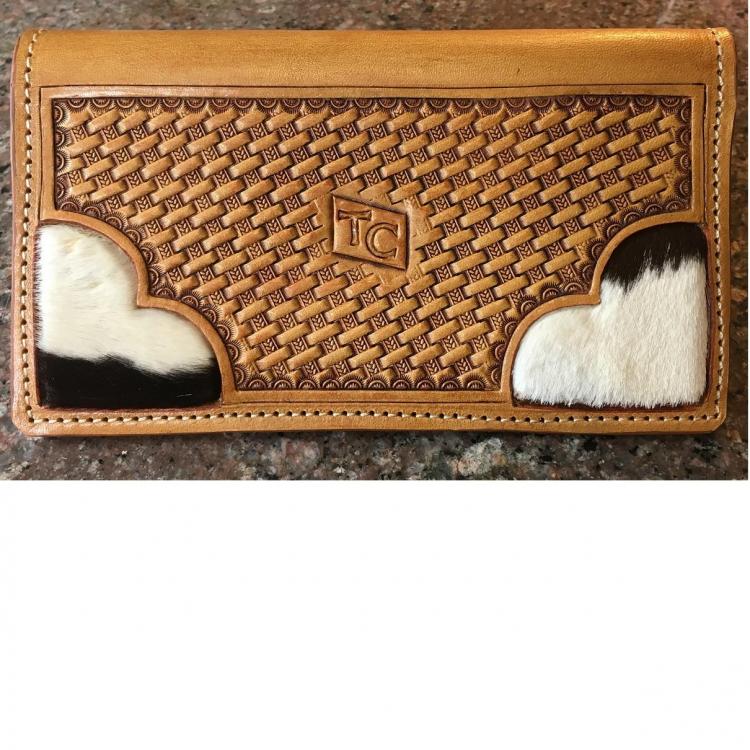
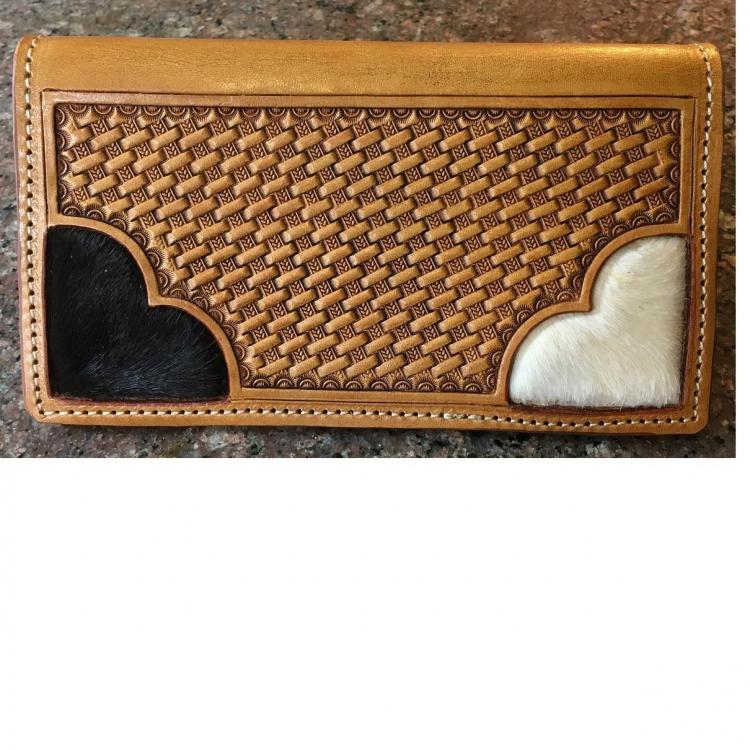
I haven't posted something I've made for a while. This was a custom order I completed just recently. The customer wanted a roper style wallet with hair on hide inlays similar to a notebook I had made several years ago. She also wanted the basket stamping like that notebook had and her boyfriend's initials centered on the front. It was a bit of a rush order to get it to her on time for his birthday but it made it in time and apparently he loved it. The stitching got a little wonky on the interior in places when I sewed it. Still mastering my sewing machine unfortunately. Not sure why the last picture is sideways.
- 15 replies
-
- leather wallet
- inlay
-
(and 1 more)
Tagged with:
-
I put the WyoSheen on in very thin coats (usually two) and gives the leather some shine but it doesn't feel like plastic unless I get a lot on it. It does seal the leather up pretty well. It leaves it pretty water resistant but I think I've seen times where Neatsfoot oil has gotten through. I've been told by other leatherworkers they have oiled things after a lot of wear that have been sealed, but I suspect that only worked because the seal had worn off. I need to test it sometime.
-

Oh, come on now. Seriously, Tiny Again?
Bob Blea replied to YinTx's topic in Floral and Sheridan Carving
I think that is pretty dang impressive! I've never tried anything that small! Bob -
I sometimes antique without using a resist and I completely agree with @TargetRockLeatherabout experimenting first. It's not easy to get a good even result. You will want to have some unscented baby wipes (that's really what I use) handy as they are really good at removing unwanted antique and evening out the finish. Without a resist it is hard to get an even coating (especially on untooled smooth areas) but the baby wipes will remove the excess, even if it has dried quite a bit, and make your surface much more even. For resists I've never been happy with Super Shene or Satin Shene as resists. I found I needed to use a lot of coats and still had problems with it not resisting. I use Wyo Sheen (sold by Barry King) which is a lacquer based resist that is supposed to be the same thing as the old NeatLac was. It works well but I still need at least two thin coats for a good resist layer. And again I always have the baby wipes handy to clean up and make things even if there is any streaking. As for top coats, I don't think there is any top coat that doesn't take some of the antique off when you rub it on. A lot of people use Tan Kote as a final finish and it does take some of the antique off. The only solution I've found is to spray a top coat on that I don't rub at all. I use a spray on acrylic made for spraying over pastel chalk artwork, but some people water down Resolene and spray it on with an airbrush.
-
I have a couple of large plastic free standing storage shelving units I got a Lowe's. They can handle a fair amount of weight and I keep my sides of leather on the shelves, rolled up with the grain side inside the roll to protect it. I keep my veg tan leather separate from my chrome tan leathers because the hides that have more fats in them or that are already dyed could potentially stain the veg tan. I also have plastic totes that I store small scrap pieces in, again keeping the veg tan separate. My shop is in a finished basement, so I've got room for the shelves. It's also pretty dry where I live so I don't have to worry about moisture in the basement.
-
@YinTx Looking pretty good. Nothing easy about small stuff like this. The only suggestion I would make is to work on making smooth swivel knife cuts at this scale. I see a couple of places where the vine work curves flatten out in spots. Really easy to do at small scales. It takes a lot of practice to cut a design in smoothly with flowing lines when the pattern is this small. It's something I can achieve only about half the time.
-
Nice looking saddle, and very nice carving!
-
Thanks for posting this @cseeger I definitely want to try this now. You did a great job describing your process.
- 30 replies
-
- diy conchos
- coin
-
(and 2 more)
Tagged with:
-
Unfortunately I don't think there is a good way to do this. I was always taught that dye is pretty permanent stuff and that it's always possible to make colors darker but not lighter. So my 2 cents worth, you are left with only a few options. You could make the rest of your piece darker to match the knife sheath. Or you could someone make the knife sheath being darker some sort of highlight of your overall design. A third option would be to use acrylics to mask or cover up the dye job and make the sheath color more like the rest of the project. The problem with using acrylics is that they are UV resistant and will maintain the same color over time while the veg tan leather of the rest of the project will naturally darken over time. Sorry I don't have a better suggestion for you. Bob
-

This Year's Stohlman Award Winner
Bob Blea replied to Sheilajeanne's topic in Leatherwork Conversation
@Sheilajeannethanks for posting this! His work really is amazing and I can certainly see the marriage of Eastern and Western concepts in his artwork.


