Josh Ashman
-
Posts
1,183 -
Joined
-
Last visited
Content Type
Profiles
Forums
Events
Blogs
Gallery
Store
Everything posted by Josh Ashman
-
Ruger 1911 Wet Mold Holster Help!
Josh Ashman replied to indidana's topic in Gun Holsters, Rifle Slings and Knife Sheathes
-
Ruger 1911 Wet Mold Holster Help!
Josh Ashman replied to indidana's topic in Gun Holsters, Rifle Slings and Knife Sheathes
Indidana, With all due respect there is more to building a holster then knowing how to cut, stamp, carve, dye and sew leather. If you don't know anything about holsters it's going to be pretty difficult for you to build one that works at all. The same can be said for saddles and tack, if you don't ride you have a hard time building gear that works well for its intended purpose. That said, if you want to build a holster similar to what your friend bought I'd start with Al Stohlman's holster making book. You can get it from your local Tandy shop or it's $12.99 from Amazon. Go through the book and you'll understand how to make a holster pattern. That should get you started. Another resource you could tap into is provided by a member on this site. JLS Leather has a ton of patterns and excellent DIY info on his site. I doubt he'll have a pattern for the holster type you're wanting to make but there is enough info there to get you started. Good luck, Josh -
Avenger Rig
Josh Ashman replied to Josh Ashman's topic in Gun Holsters, Rifle Slings and Knife Sheathes
Thank you sir! I think it was either a post from you or George that made me think I should start doing sewn in sight channels for avenger holsters. Seeing what others are doing is a great way to improve or at least re-think some of your own practices. All the best, Josh -
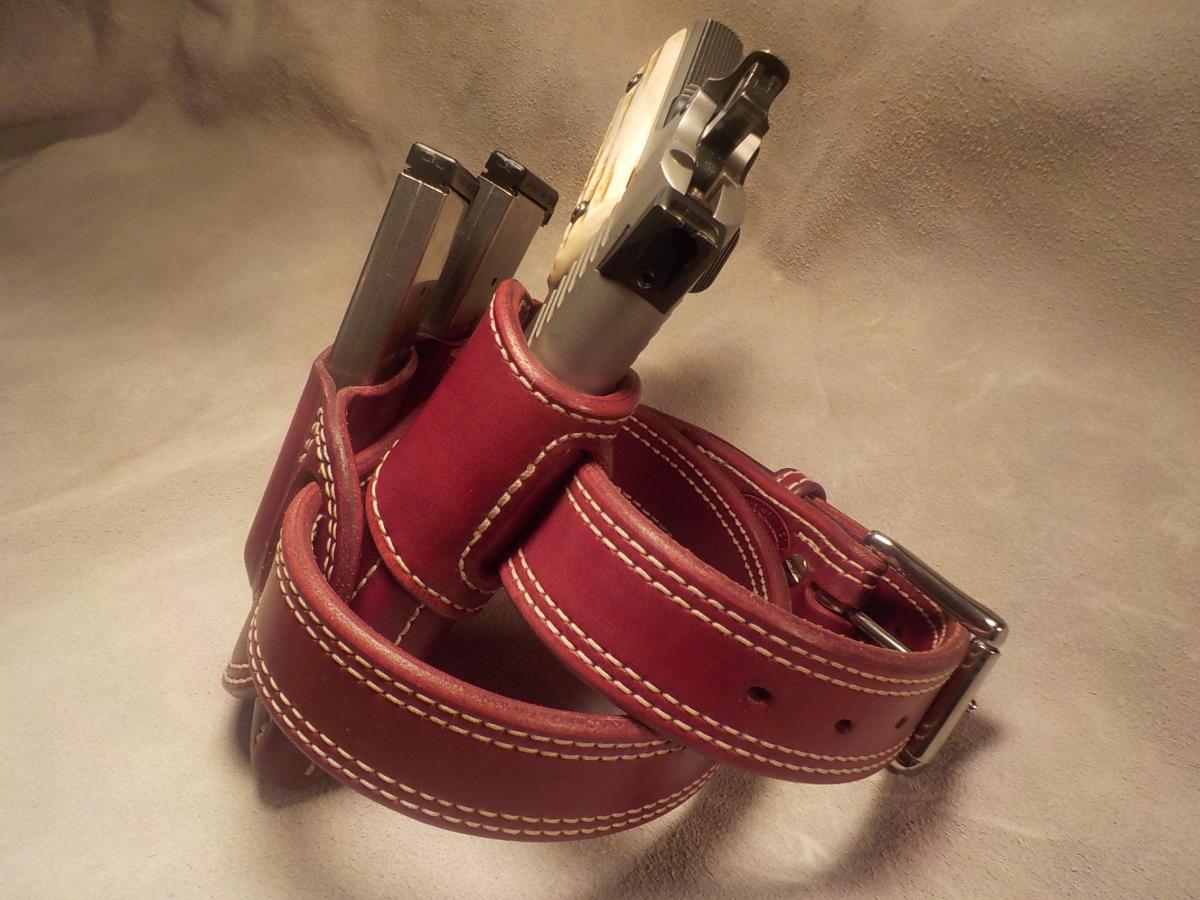
Some recent goodies. 8/9 HO and a mixed lot of Fiebings dyes all around. Have a good Friday and weekend folks! Josh
-
1911 Avenger Crossdraw
Josh Ashman replied to glockanator's topic in Gun Holsters, Rifle Slings and Knife Sheathes
Nice job! -
What Blue Gun Do I Need?!
Josh Ashman replied to mikekratz's topic in Gun Holsters, Rifle Slings and Knife Sheathes
Have the customer fold a piece of paper in half, place the pistol upside down with the sights centered on the fold and roll it over to the side. Then have him trace around the bottom edge of the pistol and mail, fax, scan and e-mail you the piece of paper. He just did the first few steps of your pattern making for you. Since it's a western holster and not molded any similarly sized pistol should work to rough fit it once it's stitched up. If you don't have a similarity sized pistol a hammer handle will work. Just open up the pouch and you're going to be close enough. I've done it a few times and had good success. Good luck, Josh -
I also could have added I wouldn't worry too much about pre-stretching the leathers. It's a fine thing to do but I really can't see skipping it being a problem. The leathers I've used from Weaver were cut out of very firm good leather up along the back where they should be cut from, they will have a minimal amount of stretch to begin with. For a recreational rider you'd be hard pressed to ride enough to have those streach and if they do just adjust the length accordingly. I also wouldn't worry about relining it. That's more work and money than it's worth. Just get a decent pad and it's a non-issue. All the best, Josh
-
Are you saying the slide piece of the Blevins buckle won't slide over the punched end of the new stirrup leather you got from Weaver? I've used those replacement leathers a few times and never had a problem with them. Did you get a full set of new Blevins buckles or are trying to re-use the old slide? As far as how I'd go about it, from where you are I would do the following; 1) Figure out the sleeve thickness issue. If your trying to re-use the old slides I'd just buy new ones and carry on. I can't imagine new slides not working. 2) Figure out how long you need the new leathers to be. Maybe you already did this. 2) Rivet the fender, post part of the buckle and stirrup leather together. Sew them if you like, with 3 #8 copper rivets I don't bother. 3) This is an important one and something you might not think to do. Fold the fender and stirrup leather over where it would wrap around the stirrup before you mark where to attach the top of the fender. If the fender and stirrup are laid out and put together flat then they won't be right when you put it all together. The end of the fender needs to be longer than the stirrup leather to account for it being on the outside of the fold. 4) Oil/grease the leathers especially where they go over the bars. 5) Put it all back together. Hopefully that makes sense and is helpful. If not then I suppose it's good that it was free . Al Stohlman's saddle encyclopedias (mostly volume #1 for what you're looking at) and the Dusty Johnson saddle makng video would be good references for you that are not free. These are both relatively inexpensive and would give you a better ides of what to do. Anyway, good luck and have fun! Josh
-
Bob, If you google search "glass slicker for leather" you'll get several different results and ideas for how to get one. You can buy them from Amazon or Sheridan Leather, or you can find a local glass shop and have them make you one, they would likely do it for next to nothing. My "glass" slicker isn't glass, it's a rectangular piece of cocobolo wood with all of the edges rounded, fine sanded then polished. Thanks for the kind words about that holster. All the best, Josh
-
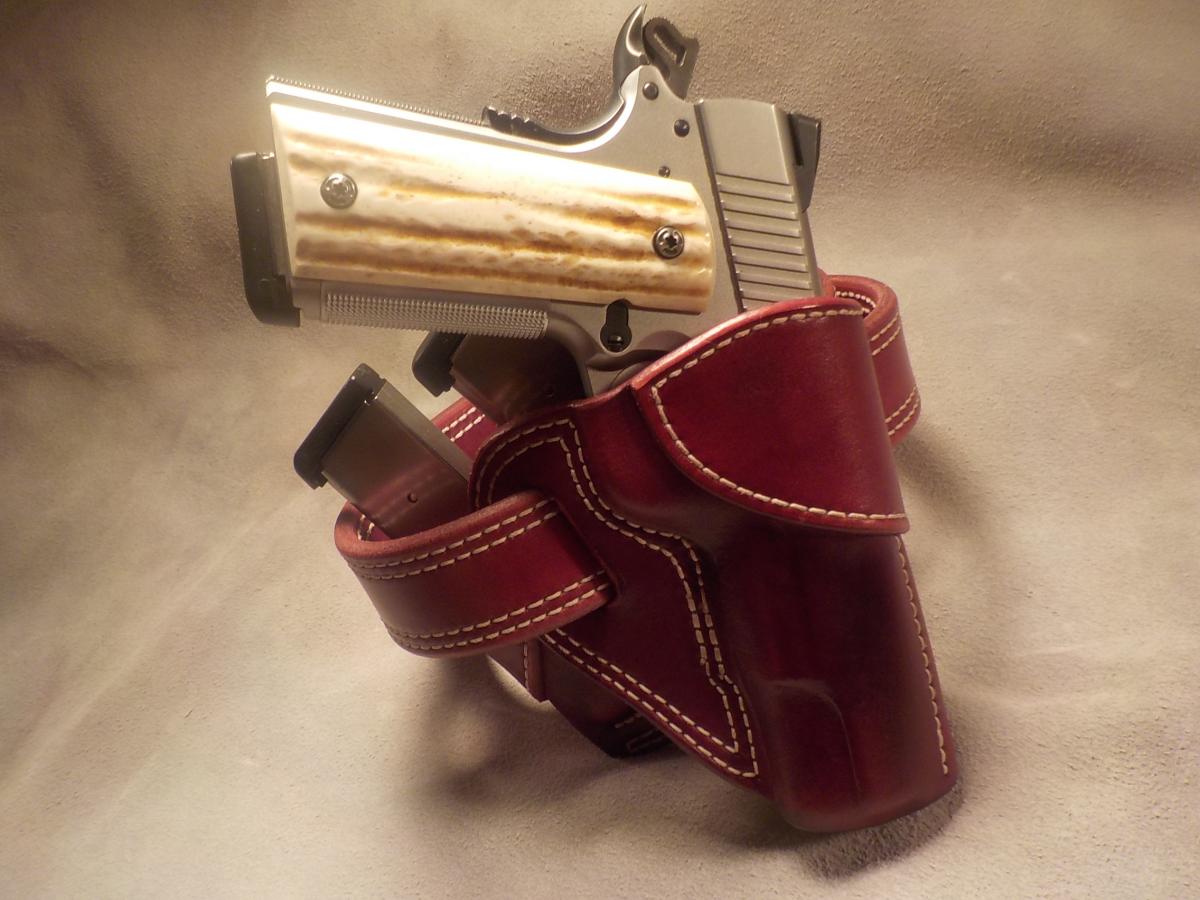
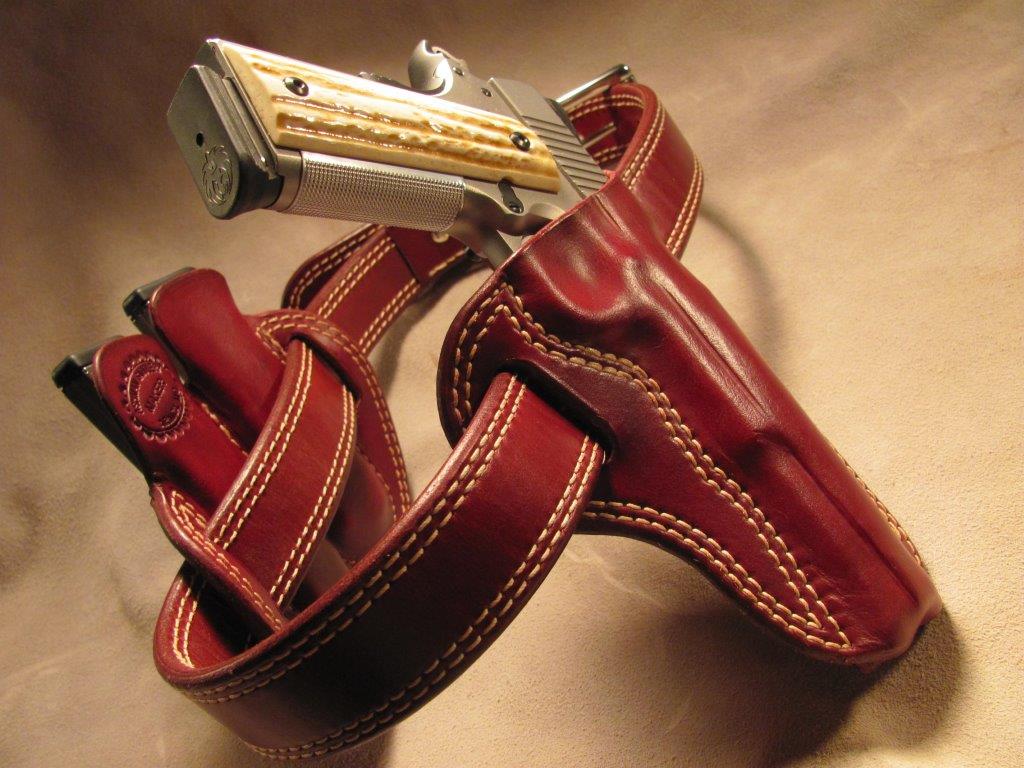
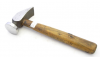
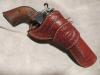
Bob, The hammer I use is a CS Osborne Shoe Hammer like the one pictured below. The method is pretty straight forward, apply the cement to both pieces. Let it dry for 10 minutes or so, or whatever the can says. Put the 2 pieces together and tap them with the hammer all over to ensure they are fully cemented together, I do this on my tooling slab and tap the liner not the finished side. Wet the fold with a sponge feathering out to the sides if I think it needs it. Fold the holster over, if the inside starts to wrinkle open it up enough that you can rub the wrinkles out. Rub don't tap, watch out for burnishing the leather. Use the hammer face or handle or a glass slicker. Once you're happy with the fold then glue the mainseam, with a welt if you're using one, and sew it up. I scrolled through the pictures I have on my computer and found the one below of a lined holster. I generally don't bother with lining them, but on this one for whatever reason I did. Unfortunately I don't have a picture of the inside but it was wrinkle free. It was lined with veg tan HO and not the pigskin like you use so that may make a difference. Smoothing wrinkles out of leather with something smooth and using contact cement are standards in western saddle making and in my opinion they transfer well to all leather working. All the best, Josh
-
I hand stitched holsters, tack and saddles for years and my method couldn't be more different than you two are talking about. I glue the main seam with a good quality contact cement, usually Masters or Barge. If you use it per the directions it will generally hold. If you have a tight fold on a thick piece of leather you may have to wet the fold or put a few hand shoe tacks in the stitch groove to help hold it. Typically the only time I've had trouble is with saddle scabbards out of 12-14 oz leather down at the barrel end, usually the contact cement just holds. Anyway, once it's glued I place one of those rubber poundo boards that Tandy sells over a vinyl cutting board and stab all of my holes straight down through the stitch groove. The leather is stable while stabbing so it doesn't try to push out of shape. I never had a problem with the cutting board dulling my awl and the 1/4" or so thickness of the rubber poundo mat makes a nice depth to stab through the back side. Once all of the holes are stabbed put it in a stitching horse and sew it up with one piece of thread with a needle at each end using a saddle stitch. When I make a lined holster the lining is solidly cemented to the main piece then treated like a single layer. If it wants to wrinkle on the fold then wet it a little and smooth it out with a smooth faced hammer. With a sewing machine everything is the same until it's glued, instead of stabbing holes with an awl and then saddle stitching it just goes tot he sewing machine. Different strokes for different folks, everybody should do what works best for them. Good luck figuring out your way, Josh
-
Check the local hardware stores machine screw selection. I would think that either a pan head or flat head screw would be fine. The "dome" on a chicago screw will probably be the same as a pan head screw but I really don't see that being an issue. When you tighten them down the screw head will suck into the leather and countersink to some degree. If you would rather have a flat head then do that, they have a taper on the underside but it will just suck into the leather and shouldn't be any problem at all. Have fun with your project! Josh
-
I haven't seen any square saddle D's that I can remember. If nobody chimes in with a supplier and you don't want to buy a complete custom set then you could just install a regular D upside down. You may have to get a little creative on the installation but it should be do-able. If you want to have actual squares custom made you can certainly do that but it doesn't come cheap. I like Josh Cain, he's made several buckles and a bit for me over the last few years and he does a great job. You can check him out at "Raising Cain Bits and Spurs" on face book. Good luck!
-
Silver Buckles And Conchos
Josh Ashman replied to Johan Scheepers's topic in Saddle Supplies, Tools & Trees
Not actual "silver" or "gold" but nickle plated brass, stainless stel and brass hardware can be purchased from Weaver Leather and Springfield Leather. Good luck finding what you're looking for, Josh -
Saddle making is more than just making a large leather project and there are all manner of specialized tools that can make it easier. I recommend getting the Al Stohlman saddle books, if you don't want to buy all 3 then at least get volume 1 and start by reading it. Repairing saddles is a great way to learn how things are done and develop your own ideas on what you think works and doesn't work. Many of the parts of a saddle are fit in place and would be difficult, if not impossible to pull off an existing saddle, lay flat, cut a pattern from and reinstall. I'm thinking specifically of the seat, it just doesn't work that way. However you could certainly use the existing piece to get you a starting place then go from there. Good luck, Josh
-
Western Holster
Josh Ashman replied to LederRudi's topic in Gun Holsters, Rifle Slings and Knife Sheathes
Looking good sir! -
Recent Projects
Josh Ashman replied to mattsh's topic in Gun Holsters, Rifle Slings and Knife Sheathes
Very nice Matt! -
Critique My Basket Weave
Josh Ashman replied to AEMcClain's topic in Gun Holsters, Rifle Slings and Knife Sheathes
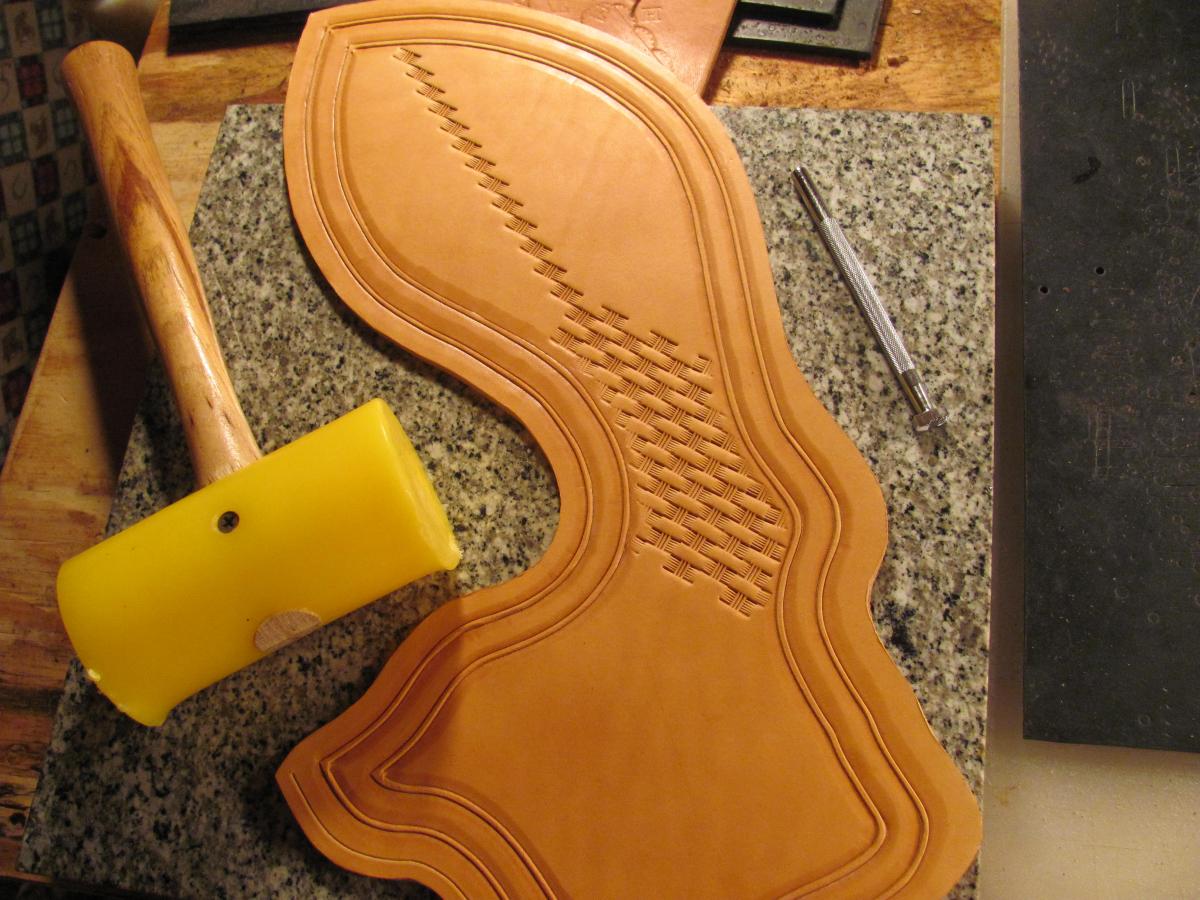
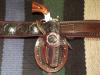
It's a good start AE! You asked for feedback so I'll offer my thoughts. Bear in mind that this is based off off my preference, and it didn't cost you a thing so take it or leave it as you see fit. I think that diagonal basketweave looks MUCH better than horizontal like you have. However to really have it look "right" the angle needs to be such that the pattern stays the same the length of the piece, if it's too shallow or too steep it will run off the end then need to start over again. Some pieces this isn't very noticeable on but on belts or anything that is narrow and long it really jumps out. I read a number of tips for how to get the angle right ant keep the pattern even and none really worked for me. What I found that does work is to make a light scribe mark down the center of your tooling area. Then place your stamp diagonal on that line with the corners right on the line, say the top left corner and the bottom right corner. Stamp that then move it ahead and line up to the previous stamp with the leading corner still centered on your scribe line, stamp and repeat. Once you've gone the whole length of the scribe start building out off this line. The picture below shows this in mid process. I do use a basket stamp with a parallel lines, yours looks like it has a bit of a curve. I also space my impressions quite a bit further away than you do, with the stamp you have you may not be able to do this. But if it sounds like something you want to try it's easy enough to get a piece of scrap and give it a go. That pretty well covers layout, my other feedback is to make sure and let your leather dry out a little after you get it wet before you start tooling, this is called "casing". Having the leather cased properly will help get crisp defined impressions instead of "mushy" ones. It also leaves the impressions darker due to some burnishing that occurs and depending on how your going to dye or finish the piece this can be pretty desirable. Looking at your cam border I couldn't tell for sure if your leather was maybe a little too wet or if it was just that the stamp you are using has really fine lines. I like cam stamps that have fewer bolder lines, again I think this helps to get nice crisp impressions. Again, it's a good start, keep up the good work! Josh
-
Wet Forming After Antique Finish
Josh Ashman replied to SLP's topic in Gun Holsters, Rifle Slings and Knife Sheathes
Hey SLP, I use the Fiebings liquid antique quite a bit and it absolutely will rub off if you try and wet mold it and it will turn clean white stitching a mess. I can get by with a quick dunk then fitting the pistol into the holster then leaving it alone to dry, but if I start rubbing my thumbs on it the finish immediately starts to rub off. If I want white stitching I apply the antique and let it dry for a day or so then rub it down good with liquid glycerin saddle soap to try and get any bleed off gone and sometimes I'll also put a coat of finish on it before stitching to try and keep them nice and white. Good luck, hopefully you can figure out a way to get what you're after. Josh -
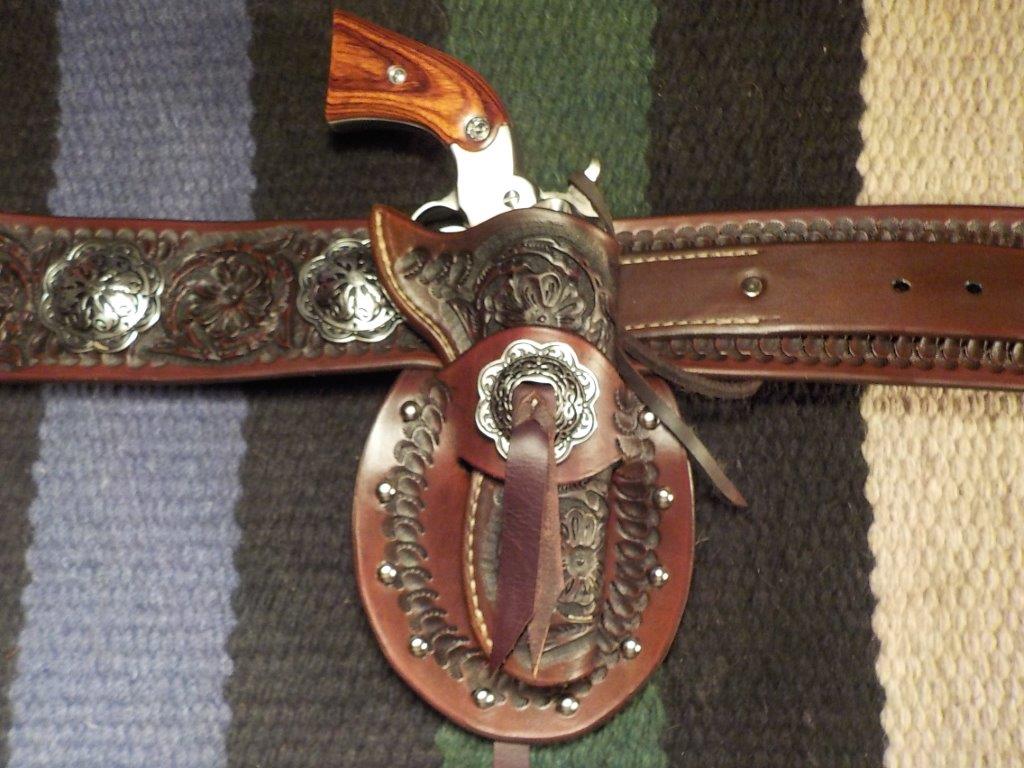
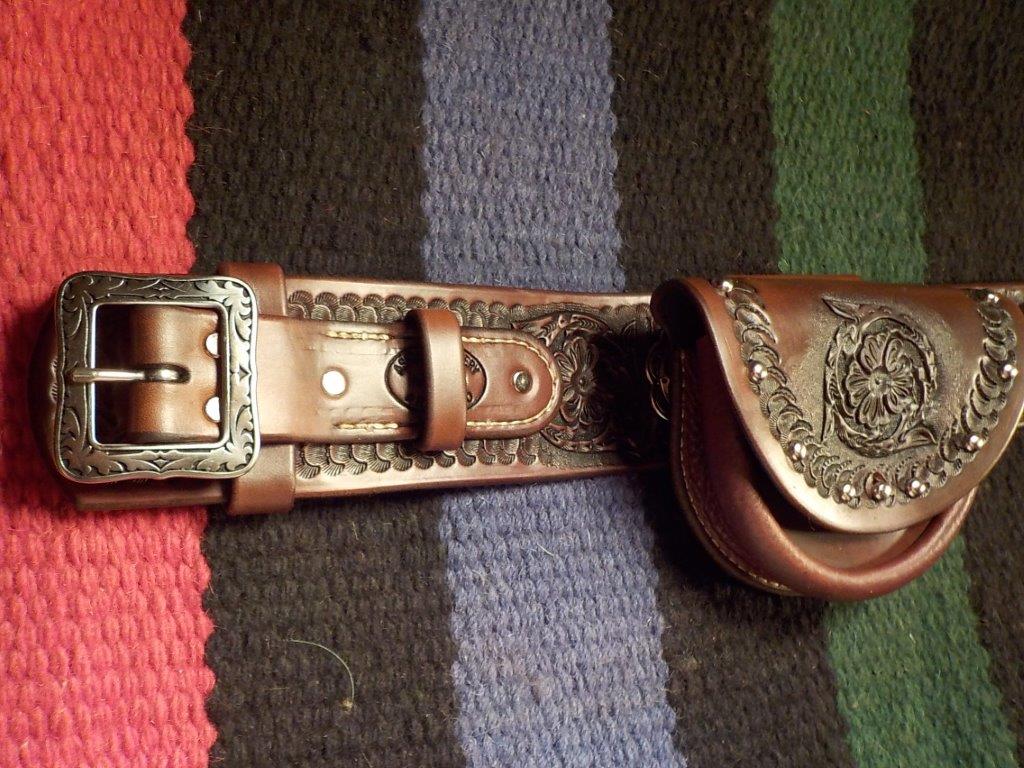
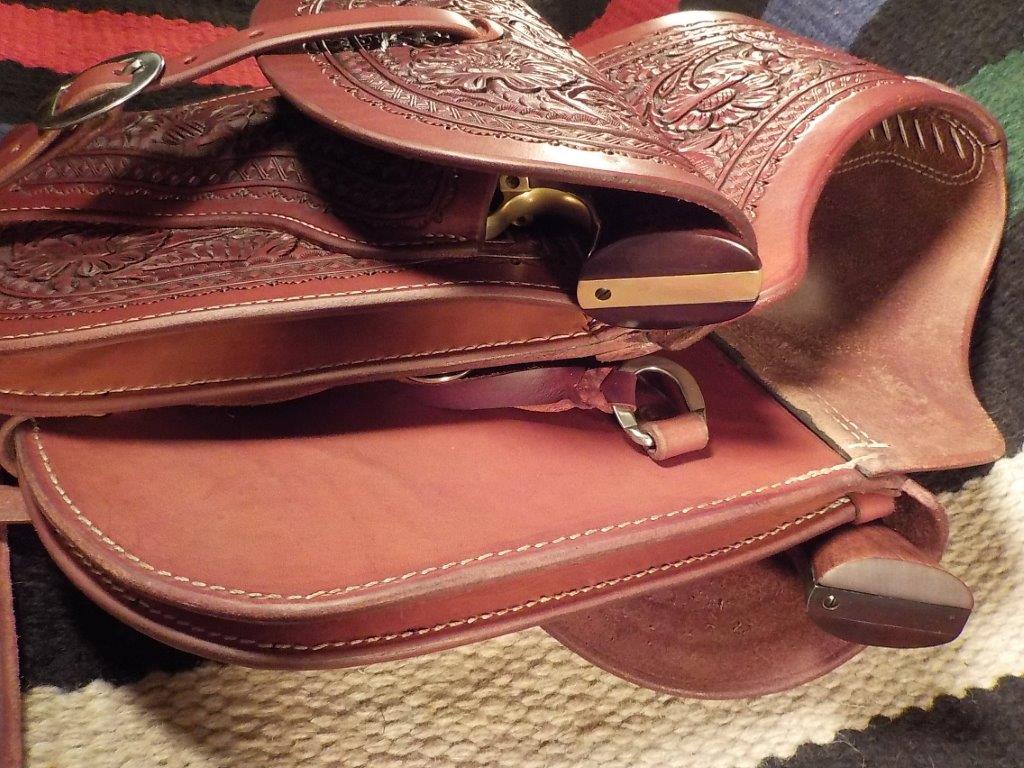
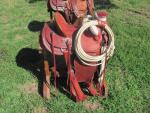
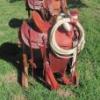
Saddle Bags & Bearcat Rig
Josh Ashman replied to Josh Ashman's topic in Gun Holsters, Rifle Slings and Knife Sheathes
Thanks everybody! -
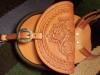
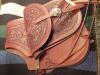
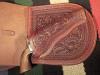
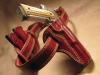
I buttoned up the bearcat rig this week and hadn't taken any pictures of the saddle bags and the little pommel pouch so I decided to share. All is HO leather in various weights except the chap leather used in some of the gussets. The saddle bags with holsters is Will Ghormley's single strap pattern with the very minor change of using 2 separate pieces for the yoke. Thanks for looking, Josh


-
How Many Holsters A Week
Josh Ashman replied to cleanview's topic in Gun Holsters, Rifle Slings and Knife Sheathes
Thanks Big Sioux! When I fessed up that I could only get one rig per week done I felt the need to share pics to show that at least they were nice looking! How in the world George and JLS put out 30 some holsters a week with the level of quality they have in them is beyond me. Have a good day folks! -
Re-Fleecing Old Saddle-
Josh Ashman replied to DIYhorsemanship's topic in Saddle Identification, Restoration & Repair
My 2 cents is that with a good pad there is usually no reason to replace the sheepskin on a using saddle. If you think you have a classic or collectible saddle I'd skip it as well since any alterations will likely reduce the value. But, that's just me. Good luck whichever way you go with it. -
How Many Holsters A Week
Josh Ashman replied to cleanview's topic in Gun Holsters, Rifle Slings and Knife Sheathes
Tooled western rigs take a full work week and I have to hustle. Plain carry rigs with a belt, mag pouch and holster takes a work week and I don't have to hurry too much. I usually put in 2 to 3 hours a day before I go to my "real" job. I have a sewing machine, which has speed up the carry gear a lot and made doing lined items much quicker everything else is done with hand tools.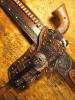
-
I've about given up on using dye to get that nice rich saddle tan color. The good news is that if you don't need the item to be super rigid a coat of neatsfoot oil and a day in the sun will pretty much get it the right color, at least it does for me. The color in your pic does look good! All the best, Josh