ReneeCanady
-
Posts
528 -
Joined
-
Last visited
Content Type
Profiles
Forums
Events
Blogs
Gallery
Store
Everything posted by ReneeCanady
-
Running a needle right into the cuticle hurts.....I don't care who ya are

- Show previous comments 11 more
-
its a good job my last project was in red chrome tan - must have lost nearly a handful whilst stitching it together!
-

Glad to see I am not alone in this matter :0
-

it also hurts when you sew materal. And boy do i KNow that one and no you aren't the ony one to do it Renee
-
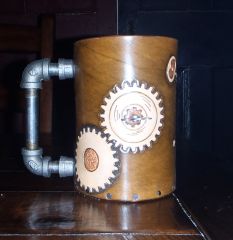
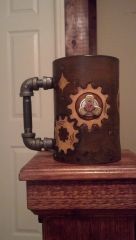
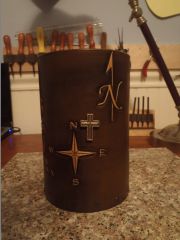
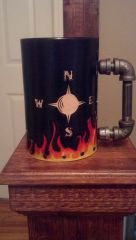
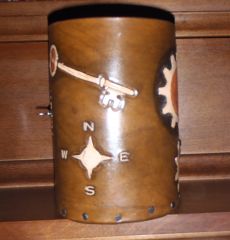
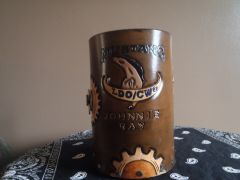
steampunk leather Mug tankard with spinning propeller
ReneeCanady posted a gallery image in Gallery- Our Leatherwork
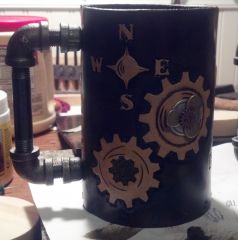
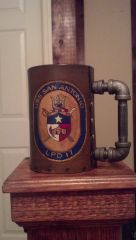
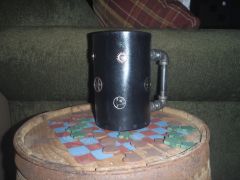
From the album: Leather mug tankard
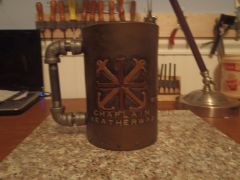
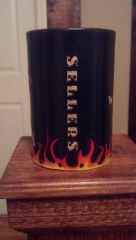
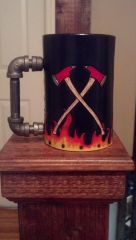
All of my custom mugs are made with the awesome pipe fitting handles, high quality vegetable tanned leather, wooden bottoms, eco friendly dyes, and lined with an FDA approved resin. Mugs are great for your favorite beer or coffee. Hand crafted by Renee Canady. Please visit and "like" www.facebook.com/alteredleather© Custom made and designed by Renee Canady at Altered Leather
-
From the album: Leather mug tankard
All of my custom mugs are made with the awesome pipe fitting handles, high quality vegetable tanned leather, wooden bottoms, eco friendly dyes, and lined with an FDA approved resin. Mugs are great for your favorite beer or coffee. Hand crafted by Renee Canady. Please visit and "like" www.facebook.com/alteredleather© Hand crafted and designed by Renee Canady at www.facebook.com/alteredleather
-
From the album: Leather mug tankard
All of my custom mugs are made with the awesome pipe fitting handles, high quality vegetable tanned leather, wooden bottoms, eco friendly dyes, and lined with an FDA approved resin. Mugs are great for your favorite beer or coffee. Hand crafted by Renee Canady. Please visit and "like" www.facebook.com/alteredleather© Custom made and designed by Renee Canady at Altered Leather
-
From the album: Leather mug tankard
All of my custom mugs are made with the awesome pipe fitting handles, high quality vegetable tanned leather, wooden bottoms, eco friendly dyes, and lined with an FDA approved resin. Mugs are great for your favorite beer or coffee! Hand crafted by Renee Canady. Please visit and "like" www.facebook.com/alteredleather© Custom made and designed by Renee Canady at Altered Leather
-
Very nice! I feel silly now. I just made a bag last week and fought with 8-9oz veg tan for the body and 5-6oz gussets. Good to know that a lighter weight will hold up
-
Love these!
-
Maybe you are on to something there!
-
Well my 2 cents here would be that the "blackjack" was already predyed leather when it was bought. I only use veg tan, but I did get some kind of grey leather for Christmas the year I got all my tools and played with it for about 2 seconds before I realized I liked the veg tan much better. With that being said, when I tried tooling the grey leather I got it didn't work so well because not only is it predyed or but it also has a slight finish on it. The finish almost makes casing the leather impossible. If you can't case it the tooling will not pop like it should and when I used the beveler with much more force than I would have to with a peice of veg tan it gave the same look at the photo for "blackjack". Almost as if the color you are calling white is actually what the inner part of the predyed black leather looks like (like when I hit the grey leather it was lighter in the area that was beveled naturally). One other reason that makes me think this is because the beveling on "blackjack" is rough. You shouldn't see all the tool marks like that...meaning I think they hit it pretty hard to make the impressions. Again this is all my opinion, I can't be certain.
-
Hey there Widget, I see you are from my town
-
Very nice....I'd say there was some patience going on with that lacing!
-
I hear that! I remember Christmas of 2011 when I got my tools as a gift I sat there thinking "and what am I supposed to do with these" lol! I now think it was a much better give than a vacuum and I have spent countles hours online looking like this
-
HAHA! I seriously just laughed out loud on that one.
-
Thanks H Factor. Cyber....this is why I keep you around! One of my leather working idols for sure
-
Thanks guys! Cyber....after our talk I actually laughed because that is the FIRST thing I say when I visit local farmer's markets and such when I see that ALL their stuff is stamped vs tooled. I always say "nice of them to have put the time in that one" LOL Then that's exactly what I did. Then again, the guy at the farmer's market is rolling in money because people just don't "know" there is even a difference. Hopefully with all the workers out there we can change that! For instance, the renn faire guys are making SOOOO much money on braces, pouches, belts etc...that are pre-dyed, not finished, not edged, no grommets, no tooling etc.. and yet they are the ones that will be there for years making the money lol
-
Latest Off The Bench
ReneeCanady replied to BondoBobCustomSaddles's topic in Saddle & Tack Maker Gallery
I don't know anything about saddles either but it looks awesome to me! Great detail and it fits nicely! I have to admit the mules haircut has be cracking up. Marine mule -
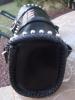
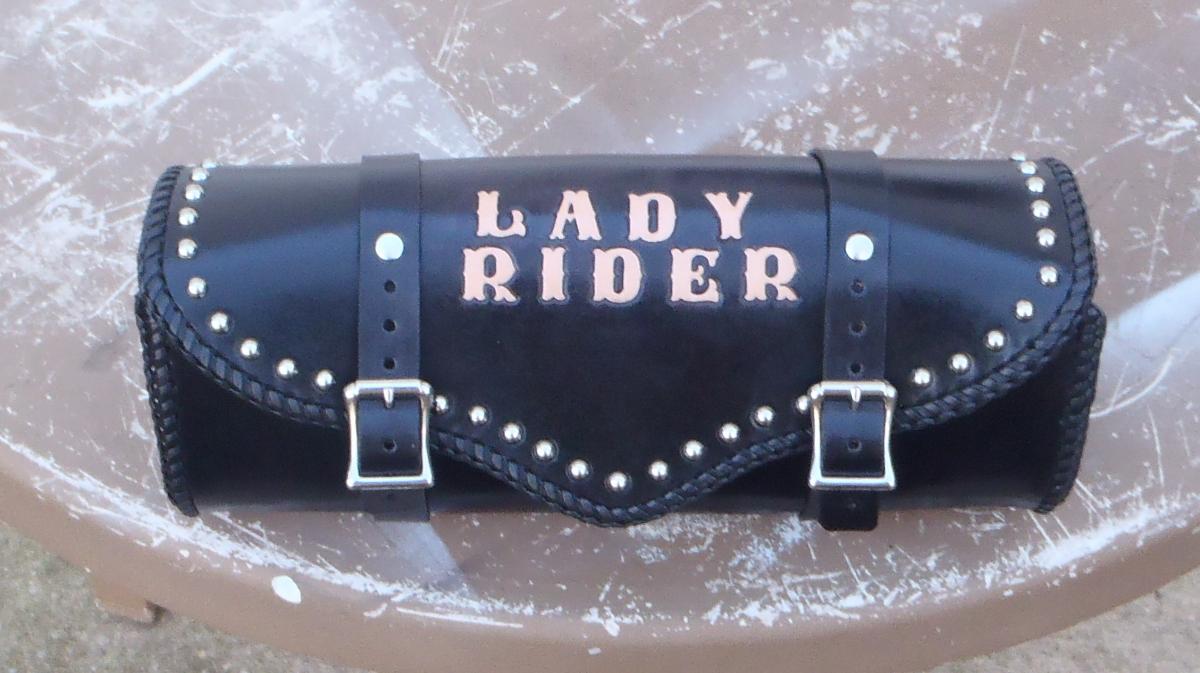
This was a custom order from a girl I country line dance with. I had to make a pattern for this because I don't have one. Talk about a job that made me think. She gave me measurements of 12" wide, 5" high, and 2 1/2" deep. I was able to make it 12" wide, 5" high, and 3 1/2" deep.I made sure that was ok with her before I moved on. I just didn't think it looked right only 2 1/2" deep anyway. Thankfully she didn't NEED the 2 1/2" deep, it was just a random measurment she pulled offline. I should have used custom lettering, but I didn't Either way I am happy with the final result at my first attempt.