-
Posts
528 -
Joined
-
Last visited
Content Type
Profiles
Forums
Events
Blogs
Gallery
Store
Everything posted by ReneeCanady
-

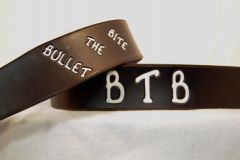
Bite The Bullet Guitar Strap
ReneeCanady commented on Cyberthrasher's gallery image in Gallery- Our Leatherwork
- 2 comments
-
- guitar strap
- hk leather
- (and 3 more)
-
My two cents.....I have only been leather working about a year and Tandy pretty much talked me into the Eco Flo. I have used it since. However, I have noticed things like cell phone cases and certain belts I have made are now fading really fast. I don't care what anyone says about antique gel LOL I actually use the med brown gel as my dye and it holds up nicely and is the BEST shade of brown to my liking. I have been curious to try the fiebings for a while now so I tried it the other day. I was very impressed at how it actually soaked INTO the leather which is not something I was used to seeing. I think that once I figure out the process of making the mixute of dye vs alcohol to make it to color I want, I will be in love with the fiebings as well as the gel.
-
From the album: Leather mug tankard
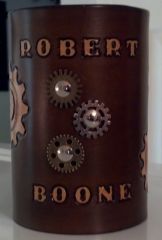
Leather mug with spinning gears.-
- usn gift
- altered leather
- (and 6 more)
-
From the album: Leather mug tankard
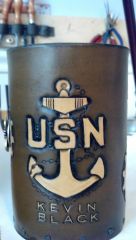
This mug was created for a USN officer. It is made from 8-9oz vegetable tanned leather, pipe handle, wooden bottom, resin lining, and even has a spinning propeller.-
- resin lined mug
- navy anchor
- (and 8 more)
-
Looks good! Wonder how many times that will scare you walking into your LW area in the dark lol.
-

Lining Tankards With Brewers' Pitch
ReneeCanady replied to Toadflax's topic in Leatherwork Conversation
I don't remember the guys name but he is on this forum and you might be able to find him under a "leather tankard" search. I know he is really good with the mixture of beeswax and pitch. I have never used pitch as I said, I use epoxy resin now, but I know if you get the mixture of pitch and wax right it makes a nice lining. I would check the flash point of beeswax before I played with combining the two and raising temps for the pitch. Just a thought. -

Lining Tankards With Brewers' Pitch
ReneeCanady replied to Toadflax's topic in Leatherwork Conversation
http://kimmulhall.vpweb.co.uk/Leather-Cup-Project.html This is the video I watched to make my very first mug about a year ago. Thought I'd link it to you just to see in part 3 how he paints on the wax and bakes it so it gets absorbed. I know most that do the beeswax and brewers pitch use a 50/50 mixure. I personally have never used the pitch, but have seen some really nice mugs that have been made with it. -
Good call! I think you might be on to something there
-
Well if I had to guess I would say that they were just regular gussets and are folded in instead of out. THEN, I zoomed in and it doesn't look like there are any edges folded in, it looks like a plain oval. With that being said they have some type of lining attached to the inside and holding it all together with the lining. I doubt they are really being held on by those two stitches and glue. Well I hope not any way. Here is a pic of one I made and thought it was the same type except they reversed the way I have the gusset folding out and stitched. You got me lol.
-
Oh God, I wouldn't even know where to start with something like that so I give you kuddos for even accepting the challange first of all lol. I think it came out really nice, probably better than it ever was.
-
I think it's really neat. You should color it and eventually make it part of a handbag
-

Floral Award Bronc Halters
ReneeCanady replied to Double U Leather's topic in Saddle & Tack Maker Gallery
Great job Double U! They are all fantastic!! -

Custom Motorcycle Seat Cover And Accessories
ReneeCanady replied to TaurusSeats's topic in Motorcycles and Biker Gear
Ah thanks! That is really nice! The circles were cool before you showed what the intent was and now they are awesome lol!- 19 replies
-
- motorcycle seat
- motorcycle accessories
- (and 3 more)
-

Custom Motorcycle Seat Cover And Accessories
ReneeCanady replied to TaurusSeats's topic in Motorcycles and Biker Gear
Genius with the purse idea! I love the bags and the seat. All look very clean, nicely stitched, and have a bit of attitude with them. Well done! One question that has been killing me and I see it is on your seat there. The piping on the rear of the seat....what is that? I'd like to try that with a western style handbag, but I don't even know what it's called. Probably not piping lol.- 19 replies
-
- motorcycle seat
- motorcycle accessories
- (and 3 more)
-
Cuir bouilli is the term for using hot (boiling) water for molding leather, and WILL harden the leather. If that is the result you want you can take it a step further by adding a 50/50 mixture to it of beeswax/neatsfoot oil and bake your project at your ovens lowest temp for very short periods of time. It all depends on how hard you want it and what type of leather you are working with. I almost always use veg tan. With this method your leather WILL shirnk as well. Same rule, depends on the leather. Personally, I find room temp water to be perfect and gives hardly any shrinkage at all. I make leather leather bags all the time and it makes the 5-6oz leather have a decent feel, but the 8-9oz leather has an amazing feel once dried. I also still use neatsfoot oil, dye, finish, and hit it with aussie as well. May be over kill, but hey it works LOL
-
I use room temp water also for veg tan.
-

Dying/painting White + Blocking Out
ReneeCanady replied to Milton Penflick's topic in How Do I Do That?
Cyber pretty much summed that one up lol. I use resolene on my acrylics BUT I also use the medium brown antique gel as a dye. Weird and expensive I know, but I absolutely LOVE the shade of brown I get from it soo.....I did attempt it once on my own personal fairie mug with black water based dye to see if that would work by chance and needless to say I call her my dirty dirty little fairie mug ROFL *insider* on that sorry. Anyway, you can look at my Facebook leather page and see the results of using the antique as a dye over the resolene. MOST of the mugs on there and the butterfly purse were done as I explained above. You can also see the fairie mug on there to see the difference with the water dye vs the rest being done with the antique. -
I don't know about most craft stores, but our Joann Fabrics lets us use 3 coupons per checkout. They are ALWAYS good for finding atleast one online or you can sign up to get them via email AND regular mail. I get Joann coupons out the ears. Their patterns ALWAYS seem to be on sale and then take in your 50% off coupons. The only bad thing is that they are not really sorted, you have to look through a ton of books to find what you want and then find them in the drawers. One really good thing is that you usually get more than one style per pattern pack.
-

Dying/painting White + Blocking Out
ReneeCanady replied to Milton Penflick's topic in How Do I Do That?
LOL No sarcasim in that comment sorry. I just ment that I like the colors together I made an armor set last year (before I had a clue of what I was really doing) with acrylic paint on the edged. It's still standing strong, but the trick I am sure was the multiple thin coats as cyber said. The latex, I have seen many products (lots from cyber) and it does seem to be the best result. I haven't tried it yet, but certainly plan to. -

Dying/painting White + Blocking Out
ReneeCanady replied to Milton Penflick's topic in How Do I Do That?
Well, first I would like to say that I like the white on the black lol. As for my two cents on block out, I don't like the product at all. I have used super sheen, resolene, and block out. For me, the resolene is the best. I use two coats sometimes 3 to just be sure. I let each coat dry completely before apply the next. -
I also sometimes use the daubers or a sponge cut up into little squares. The little squares make it easier to handle with less of a chance to go off the edge.
-
I am no pro but my 2 cents would be to ask if this is a photo after the water is dried or not? If it is dry in this photo it looks to me like it is just hitting more than the edge when you apply the beeswax or paste. I don't know. That's what my edges look like when it is still wet, but goes away when it has dried.
-
Here is the link to the class. http://www.shoemaking.com/shoemaking-courses/moccasins/ Now it's time to go check out your pics of the process I love them!
-

Newest Fire Suspenders
ReneeCanady replied to Fd3615's topic in Purses, Wallets, Belts and Miscellaneous Pocket Items
Thanks I really like them a lot! -
I think they came out really nice! I would also like to see more pics when ever you get a chance. I actually planned on going to Oregon this summer to take a class on how to make these boots, but my kid's HS graduation falls during that same week. It would have been a nice trip too I do not fly and planned on driving from DE to OR lol. However, you have me tempted to try them on my own after seeing what a great job you did.


