


ReneeCanady
-
Posts
528 -
Joined
-
Last visited
Content Type
Profiles
Forums
Events
Blogs
Gallery
Store
Everything posted by ReneeCanady
-
The Big Swan, you viewed these today? I have tried a few times to view the videos Chief posted and also the link that St8line posted and keep getting a broken link. I'll have to try again using another browser.
-
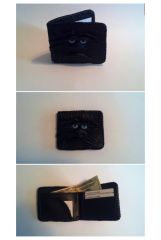
From the album: Handbags, Pouches, and Hip Bags
This wallet is made from fine Italian leather, 3 oz veg tan leather as support backing, and lined with pig skin. This wallet was inspired by my husband and I's 4th Anniversary. Every year we dress up in themed costumes to match the traditional gifts. This year it was "Fruit and Flowers". The only thing we could come up with that wasn't really girly was a druid ranger and a wood elf fairy. I needed somewhere to carry my cellphone and wallet so I created a handbag much like this. Now for Valentine's Day I have made him a matching wallet.© Altered Leather made by Renee Canady
-
I too use my ruler when I am doing lightly colored items and don't want the guide line to show. I usually put my little anvil on the ruler so it doesn't move lol.
-
I don' t even know if I can actually explain this but I will try lol. The guide line is an amazing thing. I always stamp the first letter and pretty much leave it where it is with the stamp head in it so I can use the side of the first letter head as a guide to make sure the next is straight vertically. Now, when lining it up horizontally, use your guide line that you drew to begin with not the previous stamp. It will be slightly off if you use the stamp because the first stamp is now an impression and has basically pushed the leather out/down deforming that spot. I notice that I have to move the stamp slightly up from the previous...SLIGHTLY. This isn't always the exact case either. Mainly use the first stamp as a guide to keep the next straight vertically and use you guide line for the bottom of the stamp for horizontal guide line. Sorry I am so bad at explaining lol.
-
Ah cool.
-
Of course now that I moved to DE lol
-

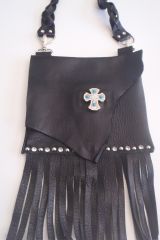
Leather Biker Hip Bag with Fringe
ReneeCanady commented on ReneeCanady's gallery image in Gallery- Our Leatherwork
 Thank you both very much!
 -
From the album: Handbags, Pouches, and Hip Bags
This can be worn as a shoulder purse or a hip bag. It comes with a removable mystery braided leather shoulder strap. Magnetic closure. -
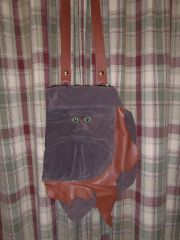
From the album: Handbags, Pouches, and Hip Bags
This treant face bag can be worn as a shoulder bag or may be worn around the waist to complete your renaissance garb!© www.facebook.com/alteredleather
-
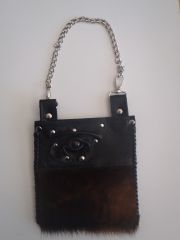
From the album: Handbags, Pouches, and Hip Bags
This biker hip bag can be used as a small clutch purse or you may remove the chain and hook it to your belt loops to be used as a hip bag.© www.facebook.com/alteredleather Renee Canady
-
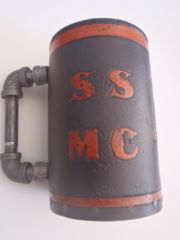
South Side Motorcycle Club Leather Mug
ReneeCanady posted a gallery image in Gallery- Our Leatherwork
From the album: Leather mug tankard
Custom leather mug for the SSMC.© www.facebook.com/alteredleather
-
From the album: Leather mug tankard
-
From the album: Leather mug tankard
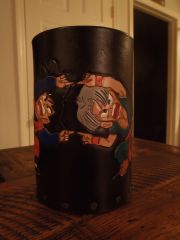
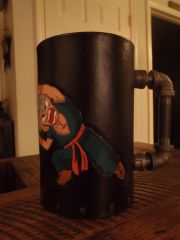
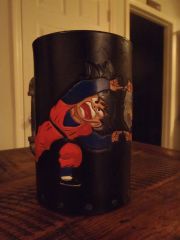
Dragon Ball Z Fusion leather mug© www.facebook.com/alteredleather Renee Canady
-
From the album: Leather mug tankard
Custom made leather tankard for a Dragon Ball Z fan in Australia. This mug measures 6" tall and 4" round© www.facebook.com/alteredleather Renee Canady
-
Nicely done Kevin The best I can answer why no one comments is I think people tend to comment on the things they are in to and best fits what they like. It's what I told myself when I first started leather work anyway. Sometimes I would spend weeks working on one item and couldn't wait to upload it for a few "pats on the back" only to see that I had something crazy like 200 views and 1 comment lol. I think we all know this feeling one way or another. Keep up the good work
-
Would you mind telling where you got the pattern for the neck piece? Gorget or something like that I believe it's called lol. I REALLY like the looks of that.
-
Nevermind it was a link to his website to purchase the pattern. It's there if you want it I suppose lol. Doubt you would get it in time now though
-
Someone just posted this in the gallery yesterday did you see it? I think it was posted by Jacket Potato. Going to see if I can copy the link.
-
It would probably be cheaper for him to order the right size hole punch and do it himself? Really for a one time use he wouldn't need a mallet or a poundo board. He could just use a hammer and a cutting board lol. He won't need the tool ever again so.....
-
Call Tandy or SLC, for some reason I think I have seen the metal part you would use to do this in the Tandy store last time I was there. Maybe they have some kind of tutorial/kit thing? Heck, I hope it wasn't at Joann Fabrics that I saw it, possible. If it was at Joann Fabrics they would not have a tutorial on how to use it, but if you had it in your hand maybe you could figure it out *Shrug*. Sorry I couldn't help with this.
-
If they look like itsy bubbles, I have had this happen as well. Mostly get stuck in the beveled areas. I have come to find out it was done by a cheaper sponge as Cyber posted. Infact, it happened so badly to me that I have never used a sponge again. Not only were there little bubbles but also where every bubble was it looked dirty. I either now use a nice brush on technique and in most cases if I can I use my airbrush. A TINY bit of alcohol on a qtip worked for me on some of the areas, but I couldn't get them all off. Then I made an even bigger mistake, I forgot to reseal the resolene that I basically scrubbed off. I lived and learned I guess LOL.
-
Paint: Keeping Stain Color From "bleeding" Through
ReneeCanady replied to BrrlRacerJunkie's topic in How Do I Do That?
I sent you a pretty long email lol. If you seal the leather and then paint it, wouldn't the paint just peel off? Especially on something that needs to be flexible like spur straps and bracelets? -
The men's armor set is veg tanned leather dyed black. The chest is made of 4 pieces of leather on each side. The bottom of each piece was not dyed ( the strip), it was oiled an tanned in the sun. Then the entire suit was "finished" at the same time. The female armor set is also veg tanned leather and was dyed completely black and then I used acrylic leather blue dye on the edges. The design on the female leather armor was don't with paint markers that just happened to match perfectly to the light blue acrylic dye.
-
The way Dwight explained it is exactly how I did mine. The armor on my husband is thicker though. His is about 8-9oz. The leather set on my daughter is about 5oz.
-
My First Project
ReneeCanady replied to Nomadiccorpse's topic in Gun Holsters, Rifle Slings and Knife Sheathes
Well I think you did really well especially for your first time ever! If you stay with the art (and you should) you will slowly find out how to do other things like finishing edges. You will find yourself buying a few tools for each project you want to do and then before you know it you have more leather tools in your house than Tandy carries lol.