-
Posts
528 -
Joined
-
Last visited
Content Type
Profiles
Forums
Events
Blogs
Gallery
Store
Everything posted by ReneeCanady
-

Cowboy 3200 Belt
ReneeCanady replied to Jess Jones's topic in Purses, Wallets, Belts and Miscellaneous Pocket Items
Thanks Francesco for the information! -

Cowboy 3200 Belt
ReneeCanady replied to Jess Jones's topic in Purses, Wallets, Belts and Miscellaneous Pocket Items
I agree! The second I saw this post I Googled the machine. It's actually about half the price of some of the machines I was looking at last year. This one is so tempting. -

Cowboy 3200 Belt
ReneeCanady replied to Jess Jones's topic in Purses, Wallets, Belts and Miscellaneous Pocket Items
Nice job! -
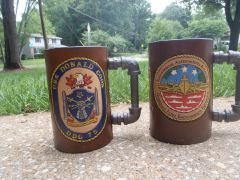
From the album: Leather mug tankard
Two more leather mugs for a US Navy officer have been delivered today!© Made by Renee Canady at Altered Leather
- 4 comments
-
- leather mug
- leather tankard
- (and 6 more)
-
I have been to the one in Allentown before.
- 10 replies
-
- new
- pennsylvania
-
(and 1 more)
Tagged with:
-
Welcome! I do believe there are three Tandy Leather Factories in PA. Allentown, Harrisburg, and Pittsburgh.
- 10 replies
-
- new
- pennsylvania
-
(and 1 more)
Tagged with:
-

Punisher Sportster Rear Fender Bib
ReneeCanady replied to Cyberthrasher's topic in Motorcycles and Biker Gear
Love this piece! Awesome job all the way around. The black dye is nice and even, the black/grey shading makes it all come to life, and the lace is on point. Well done! -
LOL No problem! I went through the same thing when I was researching armor. Finally I stumbled by that name.
-
Nice work and it is certainly original. Lederrudi, use the term cuir bouilli when you search this site. It is what the process of boiling leather is called. There are lots of interesting things here that people have made using this process. It ranges from small items all the way up to full armor sets.
-
- 2 comments
-
- custom leather mug
- custom leather tankard
- (and 4 more)
-
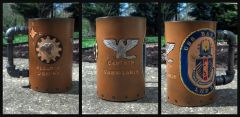
From the album: Leather mug tankard
Leather mug made for a Captain aboard the USS Bataan.© Made by Renee Canady at Altered Leather
- 2 comments
-
- custom leather mug
- custom leather tankard
- (and 4 more)
-
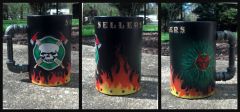
From the album: Leather mug tankard
Custom leather mug made for a Navy firefighter aboard the USS SAN ANTONIO.© Made by Renee Canady at Altered Leather
-
- leather mug
- leather tankard
- (and 8 more)
-
Love it! Well done!
-
Vintage C.S. Osborne draw gauge marked Newark, NJ.. This tool could use a good bath, but I am not going to attempt that It also still has a blade on it. The blade is dull and I don't know if it's the original blade or not. Selling it for $110.00 with free small flat rate shipping within the USA. I will have to take the tool apart to fit it in a flat rate box. PayPal only please.
-

To Those Who Personalize Belts On-Site At Shows, How Do You.....
ReneeCanady replied to Tallbald's topic in How Do I Do That?
Wow, Troy, that's pretty interesting! I will have to try this some time. -
Yep. Many resists out there to do the trick. I have had bad experiences with the product called Block Out. I personally use Resolene/water 50/50. Some others use Wyosheen, Super Sheen etc..
-
The light color you see on the projects is the natural leather with a finish on it. The antique (stuff in the grooves) is more than likely med brown antique paste by Fiebings or Eco Flo antique gel.
-
Ray, It makes me sad to read this post Ray. You are such a sweet guy and I would really hate to see you leave I understand paths in life take us in different directions, but I hope you stay on the forum to chat with us once in a while. I hope all is well on your end! I will keep you in my thoughts as always! Renee
-
I just did a quick google search and it actually brought me back to this site lol. Here is a link to a nice pattern a member here posted. I would contact him first, he may have more http://leatherworker.net/forum/index.php?showtopic=52011
-
Thanks again Leela! Afro, I am confused by what you mean how? Like how are the sides connected to the bag? If so, you have to gouge the gussets so they fold and meet with the body of the bag. Contact cement them in place first and then you can stitch without trying to hold it together. It looks like one piece of leather and maybe that's why you are confused. It's not only one piece, Leela did a great job finishing the edges. As for the how to saddle stitch, there are many tutorials out there to learn from. This is one of my favorites to view on youtube and he is a member here as well.
-
I wish I would come by an estate sale like that. They would have a hard time getting me to leave lol.
-
That's a pretty good deal! I just ordered my maul a few weeks ago
-

New Belt For Myself
ReneeCanady replied to Tim Schroeder's topic in Purses, Wallets, Belts and Miscellaneous Pocket Items
Very nice Tim! I love everything about the belt.


