-
Posts
444 -
Joined
-
Last visited
Content Type
Profiles
Forums
Events
Blogs
Gallery
Store
Everything posted by Reegesc
-
Yeah that does help. $25/spool is a terrific price.
-
Just giving this "thread" a bump to the present day and adding my two cents. The Chinese Poly Braided thread is an exceptional value but it is not quite as good as Tiger Thread. It gets reasonably close, however, for around one tenth the cost. Because I like Tiger Thread so much, I don't mind having to pay their monopolistic prices for a single spool. $65 for a 500M spool of 1mm white lasts me a long time (been about one year on the same spool) but it sure would be nice to have it in multiple colors. That’s when you start looking for alternatives because $65 x 10 colors ain’t happening. Sure, you can buy smaller quantities wrapped around squares of cardboard from Etsy and eBay vendors. I went that route and didn’t care for it because I ran out too quickly. I like having a big spool of whatever color I have stock and not be concerned about running out midway through a project which happened on several occasions. That’s where the Chinese thread comes in. At $4 a spool (260M), you can have 20 colors and not break the bank. The two major differences as best I can tell is the Chinese thread is not as thick as Tiger Thread and is not as heavily waxed. You can add wax yourself, but it’s not not quite the same as thread that has been saturated in wax as part of the manufacturing process and where the wax is evenly distributed throughout the fibers yielding a nice plump waxy thread. Not a biggee for some, but it is a noticeable difference to me. I closely examined the threads under a magnifying glass and they appear to be flat braided exactly the same way with neither one being a looser braid than the other. I frayed the ends and splayed out the threads -- both appear to be similar gauge threads. They are tiny little buggers so don’t hold me to an exact count but the Chinese looked to be approx 16 thread count whereas the Tiger Thread was approx 24 thread count. That would certainly explain the difference in thickness between the two. All things equal, a higher thread count would yield a stronger thread, but the Chinese thread appears plenty strong as is. All in all I rate the Chinese Poly Braid an 8 (Silver Medal) as compared to Tiger Thread at 10 (Gold Medal). There are a number of sellers on eBay all selling the same product. Search “260M Sewing Leather Waxed Thread” and you’ll find multiple listings. Although this link won’t last long, this is who I bought from - sanheshun - @ $4.15/spool for 1mm thread and that included shipping (two weeks shipping time).
-
Tooled & Handpainted Dog Collars
Reegesc replied to Beret's topic in Collars, Cuffs, Leashes and Leads
Look at the brain on Beret. Talented, smart, and probably good looking too! You're more impressive at every turn. ;-) -
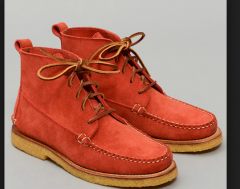
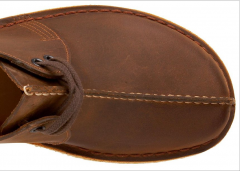
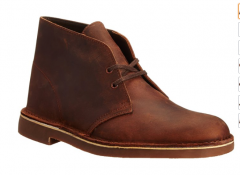
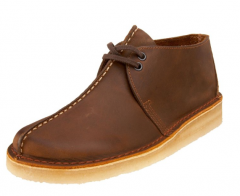
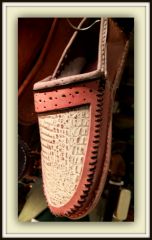
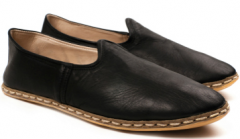
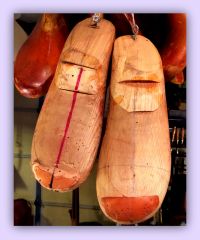
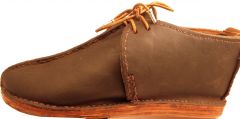
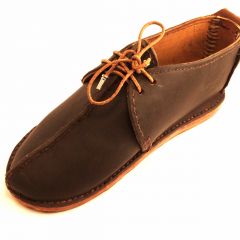
This is a repost from the Flip Flops Tutorial This is very long comment that was tacked on to the Flip Flops Tutorial that ventured off into Sandal Making and Shoemaking. While this isn’t a tutorial in its own right, there’s enough useful information here that it merits a stand alone topic with it’s own search tags for those looking for tips on making men’s sandals and men’s casual shoes. There’s so little info on this topic that every little bit helps and here’s some sourcing tips and a few how-to’s from someone just six months ahead of you on the learning curve If you don’t mind the trial and error method and can figure stuff out on your own, you can teach yourself as I am. It is completely doable for the intermediate level leatherworker. There’s no new techniques to master nor specialty tools to purchase. If you haven’t seen or tried your hand at making a pair of flip flops, start there first. Make at least a couple two three pairs for jumping into this. What Tutorial? I was asked whether I had made any progress on a tutorial I had promised some months back but never materialized and that’s what prompted this lengthy post. -------------------- You mean the Sandals Tutorial I promised last August? Where I said: “I’m working on a tutorial for these and one other model of Men’s Sandals, plus a minimalist, or “barefoot sandal”, as a companion to the Flip Flops Tutorial. Should have a download posted in a few days in the tutorial section.” That post? Where I promised a tutorial but was really just showing off this pair of sandals I had made? No Sir, I have not made any progress whatsoever. What happened was I went through the pics I had taken and realized they weren’t going to work. Oddly, the thing that the tutorial is about is not the thing you make for the tutorial. You have to decide on the front end what is you’re doing. Making sandals or making a tutorial? If it’s a tutorial, then you make a series of process steps and you think in terms of process steps. That meant I had to start all over, which is no problem if you are really motivated to make a tutorial. I was more motivated to move on to shoemaking. I still might make that tutorial and even one on Shoemaking. Who knows? I'm a novice at all of this and I’m just self-teaching my way through by trial and error. But listen, if you can make flip flops, you can make sandals. And if you can make sandals, you can make shoes. Tell ya what, here’s a Cliff’s Notes version of the Tutorial I was going to make. Sandal Making Sandals are not much different than flip flops; heck, flip flops are sandals. The key bit in either case is securing the upper to the lower using "sew tabs" that are folded under the insole and are stitched down. I came up with a variety of approaches on how to do this. - Eliminate the fold tabs altogether and stitch the "stub" straight down to the insole. It’s a really cool look with the stitches exposed but requires that your stitches are all lined up perfectly. - You can fold inwards, you can fold outwards. - You can expose the fold on top of the insole, again either inwards or outwards (the latter being a lot easier of course). - The Elevator Approach — Raise the insole into the upper and keep it suspended while you stitch down to the midsole, Then lower the insole and glue down. Provides for a really sleek look not having stitches exposed but with all the strength benefit that stitching provides. - Side Stitched. Here you notch the insole on the side, just enough for the tab to fit flush to the insole and at the same angle where it meets the insole. You use a running stitch at the same angle (for looks) to secure. The stitches are exposed on the side, so again you have to get the stitches symmetrical for a nice look. As of the uppers, there are further options using buckled straps which are particularly useful as backstraps to really secure the sandal to your foot and an absolute must if you intend on running with them as in the case of the “barefoot sandal” that is so popular now. Shoe Making There’s not much difference between sandal making and shoemaking to tell you the truth. I’m referring to Men’s casual shoes, not that mind-blowing bespoke stuff. I’m not saying it’s easy, however. Shoes are a lot harder than sandals — not the technical parts. Stitching is stitching. Rather, it’s the patterns and fit that will drive you crazy. Don’t even bother with shoemaking unless you have a pair of lasts. You should have those even for sandal making actually. You can get a pair of used lasts for $50 on eBay any day of the week. Wait and hunt for a deal and you can get a pair for $20 or less. While waiting for your eBay deal to come along, try your hand at making some lasts yourself. Just a side note on lasts, they are not replicas of your feet as commonly thought of. Instead, they are the cavity of a shoe, the empty space inside a shoe. Might seem like hair splitting but it is an important difference. Your foot fits inside that cavity. Foam Lasts Anyways, here’s a cheap and easy way to make some lasts using expanding foam. You’ll need to sacrifice a pair of shoes however. Lace up the shoes as you normally would and place a plastic bag inside the shoe. <Just occurred to me that you should put some talc powder in that bag and give it a shake. I forget whether I did that or not, but I must have otherwise it would be difficult to separate the plastic> Dispense the expanding foam making sure you fill in the entire cavity. You’ll end up using too much and it will bulge at the shoe and expand out of the top enough to make half a lower leg. Not a problem. Just let it cure and cutaway the shoe. Remove the plastic and sand off any excess bits. Then cover the foam last in masking rape or duct tape. Any tape. You know what would look cool? That white cloth medical tape — get that “invisible man” look. In any case, be sure to apply tape to prevent crumbling from handling, If you want to get artsy with it, decoupage the masking tape. Why not? I did. I also sprayed it with some varnish. And then a curious thing happened, the foam shrunk. I guess with that much foam it takes a while for the center to cure and when it did everything shrunk. But it wasn’t anything that a couple pairs of thick socks couldn’t take care of. Wood Lasts Right after congratulating yourself on how smart and practical you are you will discover the shortcomings of a foam last. “It sure would be nice if I could secure the upper by tacking or nailing it to the last while taken measurements and for fittings.” Indeed it would, Go back and hunt for a deal on eBay. I just wanted a “reasonable” deal and refused to pay usury prices for something that’s just a hunk of wood. (Turns out that last making is a specialized art from that takes years to master.) Mastery or not, it’s still true that it’s just a hunk of wood. If you’re comfortable with woodworking, you can make a rudimentary pair for the cost of 2x6 and 2x4 scrap wood. Just stack and glue graduated pieces from toes to ankle height and draw the outline of your foot on the side. Then spend a couple hours at the belt sander and you’ll get a pair you can work with, Use your feet as a shape guide and a pair of existing shoes as your guide for fit. For me the biggest benefit in making homemade lasts is that I now more fully understand and appreciate the lasts I purchased on eBay. I will say though that I still use my homemade wood lasts at times. Shoe Patterns The other thing that is difficult for me is converting a 3D concept into a 2D pattern. The 2D version of the front half of a shoe (the vamp) doesn’t look like a shoe at all, not to me anyways. Forget about finding patterns for men’s shoes. There aren’t any. However, there are plenty of YouTube videos showing you the “tape method” for pattern making. You might find those useful, they weren’t much help for me. What did work was to take shoes apart. Instant pattern. The hard part is finding the style you like at a cheap price. I’m interested in retro patterns from the 70’s like these two shoes: Those guys cost upwards of $150 new and $50+ used on ebay because retro is the thing these days. But I know a guy who knows a guy who knows about this place: ShopGoodwill.com (sorry for the small pic – just click on it) This is Goodwill’s auction site that’s looks and feels like it was built using a TRS 80 hobbyist PC before the internet existed, but once you get used to navigating you will be surprised with how deep their inventory is and how their prices are. I’ve bought several pairs and was the only bidder. As show in that screenshot, that particular day there were 360 listings for “Leather” in the Men’s Shoes category starting at $3. Reverse Engineering Taking shoes apart is highly recommended, not just to yield a pattern but also to figure out how they were constructed. Once you get that level of understanding, it’s no big deal to experiment with your own ideas and patterns because you’re starting from a working model instead of from scratch. The Stitch Down Shoe The stitch down shoe is pretty straightforward and easily doable for the intermediate level leatherworker. No special tools required and no new techniques to learn. Look at how the upper is attached in this pic. That’s about as straightforward as it gets. The Chukka Boot I’m partial to the Chukka style which can be found in a variety of shoe style as well as boots. That’s the next level after shoes. Traditional Turkish Shoe I also want to figure out how to make these guys. These are traditional Turkish Shoes that have been around for a loooooong time and still being made today. I want to say they date back centuries, but I don't know that for sure. Many many years for sure. They look super cool and comfortable, don't they? Some hot shot kid is marketing these in the U.S. for $200 pop and I would be surprised if his cost was more than $20. Google "Sabah Shoe" for more info. Soling Material – Conveyor Belting About the only thing unique about shoemaking is soling material. Soles take a beating and can wear out quickly. The best leather option is “shoe sole bend” — super thick, super strong, compressed leather that you’ll need a bandsaw to cut. It’s expensive and not readily sourced. From there your looking at rubber or synthetic materials and those are expensive too….unless you know somebody who spent months finding this triple top secret soling tip. During my research, I ran into a handful of recommendations to use conveyor belt material. In fact there’s a couple such posts on this forum that mention it. Apparently this was a popular choice years ago, particularly with moccasin makers who could source used conveyor belts for practically nothing. Then came eBay where anything is worth something to someone and sure enough that drove prices way up. Look, this is just plain o’ rubber. You can buy rubber floor mats for next to nothing. Surely somebody offers industrial rolls of rubber cheaply? No no no. Apparently not. But here’s the thing. There is one price for a “roll of rubber sheeting” and then there’s another price for “Skirtboard 60 +/-5 Durometer.” Sometimes what you know is better than who you know. I found a deal for a 50’ roll that is 5” wide and 1/4” thick for .79 cents a foot – free shipping! That’s $40 delivered. That will yield up to 25 pairs of soles. Now that’s what I’m talking about! Compare that to the other alternatives at $10/pair and more….a lot more in some cases. (Click on screenshot picture to expand) I haven’t worked with it much yet. Feels like it will last forever. Very flexible yet firm. I like the feel of it, even the smell of it. Has a perfumey sort of smell. Easy to work with, cuts like a dream. I cut out a pair of soles and glued it to one of my failed shoe attempts (I have a bunch) and it looked great…..and then it started separating after a couple days of use. Stitching it down will obviously work, but that will require a channel and punching or drilling holes. I haven’t tried it yet, but I don’t think a stitching iron will work as the holes will fill right back up. But maybe not. Like I said, haven’t yet put it through the tests. I don’t know if this is some special deal or not but everywhere else it’s lot more expensive. Just saying, for $40 you can’t go wrong. Get a roll of this for whatever shoe style you’re working on, flips flops, sandals, or shoes. I just can’t help but think that this deal is probably not going to last long. Heck, that roll is so heavy you would spend $30 just to ship it. And there you have it. EDIT: I still haven't made a "perfect" pair, but this is my best effort so far. Notice that it's just one shoe. I have lot of those. No point making the other one if you're going to do it all over. EDIT 2: Check out this Dude. I call it "The Liberace". Again, just one shoe -- it was extremely uncomfortable. This design just came out of nowhere, sorta. I was taking apart a failed attempt on a chukka style and it was taking forever, so I took the scissors to it and cut off the upper, just leaving a stub attached to the insole. It caught my attention right away and I stared at it while my brain whizzed through it's "match that image" thing that it does. And then it occurred to me. Heck. that's a loafer without a top. I tossed the failed attempt to the side and went straight to work on this prototype. I think it's cool. I had a Miami Vice vibe in mind. To bad it kills your feet. I'll come back to this style later on. Lots of variations you can do with this style.
- 2 replies
-
- mens sandals
- casual shoes
- (and 8 more)
-

Screenshot 2015 11 18 17.03.51
Reegesc commented on Reegesc's gallery image in Gallery- Our Leatherwork
They are beautiful, but it's not my work. This was uploaded to use as an example in this tutorial http://leatherworker.net/forum/index.php?showtopic=62573&p=445291 I forgot that whatever you put in your own gallery gets broadcast to the entire forum. But....I hope to make these someday, so I'll take your compliment in advance. ;-) Sorry 'bout that. -

Screenshot 2016 01 27 01.11.41
Reegesc commented on Reegesc's gallery image in Gallery- Our Leatherwork
-
-
-

Screenshot 2016 01 27 12.03.41
Reegesc commented on Reegesc's gallery image in Gallery- Our Leatherwork
Danngit. I'm misleading everybody. I forgot this feeds over to the public gallery. These are just example pics for a lengthy comment on my Flip Flops tutorial. Only a couple of those pics are my work. Sorry about that. I wish I could do all that. Working on it...someday. Here's the comment...will make more sense. And hey, why not try your hand making some Fip Flops? http://leatherworker.net/forum/index.php?showtopic=62573&view=getnewpost -

My First Full Armor Build And Other Geeky Things
Reegesc replied to GlitchLW's topic in Historical Reenactment
hahaha 'Course you do.- 4 replies
-
- templararmor
- lamellar
-
(and 2 more)
Tagged with:
-

Tooled & Handpainted Dog Collars
Reegesc replied to Beret's topic in Collars, Cuffs, Leashes and Leads
Very refreshing to see original design work. ~Clap~Clap~Clap~ Edit: But if you tell me you've only been at it for six months I'm gonna smack ya. ;-) -
From the album: Tutorial That Never Was
-

Screenshot 2015 11 18 17.21.51
Reegesc commented on Reegesc's gallery image in Gallery- Our Leatherwork
-
From the album: Tutorial That Never Was
-
From the album: Tutorial That Never Was
-
From the album: Tutorial That Never Was
-
You mean the Sandals Tutorial I promised last August? Where I said: “I’m working on a tutorial for these and one other model of Men’s Sandals, plus a minimalist, or “barefoot sandal”, as a companion to the Flip Flops Tutorial. Should have a download posted in a few days in the tutorial section.” That post? Where I promised a tutorial but was really just showing off this pair of sandals I had made? No Sir, I have not made any progress whatsoever. What happened was I went through the pics I had taken and realized they weren’t going to work. Oddly, the thing that the tutorial is about is not the thing you make for the tutorial. You have to decide on the front end what is you’re doing. Making sandals or making a tutorial? If it’s a tutorial then you make a series of process steps and you think in terms of process steps. That meant I had to start all over, which is no problem if you are really motivated to make a tutorial. I was more motivated to move on to shoemaking. I still might make that tutorial and even one on Shoemaking. Who knows? I'm a novice at all of this and I’m just self-teaching my way through by trial and error. But listen, if you can make flip flops, you can make sandals. And if you can make sandals, you can make shoes. Tell ya what, here’s a Cliff’s Notes version of the Tutorial I was going to make. Forget The Patterns - Use The Concepts ============================== Sandals are not much different than flip flops; heck, flip flops are sandals. The key bit in either case is securing the upper to the lower using "sew tabs" that are folded under the insole and are stitched down. I came up with a variety of approaches on how to do this. - Eliminate the fold tabs altogether and stitch the "stub" straight down to the insole. It’s a really cool look with the stitches exposed but requires that your stitches are all lined up perfectly. - You can fold inwards, you can fold outwards. - You can expose the fold on top of the insole, again either inwards or outwards (the latter being a lot easier of course). - The Elevator Approach — Raise the insole into the upper and keep it suspended while you stitch down to the midsole, Then lower the insole and glue down. Provides for a really sleek look not having stitches exposed but with all the strength benefit that stitching provides. - Side Stitched. Here you notch the insole on the side, just enough for the tab to fit flush to the insole and at the same angle where it meets the insole. You use a running stitch at the same angle (for looks) to secure. The stitches are exposed on the side, so again you have to get the stitches symmetrical for a nice look. As of the uppers, there are further options using buckled straps which are particularly useful as backstraps to really secure the sandal to your foot and an absolute must if you intend on running with them as in the case of the “barefoot sandal” that is so popular now. Shoemaking =========== There’s not much difference between sandal making and shoemaking to tell you the truth. I’m referring to Men’s casual shoes, not that mind-blowing bespoke stuff. I’m not saying it’s easy, however. Shoes are a lot harder than sandals — not the technical parts. Stitching is stitching. Rather, it’s the patterns and fit that will drive you crazy. Don’t even bother with shoemaking unless you have a pair of lasts. You should have those even for sandal making actually. You can get a pair of used lasts for $50 on eBay any day of the week. Wait and hunt for a deal and you can get a pair for $20 or less. While waiting for your eBay deal to come along, try your hand at making some lasts yourself. Just a side note on lasts, they are not replicas of your feet as commonly thought of. Instead, they are the cavity of a shoe, the empty space inside a shoe. Might seem like hair splitting but it is an important difference. Your foot fits inside that cavity. Anyways, here’s a cheap and easy way to make some lasts using expanding foam. You’ll need to sacrifice a pair of shoes however. Lace up the shoes as you normally would and place a plastic bag inside the shoe. <Just occurred to me that you should put some talc powder in that bag and give it a shake. I forget whether I did that or not, but I must have otherwise it would be difficult to separate the plastic> Then fill it up with expanding foam making sure you fill in the entire cavity. You’ll end up using too much and it will bulge at the shoe and expand out of the top enough to make half a lower leg. Not a problem. Just let it cure and cutaway the shoe. Remove the plastic and sand off any excess bits. Then cover the foam last in masking rape or duct tape. Any tape. You know what would look cool? That white cloth medical tape — get that “invisible man” look. In any case, be sure to apply tape to prevent crumbling from handling, If you want to get artsy with it, decoupage the masking tape. Why not? I did. I also sprayed it with some varnish. And then a curious thing happened, the foam shrunk. I guess with that much foam it takes a while for the center to cure and when it did everything shrunk. But it wasn’t anything that a couple pairs of thick socks couldn’t take care of. Right after congratulating yourself on how smart and practical you are you will discover the shortcomings of a foam last. “It sure would be nice if I could secure the upper by tacking or nailing it to the last while taken measurements and for fittings.” Indeed it would, Go back and hunt for a deal on eBay. I just wanted a “reasonable” deal and refused to pay usury prices for something that’s just a hunk of wood. (Turns out that last making is a specialized art from that takes years to master.) Mastery or not, it’s still true that it’s just a hunk of wood. If you’re comfortable with woodworking, you can make a rudimentary pair for the cost of 2x6 and 2x4 scrap wood. Just stack and glue graduated pieces from toes to ankle height and draw the outline of your foot on the side. Then spend a couple hours at the belt sander and you’ll get a pair you can work with, Use your feet as a shape guide and a pair of existing shoes as your guide for fit. For me the biggest benefit in making homemade lasts is that I now more fully understand and appreciate the lasts I purchased on eBay. I will say though that I still use my homemade wood lasts at times. The other thing that is difficult for me is converting a 3D concept into a 2D pattern. The 2D version of the front half of a shoe doesn’t look like a shoe at all, not to me anyways. And forget about finding patterns for men’s shoes. There aren’t any. However, there are plenty of YouTube videos showing you the “tape method” for pattern making. You might find those useful, they weren’t much help for me. What worked for me was to take shoes apart. Instant pattern. The hard part is finding the style you like at a cheap price. I’m interested in retro patterns from the 70’s like these two shoes: Those shoes cost upwards of $150 new and $50+ used on ebay because retro is the thing these days. But I know a guy who knows a guy who knows about this place: ShopGoodwill.org (sorry for the itsy bitsy pic -- click on it for something you can actually see. THIS SITE'S FORMATTING!!!!!! ARRRRGH!!!!!) This is Goodwill’s auction site that looks like it was built using a TRS 80 hobbyist PC before the internet existed, but once you get used to navigating you will be surprised with how deep their inventory is and the low prices. I’ve bought several pairs and was the only bidder. As show in the screenshot, there are 360 listings for “Leather” in the Men’s Shoes category starting at $3. Taking shoes apart is highly recommended, not just to yield a pattern but also to figure out how they were constructed. Once you get that level of understanding, it’s no big deal to experiment with your own ideas and patterns because you’re starting from a working model instead of from scratch. The stitch down shoe is pretty straightforward and easily doable for the intermediate level leatherworker. No special tools required and no new techniques to learn. Look at how the upper is attached in this pic. That’s about as straightforward as it gets. I’m partial to the Chukka style which can be found in a variety of shoe style as well as boots. That’s the next level after shoes. I also want to figure out how to make these guys. These are traditional Turkish Shoes that have been around for a loooooong time and still being made today. I want to say they date back centuries, but I don't know that for sure. Many many years. They look super cool and comfortable, don't they? Some hot shot kid is marketing these in the U.S. for $200 pop and I would be surprised if his cost was more than $20. Google "Sabah Shoe" for more info. About the only thing unique about shoemaking is soling material. Soles take a beating and can wear out quickly. The best leather option is “shoe sole bend” — super thick, super strong, compressed leather that you’ll need a bandsaw to cut. It’s expensive and not readily sourced. From there your looking at rubber or synthetic materials and those are expensive too….unless you know somebody who spent months finding this triple top secret soling tip. During my research, I ran into a handful of recommendations to use conveyor belt material. In fact there’s a couple such posts on this forum that mention it. Apparently this was a popular choice years ago, particularly with moccasin makers who could source used conveyor belts for practically nothing. Then came eBay where anything is worth something to someone and sure enough that drove prices way up. Look, this is just plain o’ rubber. You can buy rubber floor mats for next to nothing. Surely somebody offers industrial rolls of rubber cheaply? No no no. Apparently not. But here’s the thing. There is one price for a “roll of rubber sheeting” and then there’s another price for “Skirtboard 60 +/-5 Durometer.” Sometimes what you know is better than who you know. I found a deal for a 50’ roll that is 5” wide and 1/4” thick for .79 cents a foot – free shipping! That’s $40 delivered. That will yield up to 25 pairs of soles. Now that’s what I’m talking about! Compare that to the other alternatives at $10/pair and more….a lot more in some cases. (Sorry about the image sizes. For the life of me, this board drives me crazy when it comes to formatting. Click on the pic and you'll actually be able to see the dang thing.) I haven’t worked with it much yet. Feels like it will last forever. Very flexible yet firm. I like the feel of it, even the smell of it. Has a perfumey sort of smell. Easy to work with, cuts like a dream. I cut out a pair of soles and glued it to one of my failed shoe attempts (I have a bunch) and it looked great…..and then it started separating after a couple days of use. Stitching it down will obviously work, but that will require a channel and punching or drilling holes. I haven’t tried it yet, but I don’t think a stitching iron will work as the holes will fill right back up. But maybe not. Like I said, haven’t yet put it through the tests. I don’t know if this is some special deal or not but everywhere else it’s lot more expensive. Just saying, for $40 you can’t go wrong. Get a roll of this for whatever shoe style you’re working on, flips flops, sandals, or shoes. I just can’t help but think that this deal is probably not going to last long. Heck, that roll is so heavy you would spend $30 just to ship it. And there you have it. EDIT: I still haven't made a "perfect" pair, but this is my best effort so far. Notice that it's just one shoe. I have lot of those. No point making the other one if you're going to do it all over. EDIT 2: Check out this Dude. I call it "The Liberace". Again, just one shoe -- it was extremely uncomfortable. This design just came out of nowhere, sorta. I was taking apart a failed attempt on a chukka style and it was taking forever, so I took the scissors to it and cut off the upper, just leaving a stub attached to the insole. It caught my attention right away and I stared at it while my brain whizzed through it's "match that image" thing that it does. And then it occurred to me. Heck. that's a loafer without a top. I tossed the failed attempt to the side and went straight to work on this prototype. I think it's cool. I had a Miami Vice vibe in mind. To bad it kills your feet. I'll come back to this style later on. Lots of variations you can do with this style.
- 131 replies
-
- flip flops
- pattern
-
(and 2 more)
Tagged with:
-
From the album: Tutorial That Never Was
-
From the album: Tutorial That Never Was
-
From the album: Tutorial That Never Was
-
From the album: Tutorial That Never Was
-
From the album: Tutorial That Never Was
-
From the album: Tutorial That Never Was
-
From the album: Tutorial That Never Was
-
From the album: Tutorial That Never Was


