
Reegesc
-
Posts
444 -
Joined
-
Last visited
Content Type
Profiles
Forums
Events
Blogs
Gallery
Store
Everything posted by Reegesc
-
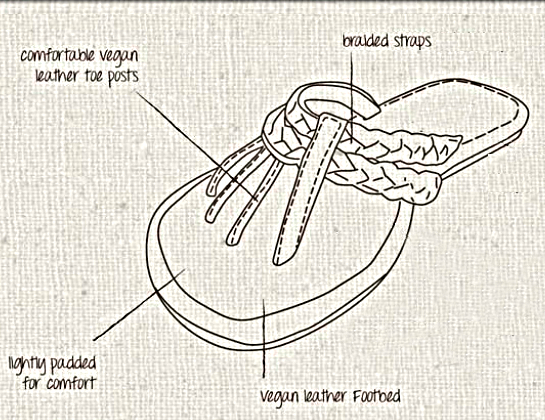
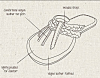
Here's an interesting design that features multiple "Toe Posts"
-
 Clever. I'm curious about the "grip" that leather provides vis-a-vis grip tapes. Do you know? That is a really cool treatment. I have a buddy who is really into skateboarding. I'm gonna try this. Thx
 -
 Wow....that's impressive.
 -
Agreed...would be a nice feature. Hello.....Moderators...? Hello...?
-
@Impulse -- Thanks for the Roo tip. I'm ordering some now. Post a pic when you get a chance.
-
 Yeah, sell them individually. It will take longer, but you'll make a lot more. You might try selling them here first as that would save you some money on commission fees (10% on eBay). But surprisingly this isn't a very active or robust market. For pricing, look up past sales on eBay and new and used book prices on Amazon. Just scanning through these, I'd say your looking at an average of $15 per book. For your Home Study Course, I found one sold listing at $60 (seems low to me though). eBay is an obvious choice with its sizable marketplace for leather craft items, books included. I would also take a look at Etsy as these are vintage items and you're likely to fetch a higher price there with the vintage angle although it is a smaller marketplace: Listings for "Al Stohlman Books" Etsy 6 Amazon 67 eBay 88 TomG is right -- shipping will not be an issue if you get yourself a USPS account and use online shipping. It's not only ultra convenient, it's cheaper too as you get an online discount. If you would rather not mess with any of this and just have someone do it for you (there's a lot to learn and do if you're new to this), there are services that will do it all. eBay has a large "drop off" network that includes all FedEx locations. These consigners will create the auction listings, manage the auction, field questions, handle payment, ship the product..... everything.... and they cover all selling expenses. They charge around 30% of the selling price. Here's a directory where you can find one in your area. I scanned through your list a second time and noticed the saddle making encyclopedia set and figured those would be worth more than the others, and they are. Volumes 1 and 2 are worth around $90 each. BUT, it looks like volume three is a rare and collectible book. Be sure to research that one carefully. Here's what I found. Amazon $1,207 Abebooks $3,474 eBay $1,214 Good luck
 -
"You could have "God" embroidered on your bunnet." I see your point. Had the google search all wrong. Apologies. That is very cool.
-
"never thought to take any photos" .....ah, of course, you're an artist. Were you able to mimimc gold foil?
-
@ LumpenDoodle -- That is such a cool name, almost as cool as "Fergle", my all time fave. So....LumpenDoodle.... you've just been sitting on this secret all this time? Hmmm....? You know, I have googled this concept several times and not ONCE has your name or tip shown up. Well, at least you came clean. I'd like to see some examples of that work, if you're so inclined to share. And welcome to the forum. ;-)
-
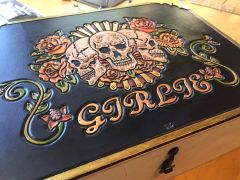
I tried again today and it was FAR harder. After two hours of messing around with it, I managed to get one image printed. The leather was a little thinner the first time and it was also cooler and less humid that particular day (the printer is in the garage). The thickness is an obvious issue, but environmentals can be a factor. The one image I was able to get today was after skiving the leading edge. Clearly the thinner the material, the more likely it will work. I have a bunch of paper-thin chrome that I'm certain will work, but what's the point? Might as well print on black card stock. But ....? well....? maybe not. A B&W image might work just fine on chrome. You know what occurred to me as I was researching this further and thinking about the process? This is tattooing leather. It's exactly what it is. Instead of needles, it's a jet injecting the ink...under the skin. The first thing that I noticed about this process was how well "set" the ink was as soon as it came out of the printer. I expected it to smudge, but it didn't because the ink was underneath the surface, just like a tattoo. After realizing that, I spent a couple hours searching for a cool tattoo to print. My lord, there are so many cool tattoos out there. I also did some printer research and found that that 3 oz leather is roughly 6 times the acceptable range for my printer, and yours too... all low-end printers for that matter. Oh, yeah, and you're only supposed to use their ink.!!! Btw, Brother is the last of the manufactures that haven't engineered a built-in ban on generic cartridges. You can buy Brother generic ink cartridges for less than a buck on Amazon and eBay. And Brother printers will print on leather! Sorta. Keep that in mind next time you're looking at printers. I also looked for hacks, but didn't find anything. Epson gets high marks for handling thick cardstock as do printers that have menu option selections for heavy paper (mine doesn't have that). Supposedly rear manual feed printers are thick friendly, but that wasn't true in my case. Mine prefers feeding from the tray. My next step, is to hack into my printer and figure out how to adjust whatever the bottleneck is. I'll bet it's nothing more than a sensor that needs to point somewhere else. Here's the image that I printed -- one pass and one coat of Sad Lac to saturate the colors . Note the stuttering at the top of the image where it must have hopped around a bit while the printer was deciding what to do with it. That didn't happen on the my first two treasure map prints. Here is what the image looks like on my monitor. You can tell there's some degradation with the printed version, but it's not a bad reproduction all thing considered.

-
@ Chriscraft -- you had it right the first time, you worm can opener you. ;-)
-
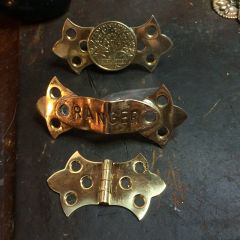 Yeah, just cut off the ends of the hinges and solder to a brass strip
 -
@ Hacakady -- those look great. I too have been working on incorporating arch support and heel. I like yours better.
-
Clap ~ Clap ~ Clap I remember your post months back in a thread of "show us your work space" and remember thinking "there's a trooper." That's great things have worked out for you finally. And the shop looks terrific.
-
Has anyone else tried this? I discovered quite by experimental luck that my no-big-deal Brother Inkjet printer will accept and print on thin veg tan, in this case 3oz. I had one of those “I wonder” moments and before the “Don’t do it, you’ll ruin the printer!” warning could kick in, a sheet-size piece of 3oz was working its way through my inkjet with no problem, (well there were a few internal groans). After fiddling around with the color saturation of the image, I obtained a pretty impressive result that was crisp, detailed and around 80-85% paper color saturation. I bumped that up some more by going over the two major colors and using a sharpie to highlight the borders and certain features. Pretty cool stuff -- opens up all sorts of possibilities that I'm looking forward to try and maybe one of those is ruining the printer after all. I guess it shouldn't come as much of a surprise when you think about it. The only limitation would seem to be the thickness that your printer will accept. After that it’s just laying down ink, right? Passport/Field Notes Case/Wallet with Treasure Map Cover
-
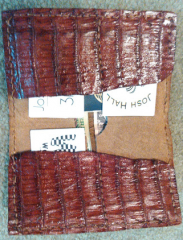
From the album: Direct to Leather Inkjet Printer
-
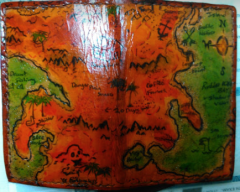
From the album: Direct to Leather Inkjet Printer
-
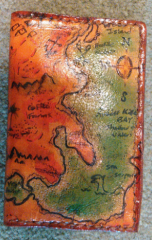
From the album: Direct to Leather Inkjet Printer
-
From the album: Misc
-
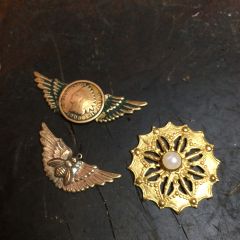
From the album: Misc
-
From the album: Misc
-
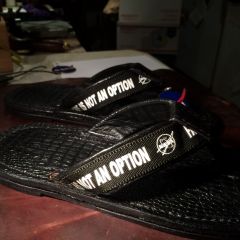
NASA inspired flops: Failure Is Not An Option
-
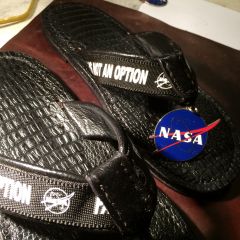
From the album: Failure Is Not An Option
-
From the album: Failure Is Not An Option
-

From the album: Failure Is Not An Option