-
Posts
444 -
Joined
-
Last visited
Content Type
Profiles
Forums
Events
Blogs
Gallery
Store
Everything posted by Reegesc
-
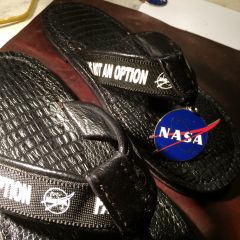
From the album: Failure Is Not An Option
-
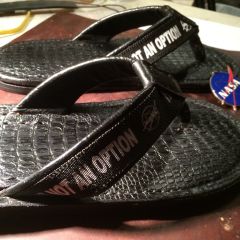
From the album: Failure Is Not An Option
-
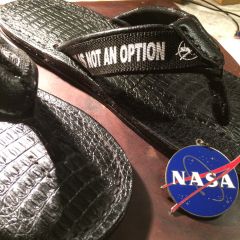
From the album: Failure Is Not An Option
-
@Wraith -- Those look great. I like how you brought the straps in the sides. The cork looks cool too.
- 131 replies
-
- flip flops
- pattern
-
(and 2 more)
Tagged with:
-
@ The Don -- Yeah you're probably ok. That's how most are made.
- 131 replies
-
- flip flops
- pattern
-
(and 2 more)
Tagged with:
-
@ The Don -- Man those look great. On the first pair, how did you inlay that upper layer? Looks sharp. And on the second pair, how did you secure the toe stem? It really likes nice without a visible sew line. Impressive, all the way around.
- 131 replies
-
- flip flops
- pattern
-
(and 2 more)
Tagged with:
-
If I had a bag like that I could travel the world. Maybe even rule it. Very nice...
- 28 replies
-
- cone mills canvas
- waxed
- (and 6 more)
-
Ditto on the bandsaw idea.
- 131 replies
-
- flip flops
- pattern
-
(and 2 more)
Tagged with:
-
@ Monica - ~ Clap ~ Clap ~ Clap ~ Very nice! Good job! Btw -- Although I said "rawhide" in the tutorial, it was actually "horsehide". I do know the difference, but ever since I was a kid the term rawhide has meant horses. Not because I was taught that, but because of countless hours watching reruns of the old TV Western "Rawhide". Somehow that just became the association. So...I'm living proof that watching too much TV can have consequences. :-) Small font for embarrassment purposes and to not take away from your well deserved praise.
- 131 replies
-
- flip flops
- pattern
-
(and 2 more)
Tagged with:
-
That's right they are different. Just offering another option based on my experience using these relatively knew and unknown irons. I don't have anything against the prick/awl method when it comes to making stitch holes except that it's hard as crap and and time consuming and error prone. Foregoing the excitement of prick/awl stiching, I've ventured out and tried my Chinese Irons using the Arbor Press ($40 Harbor Freight) method and am quite pleased with this approach. For those of you who are experimenters and in the Punch Camp of Stitch Hole Theory, spring $5 and buy yourself one 6-Prong Chinese Stitching Iron. Buy the round shaft style so you won't have to grind the iron to fit your Arbor Press as I had to. Slide the iron into the press, set the proper angle and lock it down. You now now have a "Stitch Hole Punching Machine." I've been playing with this setup for a couple days now and love it. Only thing better would be someobody else doing it (I've never liked this step). The stitch holes are perfectly straight up and down. The diamond angle is perfect placed and uniform from the first to the last hole. The holes are punched all the way through in one pass, landing exactly on the stitch lines, both front and back (up to 1/2" thickness). It is boring though -- set, press, set, press, set press, perfect hole, perfect hole.
- 16 replies
-
- hand stitch
- saddle stitch
- (and 7 more)
-
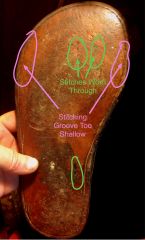
Nail Holes -- I should have been clearer in the Tutorial and pointed out that the nails follow the stitching line/groove. However, that is of zero consequence if you're not going to perimeter stitch all the way through to the bottom sole. In that case, I just hold the bundled layers together with my hand when I belt sand, but that's also been with flops that had fewer and thinner layers. Although I haven't tried, a hand clamp should work just fine as long as you carefully realign the layers as you move the clamp around. Any other ideas out there? At any rate, if you did not foresee nail holes as an issue, plan ahead.
- 131 replies
-
- flip flops
- pattern
-
(and 2 more)
Tagged with:
-
@ Tboyce -- Why thank you Sir, that means a lot. I'm a mere student compared to you. Long time fan.
- 131 replies
-
- flip flops
- pattern
-
(and 2 more)
Tagged with:
-
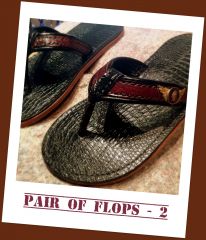
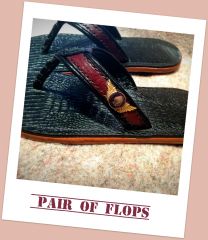
Just to be clear, the top layer is embossed cowhide, not genuine alligator. Pretty sure I got that from Springfield to -- their embossed leather bargain bundle.
- 131 replies
-
- flip flops
- pattern
-
(and 2 more)
Tagged with:
-
@ Grey -- The rawhide was just handy. I liked that it was relatively thin but tough as nails. Been thinking of making a pair out of rawhide only. I bought scraps from Springfield http://springfieldleather.com/33907/Pieces%2CHorse%2CVegTan%2C5lbs/
- 131 replies
-
- flip flops
- pattern
-
(and 2 more)
Tagged with:
-
There ya go..... Like the grunge look. ;-)
- 131 replies
-
- flip flops
- pattern
-
(and 2 more)
Tagged with:
-
Opaque Projector For Transfering Patterns?
Reegesc replied to chriscraft's topic in Patterns and Templates
That is totally cool! Thanks for sharing. -
Ok, finally figured out how to upload the tutorial. You can find it here under Patterns and Templates. http://leatherworker.net/forum/index.php?showtopic=62573
-
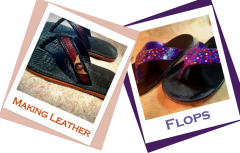
While written for the intermediate-level audience, here's a relatively simple project for most anyone. Using the concepts presented here, the variations are limitless Please post a pic of your project interpretation here and share your tips and tricks as well. Making Leather Flip Flops.pdf
- 131 replies
-
- flip flops
- pattern
-
(and 2 more)
Tagged with:
-
From the album: Untitled Album
-
@ Shyla -- Sure, just shoot me an email and I'll send the tutorial. Clyde.Seeger@gmail.com Trying to figure out a way to upload the tutorial pdf to the forum so that folks can just download from there. Have a request in to Admins on that, but haven't heard anything. If someone knows how to do that, please let me know. thx
-
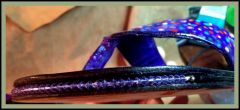
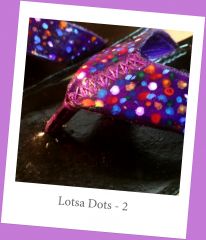
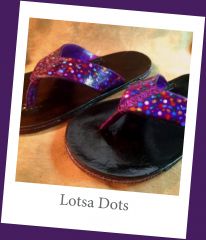
Here's another pair titled "Lotsa Dots". Pics don't do them justice (of course). But check out the crystal bead inlays in the front (placed them in the back as well). But what I mainly wanted to point out is the treatment on the straps, where the front strap cover is omitted to show the criss cross decorative stitching instead. Just another example of the myriad of designs you come up with on something as simple as a pair of flops.
-
@ Jstar61 - Just sent you the tutorial.
-
From the album: Untitled Album
Beaded Inlay -
From the album: Untitled Album
Flops


