-
Posts
444 -
Joined
-
Last visited
Content Type
Profiles
Forums
Events
Blogs
Gallery
Store
Everything posted by Reegesc
-
60S - 70S Time Traveler Men's Sandals
Reegesc posted a topic in Shoes, Boots, Sandals and Moccassins
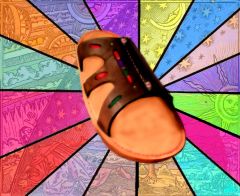
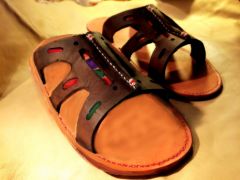
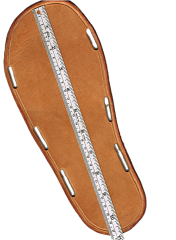
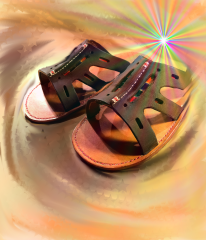
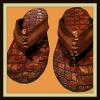
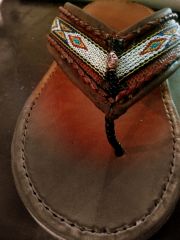
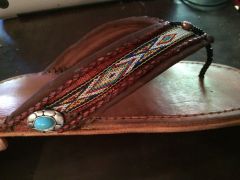
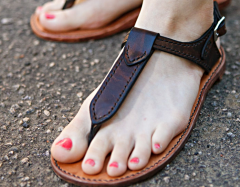
A must fashion item for the 60s - 70s Time Traveler. Psychedelic accents set these funky sandals apart from the tire-soled huaraches fare and put you right in the middle of the "in-crowd". Whether grooving at Woodstock or throwing frisbees in the park, these sandals are as hip as you can get. If it's good to ya, it's gotta be good for ya. Right on! Keep on trucking, baby. I'm working on a tutorial for these and one other model of Men's Sandals plus a a minimalist, or "barefoot sandal", as a companion to the Flips Flops Tutorial. Should have a download posted in a few days in the tutorial section. Until then, peace and be cool. -
From the album: 60s - 70s Time Traveler Men's Sandals
60s - 70s Time Traveler Men's Sandalsy -
From the album: 60s - 70s Time Traveler Men's Sandals
Tutorial coming soon -
From the album: 60s - 70s Time Traveler Men's Sandals
Tutorial coming soon -
From the album: 60s - 70s Time Traveler Men's Sandals
-

Mystery Braid Bracelets!
Reegesc replied to Grey Drakkon's topic in Purses, Wallets, Belts and Miscellaneous Pocket Items
That looks really cool Grey and makes me want to start working with beads again. Your bonus bracelet was similarly cool. I've not tried a braided bracelet, but I've been experimenting with beads and leather off and on for years, usually with less than wonderful results. The problem was always "bead lay" and a way to attach them so that they moved with the leather. What I mean by "bead lay" (my own term) and what you no doubt are intimately familiar with is the beads protruding outward, a lot, from the leather and are strung through the middle. Rounds and bicones roll around and the string bunches up if using beading wire. I tried regular metal wire and that does keep the bead design where you want it, but you give up flexiblity of the leather (belts, dog collars) and hiding beading wire when terminating a strand was always a challenge. Coming up with cool bead designs is no problem and they look terrific against leather. Just have not cracked the code. Years ago I ran across some gals who were making beaded leather harness for horses (I guess that's what they are called) the part that goes over the head. They were really cool looking. What they did was create a channel for the beads such that they were flush with surface and, presumably, that "corralled" the beads to stay in place. Thought that was pretty clever, which is right about the time I quite messing with it. Flat beads, of course, is the answer, but I haven't been impressed, at all, with what's available but that's been a while (sliders are an exception), plus I have THOUSANDS of $$$$ in jewelry beads. As it turns out I'm working on a flops design using beads for the straps (when I say working I mean thinking about it -- same same). We'll see.- 32 replies
-
- mystery braidbracelet
- snaps
-
(and 3 more)
Tagged with:
-

Mystery Braid Bracelets!
Reegesc replied to Grey Drakkon's topic in Purses, Wallets, Belts and Miscellaneous Pocket Items
I can confirm, it was indeed a joy installing the snaps myself. You know how it is...it's all about the little things. The Twins loved the bracelets... and the snaps.- 32 replies
-
- mystery braidbracelet
- snaps
-
(and 3 more)
Tagged with:
-
Voodoo Flops Here's a pair made for a friend who went through a very tough three months of near death surgeries and complications and who's still not entirely out of the woods. The tongue-in-cheek inspiration was that Western Medicine hadn't worked all that well for him and that maybe it's time he considered an alternative solution -- Voodoo Of Course! I explained that his stylish Voodoo Flops where merely a housing for the powerful middle layer -- the Mojo Layer which can accommodate a maximum of three mojos. I selected the mojos for him since he was inaccessible and this was a rush. Health, Revenge, and Parking Space Luck This is the second pair I've made using beads for the toe post and I'm sold on it. I like the slim profile looks wise and you can't beat the comfort. The beads swivel freely with the toes and that means no friction against the skin. I searched and searched and have yet to see this used as a treatment. Here's your chance to get on the next big thing in flops! Another style change worth pointing out is attaching the straps flush to the sides of the sole rather than folding underneath. There are a few things I like about this. First, it's different, a lot different. Second, this allows placement of the straps much further back. Third, the combination of back placement and flush mounting on the sides of the soles via cutouts makes for a sleek, swept back, modern look versus the traditional rounded strap look. This was a rush job or I would have taken more pictures to detail these features. But more flops are in the works and pictures coming soon.
- 131 replies
-
- flip flops
- pattern
-
(and 2 more)
Tagged with:
-
@ Richard M -- Oh man. those are nice.
- 131 replies
-
- flip flops
- pattern
-
(and 2 more)
Tagged with:
-
Here's a source for sole templates in every size, Men and Women. Note that these are "slim fit" templates, or "just fit" meaning there is very little room around your foot with this style. Adjust accordingly. Here's a template example.
- 131 replies
-
- flip flops
- pattern
-
(and 2 more)
Tagged with:
-
"Dad Buy's A Souvenir" -- Tacky design inspired by the Great American Family Road Trip. Ever wonder how artists come up with names for their creations and the source of their inspiration? They see just how ridiculous they can make something look after they've screwed it up. Then tack a name and inspiration source on it.
- 131 replies
-
- flip flops
- pattern
-
(and 2 more)
Tagged with:
-
From the album: Summer Road Trip
Tacky never goes out of style -
From the album: Summer Road Trip
"Dad Buys A Souvenir" Tacky design Inspired by the Great American Family Road Trip Vacation -
Don't spend it all in one place. oh wait...
- 131 replies
-
- flip flops
- pattern
-
(and 2 more)
Tagged with:
-
!!!!!!!! DING DING DING DING!!!!!!!!!! !!!!!!!!!!!!!!!!!! We have a winner !!!!!!!!!!!!!!!!!!!! There were TWO secret contests going on at once. Monica Jacobsen won the "Best Design in 90 Days" Secret Contest. And now.....our latest winner B O B H A L L From Central Texas Congratulations Bob! You have won $$$$$$ TWENTY FIVE UNITED STATES DOLLARS $$$$$$ backed by gold bullion reserves and credited to your account at SPRINGFIELD LEATHER COMPANY "If They Ain't Got It, You Don't Need It"! What the heck did he do? It has been exactly 105 days since the Tutorial was first available for download. Since then, 618 people have downloaded the tutorial, actually more like 608 -- I've downloaded 10 times myself because I can never find it on my hard drive. Let's just say over 600 downloads, and that makes this the all time best seller Flip Flops Tutorial in the history of Leatherworker.net! It's also the only Flips Flops Tutorial on Leatherworker.net. It has been read and re-read, pages flipped back and forth, and where the heck is page number 9???????????? There is no page number 9. Right after I uploaded the tutorial and was stroking my ego and counting up the future Karma, then I noticed it...dammit!!! I hadn't renumbered the pages after a major reshuffle. Ordinarily that would not be a big deal, except I was sick of working on it and each page is a Gimp graphic file that has to be converted to a .jpg and then all the .jpgs assembled in Power Point then converted all together into a PDF... Then I came up with a brilliant idea. Forget about it. I also bet my wife $25 nobody would notice, and if someone did, they would get an Editor Contest Prize. My wife was thrilled to be right and funded the award. This is one time I'm happy to be wrong. Go back and read his comment. If anyone was going to catch this, it was gonna be Bob. Just goes to show you, that quirky trait of yours? You just never know -- you too might strike it rich. Congratulations again Bob!!!!! CLAP ~ CLAP ~ CLAP ~ CLAP ~ CLAP ~ CLAP Are you going to renumber the pages? No. Are there going to be any more edit contests? No Does Bob have to claim this on his Income Tax? No Are there going to be any more Design Contests? YES How come Monica didn't win a cash prize? ......
- 131 replies
-
- flip flops
- pattern
-
(and 2 more)
Tagged with:
-
@JamesR -- Check your mail. Left you a copy. Not sure why you weren't able download. Seems to be working now though.
- 131 replies
-
- flip flops
- pattern
-
(and 2 more)
Tagged with:
-
I did shows for a while and what I discovered was... 1. It's a whole lot easier buying than it is selling. 2. Putting a sign on my dog that says "$1 Hugs" doesn't work, but "Not For Adoption" does. 3. People are more fascinated with cool custom displays than what is in them. 4. Booth waiting lists are just a way to make you feel lucky about getting a crappy booth that nobody was waiting for. 5. Estimating there are 2,000 cars in the packed parking lot and multiplying it by the $10 parking fee is depressing. 6. Illegal parking is a lot quicker than calling the Show Assistance Line. 7. Food vendors will say "Not interested" before they even hear what you are willing to trade. 8. "Will ya take less than half for it?" is best answered with "No, but that Cuban Sandwich Vendor right over there likes to bargain". 9. The 3:2 Rule. Take two of everything but you will still end up using the third one that is at the house. 10. The 2:3:1 Rule. It will take two trips back to the house to get that third thing you forgot on the first trip.
-

Bikini Handcuff Pouch
Reegesc replied to kiwican's topic in Gun Holsters, Rifle Slings and Knife Sheathes
I thought bikini pouch, as in pouch for your bikini. For the beach, it's summer, it's handy, you don't have pockets...that's cool. Then I'm like, what...? a bikini in a pouch.... attached to a bikini bottom.... that you're already wearing at the beach?!?! Ohhhhh, a backup bikini! Of course. That is clever. :-) So.... what's the deal with the handcuffs? edit: actually, when I first glanced at the thumbnail I thought, metal bikini? I gotta see this. ;-) -

Screenshot 2015 07 04 23.18.11
Reegesc commented on Reegesc's gallery image in Gallery- Our Leatherwork
-

Mystery Braid Bracelets!
Reegesc replied to Grey Drakkon's topic in Purses, Wallets, Belts and Miscellaneous Pocket Items
Those are cool as S***.- 32 replies
-
- mystery braidbracelet
- snaps
-
(and 3 more)
Tagged with:
-
@Jimdad -- excellent tips. Thank you
-
@monicajacobsen -- Was just looking back on everyone's pics. I have to say, once more, these are just terrific and your entry is hereby awarded the "Best Design In 90 Days Trophy". @Everybody Else -- Hey, I didn't know there was a contest going on either.
- 131 replies
-
- flip flops
- pattern
-
(and 2 more)
Tagged with:
-
From the album: Trophy Win
-
@okiwen -- Yeah, seems like there should be some sort of ergonomic formula. There are zillions of such formulas and standards for things like chairs and cabinets and lord knows what all. I just used an old pair of flops as a guide and adjusted from there.
- 131 replies
-
- flip flops
- pattern
-
(and 2 more)
Tagged with:


