-
Posts
111 -
Joined
-
Last visited
Content Type
Profiles
Forums
Events
Blogs
Gallery
Store
Everything posted by Black Dogg
-
I have mentioned and recommended them a few times in the past because of their great leather (in my humble opinion) and excellent customer service. This week I had another example of that: I placed an order for 10 of the skirting bellies from the December sale flier. As usual, the lady on the phone was very nice (I think it was Cindy) and I got an email an hour later that the package was ready to ship! It arrived TWO DAYS later, which I thought was really fast, considering the Christmas rush and all. When I opened it there was a sticker on top that said “Extra leather at no charge” . I couldn’t figure out what that meant until I unwrapped the leather and found they had put four extra bellies in! I’m guessing they did that because some of them are a little narrow; I still consider them a steal at $5.00 a piece. I’m by no means a high volume customer, but I thought that was a really nice thing of them to do! So if you’re looking for great leather and even better customer service go to Wickett & Craig! They definitely have a lifetime customer in me!
-
Another vote for Wickett & Craig here! I started buying from them about six years ago and have never bought anywhere else since. Their leather is top notch, even the lower "special" grade is better than a lot of higher grades from other tanneries. Carves and wet forms very well! I visited them last year and got a tour of the place, which was amazing to see! All their hides are sourced from their own slaughterhouses in Canada and only from US/Canadian cattle. I thought their leather was priced pretty good, but after seeing firsthand how much work they put into each hide, I think it's really cheap! Just my $0.02
-
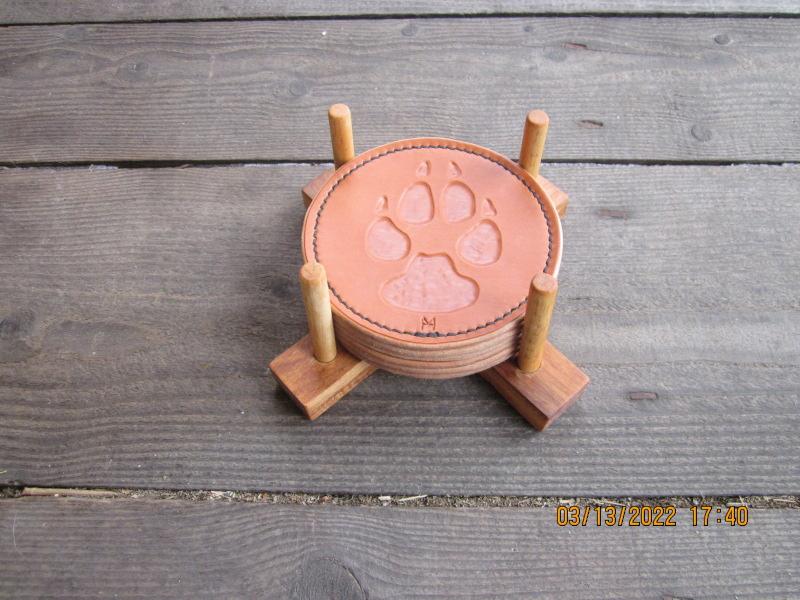
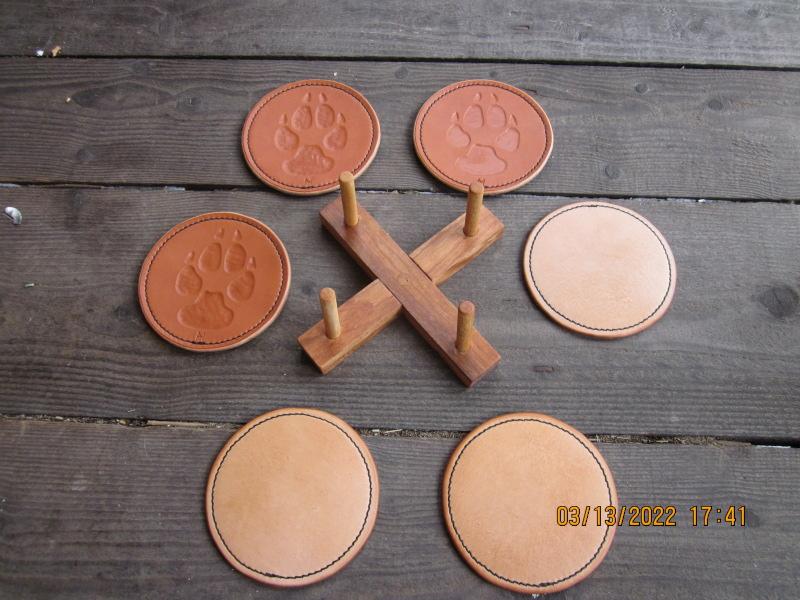
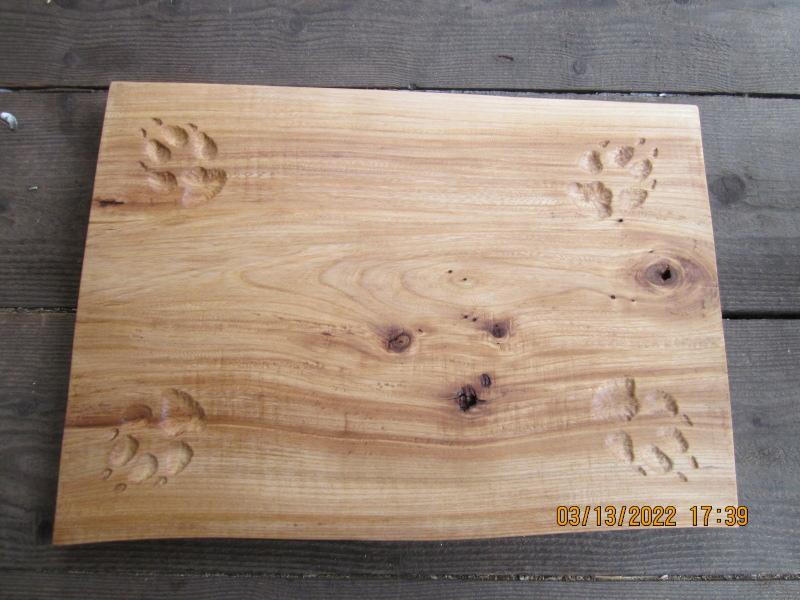
I just realized I never put the 2022 donation on here, so here are those pics for your viewing pleasure ! I had made a serving board and coaster set that year. The board was a piece of live-edge red elm with paw prints carved into each corner and sealed with Tung oil. On the back I put my maker's mark, "FECIT MANU" (Latin for "made by hand" since I don't have power tools) and 2022 in Roman numbers. The six coasters are Wickett & Craig bridle front and back and 1mm Tiger thread.
-
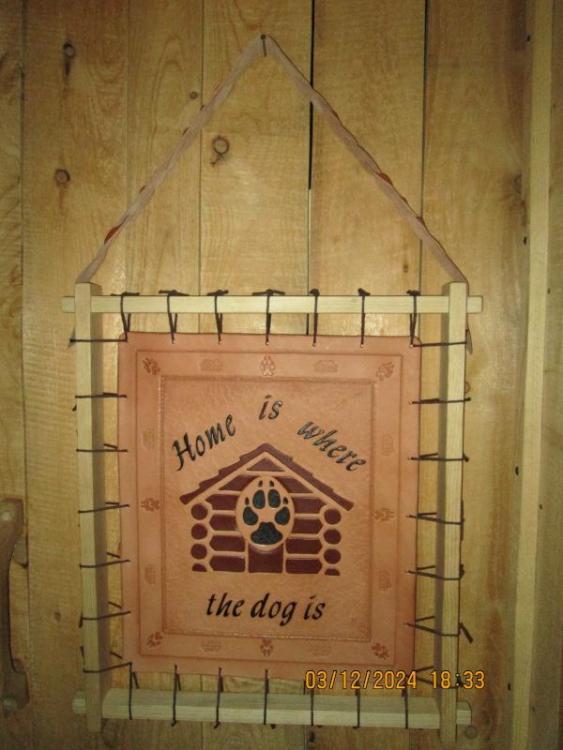
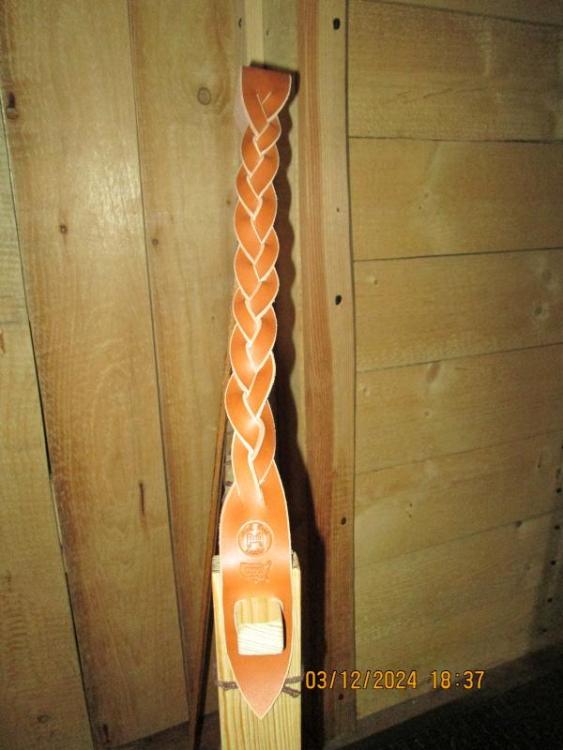
Resurrecting an old thread here, but I thought it kinda fits with the "picture" theme: After making more "practical" items for the last few year's auction donations, I had an idea for a carved picture again and went to town. It's hard to tell from the picture (my photography skills are not the best ), but the lettering and cabin silhouette are raised and the paw print is embossed. The rope border didn't come out quite as good as I wanted (was my first time using that stamp). The frame is mortise-and-tenon and held together only by the tension of the laces. To fancy up the hanger strap, I did a mystery braid on each side. All the leather is from Wickett & Craig; 8-10oz. carving for the picture and 5-6oz. English bridle for the hanger. Outside dimensions of the frame are 20" x 24".
-
Another happy LeatherStampMaker customer here!! Had my maker's mark and two other stamps made so far and they are great! Detail is outstanding, even with small script letters. I use both maul and a 1.5ton arbor press and they work like a charm. Their ordering process is easy and they are fast: All three times I ordered I had the stamp in my mailbox a week after approving the proof (that's clear across the country from CA to NY). Great company that's for sure!!
-
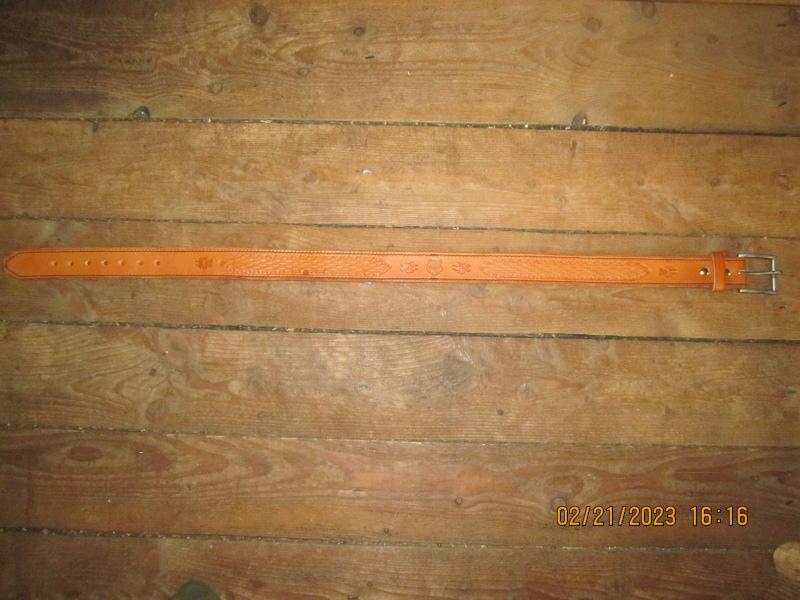
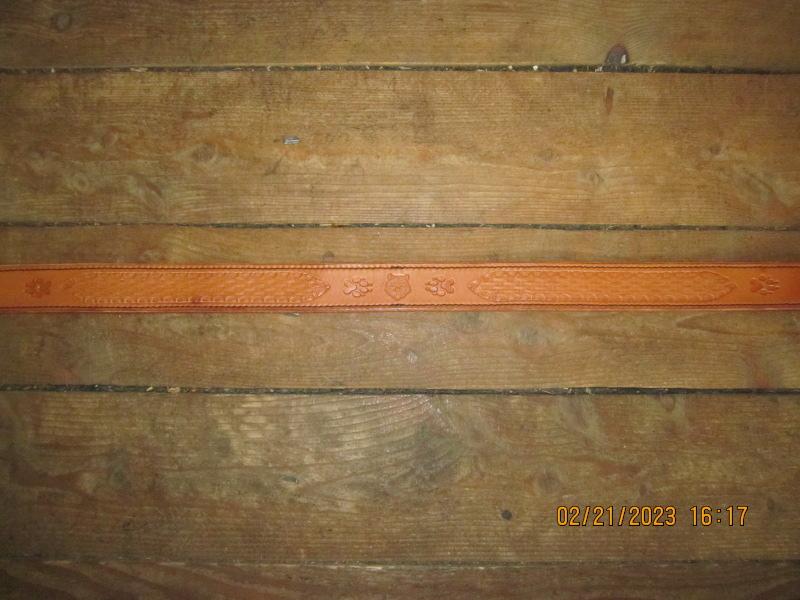
Well, the leash didn't come to pass. I wasn't quite sure how I wanted to do it and didn't have the right hardware for any of my ideas. However, digging through my stash I came up with an odd belt buckle I had squirreled away for something I don't remember. So I figured I'd make them a nice belt. All Wickett & Craig English bridle, the top is 5/6oz, the lining 3/4oz; sewn with 1mm Tiger thread. The buckle is held on with two Chicago screws, so whoever buys it can put their own on if they don't like this one. Would be a good belt for holding a handgun ! Next week we'll take a trip to drop off the goodies and visit with everyone at the shelter.
-
Lonewolf, that is definitely a Class 18 Duerkopp. I got one almost exactly like it and got it going again. Here's a thread I posted a while back: And here's one for the manuals: As far as finding parts, you'll have to either canibalize off another machine or find a really good machinist to make any parts you'll need. From what I understand, the Duerkopp factory was bombed in WW2 and all the machinery and patterns were destroyed. When Adler bought them out, they didn't bother with Duerkopp's design, since they had their own patcher. Whatever you do, don't loose the shuttle for the bottom spool! I've had two machinists look at mine to see if they could replicate it, so I would have a spare, but neither one was able to do it (even with all the CNC tooling!). I see yours still has the drawer and original slide-on table. If you decide to take her apart, don't loosen any of the guide wheels that are attached to the shafts that run inside the machine. These have to be exactly aligned or the machine won't work. When I cleaned up mine I used a lot of Kerosene to soak and loosen all the hardened oil and grease. After getting most of the goo out of the head, I used petroleum jelly (vaseline) and a good sewing machine oil to lube everything. For needles, you will need "System 88" or 332LL . I'm not sure if anyone still makes System 88 needles, but 332LL are available on Amazon and other places. Good luck with your project! Black Dogg
-
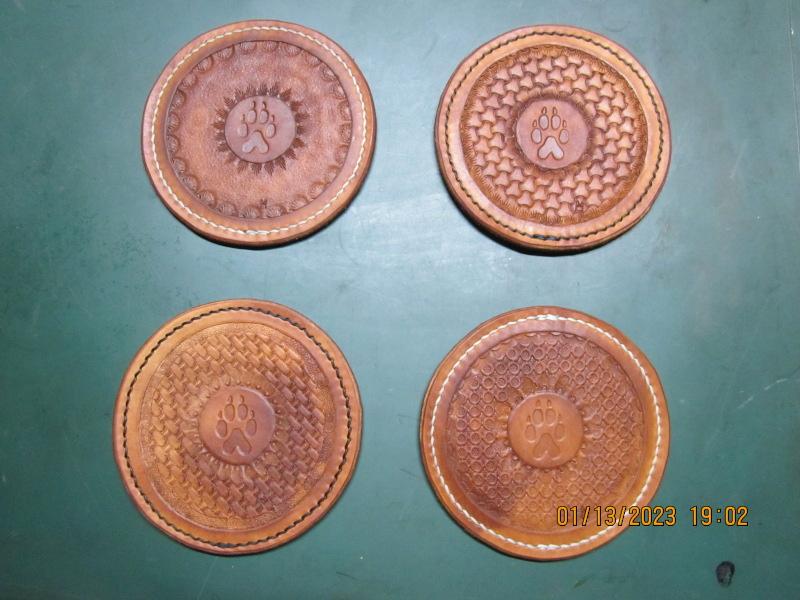
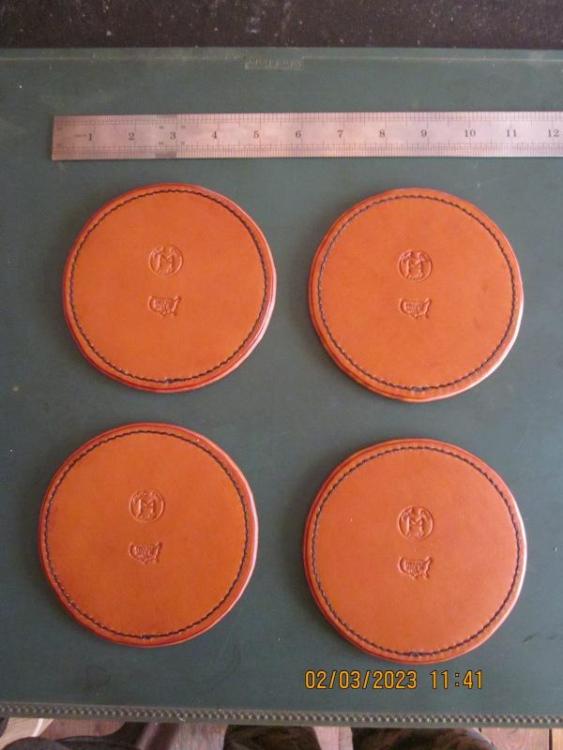
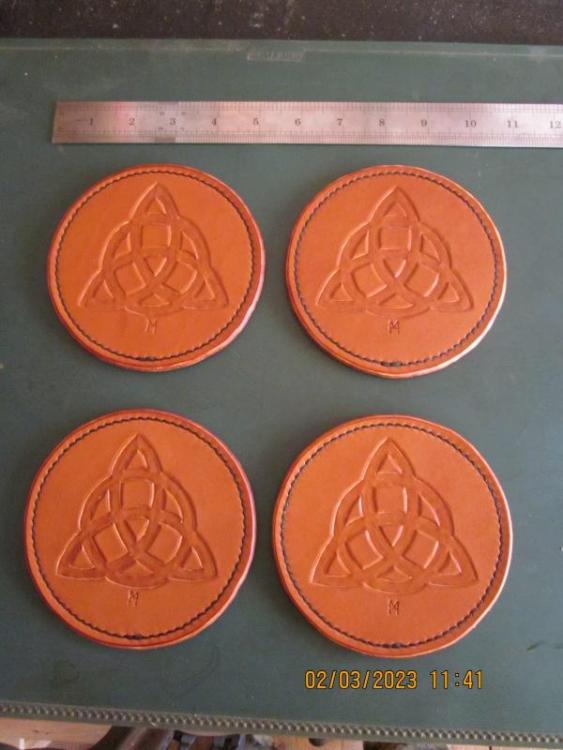
I haven't been able to do much in the last couple years (that little thing called "work" got in the way ), but lately I've had some spare time and dusted off my tools. The first pic shows four coasters I made for the animal shelter's gift shop. Front is regular veg tan, back is bridle. The basketweave shows it's been a while . The Celtic coasters are an order and made from bridle, both front and back. I tried some carving in bridle last month and was surprised how well it cut and stamped. All leather is from Wickett & Craig, the thread is 1mm Tiger thread. Next project will be a fancy leash for the shelter's spring auction; stay tuned for pics !
-
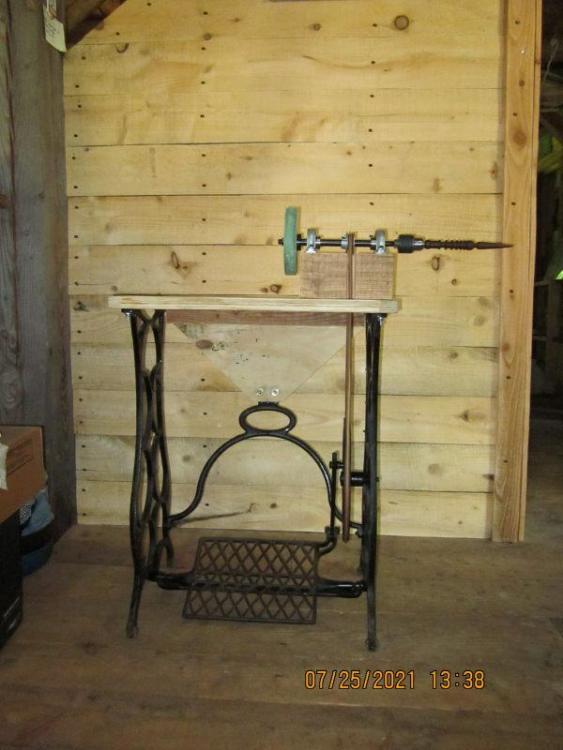
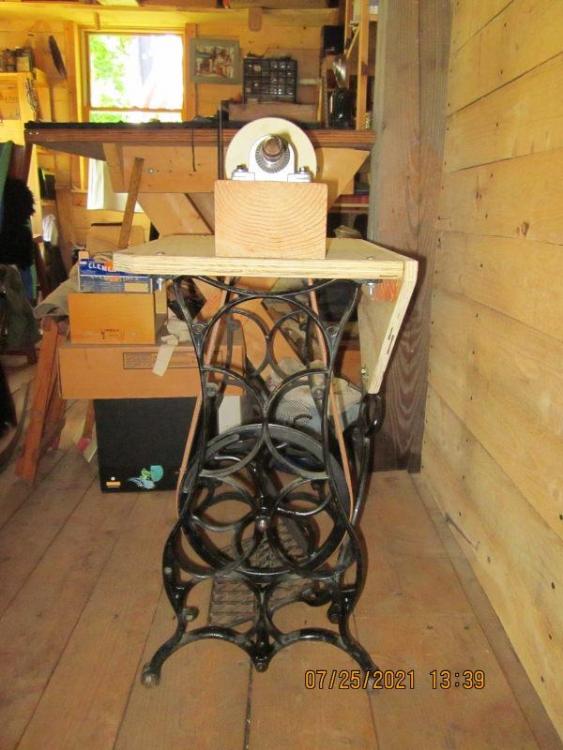
Here are some pics of my latest piece of "machinery": Living in an off-grid cabin, I don't always have enough power to run a Dremel (and definitely not a bench grinder), so I built this treadle burnisher. I bought a sewing machine treadle on ebay and put a table top on it. Then I added the double-ended mandrel ( https://www.constantines.com/mandreldoubleended.aspx ). On the left I put a felt wheel with green (x-fine) compound for polishing knives and other cutting tools. The right side has a regular drill chuck for attaching the leather burnisher (from Pro Edge Burnishers) or any other rotary tool. Some new sewing machine belting from McMaster-Carr ( www.mcmaster.com ) lets it spin like a top. I already put a razor-edge on all my leather knives and the burnisher works great, too. Talk about some shiny edges!
-
Yes, it's still here. But I have no idea how much it would cost to ship overseas. Based on previous small envelopes I've sent to Germany probably around $ 15 to 20. It gets pricey really fast once you put anything other than a sheet of paper in. Hope this helps! Black Dogg
-
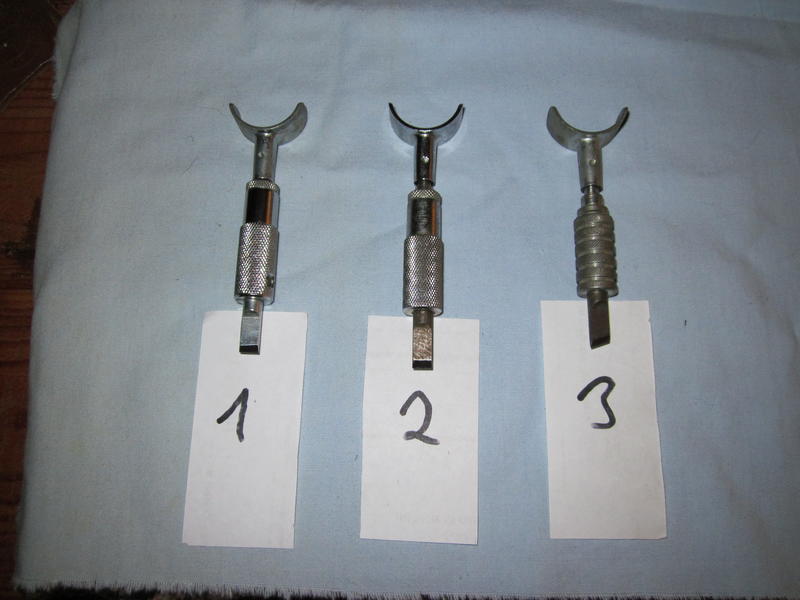
Knife #1 and #3 are sold pending funds; #2 is still available. Black Dogg
-
I recently upgraded to a new swivel knife and figured, since I can only use one at a time, having four around won't do me any good. I know that the price of tools is high, especially if you're just getting started and want to get the basic tools for yourself. That's why I'm making the following offer for folks new to the hobby: I have three swivel knives for sale; two are adjustable (#1 and #2) and come with a narrow, straight blade and one is non-adjustable (#3) and has an angled filigree blade (for detail work and small carvings). They are the basic Tandy models, but I have cleaned and lubed the swivel with sewing machine oil so it is a lot smoother than out of the box. I also sharpened and stropped the blades (when you get them from Tandy they don't cut well) so they are ready to carve when you get them. I will sell these for $ 10.00 each (postage included in CONUS) plus with each one I will throw in two random Craftool stamps (I have some duplicates that I acquired over the years). Please PM me with the number of the knife you would like and your address. Payment is by USPS money order. I will reserve your knife once I get the PM and send it out as soon as I get the MO. Black Dogg
-
Hi Roland and welcome to Leatherworker! This glue here https://schuhbedarf.de/klebstoffe/klebstoff-dosen/haller-hirschkleber-innenkleber-lederkleber-das-original-600gr.-dose.html is what I would use. Barge's or any other contact cement certainly work, but Hirschkleber is all natural and doesn't have the awful smell of the solvent based cements. Also, a little goes along way; that 600g tub will last you for a long time. I've had mine for ten years and it's not even half gone. If it turns thick over time, just mix a little water in it. I also second what Mattsbagger said above! Good Luck and post some pics when you're done ! Black Dogg
-
That's me; I'm an '81 vintage!
-
Dürkopp 18 Patcher Restoration - long journey...
Black Dogg replied to Constabulary's topic in Leather Sewing Machines
Shoepatcher, there's a few pics in the thread I posted three years ago (see above). If you're looking for some close-up shots, let me know and I'll see what I can do. How did come by FIVE of these, anyway? Did you buy them from private sales or was there a dealership somewhere over here? I didn't think there'd be so many over here; I had figured they were more of a European machine. Black Dogg -

Dürkopp 18 Patcher Restoration - long journey...
Black Dogg replied to Constabulary's topic in Leather Sewing Machines
Yup, that's me . By the way, when I watched your vid of the restored machine in action, I noticed that in the beginning you seem to be threading the shuttle the wrong way. According to the manual, the thread comes off the spool, out through the long slit, back over the spool and then out through the center hole in the other side. If you need more tension for the bottom thread, you have to feed the thread back inside through the second hole and out the third again. I guess some shuttles even had five holes for really high tension in extra thick leathers or multiple layers. Finding that manual was a godsend for me; I had spent hours trying to figure out all kinds of different ways to run the thread but just could not get it to work right. Another difference between your machine and mine I noticed is the flap covering the threadhook on the back of the arm. Yours swings down to open; on mine it is hinged and swings backwards. Black Dogg -

Dürkopp 18 Patcher Restoration - long journey...
Black Dogg replied to Constabulary's topic in Leather Sewing Machines
Constabulary, here's the post from three years ago with pics of my machine (and your thread stand ): The drawer on mine is missing, but it used to be on the right side of the stand, under the main part of the head. The two wood guides for it are still there and I want to build a new drawer for it. Black Dogg -

Dürkopp 18 Patcher Restoration - long journey...
Black Dogg replied to Constabulary's topic in Leather Sewing Machines
Well, I just watched the video in the first post and that is EXACTLY the machine I have! So if the title is correct I have one from around 1890 ! Thanks for posting it, Constabulary! I had figured (based on the four-digit serial number) it would be from around 1910-1920, but another 20 years older is great. Just shows that back then things were really built to last. Black Dogg -

Dürkopp 18 Patcher Restoration - long journey...
Black Dogg replied to Constabulary's topic in Leather Sewing Machines
Very impressive job, Constabulary! Da sag ich nur: "Hut ab!" I bet you wish you would have kept that threadstand you sold to me a couple of years ago , it would fit perfect with that machine. If you need the complete manual for it (or a class 17), try www.altenaehmaschine.de . Mr. Bethke has scans of the original manuals there. they helped me finally figure out how to thread mine. By the way, what's the serial number of your machine? Mine is 4910 and I think fairly early, because of how fancy the stand and paint are. The front crank on yours was an option that had to be special ordered when you placed the order with the factory and was more money. It was meant to make starting easier (instead of reaching around the side one could just use the front crank). As far as I know, every machine has the round cut-out cast into the body. And yes, I heard the same about the factory being destroyed in an air raid at the end of WW 2. A crying shame, if you ask me; those machines are awesome!! Again, very nice job on the restoration!! Black Dogg -
Yeah, that works, too. I always put a dab of grease right in front of the lock between the barrel and stock to keep any water from creeping through the small gap there. I quit using 4F, too, about ten years ago. I just prime from my horn with 3F, never had a problem yet. I've shot more deer with my flinter than with my modern gun. You should get yours back out again, even if it's just for some target shooting. They are fun to play around with, that's for sure! Black Dogg
-
A bit more on the history of these: The name comes from the actual animal part used for making the original ones. You would skin out a cow's leg and tan the knee section without stretching it too much, so the "hump" was preserved. It has the perfect shape to fit over a flintlock. A good coating of tallow/beeswax/bear oil/lard (or combination thereof) made it quite water resistant. I've been out on an overnight trek where it rained about half the time we were in the woods and at the end my rifle went off without a hitch (we loaded blanks that time, as keeping it dry was part of the challenge)! They are really handy when it snows while out hunting. garypl: Mine is tied around the bottom in front of the triggerguard with a looped half hitch (like tying your shoes) and on the wrist with a square knot. I can untie the front and just pull the cow's knee back by the time I bring the gun up. Not quite as fast as without one, but better than not having the gun off at all ! Nicely done, Sceaden!! Mine is just a piece of braintan stitched up and by now almost black from all the grease and powder residue. Black Dogg
-
Sent you a PM ! Black Dogg
-
I thought exactly the same thing when I first started out and was looking at the expense and/or time involved in buying or making a horse. Once I built mine (according to the plans in Stohlman's "Art of Handsewing Leather") and used it a couple of times, I realized it was time and money VERY WELL spent. Mattsbagger and Battlemunky have it right: For odd shaped pieces (and sometimes even for huge flat pieces) just use your imagination and turn/bend/squeeze until it holds. Sometimes a block of wood or old bathtowel shoved inside a pouch or such piece will bulk it up enough to clamp in the horse the way you want it. Bottom line: They were invented quite a long time ago for a reason and the basic principle hasn't changed much because it works. Not everything works for everyone, but I would not want to be without mine! If you don't want to go out on a limb with a full size stitching horse, I would suggest to build or buy a simple clam (or "pony") and try it. if it's something you like you can always upgrade and if it doesn't work for you then you didn't spend a lot of money. Whatever you decide, have fun with your new hobby (or should I say addiction?) and enjoy it! Black Dogg
-
Thanks, bikermutt! It is paradise, considering the set-up I had in my apartments, where everything was crammed together and I only had small windows. The best days here are in the winter when it's a snowy day and I can sit and carve while looking at the falling flakes. Doesn't get much better than that! Black Dogg
-
I guess I'm a little late to the party (considering this thread's 14 pages long already) but here's my shop set-up: I posted the original thread two years ago and just recently finished the walls and updated with some new pics. To everyone who's posted pics of their shop here: They are all pretty cool and some quite ingeniously set up for the limited amount of space they're in !! I might have to steal some ideas from you folks ! Black Dogg


