-
Posts
366 -
Joined
-
Last visited
Content Type
Profiles
Forums
Events
Blogs
Gallery
Store
Everything posted by rdl123
-
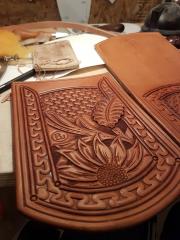
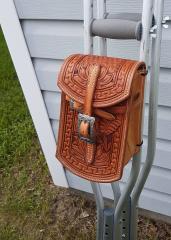
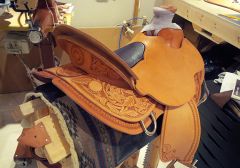
Bust up my leg bad this spring and spent three months on crutches. Built these to make hauling wallet/keys/phone etc easier while crutchbound...
- 11 replies
-
- saddle bags
- crutches
-
(and 1 more)
Tagged with:
-
Looks great Randy!! rdl
-
Horn Broken Off - Wade Saddle
rdl123 replied to rdl123's topic in Saddle Identification, Restoration & Repair
mikesc - I think I will do that - Maybe tonight when I'm done work! Thanks for the advice! R -

Horn Broken Off - Wade Saddle
rdl123 replied to rdl123's topic in Saddle Identification, Restoration & Repair
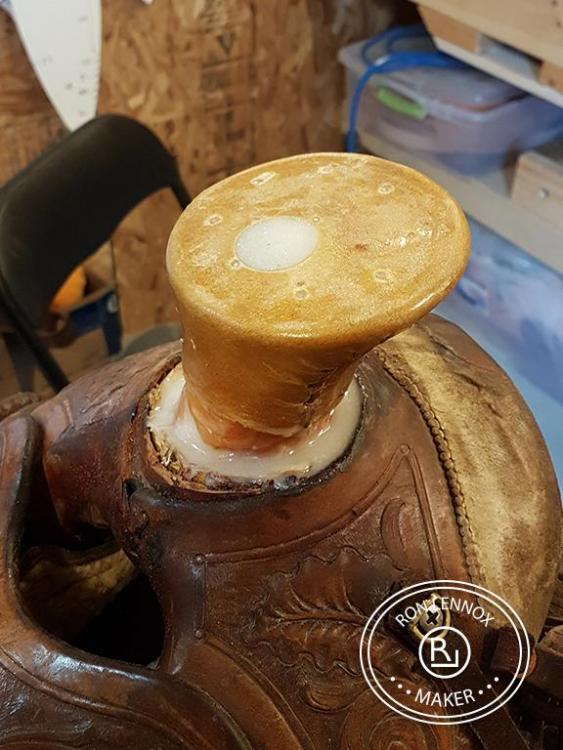
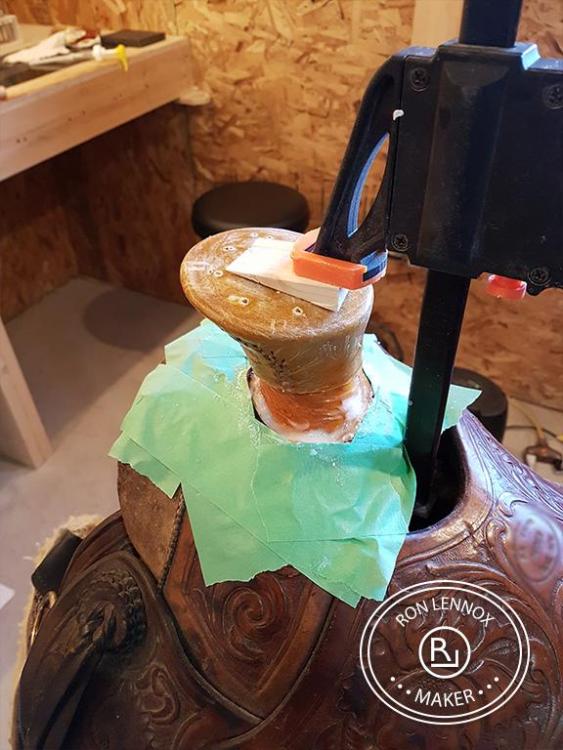
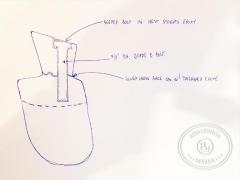
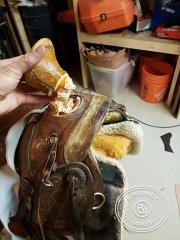
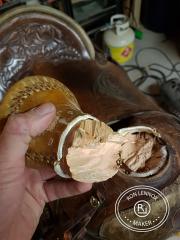
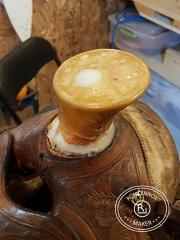
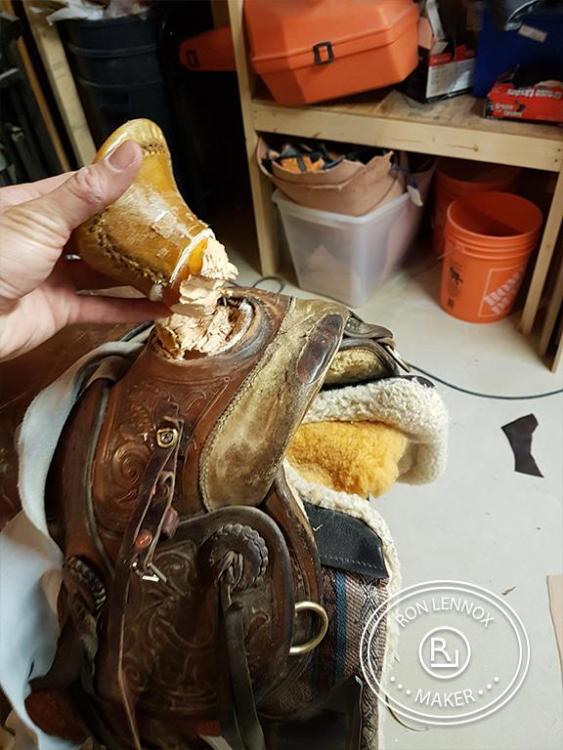
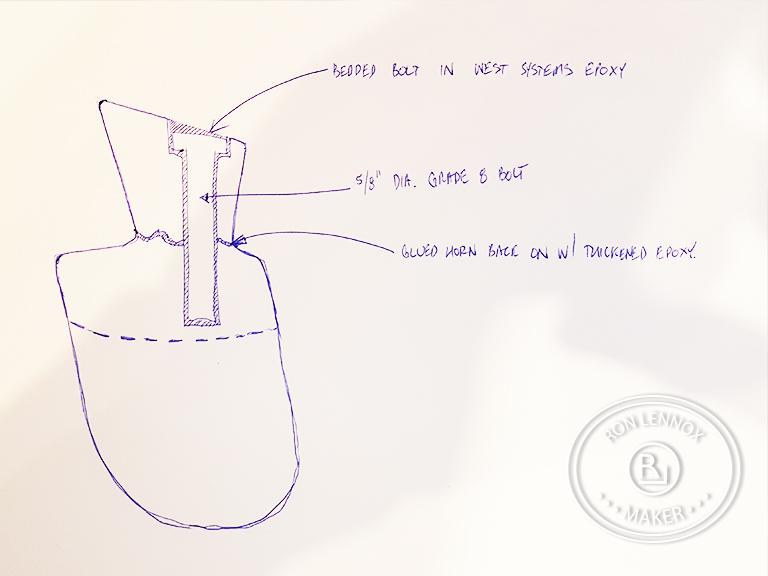
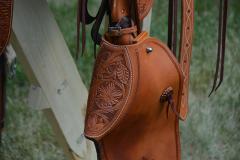
Fair enough! Bad break and we didn't just want to garbage such a nice saddle. Got the epoxy idea from structural engineers who use it to hold heavy loads in concrete. https://www.westsystem.com/instruction-2/epoxy-basics/bonding-fasteners-hardware/ Here are some pics before I cover with leather again... -
From the album: Broken Wood Post Horn
-
From the album: Broken Wood Post Horn
-
From the album: Broken Wood Post Horn
-
From the album: Broken Wood Post Horn
-
From the album: Broken Wood Post Horn
-
I have a friend who gave me this well used and well made older wade saddle to repair. A horse reared up in a trailer on him and the horn caught on one of the ribs of the trailer ceiling - Bust the horn off as you can see. This saddle is old and well used - However goal here was to get it back to a functional rig that could still be ridden and used for light roping (ie: brandings). Here is my solution to the repair - I would like the thoughts of others...What would you have done and do you think this repair will be solid?
-
Ed, Impressive workmanship! Very clean and smooth looking! Sure nice to see other makers work in mid stream! I like both your rigging options and I may just have to try the slot one on next saddle... And yes - I can see what you mean on seat jockey / rear jockey line - Very helpful information - I will make sure my next build reflects all of this input - I sure do value all the time you've put into giving these tips and critiques - Very useful to someone as green as me at all of this!!! Be interested to know what you do for trees? R
- 26 replies
-
- 26 replies
-
Rob, one thing I have been looking at is the color you got on that saddle - Really, really like that coloring - Looks very rich - How did you achieve that?
-
Rob, This is an interesting subject and not one I have enough experience on to hold very valid opinions... However, when I started building saddles what I observed was that saddles that had the seat jockey and the rear jockeys more or less lined up on the horizontal looked 'balanced'. I also try to get my rosettes lined up horizontally - The ones at the latigo carriers and the farthest back ones on the rear jockeys. The other thing I think looks good is a seat jockey depth that matches the skirt depth at the cantle point - However, that does make a deeper skirt which some may not care for. Very subjective in my opinion...What I like may look terrible to others for all I know! Here are some examples of my work showing what I have done... as you can see I struggle to line up my jockeys on the horizontal - However I do try too get it so that the lines from one to the other, if imagined, flow nicely. I have yet to build a saddle I think looks really good. I typically only see mistakes. My last two rigs have been inskirt rigged which I really like - I believe they are strong if built right and cleaner looking than a flat plate. I also like the lack of leather bulk under my leg - It does feel closer to the horse. So far they have held up to roping well - We rope bulls from time to time and have observed no problems. Makers who have lines that I really like are Mike Keetch and Bryan Kendrick - I like to study saddles like theirs and analyse why they 'look great' with the goal of improving my own work. RDL
-
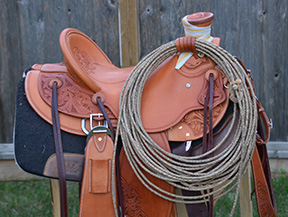
Hello Waddy, I am not experienced but I usually target about 6.5" to the bottom of the rigging ring. I find if I go much lower than that the saddle looks 'front end heavy'. Also that has been on wade / slick fork saddles like the one pictured here. Ron L
-
Randy, thanks for the kind words! SaddleBags: I bought the pattern online somewhere and just cant remember from where - After building these I'd say if I did it again I would definitely want the eagle beak part moved ahead to help the stirrups hang a bit more level! Also, after riding this saddle I don't know if I would want taps on my personal rig! Sure drag on everything if you get into the brush. Big Sioux: Thanks for the encouragement, and yes, the quality of instruction available nowadays is amazing. Between Dale Harwood's & Jeremiah Watt's DVD's there is very little excuse to do poor work! The other thing I have observed is that most makers these days are quite helpful. If you can arrange it, an hour or two, in person, with some of the good makers out there can really help a guy! Regards - Ron
- 26 replies
-
My thoughts on trees are as follows: Do not buy a cheap tree Sonny Felkins makes a good, reasonable priced tree - I like his Northwest Bars Lately I have used all Swanke trees. A slick fork will make covering the fork with leather way easier than a swell fork saddle which more than likely will require a welt. I like slick forks! A deep seat and a nice cantle will keep you locked in. Nice thing about slick forks is when you do get some daylight under you and the saddle you tend to come down right back in your seat - There are no swells to impede finding your seat again. If you ever plan to rope or cowboy out of a saddle wades make nice working rigs. Enjoy the Dale Harwood DVD's - The way he handles a round knife gives you an idea of how it should be done! Buying leather - The seat will come out of the butt piece of leather - This is a an area of the hide you want as clean as possible. Finding a hide with no blemishes is tough! R
-
-
Hello Paulamoose, I haven't look at Bruce's stuff so I can't comment one way or the other. I think Jeremiah Watt's DVD's should be a big help. The only thing I like to do different from him is I bore my strings through the tree. Jeremiah screws his on. Jeremiah Watt's DVD's are very in depth and what I usually find myself going back to. Saddle making is fun - Just in a exasperating, long drawn out kind of way! I don't know where you plan to buy your leather but Montana Leather in Billings has been pretty good. In a perfect world you would hand pick the sides you want but that's not always feasible. R
-
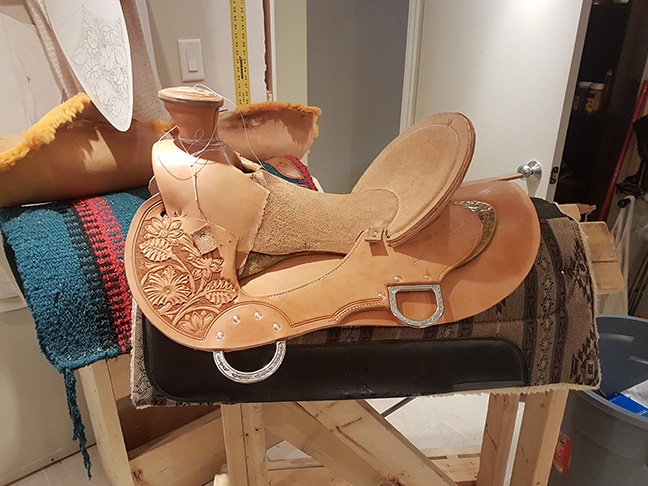
Hello Goldshot, Thanks for the pointers - I find them very helpful... Regarding Gordon Andrus bar grounding tips - Was that in this issue? http://leathercraftersjournal.com/store/product.cfm?product=1212 If so i'll try and buy a copy. I really debated whether to round the leather inside of the rigging rings - I was torn between making the extra room for cinching up and keeping the skirt line smooth and flowing...In the end I decided to keep the line flowing through but I still question it - Maybe on next one I will round it and see how that looks! I agree on the seat jockey and front jockey pointers - I really wish they were deeper and that the seat jockey came forward a bit... On the misalignment of front & rear jockeys - This is an area I struggle with because I am never 100% sure how the saddle will sit on a broad selection of horses...as some horses are downhill and some built uphill (and I don't have enough experience to feel confident in how my saddle sits on the stand). The horse this saddle is being used on primarily turned out to hold the saddle in such a way that they lined up horizontally pretty well. However, If i was doing this saddle again I would drop my front jockey line 3/8" - 1/2" down more than likely. I'll keep an eye on that center button tab - I would definitely move it down if doing a cheyenne roll!! Once again Goldshot, I appreciate the help. I believe constructive critiques are really important to making progress. This forum has been a hug help to me in the past and continues to be. Josh, Thanks for the kind words - I think I have finally found a seat shape I like - My personal saddle has a seat shaped very similar to this one and I can put in really long days riding colts and feel pretty good afterwards! Hand stitching is something I enjoy - The secret I think is to purchase very high quality awls, keep the points sharp and have good awl handles. For cantle bindings I had a friend turn a awl handle that is quite large - Like the size of a medium sized orange - It really helps me control the blade and reduces pressure on my palm making the stitching far easier and more comfortable - That handle alone probably improved my cantle binding stitching by 50%. Saddle got used this past weekend and sweated up the horse good. Swanke tree was incorrectly stated as 4.5" handhole in main description - It is a 4.25" handhole with 90 degree bars. Regards - Ron L
- 26 replies
-
Thanks for the kind words. Horsemint: I like to use softer chap type leather for my horn wraps as I find it doesn't slick up as fast as mule hide. This was a piece of 'butter' colored glove tan and I skived edges down to help wrap go on nice. Unfortunate the yellow doesn't go all the way through so I ended up with this strange affect - A few days of roping in the mud & rain and this wrap will just all go greyish brown (in theory)! R
- 26 replies
-
Ground Seats - Area of huge debate in saddle making world. I built first two with all leather and last two with tin strainers. I believe tin strainers is the method I will use going forward on all saddles I build. Advantage of tin in my opinion: Very Strong Quick to build Easy to get a flatter profile across pin bone area Uses less leather R


