supercub
-
Posts
135 -
Joined
-
Last visited
Content Type
Profiles
Forums
Events
Blogs
Gallery
Store
Everything posted by supercub
-
Suggestions
supercub replied to charlescrawford's topic in Gun Holsters, Rifle Slings and Knife Sheathes
ATS-34 is a stainless alloy that is( or was) a popular material for custom knives. It has some heat treating requirements that cause most home knifemakers to farm out profiled blades to specialized heat treaters. It can be done in a small shop, but it is a little more demanding than regular carbon steel. My experience is that it will hold an edge for a long time IF you can get it sharp and keep it sharp - don't let it get too dull or it will take some effort to get it back to a good edge. If I have a real dull blade, I usually set it up with a guide like the Lansky sharpening tool. It may take some time and effort to get an edge established, but it is necessary. Once you get the proper angle established, it can be touched up with a cardboard abrasive wheel or a fine grit belt sander at low speed. Most custom knife makers establish the grind line and final sharpen with a belt grinder. A small grinder in 1x30 or 1x42 works well and also serves as an excellent tool to shape the edges of leather projects. If I could have only one power tool for leather work it would be a small belt grinder - even before a sewing machine! -
Suggestions
supercub replied to charlescrawford's topic in Gun Holsters, Rifle Slings and Knife Sheathes
Since I learned to sharpen the round knife, I haven't used any other type. If you get them sharp, they are so much easier to use than razor knives. Once I get a good edge, I strop it everytime I pick it up. Once a week or so, I'll run the edge against a cotton buffing wheel with grey polishing compound. I've used the inexpensive Midas knives and they work okay, but they are a little softer steel and need more frequent sharpening. The osborne knives are a little better steel and I still use them, but I've had a few custom made round and head knives from knifemaker friends who used ATS-34 steel - keeps an edge for a log time! Use whatever works best for you. I just happen to like the old style cutters where the handle fits the hand. -
How Would You Sew This And What Machine
supercub replied to Barlaam1's topic in Leather Sewing Machines
I started sewing leather many years ago with a Tandy Awl and a couple of harness needles. After a few years, I upgraded the awl to one of Douglas snakehead designs. I handsewed for quite awhile until I had enough business to buy an entry level machine. That machine was the Boss. It was one of the first machines that Tippmann made and it took me awhile to figure out it's quirks. Once I did, it served me well until I had enough customers to upgrade to a Pro 2000. It is certainly faster than the Boss, but I still use the Boss (and the awl and harness needles) when the need arises. If I need to lay down a lot of stiches - like a belt, I'll use the Pro 2000. For small jobs, or prototypes, I'll usually do them on the Boss. It continues to work well and I have no desire to give it up anytime soon. -
How Would You Sew This And What Machine
supercub replied to Barlaam1's topic in Leather Sewing Machines
Hard to tell from the pictures, but it looks like you could put the seams on the outer edge rather than folding them inside. If you sew along the outside edge, the Boss will easily sew through two 10oz layers with 346 thread. I've made a number of cases and saddlebags with it by using a slightly lighter weight gusset of latigo leather. Tippmann also used to sell a french box attachment that would let you sew through a box corner mitre joint with two layers of 8-10 oz. -
Need Help With Sheath Idea
supercub replied to Shooter McGavin's topic in Gun Holsters, Rifle Slings and Knife Sheathes
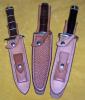
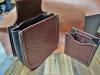
I've used the magnetic vinyl like that on vehicle signs as an inner layer and it sorta worked, but most custom knives that I work with are stainless alloys that don't stick that well to magnets. They stick, but not like regular carbon steel. I'm attaching a couple of photos I dragged off the internet to illustrate my previous post on retention straps on Randall knives. One sheath appears to be a Heiser and the others are not - don't know who's, but they are fine work.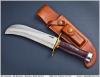
-
Need Help With Sheath Idea
supercub replied to Shooter McGavin's topic in Gun Holsters, Rifle Slings and Knife Sheathes
I'd do it a little differently. It looks like a tanto style with a sharp or false edge on the top. If so, it ought to have a solid welt against both edges of the blade. The welt should be only as thick as the blade so as to keep the knife from moving ( and slicing through). If you try to make it like a pouch, it will be a little difficult to accommodate the hilt and still keep the blade tight to the sheath. I've had a lot better luck making pouch sheaths for drop point knives (with small guards) rather than with two edge or tanto style blades. A conventional style sheath (like a Randall Heiser type) would be my choice for this knife. A conventional transverse strap across the finger groove area should do an adequate job of securing it. Just make sure that the strap is away from the blade when the knife is drawn. On second thought, looks like you could put the retention strap on the front side of the knife ( across the thumb groove) and put the snap on the face of the sheath. I'd post a photo, but this IPad won't let me. Google Randall knives Heiser sheaths and click on the image links. Lots of good examples there. Heiser sheaths were some of the best ever made. -
Laminated Holster
supercub replied to Red Cent's topic in Gun Holsters, Rifle Slings and Knife Sheathes
Pretty much the same way I've done it when repairing the stitching on old trunk leather gun cases. Glue in the new welt and use the existing stitch holes as a guide for punching new holes. Use a VERY sharp awl and index the punched holes with a bunch of needles. The process is similar to aligning aluminum panels with Cleco fasteners prior to riveting. If you're careful with the awl, you can do a good job of duplicating the original stitch line. -
Laminated Holster
supercub replied to Red Cent's topic in Gun Holsters, Rifle Slings and Knife Sheathes
The old Safariland holsters that I'm familiar with used a softer plastic than kydex. Many of them used a plastic front welt that also doubled as a molded sight track. it seemed to work okay, but the plastic would degrade over time (about the time the rest of the holster needed replacement). I would think that a welt made from several layers of leather would be easier to work with than a built up welt of kydex, especially if you're using an awl or stitcher to punch the holes. If you're using a drill press, then it really wouldn't matter. -
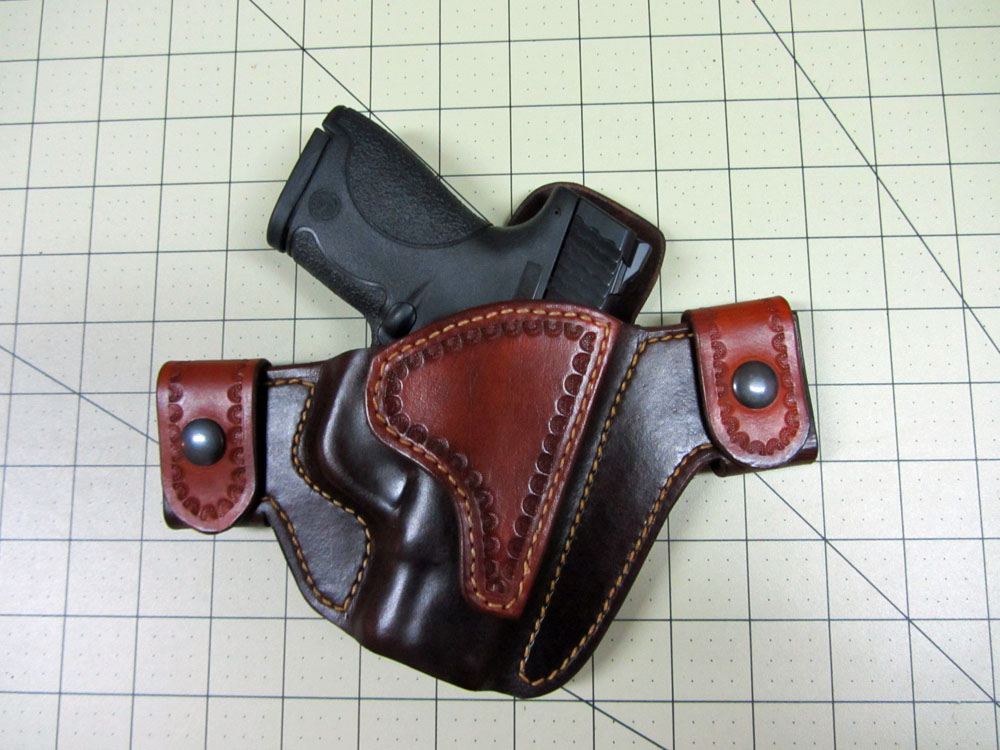
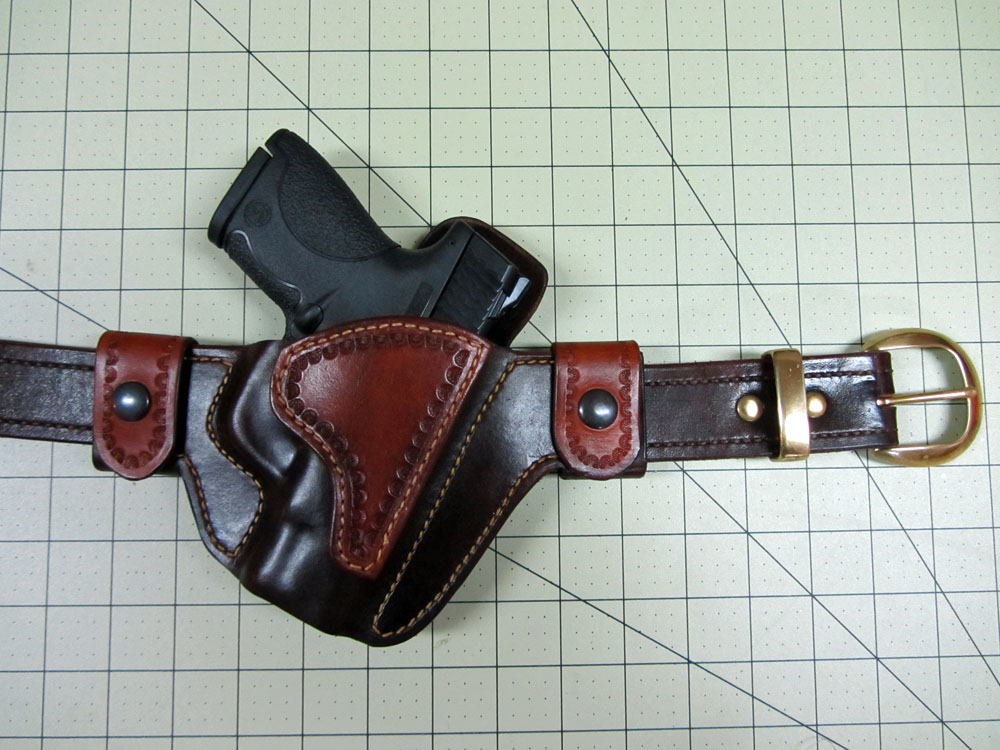
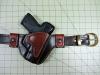
Two Tone Snapcake
supercub replied to supercub's topic in Gun Holsters, Rifle Slings and Knife Sheathes
Thanks everyone for the positive comments. Just for clarification, I didn't mean to imply that the "snapcake" holster was anything new or unusual, or that Ran was the originator. I've made more than a few of them of various types over the years. This time, I tried to copy Ran's style of two tone finish with a decorative reinforcing patch. My usual snapcake style is a flat back with a double layer front of two pieces of 4/5oz bonded together. Sorta like this one:
-
Two Tone Snapcake
supercub replied to supercub's topic in Gun Holsters, Rifle Slings and Knife Sheathes
Ummm.... Not quite the first one, but the first of this particular style. It was fun, and I got to try a couple of new techniques. -
I have been admiring many of the holsters that I've seen posted on this site. In particular, I've really like the two tone "snapcake" holsters that Ran has produced for the 1911. They are really attractive and very well executed. Having some spare time and a little leather, I decided to try one based of his style for my personal S&W Shield. Lest you are thinking I'm stealing his design - I have no intention of producing this holster for sale. It is for my own personal use. His holsters may look simple, but they are a little more challenging than I had expected. I've changed a couple of design features to fit my needs, but I tried to retain his style. Thanks Ran, for providing a design worth emulating.
-
A Couple Of Recent Builds
supercub replied to Ran's topic in Gun Holsters, Rifle Slings and Knife Sheathes
Every time I see one of your new holsters, I get depressed. They are so well done that I look at my own latest project attempts with disappointment. Your design is clean and the execution is almost perfect. I do my "snapcakes" styles a little differently, but I sure like the style of yours. Good job! How do you layout and dye the front side of the straps on the two tone holsters? Any chance you could post a photo of the holster back? -
I don't know how to post a link, but if you search for the thread "vacuum molding" from Sept. 2012 it contains a lot of very good information. Particle ,from this site, posted a description of his vacuum system and where he got the components. His website, "Adams Leatherworks" also has a very good tutorial. I based my system off of his and am very happy with the results.
-
I was going to reply also, but Dwight covered everything I would have said. I got my vacuum pump oil at NAPA. Unlike many things I've bought at Harbor Freight, the $99 vacuum pump seems to work well. Don't forget the HF 20% discount coupon.
-
Sure looks good to me. Over the years, I've collected several beader tools and a few push bevelers. They work well, but aren't really necessary for most of my small projects. Nowadays I mostly use a twin blade swivel knife blade and a plastic beveler blade. The blades are each permanently mounted in a couple of cheap swivel knife handles. They re quick, work reasonably well, and are relatively inexpensive compared to good quality beaders and push bevelers. Just scribe a light border line with a compass, follow with the twin swivel blade and make a pass where necessary with the plastic bevel blade. I think I bought the blades at Tandy or the Leather Factory.
-
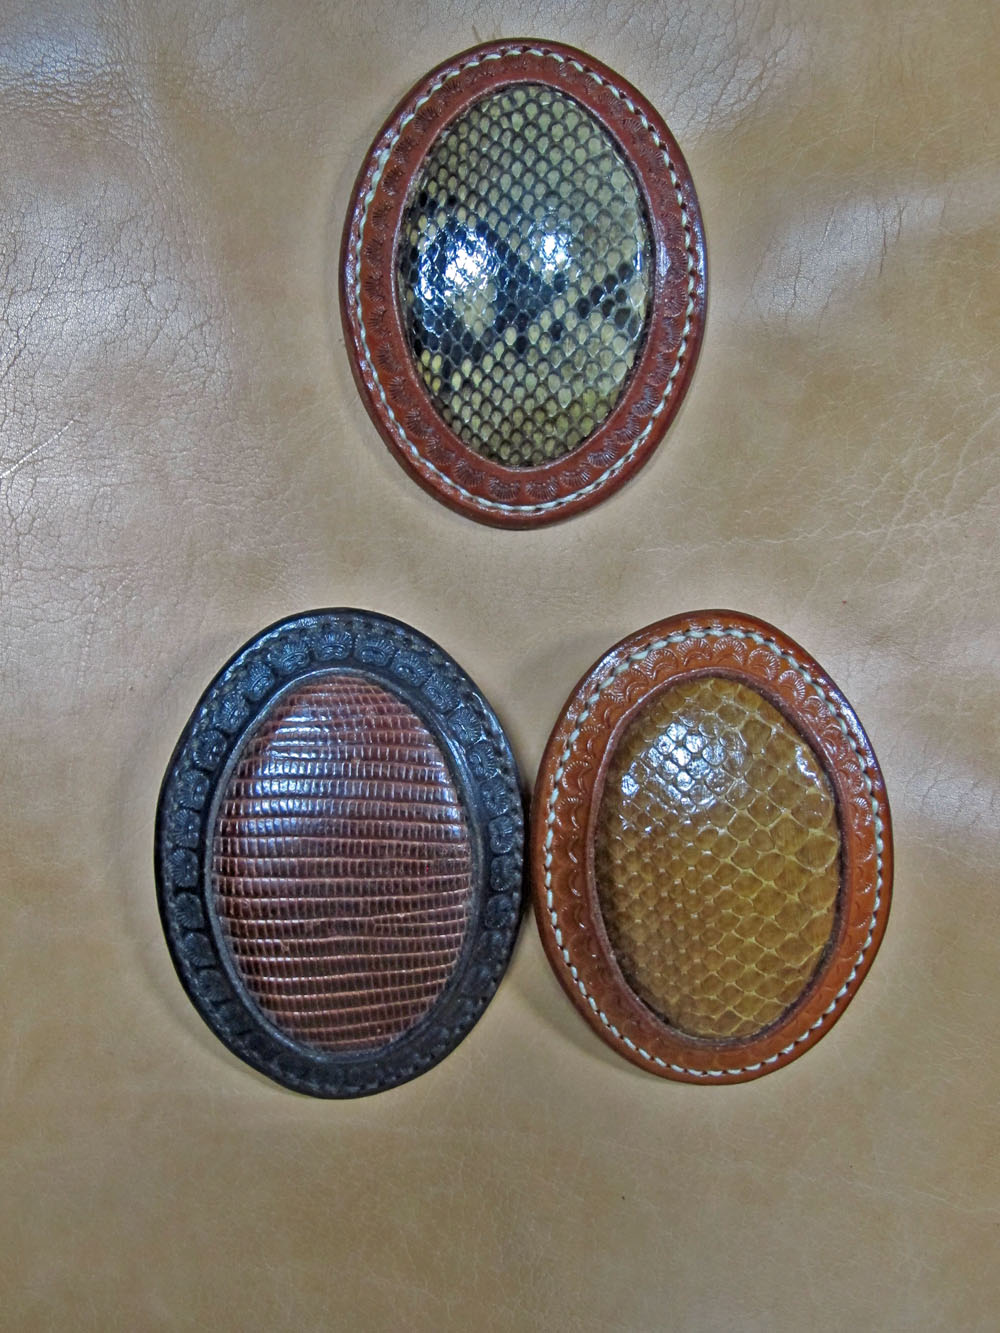
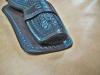
A Few New Projects
supercub replied to supercub's topic in Gun Holsters, Rifle Slings and Knife Sheathes
Thanks for the compliment. The buckles were the result trying to do something with a bunch of small pieces of snake and lizard left over from other projects. A few small pieces of 4/5 oz vegtan and some 1.5" buckle blanks and a little time to stitch it all together and voila! -
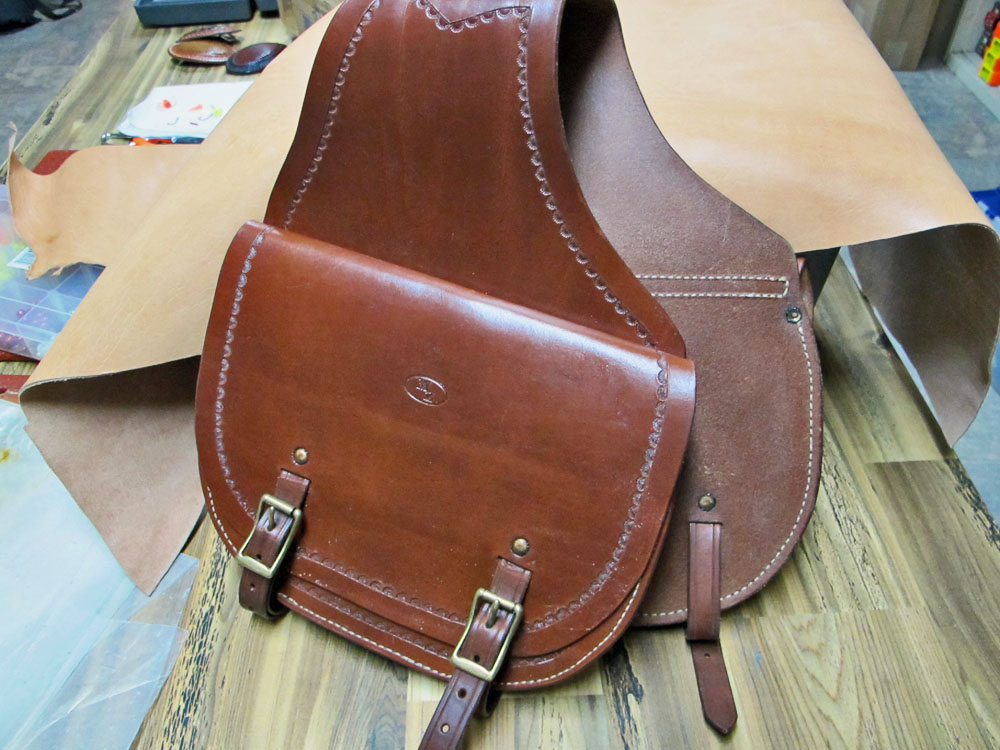
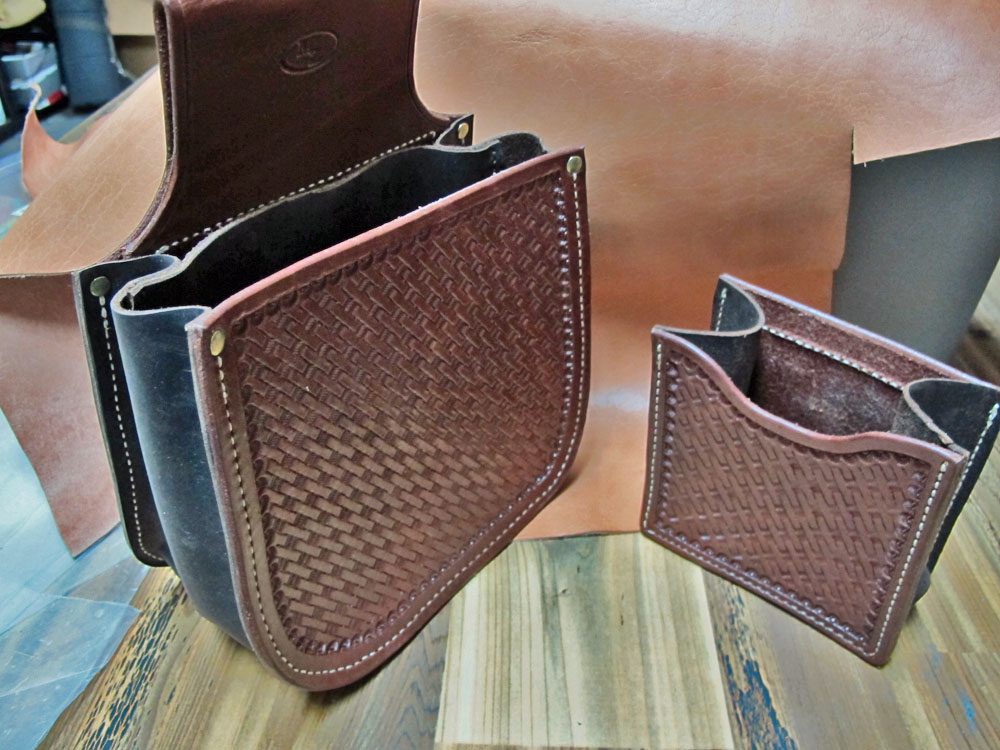
I don't usually do cowboy action gear, but I decided to try a couple of things as well as some contemporary stuff. Still trying to learn how to do a lot of it - but it's all fun. Sorry for the photo quality - still trying to figure out the camera and photo software.

-
I use pretty much the same setup as Jake with the exception of the bag. I went cheap and use the vinyl bag. That's a mistake, spend the money for a good bag. When the vinyl bag wears out I will replace it with a poly bag. With the exception of the bag, I'm really happy with the results from this type of vacuum setup. I used a food saver bag years ago when I first started molding leather. It worked okay, but the bags were a little pricey. I also tried the foam in a hydraulic press. The dedicated vacuum pump like Jake uses is a FAR superior method. It may seem a little expensive, but it does a really good job and makes the process a lot easier. I haven't tried a home vacuum cleaner and space saver type bags, but I would be surprised if they pulled enough vacuum to do an adequate job.
-
It would be helpful if you could attach a photo of your molded holster. Most mold methods I've used ( vacuum press and shop press with foam) required a fair amount of manual detail work with a bone folder or modeling spoon after pressing to get the desired results. There is also a critical moisture level that the leather needs in order to capture fine molded detail. Leather that is too dry or too wet will not retain sharp, crisp detail. I currently use a vacuum bag system that does most of the "heavy lifting" giving a pretty good overall fit, but it is still necessary to go over the piece with a tool to bring out more detail. Additionally, thinner leather will usually give a finer level of detail. It is certainly possible to get good results with 8/9 leather, but it takes a little more time and effort than with thinner leather.
-
There are a lot of good machines out there that will work for you. It all depends on what features you want and how much you will use it. If you have no experience, then the hand operated Tippmann Boss will allow you to stitch up to around 3/4" thick leather slowly and accurately. I started with one and eventually worked up to a JUKI 441 clone. I still use the boss on small projects or when prototyping a new design. If you are going to do a lot of stitching i.e. belts, then a powered machine might be a better choice since they are much faster.
-
I've done a few. I use a piece of galvanized steel around 18 gauge. Cut it out with tin snips, glue it to the holster body, overlay the leather reinforcement and sew it together. Lately I've sewn two pieces of 4/5 oz together with the metal sandwiched between the layers. No need to add an additional reinforcing leather throat piece and you end up with smooth grain side inside and out. Of course, if you are building an avenger style, you'll need something like the throat band for the rear belt loop.
-
Kydex/leather/machine Sewn
supercub replied to Red Cent's topic in Gun Holsters, Rifle Slings and Knife Sheathes
I've sewn a few pieces of Kydex for holsters, knife sheaths and mag pouches on my Pro 2000. I don't really like the result since the back side of the kydex is "punched out" leaving a burr which can abrade the thread. This effect is somewhat reduced if you use a very sharp needle. I suppose one could use kevlar thread to minimize thread fraying, but it seems like too much hassle for a limited return. It works a little better when sewing a kydex face to a leather back like the cross breed holster, but riveting it together seems to work just as well (its still a piece of plastic regardless of how you dress it up). As for forming the kydex - there are numerous you tube videos on kydex knife sheaths and holsters. All it takes is heat and pressure - just like making diamonds (with somewhat less spectacular results). -
Lion Holsters
supercub replied to silkfatblues's topic in Gun Holsters, Rifle Slings and Knife Sheathes
I use the same type of staples (think I got them years ago from Ohio Travel Bag). I use a small thonging chisel to cut the slot and a pair of cantle pliers to squeeze the end tabs down. If I did a lot of them, I'd probably make a flat steel bar to serve as an anvil and hammer clinch the tabs shut. The staples work pretty well on belt keepers and are quicker than sewing. I do have a question on the Python holster. The molding and finish work is excellent, but how is the gun retained? The stitchline is along the perimeter of the holster and does not appear to be near the gun. I realize the glue holds the leather together, but is that going to keep the holster from separating and loosening over time and with use? I have not had a lot of longterm success with retention unless the stichline is tight to the gun. If it works this way, that's great - Just curious. edit: I know there is a thumbbreak for overall retention, but does the gun move around in the holster after the glue seam wears? -
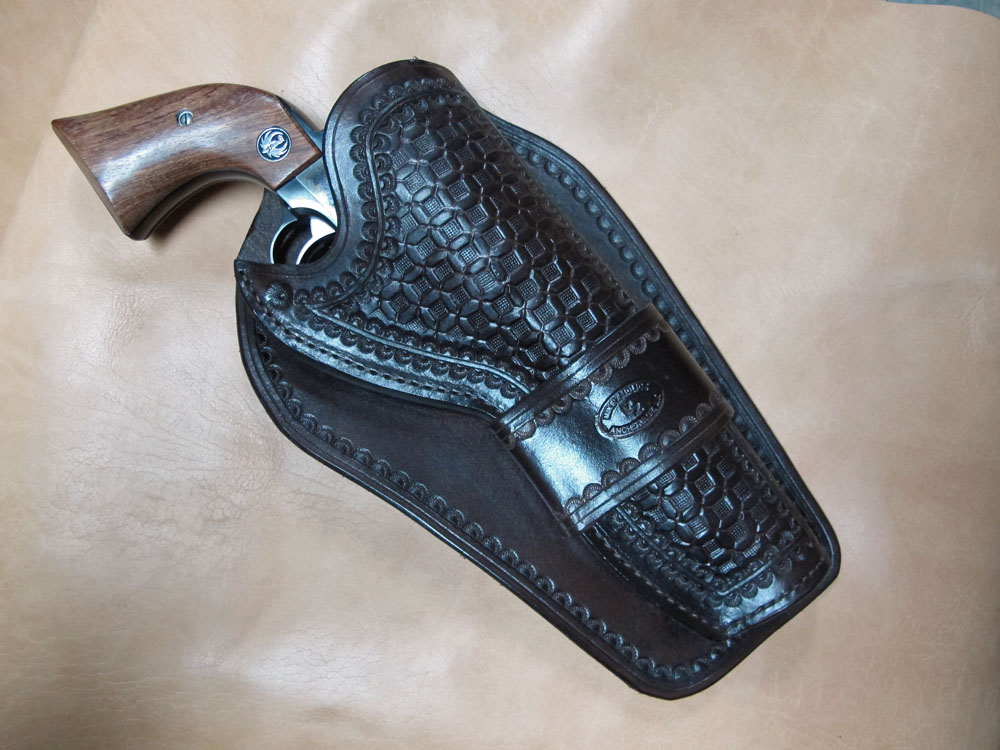
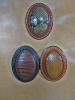
Geometric Basketweave
supercub replied to Eaglestroker's topic in Gun Holsters, Rifle Slings and Knife Sheathes
Wow! That is plumb beautiful. -
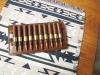
Woven Cartridge Loops
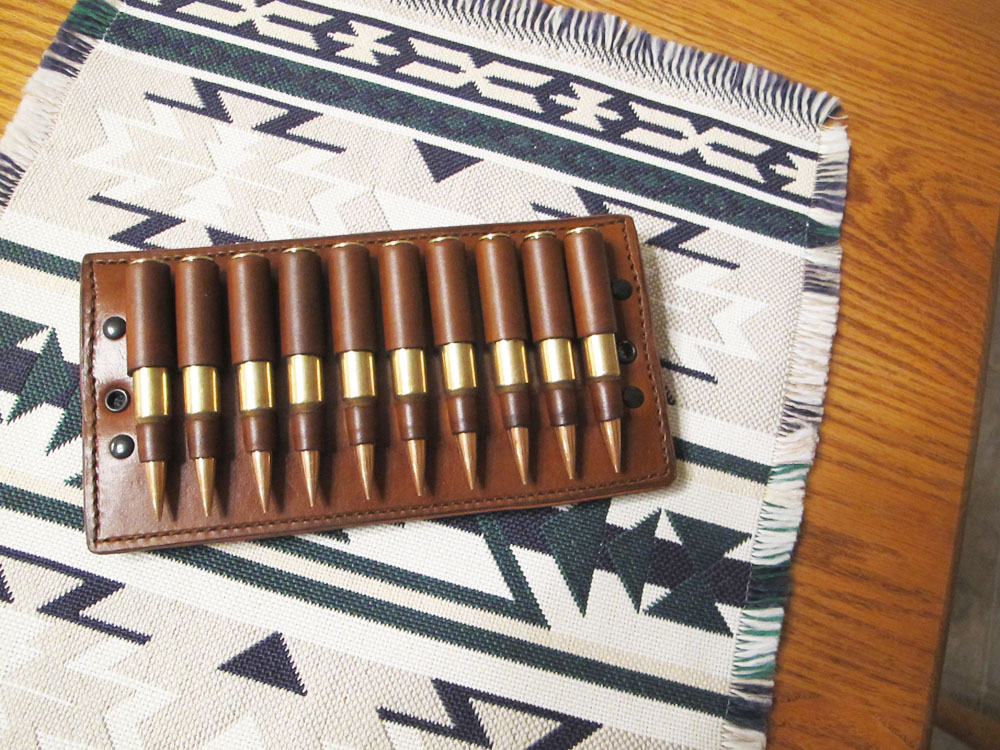
supercub replied to Lobo's topic in Gun Holsters, Rifle Slings and Knife Sheathes
I've done a lot of these over the years for rimmed cases. As long as you secure both ends of the woven strip and wet mold (and allow to dry) the loops, they shouldn't move. Shotgun shells are doable, but you have to cut a pretty good size slot and end up with a potentially weaker holder. I prefer to stitch loops for shotshells. Rimless shells like many rifle cartridges work okay with two loops. A little more work, but much easier than stitching.