


blue duck
-
Posts
331 -
Joined
-
Last visited
Content Type
Profiles
Forums
Events
Blogs
Gallery
Store
Everything posted by blue duck
-
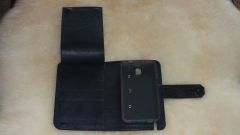
From the album: Blue Duck Creations
-
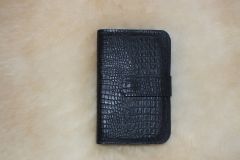
From the album: Blue Duck Creations
-
Branding is hard, very hard. My 2 cents. I have to agree with others, the change of font is a must. I kept reading and re-reading it trying to figure out why the two g's did not look symmetrical, it took a bit to realize they were two different letters. You don't want anyone looking for Maggies Leather when they need to find Magpie Leather. Without knowing your style and what you plan on going forward with, how about Bespoke Leather Goods? Very stressful
-

Leather Weights For Newb
blue duck replied to retiredff's topic in Purses, Wallets, Belts and Miscellaneous Pocket Items
Tony, I know you asked for veg tanned, but for some of your purses/bags/clutches you may want to look at chrome tanned leather, in about 3-4 oz. You can find many colors and types of embossing that may give you a very different look. You can still lace it. If you ask the folks at Springfield leather, they will send you only the amount you need so you don't have an entire hide for one little clutch. (BTW - Depending on your design, with that wt. leather you may need to add a stiffener to get the shape you are after) Just an idea to consider. Best of luck. -
Hi Mike, Sent you a pm. Thanks.
-
Inside Lining For A Satchel/breifcase
blue duck replied to rmr's topic in Satchels, Luggage and Briefcases
Hi rmr, Know you may already be done with this by now, but here is my 2 cents. I am not sure which material you are referring to exactly, but if it is the material that is used commercially, the satiny looking stuff, stay away from it. Far, far away. If you put that much time, effort, and expense into the outside the fabric they sell as lining will fall apart before the outside has had a chance to break in. Suggest you go back to the fabric store or anyplace where you can feel the fabric, and look in the upholstery wt. materials. It is going to last longer, look nicer, and lay better. It was made to be sat on, etc, so it going to be much more durable. This is just my opinion, but have made enough bags to determine this based on our construction and how they turn out with different lining fabrics. Good Luck. -
Good question Austin. I have heard somewhere that if you gently heat a stamp [it would have to be metal, not sure what yours is] that you can get an impression that way. I am sure there is a little more to it than that, would guess maybe pressing until cooled? At any rate, I would sure like to know how get our mark on that leather also. Any truth to this method? I would try it, but my stamp is not metal either. If this does work, I will be getting one though. Thanks to you all.
-
Hope you have found this by now, but if not you might try Bogel-Greewell in Grand Prarie TX. They are some really nice folks and I bet they can help you out. kat
-
Bontex will have a grain, somewhat like fabric. When you gently bend it, one way it will go quite easy. Turn it 90* and it will resist. So depending on what you want to accomplish make sure you lay your pattern and cut it in the right direction. Say you were wanting it to stiffen a cylinder shape, make sure the grain goes end to end of the cylinder whether it stands up and down or lays on its side and it will create a smooth bend around the circumference. If you wanted it to hold something straight up and down the grain would run up and down. If that doesn't sound right, holler and I will draw it out. If you lay your piece of leather cross grain or against the direction you need, it will always fight you and if it is really stiff paper, it could actually change the shape of your project and make it out of whack.
-
Bontex is a paper type product that starts at about .014 and goes to at least .060 that I know of. Maybe more. So it can be hardly nothing to stiffen a project to so stiff there is absolutely no give once materials are applied. What sets it apart is that it is a fiber with some sort of chemical (maybe it isn't a chemical per se) that makes it mold and mildew resistant. I seem to recall it was made for handbags to be used in place of something like cardboard. It won't melt and get squishy if it gets damp and since it usually can't dry fast enough inside a bag, it won't turn smelly and ruin the bag. There are other names for it in other parts of the world, if anyone would like, I could find the name they call it in Europe.
-
Hi jk, What I think this is, is a basic T bottom tote. You would do all of your work on front and back piece and then sew the bottom together at the middle seam. Then you place the bottom piece on stitching on the long sides. The sides are then sewn down. Finally the bottom edges of the sides and the bottom edges of the bottom are stitched while inside out. It is then turned outside in, feet attached, lining is dropped in and stitched around the top. This can all be done on a flat bed machine. I was not gifted as a writer, so if this doesn't make sense, let me know and I will try and draw you a picture or something.
-
There you go!
-
I suppose this project is already finished, but will give you my $.02 worth for next go around. Gluing is the best option, however it can leak through and leave a little or a large splotch of glue. The best option I have found is to get some fusible interfacing from the fabric store. Cut the size you want it to be and fuse it to your material. Then you have a nice straight edge to fold over to keep from fraying and then when you glue it will not bleed through as the interfacing should stop it. Depends on project, as to the facing, but the heavier you can use, the less you will worry about anything coming through. Good luck.
-
I am not sure what Tandy sells. Is it bontex or a similar type? If so the best thing to do is to unroll and lay flat on the floor so the roll has the ends on the floor and ha a hump in the middle. Weight it down with books or whatever. You are right not to try and roll it the other way. Sometimes a dry iron will help if you put the weight on it quickly. Most important is to make sure the grain is laid out correctly when you go to cut it. As hard as it is, the most important part is to store it flat. Yeah, I don't have any place for that either.
-
I have read so many tutorials, posts, ideas here and I thank you all from the bottom of my heart. You are all great teachers and for you folks to share your knowledge is quite rare. I am sure the information I am looking for is here, but after several hours I still can't pull it out. Please forgive me if it is. I am working with some Horween Natural Essex. I have created some beautiful edges following the many ideas posted here, but basically the steps hidepounder posted awhile ago. [Again, I am so grateful to you.] Now the problem becomes, the client does not want any color on the edges, even after showing him the samples I made for him. So my question: is it possible to get that nice edge without the color? It seems that there are 'fillers' to help the seam close or maybe just the color to cover it up. What do I need to add to or delete [besides the color] from the basic 5-6 step finish to make it look as nice as those with a colored edge? Something that has crossed my mind is that I am thinking the color is doing more than it really is? It may be, but the sample I made for him had a brown section, then black, then no color. It did just not look like I thought it should. I know I should be doing what the client wants, but I also don't want our name on something I know could look better. So any and all of your suggestions are greatly appreciated.
-
Keeping Linen Thread Looking Slick And Tidy
blue duck replied to KiwiLeatherLearner's topic in How Do I Do That?
I believe here in the US the material Jimmy Eng refers to as calico, is called muslin. In case it happens to be something you are looking for. Calico here is usually a small flowed print fabric. Just as a gee whiz. -
4 Joseph Dixon Pricking Irons And Stuff For Sale (Uk)
blue duck replied to Dangerous Beans's topic in Old/Sold
Good day to you. I have sent you a pm. Thanks -
DebHop, thank you so very much for the link. Quite amazing to find patterns of this quality, much less for free. I'm going to try and see what else they may have for sale. This was great of you to post this. Thanks again!
-
Know this is getting a little old, but outdoor wilderness fabrics has closed cell foam in different thickness that may be what you are looking for. Nice folks too. OWFINC.COM
-
I don't know if it is what you are after exactly, but you might try dickblick.com they are an art company mostly and have hundreds of types of paper. Some look like what you want, but like I said hundreds, so I didn't leave a specific link.
-
There you go. You know you might try it with some scrap fabric . If you don't have any, go to the fabric store and ask them for the material to make reusable grocery bags. This stuff won't fray, is easy to work with, about $5 a yard [can get 2 to 4 out of a yard] and you will actually have something to use when you are done. Templates and/or patterns are never a bad idea either. Good Luck!
-
Good day to you both Miss Mia and Mr. Cox. I am pretty sure yours is the one I have been watching, hoping it would give me the answers I desperately need. But hard as I try, no luck yet.\ I went down and changed the needle and made sure it was as you said, scarf to the hook. The top stitch looks so nice, but then aarrgh! the bottom is full of pretty loops. Thank you so much for your posts.You folks (all inclusive) are great!
-
I am so sorry. I did not mean to confuse you. No, no it's not your new-ness. First let me try to explain a t-bottom. Look at Char's post above. The bottom sketch she has there, if you were to cut it in half horizontally, can you see the really fat distorted T? The corner of that T is what determines your sides and bottom. So let's try it this way. Take Char's drawing and cut it out, let's say8" H x 8"W [just so it is one piece of paper]. Where she [please excuse me is it's not] has the cut outs, make those 2" deep and 4" down. (a 2" x 4" cutout starting 2" down one side and the same on the opposite side) Now fold it in half longwise. So you have a 2 x 2" sq in each outside bottom corner. Now can you see the T? So where you folded it is the center of the bottom. If you take the top corner on the side [the cut out] and bring it the center fold and likewise the bottom top corner to the fold, tape that like you are stitching do you see the bottom of your tote starting to appear? So it depends on how deep and wide those cut outs are to get your width and bottom. In this paper one you will end up with a 4" gusset and 4" bottom. But like I said, Don't forget to add seam allowance once you figure out how it is supposed to work. Is this making any more sense? I do apologize, I can not explain what is going on in my head. It is like me trying to talk without moving my hands and arms. But I don't want to leave you confused. I have watched this board under a different name for years but now am producing we changed the name. But I truly understand the new part of this, it is quite exciting, yet frustrating at times. Let me know if this helps at all.
-

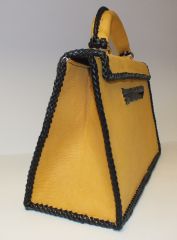
From the album: Blue Duck Creations
-
From the album: Blue Duck Creations