rejerome
-
Posts
75 -
Joined
-
Last visited
Content Type
Profiles
Forums
Events
Blogs
Gallery
Store
Everything posted by rejerome
-
Rabble, Since you're looking at Amazon, get something like this: https://www.amazon.com/Jumbo-51pc-Drum-Sanding-Kit/dp/B007FER2IW/ref=sr_1_4?ie=UTF8&qid=1478094741&sr=8-4&keywords=dremel+sanding+drum Those smaller dia drums are pretty handy!
-
For me, 80 to 120 grit works well. The 120 might load up a little faster....just depends on the leather. The pre-made slickers are nice but pricey for what you're getting. It's pretty easy to make your own slickers. It's easiest to start with a hardwood dowel that's close to the diameter you want. Cut it to the approximate length, drill a hole in one end, expoxy in an arbor or a large pop rivet. Chuck it up in your Dremel and clamp the tool down to a table top. Turn it on and start sanding the wood to the shape you want. If you have any vibration you may need to have a stationary "tool rest" of some sort so you can true up the wood to make it concentric with the arbor. Either that or the arbor is not straight. If that's the case you can usually rotate it by hand and figure out what you need to do to bend the arbor to straighten it visually. Even the "store bought" slickers may vibrate. Usually its a bent arbor.
-
Not sure what you're going to do with your Dremel, but I use a newer variable speed model that has load sensing (maintains speed under load). I use it with sanding drums to even up edges and I also use it with various attachments for edge slicking. It also works great on the inside of holster belt slots For me, running at 10k-12k RPM seems to work best. Any faster and it will quickly burn edges. Slower is just, well, slower. When burnishing be sure to keep the edges plenty wet. When slicking edges on items like belts I just use a QuikGrip clamp and clamp it to the bench top and use it as a stationary bench top tool. I've made some of my own special shaped slicking tools for it. You can purchase arbors for them but I have found that a large sized pop rivet is just about the right size. The rivet end goes into the wood of the slicker and the nail shank goes into the Dremel collet. I also highly recommend a keyless chuck which you can purchase for less than $10. That way you don't have to keep track of that tiny collet wrench. I've also made a leather drum for it and it works great to quickly strop edge tools running at a slower speed. Just experiment on scrap and you'll quickly learn what speeds work best for you. I've read where you can control the speed using those widely available foot pedal switches, assuming you're Dremel is compatible. I have NOT tried using one. Just Google the phrase "dremel foot pedal speed control".
-
Talk to Bruce Cheaney. He has a Cowboy and a Cobra 4. They are the same machine as previously stated I purchased my Cobra 4 from SLC which is about 400 miles from me but they're my closest dealer. I actually talked to Kevin just a couple of days ago. When I switched from #96 thread to #346 thread the bobbin spring was acting up. I'd not had any trouble in the past, but the thread kept jumping out of the notch in the bobbin's tension spring, or sometimes the spring would split the thread. I shot a quick video for them and tossed it up on YouTube. Kevin didn't even go look at the video after I described the problem. He said he'd send me new new bobbin tension spring ASAP. Rusty is the real Cobra expert at SLC but was out at the time I called. There's another young fellow there that is also pretty knowledgeable, so you can always get help if you need it Since they're sending me that new part I decided to perform a little percussive maintenance on mine. I tapped on the spring to bend it slightly into a tighter curve. I fits the bobbin case better now and works like a charm. I think most guys will tell you that you should expect to become a sewing machine mechanic if you buy one....any brand....they all require maintenance but generally its pretty simple. Here are links to the videos in case anyone is interested Before: After: Rex
-
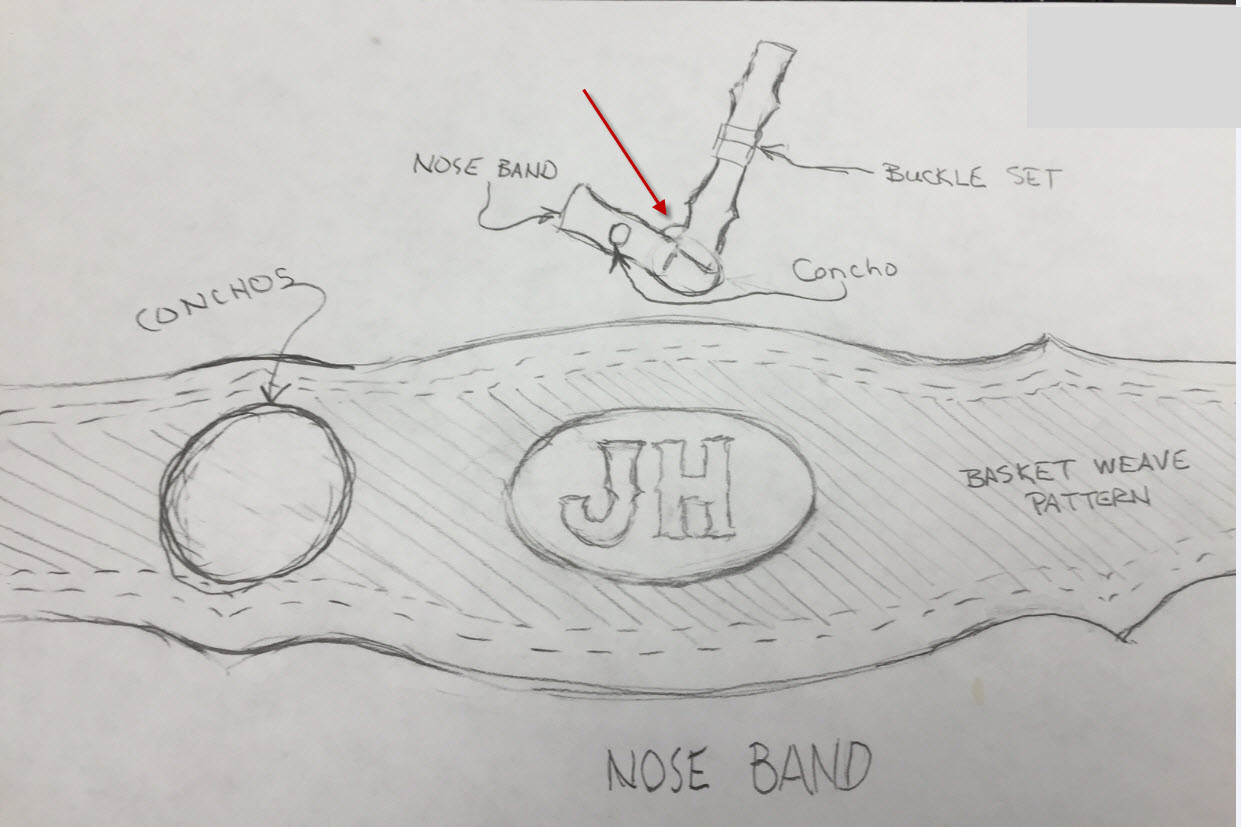
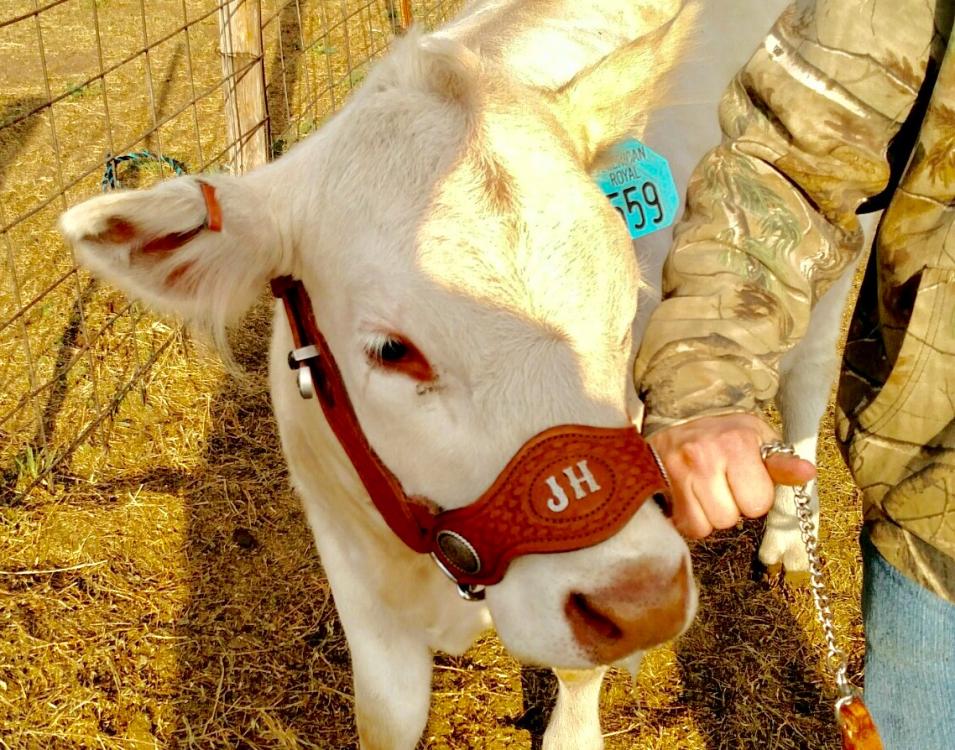
Steve,
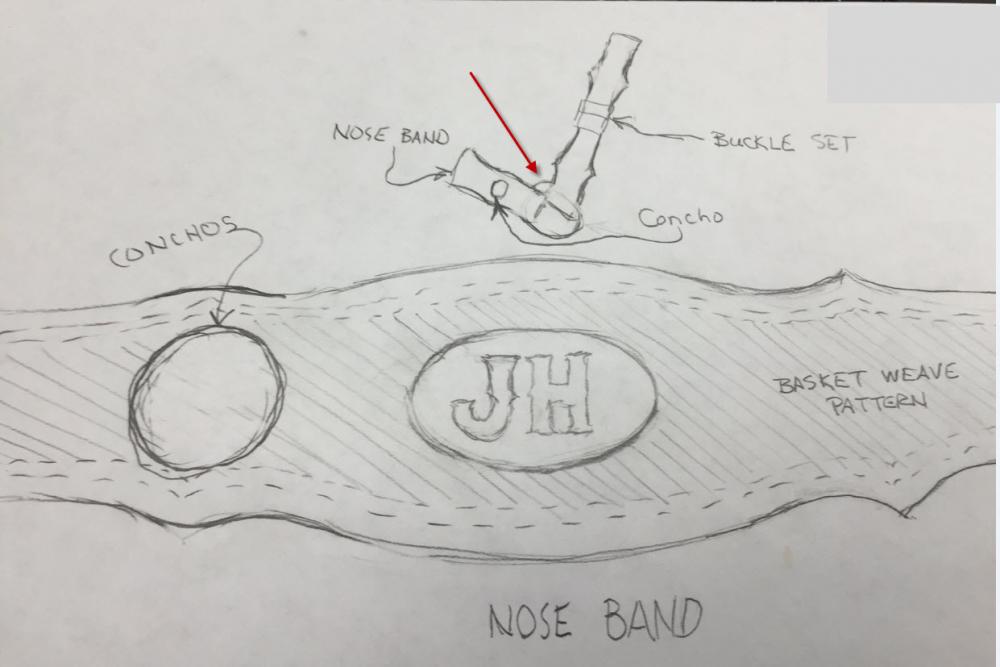
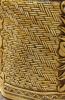
Here's one that I made. Sorry, not a great picture. On mine, I had buckles on each side, shown just under this heifer's right ear. The buckles are connected to the side pieces. The strap over the top of the head just has the tips on each end and holes for the buckle tang.
The side pieces attach to the stainless steel rings on each side of the mouth. A lead chain goes through the ring on the far side and snaps onto the ring on the visible side. The nose band also connects to the rings on each side and there is a little 90 degree "L" shaped piece that is sewn in at the ring. That piece keeps the nose band at 90 degrees to the side pieces. I've include a rough sketch. The "L" shaped piece fits right up against the ring and is about 3/4" wide.
I have pictures of the original halter that I patterned this one after. I refurbished the original and then had to get it back to the owner while I built the new one, so I just went off of my pictures.
Let me know if you'd like those.
Rex
-
Rex,
That would be great. Nice job on the halter. I want to make something similar.
Steve
-

I combine the jpeg files into a single PDF. It's a little to large to post here.
Go to https://drive.google.com/open?id=0B7jk7QotcGRQWmltNVhvVkJ6UUk
Let me know if you have any problems downloading or have any questions. Be glad to help.
Thanks for the positive comment on my version. It was fun.
Rex
-
Rex,
Thank you for sharing. I appreciate your offer to help with questions. You did a great job documenting the original halter.
Steve
-
-
Like Ferg, I use photos. I have some photos with a ruler next to the parts that I'd be happy to send to you. Rex
-
MADMAX22, it sounds like you'd better sew it then when you start producing them. I'm not the author of the video link I provided. I was just being neighborly and answering the original question that was posted. I have only made two wallets using this exact method. I am not mass producing these for sale at this time. I prefer card pockets to slots. The ones I did make where given as gifts. They've been in use for over a year now with no failures. My guess is the ribbon will crap out before the glue fails but it remains to be seen. It has been my experience that modern day contact cement generally doesn't fail, but the material does. I could be wrong. I generally and frequently am. It doesn't take much time to build a prototype using this method. If you have concerns then by all means I whole heartedly urge all readers to test the method demonstrated in the video above before you take my word for it. That's what I did before building any to hand out and for me, and as gifts I was satisfied they would last. The wallets I made went to good friends. They'll have no issue letting me know if there's a problem. At the risk of raising further debate, I stumbled onto another video where fabric is used instead of ribbon. In the video they stitched it (by hand) as I had mentioned you could do with the photo I posted earlier. I did not envision that ribbon would hold up well at all after being stitched. I figured ribbon would start shredding as only ribbon can do after being poked full of holes with a leather stitching needle. Now that I have seen this second method I intend to use this fabric and stitch (machine stitch) method going forward as the fabric will be easier to work with and more durable than ribbon, but again I will prototype it for myself first and not just rely on a video or my guessing. I will include a link to this 2nd video....God help me! So, now know everything I know, and in the words of Forrest Gump; "That's all I've got a say about that." N
-
Belt with decorative holes
rejerome replied to HannahT's topic in Purses, Wallets, Belts and Miscellaneous Pocket Items
Hi HannaT, I'm not going to attempt to address the question on stretching. There are factors such as hole size, spacing, firmness of the leather, how tight its worn,..... To make the holes consistently I would create a pattern on poster board. If the pattern is a repeating one then I'd make a pattern that is just of one section of the repeating pattern, then use it to do the layout on the belt. To punch only dots (not all the way through) you could make your own simple tool. A nail. A metal punch . A short piece of steel rod from the hardware store. Lots of options to make your own simple tool for this project. Good luck! -
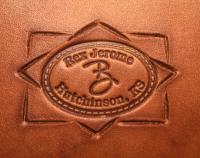
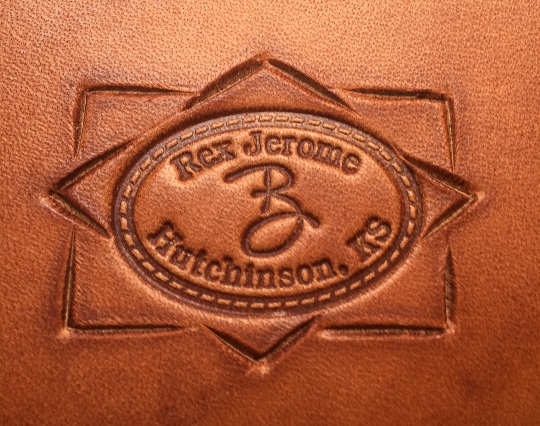
I didn't want to step on this guy's stamp ad but I have used these folks in Springfield. MO. They are very nice, helpful, easy to work with. They made my maker stamp in a couple of sizes.
http://www.phillipsengraving.com/leather-stamps.html

-
A bit pricey, but here's a 1-1/2". http://www.belts.com/p3blbebu.html
-
Can you taper down the ends? That'll open up a lot more options on the hardware.
-
Nice. On the lettering, one thing that I have found that improves them is to use a modeling tool and very slightly round over the sharp edges of each letter. A modeling tool can also be used like a "magic" eraser to remove/improve small errors.
-
Personal preference I suppose. If you trust the tape (I use contact cement and have not tried the tape) then that's it. If you want you could stitch across just under each card slot before you fold the ribbon down. Here's one I did. It is glued only.

-
Yup. This works well...
-
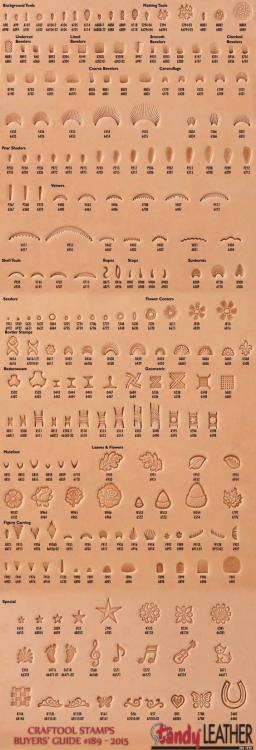
I assume you have some of the actual tools. Take image impressions from a Tandy tool graphic of those tools that you have into PS and measure them. Compare the digital measurements to those of the actual tools. The images in the Tandy graphic appear to be proportionally correct so if they're out of actual scale then I'd think it would be safe to assume you can scale each of the images by the same amount to get you close to 1:1. You'd want to do the same thing if you scanned them to insure you got then migrated into PS at 1:1. I'd also thought of doing this but quickly decided I didn't really need patterns with the tooling impressions included.
-
Rather than scanning, couldn't you just grab a copy of something like the Tandy stamps image, then crop and save off copies (by stamp number) of the stamps you want? Just a thought....

-
Oops....he's in Texas....not Arizona....
-
Thanks for the reply. Actually there is, but I've learned that it's actually 2 stamps and I also finally found the maker late yesterday. Clay Miller in Arizona makes the stamps. Example below. Thanks again.......
-
Anybody know where a fellar could find a good wicker-like geometric stamp? Thanks!
-
High Point .40 Holster
rejerome replied to rejerome's topic in Gun Holsters, Rifle Slings and Knife Sheathes
89cherokeelimited So sorry for the delay in getting back to you. That holster used 6-7 oz veg tan for the outer layer. I molded that layer to the gun, grain side out as usual and let it dry. Then I wet some 2-3 oz veg tan and molded that to the gun with the flesh side out. After the 2-3 oz had dried slightly I then glued them together. I was able to adhere the two really well that way. Thanks for the compliment! Rex -
Holster For S & W With Carved Cross
rejerome replied to Rohn's topic in Gun Holsters, Rifle Slings and Knife Sheathes
I really like the way you're using lace instead of stitching. I'm gonna have to try that out. -
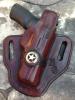
One I whacked out this past weekend.
-
Small Holster For S & W Snuby
rejerome replied to Rohn's topic in Gun Holsters, Rifle Slings and Knife Sheathes
Nice! -
Things I've Learned From Leather Working
rejerome replied to CTaylorJr's topic in Leatherwork Conversation
Well Red Cent, I hate to disagree with you seein' as how yer packin' iron, but that number see's high to me. I was thinkin' it was somewhere in the 2's. I could be wrong....as I have been a few times in the past. Maybe twice.......................a day. -
Yup, same in the US. Currently a penny costs 1.83 cents. I think I should move to Canada....a government that thinks logically....haha...