Harry Marinakis
-
Posts
124 -
Joined
-
Last visited
Content Type
Profiles
Forums
Events
Blogs
Gallery
Store
Everything posted by Harry Marinakis
-
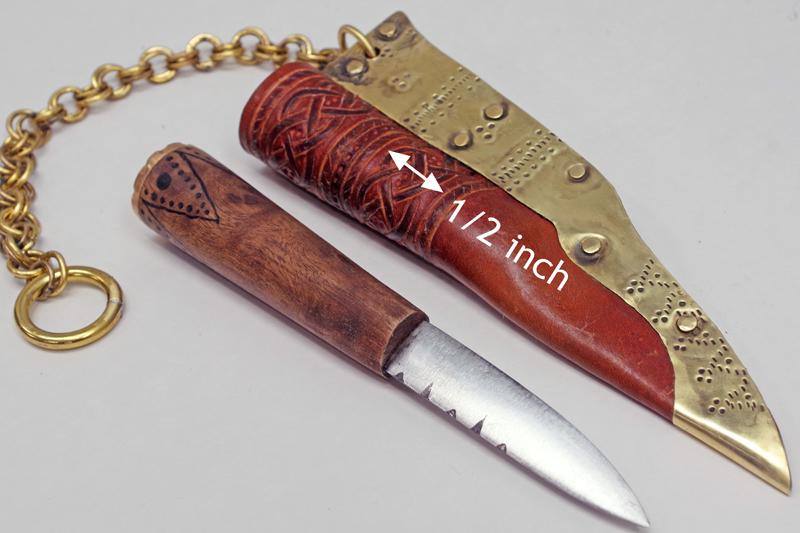
I'd like some advice on improving my game. I make these small knives with some leather tooling, typically Celtic knotwork. The knotwork is only 1/2-inch wide, and I really struggle to carve the design and get it to "pop." The photo shows the best that I can do at the present time. I am wondering if there is a better way to do this. I am using 2-3 oz. or 3-4 oz. veg tab because I have to use a thinner leather. I know that affects my ability to get some relief in the leather. FYI here is my process: 1. Case the leather 2. Put on my magnifying loupes 3. Trace the design onto the leather with tracing paper and a stylus 4. Carve with a swivel knife. (This is where I really struggle to get all the curves and lines parallel for something this small.) 5. Beveler to bring out some relief. 6. Modeling spoon to round the edges of the knotwork. As you can see, it doesn't look like I used a modeling spoon to smooth the knotwork, but I did. Suggestions would be appreciated.
-
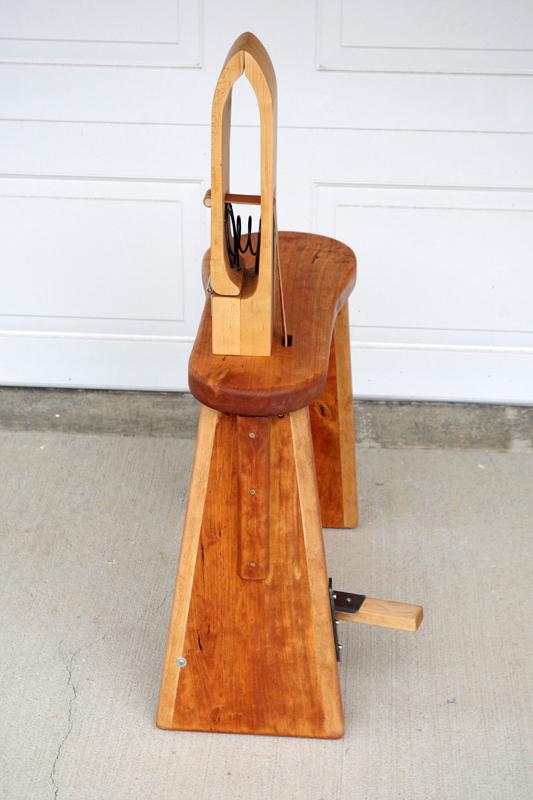
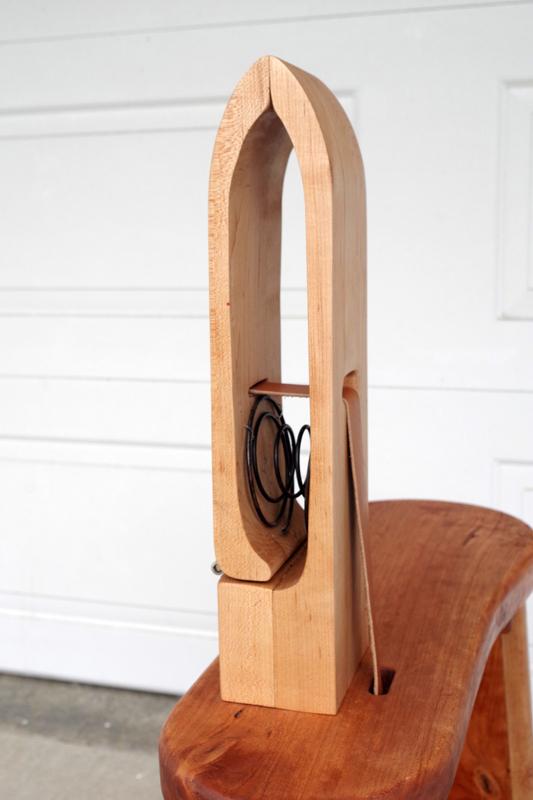
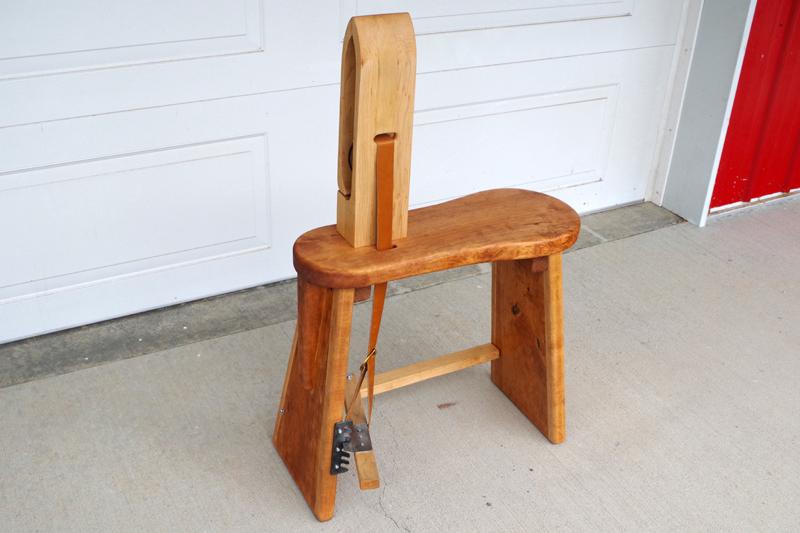
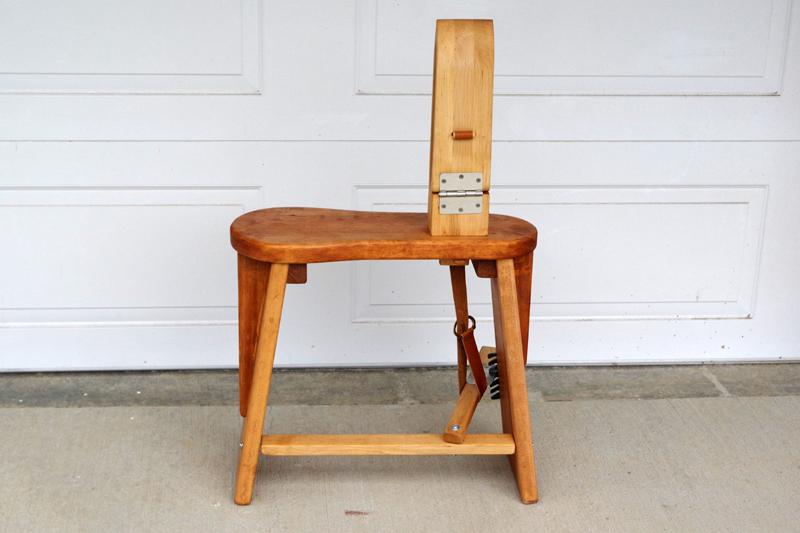
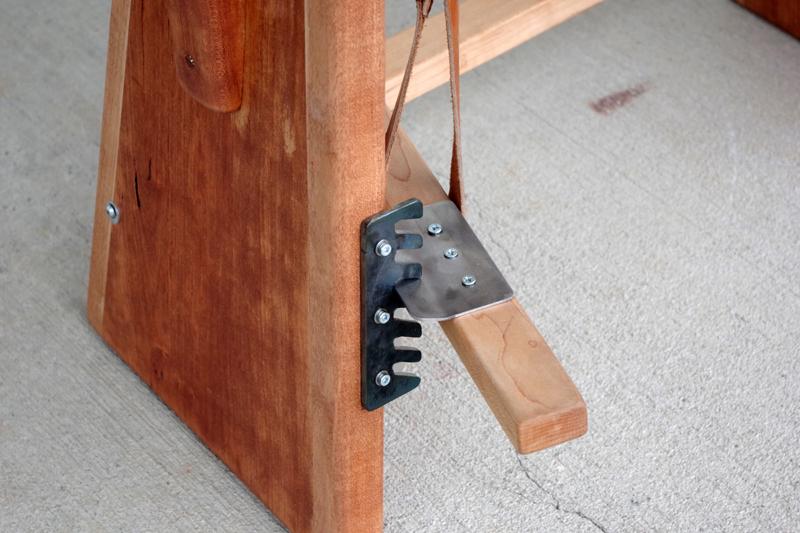
I used the plan by Randy Steffan, found here: https://leatherworker.net/forum/topic/20586-stitching-horse-plans/ I modified the plan, and made the jaw vertical instead of angled. I really don't do a lot of punching holes by hand in heavy leather, so the ergonomics of angled jaws was unnecessary. Otherwise, the dimensions are the same as in Steffan's plan. Oh, I forgot, I made the jaws 2 inches taller than what's specified in the plan. I made the jaws by laminating strips, since I don't have a bandsaw large enough for this job. First I cut the Maple into four strips, each 21 inches long and 1-1/2 inches square. For each strip, I cut out of the shape of the jaws using a jigsaw. Then when I glued all the strips together I had the basic shape of the jaws. It took only a bit of work on the 4x36 belt sander for smooth out the final shape. I repeated the process for the shorter jaw. If I had to do it over again, I would make a few changes: 1. The plan assumes that jaws are angled left, so the mortise in the seat is shifted right. Since I made the jaws vertical, I should have centered the mortise in the seat. 2. There is a slot in the seat through which the leather strap passes. That slot is so close to the mortise for the jaws that the wedge has to be very short. I should have moved that slot in the seat for the leather strap further away from the mortise for the jaws. Then I could have made a longer wedge, and the jaws would be more stable. All the wood was cut from rough-cut slabs. The Cherry slab was 10 feet long. The Maple slabs were 6 feet long. Cherry seat with Maple trim on the legs. Maple jaws Maple lever bars 3/16" plate steel 1/8" plate steel Chair spring to pop the jaws open Leather strap Wood screws Tried & True wood finish


-
Period correct AND gorgeous
-
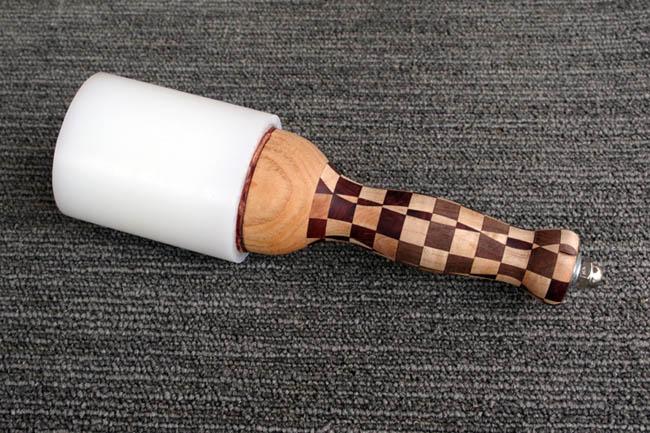
I made another tooling maul with parquetry. This time I recessed the bolts. The pommel swell is essential for a good, loose grip. I wanted this one to be smaller and lighter for more precision work, so I used lighter woods. Pine Giant Sequoia Madrone Camphor Plum 10 oz. UHMW head (2.5" tall x 3" diameter) 14.5 oz. overall weight. The larger maul has a 16 oz. UHMW head (3.5" tall x 3" diameter) and weighs 23 oz. overall. If you could have only one maul, then I think a perfect one-maul-does-it-all would have a 12 oz. UHMW head (3" in diameter).


-
GOOD IDEA!
-
I turned my wood mauls with a flat top. But I just knock them over all the time, so I don't stand them up.
-
There's a story behind the reason that an acorn nut is not there. I'd tell you, but I don't want to embarrass myself.
-
My new DIY tooling maul 1 lb. head of UHMW poly 23 oz. total weight Maple, Manzanita, Walnut, Ash


-
Cheap 4x36 belt sander. They don't last long, plan on replacing it every 5 years.
-
THANK YOU
-
I am looking for a leather with very special characteristics. - Soft as chamois -Anywhere from 5 to 9 oz. thickness -Doesn't stretch -Light cream or natural light color I was able to obtain this leather from Promise Land Tannery, but it's not available anymore. They advertised it as Latigo. Does anyone know where I can get such a leather? Many of us are looking for it, but we can't find it.
-
Not wash-fast means the dye is water-soluble and will wash out if the leather is wetted. Not sun-fast means that the dye will fade rapidly in left in direct sunlight.
-
Skiving without a skiving knife? And Splitting with minimal tools?
Harry Marinakis replied to JC2019's topic in Leather Tools
Belt sander -
How to set pearls and jewels into leather?
Harry Marinakis replied to Harry Marinakis's topic in How Do I Do That?
Thank you Hilldale I searched on bezel but found only blanks, earrings, or pendants. Nothing that would even remotely suitable for leather. I guess I'll have to solder my own settings. -
How to set pearls and jewels into leather?
Harry Marinakis replied to Harry Marinakis's topic in How Do I Do That?
Thanks but that suggestion was not useful. Anyone else have any ideas? -
I want to set half pearls and other costume jewelry into leather. I assume that there is a setting for half pearls and other similar jewels that have a rivet stud. But I don't even know what they're called. I've tried searching on Google, but can't find the correct search term. Can someone help? Thanks.
-
1/8" aluminum bar stock Make a template
-
Soak those babies in Evapo-Rust to clean them up.
-
The usual procedure is to drill a hole in your anvil the same shape and size as the rivet head. Then place the head of the rivet into the hole and peen as usual.
-
Absolutely nothing in any of those photos is historically accurate. Questions: How do I get the shape molded for the pectorals? I've read about wet-forming but what would use/make as a mould? You could make a foam mold, or emboss the leather The chest seems to have a split down though the center to the bottom of the pectorals, I assume this is to be able to get in and out of the armor? You're reading too much into what you see. The armor is fantasy. What you see has nothing to do with purpose or function, it's all fantasy. The design, layout, methods of attachment, etc., are all fantasy, and are not similar in any way to any type of historical armor. Do I need to put metal eyelets in at the shoulders for the lacing? Not necessary, since the suspended weight is minimal and you won't be fighting. Just be sure that you set the eyelets in the leather far enough away from the edge that they don't rip through. The sides come together and attach with clasps under the arms, It looks like it's a perfect fit but should I make it slightly overlap instead? Yes, that makes it easier to adjust and fit properly The neck has a collar that comes up, how do I make it so it attaches all around? How do I attach it? Historically the neck protection was a separate piece (in most cases), worn under the chest piece, not a collar. Again, since this is fantasy you can make it and attach it in whatever manner you want. Question: For the edges which hold down the chainmail, do I cut one set of the side pieces short so that they don't overlap? or do I overlap them? Don't understand your question
-
I use animal (hide) glues. Initially I bought a glue pot like yours, but discovered that it's worthless. It's too big and holds too much glue. Now I just mix up what I need and heat the glue in double boiler on a hot plate. Anyone want to buy a lightly-used glue pot?
-
Oops! Forgot to say that the iron-tannin-acid dyes are all black or grey. Vinagroon is a black dye.
-
No idea, sorry I cannot get any logwood, so I haven't tried it.
-
Walnut husks are not useful in making a leather dye. Use green walnuts before a nut forms. Break them up into 1/4-inch chunks, boil, and strain. Wear gloves or you will have brown fingers and fingernails for WEEKS!!!