-
Posts
1,039 -
Joined
-
Last visited
Content Type
Profiles
Forums
Events
Blogs
Gallery
Store
Everything posted by Big Sioux Saddlery
-
International harness machine
Big Sioux Saddlery replied to shoepatcher's topic in Leather Sewing Machines
Will do. I'd love to scan the whole book in because there is some cool stuff in it. But my connection has been terrible at best for the last few days and the pics take a long time to load. Provider made "upgrades" and now they say I need to upgrade to a faster speed, and of course more money. I liked it fine the way it was before. -

Precision/neat work with Landis 1
Big Sioux Saddlery replied to Alexis1234's topic in How Do I Do That?
Thick but narrow straps are tough on any machine. Due to the design of the Landis One, it is going to walk over the edge worse than some other machines. The type of foot makes a difference also. If using a pricker foot with one toe, it tends to be worse. I have a wider double-toed foot that helps a little. With #200 needle being the smallest that is available in the States (I think Aaron Martin has had #180 needles available at times), that is going to border on being too big of a needle to use on fine and narrow straps anyway. Anything smaller than a #200 needle, and you better have a really tight machine. I've used a #6 original Landis needle (I don't know what modern needle size that equates to but it is small and fragile) with a 207 thread and 9 stitches to the inch on a super tight Landis One. The needle guide bushing must fit and have zero play to be able to do that, and it's still easy to break a needle. Advice from someone who has sewn on a Landis One for over 25 years and still loves them: if you are going to do much of that kind of work, you'll save yourself much frustration if you find a different machine for that type of work. We don't have the support available for those great old machines to enable them to do all of the work they were designed to do. Even the modern needles that ARE available, are a poor substitute for the originals. Needle guide bushings are hard to get, and rarely fit as tight as they are supposed to. -

International harness machine
Big Sioux Saddlery replied to shoepatcher's topic in Leather Sewing Machines
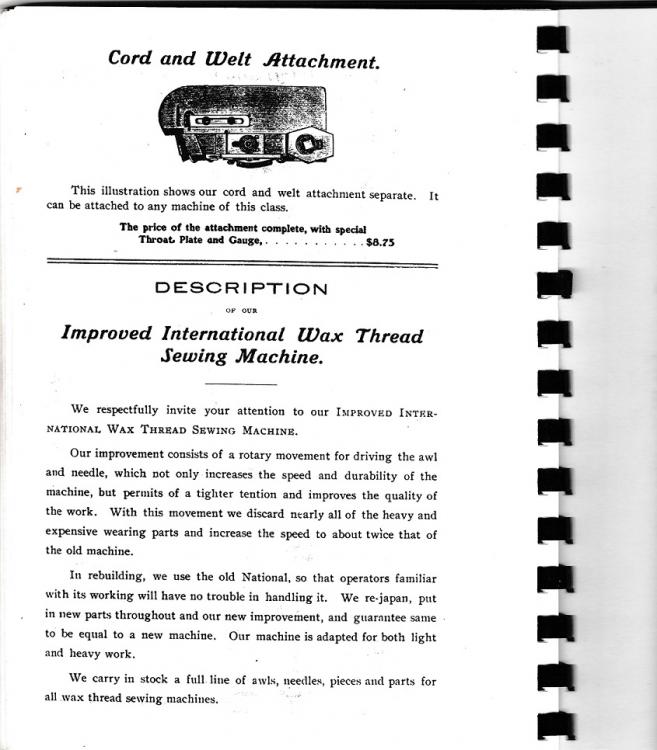
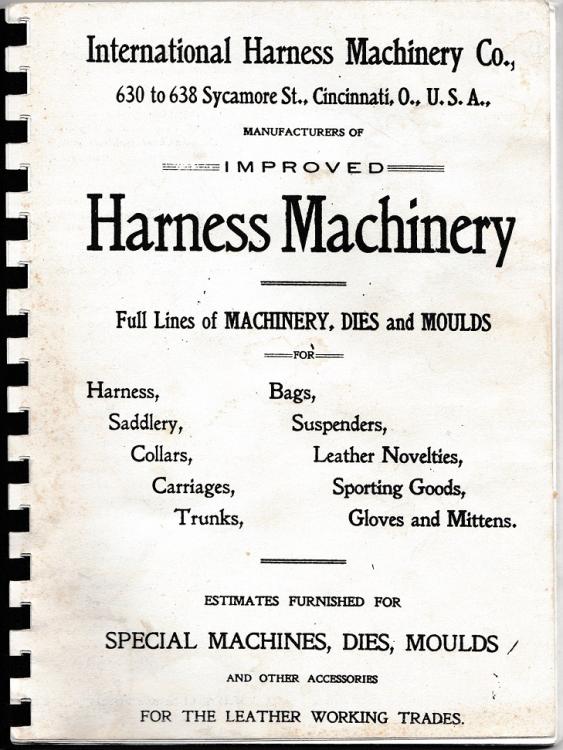
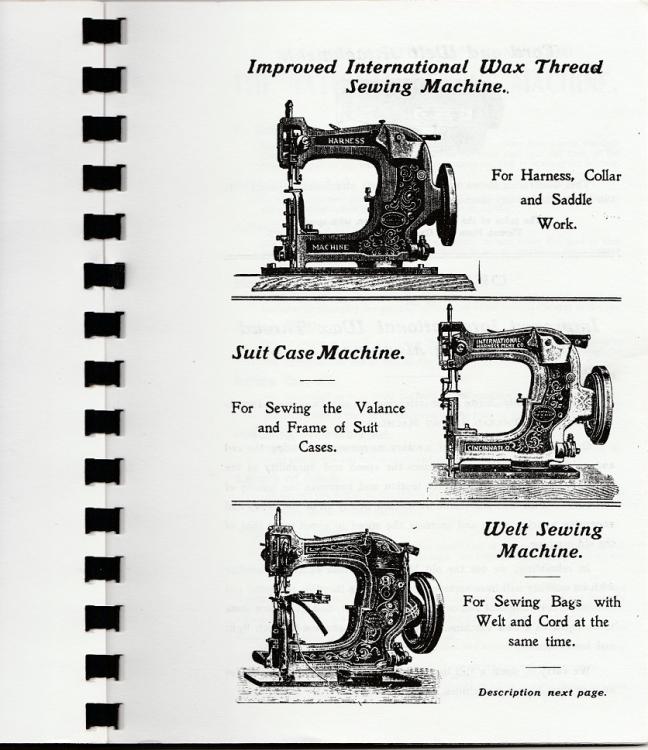
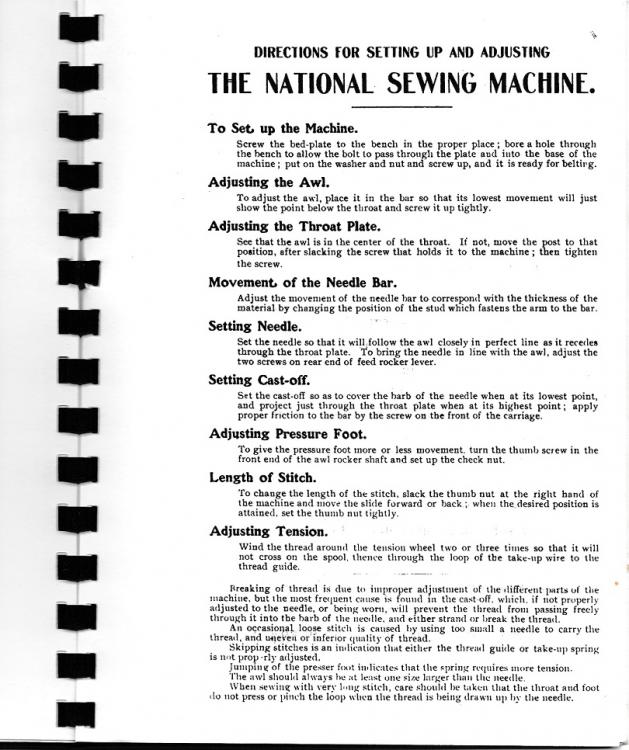
The above pictures were scanned from the pages of a copy of The International Harness Machinery catalog. I can't find a date anywhere in it, but I imagine it was from the early 1900's. It is full of all sorts of fascinating specialty harness making equipment. There were also a couple pages of lighter duty sewing machines. -

Wickett Craig Harness Quality?
Big Sioux Saddlery replied to BESON's topic in Leatherwork Conversation
While I'm certainly no chemist or tanning expert, I think it is the tanning process that produces the mellow leather that W & C is known for. I heard many years ago, when they first moved down into the states from Canada that they buy primarily dairy hides, because they tend to be bigger. Whether that affects the finished "hand" of the leather or not, I don't know. But I suspect that dairy hides would not only be larger than beef hides, but not quite as heavy, which holds true with Wicketts thickest leathers; they are typically lighter in weight than Hermann's thickest and especially the low quality imported hides from Mexico and South America. That's why it always irks me when people equate thickness of leather with quality. I would also think that the quality of the hide itself, before tanning would be almost better with the dairy hides than a lot of beef hides. Beef animals fed for the meat market are typically slaughtered at under two years of age. The animal has not anywhere near reached it's full growth potential by that age. Dairy cows are not in production near as long as they used to be. I think 3-4 years and most dairy cows are done. But they are of a pretty good size by that time. Even dairy steers are big animals by the time they reach slaughter. Older beef animals have had time to reach their full growth potential, but they also are normally "range" animals during their production years, which means a tough life if you are a cow. When you see hides that are full of healed barb wire scratches in the neck and shoulder area, those likely come from beef animals that have been "running out" their whole lives. Dairy cows have are typically kept in a more controlled environment throughout their lifetime. So my short answer is I believe it to just be characteristic of their tanning methods. -

International harness machine
Big Sioux Saddlery replied to shoepatcher's topic in Leather Sewing Machines
There aren't many of those around. I have a reprint of an International catalog. I don't remember what year it's from, but it is full of harness machinery and there are several stitchers and sewing machines in it. I'll look for it tomorrow if I remember. -

Wickett Craig Harness Quality?
Big Sioux Saddlery replied to BESON's topic in Leatherwork Conversation
W & C are typically nice big sides, but I've found that since it is softer leather by nature, I can't cut as low in the side for straps requiring some body, hence poorer yield. The shoulder area of the hides can get pretty raggy also. Having said that, I do like their leather for a lot of things, and just have to factor in the extra cost due to waste and pass it along to the consumer. -

Wood Planer for Splitting Leather
Big Sioux Saddlery replied to Anubis78's topic in Leather Machinery
Years ago, more years than I care to count, I was starting out and thought the same thing of splitter prices. . . simply out of the question. I'm in the process of moving my shop, and I recently came across an early attempt to build a splitter myself. The blade was the problem, and I never did find something to work. I eventually came up with the money to buy the cheap Tandy splitter, which at the time was like $99, although I still thought it was a lot of money for a splitter. It got me by until I could buy a better one, for $350. Through the years I've added as I needed, and could afford. It's just like Mutt said above, don't try to reinvent the wheel. Even though they cost $$, it's less than you'd spend in time and wasted material trying to come up with a better wheel!- 9 replies
-
- leather splitting
- leather splitter
- (and 3 more)
-

Breeching (as in harness breeching)
Big Sioux Saddlery replied to ojd's topic in Saddle and Tack Accessory Items
The answers to your questions will depend on what style of harness you intend to make and the intended use, ie, buggy vs field work. I will get some pictures of my breechings, although my intenet service the last couple days has been lousy, so I can't promise that I'll get them downloaded to my computer and then loaded to this site. I don't care for a breeching base wider than 2-1/2", as a horse's hindquarter is not flat where the breeching rests. Past a point, the wider the base it, the poorer it will fit. While most people adjust the hip straps to let the breeching hang too low, even properly adjusted it still does not lie in a flat spot on most horses. Your first harness picture is the style of team work harness most commonly seen in the US, with the exception of the hip straps buckling into uptugs. More commonly, our work harness uses a longer hip strap with a Conway buckle (reverse style). The harness in the second picture we do not see here, and I have no experience with, although the principles of construction of the actual breeching appear to be similar. The third picture shows just about exactly the type of breeching that we see on a majority of work harness here. The hip straps attach by way of a reverse with a Conway style buckle. Using hip straps that buckle directly into uptugs attached to the breeching hardware greatly complicates the building process, the degree of complexity depending on style of uptugs (endless number of variables when building harness.) I do not know of a breeching dee currently available built on the same principle as a halter square. At one time, at least one harness manufacturer offered that type of a dee. With that style, all the straps had a flat surface on which to wrap around the dee, and it was a big selling point in their catalog (1930's). As far as I know, they have not been available for a half century, or more. I will try to take pictures of my hardware. A layer loop is a hardware item designed specifically for the rear hip strap on a breeching. They are available in a number of styles and sizes. Regarding traces: again, it depends upon what you want to do Buggy style commonly are all leather, with slots in the end to accommodate either a sword-end single tree, or any number of metal attachments designed to go on the end of a single tree. Work style traces will generally have a 6 or 8 link heel chain on the end to hitch to a single tree with hooks attached to it. Building traces rivals building breechings in time spent getting everything level and tight, as well as being a tough sew. I have a set of work traces I recently built that I will also try to get pics of. I cut all my trace pieces full length of the hide. Work traces for heavy horses finish at 6'3" or 6'6", depending on type of hardware (or lack of) on the front end, as well as horse size and intended use. The chain is not included in this measurement. There is more variation in length of buggy traces. My work traces consist of 3 layers thick. I will not use the whole length of every strap when fitting up, but I cut them full length so that when fitting up, I can jockey them around to use the best area of each strap and adjust them to level the thickness of the trace. I do not know the actual breaking strength of a trace, but 1-1/2" and 1-3/4" covers most of the widths for normal work harness. Pulling harness for competitive pulling or heavy logging would be made wider and heavier. Very rarely do I see a broken trace, and that is usually on old harness that is full of dry rot. They nearly always break at the ends. Buggy traces are usually double thickness, with a third light layer at trace end, although I do see some singlestrap traces on cheaper light harness. Again, breaks happen at the ends, usually the trace end. Only occasionally do we see chain traces here, usually on mule harness. Rope traces are next to non-existent. Years ago, I did find one trace made from a cable, covered with a leather sleeve. It was hanging in my grandfather's barn with several complete sets of harness that had been hung up when they quit using the horses. Given the fact that there was only one, and it not attached to a hame or harness, I believe it had been purchased as a spare or came with a pile of other parts purchased on a farm sale or some such thing. I've never seen any other harness with that type of traces. There is a harness making book available over here that was written in the last ten (?) years. Even though I've been building harness for over 25 years, of course I had to buy it when it came out. I found it to be of limited use, as there is much info left out for someone that has never built harness before, but I don't doubt you could probably find some helpful information in it if wanting to build an American style harness. It was written by Martin and Preston and is titled Making Harness, A Step By Step Guide. They assume that the reader has some existing leatherwork knowledge, but then repeatedly go into great detail on simple things. They don't give any cutting instruction, as far as how to cut your parts to best utilize a hide, which I feel will either make or break a harness, no matter how well put-together. -

Breeching (as in harness breeching)
Big Sioux Saddlery replied to ojd's topic in Saddle and Tack Accessory Items
Do you have the hardware available to you in Sweden? You'll need either two breeching dees or a couple large O-rings for the ends. Most of them in the states are made with a base (body) that ranges from 2-3 inches wide and a layer of either 1-1/2 or 1-3/4" wide. The breeching dee for a 1-12" layer has too small of a ring in my opinion. By the time you get the hip strap, lazy strap and quarter straps through it, and especially if you use wear leathers, it gets pretty crowded. If you want to tie two horses together in the breechings, like a pair of colts, there is no room left for a snap. For a horse that large you'll probably need at least a 52" breeching, measured fold to fold. Cut your layer about twenty inches longer than your finished length and turn back the ends to make the layer double all the way back to the layer loops. I plug the layer loops and put a ramp behind them, as well as putting a liner in the ends. Remember, you will have one good end and one poor end on a strap of that length. While the good end would last a long time with no liner, the poor end will not. There is a pretty well known harness maker here in the states that does not put liners in his ends, and I've seen many of his harnesses where one end of each of the breechings wear out prematurely while the other end is still good. If you look at all the old harness, made back when horses worked for a living, the ends were lined on all the better grades of harness. You'll need to do a lot of skiving and fitting up to make a nice, level end that you can still get under the foot of your stitcher. My work horse breechings approach 7/8-1" at the very ends, and it is a tough sew keeping everything from moving and twisting. There may be other ways to make them; I'm not very familiar with the harness in Europe and other countries. When you say 4", will you have a layer sewn on top of that or will you just turnback the 4" piece through a dee ring? I just made up a set of breechings the day before yesterday. It took me most of the day to fit them up and sew them. That was just a single strap base, no folds. That takes longer and a LOT of careful skiving to be able to build it heavy enough to stand up but still be able to sew it. You end up sewing through up to 7 layers with the folded breechings. Lots of cheaper harness is made here without the ramps, liners and plugs at the dees and layer loops. That's the stuff that comes in for repair sooner or later. -
Amen! I have taken a drill or strand of round Emory cord to elongate one of the holes on some of my 441 bobbins to get them to fit over the bobbin winder pin. I imagine it is possible that the pin itself could vary in position from the top of the shaft, from brand to brand, or batch to batch. I've gotten steel bobbins that had NO hole at all, just the notch, which was when I learned to align the notch with the bobbin winder instead of the hole. I use the hole to tie the thread end through and then cut the knot and end when I'm done winding. Of course the nicer bobbins have a hole on both sides plus the notch, so when you slip the bobbin on the winder if you turn it a little it'll catch one of them.
-
I have a Cowboy 4500 and have ordered the generic bobbins from Weaver. They fit, but are steel instead of aluminum and have kind of rough machining. I got a couple aluminum bobbins from Cowboy Bob a few weeks ago when I bought an inline foot. They are really nice, maybe even nicer than the original ones that came with my machine. So far I have not had any trouble with any of the bobbins fitting into the bobbin case. Nineteen bucks for shipping?? Where in the world are they coming from. . .that's ridiculous!
-

Wickett Craig Harness Quality?
Big Sioux Saddlery replied to BESON's topic in Leatherwork Conversation
Pretty stuff though despite the blemishes! If they are in a prime area of the hide, it is absolutely unacceptable to have these blemishes if ordering and paying for the Standard grade. I would return the leather, if possible, for a refund and in the future bypass that retailer and order direct from Wickett. There is never a perfect hide. I think the Standard grade and other companies' "A" grades even allow for a couple blemishes in prime areas. But the majority of the leather (both front and back) should be useable and blemish free to make the top grade. -
While looking for a different stamp for myself, I came across something in the Weaver catalog that might be close. On page 248 of the 2017 wholesale catalog are a group of cheaper stamps. Second row from the bottom there is a left and right version of something real similar. You would have to top each impression with a cam, but when I saw it I thought of your post. Good luck.
-

SINGER 29-4 OWNERS PLEASE RESPOND
Big Sioux Saddlery replied to Sanch's topic in Leather Sewing Machines
You didn't forget to ask, I forgot to say! It was in on a package deal, otherwise I wouldn't have gone out looking for one specifically. Four figures does sound like a lot to spend on a machine when you've never had one before. It depends upon what direction you want to go with your leatherwork. If it is to remain a hobby, and you aren't particularly concerned about what your stitching looks like on the finished product, then the 29-4 might be fine for you. If you intend to be in business to make a living, then you can't afford NOT to spend the money on the machine that will get the job done, and done as perfectly as can be done. A "pretty stitch" is something that everyone wants to see on a finished product. An ugly stitch sticks out and that is all you see, no matter how flawless the rest of the project is. I have yet to see a pretty stitch made by a patcher on anything that comes through my shop, that has been worked on by someone else before it came to me. Believe me, I was in your shoes once, about 30 some years ago. There was a 29-4 advertised in the local paper as a saddle and boot stitcher. I knew nothing about sewing leather, I just knew that I wanted to do it! The machine was in a lady's basement, and she had never used it. She wanted $200 for it (that seems like the magic number). It didn't sew, but she was "sure you could get parts for it". I didn't buy it, and thank God I didn't. For one, it wouldn't have done what I needed it to do, and second, I don't think parts are all that easy to get for them. I saved the $200 and bought a different machine, that still wasn't what I needed. It was advertised as a "deep throat harness stitcher". Well, it looked pretty substantial, and the guy guaranteed it would sew. Of course it was on an auction, and the guarantee was verbal, so you know what that was worth. It was way before the days of the internet, so there was no way I could google it to find out just what the machine WOULD do. I bough it, for $200. Turns out is was a chain stitch machine for sewing feed bags. Soo. . . my search continued, and I found an American Straight Needle. The guy claimed to be a harness maker and said he had used it to build harness, but he was also a horse trader! I gave $650 for that machine. Couldn't get along with it. It sat in my shop for another 15 years before I figured out what it needed for parts and got them put in. And even after I did get it going, it's really not a harness stitcher. In the meantime, I NEEDED a stitcher! I luckily found a Landis One that did ALMOST everything I needed it to do, and used it exclusively for 15 years. I paid $500 for it. So at that point I had $1350 in basically one machine that I could use. The other two were just taking up space. Granted, your needs are different than mine were, but it seems like nearly everyone ends up needing to sew heavier material than they start out intending to sew. And the more stuff you make, and the more you sew, the more stuff you will get that will likely exceed the capacity of the 29-4. It may be able to do a somewhat passable job of sewing a wallet, but forget about holsters and gun leather. I don't mean to sound harsh in anything I've said, but I really, REALLY wish I would have had someone to offer advice to me when I was starting out, other than from the people wanting to sell me boat anchors! Best of luck to you, truly! -

SINGER 29-4 OWNERS PLEASE RESPOND
Big Sioux Saddlery replied to Sanch's topic in Leather Sewing Machines
A 29-4 is a patch machine. It is designed to do that. . . sew patches. It might be able to sew a wallet, but it will not satisfactorily sew gun leather. Others who know much more about this model than I (even though I own one) will hopefully come along with more information for you, but I know the 29-4 won't take a very heavy thread and the bobbin is pitifully small. It is for all practical purposes, a repair machine for lightweight jobs, like leather coats, shoe uppers, etc. I would save the $200 for something that would better suit your needs. -

Question on Ferdco 900B
Big Sioux Saddlery replied to Big Sioux Saddlery's topic in Leather Sewing Machines
I thought it odd that the manual instructs to open the bobbin case with the needle down, which means the bobbin case is pointing down as well. I guess that's so they didn't have to use a spring? So apparently, the original hook in your machine had been replaced at some point? At least you have an extra for your Cobra! If you find your video and would care to part with it, I'd be interested. Gregg, thank you for that information. So in reading the linked thread, I take it to mean that open frame/closed frame really doesn't matter so much, as long as the circumference and distance from heel to point is the same. I haven't had time to fiddle around with the machine since last weekend, and since I do have other machines that I can use, it's not imperative that I figure it out immediately. It was just extremely frustrating at the time, and if it's going to be a permanent fixture, it will have to get sewing eventually. Thanks again guys, when I have time to get back to it, I'll let you know how it turns out.- 16 replies
-
- bobbin case
- hook
-
(and 1 more)
Tagged with:
-
I agree, I've had good luck with Texas Custom Dies. Reasonable prices, quick turnaround, so far their dies have been accurate and held up well. Until I have reason not to, I'm going to keep using them. In fact I'm sending off a couple patterns to them tomorrow!
-

American LS440, splitting thin leather
Big Sioux Saddlery replied to Waxx's topic in Leather Machinery
I'm sure you have a good reason, but I have to ask why don't you just order your leather in the weight you need it? -

Question on Ferdco 900B
Big Sioux Saddlery replied to Big Sioux Saddlery's topic in Leather Sewing Machines
I thought of both these options yesterday. I wasn't sure how hard the steel is in the spring, and if bending it might snap it off. Since I have a spare, it might be something to try. Well that's something I didn't think of, and it might be enough to help, with the added tension from the properly tightened tension spring! Thanks guys!- 16 replies
-
- bobbin case
- hook
-
(and 1 more)
Tagged with:
-

Question on Ferdco 900B
Big Sioux Saddlery replied to Big Sioux Saddlery's topic in Leather Sewing Machines
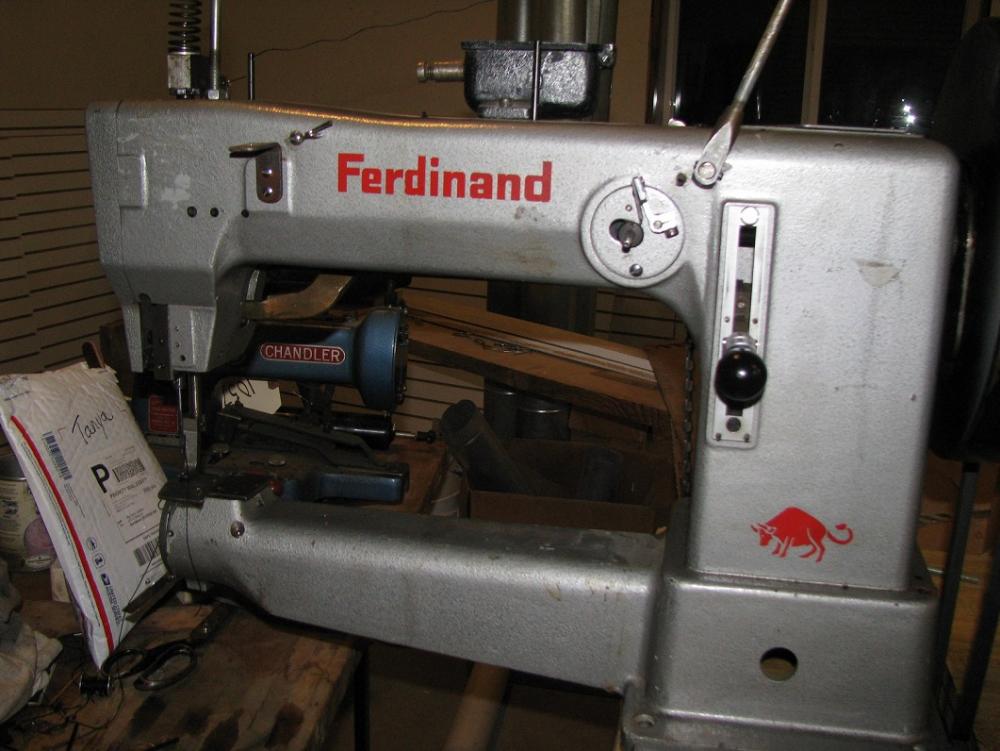
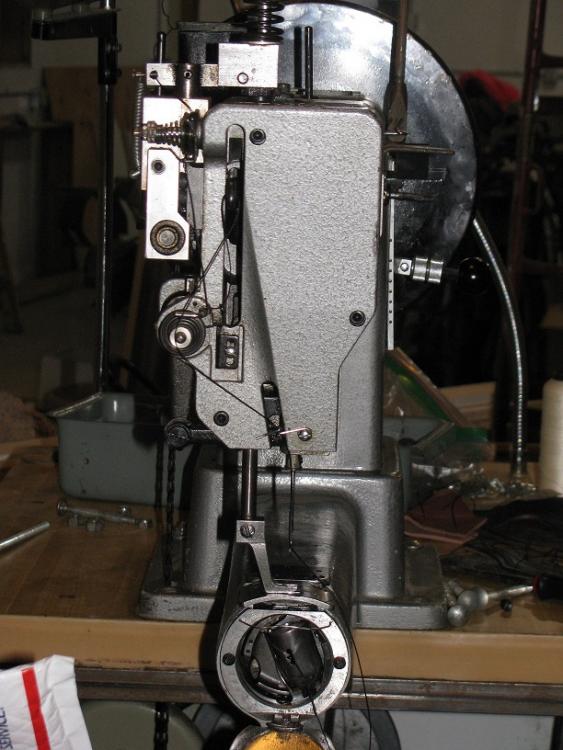
Hopefully I can get a few pics to load. The machine is actually a Ferdinand, not a Ferdco as I originally stated. I think Ferdco came later; this is a 1992 model. The hook is similar to the one in the CB 4500, but not identical. In the third pic, the bottom hook belongs to the 900B. While each one did fit in the other machine, I was afraid to try sewing with them. Last thing I need right now is to damage the hook for my 4500 trying it in a machine it isn't made to work in. I did find a hook online that looks to be identical to the one in the 900B. However, while fiddling around with it this evening, I found quite by accident that if I backed off the tension screw for the bobbin thread, it actually increased the tension a bit. It's still not where I'd like to have it, but it is better than it was. The thread also seemed to stay in the notch like it was supposed to. It sewed scrap pretty well, (they all sew scrap) and then I made the mistake of trying to sew good stuff and a whole new problem presented itself, which I will deal with another day. Thank you, Uwe, and 480 Volts also, for the info on Tony Luberto.- 16 replies
-
- bobbin case
- hook
-
(and 1 more)
Tagged with:
-
Yes I've used some over the past few years, in part to get colors that weren't available in other leathers, and in part just to test it out. My opinion, it doesn't even come close to performing as well as either H.O. or W & C. To me, if price was the deciding factor, there is no way that it would be worth the savings. The sides I've received were very poor yielding, and I have a feeing that if after 5 or 10 years of moderate use, compared to H.O., you would really be able to tell the difference in durability. Most everything I make is for equine use, so it has the potential to receive heavy outdoor use and abuse. Maybe under less strenuous applications, it wouldn't make any difference. My main gripes though would be poor yield and poor molding ability. I do have to admit however, the stuff I got did tool up pretty decent.
-
Ok, sewing machine gurus, I have a Ferdco 900B that I acquired when I bought a guy out, that sews just ok, but doesn't hold bobbin tension very well. I've maxxed out the bobbin tension, I've taken the spring off and cleaned out the gunk accumulated under it, replaced the spring with a different one (that came in a box of parts that came with the machine). Neither of the springs show very much wear, nor does the surface of the bobbin case under the spring. However, the little notch at the far end of the slot under the spring, that the thread is supposed to snap into shows some wear, and I believe the thread is slipping out of it as the thread spools off the bobbin from side to side. Even when the thread is properly in the little notch, however, I can't adjust it to have enough tension. There is no beehive spring inside the bobbin case, and I'm not sure there ever was one. The manual shows to change the bobbin with the opening in the case down, so the bobbin drops right out, which makes me think there was never a spring to start with. The manual also states that the bobbin tension should be set to "slight resistance" when in my opinion, you'll never, ever get a tight enough stitch with "slight resistance" on the bobbin thread. My question is, can I replace JUST the bobbin case, or is it an integral part of the whole hook assembly? And if I DO need to buy the whole hook assembly, will the 441 hooks work? I know that the Ferdco was made from the Consew 754R, but haven't found much online for parts for that machine. The bobbin case itself looks identical to the one in my Cowboy 4500, on which incidentally, I can screw the tension down to where it pulls a pretty tight stitch. The bobbin case for the CB4500 does have the beehive spring, but I don't believe that alone can create the amount of tension that I can get from it, primarily because when I bought it new, the bobbin tension was set way too loose for my liking. Any advice?
- 16 replies
-
- bobbin case
- hook
-
(and 1 more)
Tagged with:


