Evo160K
-
Posts
497 -
Joined
-
Last visited
Content Type
Profiles
Forums
Events
Blogs
Gallery
Store
Everything posted by Evo160K
-
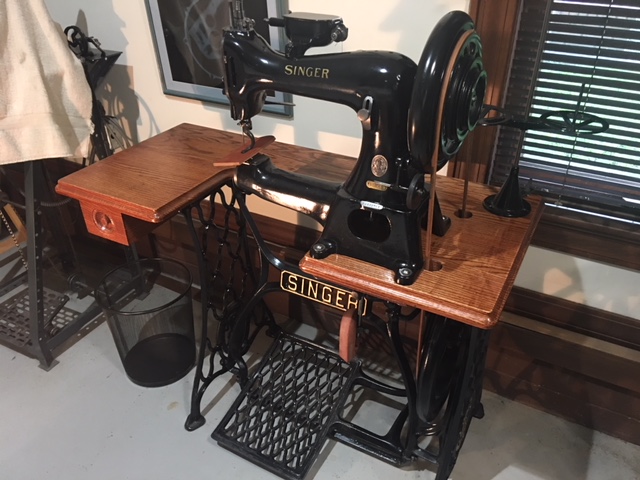
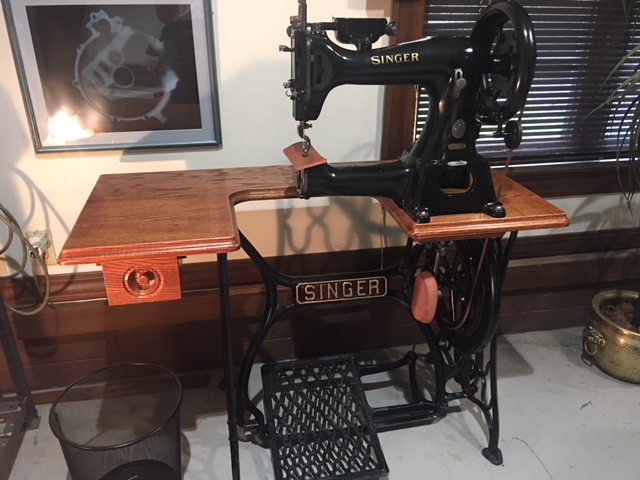
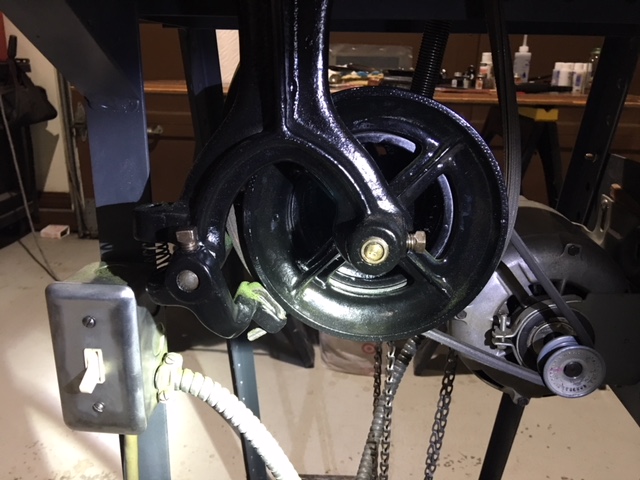
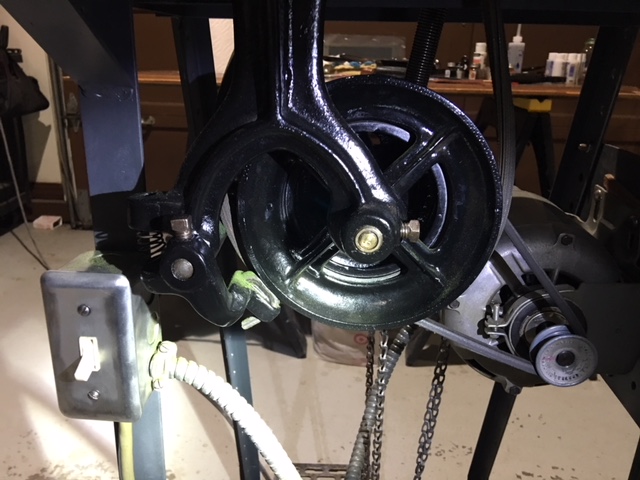
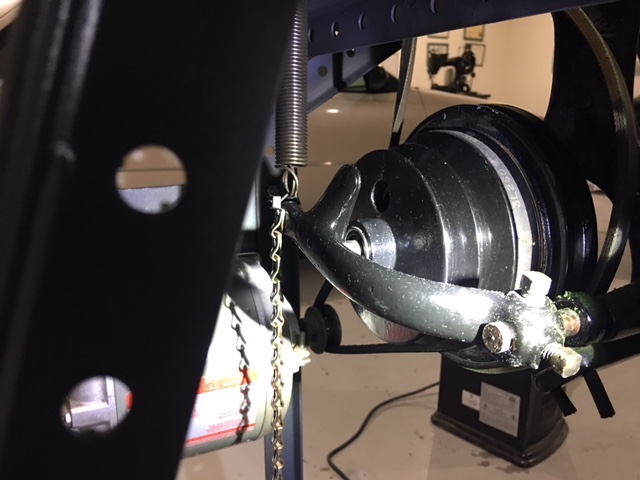
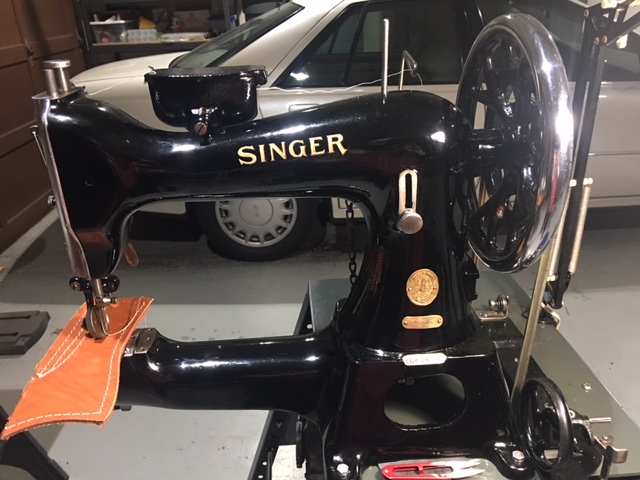
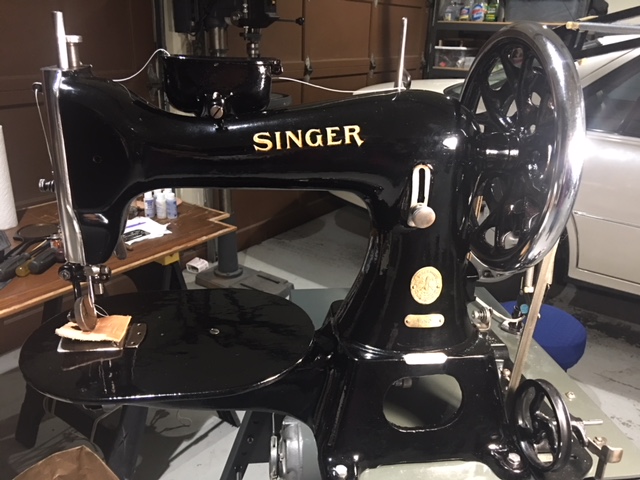
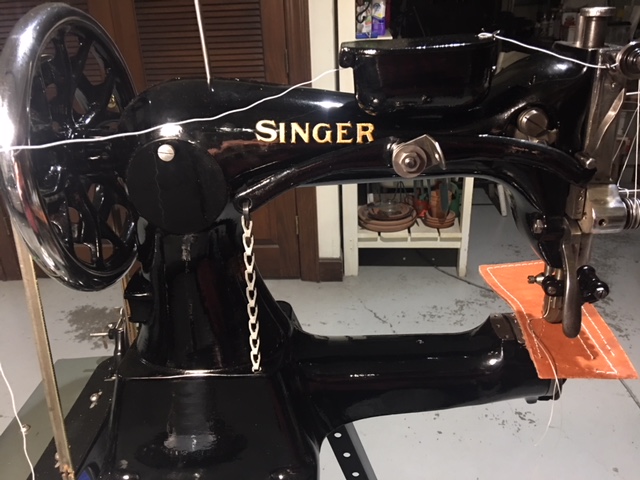
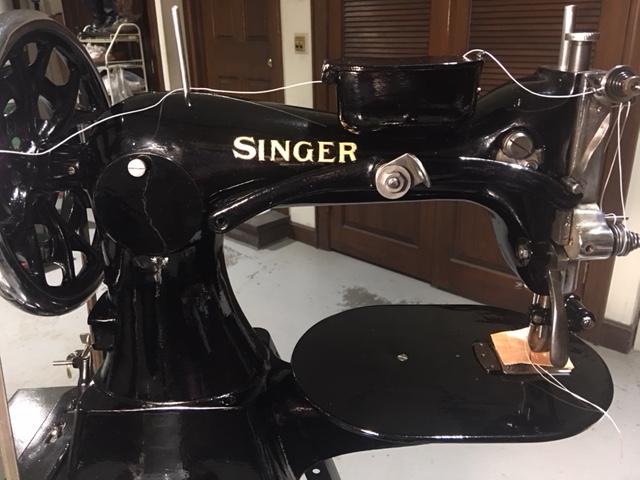
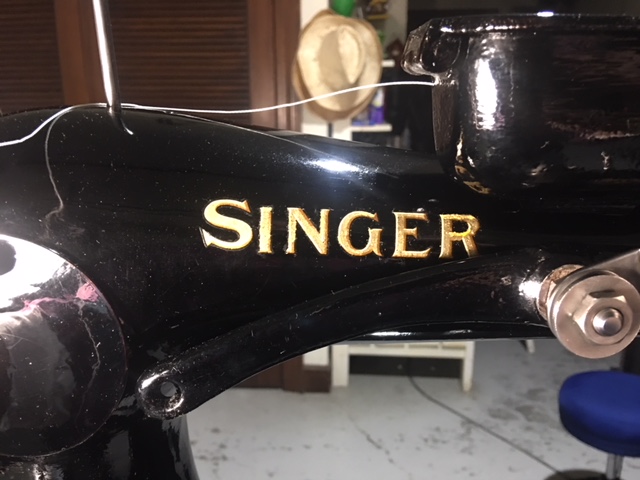
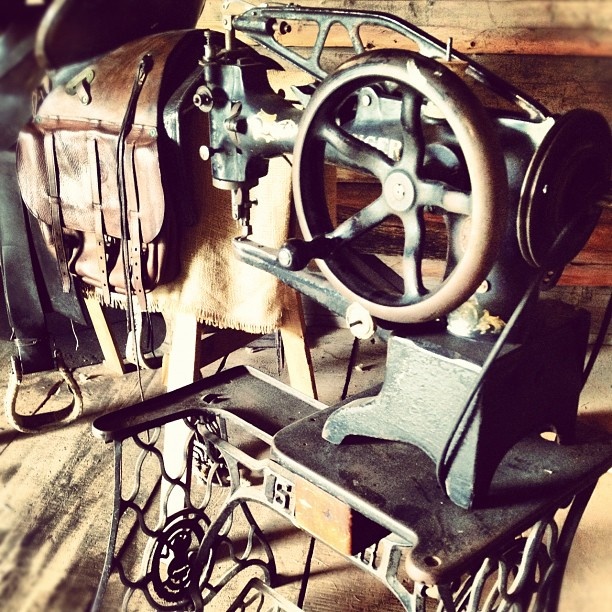
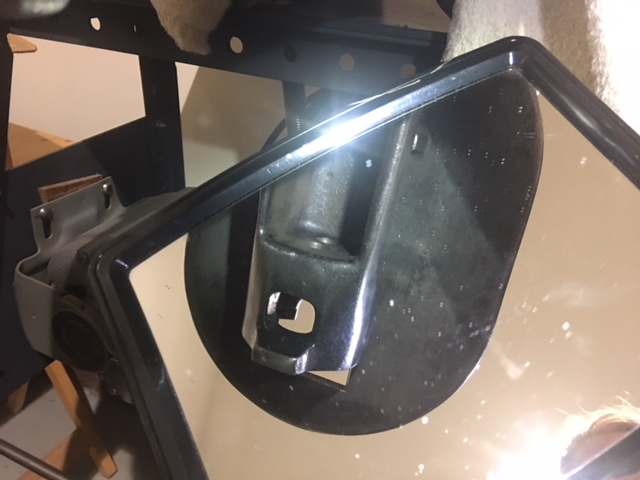
Thank you one and all for your comments. You picked up on the problem immediately, the disc was dragging slightly on the plate. I'll know for sure once the head is back on the base. At the moment the base is in the garage, and the head in the house where it's warmer; the gold-leaf decals still need a coat of varnish. Thank you again good people. @ amuckart Good to see your post, hope that means you're feeling better. All of the details on the japanning process may be found here: http://leatherworker.net/forum/topic/83226-first-try-at-japanning-on-a-restoration-project-the-conclusion/?tab=comments#comment-561849 Btw, I finally found a Singer 45K69 and treadle base. The treadle base was in England minus a table top and it's support, the machine was 200 miles away in St. Louis, Missouri. It all needed refurbishing, of course. I was able to pick up the K69, but the freight and insurance on the treadle was steep. Here are a couple of pictures:
-
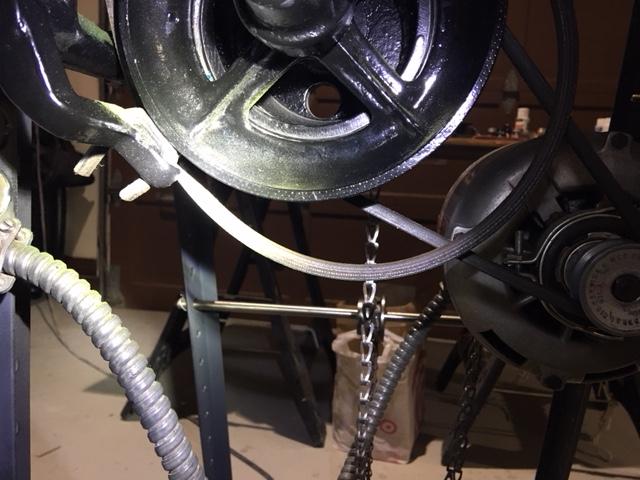
The Singer friction-clutch-pulley that you see in the pictures came with the Singer 45K25 that I japanned recently. I refurbished it including a new, round, leather, brake shoe and a new, leather, clutch face when I refurbished the 45K25. I applied a light coat of bearing grease to the leather clutch face. The machine sews well other than it continues to sew a number of stitches after the foot pedal is released. What should be done to make it stop quicker? Thank you, thank you very much.
-
@ Gregg From Keystone Sewing - You're welcome, Gregg, and thank you for your comments. Those words coming from you are particularly meaningful. @ rodneywt1180b - Thank you for your compliment and thank you for posting the link to the Victoriansweatshop.com website. Making what I've learned available to others is exactly what I am wanting to do. Thank you again.
-
@ Matt S - Thank you Matt for your generous comments. I do enjoy looking at it. Japan is a stunningly beautiful finish, particularly with a bit wet sanding.
-
Thank you gentle lady and gentlemen one and all for your kind words. I appreciate them. @ shoepatcher - Thank you Glenn. It was a lot of work, but for others going forward it'll be much easier. The Antique fan, the Stanley plane, the model T Ford and other collectors for some time have been trying to find a formula for japanning their restorations. For some reason only a few (from what I found) have shared what they know. it's like a mystery.. I was determined to make what I learned available to our LW members and anyone else who was interested. @ R8R - The tongue-in-cheek implication in your comment is correct, it'll take an understanding SO who'll be needed many times, including when the head is moved in and out of the oven . @ YinTx - Thank you. I believe the aluminum foil had a lot to do with the success of the Polyiso, together they did a good job. As a side note, you and DoninReno, who said he enjoyed the details, might be interested to know, one of the tests I did figuring out an oven was to mock-up an aluminum foil tent. I made a pyramid of aluminum foil approx.. 30" x 30" x 30" and put two 250 watt heat lamps under it, that puppy got up close to 400 deg. F. There's an oven there if someone can figure it out. @ bikermutt07 - Thank you. Like I mentioned to shoepatcher, the detail was for those who follow. Btw what do you ride? @ dikman - Thank you. You're right, we were concerned about cooking that stuff in our kitchen oven. Others had said it wasn't an issue, but we weren't sold. Buying a used oven, even a dishwasher with it's heating elements or making something, was the backup plan. We started with smaller parts in our kitchen oven and soon realized there was no odor or dripping unless the japan exceeded 420 deg. F., it cleaned up easily. There's no question though, a dedicated oven would be better. @ ScoobyNewbie - Thank you. Well the wife agrees with you on the "mad man" part, she didn't comment on anything else.
-
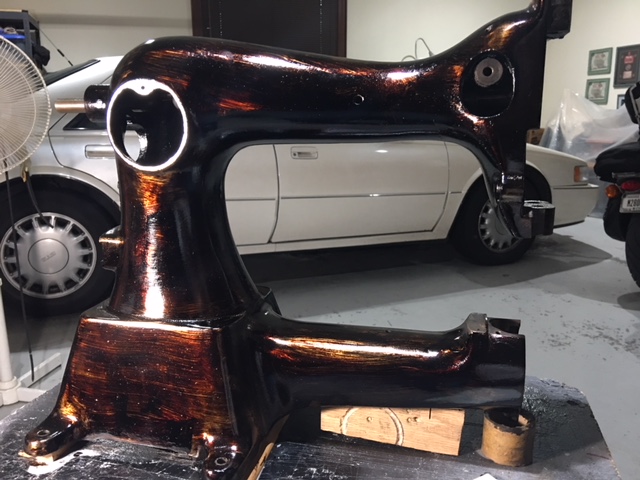
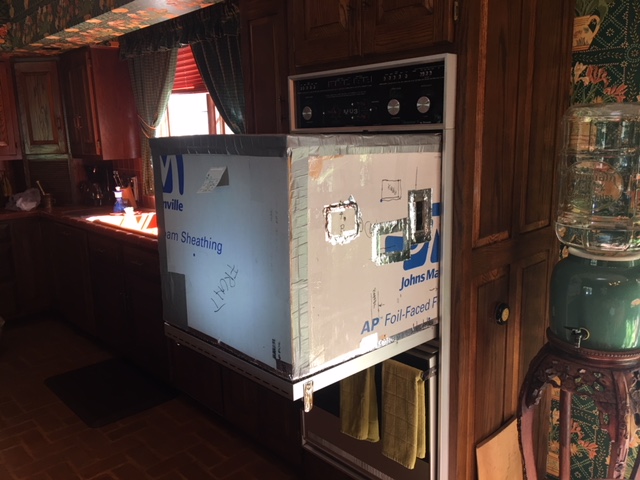
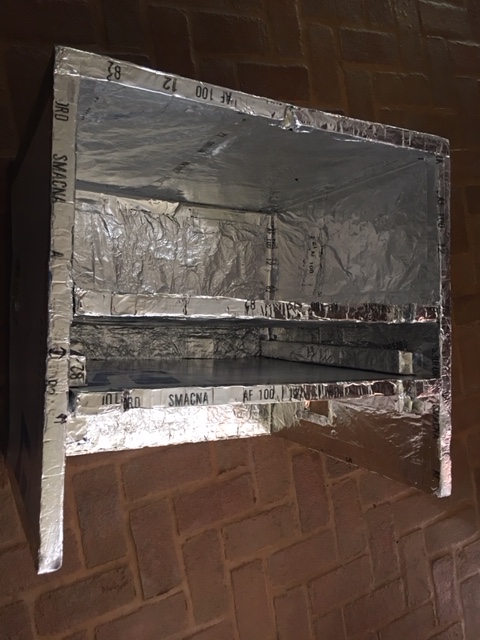
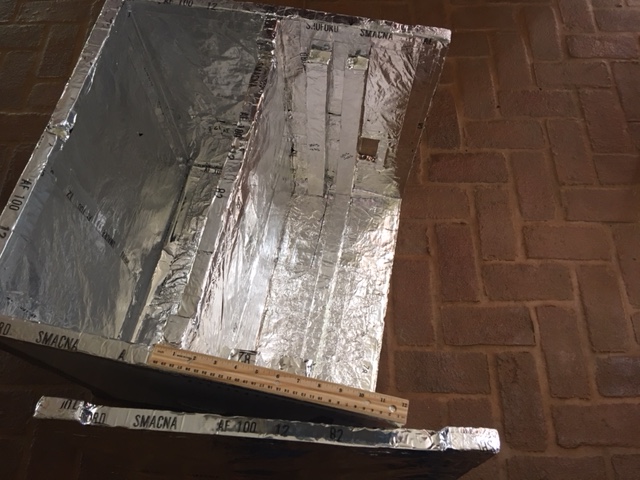
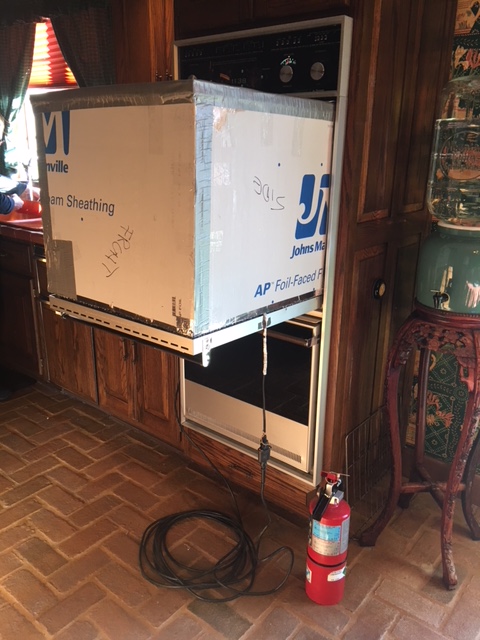
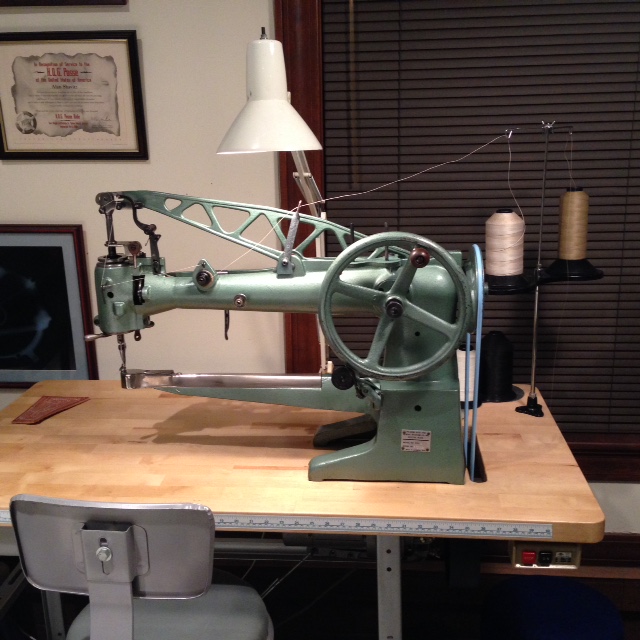
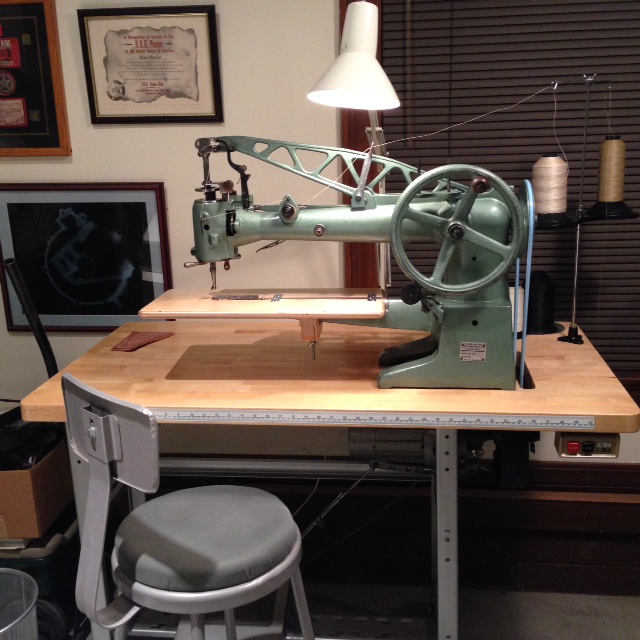
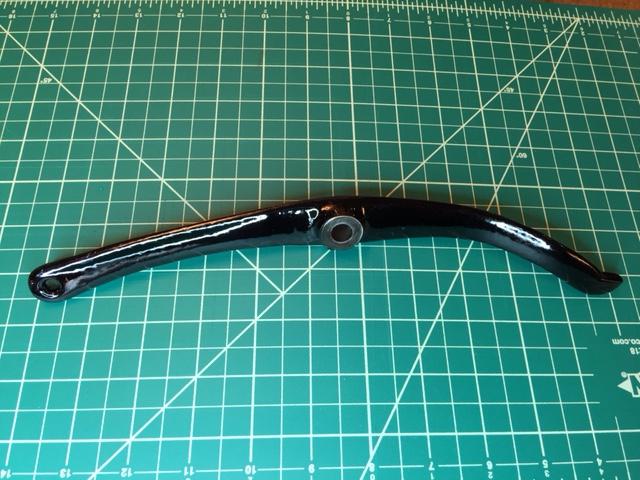
The restoration of the Singer 45K25 is finished!! The cylinder arm machine was disassembled, cleaned, stripped, re-japanned and reassembled. The machine sews 3-1/4 stitches per inch. The decals used are original, 100 +/- year old Singer gold leaf from one of our LW members. The project has been extremely interesting as well as educational. Much of the researched material can be found in the original Leatherworker (LW) post, which is suggested reading: “First Try at Japanning On a Restoration Project”. http://leatherworker.net/forum/topic/73078-first-try-at-japanning-on-a-restoration-project/ After making multiple mistakes, this LW member is convinced if done properly a japan finish is superior in numerous ways to a conventional spray-on finish…. more durable, more authentic and in this member’s humble opinion, more beautiful. Once the japan was applied, the head and other coated parts were “stoved” in an ordinary electric kitchen oven, more on that later. Three coats of japan were applied to the outside of the head and other coated parts, and two coats to the inside of the head (the inside wasn’t stripped). The inside was japanned and baked first in order to learn and gain experience, as well as to provide handholds for maneuvering the bulky head in and out of the oven. Maneuvering a heavy, freshly japanned head in and out of an oven without inside handholds would have marred the japan or damaged the heating elements…. most likely both. The following materials were used for the japanning: japan, high quality brush(s), 1000 gr. wet/dry 3M emery paper, Klean-Strip mineral spirits, cotton rags, paper towels and adjustable screw supports (discussed later). Application of the japan is simple once the items are assembled. The baking process took quite some time, mostly because of inexperience japanning a head (this was the first), and in particular inexperience using the “pregnant” oven (discussed below). Other japanners use less drying and baking times than were used for this project. The japan used was Pontypool Black Japanning Asphaltum Paint from Liberty On the Hudson. http://libertyonthehudson.com/pontypool.html. The Pontypool Japan goes a long way; a quart is probably enough to japan four or five machines. After experimenting with the addition in various combinations of mineral spirits, turpentine, and boiled linseed oil, it was decided to use the Pontypool japan just as it came from the can and to bake it. Cold curing was tried, but eliminated. The brush used was exceptional; it applied a smooth, even, near bubble-free coating, and remarkably didn’t shed a single bristle during the months of testing or during the actual applications. It’s an EMOFLO25 Ox Hair Flat Lacquer Brush, 25mm (1”) from I. L. Cornelissen & Son, in the UK. https://www.cornelissen.com/cornelissen-ox-flat-lacquer.html. The 2” brush would have been better for the larger, open areas of the head, but that wasn’t know beforehand, otherwise both sizes would have been ordered. https://www.youtube.com/watch?v=k-1kxGqmcp0 Japan was applied to the inside surface with a smaller inexpensive brush and a cotton-cloth ball on the end of a long forceps. Masking tape may be used although it isn’t necessary. Wet misapplied japan can be removed easily with a paper towel or cotton bud dampened with mineral spirits. Once baked, some masking tape may be a bit difficult to remove, the 3M blue tape used for this project came off fairly easily with an X-acto knife. The cleaning, stripping, etc. and application of japan were done on a revolving work stand made from a trash barrel. The link to the LW article on the revolving work stand can be found here: http://leatherworker.net/forum/topic/72168-revolving-work-stand/?tab=comments#comment-472017. It also shows what items were used to strip the original japan from the head. The revolving work stand was invaluable. It’s important to note that only Klean-Strip mineral spirits was used on the bare metal, not water. Mineral spirits cleaned well, totally protected the bare metal from rusting and prepared the surface for japanning. The one time soap and water were used on bare metal was a disaster, the metal rusted immediately. Oddly, even though multiple layers of japan result in an incredibly black color, japanning asphaltum is actually brown. So when cleaning an older japan finish, any brown coming off onto the rag may no longer be nicotine or tobacco smoke, but japan. In retrospect, if the part or head is known to have a true japan finish, stripping can be avoided. After a proper degreasing and cleaning, the japan only needs sanding with 3M 1000 gr. paper moistened with water and Dawn soap, the chipped areas sanded smooth, washing with mineral spirits, drying with paper towels, a light coat of japan applied to the chipped areas, the part/head allowed to dry over night and the whole part or head japanned as described below. The foot lift bar in the third picture above was finished this way and it turned out well. It obviously saved time and effort stripping. It’s better if the first of the three coats of japan is thin as shown in the previous picture. Each of the three coats was allowed to dry three days (perhaps overkill) in a dust free environment before being sanded and baked. The extra drying time was to minimize the chance of developing micro stress cracks as occurred and as was discussed in the original japanning article referenced in paragraph one above. Those cracks were attributed to the three coats being too thick and drying at differential rates thereby creating stresses. After baking each coat was allowed to cool slowly overnight in the closed oven. Then the first and second coats were sanded lightly with 3M 1000 gr. sandpaper moistened with water and Dawn soap in preparation for the next coat of japan. Doing so gives a natural gloss to the surface. If the underlying metal is rough and pitted, the finished surface will be rough and pitted, but with a gloss. Some Ford model T restorers not only sand, but also they polish and buff their japanned parts. http://www.mtfca.com/discus/messages/411944/487227.html?1413843123 Since the Singer 45K25 head is too large to fit into most kitchen electric ovens, something else was needed. Moving a freshly painted head multiple times to and from a commercial baking facility seemed unnecessarily risky as well as expensive. In the end, it was decided to use a “pregnant oven” similar to one found on the Internet; in retrospect it could have been shorter for his project. Once a removable baffle was incorporated to reduce the volume of air that needed to be heated, the supplemental electric heating element was eliminated. A 2” x 3” Pyrex glass window was added to monitor the top, middle and bottom oven thermometers. Japan begins to bubble near 420 deg F, so it’s necessary to observe the temperatures, which in this case varied approximately 100 deg. F. from top to bottom. Even with the temperature selector dial set at a maximum of 450 deg. F., the top temperature in the pregnant oven never exceeded 420 deg. F., the maximum bottom temperature reached was 320 deg. F. The pregnant oven was constructed from a damaged sheet of John Mansfield (JM) 1” x 4’ x 8’ Foil Faced Polyiso insulation board from Menard’s ($12.00). Also used were gray duct tape, ordinary kitchen aluminum foil, Shurtape AF 100 aluminum foil tape and three inexpensive oven thermometers from Wal-Mart. The inside of the pregnant oven was covered with aluminum foil, which was held in place with foil tape. The oven worked amazingly well, and after the initial testing, there was never a concern about fire, even at 450 deg. F. The Polyiso insulation board is surprisingly effective. The adjustable, threaded, screw supports were made from 3/8” all-thread rod, threaded couplers, nuts and metal plate. Any size rod and coupler that will support the weight will work. The baking procedures that proved most successful in this electric oven were straightforward. First an infrared heat gun was used to calibrate and set the temperature selector dial on the oven face to accurately correspond to the temperature of a part hung near the top of the hot oven. Baking was as follows: · If the part(s) fit completely into the oven – each coat was baked 2 hours at 250 deg. F, 2 hours at 325 deg. F and 1 hour at 395 deg. F. As mentioned above, others use less drying and baking times. · With the "pregnant" oven – each coat was baked 2 hours at 280 deg. F, 2 hours at 365 deg. F, 2 hours at 425 deg. F and 2 hours at 450 deg. F. Conclusion: designing, testing and generally working through the learning curve took perhaps 18 months; although, three other Singers were refurbished with regular paint during that time. It was quite a bit of effort to put into japanning one machine; however, it was great fun and very satisfying. Japan is a beautiful and durable finish; some of the reasons Singer, Ford and Stanley chose it. If you’re a traditionalist, decide to try japanning and follow the steps above, you’ll be able to japan a machine in a month or so. And once you have the pregnant oven (if you go that way) and threaded supports, you’re looking at a couple of weeks for subsequent machines. Your comments and questions are welcome here or in a PM.
(2).thumb.JPG.01193249fbe98f5e3d911572c12a7fc2.JPG)
-
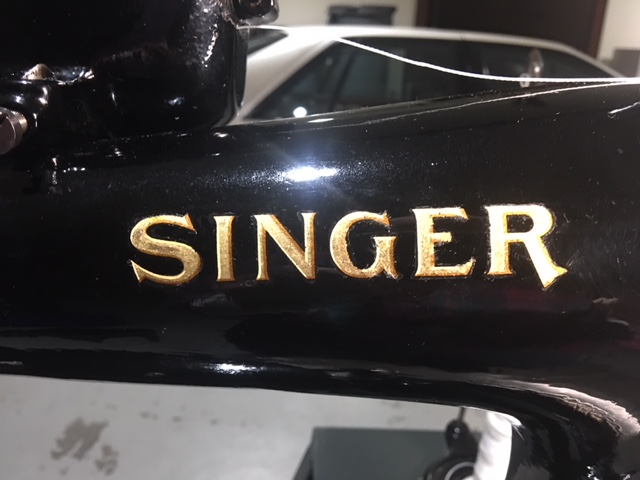
Yes, thank you Jimi, that does suggest Folker's vintage decals with the long R could be as old as 1910, perhaps older. In any case, after seeing your information and Mark Rofini's images, I feel more comfortable now using the decals on my 45K25. Thanks all for your input.
-
Thanks for the kind words fellas. The work is far from like "new from Singer" as you said, Jimi. The japan turned out well, I'm pleased with it and will document the entire process for the members shortly. The decals I'm not so confident about, I've already ruined two of them experimenting with adhesives, and I've had to touch-up the two that are on the machine, they're a work in progress. Before I shoot my mouth off prematurely and lead someone astray, I need to clean off the extra glue and put on some type of a protective coating. About the age of Folker's decals that I asked about, are you able to read the serial number on the 29K above? Mark Rofini, a sewing machine dealer in the US, shows these 45K21 and 45K25, among others, on his website. Those decals appears to have the same long "R", so maybe Folker's decals are correct on the 45K25's. Singer class 45K 45K21 45K25
-
The 45K25 is finally finished and has original, gold-leaf, Singer decals on it from Folker. He finds the best stuff. I'll clean them up a bit once they've setup and dried. I don't know if they're correct to the K25, but that's the way it'll have to be. Since I used authentic japan to restore the machine, I wanted to use authentic Singer decals, not reproductions, and that's what I had available. I'll update my japanning article with pictures and details for the members in the near future.......I'm sold on japanning. In the meantime, I would like to determine the age of the decals. Jimi posted the pictures below of a 29K33 that appear to have the same decals. I thought if I could date that machine, it would give me some idea of the age of my decals. The trouble is the serial number doesn't appear to have a letter prefix and the number, 524961?, doesn't show-up in the Singer production records. Can anyone shed some light on the serial number and/or the age of the decals? Here's a picture of the paper backing from the decals, if that helps, they're No. 7421. Thanks good people one and all.


-
Menard"s is having a sale currently on their Butcher Block Top, 25" Wide x 48" Long x 1.5" Thick for $71.19 after mail in rebate. https://www.menards.com/main/kitchen/countertops-laminate/all-countertops-laminate/butcher-block-top-25-wide-x-48-long-x-1-5-thick/4857016birchbblock25x48/p-1444430610144.htm That's what I used on this patcher, it's the natural color with polyurethane.. They stock them at the store here in town. I'll do it again if I have the need. . .
-
This one looks similar. I believe it belongs to LW member Shoepatcher. He'll know the details of the one in the ad.
-
Hi John, Sure hope the tonsil issue is behind you. You'll be in our thoughts and prayers. Maybe this 241- pdf will have what you need, it does have a threading diagram. http://dixiesewingmachine.tzo.com/MANUALS/SINGERSERVICE3/241-Inst.pdf parts manual http://dixiesewingmachine.tzo.com/MANUALS/SINGERPARTS10/241-11,12&13.pdf
-
Still can't find these parts !! Any help would sure be appreciated.
-
Your welcome. Did you notice the small, numerical list of the parts with names, it may help identify what some parts do..
-
29K53 Parts Manual http://dixiesewingmachine.tzo.com/MANUALS/SINGERPARTS1/29K51,K53,K55,K56.pdf
-
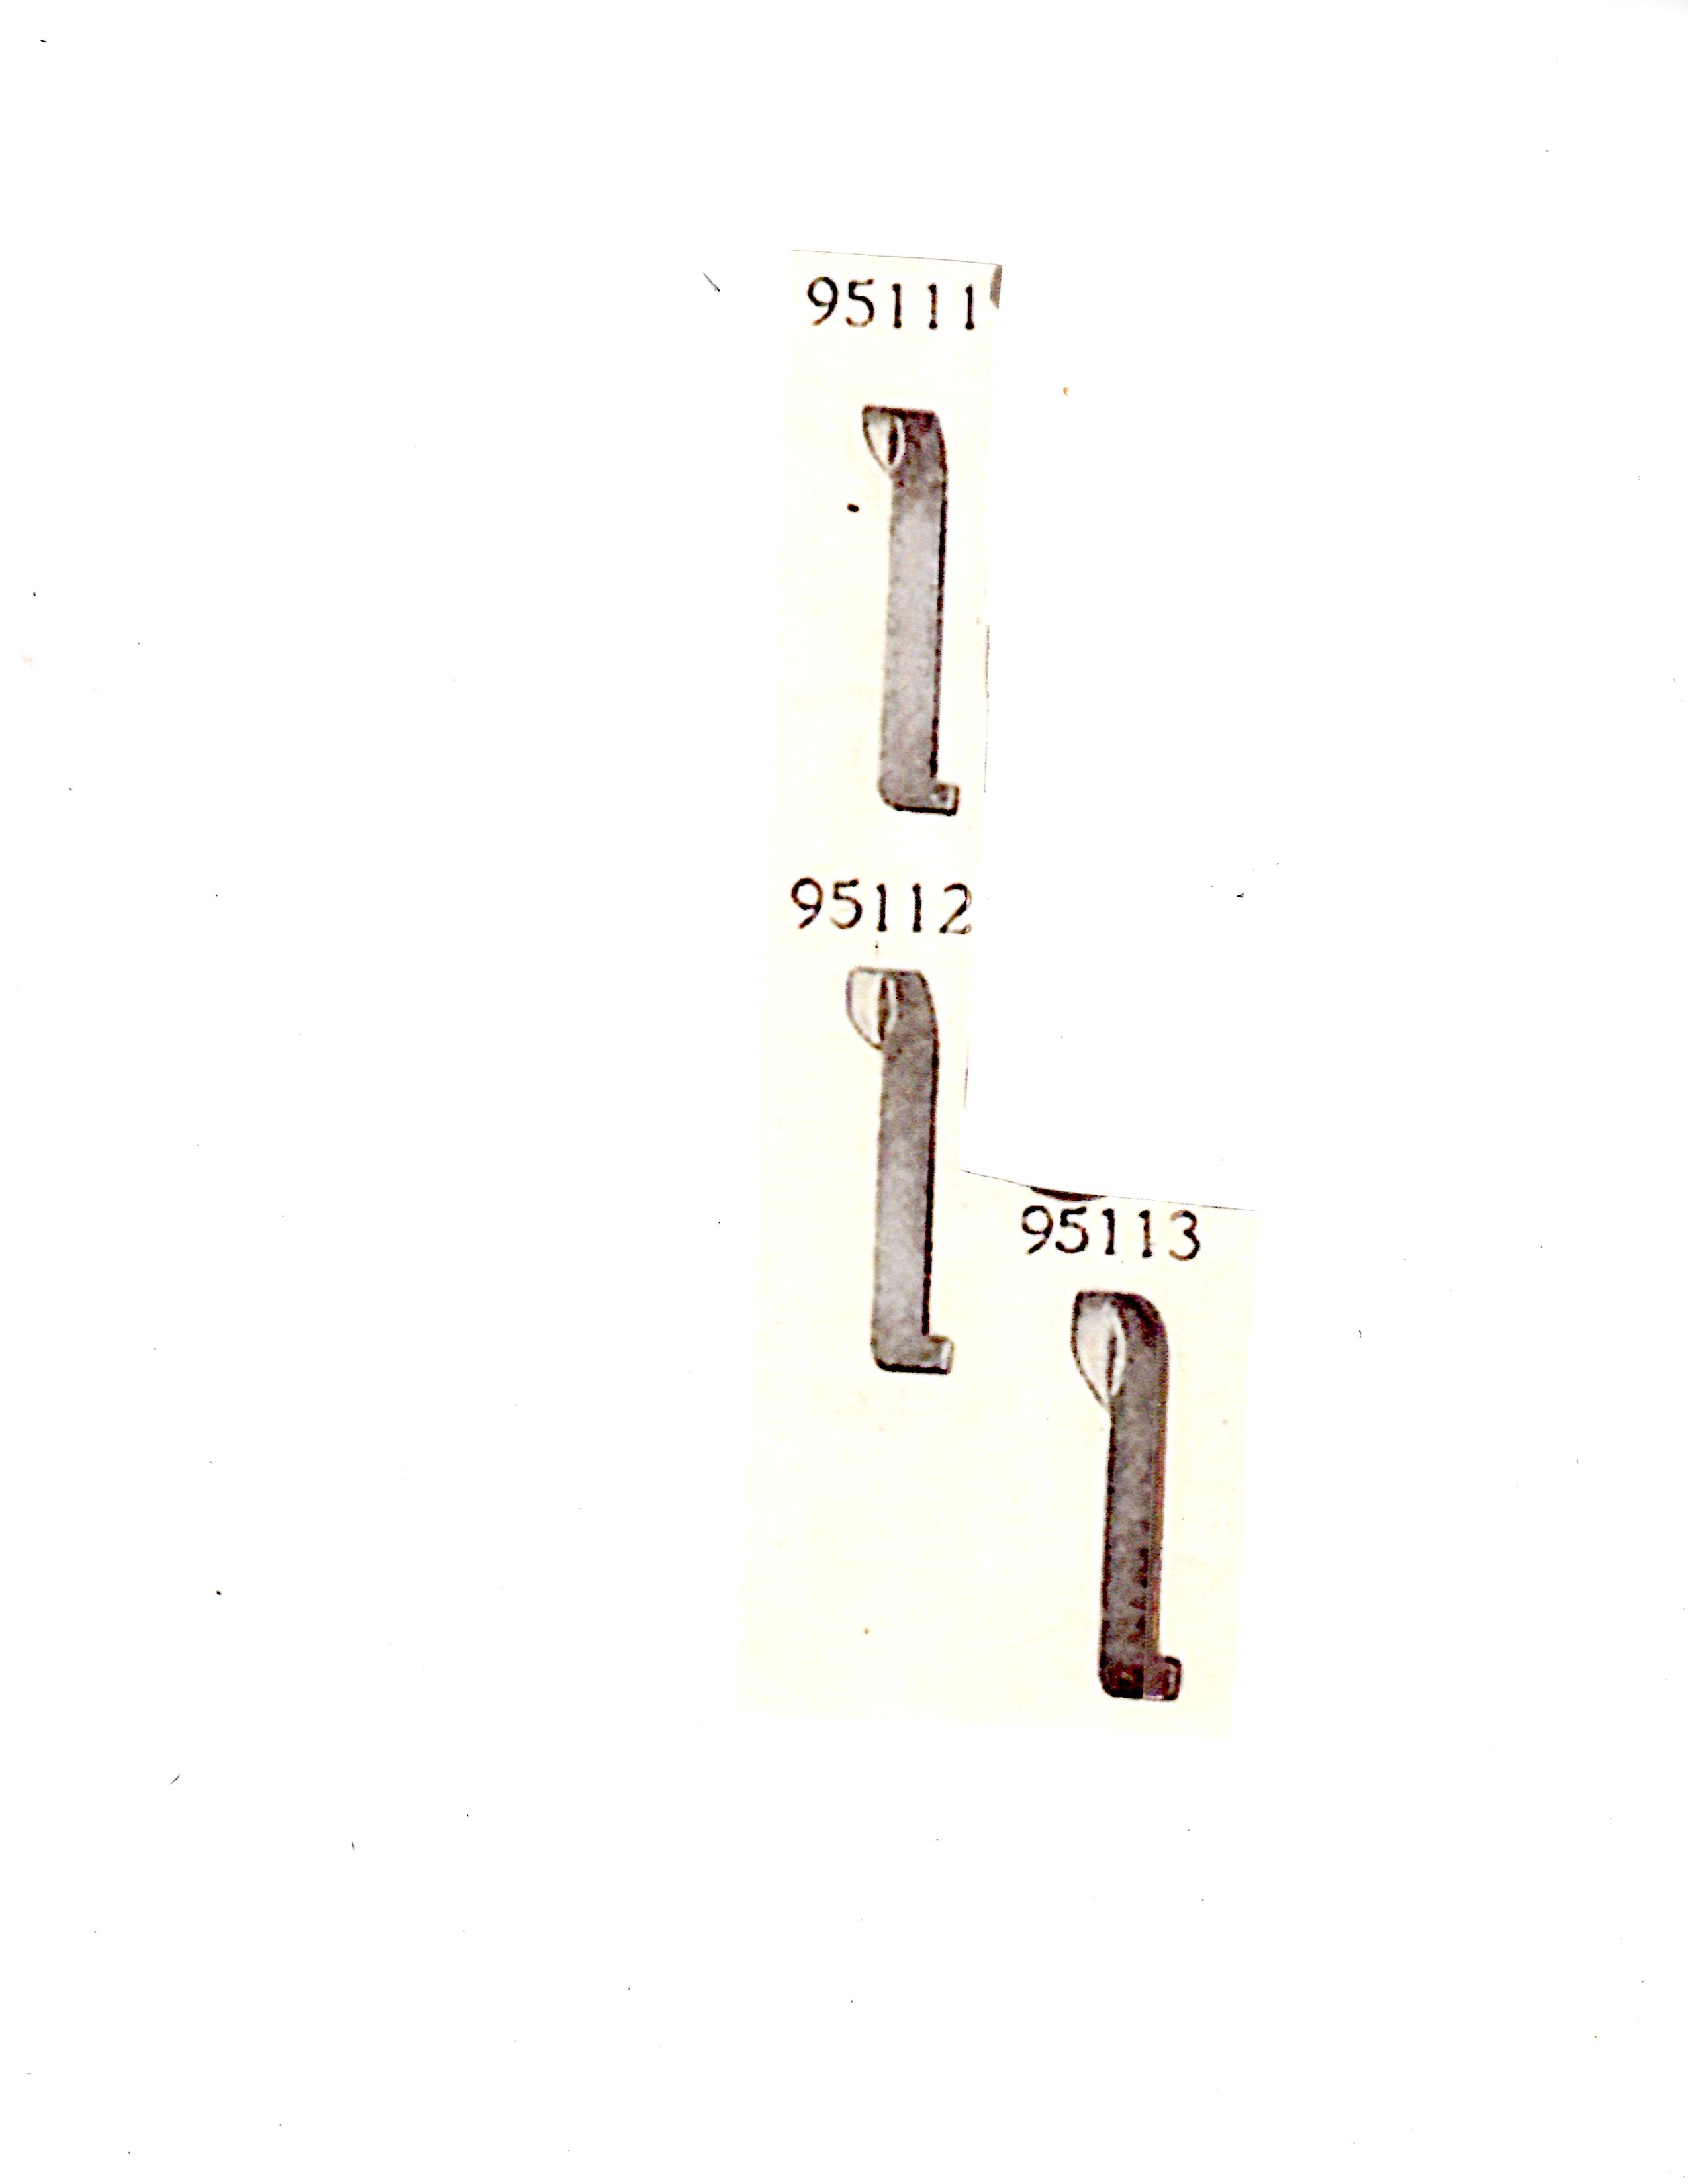
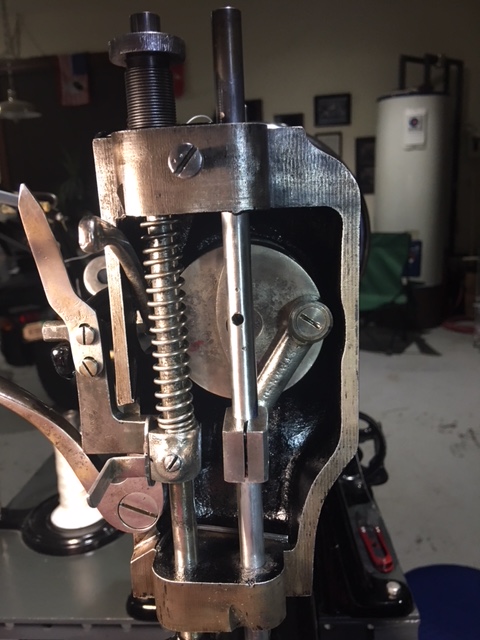
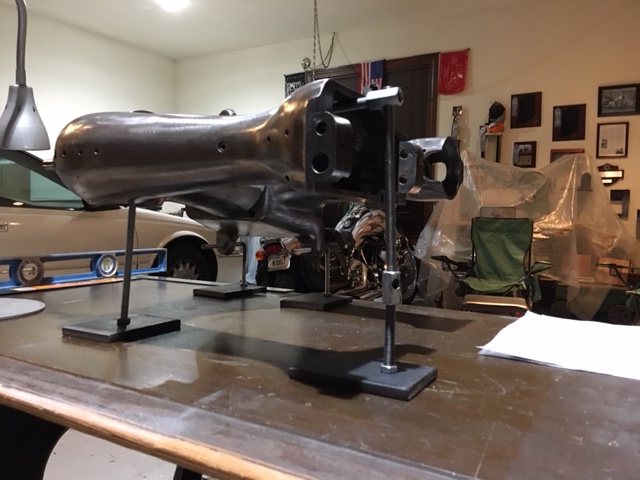
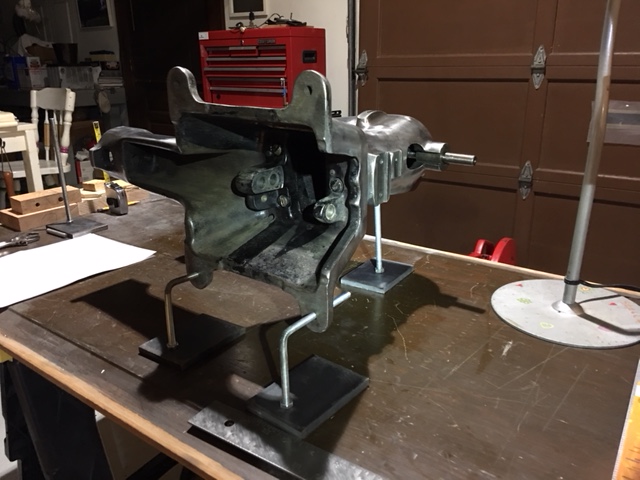
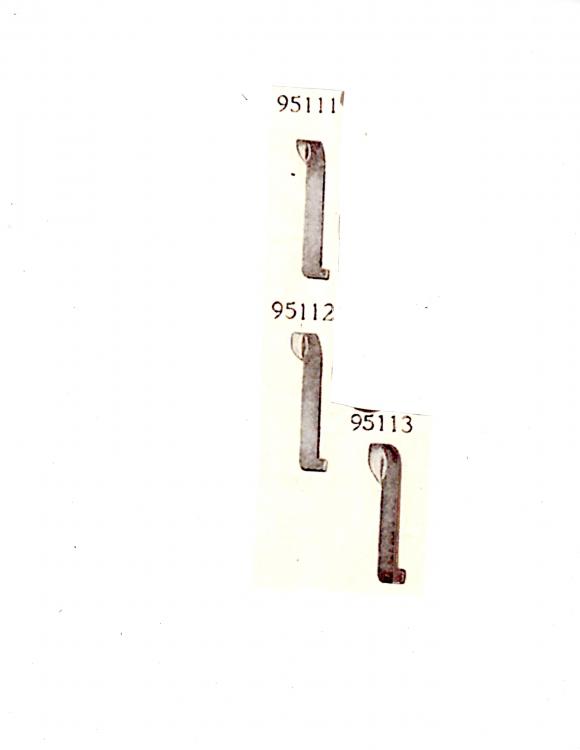
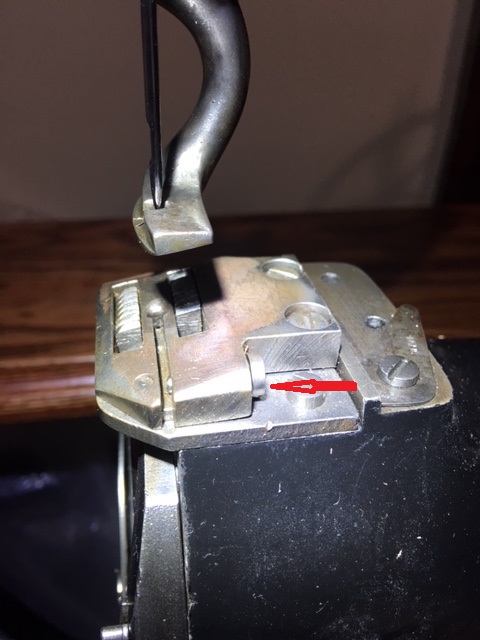
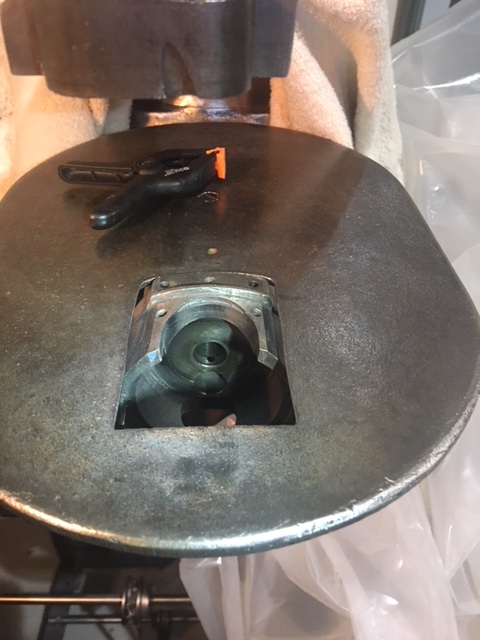
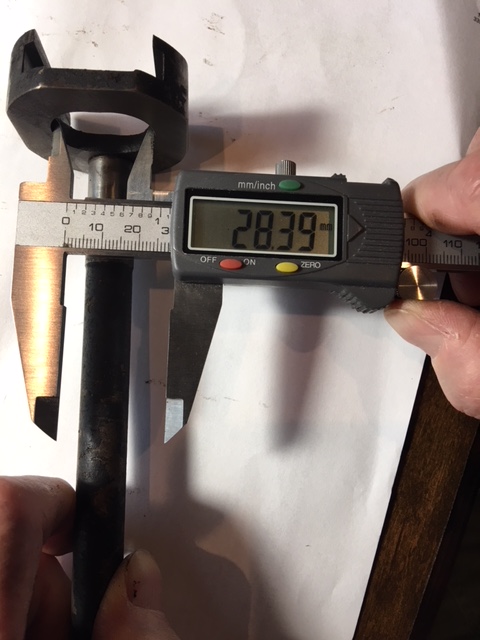
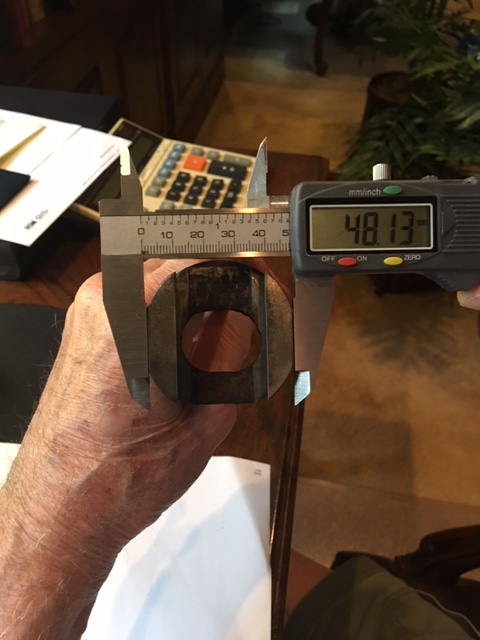
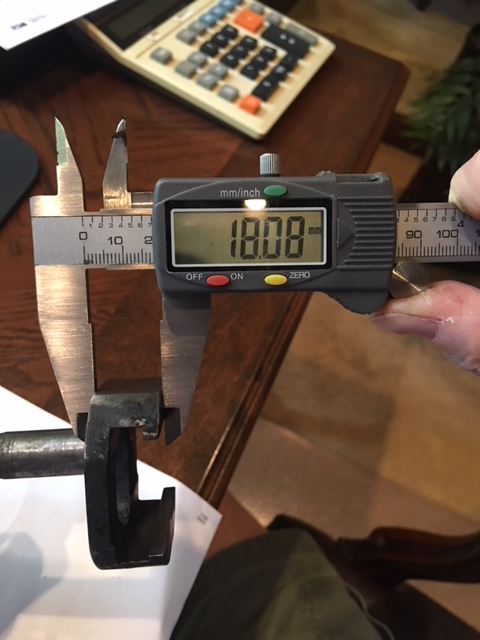
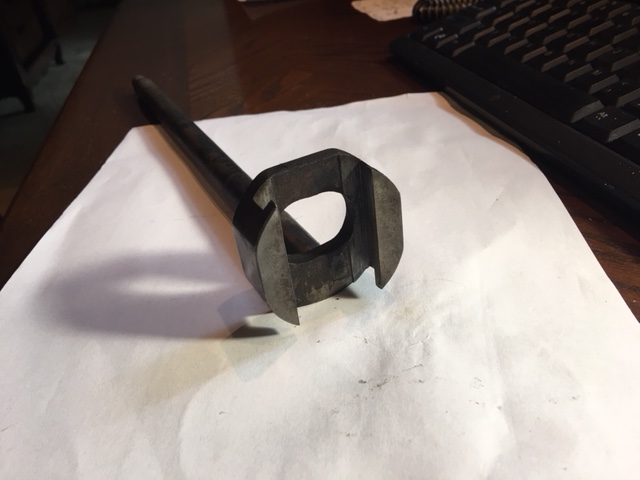
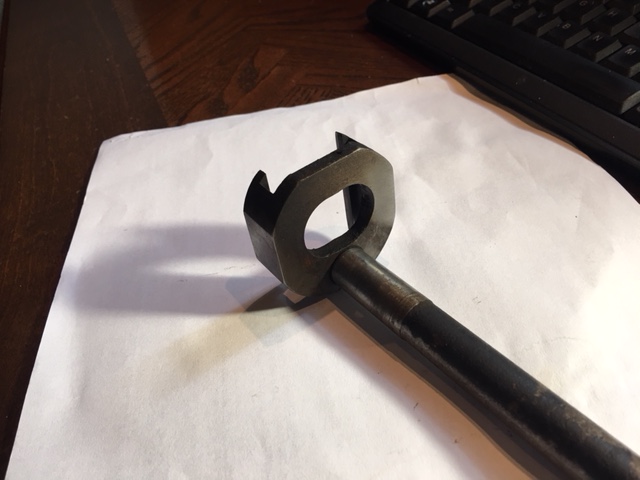
Would anyone be able to post a close-up picture of the Throat Plate Channeling Knife that's used in a Singer 45K69 leather shoe soling machine (perhaps others)? I'm nearing completion of a 45K69 restoration and may have to fabricate the channeling knife. It cuts the protective groove in the shoe sole that the thread lays in. Other than these images ( small, medium and large sizes) from the parts manual, I have no detail on the actual shape of the cutting end. The knife fits in that slot in the throat plate in the picture and is held in place with the screw. Thank you, thank you very much.
-
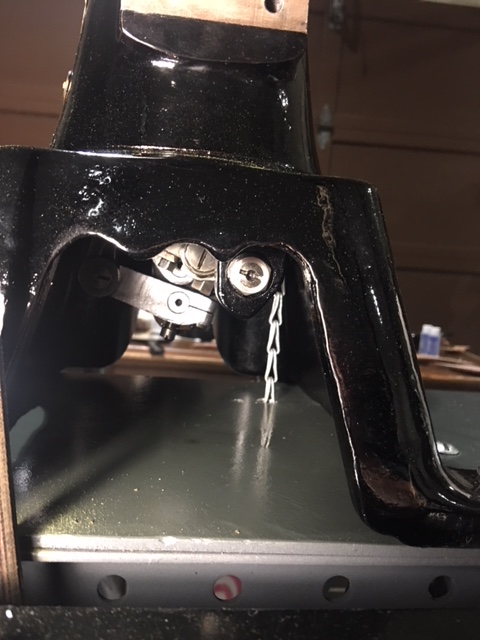
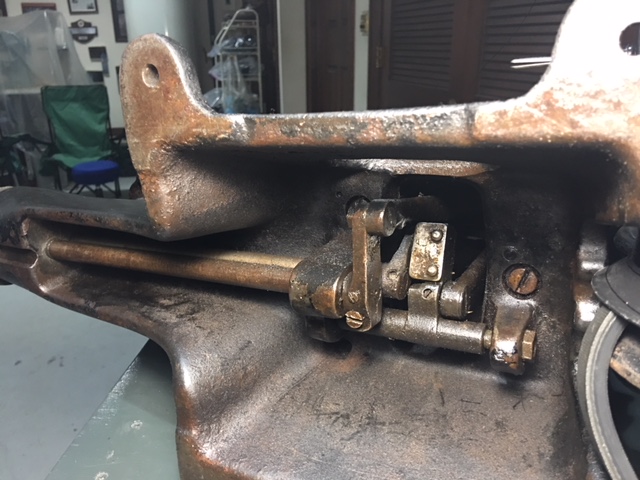
My 45K25 is disassembled at the moment (see photos above). This is the underside of a 45K53, it may be similar to a 45K25, because the 91163 part you've shown above is common to both subclasses. Others may comment.
-

-
-
Source for Red Consew Badge? 206RB
Evo160K replied to Pintodeluxe's topic in Leather Sewing Machines
If you're interested enough to have one made, you might contact the Antique Fan Collectors Association museum. They do vintage fan restorations and have many sources.....old type lacquers, cloth covered wire, custom parts and etc. The number is 1-317-733-4113, www.fanimation.com/museum Perhaps they can direct you to someone who can assist you. -
Here's a 99-1 parts list with hand crank (no pictures). http://dixiesewingmachine.tzo.com/MANUALS/SINGERPARTS5/99-1.pdf Here's a 99-13 parts list showing pictures to scale. http://dixiesewingmachine.tzo.com/MANUALS/SINGERPARTS5/99-13.pdf I believe you'll find many of the part numbers for the two machines are the same, so together the lists should be useful.
-
Simanco part number 91716. Would you please let me know what you have? Thank you. Here's a picture
-
Thanks for sharing Gregg - I too enjoyed the video - quite educational. That fellow must have a fine machine shop.
-
Stitch length maxes out too early
Evo160K replied to cumberlandharp's topic in Leather Sewing Machines
That's impressive Uwe.
(2).JPG.e54934fd865495555926dbe47206b89a.JPG)