MADMAX22
-
Posts
3,201 -
Joined
-
Last visited
Content Type
Profiles
Forums
Events
Blogs
Gallery
Store
Everything posted by MADMAX22
-
Very cool quiver, thanks for taking the time to write up the tutorial as well. Another project that I gotta try one of these days. Good luck with the sale also.
-

Business Card/Credit Card Case
MADMAX22 replied to Storm's topic in Purses, Wallets, Belts and Miscellaneous Pocket Items
Looks good man, I like that idea for the flower buds, I dont think Ive scene that before. -
Way cool, makes me wanna get a half helmet or 3/4
-
Double Wrap Sword Belt & Scabbard
MADMAX22 replied to bhl's topic in Gun Holsters, Rifle Slings and Knife Sheathes
Very cool man, good job -
Thanks for the input guys. I understand what everyone is getting at and Ill leave it be. Ill be sure to post some shots when Im finished.
-
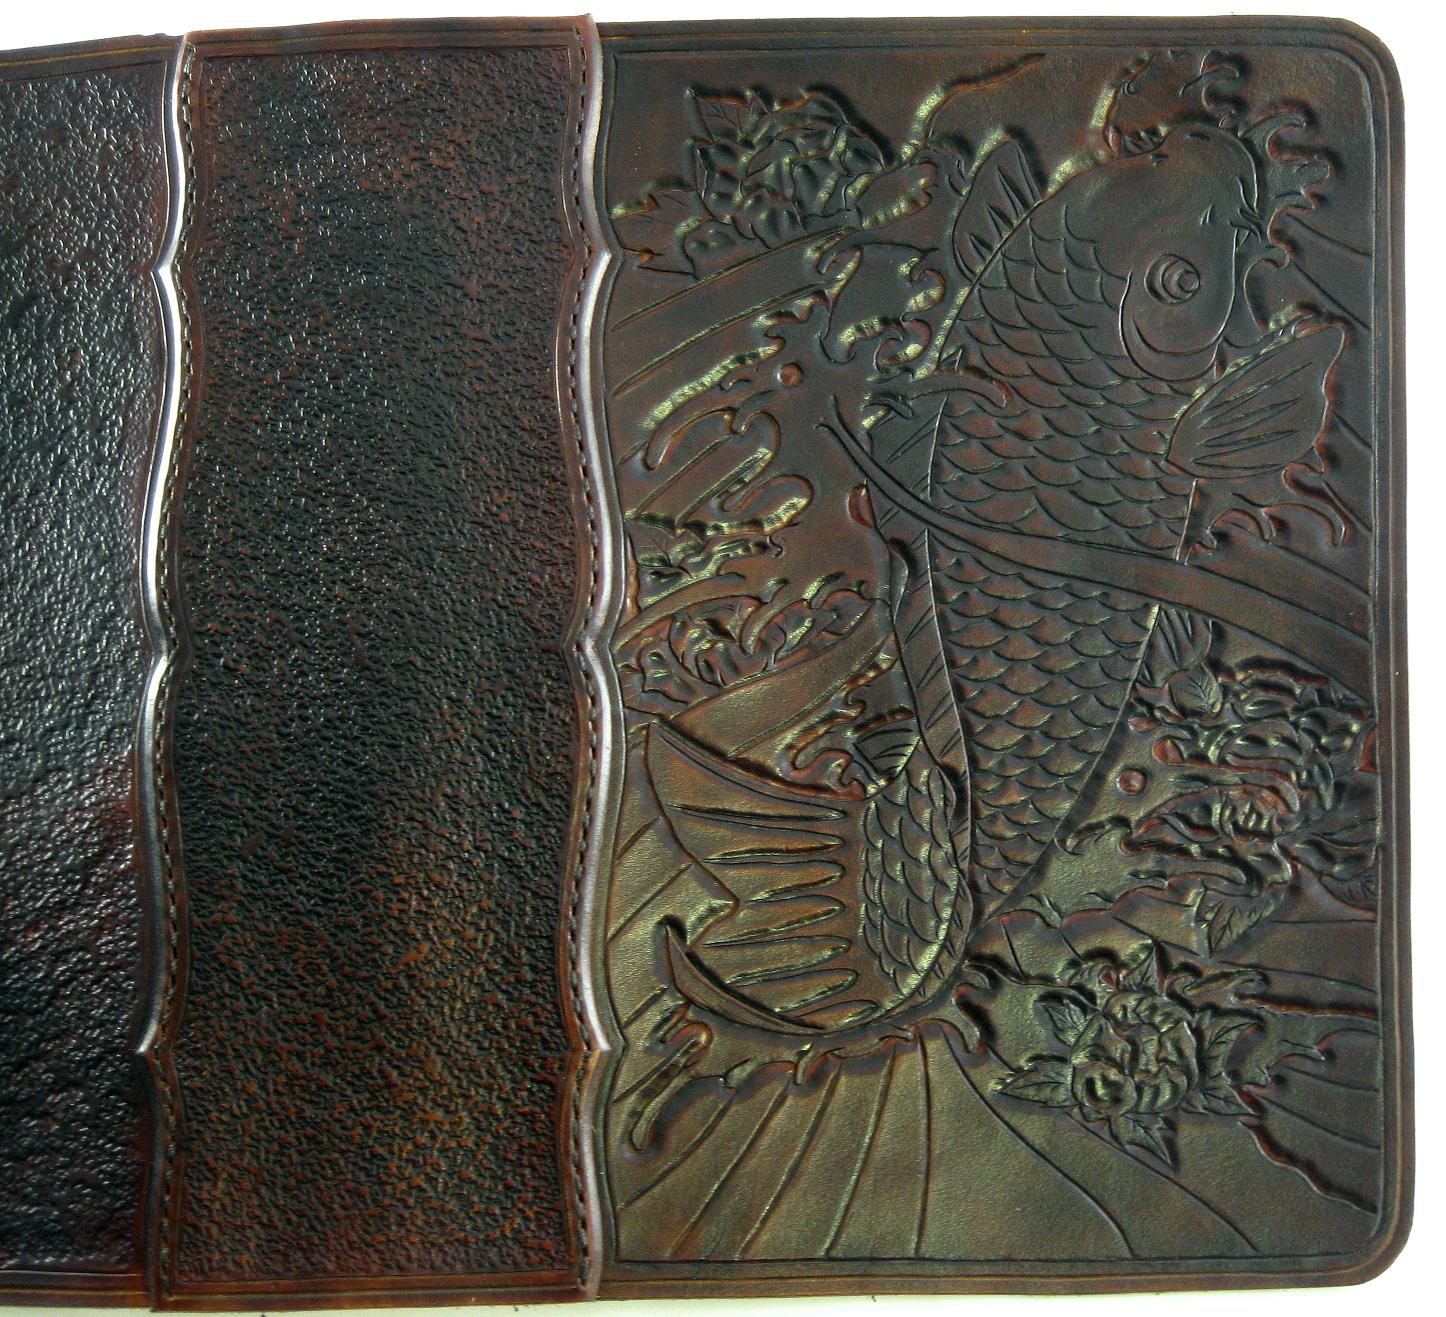
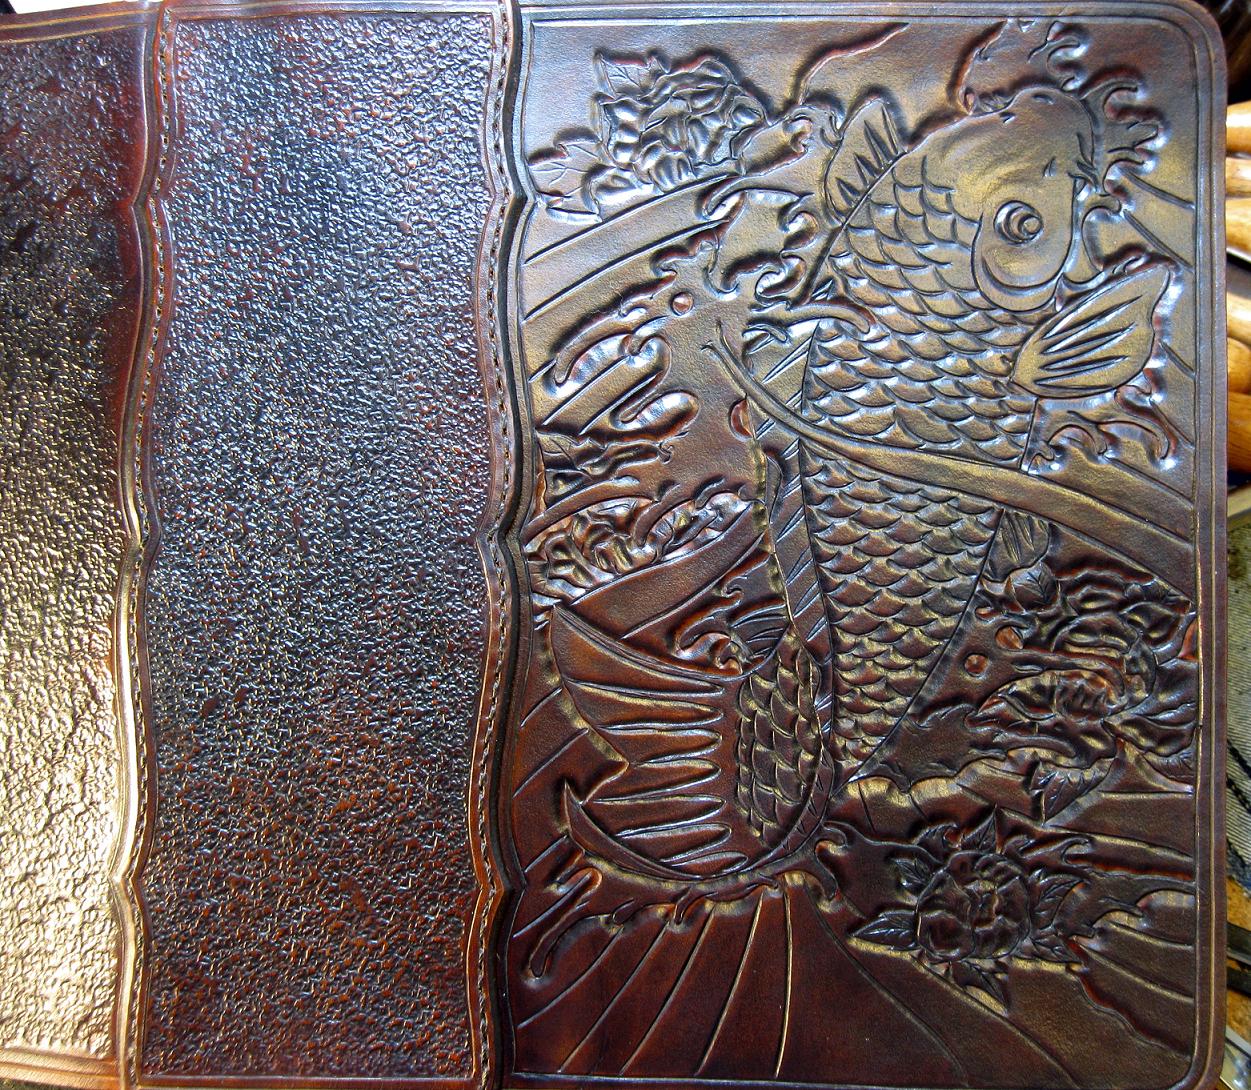
Hey guys Im using Tina's pattern to do a day planner type thing and just to experiment with it a little bit. I tooled then dyed the project so far with feibings dark brown, then went over it with a lightly with a cotton ball filled piece of cotton shirt that was dipped in feibings black dye. It ended up not having the diversity in color that I had hoped for because I did this same technique with a earlier project and used feibings tan as the undercoat, it made the tooling really stand out. But this project has a nice old look to it with a dark and slightly lighter browns that show up (its hard to see in the picture). I kind of like it but at the same time think I would like more contrast. So your opinions just finish it as is and seal it up or go ahead and try antiqueing it just to see how it will turn out. Thanks for your input.
-
Goodjob Troy that turned out really cool.
-
Thats a nice looking piece, very good job.
-
All his mauls look so nice. Congrats with your new piece of art.
-
Cutting Pattern for tooled seat
MADMAX22 replied to Casey Jordan's topic in Motorcycles and Biker Gear
Have you looked thru the tutorials on the top of the section. Kevin king's way of doing helped me emensly. -
Thats odd, most people that include "move" and "LA" in the same sentence are going somewhere else. Going from NC to la I would definatly try and take a trip to check it out first unless youve allready been there. Sorry I cant add anything as far as leatherwork and sales go.
-
Excellent looking piece of art work. That horse looks a little pissed lol.
-
waterhouse has double shoulders on sale for 2.95 sqft and offers us a 5% discount. One of the 7/8 oz could be doubled up and you could still get a couple pairs out of one. Its pretty decent leather as well. That would give you about 14oz for the soles whcih should be plenty.
-
Good stuff guys, atleast now ill know what to use it for if I get more of it. Thanks for all the good info.
-
Thanks for the input guys. Tim normally I would probably call and ask but I got this side several months ago and used most of it up allready, it did turn out some nice rifle slings so I cant say I am too disapointed. Interesting about the rawhide, so this basically happens when you pull the leather from tanning a little to early?
-
mixing waxes
MADMAX22 replied to Tkleather1's topic in Dyes, Antiques, Stains, Glues, Waxes, Finishes and Conditioners.
For cheap I took a regular pot and filled it half full of water and got that boiling, then I take a mason jar and put the waxes in there and set that in the boiling water and give it a whirl everyonce in a while. Then poor it into molds as suggested. This way I dont have to worry about getting wax in the pot since its kind of hard to get it off . -
Seat looks pretty good for your first one. The lacing is good also. Ive realized that you need to get decent leather when possible as it makes it so much easier to get better results. As stated HO from springfeild, WandC, waterhouse has some nice specials on veg tan occasionaly I got a couple of there double backs for $2.95swft and they are pretty good. Even tandy has some nice leather if you get the oak leaf or better and can hand pick it. There royal meadow is pretty nice but pricey. Thats all the ones I have tried so far. For the price the HO seems to be the best IMHO so far.
-
I think alot of this comes from the use of the animal. Here dogs and cats are considered pets hence one of the big no no's of eating them but I garuntee if your starving youll cut that little bugger right up. I know I would. Horses have been used for work for a long time in this country so as such they posed more of a value as a work animal then a food one. Horse has been eaten in many countries for a long time, even back when it was used as a war animal or a utilitarian animal as butchkitty said. Horse has also been eaten in the states during times of roughness that we dont see today. Heck I remember growing up we had a couple horsed break a leg, we had to put them down. Once we did that we didnt waste them, if anything we cut them up and froze them and would feed them to the dogs. They loved it and it was free food. Im sure some suberbanites would cry and frown on that today but back then it wasnt even a second thought unless you wanted to pay to have it disposed of or you had a back hoe to dig a hole big enought to bury the darn thing. Sure horses are pretty smart animals but I will wager a pig can learn as much if not alot more then a horse and have just as much a personality but we eat the heck out of those guys. Ofcourse if we could ride pigs then it may be a different story. I think as long as the animal is raised in a good manner and killed in a decent way then so be it. It couldnt be any worse then veal. Now thats pretty horrible.
-
This and if you want heat up the tool a little bit just enough to melt the crayon and then rub it in a tad. this kind of sets it, have scene people do this with many metal things to bring out numbers and such. Also color coding with colored tape works for grouping things ofcourse your limited as to how many groups.
-
OK so a while back I got a side of 8oz that was pretty darn nice. The only issue was that a pretty good size portion cut with relative ease about on par with what I expected, however the other portion which ranged about 1/3 of the hide was extremely hard to cut. At first I thought it was my knife, so I sharpeded it again, tried my other knife, sharpened that again, tried my shears (which allmost felt like cutting metal, near impossible). I took the same knives to some other stuff and they worked fine. Would I be correct in assuming that I have some rawhide in my hide of vegtan. I dont know much about it but have heard of it before and am wondering how common it is. Its only this one hide and it is from W&C so I know they usually have really good hide. This isnt meant to bad mouth them in any way. The center of the hide as in depth about just under the grain layer gets pretty dark but not sure if thats a indication or not.
-
metallic black color
MADMAX22 replied to troy's topic in Dyes, Antiques, Stains, Glues, Waxes, Finishes and Conditioners.
Allthough not exactly black I did get somewhat the effect you were after. I did a holster and used vinegaroon to dye it black but it was spotchy in places because of the leather. I dyed over it with feibings black and it came out a bluish/black metallicy color. Pretty cool. Maybe something to play with if you are into the vinegaroon thing. -
Wallets and Flasks
MADMAX22 replied to HarleyChef's topic in Purses, Wallets, Belts and Miscellaneous Pocket Items
Good looking stuff man. I really like those flasks. -
Great seat love that color.
-
Stupid cameras and there pixels lol. Yeah ive gotta finish reshaping it a bit also. I didnt like that real strong curve on it, makes it a heck of a guy to sharpen. I only got the thing because it was on sale for $20 and I ended up having that much in store credit one day.
-
Havnt had a chance to play with white balance and such. I put it to the most manual setting it has, selected the macro subsetting, set the iso 200 ( I think) since in reveiws I read anything above 200 and it starts getting grainy even though it goes all the way to 1600. Took the shots. The lighter version of the two dark photos are after using the editing tool that canon supplies. Prettty much just a auto adjust and I increased a few things like contrast and such by like 2 I think.