TroyS
-
Posts
599 -
Joined
-
Last visited
Content Type
Profiles
Forums
Events
Blogs
Gallery
Store
Everything posted by TroyS
-
I love it! Sleek, clean, lots of WOW factor! You're gonna have another satisfied customer!!
-
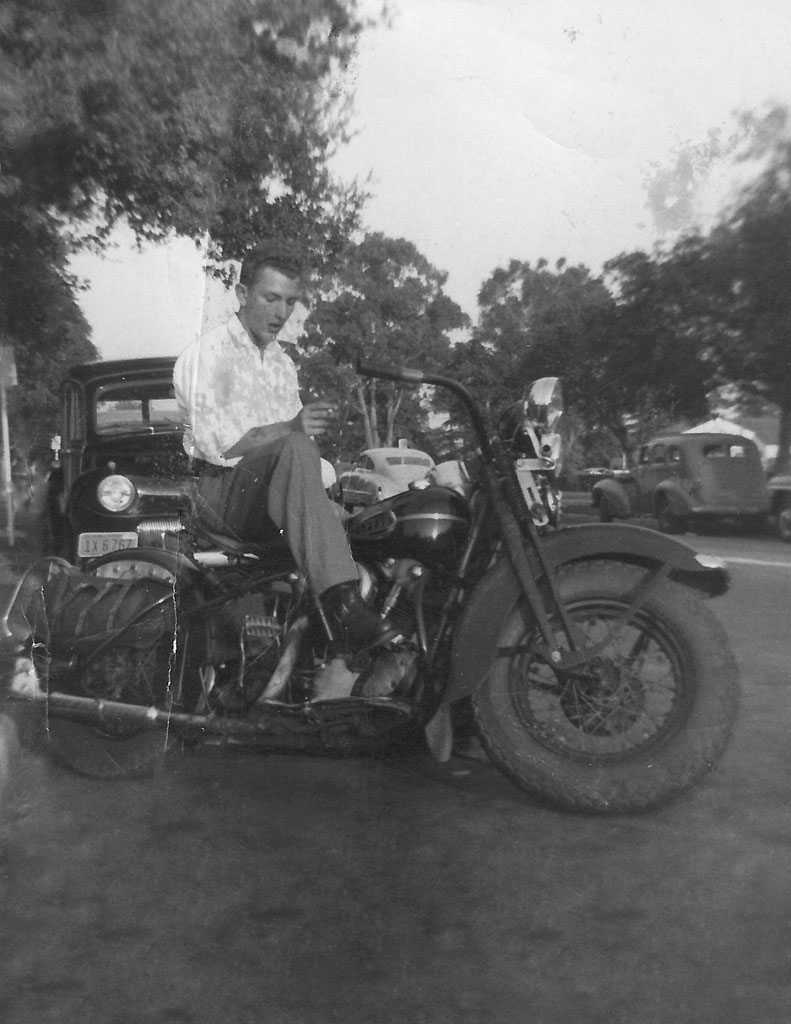
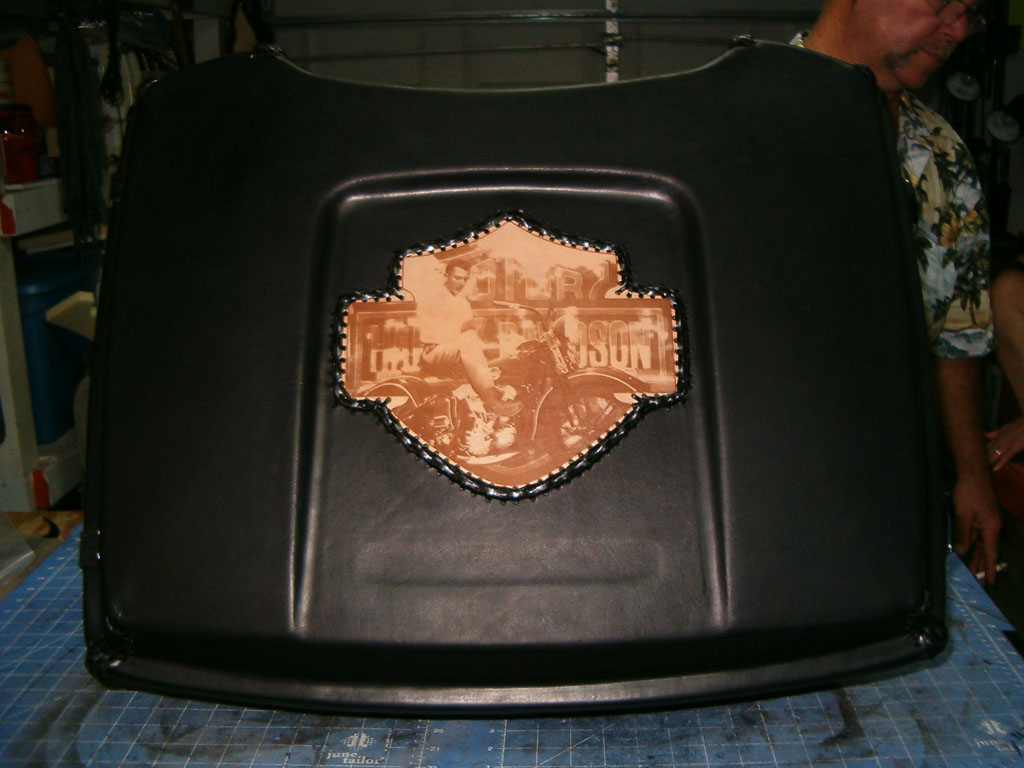
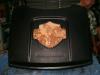
Thanks everyone! I hope he likes it as much as y'all do! He's supposed to get it today by 4:30 pm so he'll be calling soon. Dave, thanks for noticing all the work! I didn't have a lot to go with in the original photo. And, admittedly, it doesn't look the best to re-print the photo, but the contrast works out well on leather. I searched the internet for hours looking for photos that were similar. I used Photoshop to manipulate all of the pieces. Shirt from a Sears catalog, pants from a WWII gunner sitting straddling a flak canon, the boot from a boot ad, a totally restored show bike 1940 HD Knucklehead. Thanks again everyone for the kudos! Now... on to the next project... to be announced... Troy
-
First wet molded project
TroyS replied to dscott's topic in Purses, Wallets, Belts and Miscellaneous Pocket Items
Looks awesome for your first attempt! The colors are very cool! I don't see anything wrong with it at all! Keep up the good work! -
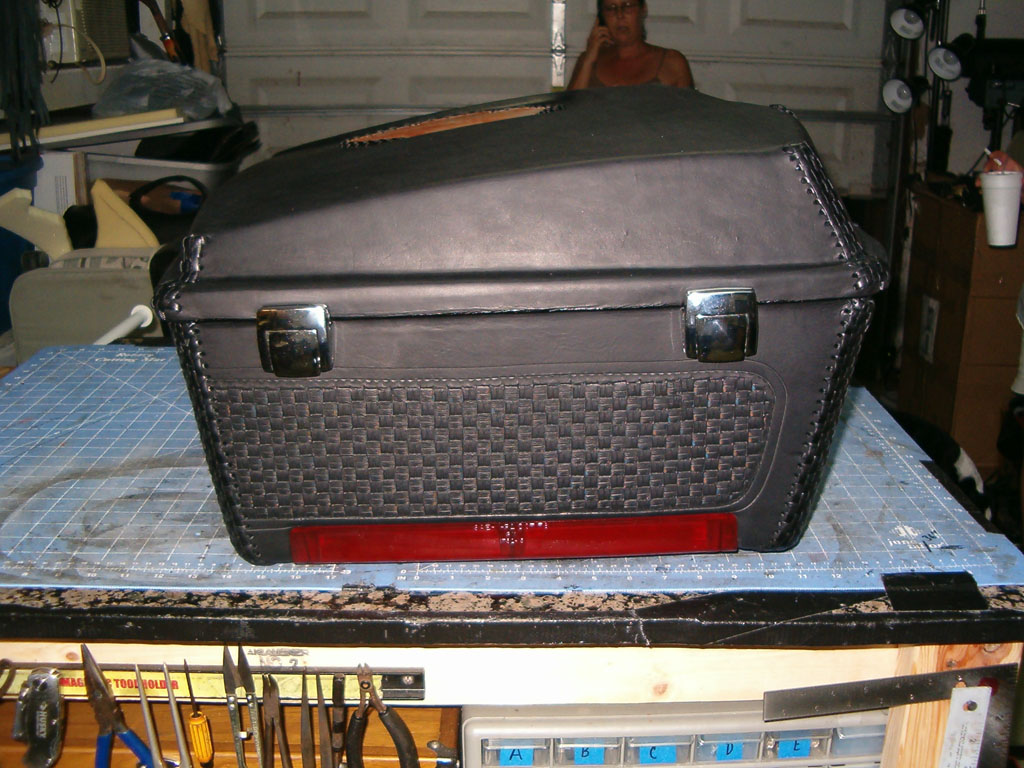
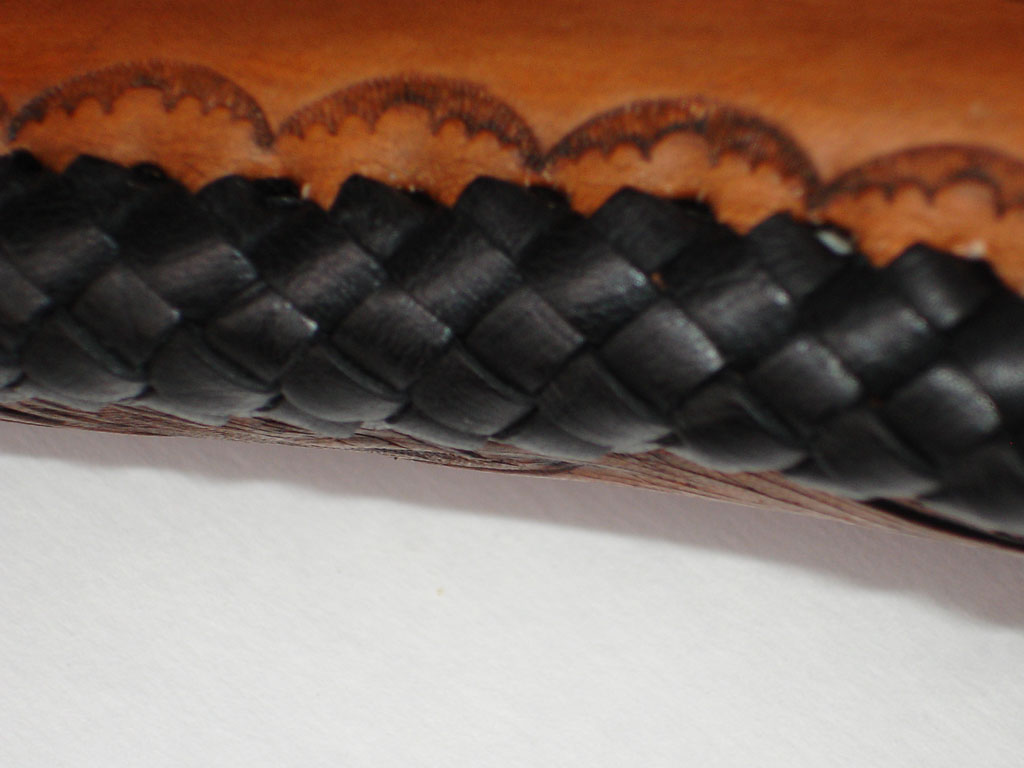
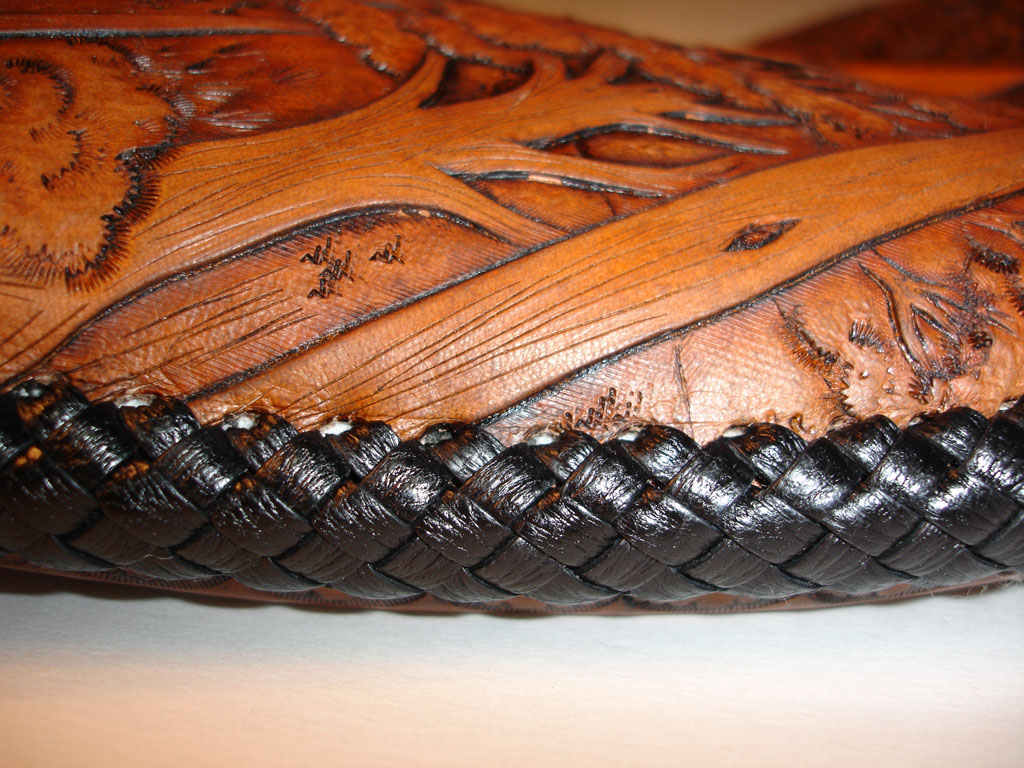
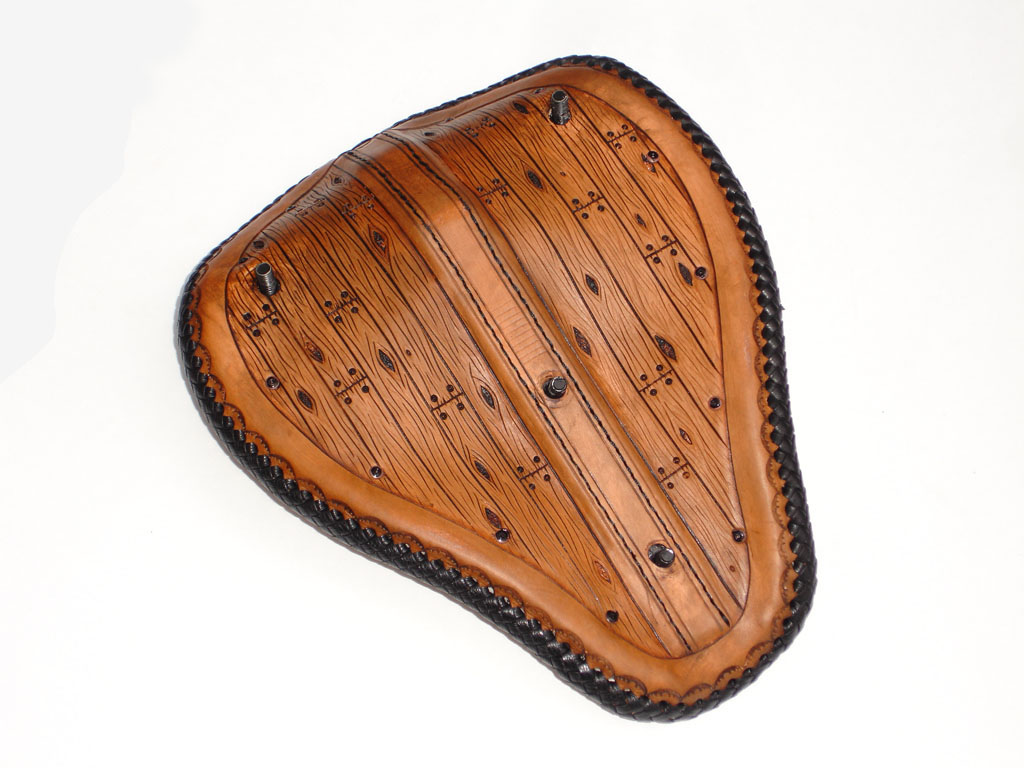
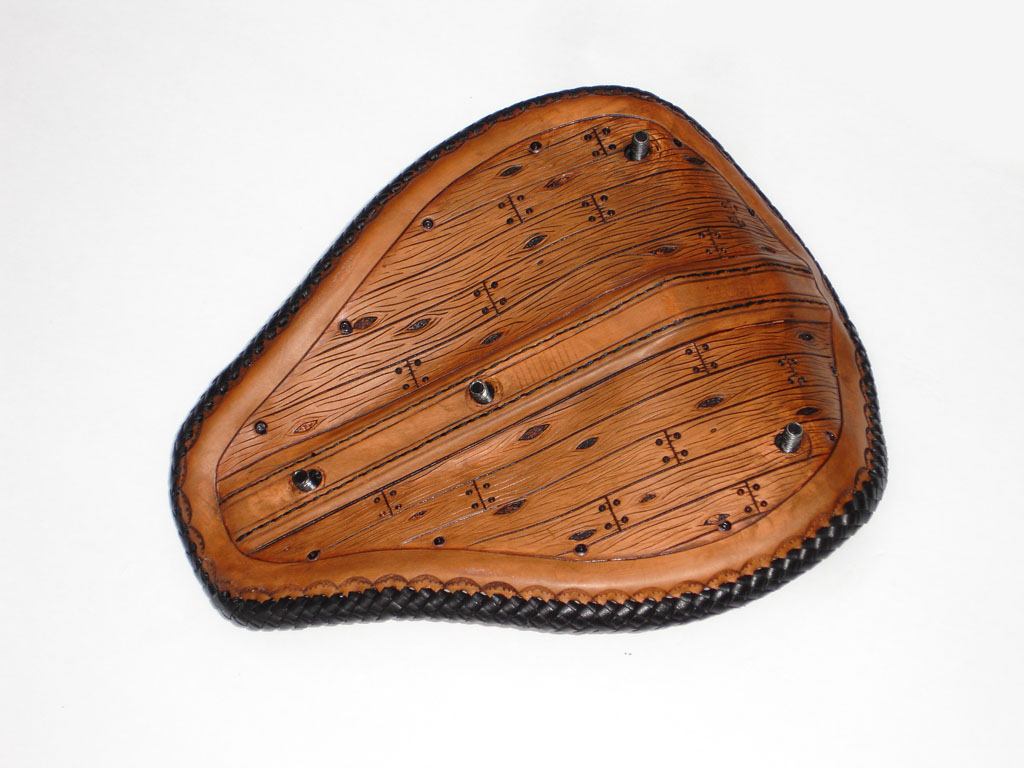
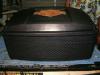
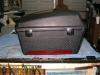
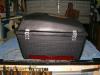
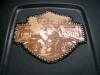
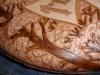
This project was for a buddy in Texas. I'll give you a little background... My buddy (The Customer) had a picture of his Dad taken in about 1946. It's a picture of his Dad on a 1940 Harley Knucklehead. The picture is all faded and cracked with some water stains. Not a very good picture. I spent hours and hours refurbishing the photo. Once the Photo was restored, I had it laser etched onto a piece of leather. I then took a TourPak (trunk) from a 1983 HD and recovered it for my buddy's new '09 Road King. Here's the results. I tooled a strip of basketweaving around the sides and back of the pak, then braided all of the corners to tie it all together.


-
Can anyone direct tell me how to leather lacing
TroyS replied to tcthipyuth's topic in How Do I Do That?
You are very welcome and thank YOU for the well wishes! -
Can anyone direct tell me how to leather lacing
TroyS replied to tcthipyuth's topic in How Do I Do That?
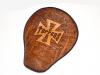
That's called a "Two-Toned Mexican Basketweve". Very nice look! Here's a tutorial... Have Fun! two tone mexican basketweave.pdf two tone mexican basketweave.pdf -
I know absolutely JACK-DIDDLY about making saddles. I DO know that that one is beautiful! I love the color and the tooling! Very clean lines. I'd really like to do something like this for my motorcycle. I admire you saddlemaker guys!
-
Stingray and Shrunken Bull Shoulder
TroyS replied to rickeyfro's topic in Floral and Sheridan Carving
I really like the simplicity of the seat! Simple, yet super! -
people who think they know everything!
TroyS replied to leatheroo's topic in Leatherwork Conversation
That kind of arrogance just solidifies one theory I have in life... STOOPID PEOPLE SHOULD NOT BREED! -
WoW! Awesome work!
-
Antique
TroyS replied to gringobill's topic in Dyes, Antiques, Stains, Glues, Waxes, Finishes and Conditioners.
I love the color! -
VERY Cool link!
-
Cool seat Ricky! I really like the color!
-
This is the leather you COULD be pounding if you'd switched to GEICO!

-
Been a while... but just shipped this one.
TroyS replied to KliffsKustomHouse's topic in Motorcycles and Biker Gear
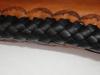
I'm like you, it's not really my style, but it is a VERY nice looking seat. The lines are very clean, the braided edge looks great, the color is awesome! Your customer should be VERY happy! -
Thanks Dave! Your opinion is VERY valued to me! I look at your work and aspire to be that good one day! Now I just need to find that custom bike shop that wants me to make their seats! Thanks again for the compliments! Troy
-
I use a #4 (5/32") hole and 3/16" lace... then I use my stylus to stretch the hole as I'm weaving... once the leather relaxes, the holes close back up leaving virtually no hole...
-
Hey Roo! Very nice seat. Sometimes, simple is better. I love the color! Given your skills with a swivel knife, some pinstripes would be awesome on your next one! I just finished a seat and also did the Round Braid/Mexican Basketweave on it. I've never used the technique your diagram shows. I always start on the left side of the nose (under your left leg if you were sitting on the seat) and work my way around. I use sections of lace about 3 feet long at a time so the lace doesn't get all stressed out and stretched. I do the entire weave in one pass. I can usually Mexican basket weave a seat like that in an afternoon. I get into a rhythm and tune the world out. Each 3ft section of lace will weave about 5 inches. I also punch all of my holes in the bottom panel first, then punch my first hole in the top and tie it off with a string or pipe cleaner. Then I pinch the edges together and mark about 5 top piece holes, then tie the 5th one with a string or pipe cleaner. I do this all the way around the seat. It takes me longer than other people, but I NEVER end up with an odd hole. Also, the last thing I do is tap the lace with a rubber mallet. It helps to "Settle" the lace and make it all uniform!


-
Okie Dokie! All finished...


-
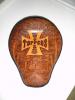
New Holster and Motorcycle Seat with Tool Bag
TroyS replied to luckydevil's topic in Motorcycles and Biker Gear
VERY VERY Cool seat! The holster is also very impressive, but I REALLY like the seat! -
Cool tooling! I like the red color also!
-
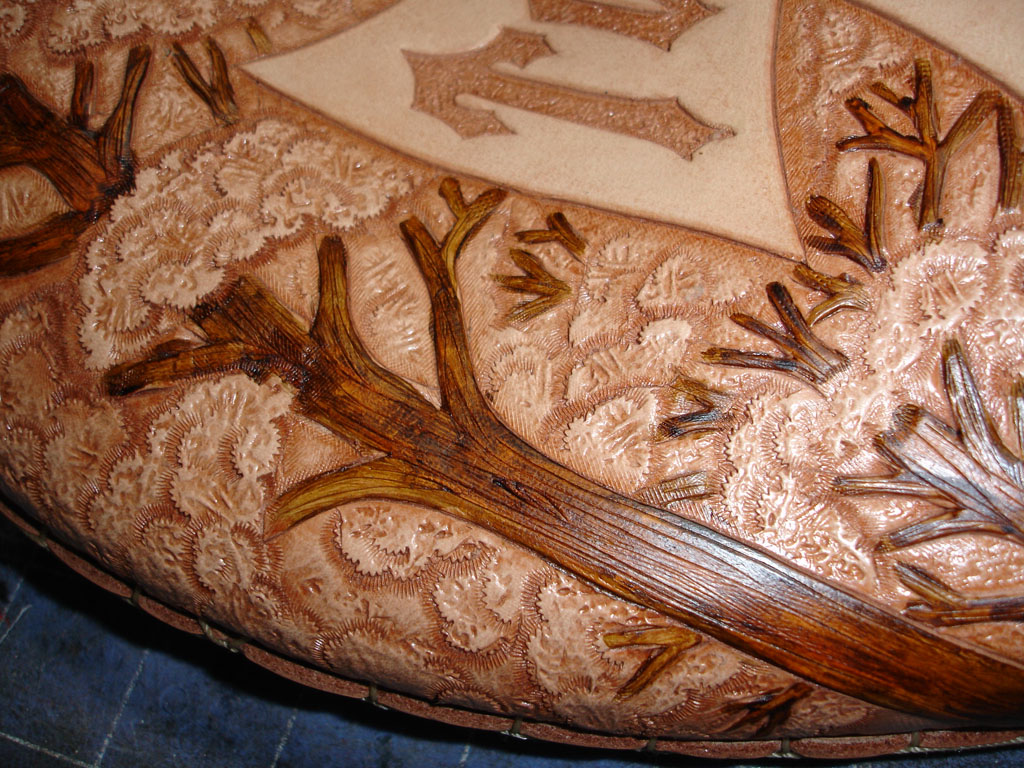
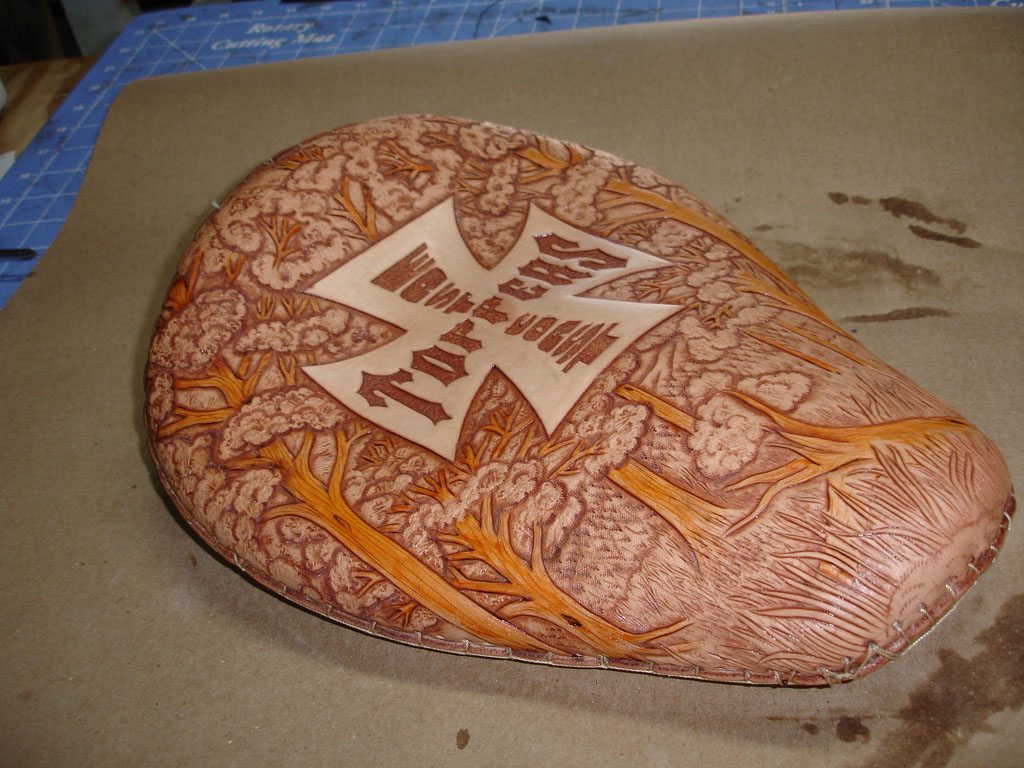
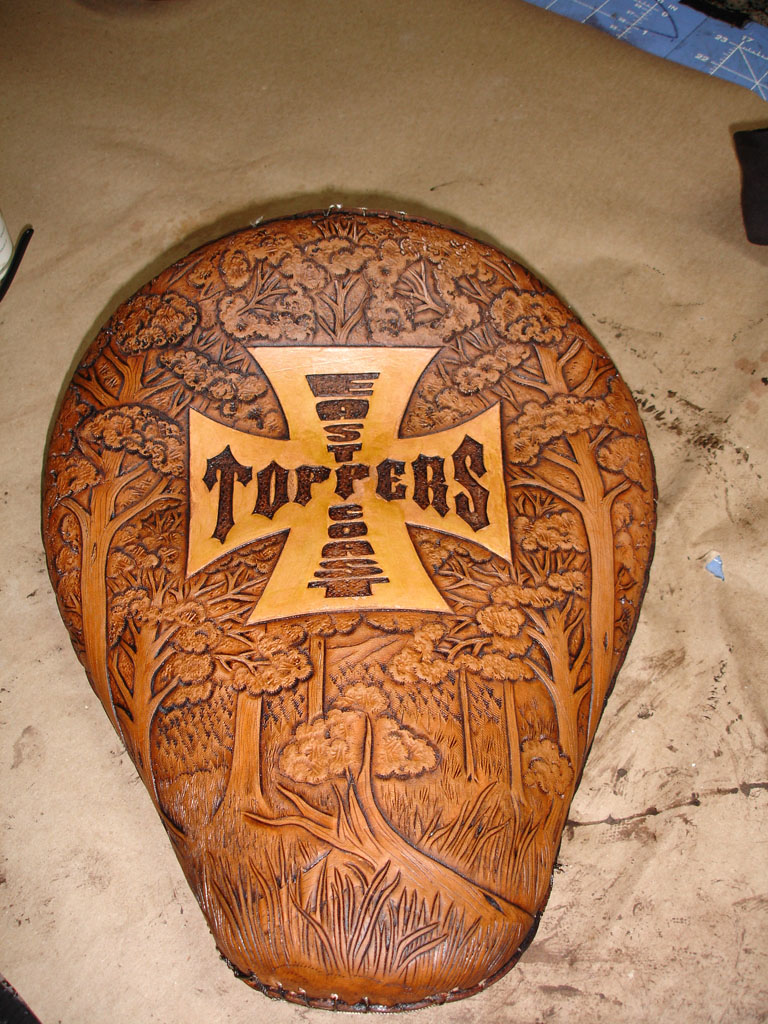
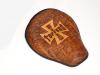
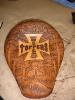
Thanks again for the compliments. I had a slight problem during the finishing stage... I applied 2 coats of BlockOut to the Iron Cross. Just the cross, not the letters in the cross. I wanted the cross to POP! It turned out like it was supposed to. Then I applied 2 coats of Tan-Kote to the entire seat and let it dry overnight. It looked great. The customer saw it and decided he wanted the tree trunks to be a shade or two darker to resemble real trees. I applied a coat of TAN Gel Antique to give it that rustic look, let it dry a few hours then went back to buff it off. Here's where the problems start! The Tan-Kote blocked so much of the color that the tree trunks looked orange. So I diluted some Briar Brown Hi-Lite stain and rubbed the whole seat to add a very light shade of hi-light to the cut lines and texture, but all of a sudden, the whole seat turned Pecan Shell Brown! Personally, the seat color looks awesome! It was a totally unexpected color, but, it does look great! I know every piece of leather is different and accepts color differently, but this is first time the leather ever turned so DARK so fast! I planned on the Tan-Kote blocking most of the color and just allowing a little bit to set in. My only real concern is the customer liked the seat natural colored but wanted the trunks a shade darker. All I can do is give him this seat, and if he complains about the color, I'll do it for him again. Any thoughts??
-
I'm sure the forum would be interested in some of your Skull patterns Jay!
-
Hey Welder! Don't get discouraged! Just like welding, or anything else for thatmatter, you have to have the right tools for the job. You'llaccumulate those on an "AS NEEDED" basis. I have about 35-40 pearshaders alone, each one with a different job. You've definitely gotthe right idea, you just need more practice. Here's a few pointers... Casing your leather: Practice how to properly "CASE" your leather! Properly "CASING" yourleather is the secret to shading! The leather should be soakedthrough, then allowed to dry JUST until the outer skin of your leatherlooks and feels dry, but is still damp on the underside. This is thehardest thing to learn because it varies tremendously. It depends ontemperature, humidity and the leather you use. You can find severalarticles here on the forum that can help you. Proper shading can NOTbe achieved by just spraying the top of the leather with a spray bottlebecause you are NOT soaking all of the fibers of the leather, only thetop ones. If your leather is too WET, then it will not hold theimpression. If you continually spray the leather with a spray bottle,the leather will swell and shrink like a sponge and you will lose allof your fine detail. Using your Swivel Knife: Try tipping your swivel knife forward on about a 22 degree angle. Itwill glide across your leather easier as you cut and allow you to makesharper turns. It will also eliminate the "Pencil" shaped cuts (sharppoint on one end of the cut, blunt end on the other). On corners,always start your knife in the corner and pull away from the corner. It'll give you nice clean corners. Beveling: Do ALL of your beveling first! This helps you to decide later whichtools will fit inside the areas you want to embellish. It also helps toreduce the "OVERSTAMP" issue. "Over-Stamping" is when your stampintrudes on another area of your design (like the upper right handcorner of your last picture, the beveler OVERSTAMPED into yourborder). In order to achieve proper beveling, ALWAYS bevel the closestobjects first! If the edge of a leaf curls down over the rest of theleaf, bevel the curled area first because it's curled down OVER therest. I usually start my beveling by simply taking a small smoothbeveler and running it along the cut line pressing lightly using just theweight of my hand to make the impression. It helps separate the cut and also givesyou a preview of what it will look like. If you do it light enough,and you think the effect is wrong, then you have an opportunity tobevel the other side of the cut without ruining your project. I liketo do all of my beveling with a smooth beveler at first, then once I'veachieved the depth and shade I'm looking for, go back and finalize itwith a textured tool. It gives it a very clean defined texture alongwith the right shadowing. Modeling Tools: Your modeling tool(s) are definitely important tools! You can achieve a LOT of fine beveling work with your modeling tools. You might find that simply running the edge of your modeling tool along a line in your design will give you the look you want. Not all lines are cut into your design. Sometimes, by merely pressing the edge of your modeling tool into the leather, you can achieve a nice subtle detail line without the use of a beveler. Veiners, Mule's Feet, Seeders and other finish detail tools: They convey Finesse! These are the details they grab your eyes! These tools are the last tools to be used when doing a project. Using these tools too early in your project will only upset you because by the time you are finished with your project, MOST or ALL of those details will have been worked out of your leather. Resizing your pictures: Someone on the forum introduced this link in another post (Thank You). It'll help you... I REALLY hope I don't come off as trying to sound like an expert because I am NOT! These are things which I've learned from the members of this forum and my own trial and error. I was just like you a couple of years ago. I had a lot of ambition, very few tools, and LOTS of questions! With Leatherworker.net and the vast pool of knowledge it's members bring to the table, this forum is the MOST VALUABLE tool you have! And remember, Practice, Practice, Practice...
-
Yo Travis! That's a very cool seat. I Love the tooling. I love the lacing! Not a bad first attempt at all! Did you wet-form your leather to the seat?