TroyS
-
Posts
599 -
Joined
-
Last visited
Content Type
Profiles
Forums
Events
Blogs
Gallery
Store
Everything posted by TroyS
-
Hiya Natalie! Nice to meet ya! Welcome to the forum. Here you'll find a virtual cornucopia of leather crafting knowledge, ideas, advice and help! Some of the best folks in the leather business hang out here because this place rocks! We look forward to seeing more of your work! Troy
-
I live in Port St. John. about 15 minutes from Kennedy Space Center. I can be in the forest in about 2 1/2 hours. If you're ever in my neck of the woods, stop in for a cold one!
-
Did you try Ohio Travel Bag?? www.ohiotravelbag.com
-
I really like the shading and color! Very cool!
-
You've done RatFink proud! That's cool as hell!
-
new work from Cowboy316
TroyS replied to Cowboy316's topic in Gun Holsters, Rifle Slings and Knife Sheathes
You done a Fine Job! -
Very cool! I like 'em!
-
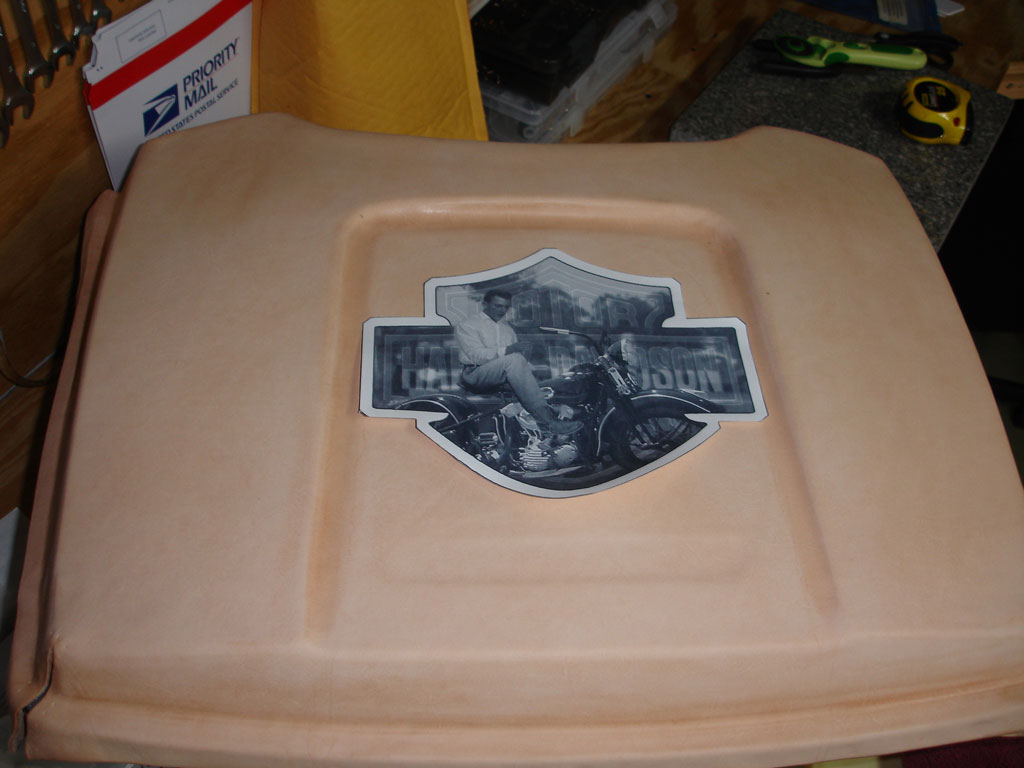
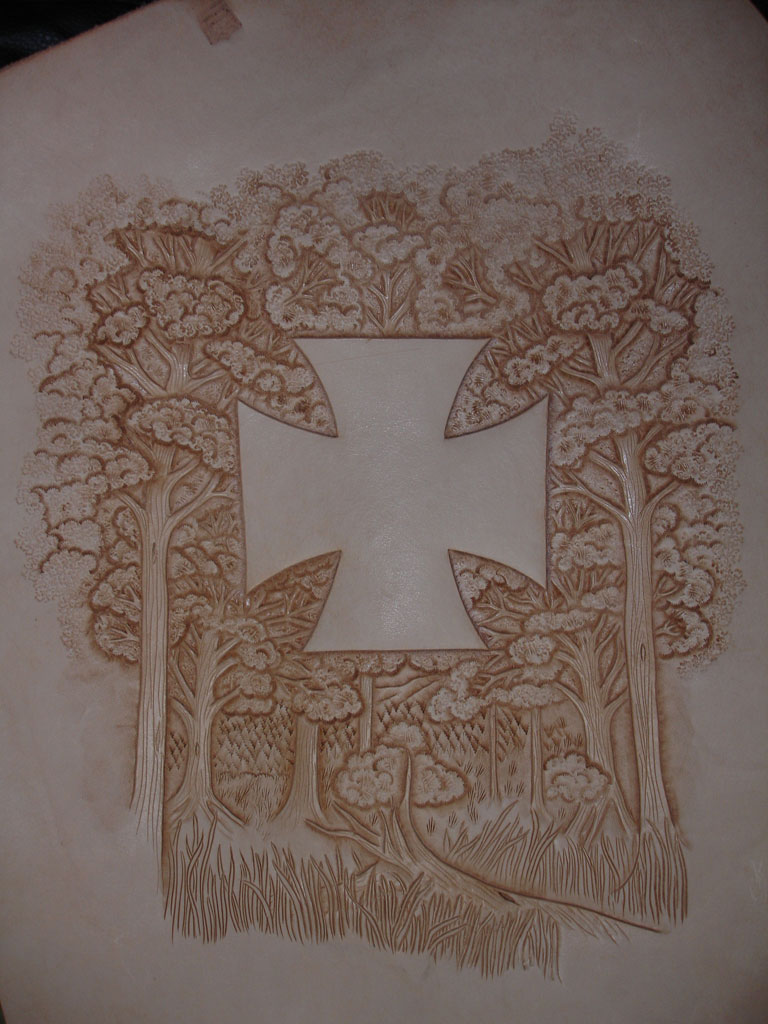
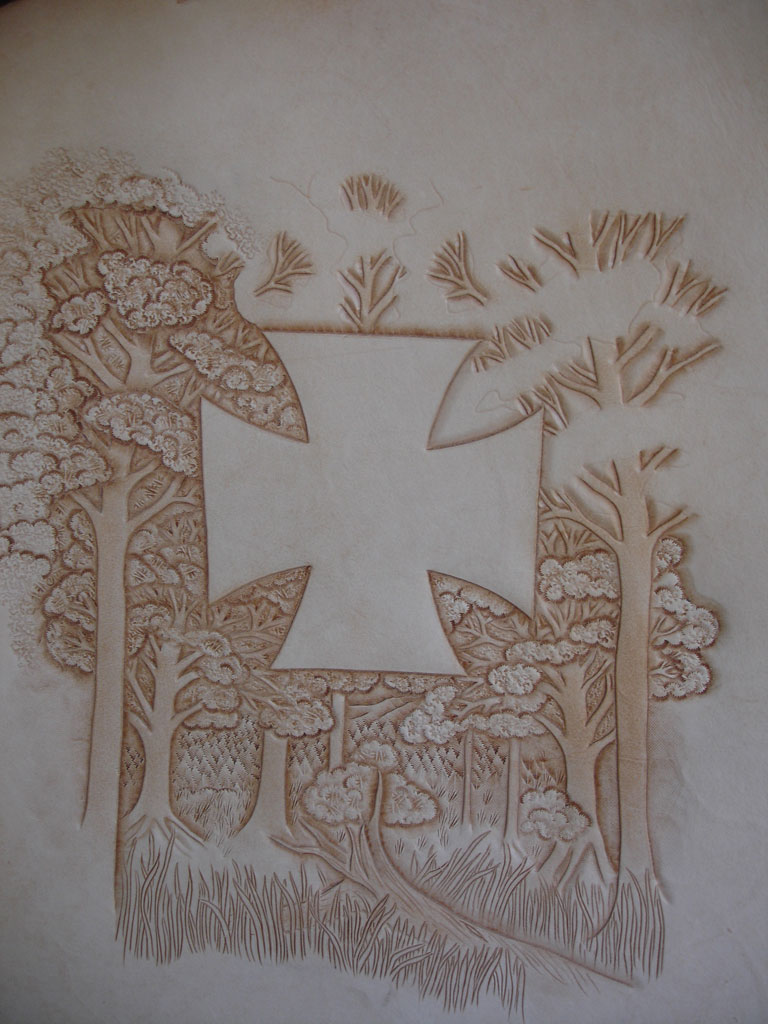
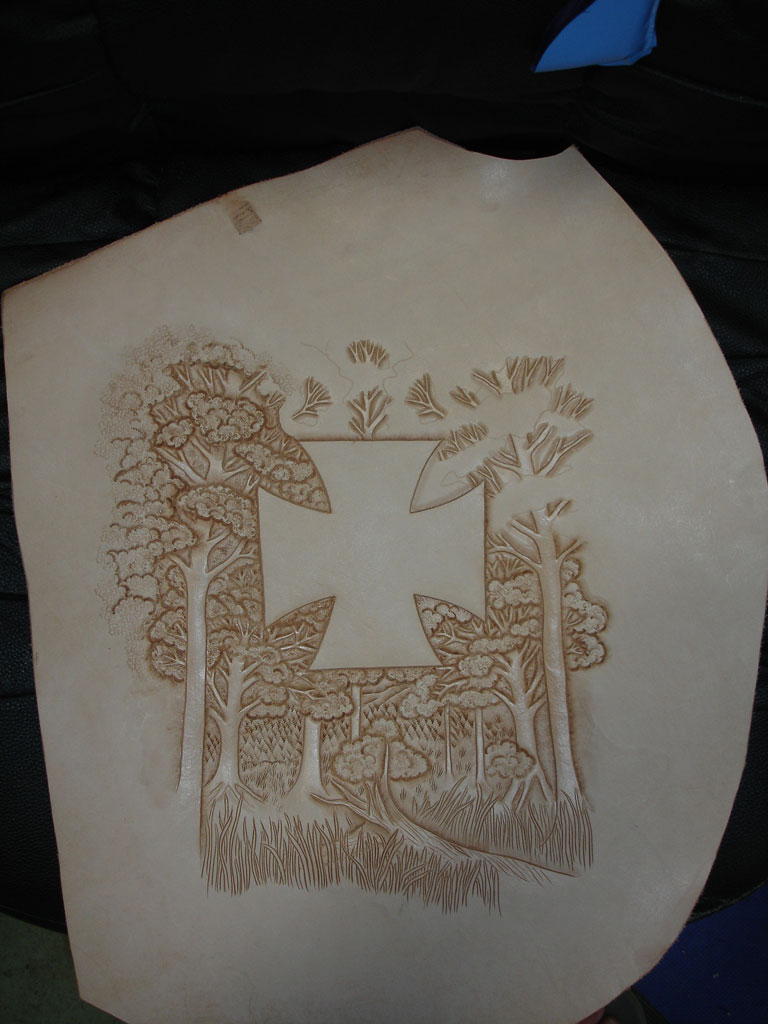
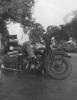
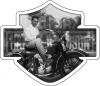
I am working on a project now that may interest you. I have a friend/customer that gave me a photo of his dad sitting on a Harley. The photo was taken in 1946. It's a tiny little crappy picture so it took a lot of work to restore it, but here's the picture. After lots of photo manipulation, I was able to come up with this photo. Now, I had it laser etched onto a piece of leather and plan on stitching it to the top of his Tour-Pak like this. I still have quite a bit of work to do, but you get the idea!
-
It's really hard to give that sort advice without seeing the problem. You may find that another deglaze, then a couple of light coats of neatsfoot oil/compound helps. Neatsfoot oil replenishes the leather's natural oils lost in the wet-molding process. It also helps to draw the finish into the leather. Lots of blemishes can be overcome by a light coat or two of Neatsfoot oil.
-
First off, I'm assuming you are trying to use a dauber or something similar to apply your oil? I use brown construction paper when I do my oiling. You may want to try using an old rag to apply your oils. Dip the rag in the oil and wipe it on some brown construction paper or a paper shopping bag. It helps because you can really see the amount of oil in your rag as you wipe it on the paper. Once the paper draws the excess oil from your rag, rub it on your leather. I'd try it on some scraps until you get the hang of it, but that should put you on the right track! Now, after you're familiar with the right amount of oil to use, you can put several light coats of oil on your projects without having them go over to the DARK SIDE! You could also consider an inexpensive airbrush. You can get a very effective, inexpensive airbrush here... I have one and it works fantastic! Hope this helps!
-
The Ostrich Market is the BEST place to get affordable exotics! As it turns out, lucky for me, it's only about 30 minutes from my house!
-
Vinegeroon Questions
TroyS replied to Vikefan's topic in Dyes, Antiques, Stains, Glues, Waxes, Finishes and Conditioners.
The way I get my "Vinegroon" is about as simple as it gets. I've found the BEST thing to make Vinegroon from is Concrete CUT Nails. Cut nails are the square untreated nails used to attach wood to concrete. Mainly for attaching walls to floors in new home construction. You can ask you local hardware store person to point you in the right direction. I take a handful of cut nails, put them in a bowl of water for a few days and let them start to rust. Then I pour the water off and let them sit a few more days in the weather. They really start rusting! After about a week or so of being exposed to the elements, and lots of rust builds up, I put the nails in a plastic container and pour a small bottle of white vinegar over the rusty items until they are totally submerged. Now, we wait... for about another week... After about a week of soaking in the vinegar, I add another small bottle to the mix, stir it around and pour what I need to use into another container. I strain it through a fine mesh strainer to remove any large chunks of debris and VIOLA! It looks like muddy water and it starts to turn the leather black almost instantly! I use my Vinegroon like sourdough bread starter. I always keep my starter in a separate jug as my "USE ME" stuff. It's all frothy and nasty looking but it does an AWESOME job! Hope this helps... -
Just for future reference, pictures are worth 1000 words. If you post some pictures, it really helps people understand your situation better. First things first... What is this "Leather Lotion" you speak of and what is the significance of using it? Without know what it is, we can't help. It could contain additives or chemicals that are having an adverse effect on your leather. Yes, the small traces of oils from your fingers can have an effect on your finish. If you rubbed that area a lot or while wet forming, you essentially burnished that area of the leather and will cause the leather not to take the dye as well. About the soap. Typical dish soap has oils in it that are designed to replace the oils in your skin so you don't get dry hands after washing your dishes. This is BAD for leather. If you MUST use soap to clean the leather, ONLY use "WHITE Ivory Dish Soap" (It's the ONLY kind you should use). The dry leather acts like a sponge and absorbs the soap. It draws the soap into the center of the leather and will keep releasing itself every time the leather gets wet. Wet doesn't have to mean wet like soaking wet, but every time you sweat with your holster or sheath on, the soap will try to resurface. Even the humidity in the air will bring it out. Hope this helps....
-
Just got my great grandfather's leather kit (pics)
TroyS replied to bigo5552000's topic in Leather History
You just received the BEST gift your Grandfather could ever give! That's an awesome kit! It's especially cool with all those receipts. Here's something to think about, that whole kit cost your grandfather $13.95 in 1969. Now, 40 years later, to buy everything in that kit would probably cost you $200.00! The tools (Basic 7 Tools) cost $40 at Tandy! The patterns alone are priceless! Your grandfather is sitting in heaven right now smiling like a Cheshire cat! Whether or not I think you should use the tools?? Hell yes you should use the tools! That's why they are there! The tool with the "U" shaped top thing is called a Swivel Knife or Finger Knife. You'll use it to cut your patterns into the leather. The other tools are stamps and the small pencil shaped tool is your Modeling Stylus. You'll use the pointed end of it to trace your patterns onto the leather and the wide flat end to do precise beveling and finish work! Congratulations on your terrific gift! -
HAHAHAH! That's too funny!
-
Here's a few more pics from this morning's work...

-
I've discovered a little trick that really helps me out... After my lines are cut with the swivel knife, take one of your smooth face bevelers and run it across your stroping block a couple of times just to polish it up a bit and remove any dust or other buildup. Now, drag the tool across the leather in an inconspicuous spot. The tool should "GLIDE" across the leather with no resistance at all. If it glides across the skin of the leather very smoothly, then you're ready to bevel, if not, it's time for another cocktail while the leather dries some more. Keep trying this every few minutes until it glides across the leather with no resistance. Now that your tool "GLIDES", I usually start with a small beveler, lay it into the cut line with the tool on it's "toe" and begin to tap lightly. I'm not trying to dig deep this pass, I'm only pushing the leather away from the cut line. Once the line has been pushed away from the cut, I start again with a larger beveler, and repeat the process with the tool still on it's "toe". I'm not trying to dig deep this pass either. Now that I have the bevel pushed away from the cut line, I take the beveler and tip it back on it's "heel" and repeat the process... Still not trying to dig deep, just get the angle of the bevel nice and smooth. Light taps... Now, without even realizing it, you've just managed to pull the leather away from the cut line, smooth out the bumps, and dig deep into your leather for a nice clean bevel. The trick is really to not try to get your bevel complete in the first pass. Several passes and light taps will get you the nice clean deep bevel you're looking for! Hope this helps!
-
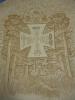
Brent, That is a spectacular work of art! I would LOVE to have something like that on my IRON Horse! Troy
-
That seat ROCKS! That is awesome!!
-
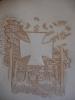
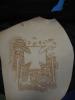
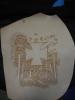
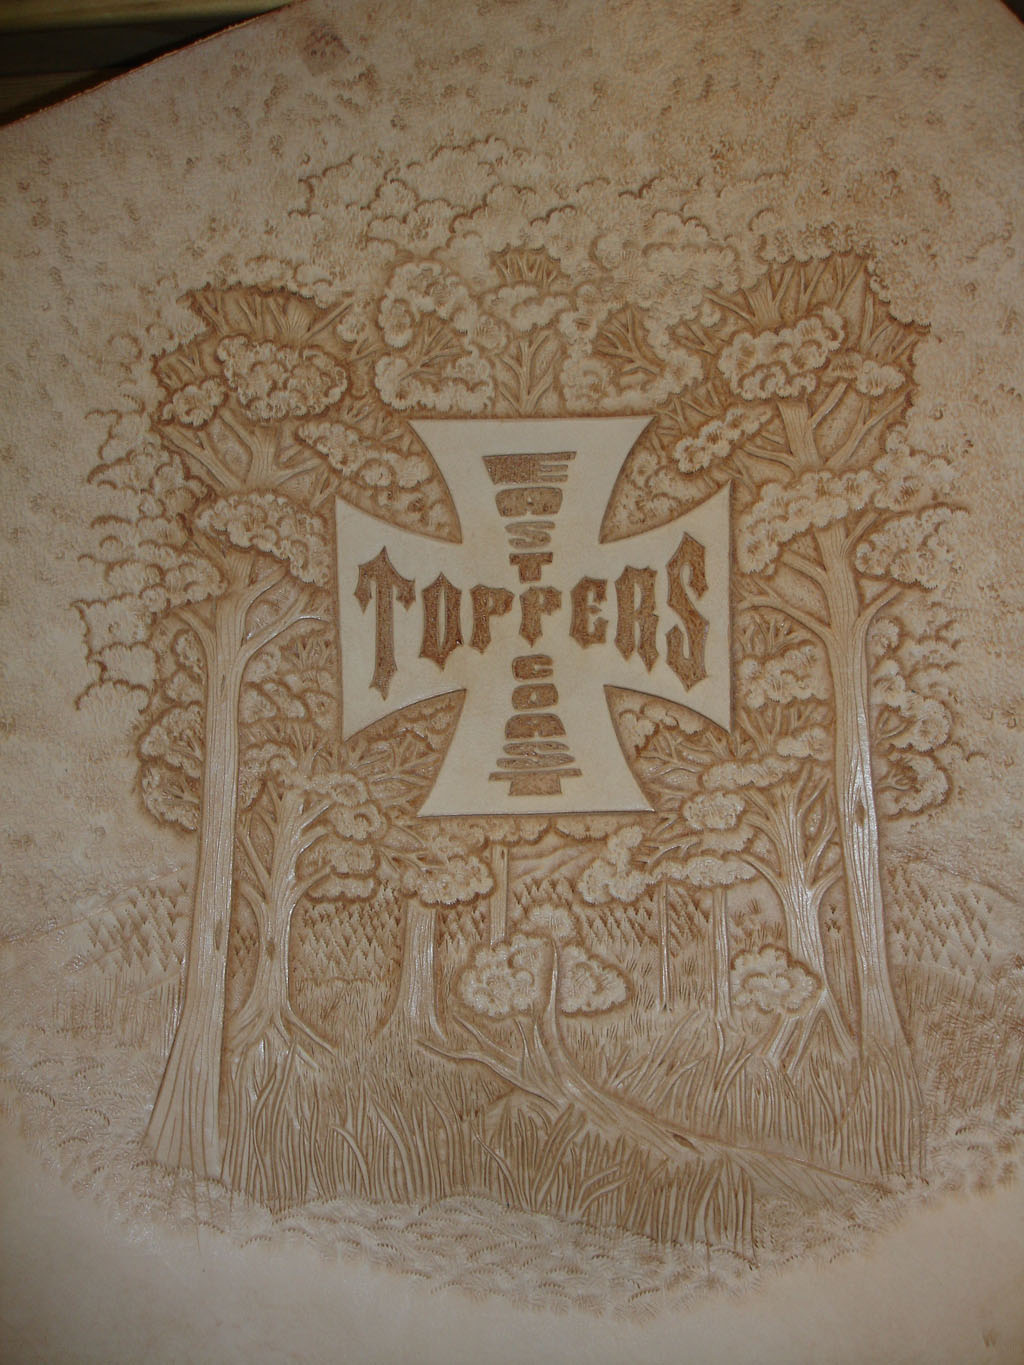
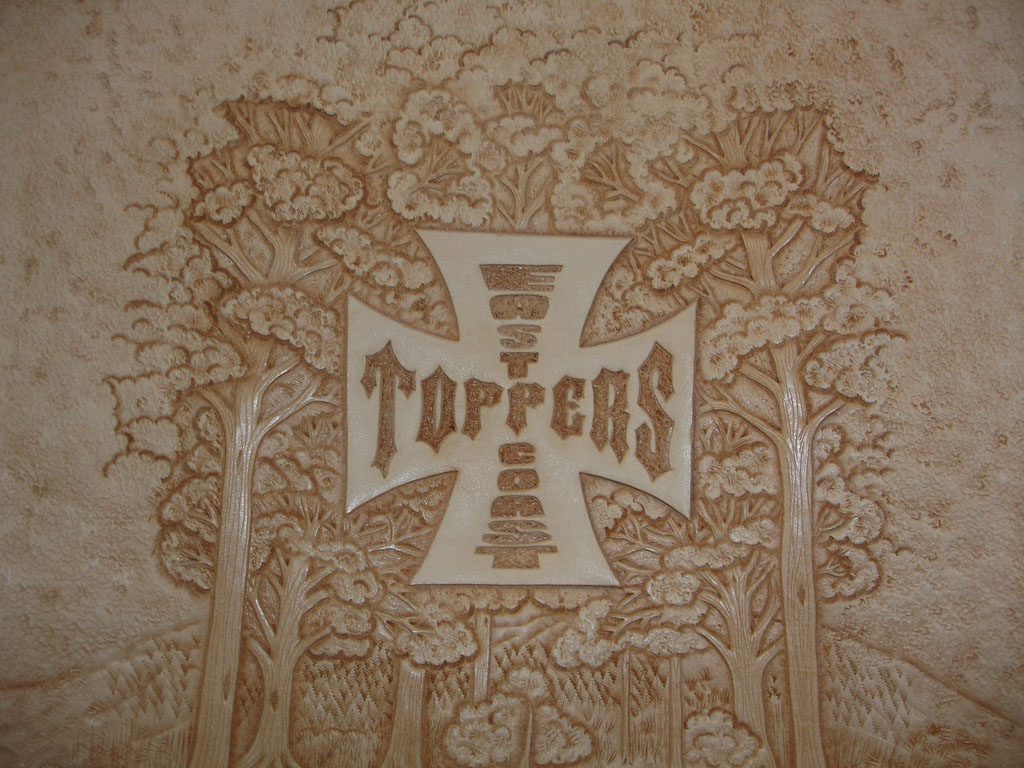
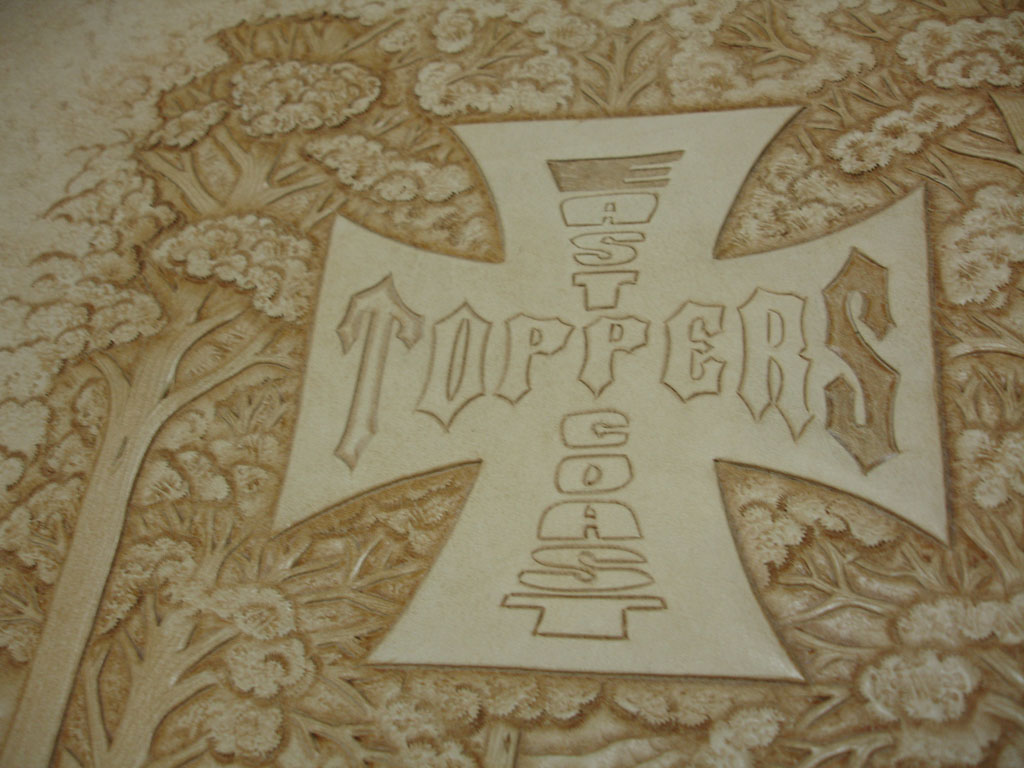
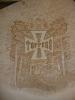
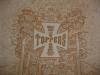
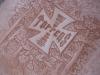
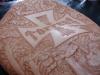
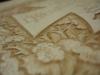
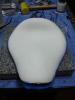
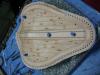
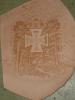
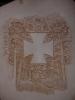
Thanks Dave! I truly value your opinion! Ok, here's a few pics of the seat top. I've done all of the tooling except for the logo (which I've started) and should be finished today. The seat has been fitted with a 1/2" medical grade Gel Pad by David Scott Company and covered with 1/2" closed cell memory foam.

-
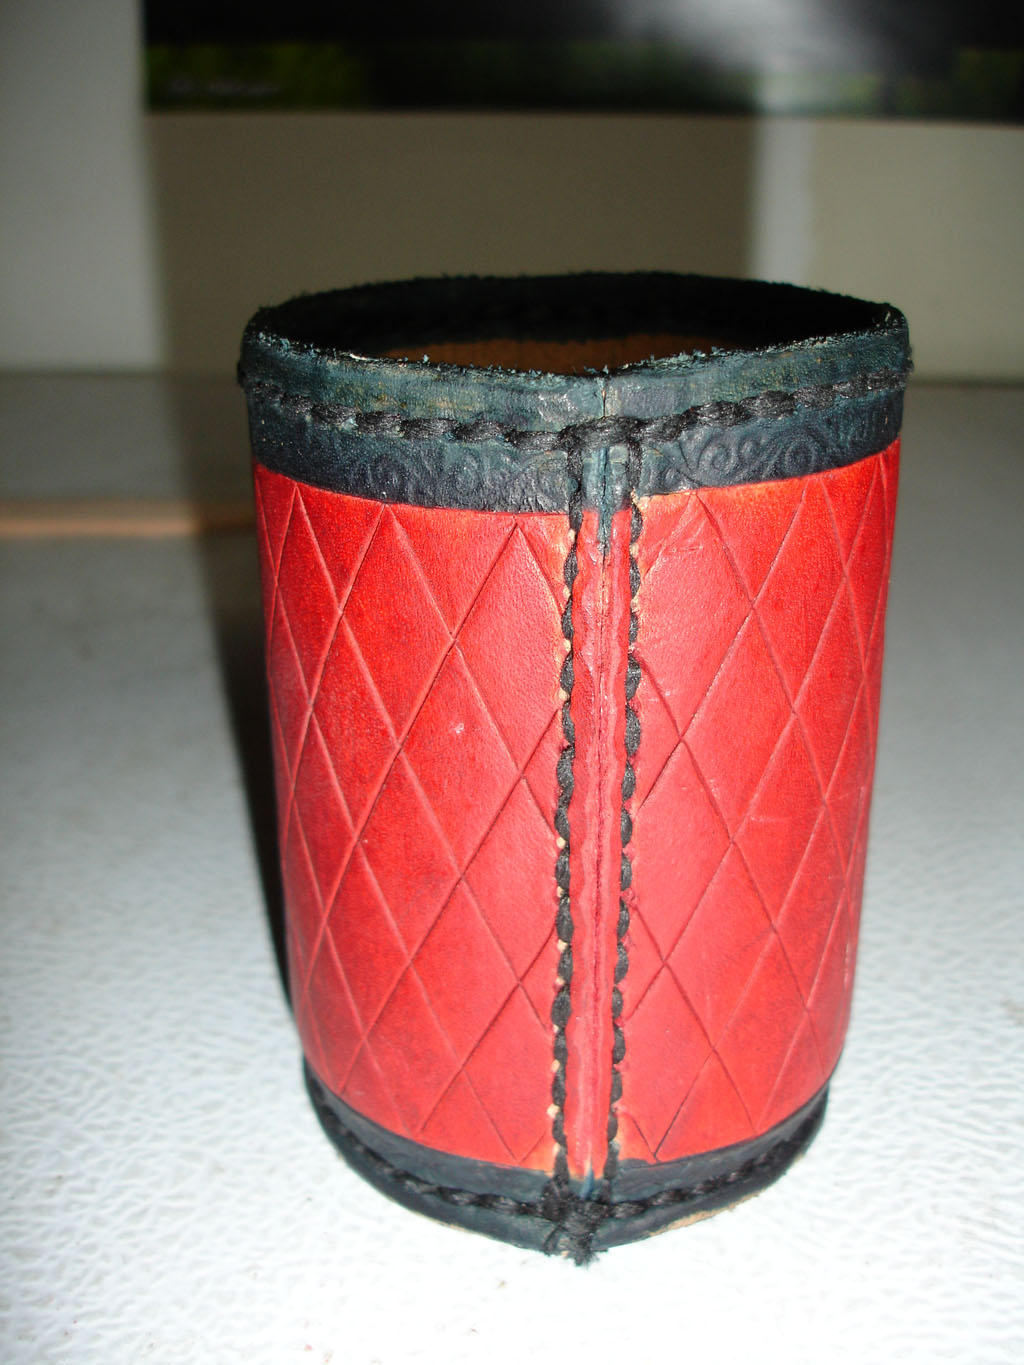
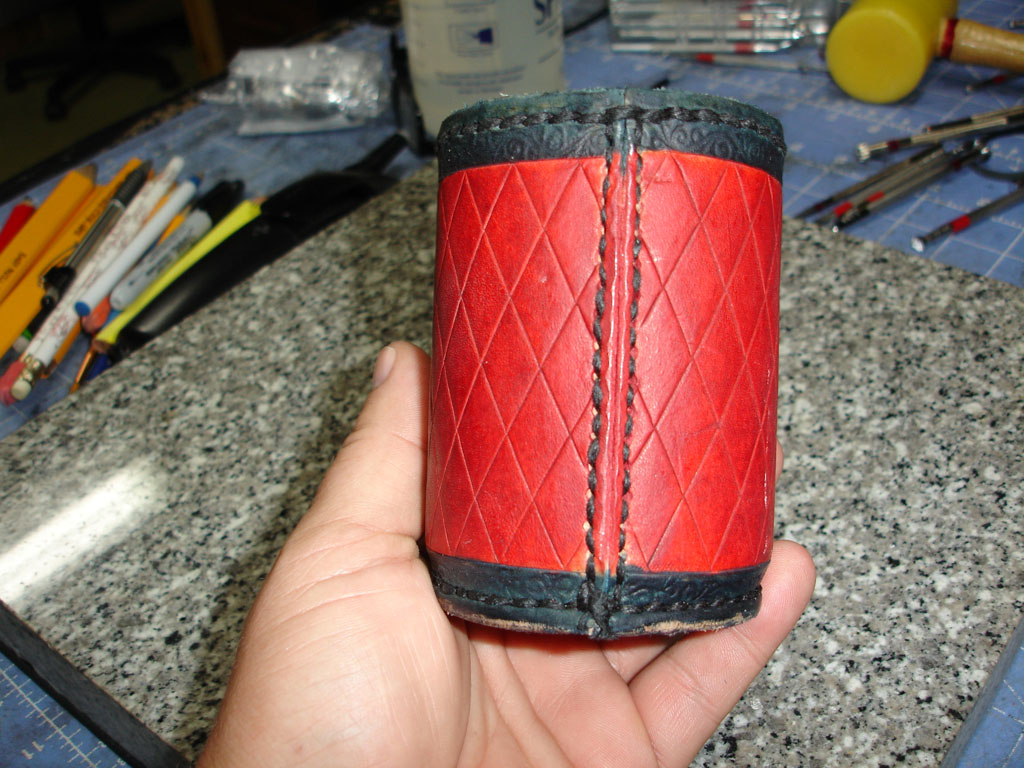
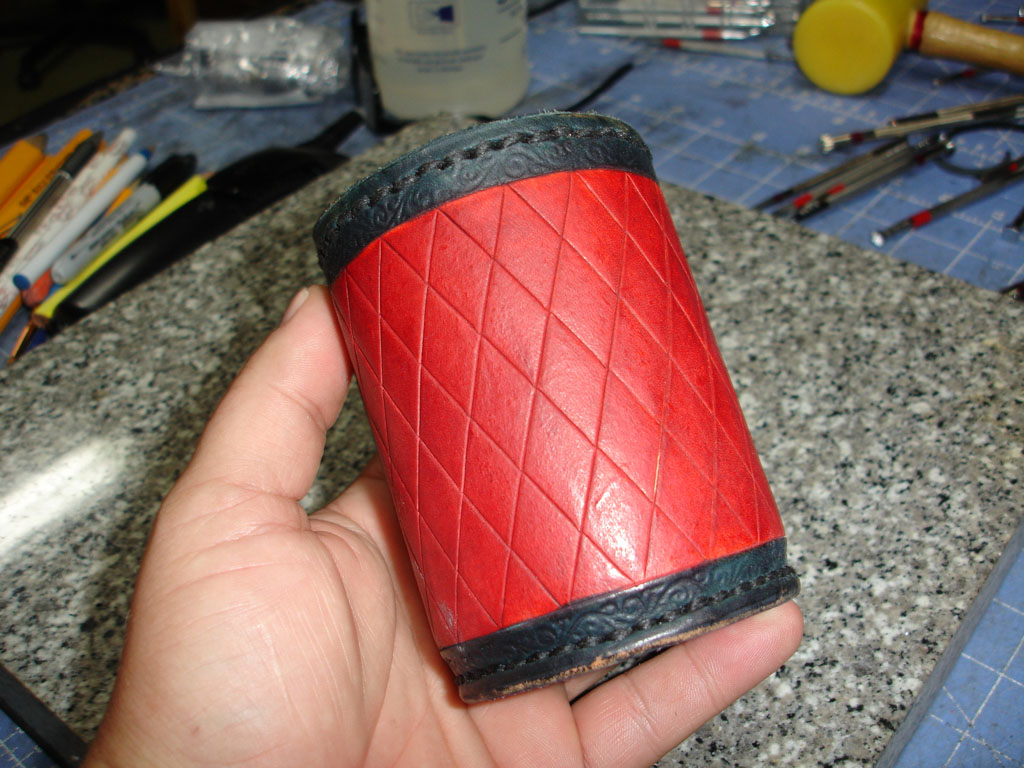
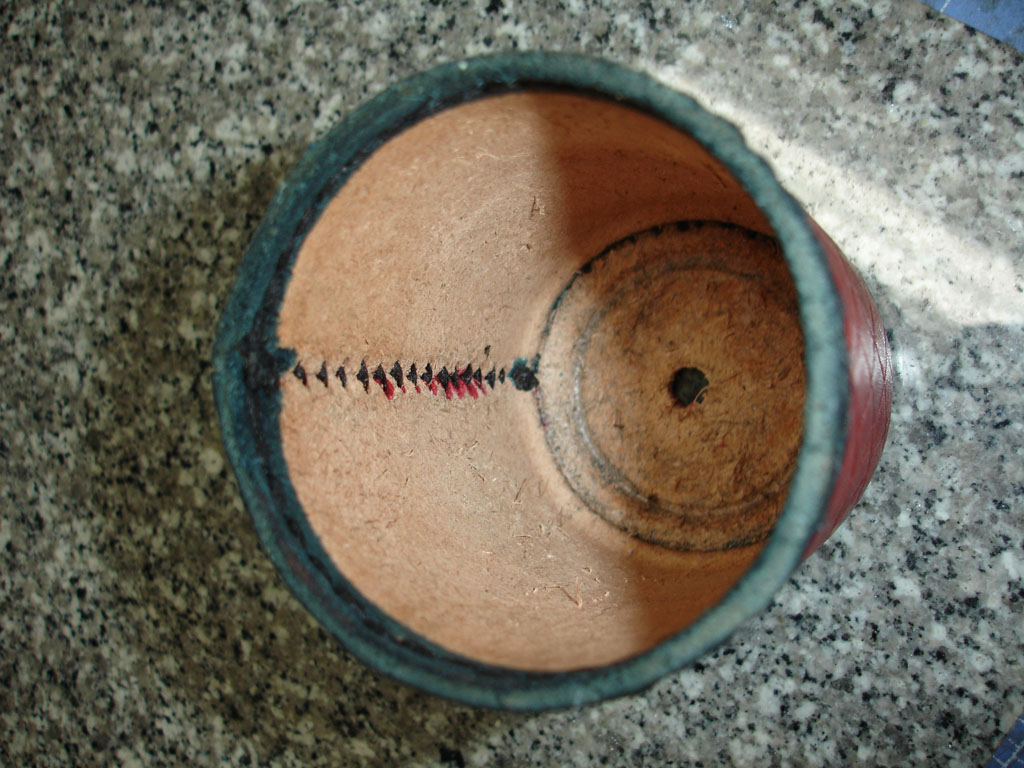
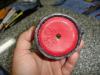
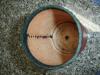
Only one small suggestion... Stitch the top of the cup or it will stretch over time. Once it gets wet (from beer sweat) and you work a 18 pk into the mix, it'll stretch, causing your beer to fall out, thus causing a BIG SCENE down at the brewery! Not to mention, it would be alcohol abuse! One of my first projects from the Al Stohlman "Cases" book series was a dice cup... It turned out pretty good, even though it was one of the very first projects I ever did. Now it sits in my shop as a pencil holder. Why a Pencil Holder and not a "Beer Huggie" you ask?? Simple truth is, I drink whiskey from a mason jar!


-
Cowboy Holster Tutorial
TroyS replied to Jim's topic in Gun Holsters, Rifle Slings and Knife Sheathes
That's an incredible tutorial! Thank you for your time and effort in making it for us! I see a new holster on my horizon! -
Very nice! I like the color!
-
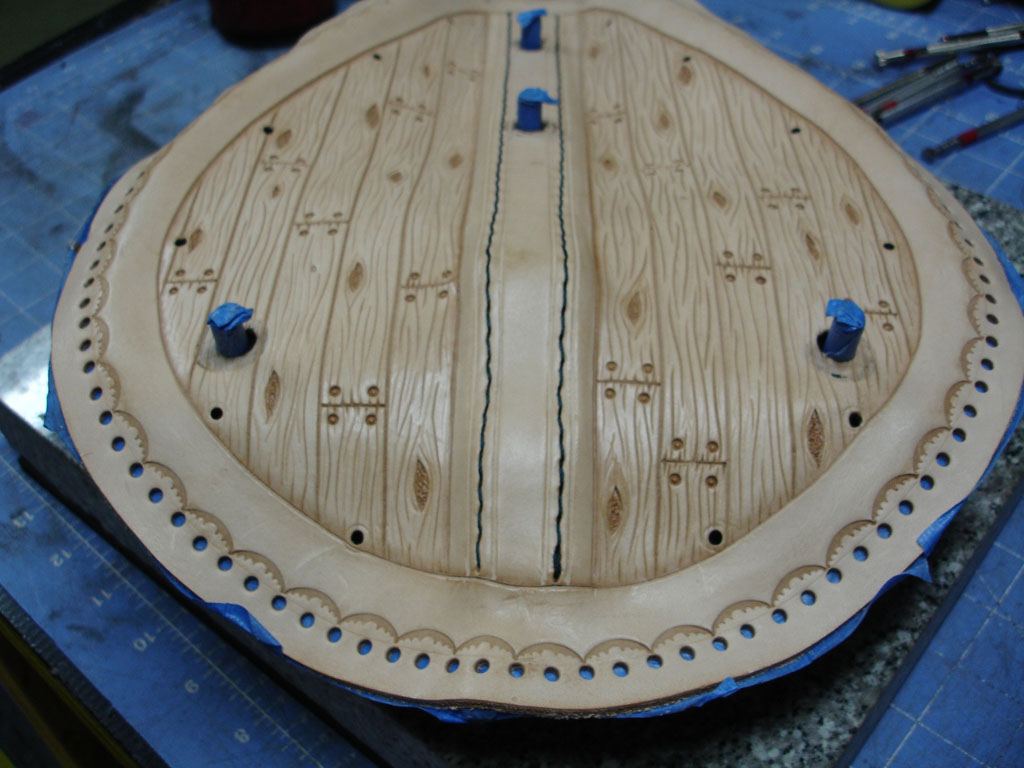
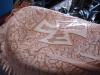
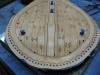
Update: The bottom is done! All holes have been punched and will be permanently attached today! The top of the seat is 99% done! All I have to do is add his logo, size it and touch-up the edges once it's sized. Here's a pic of the 99% finished seat top... If I've overlooked something, please let me know!
-
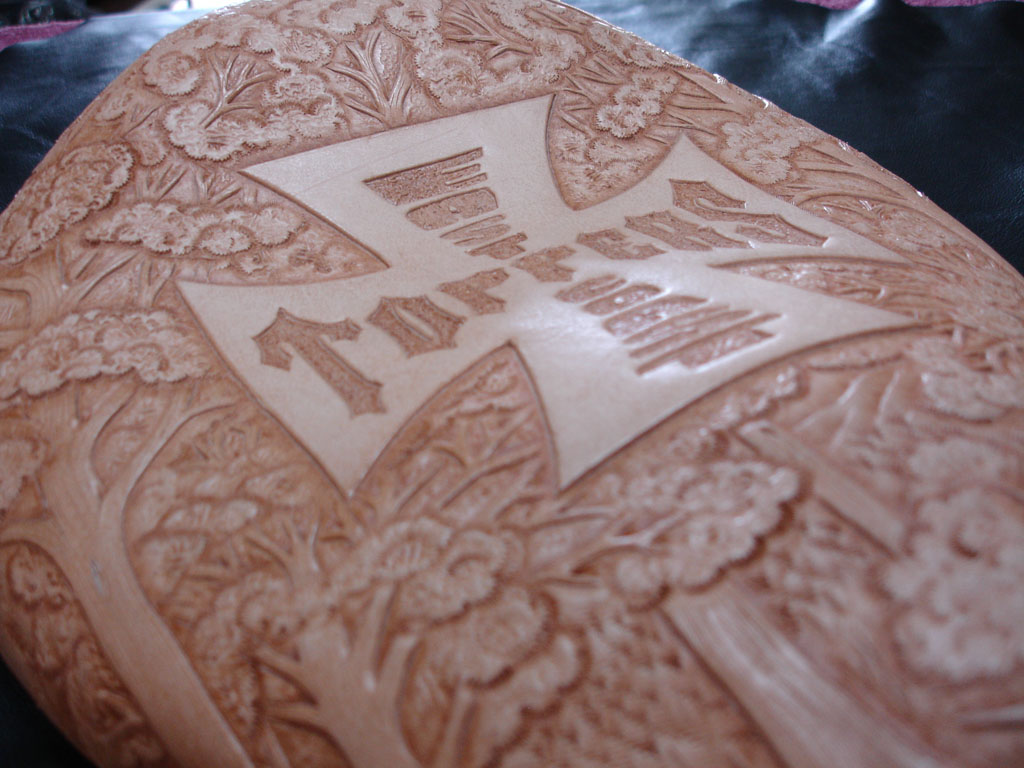
Thank you all so much! I'm really enjoying this one... The best part is that's it's a "ONE-OF-A-KIND" project which will really make his new bike stand out in a crowd! And "Sanford BikeFest" and "Daytona BiketoberFest" is just around the corner! He'll get lots of attention! Here's a few more pics... I've been hard at it today too ....