-
Posts
347 -
Joined
-
Last visited
Content Type
Profiles
Forums
Events
Blogs
Gallery
Store
Everything posted by Brooks125
-
I typically Cut, Stitch (with lining), Wet mold, Dye, Finish. This has changed to Dye, Cut, Stitch, Mold, Finish. I thought about the slave stitch, but with the lining, I can't get it in the machine for the open portions. I think I'll have to stick to a longer soak and more elbow grease on the boning process, similar to using waterproof exotics. Thanks
-
I'm sure there is a fairly simple answer that I'm not seeing. How would I go about stitching a lighter, contrasting thread on a dark (black) holster, belt, etc., but still have deep, wet molding ability? I have a couple hurdles to cross. 1) I dye my holsters, usually, after they are stitched and done. 2) I suede line my holsters, except for exotic veneers, which I build finished side-in to improve absorbency. This makes a nearly waterproof side on the panels. I am working on a tan thread on black holster. On my first go around, I dyed the veg tan leather before starting and the color held up well and didn't bleed, but the leather didn't take the water well to wet mold it, almost like an exotic. Any of the pre-dyed leathers seem to be just as water-resistant. Is there a way to get better wet molding detail and still keep the contrasting colors? Thanks
-
If this is your first project, stick with it. That's pretty cool! I use a vacuum seal as well. With the basketweave, exotics or rough-out, it works particularly well. If you are doing finished sides, the bags will put wrinkles in the leather you have to push out. Also, you don't need 48 hrs under pressure. A few minutes works well. Nice finished project. There's a few little design nit-picks, which you will correct in the future... not worth commenting here.
- 1 comment
-
- holsterglock
- holster kit
-
(and 3 more)
Tagged with:
-
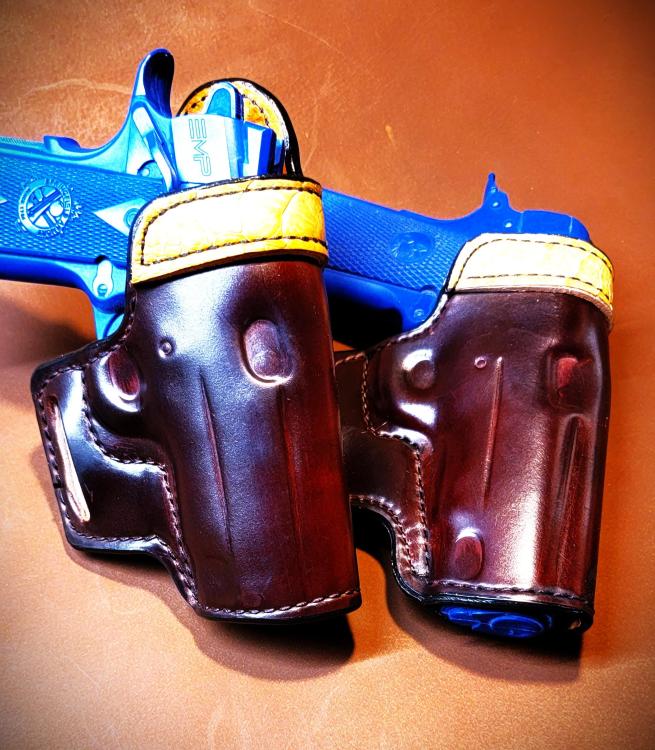
I don't finish interior edges, and the Ostrich is a veneer. Normally I would burnish the interior edges, but the OL doesn't cut well with and edger. That was all by design. I did the heavier one first and didn't like the weight, particularly on the front bend. With the Shell being about a 4+ (and not that absorbent) it gets pretty stiff to fold over. It turned out OK, but the lighter one is just about right. Shell Cordovan is certainly picky in some ways. I don't know that I would use Shell voluntarily, but the customer "loves" it and supplied the material. I was happy with it in the end. Thanks for the input!
-
I probably should have asked ahead of time but, is there a trick to working with Cordovan on holsters? I did find that using the 8/9oz cowhide base was pretty thick. The second piece used a 5/6oz veg tan and molded much better. My biggest concern came with the wet molding and losing the bright finish on the Shell. I was mostly able to get it back with a standard polish/brush/buff, but wonder if there's a better way to work with this stuff? (By the way, that's an Ostrich Leg top strap)
-
Is there a reasonably priced leather supplier recommendation
Brooks125 replied to Mulligan31's topic in Suppliers
Depending on where you are in NE Ohio, Weaver may be worth a drive to look at the leather in person. If you do, fuel up before you go ... no gas stations nearby. -
I took the order with and conveyed that this would be a "guinea pig" job. He and I may both learn from this and I may rework it as an inlay, like you suggest. He has strict orders to let me know how it wears. Thanks for the supplier suggestion, we can always use more!
-
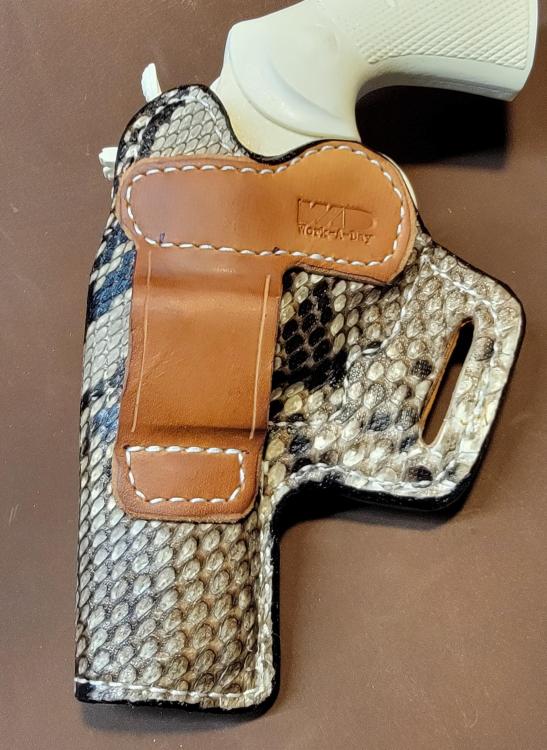
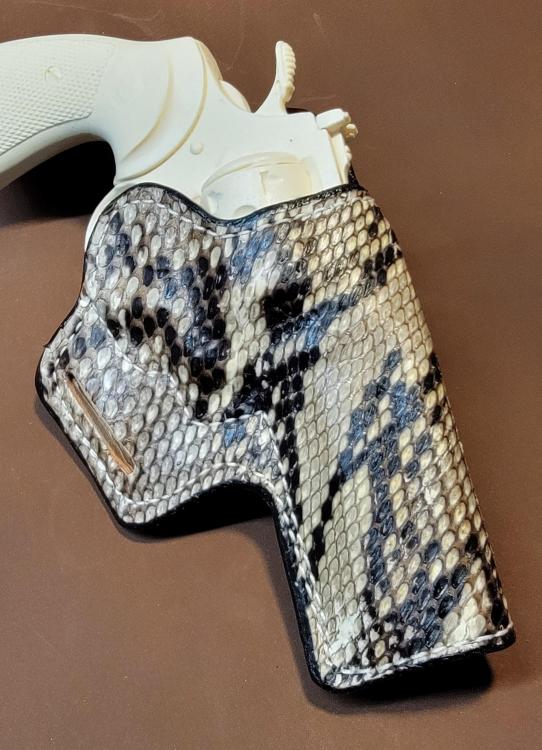
Resolene, resolene, resolene! The hide takes it well and the scales lay down pretty well. I'm happy with it and hope the customer is as well! I constructed it finished side in, as I do with most exotics. It helps with the absorption for molding.
-
Update .. and I'll post photos soon ... I put resolene on a scrap piece and it does seem to help quite a bit. I used "naked" hide and I have the holster molded and the scales are laying down ok. I think I'll go heavy on the resolene and see how that does. Stand By ...
-
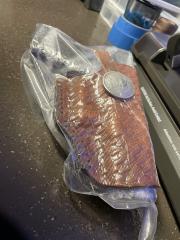
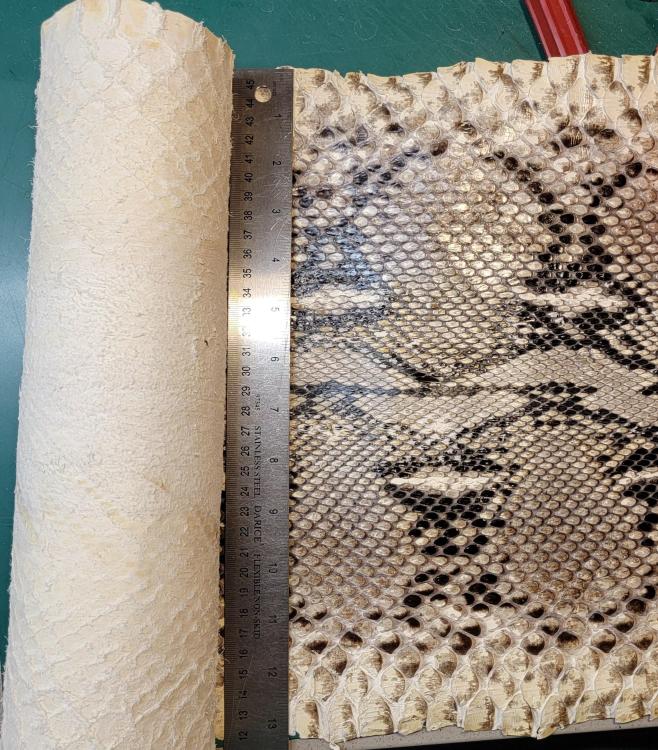
I have a request from a customer to put a python hide on a holster for his Colt Python. I got a hide from Springfield Leather Co. and it seems "dry". I think it's the larger section of the snake, about 12"+ wide. Is there something I need to do to to keep the scales from peeling off ... or do I need to find another hide? I guess I'm wondering if this is the norm (I'd rather stick to Ostrich Legs)
-
What little I've looked at 3d printing programs, most are vague, low quality replicas. The high quality replicas look like they're probably good, but you run into the same problem; the easy-to-find are common models, and too few choices when it comes to guns that are hard to find.. I'm sure this will be the way of the future, and hopefully selection will expand when that happens. We will see. It'll be nice when you can buy a $200 machine and $5 downloads ... just not there yet!
-
I'll ask first ... With a few great suppliers of dummy/mold guns closing down, Duncan's and Boise Foundry among them, has anyone sprung up to fill that void, especially with larger frame revolvers. I know Bunkhouse Tools has some larger revolvers, but they are better for single actions, mostly. Also, when I run into a brick wall for dummy guns, I have begun to acquire quite a little collection of non-firing replicas and airsoft/BB guns, which have worked well for me. Steer clear of Asian suppliers - I got burned once and won't happen again. If the only supplier you find is Asian, the product most likely does not exist and you will not get it! If it exists, it'll be available elsewhere. Some of the better suppliers are: https://www.bytheswordinc.com/default.aspx https://www.airsoftmegastore.com/ https://www.denix.es/en/ .
-
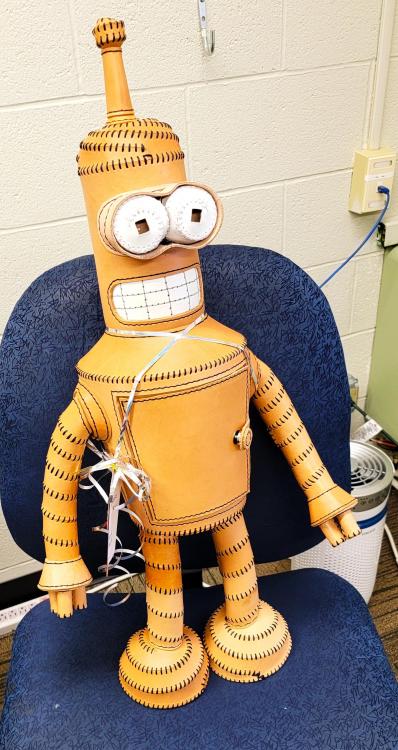
I must start by pointing out I DID NOT MAKE THIS. I do leather work, but I'm on the machine stitched gun leather end of the spectrum. I am a DARE/SRO at our local schools and have interaction with students. In the course of doing gun leather, I end up with a lot of scrap with rough back sides that I don't use on my items. I asked one of the art teachers if they have any students that want to work with leather. She said she did have one in particular that worked with an aunt who encouraged her creativity. I may give he 10-20 sq feet in a few pieces at times. Most stuff is a couple feet of veg tan and few exotics or chrome tan. When I came into the office today, the secretaries made sure I went right back to check my chair. To my surprise, there sits Bender in all his glory! I ... was ... floored! He stands about 28" tall (I didn't measure) and he will be with me as long as I'm at the schools. If you're into this type of work, get your patterns, keep making items and share your craft. IT IS COOL! (By the way - I like to pun of him being a "leather Bander")
-

NOT Real Leather - Auto Upholstery!
Brooks125 replied to suzelle's topic in Furniture: Inlays and Upholstery
In the words of Suzanne Sommers' character ("Blonde in a T-Bird) from American Graffiti - "I do love tuck and roll leather" -
I use a 6-ton shop press from Harbour Freight, less than $100. I got a couple 3/8" steel plates from a friend of mine that does metal work for the top and the Weaver red base plate on the bottom. I use it to cut the back pieces for shoulder rigs. Weaver made the clicker die for $125 from my drawing. Clicking makes it much easier to use up smaller scrap and I can batch the labor and do a lot of pieces at once. Like FredK said, I sometimes move the die around and hit it in a couple shots, but they come out clean. I would advise against hand-pounding dies, though. You'll do more damage beating them up than you would save in time or cost.
-
Sailrite offers a 5/16 ferrule, which is longer than the standard. I use them for attaching a stiffener to the thumbreak. Until then, it was a lot of cursing and wasted caps! https://www.sailrite.com/Snap-Fastener-Button-Silver-5-16-Barrel-Nickel-Key-A
-
So far, this seems to be the solution. I came down this morning and it was happening WAY too often. I swapped out the thread as suggested above ... no help. Since this is, apparently the only "how-to" video NOT on YouTube, I called Toledo Ind. and he walked me through removing the head cover (not hard at all) and a couple set screws loosened and tightened, we're back in business. Thanks for the help everyone.
-
There is a groove for all four lines. It does get easier as you go!
-
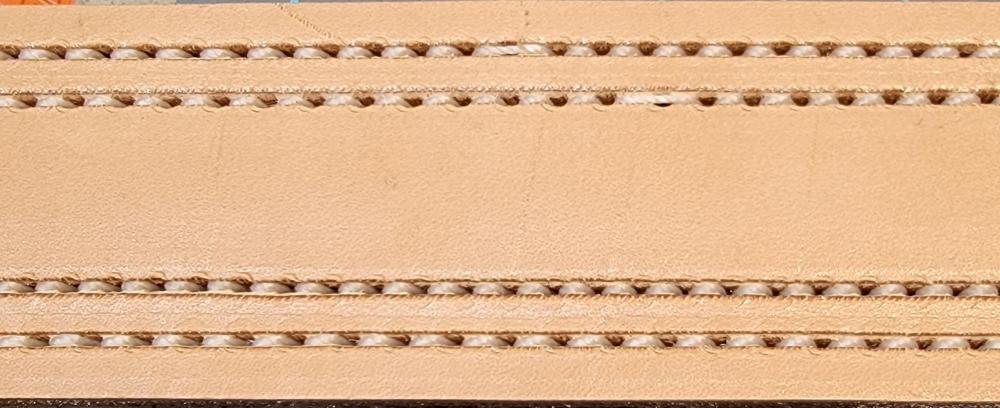
I have a Cowboy 3200 and typically stitch 8/9 oz veg tan leather for belts holsters and gun leather, belts etc. Lately, I have had trouble with skipping pick-ups from the bobbin. When it happens, I know it because the thread loops on the needle chuck. The stitch is good on all other counts, as far as tension and spacing. I'm lubricated well. Tensions all seem right. In fact, I seldom adjust much of anything since my projects are all pretty similar. I've been pretty consistent for about 7 years now! One thing I did change ... I recently switched to Superior Thread (277). Oddly enough, it only seems to be the white thread that does it. Any ideas what may cause this and, more importantly, how to correct it. It's infrequent enough that if need be, I can hand stitch the offending thread down, but that gets old after awhile. The picture shows the skipped stitches on the top row, there's only a couple here. Thanks for the input.
-
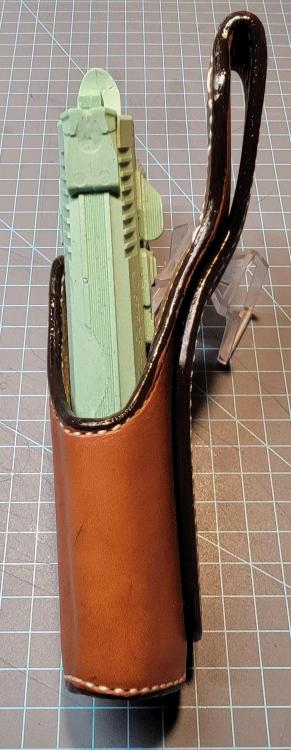
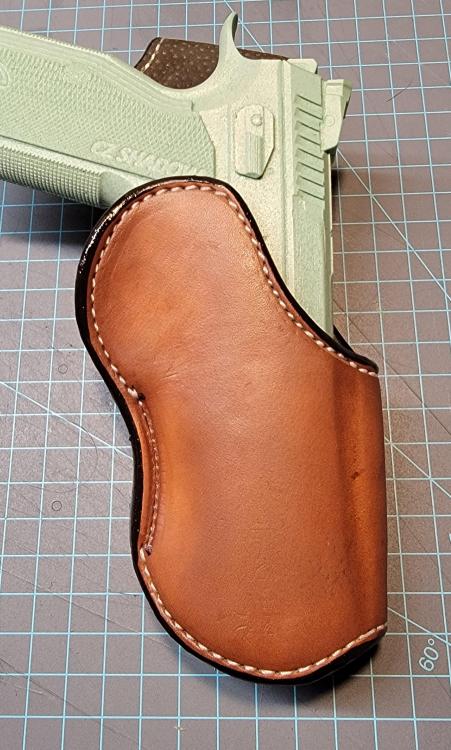
Well, to get back to the holster, I just finished it up (yes, the oil is still wet). It's certainly not as stiff as steel, but it firms up nicely. This rig has a leg thong, so I think it will serve quite well. Yes, there is a real timing issue when you laminate leather-rawhide-lining. I had to wait for the rawhide to soften up, then wait for it to dry enough to accept the Barge, and then stitch, form and hold it in position until it dried enough to put on the rack for final drying. Figure on scheduling your evening around the process. Thanks for everyone's input!
-
However, I used the rawhide on a different project and it looks like, yeah, it leaves a pretty decent window where it's dry enough to accept the Barge and hydrated enough to work with. I'll keep you posted.
-
This is a Bianchi, which may be a copy of his design. I'll try to play with the drying/Barge timing. Thanks!
-
-
I have a customer who wants a re-make of an existing holster for competition. His current holster fits a 1911 with a minimalist holster on a western belt. He wants a holster and belt that fits a CZ Shadow 2. The existing holster is steel lined. He wants to stay away from steel and I know some makers use rawhide as a stiffener. My question, how do you put the rawhide between leather layers and get it to fit well, particularly on the inside radius, against the gun? I've discovered the Barge cement won't adhere to wet rawhide. Is there a way to get the layers to bond, or not really? By the way, this is NOT a detailed boning on the outside of the holster. Kind of a western take on a modern gun.
-
I'm fortunate in being able to drive to Weaver and pick out a side when I buy leather. Today, I went to he warehouse, was greeted by a nice young man who offered to help me sort the stack. I saw from halfway down the aisle that it would be a short sort. ONE SIDE was left of my preferred leather (H/O 8/9). I'm glad it was a high-yield piece, and probably would have been my choice given a full stack. I was told that 8/9 and 7/8 are on backorder and may be for several weeks. I tell you this to give you fair warning: call and check availability, if you can get it ... get it and start getting with your secondary sources. It seems the supply chain has hit leather! Good Luck!

.jpg.d60258221c476480a6e073a8805645bb.jpg)
.jpg.15f69bc1aa7395feddc4399d43e01832.jpg)
