Lobo
-
Posts
1,065 -
Joined
-
Last visited
Content Type
Profiles
Forums
Events
Blogs
Gallery
Store
Everything posted by Lobo
-
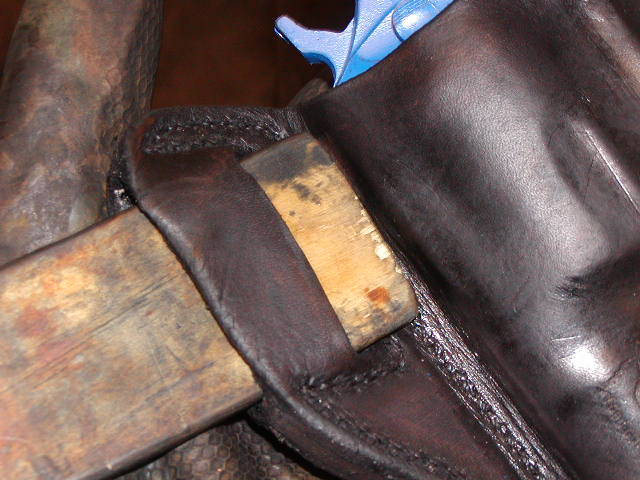
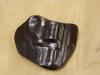
 If I remember correctly, that locking device was a patented design. About the only possibility will be contacting Bianchi International to see if (1) they might have some old stock on hand, and (2) whether or not they would send one to you. Another idea is to watch eBay for another holster of this type that you might be able to scavenge for the part needed. I've done repairs on a number of Bianchi products through the years, but I haven't worked on that particular model. Good luck.
 -
My club is strategically located about 1.5 blocks from my shop. Drying times are ideal opportunities for a few beers and a couple of hands of cards. I thought that this would go without saying!
-
Saturday morning (March 27) I received an e-mail from a retired US Marine. He is giving his pistol to his Army officer son, who is deploying in two weeks. Problem? No holster for the pistol. Did I have anything in stock that might work? No. Well, I had more than a little help from Marines while I was in Vietnam, and I have an Army officer son who has deployed a couple of times. So I decided to make something happen. Having a production batch of 12 items ready for finishing I cut, sewed, and formed the holster Saturday morning. Dried and burnished Saturday afternoon. Sunday I finished the 13 items. Holster went out in the mail this morning (46 hours after receiving the order), along with packages to 8 states and 2 European destinations. That tune from Mission Impossible keeps running through my brain now!
-
Bill: I received your e-mail and responde so you should have that by now, with a few suggestions on design elements. General comments: The use of heat can be very useful in achieving the most rigid results in holster forming, but it is easy to overdo the heating. Too high a temperature, or too long an exposure, will damage veg-tanned leather. Heating will activate collagens in the leather fibers, which causes the difference in the final structure. Once the necessary degree of heat has been reached the result will occur, so there is no need to complete the drying process at temperatures above normal room temperature. Heat guns can be used but, as you have found, the flow of super-heated air must be kept moving and not allowed to concentrate on a single area. A better approach for the hobbyist or occasional maker would be the kitchen oven. Most ovens have a minimum temperature of around 170 degrees, which is hotter than the 130 to 150 degrees necessary for the purpose. So, short exposures (about 10 minutes at a time) should be used. For those who do detail boning on their products this provides a good opportunity to complete that process easily at intervals of decreasing moisture content. Convection ovens will generally operate at a lower temperature (around 150) and feature a fan to keep the air moving, so these are better for the purpose than the kitchen oven. For those making holsters on a regular basis a drying cabinet can be useful. A heat gun or even a hair dryer can be used to produce the heat and to induce air flow into the cabinet, and a thermometer will allow temperatures to be monitored and maintained within a fairly narrow range. Once the desired level of heat has been applied the heat source can be stopped and the contents will continue drying as the temperature gradually dissipates. Additional applications of heat can be done as desired.
-
My First 2 Holsters. New To The Forum.
Lobo replied to muerte's topic in Gun Holsters, Rifle Slings and Knife Sheathes
I think you have a very innovative idea there, allowing both back pocket and front pocket carry. As you progress you will find that sewing the holster first, then forming to the handgun, is far easier and results in a better overall appearance. This also allows the edges to be dressed down and beveled more easily, before the forming process. Burnishing is best done following forming, as the moisture causes leather fibers to swell. With most dyes there will be some difficulties in getting an even finish after the holster has been molded. Compression of the leather fibers during forming results in areas of differing densities, so dye penetration will vary. Best regards. -
The Stohlman method described works very well, but is somewhat time consuming. I have found that I can assemble and sew the pouch then wet it more thoroughly than we might do otherwise for the forming process. This makes the leather more flexible. A wooden mandrel of belt size can then be forced through the belt attachment and the back pouch panel can be forced flat against the mandrel. Insert the magazine (or dummy), complete the forming as the pouch dries. This also permits the belt attachment point(s) to be formed to belt size (width, thickness desired). Drying time is longer due to the additional moisture used. If using a drying cabinet or convection oven the whole thing (pouch and mandrel) can go in together.
-
In cutting belt slots there is another thing that needs to be kept in mind, and that is the angle of the slot to the belt line. If the slot is to be precisely perpendicular to the line of the belt then a 1.5" slot length will be correct for a 1.5" belt. When the angle of the slot is changed (on an angle to the belt line) the length of the slot needs to be increased. Every possible angle will result in a different length. I like to use wooden mandrels to lay out belt lines and mark the points at which the slots are to be cut. I make the mandrels in 1/4" thickness, about 12" long, and for each belt width (1.25", 1.5", 1.75", etc). This permits all belt attachment points to be laid out and marked at once. Then while the holster is being formed I use the wooden mandrels to form each belt attachment point, forcing the mandrel all the way through all belt attachments (slots, loops, etc) to simulate what a belt will do when the holster is worn. As the holster dries the fully formed belt attachment points become permanent. Actually, the angled belt slots provide some advantage. Since the slot length actually exceeds belt width the belt can be pushed through more easily, and then when the belt is fully through all slots (loops, etc) it will be firmly anchored top and bottom.
-
About a year ago I moved my business from a home work shop to leased space, as the volume of orders (along with materials and bins of items in production) were driving my wife nuts. At about the same time I launched a website. Business has continued to grow, and I am now at the point where my little work shop is overflowing with materials and bins of items in production. I have been in the shop for at least a few hours every day since the first of this year, trying to keep delivery times as short as possible. On April 1 I will be moving into a new shop with more than double the work space. I will be adding at least 4 more work stations to keep multiple production runs going simultaneously. I am also starting a new apprentice in training, so I hope to cut production times in half within the next couple of months. I also hope to be able to take a day or two off each week. Life is good. I wish all of you the best as well. Now, back to work.
-
Re-Form A Holster?
Lobo replied to BigRiverLeather's topic in Gun Holsters, Rifle Slings and Knife Sheathes
About a year ago I had made a couple of holsters for a customer who reported that they would not fit on his belt. Belt slots were the correct size, but he was using a very thick belt (I learned to ask after that!). Anyway, I tried to reform both by soaking in hot tap water for several minutes, then scrubbing off the finish with a rough towel. After that I was able to reform the holsters and used a wooden mandrel to stretch the belt slots out. Drying time was long, of course, but I was able to completely reform the holsters properly, then refinished both. They looked just great. If anything, the second round of forming and boning resulted in an improved fit overall. So, it can be done. The time involved is actually about the same as making another holster. Best regards. -
Holster making was a very small part-time thing for me during my 24 years in law enforcement, and continuing that way for several more years. My market was limited to the people that I knew and worked with. Even at that, I developed good relationships with many people and continue to produce for some of my customers from over 30 years ago. I've also had a few stores stocking my products for several years. The internet has opened up a world-wide market for anyone who chooses to pursue it. I hesitated for several years to put up a website, fearing that a time might come when volume of orders exceeded my ability to produce. I now use a website, but there is no ordering link. Each order is received by e-mail, and I tell each customer what to expect for production time prior to proceeding. I require payment prior to starting production because there are a few folks out there who will order something, then change their minds or find something else during the wait. I also offer a "no questions asked" return policy (any standard production item can be returned when received by the customer and found to be unsatisfactory, but only when returned in new, unused condition), and I provide a one year warranty for defects in materials or workmanship. Some folks call me a "custom" maker, but in reality I run a small production shop. I offer several holster models with a few options within each product line. I do several "batches" of orders each week, each of about 8 to 12 items. I cut everything, then assemble everything, then sew everything, then fit everything, then finish everything in each batch. During the times required for drying between processes I start another batch. In this manner I am able to complete an average of more than 30 items per week, and I have finished as many as 42 items in a week's time (during which I was in the shop for about 28 hours, plus the daily times spent answering e-mail questions, responding to orders, packaging and shipping products, etc., so I am now working a full 40-plus hour week). My kids are grown (as are 3 of my 9 grandchildren), my home is paid for, I don't owe anyone anything. I recently shut down another business which, though relatively profitable, required a great deal of travel. Now I can relax more, spend a few hours per day in the shop, and enjoy this time. The leather business has grown well beyond anything I ever expected. With 40 states now having "shall issue" concealed carry laws, millions of Americans are obtaining permits and carrying daily. The market is huge and the business continues to be very good for me. I am now looking at doubling the size of my shop and (depending on what employer mandates might come out of Congress soon) I may hire some help. Ideally, an energetic and responsible person will turn up that I can put into a position of taking over the business in a few years when I decide to retire completely. For your situation, I recommend staying small for the time being, build up a good part-time business, establish your reputation. There may well come a time when you can make the transition to a full-time operation. If so, that is fine. If not, you will have an ongoing stream of additional income and build many good relationships with other people. For equipment needs, make your investments carefully. Good sewing equipment is essential, and will cut production time substantially, making your working time far more productive. A broad selection of dummy guns will help you expand your market, and dummies pay for themselves very quickly (so long as you don't invest in too many oddball pieces). I am also constantly adding more of the out-of-production handguns for which dummies are not available, and these have proven to be very good investments. Presses, clicker dies, and a lot of other things are expensive to acquire and can only be justified when you have a lot more production to do. Wholesale orders can be good. Making a dozen identical, or very similar, items can be a very efficient use of time. If you can find dealers willing to stock (and pay for) your products (including some of the gun show dealers) you can develope a steady income stream. Consignments very seldom work out very well, and can be a dead loss very easily. All the best.
-
Should I Use 7/8Oz Or 8/9Oz For Holsters
Lobo replied to troppy's topic in Gun Holsters, Rifle Slings and Knife Sheathes
For most applications I find that 7/8 works very well. 8/9 is useful for the heaviest applications but, as you have noted, it can add to the work for the maker. Holster style and the size/weight of the handgun should also be considered. For the smaller and lighter handguns (J-frame S&W, PPK, P230, etc) several holster styles can be made very satisfactorily from 6/7 oz. cowhide. The type and style of belt attachments need to be considered when doing this, as the lighter leather does not resist belt tension and distortion as well as the heavier leathers. There is nothing wrong with experimenting, making your holster designs in different weights and for different handguns so you can evaluate the results. This helps you to gain knowledge and experience that will benefit you in the future. Best regards. -
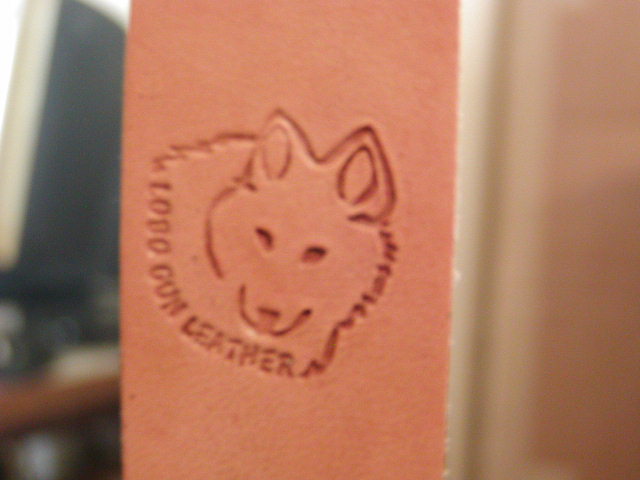
Maker's Mark Stamp
Lobo replied to gregintenn's topic in Gun Holsters, Rifle Slings and Knife Sheathes
I second the recommendation for Brenda at Laser Gift Creations. She made two custom stamps for me about a year ago (I like to have a back-up tool for everything). I am still using #1 and receiving crisp and sharp images after over 1,000 strikes.
-
Clicker Die - Versatility In The Pattern
Lobo replied to particle's topic in Gun Holsters, Rifle Slings and Knife Sheathes
Particle: I have watched your posts, and I have seen your video. You are doing first-class work. You are also looking at holster-making as a business, which is all good. I started making holsters in 1972, and it was a nice little part-time thing for many years. In 2008 I finally bought a sewing machine; before that I sewed everything by hand. I still cut every piece by hand, assemble everything by hand, form everything by hand, and finish everything by hand. I have never used a clicker die, and probably never will. I have never used a holster press, and never expect to. Last week I completed and shipped 42 items (31 holsters, 5 belts, and 6 pouches). I spent about 28 hours in the shop to complete those items, plus about 15 hours on-line keeping up with my website, orders, and customer inquiries. I now have orders in hand for about 150 items, plus restocking several retail stores that carry my products. I have no plans to put in a press or to buy clicker dyes. I will continue cutting each piece by hand. I will admit that I am struggling to find a little time to develop a new product idea that has been burning a hole in my head for several months. Last year I introduced two new products, and those have been very well received by my customers, so I have every reason to believe that this new product will do well. As I find time I will make that happen. My point is this: We can work hard or we can work smart. For me, working smart involves production of multiple like-kind items in batches. This minimizes time requirements for workspace set-up, tool set-up, and clean-up time. I cut 8 to 12 patterns at a time, then assemble those, then sew those, then form and finish those. While that batch is drying I repeat the process. Today was a "pouch day". I made up 7 speedloader pouches and 4 magazine pouches before I went to the club to play poker and drink beer for a few hours before dinner. My power tools are these: a sewing machine (since late-2008), a drill press, a belt sander, and a drum sander. I also like to have a radio going in the background to keep my mind occupied, and a refrigerator to keep the beer cold. I am a great-grandfather (of one), grandfather of nine, and a retired cop. I'm working in a 300 sq. ft. production shop. I expect to complete at least 2000 items this year without clicker dies or presses. Before I consider a press or clicker dies I will be looking at a little larger facility and, perhaps, hiring an apprentice to do some of the grunt work (so I can play more poker and drink more beer). I wish you nothing but the best, sir. I suggest that the best may not include fancy equipment and time-saving devices. I don't think either are necessary to keep your customers happy with your products. Best regards. -
Getting That Even Shade Of Brown
Lobo replied to dickf's topic in Gun Holsters, Rifle Slings and Knife Sheathes
Working with the brown dyes has caused me more than a few incidents of grief. I believe that immersion dying is needed so that minor surface abrasions won't expose the underlying fibers. I also use neatsfoot oil on all finished products, which dramatically darkens just about any dye shade I have tried. I still use immersion dying following the forming process. Using Fiebing's spirit-based dyes diluted with isopropyl alchohol, I dip each piece very briefly (about 5 seconds), then place it onto a drying rack. Depending on temperatures in the shop, the alcohol has evaporated off and the dye has set to a point where the piece can be handled within 20 to 45 minutes. Any signs of uneven dye penetration are readily visible, and a second very brief dip (or quick swabbing with dye solution) can be done easily. Making sets of items can be a real challenge. A holster of 8-oz. veg-tan from one hide, a pouch of 6-oz. veg-tan from another hide, and a belt of 9-10 oz. veg-tan from a third hide, all of these will respond a little differently to the dye solution, so a little time and attention is needed. I usually do all of my dying at one time, frequently over a couple of hours during an evening, and I take a 6-pack of beer into the shop to entertain myself while drying periods are completed. Then, after a day or so, I do my oiling. I have learned to go slowly with that, using a paintbrush to apply the oil moderately and buffing with a towel. This is especially so on sets (as described above). I very much like the highlights provided by this method, finding the result much more natural looking than any even coating and resulting plastic-like effect. It has been a period of trial and error for me, learning to do controlled applications of the browns and achieve consistent results. There is nothing wrong with pre-dying your cut pieces prior to assembly, sewing, forming, etc, and I am now experimenting with that method for a planned new color (more in the russet/saddle tan range, which has proven very difficult to reproduce with my current methods for black and cordovan brown). I expect to find a few more challenges in this business any time now. -
Holster Dye procedure
Lobo replied to rccolt45's topic in Gun Holsters, Rifle Slings and Knife Sheathes
I use buckets with lids (to prevent evaporation between uses). I immerse each item in the dye solution for about 5 seconds, then remove it to a drying rack. Too long in the solution and your forming work is undone for you. After a half-hour or so they have dried to a point where they can be handled. If the color saturation is not complete (frequent with black) you can repeat the procedure. The following day I apply neatsfoot oil, then rub briskly with an old towel to remove excess dye from the surface that has not penetrated. This minimizes color rub-off. This is followed by final edge burnishing, then final finishes and surface sealant. -
Most Unusual Holster Requests?
Lobo replied to Lobo's topic in Gun Holsters, Rifle Slings and Knife Sheathes
Well, some good laughs so far. K-man is always good for a chuckle or two, isn't he? Keep them coming! -
From time to time I receive unusual requests, some of which result in interesting projects and some of which are simply amusing. I thought it might be interesting if we shared some of our experiences. Here are a few that I have dealt with: Request: Convertible holster for strong-side and cross-draw, inside the waistband and outside the waistband. Response: This may be possible to do, but I don't think the resulting holster would serve any of the intended purposes very well. Request: Female officer who likes to dress well requested matching holster, belt, mag pouch sets in three colors (all for the same weapon) so she could coordinate with her wardrobe. Response: Completed the order. This one was easy. Request: Absolutely ancient S.D. Myres Saddlery holster (probably made by Tio Sam himself) with the stitching falling apart. Leather still in good condition. Could I restitch it? Response: Done, using waxed linen thread, took about an hour to saddle-stitch it. Looked great. Request: Federal agency receiving new pistols in three weeks, wanted 17 identical holsters with matching mag pouches delivered in time for issue with the new pistols. Response: Completed and delivered in two weeks. Six follow-up orders for other products from individual agents so far. Request: European agency, using S&W revolvers with German-made speedloaders, wanted holsters with matching pouches for the speedloaders. Response: Send me one of your speedloaders and I will get it done. Request: Pancake holster for 2" K-frame S&W; then a week later: change that to a 3" K-frame; then a week later: change that to a 2.5" L-frame; then while the 2.5" L-frame was in production: can I change that to a Glock 23? Response: Made and delivered the Glock 23 holster, finished the 2.5" L-frame and sold it a couple of weeks later. Same customer has since ordered two more (I think he changes pistols like I change my socks!). Request: Two dozen holsters, for assorted handguns and in different colors, to display and sell at a gun show. Response: Sure, here is your price. Second request: Will you do these on consignment? Response: No, thank you. Request: Special operations guy, deploying in a week, wanted one of my holster designs for a 1911-type pistol. Response: I mailed him my personal holster the next day. So far, three of his friends have ordered similar holsters. Request: Concealment holster for a Browning Hi Power, no markings on the holster, to be shipped to a post office box address in Tel Aviv, Israel, no name, payment received in cash (US currency). Response: Done. Filled out the customs declaration with nothing but the address for the recipient's name, no problems. So, some of these are fun, others are funny, some just make the mind wander a bit. Tell us about some of yours!
-
Holster Making Video Overview
Lobo replied to particle's topic in Gun Holsters, Rifle Slings and Knife Sheathes
Excellent! Very well done video. I am sure that you have created something that will guide many hobbyists through the production of very good products. -
The standard skiving tool works well enough. You can also use a belt sander (if you do, I suggest dampening the leather first which prevents a lot of dust in the air as you work).
-
First holster attempt in progress
Lobo replied to 6guns's topic in Gun Holsters, Rifle Slings and Knife Sheathes
Rather than drilling the stitching holes, I recommend a stitching awl. This tool features a diamond-shaped blade to pierce the leather at each stitch hole. After stitching the hole will contract around the thread. -
This topic comes up with regularity. Be advised, there are many outlets that advertise the Ring's Blue Guns but NONE OF THEM (to my knowledge) maintain any significant inventory; all of them (that I know of) take your order then have Ring's produce the piece and drop-ship to you. For Ring's Blue Guns you are much better off to contact Ring's Manufacturing directly and place your order. You will pay retail price, which is more than some suppliers advertise, but the difference in service is well worth any discount you may find. RE: Duncan's; their cast aluminum dummy guns may not be very pretty at times, but they are entirely functional for the intended purpose. If you wish to do so you may clean up the castings to your heart's content. A phone call will let you know what is in stock, when it will ship, and how much it will cost you. Good people providing a good product and very good customer service. Best regards.
-
All very good points, Rick. In the instances I have described people have specifically asked me to directly copy currently-offered products of other makers. I have no problem in creating a new design based upon the customer's stated preferences, or in altering one of my existing designs to incorporate other features for a customer. But to intentionally copy another maker's work would be little more than theft, in my opinion (excluding individuals making an item for their own use, of course).
-
About once per month I receive a request that goes something like this: "I really want a XYZ Brand, Model 111 holster for my Super Frazbat .43 caliber automatic. But their prices are ridiculous! How much will you charge me to make one?" or like this: "The ABC Brand, Model 999 holster is perfect for my Bojon Special .34 caliber revolver. But their waiting time is over a year! Will you make one for me?" The home page of my website clearly states that I will not copy the work of another maker. I would prefer to be polite about this type of thing, but it just keeps coming up. Twice this week I have received specific requests to do knock-off's of other makers' products. I find myself sending one-word replies, "NO". Am I the only one having to deal with this?
-
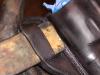
Yes, I work all of the flat surfaces using a round tool which I roll over each surface firmly. This compresses the leather and leaves a nice smooth surface. I do this on all holsters during the forming process, whether they are to be detail-boned or not. Most of my production is not detail-boned, but each one is fully fitted by hand. Detail-boning provides the best possible result, but a very good result can be had using nothing more than your hands and a few simple tools. This is why I offer detail-boning as an option for those who wish to have it, and are willing to pay for the additional time and effort required. I am attaching a couple of photos showing the difference between my standard forming and a detail-boned piece. As will be obvious, I am not the master of this process as some others here are. A mechanical press provides advantages for volume production, I am sure. But I have never used one and really don't feel the need
-
Cross Draw Sheath
Lobo replied to HC Leathers's topic in Gun Holsters, Rifle Slings and Knife Sheathes
I haven't done a pancake-style cross-draw knife sheath, but the first thing that comes to my mind is to protect the stitching from the knife edge when inserting or withdrawing the knife. I would suggest a welted-seam, and metal rivets at the holster opening might be a good idea.