


JJN
-
Content Count
347 -
Joined
-
Last visited
Posts posted by JJN
-
-
When I was looking for my first machine, I also looked very seriously at the Sailrite Fabricator. It was around $1400 at the time. While looking I found this same Sailrite that someone bought to make a Youtube review and never used it for anything else. It was listed at $1000 and took some time to sell. This might reveal something about resale value of this machine. I think it is a very good machine but I don't have any personal experience with. I finally bought a Juki DNU-1541S for my first machine and felt I make an excellent choice. I bought it from Keystone Sewing Machine Co, located in Pennsylvania, at a great price with free shipping (current price is $1710). Although I have quite a few machines available to me now, this Juki is still my "go-to" machine for most of what I want to sew. You can ask them to put a speed reducer on it too.
-
If you had a jam, make sure the safety clutch is reset. It may have been activated and could be causing your timing problem.
-
@Loudcherokee, something to consider: I think the CB4500 has a larger diameter balance wheel than the others you are thinking about. I don't have personal experience with the CB4500 but I have read here that some people like the larger wheel when turning by hand. My thought on the needle position is that I have it on 2 of my smaller upholstery class machines that I use for production (Non-leather items in quantities of 50 or more). It is great for that purpose. I think that on this size of machine with the speed reducer and servo motor you get plenty of control without the needle position sensor. Personally I would not use it in this application. Just my thoughts, other may vary.
-
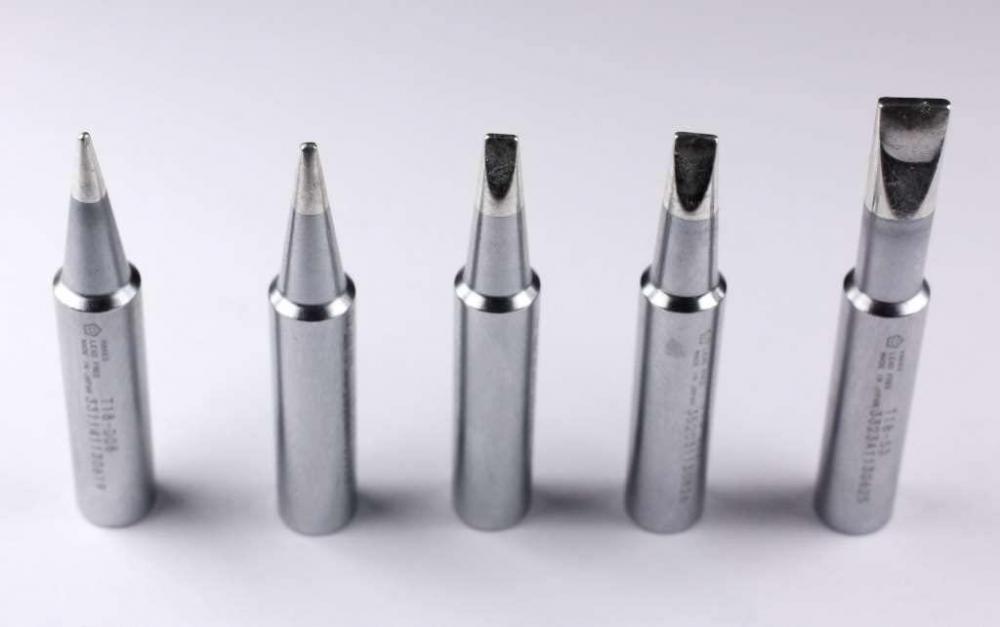
The 135x16 and 135x17 are needle systems. These numbers refer to the length and other dimensions of the needle, not the thread size. Every machine is designed to use one needle system. The 135x17 is a round tip needle made for sewing fabric. The 135x16 is a blade tip needle made for sewing leather. Leather needle tips come in several styles like diamond point or triangle point, slant or straight. In a needle designation the style comes first like 135x16 and the size comes after it like 135x16 size 22. the size refers to the diameter of the needle and the size of the hole. For 138 thread you will want to try a size 22 or 23 needle. It will depend on the type and thickness of the leather you are sewing.
-
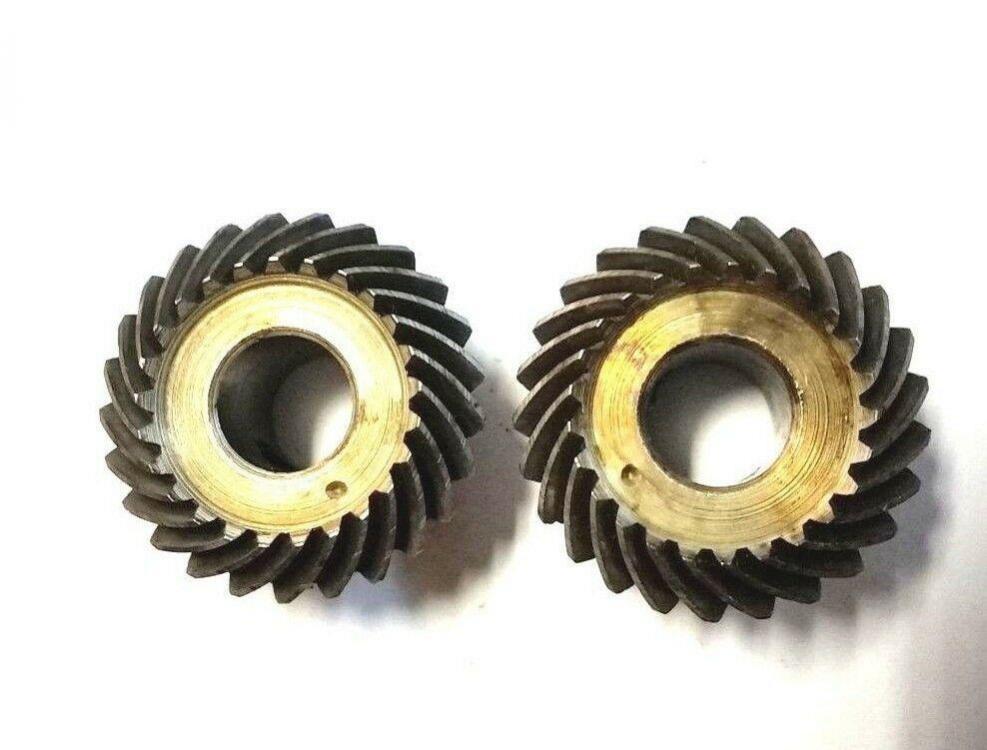
On 1/23/2021 at 7:33 AM, shoepatcher said:ok the parts number for the bevel gear sets (only sold in sets) is #91-141536-90, the set screw set is #11-330964-15. The cost i found was $190.00 for the gears and the screws. Hope that helps
Glenn and @sandmanred the part number for the bevel gear set in the parts manual I looked at has a different part number, 91-009-432-90. I see someone had 11 sets for sale on ebay for $70 per set but is sold out now. i sent the seller a message to see if they had any more.
update: I now see that this is the seller from Lithuania you mentioned above.
In his description he says this gear set will fit other models:
USED PFAFF 120,122,141,142,144,145,146,148,151,153,155,190,191,192,193,194,195,196,333,335,341,342,343,345,346,3300,541,542,545,546,595,596 LOWER GEAR & PINION, 10046, 10045. SET 91-009 432-90
You might find a parts machine from the list that you can salvage a set of gears from.
update #2: I got a reply from sewtech71: Hello. I don't have sets at the moment. I have two units of 10046
-
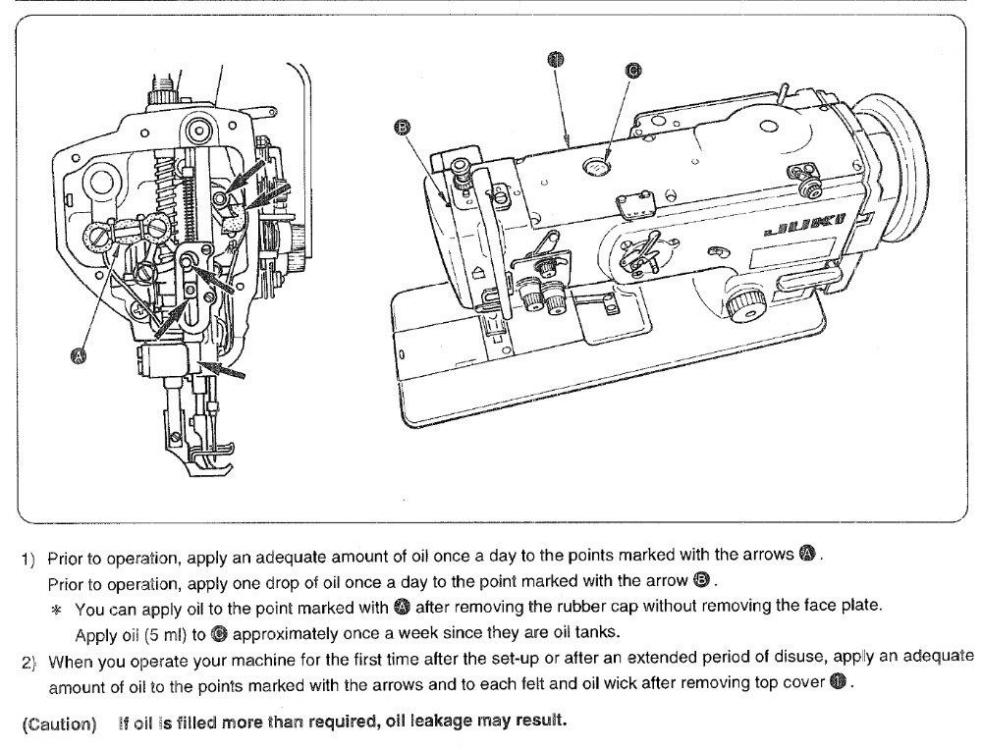
This is from the manual. I hope it helps.

-
Looks like a nice design. I will need one for my Juki LS-1341.
-
-
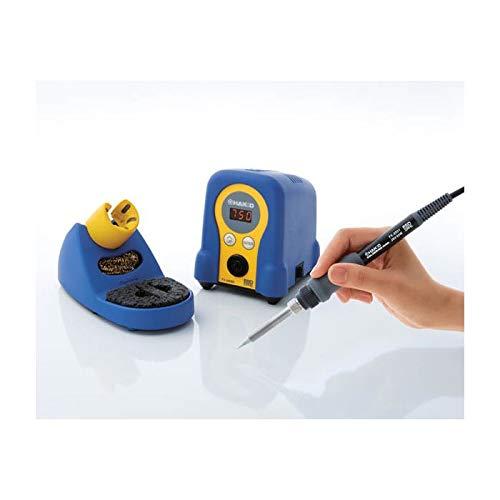
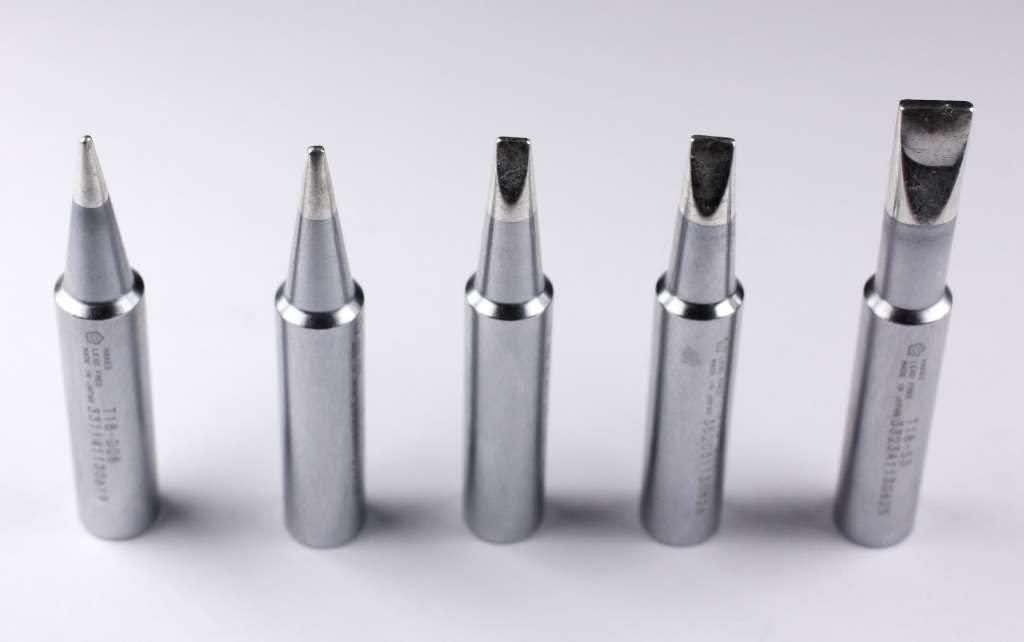
We use this Hakko Soldering Station. Set the temp to 700 degrees and it never overheats. You can get many different tips to suit your needs. I already had it for soldering wires so it has a dual use now. It heats up in about 20 seconds.
-
-
Nylon will stretch where polyester will not.
-
@JClif88I would like to see a photo of your setup.
-
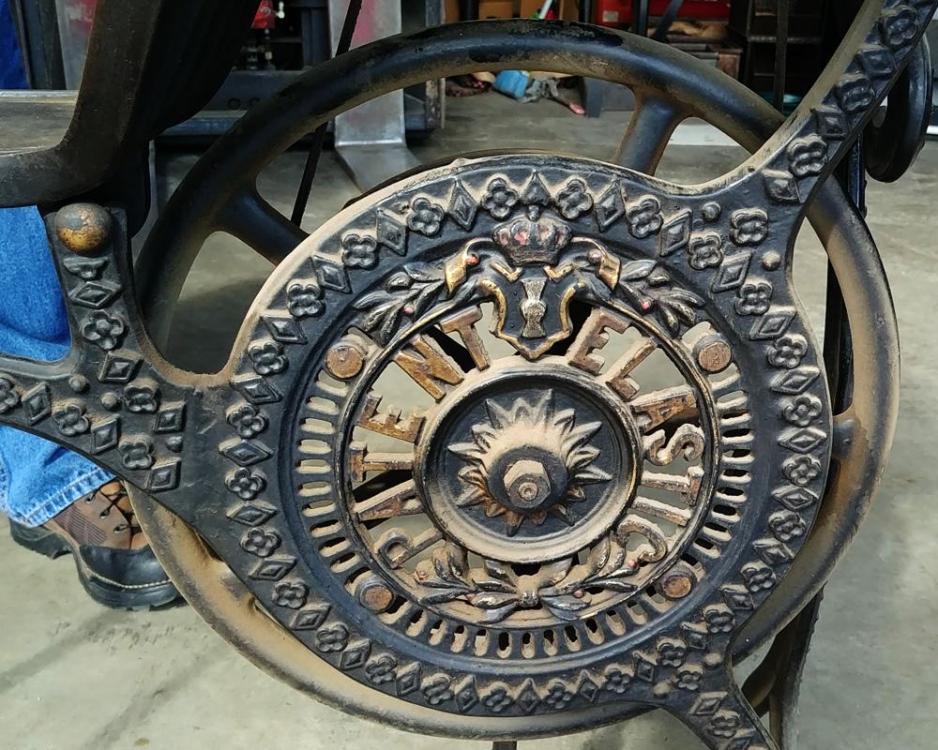
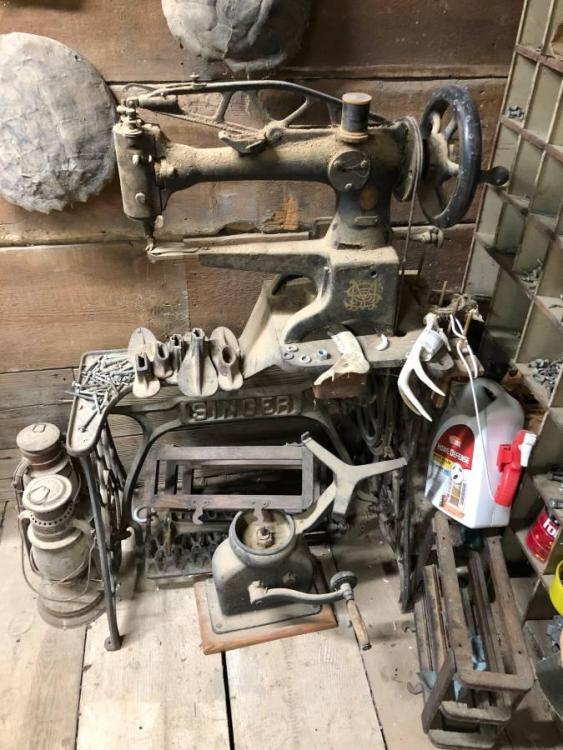
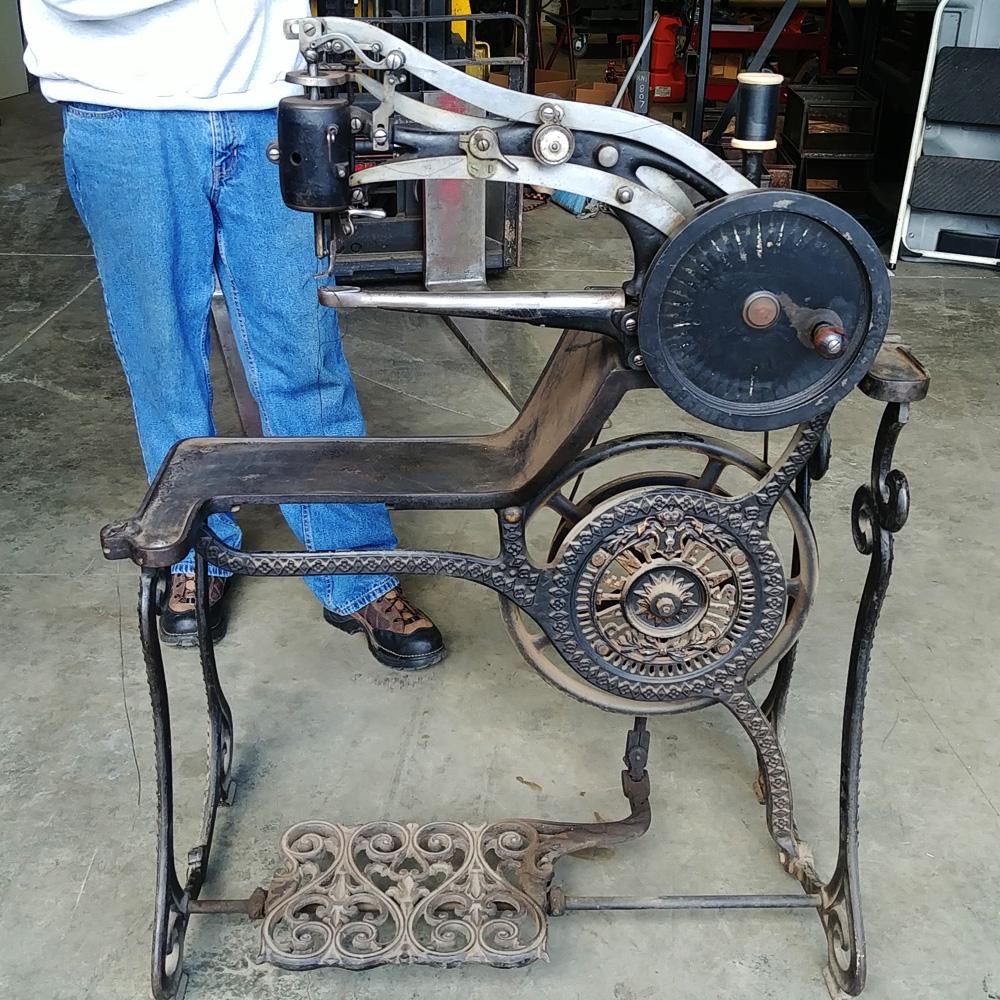
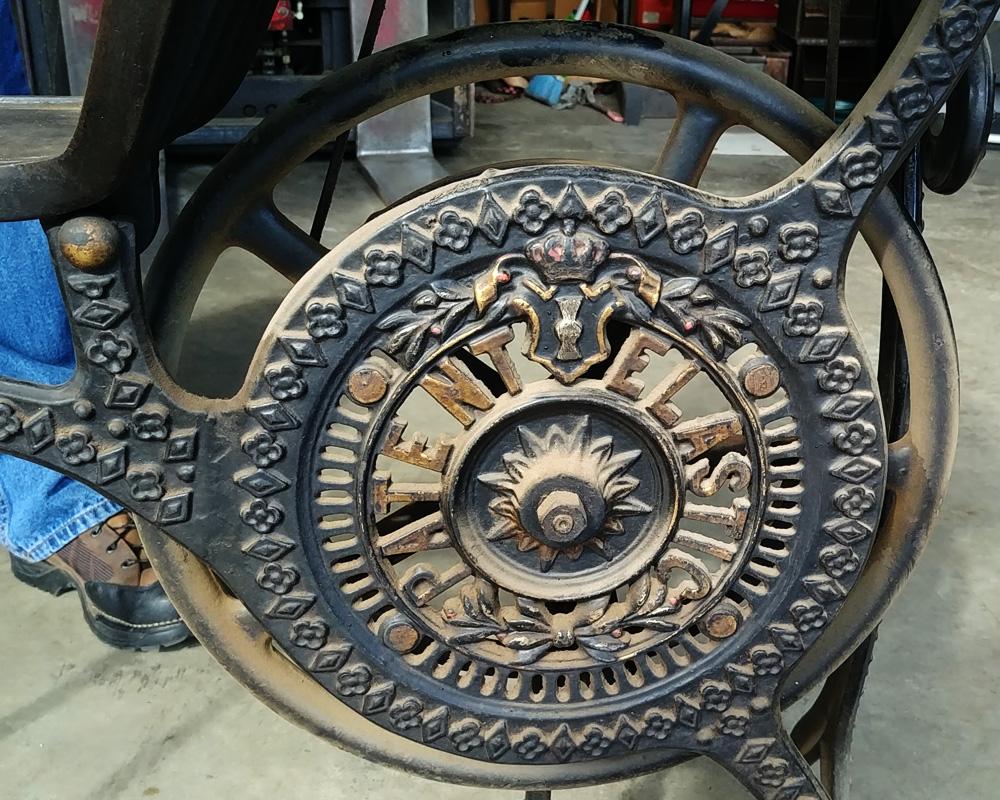
Patent Elastic patcher. Probably from around late 1890's. It sews great, nothing broken.

-
10 minutes ago, DonInReno said:Did you get the Adler from near Los Angeles about a month ago? It looks great. When I first saw the description and price I was convinced it’s worth picking up, but then the location was a deal breaker since we couldn’t get away for two days. Both are very nice indeed.
Hi Don, No I bought it in Fresno around the middle of August. I live in Grants Pass, Oregon but I used to live in Fresno. I had a friend pick it up for me and hold it until I went down to visit family a month later. The Adler is almost like new. The Singer was in Concrete, Washington in an open barn. If I know I will be visiting an area in the future, I look at the ads in that area and try to make the trip pay for itself. My wife has family in central California and likes to visit her mom regularly so it works out for both of us. We have a travel trailer (toy hauler) and can park it at my wife's family farm and stay about a week when we go.
-
@MikeRock, it is an interesting photo. Did you notice the sea turtle shells on the wall?
-
Here is one for sale in St Louis. Singer 29K51. $500
https://stlouis.craigslist.org/for/d/girard-antique-singer-sewing-machine/7242575473.html
-
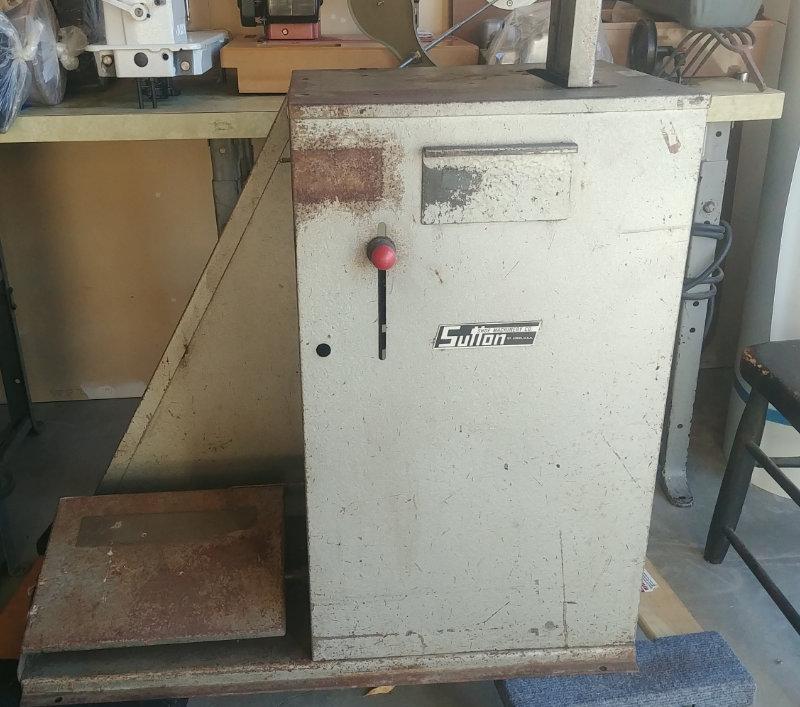
I am posting photos of two patchers I aquired in the last couple months. I paid the $200 asking price for the Adler 30-15. It is a short arm, small bobbin patcher that is in excellent shape. Cleaned up and oiled is sews just fine. It did not come with a stand. The other machine is a Singer 29-72, long arm, large bobbin. They were asking $100, but I paid them $200. I haven't done anything to it yet. It came on a Sutton motorized stand. It will need a little de-rusting but I think it will be the patcher I keep. I had to drive about 500 miles south to get the Adler and about 500 miles north to get the Singer. My point in posting this here is to show that there are better deals out there if you look for them. I would rather take a little mini vacation and see the sights when buying a good machine than spend more time trying to remove rust and locate hard to find parts.


-
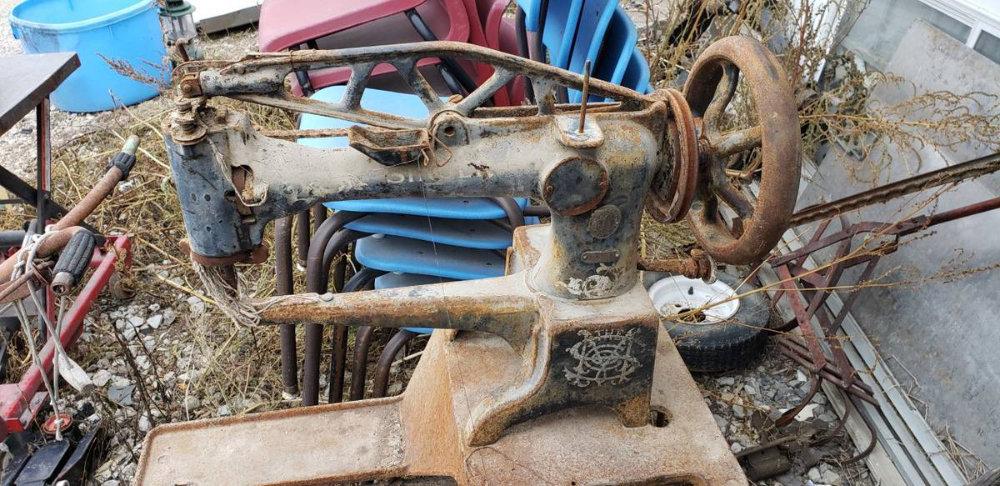
This is the machine in question. I am posting here so the image is still available after the craigslist ad is gone.
-
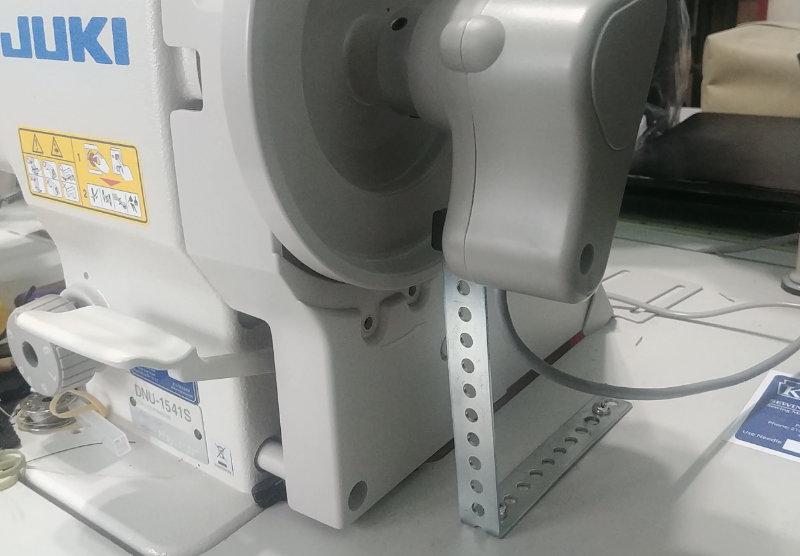
This how I have the NPS on one of my machines mounted. Just a simple "L" bracket screwed to the table below the sensor. I should stiffen the bracket with a cross brace but it works just fine the way it is. When you tilt your machine head back the sensor lifts out of the tab on the end of the bracket. When you put the machine back in place, be sure to have tab inserted in the slot on your sensor. Very simple and it works perfect for me.

-
I own and use both types of binders you are referring to. I started with the Sailrite swing away 1" and 3/4". These binders are more expensive than the cheap generic versions, but are way better quality and worth the higher cost. The mouth on these are for binding thinner assemblies. As Wiz mentioned, these are not for binding inside curves. They do good on straight edges. A big advantage is you can backtack at the start and end of the binding because of the swing away bracket. I am now using a right angle binder that attaches to a special cut out needle plate. I am getting better results because the binder is closer to the inner walking foot and the tape and material hold their position better. Also this binder has a wider mouth to handle thicker assemblies. The disadvantage is there is no way to backtack. I cut the binding long when I remove the piece from the machine and trim with a Sailrite hot knife to seal the edges of the nylon binding tape.
John
-
Servo motor: This is what I use and recommend.
https://www.tolindsewmach.com/motors.html
This vendor is a contributor and financial supporter of this forum. There are others here too. You can find them in the ads at the top of each page. They make this forum possible and suggest giving them your business.
John
-
You have a steep learning curve ahead of you, but don't be intimidated. Take it one step at a time. I'll start the conversation with my first observations. This is what I would do if I came across this machine myself and wanted to sew with it.
Oil oil oil oil oil! That head is bone dry. I never even turn over a machine that was left un-maintained without oiling all the critical points. You will see some oil locations indicated on the top of the machine but download a manual and learn the lubrication routine.
Don't take it apart and don't loosen any screws unless you absolutely know what you are doing. You could be creating more problems, not solving them.
Either re-wire that motor or much better, get a new servo motor for about $150. Trust me, it will be one of the best investment you can make for that machine.
Needles: The needle that you broke sounds like it was a domestic sewing machine needle. Industrial sewing machine needles do not have flats on the shank. The best idea it to use a slightly different needle system from the one that machine was originally set up with. Understand that there are needle systems and within that system there are different needle sizes to choose based of the thread you are using and the material you are sewing. I would adjust the needle bar to use system 135x17 for fabric and 135x16 for leather. If using #69 bonded nylon thread, I would use a size #18 needle.
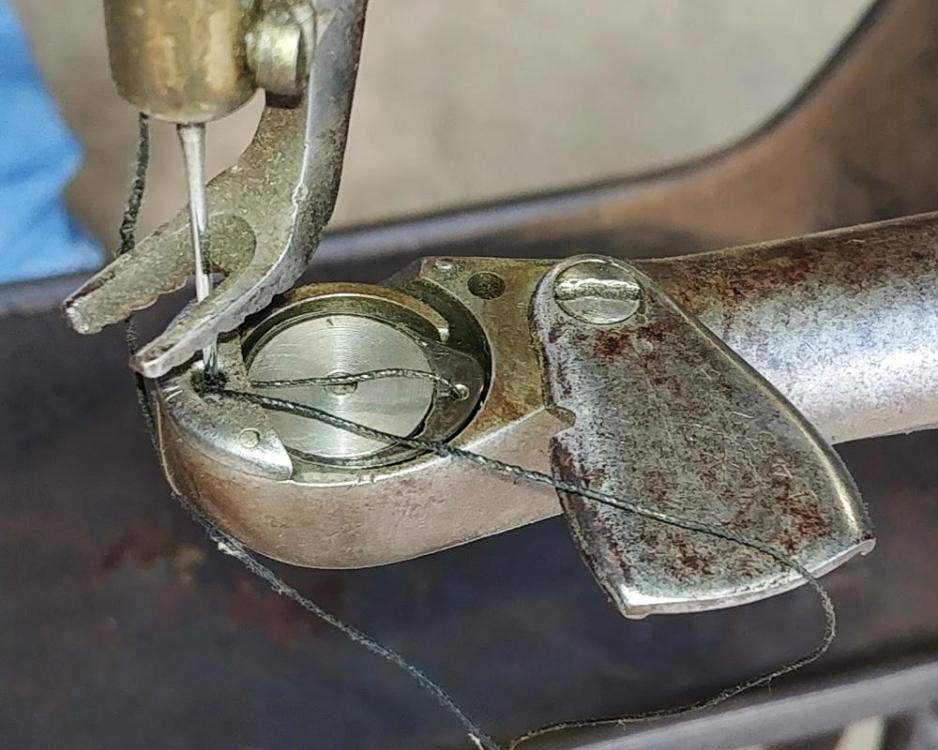
These needles have a long groove down one side and a scarf, or cutout above the eyelet on the other. The scarf side needs to face bobbin or hook side. If the needle is turned the wrong way, it won't form the loop correctly and the hook will not catch it. It won't stitch.
I usually clean the mechanism with denatured alcohol and an old tooth brush, rags, q-tips and whatever I need to get into the tight spots. Get some 'lily white' sewing machine oil and lubricate all turning or sliding parts. Do not remove any felt or cloth pads or cords you find in the machine. Oil them well as they are used to carry oil to remote locations.
Study the manual for this machine carefully and then check the timing of the needle, hook and feed dog.
Oh, did I mention oil?
-
@MtlBiker, here are a couple of links that might be helpful to you.
Cordura, canvas and other denier fabrics. I buy 1000D Cordura, 420D nylon packcloth, pvc coated 600D polyester and waxed canvas from this vender. I have been very happy with them.
https://www.canvasetc.com/product-category/denier-fabric-synthetic/
I was buying some watch band buckles from this vendor and saw they have leather scrap by the pound. I haven't purchased any of their leather yet buy I do plan on giving them a try.
https://www.buckleguy.com/leather-scrap/
Your Consew will sew leather up to around 3/8". Get leather point needles for sewing leather. System 135x17 for fabric and System 135x16 for leather. You will probably want to use bonded nylon or polyester thread weight #69, #92 and no bigger than #138. Get needles that are appropriate for each thread weight and type of material.
-
@Constabulary, that is a very clean setup you did with that stand. Thanks for the photo! I'm going to try to fit a standard 'family' style servo on it since I already have an extra one and modify the original linkage to move the speed controller. If that doesn't work out I'll try using a separate controller.
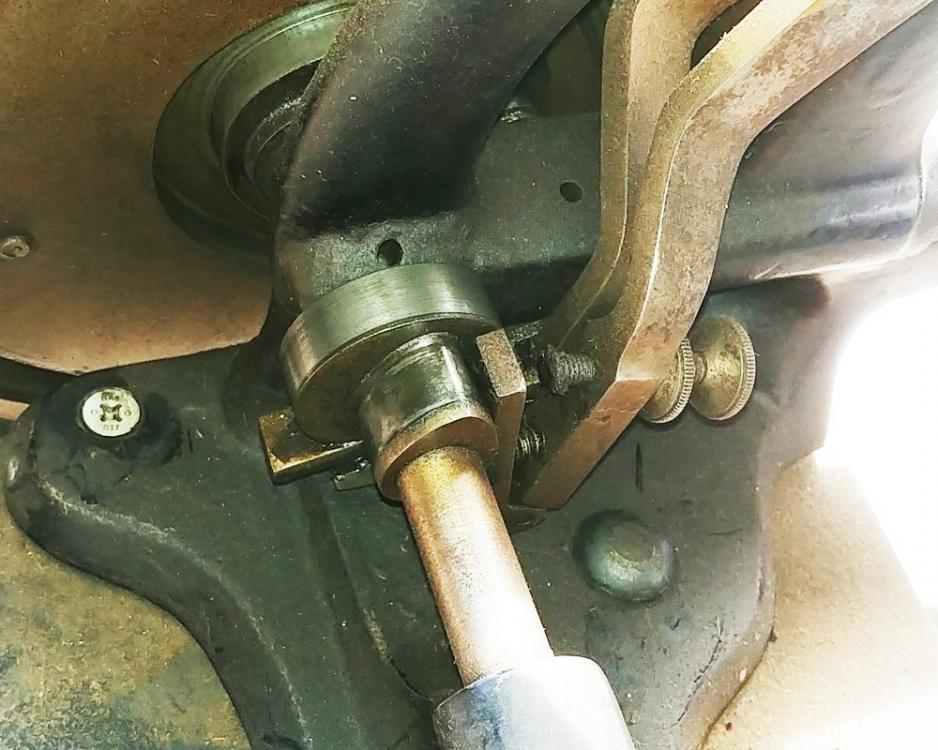
@shoepatcher, this stand has a weird clutch mechanism. Looks like it is rusted up right now. I'll clean it and bolt it as you suggest. I have an extra servo motor like the one you recommended. I wonder why Sutton mounted the motor on an adjustable mount with the adjustment control on the front of the cabinet. (red knob) Why would an operator need to adjust the belt tension? I like your idea to put a wood top on the stand. I will do that for sure.


First sewing machine
in Leather Sewing Machines
Posted · Report reply
Work out a deal for the 1541s with Keystone where you pick it up to eliminate their shipping cost and trade that cost for an upgrade to the Reliable brushless motor. They have them.