ABR
Members-
Posts
25 -
Joined
-
Last visited
Profile Information
-
Location
Coalville, Utah
-
Interests
Leather and wood working, Hiking, camping, cross country skiing, shooting, photography, and fishing.
LW Info
-
Leatherwork Specialty
variety of leather work.
-
Interested in learning about
Tooling, becoming more professional in all areas.
-
How did you find leatherworker.net?
Internet
Recent Profile Visitors
1,710 profile views
ABR's Achievements

Member (2/4)
-
I know this thread if over 2 years old, but I have been doing leatherwork since I was in high school back in the 1960's and have sewn a lot of leather by hand. One problem that I have never had is thread failure. In 1968 I had a lot of time in the evenings to work on leather. I sewed doubled and stitched latigo bridle head stalls with the waxed linen thread sold by Tandy Leather. (they still sell it) I know those head stalls were well used for over 20 years. Over the next 15 years or so I did leatherwork off and on. In the early 1980"s I started doing more leatherwork. I was looking for ways to improve my hand sewing and bought the book by Al Stohlman - The Art of Hand Sewing Leather. The information in that book made sewing leather a LOT EASIER. Al Stohlman used linen thread. As time went on I bought another book from Tandy Leather - Making and Repairing Western Saddles, by Dave Jones. Dave Jones had a few more tips about hand sewing leather which helped. He talked about using a thread made by Ludlow Textile Mills called Waxed Nylon Lacing Tape - extremely strong thread. Towards the end of his book he talked about a waxed polyester thread made by Ludlow Textile Mills. I bought the waxed nylon lacing thread and used it for a while. I went in search of the waxed polyester thread that Dave Jones talked about. I never found it, but I found another thread made by Ludlow called Bulldog polyester Shoe Repair Thread in 6 and 7 cord sizes. It was not waxed and had a long twist like the old Barbour's linen thread and it sews a lot like linen thread. It is easy to taper the ends and thread needles onto then load it with bee's wax. In all of the posts that I have read on this forum, I have never read of anyone using the Bulldog thread to hand sew leather. Ludlow has been out of business for a long time, but sometimes you can still find some of their thread on line. You can still get unwaxed polyester shoe repair thread but it has a tighter twist than the old Ludlow Bulldog thread but still works. I have used well over 1000 yards of the Bulldog thread for hand sewing leather. I had a britchen for a pack saddle come back for a minor repair and the Bulldog thread was in excellent condition after 32 years of use. Over time there is one thing that is easy to learn - that is if you find something you like stock up on that item because in a few years you won't be able to get it anymore. I did exactly that and I still have a supply of Ludlow Bulldog Unwaxed Shoe Repair Thread on hand. It is still one of my favorite threads to use for hand sewing. I use a lot of nylon and polyester bonded thread in my sewing machines and I use bonded nylon and polyester thread to hand sew wallets, belts and small items. I have also started to use linen thread on some items again.
-
I know that the last post on this thread is a little over a year old but I wanted to add this. I have found a way to strop the strap cutter blades and the Schick razor blades that works extremely well. Home Depot has small spring clamps with black plastic on the jaws. They are only about 2 1/2 inches long. Place the blade in the clamp with the sharp edge away from the clamp and use the clamp as a handle and strop the blade to get the edge that you want. The strap cutter and the safety skife work a lot better after the blades have been stropped. The blades will last a lot longer if they are stropped often too.
-
I bought a Ferdco sewing machine in 1992. It is a Consew 206RB-3 I think. I can see where they took the Consew serial number off and they stamped a Ferdco serial number in it. The operating instruction book that came with it is for a 206RB-1but it's not a 206RB-1. My machine looks quite a bit different than yours. Most of the 206RB machines take a 135 size needle but mine uses 190 needles. That's something that Ferdco changed. It is a Ferdco model 990
-
Get the book from Tandy Leather by Al Stohlman "The Art of Hand Sewing Leather" it gives detailed instructions on tapering the thread, waxing and threading the needles.
-
Black Folded Knife Sheaths
ABR replied to ABR's topic in Gun Holsters, Rifle Slings and Knife Sheathes
Thanks bikermutt07, I figured these would be less work than sheaths made on the wood forms, but it is about sixes. I don't like the black thread on black leather as much as I do contrasting thread, but I guess if you like the subdued look it is okay. The drum dyed leather is pretty stiff to work with but after neatsfoot oil is applied it loosens up some. One thing about the Herman Oak leather the edges burnish quite easy. I am going to make some more with contrasting thread. -
-
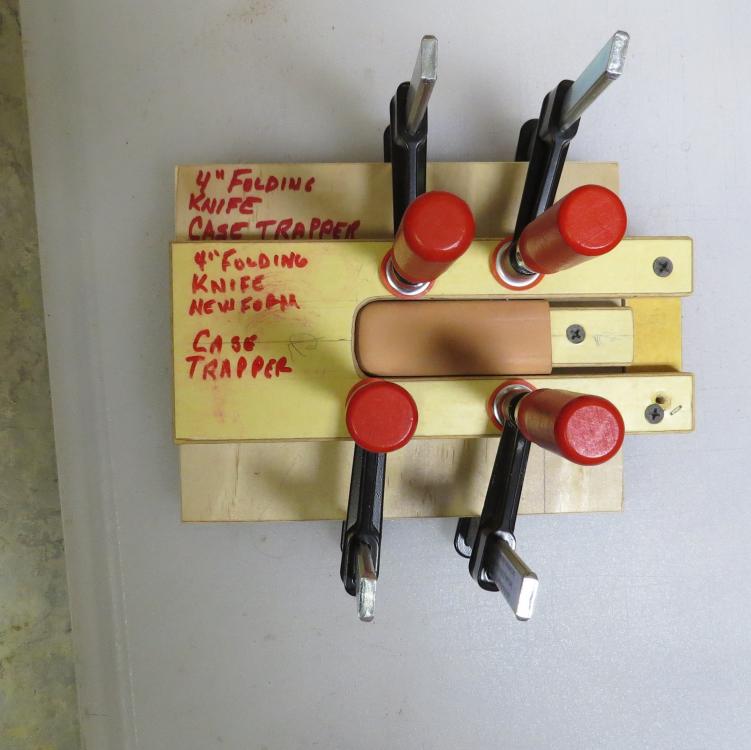
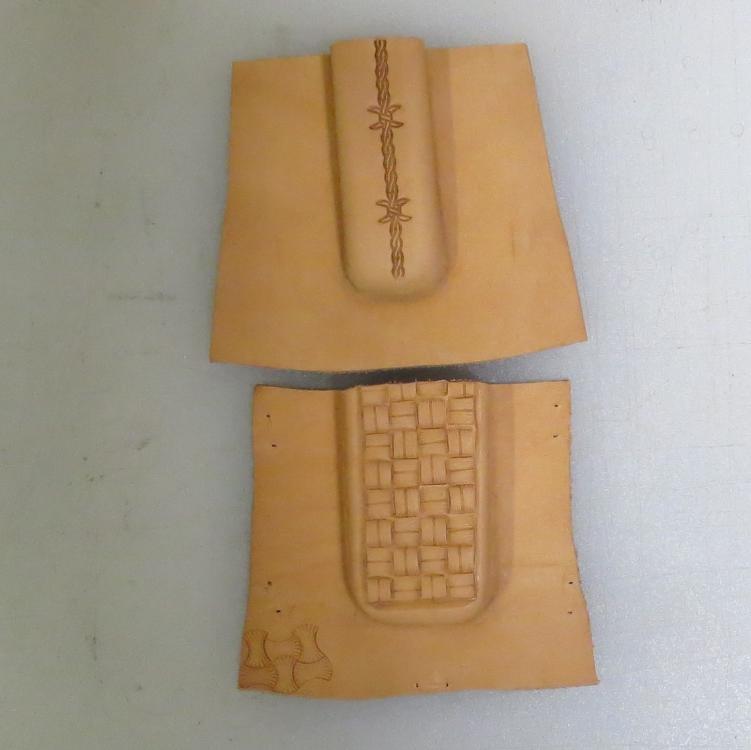
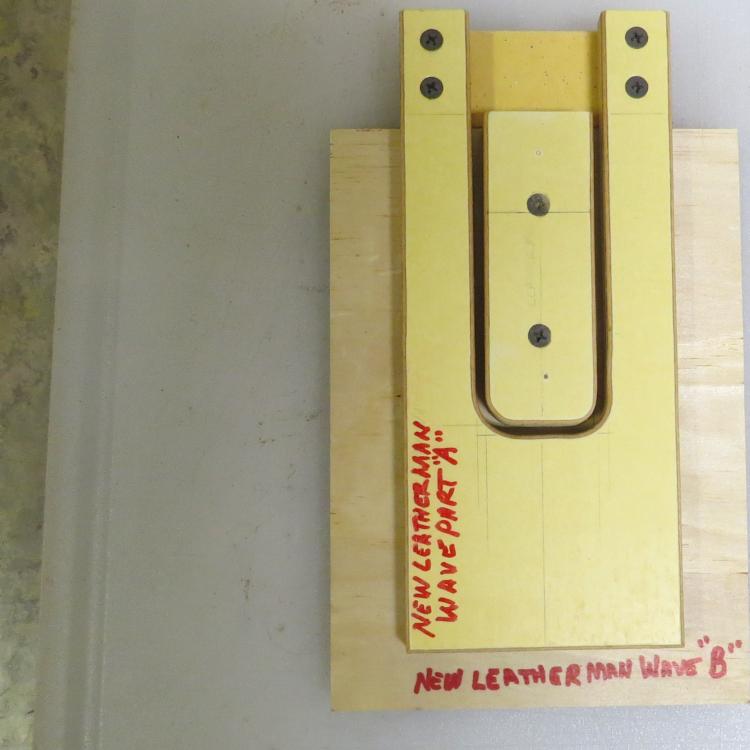
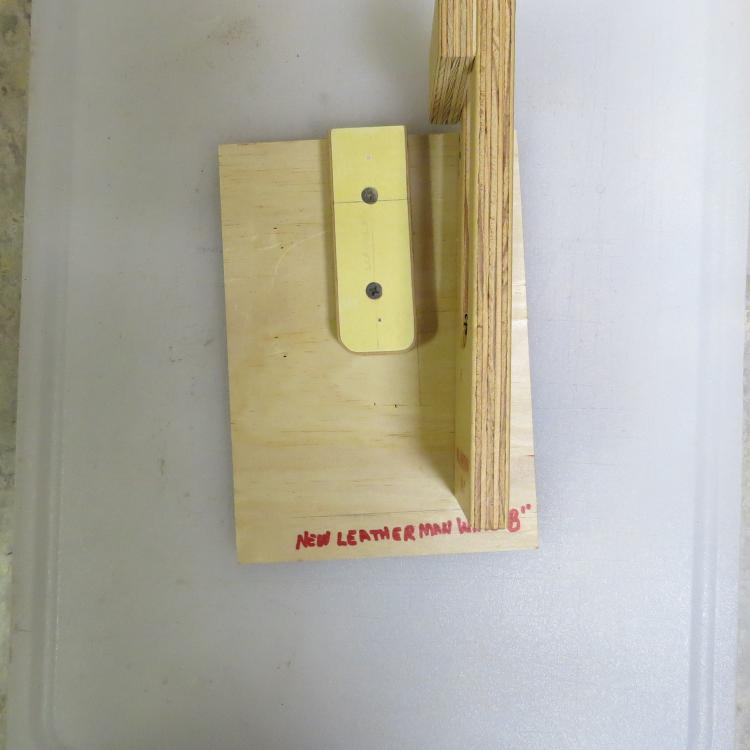
Thanks for your reply Rockoboy, Here are a few pictures of my forms with the (HDO) High Density Overlay plywood. For the base I use 3/4" plywood and fasten the inside form to it. I use the center piece cut out for the inside form. For 6 to 7 ounce leather I make 1 table saw blade width on each side to allow for the leather thickness. If you use 7 to 8 or 8 to 9 ounce leather the cut will have to be more than 1 table saw blade width. Then using a band saw cut the inside radiuses to finish cutting out the inside form. Then cut the outside radiuses to finish cutting the outside form. A piece of plywood is fastened across the legs with screws to hold the outside form to the right width. The piece of plywood fastened across the legs also gauges the outside form to the right distance for the bottom of the leather sheath. I adjust the inside form to the thickness of the knife by adding plastic laminate (1/16")or Masonite (1/8" or 1/4") to the bottom of the inside form then screw it to the 3/4" plywood base. I use a 3/16" round over bit in a router to round the corners where the leather bends over them on the inside form. The rounded corners make a nice looking appearance on the outside of the leather. This is close cutting with the table saw so safety is a major concern. You have to mark where the saw cut should end on the bottom side on top so you can stop before the blade gets into the area for the radiuses on bottom. I case the leather over night then I mold it with my hands and rub sticks so it sits on the form where it should then I clamp it in place. If you are making a pancake sheath the leather needs to be wider to allow for the belt loops.
-
I have used various methods of edge finishing over the years. On good quality vegetable tanned leather I have had good results with just dye and a wood burnishing wheel. Lately on leather that is harder to burnish and good vegetable tanned leather, I use an electric drill to power the wood wheels and I have used Barry King's Quick Slick. It works pretty good. Another liquid that I have found to work really good is Fiebing's Neutral Leather Balm with Atom Wax. Dye the edges (may take more than one coat) if needed and apply the Atom Wax with a dauber and let it dry for a little while then burnish with a wood wheel in the electric drill or bench grinder. Then I apply some Bee's Wax and run it again on the burnishing wheel. You can apply Resolene or Tan Coat over that. Thanks ABR
-
Questions - Shotgun cartridge belt
ABR replied to stormdevil's topic in Gun Holsters, Rifle Slings and Knife Sheathes
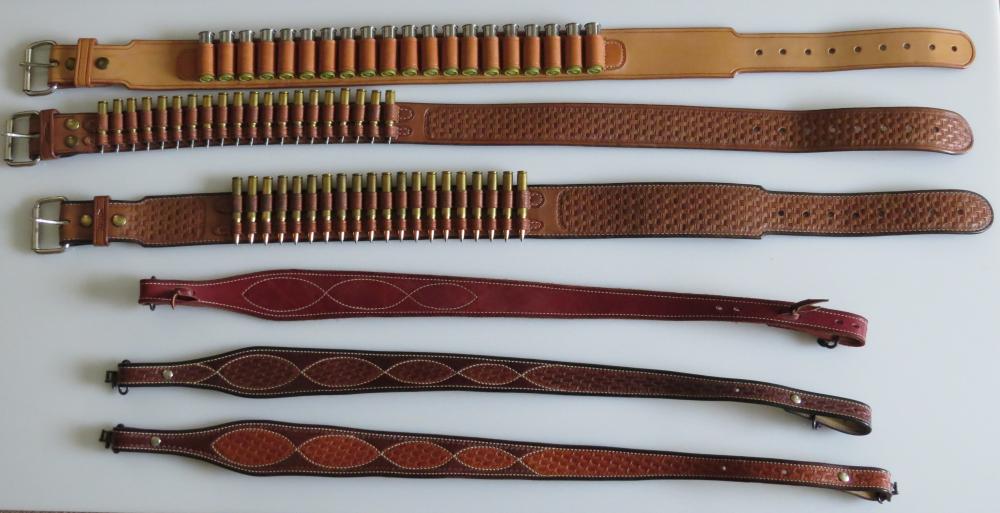
I posted a picture of a shot gun shell belt that I made on March 24, 2018 under Gun Holsters, Rifle Slings and Knife Sheaths. Hand stitched and it holds 20 shells. You may be interested in it. -
I stamp the knife holders while they are on the forms, when the leather is dry enough to hold the stamp shape. My forms are made of maple or high density overlay concrete form plywood. I was a contractor for 40 years and did a lot of concrete work. I have a few scraps of the plywood left. It is available in 1/2", 5/8" and 3/4" and possibly 1 1/8" thicknesses, 4' x 8' sheets. It is pretty expensive. It would last for a lot of pours if taken care of. If you would like I can put some pictures of my forms on the web site. Thanks for your interest, ABR
-
I looked at your youtube videos, you have a nice shop and your finished products on the Wild Harry web site are very high quality. . Mine shop is a small room in our basement, pretty crowded.
-
That is a good looking rifle sling, The lining on mine was made from chrome tanned cow hide, tanned here in Utah by a tannery that is out of business now. We used to be able to have our own hides tanned there. The length and range should work good.
-
Vertical Wallet Card Holder
ABR replied to ABR's topic in Purses, Wallets, Belts and Miscellaneous Pocket Items
Using Tyvek is a real innovative idea. It is a lot more durable than light fabric and holds a crease really well. You can buy a smaller quantity of Tyvek on Amazon so you don't have to buy a whole roll. There is no movement in the Tyvek so there is no sound or noise, it is creased real flat. There is a story about how I came to sew the way I do. I don't have as much slope in the stitches as the British Saddle stitch, but I only use a pricking iron on thin soft leather and I pierce the holes as I go one at a time using the smallest awl blade that will allow the needles to go threw leather without catching on the leather. I also taper the ends of the thread so I can use smaller needles. On the 277 thread I am using a #4 harness/saddlers needle. -
Vertical Wallet Card Holder
ABR replied to ABR's topic in Purses, Wallets, Belts and Miscellaneous Pocket Items
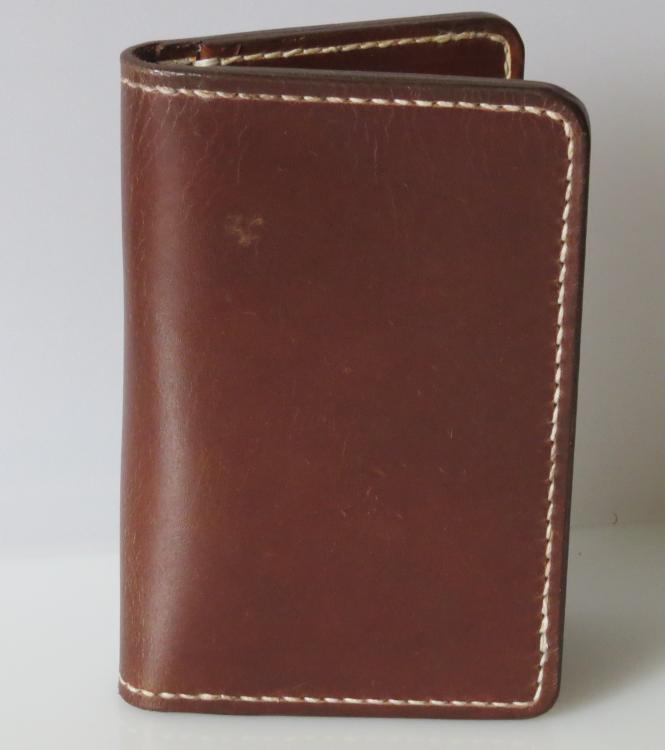
I used the card holder system that Aaron from Maker's Leather Supply uses. It is Tyvek Building Wrap bonded to the leather with 1/4" double side adhesive tape. Aaron doesn't sew the Tyvek to the leather, but I just want to make sure that the tape doesn't let go in the future some time. You can see the system Aaron uses on his Youtube videos under Maker's leather Supply. He also sells the acrylic plastic templates for 3 different wallets, very professional made with a laser. Here is a picture of the back. I didn't make the beat selection of the horse hide and there are a few imperfections in the leather. The Horse Butts are seconds so there are some grain issues in some of them. You can see a better example of Horse Butt leather on another post I make under Passport Card holder wallet. Thank you ABR -
Passport holders
ABR replied to ABR's topic in Purses, Wallets, Belts and Miscellaneous Pocket Items
I forgot to include in the description that I purchased the acrylic plastic templates for Passport Holders, Bifold Wallets and Roper Wallets from Aaron at Maker's Leather Supply. The templates save all of the time for trial and error and making prototypes. They are cut out with a lazer and are very high quality. He has an excellent system for card holders using Tyvek building wrap and 1/4" double stick adhesive tape. I sewed the Tyvek just under the card slot with #92 thread so it would never come off. That may not be necessary but just to make sure. Aaron has Youtube videos showing how to use the templates under Maker's Leather Supply. ABR


