BondoBobCustomSaddles
-
Posts
1,033 -
Joined
-
Last visited
Content Type
Profiles
Forums
Events
Blogs
Gallery
Store
Everything posted by BondoBobCustomSaddles
-
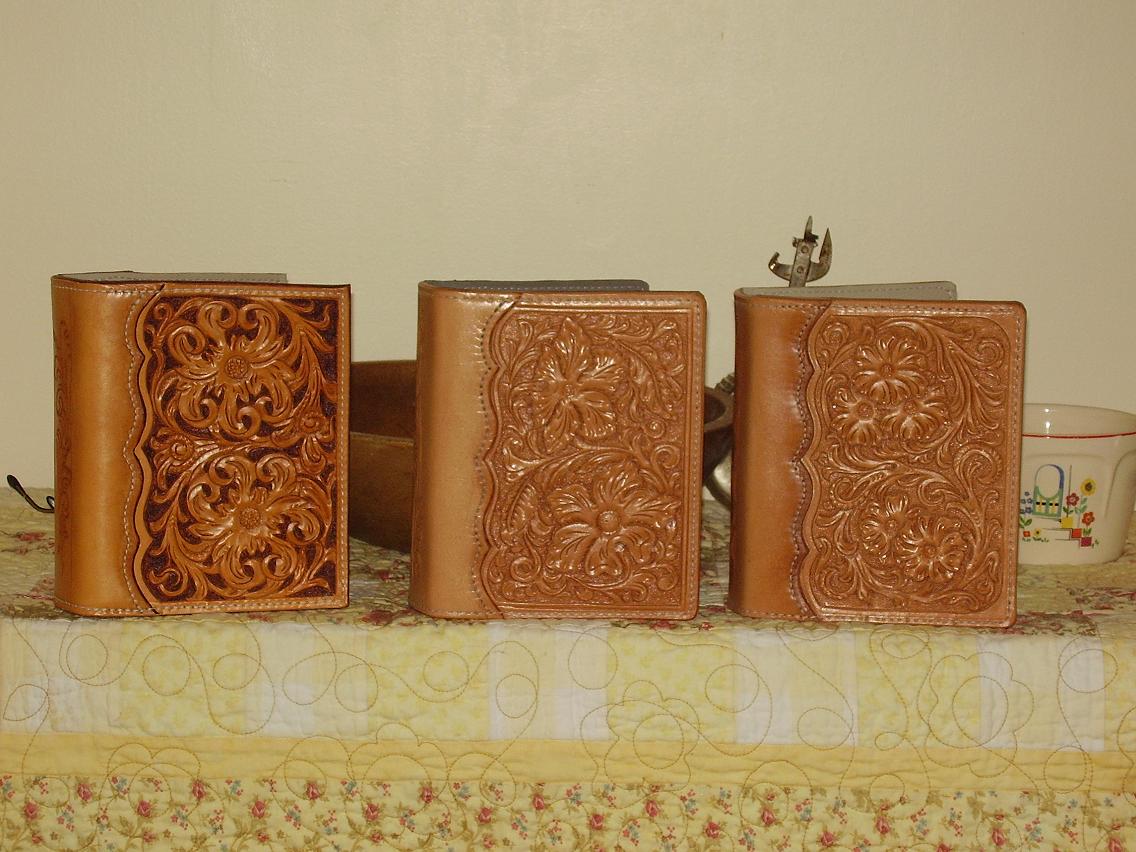
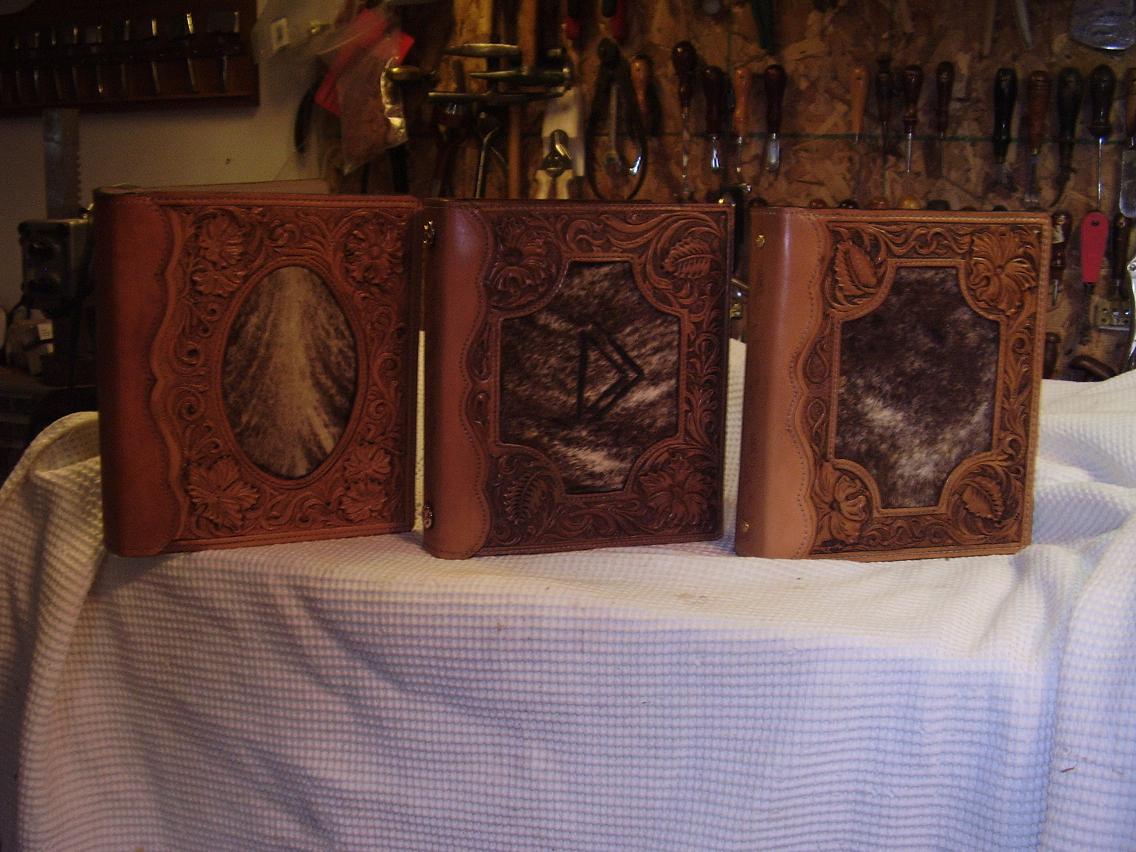
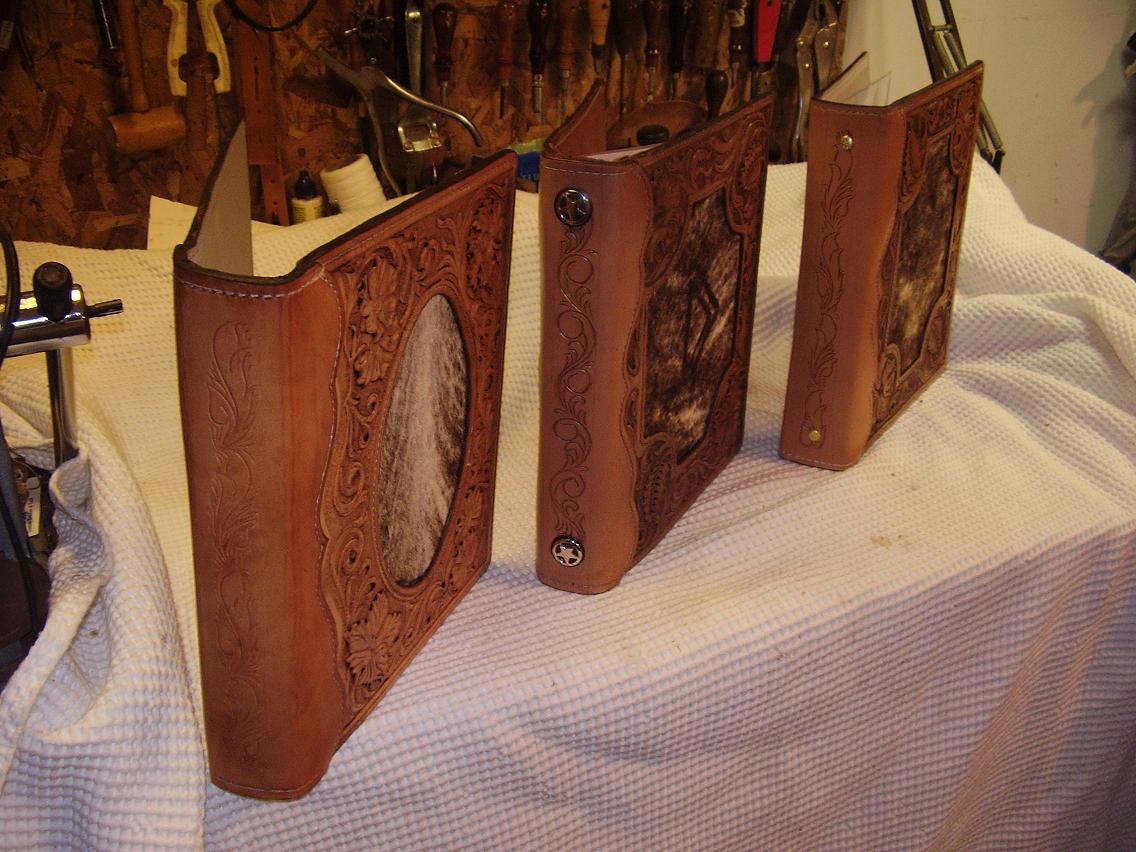
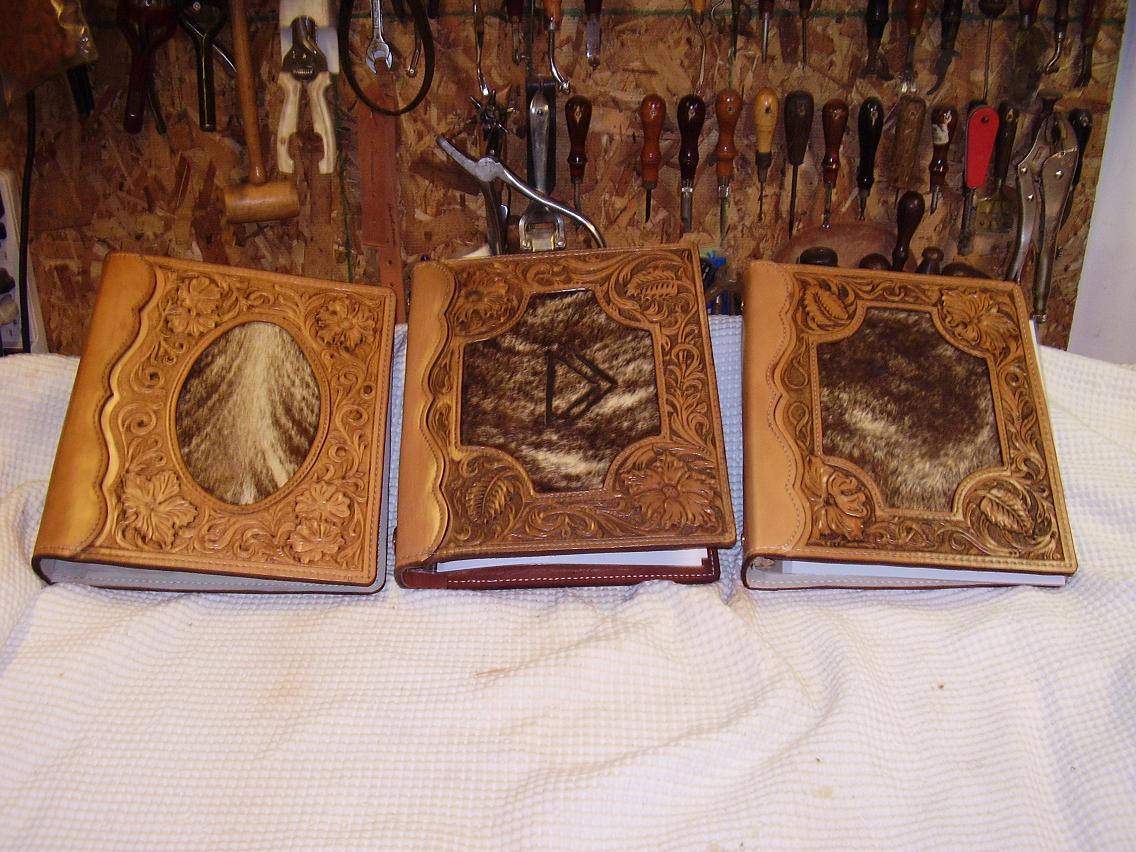
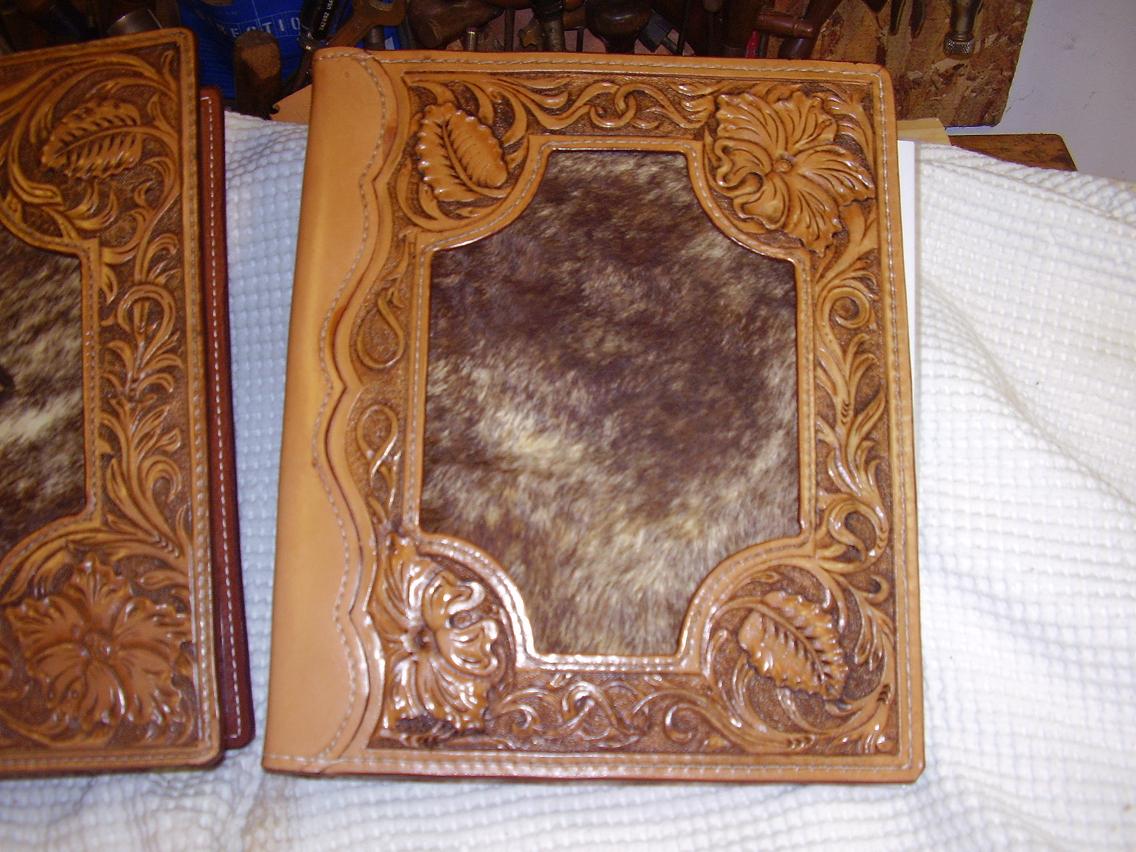
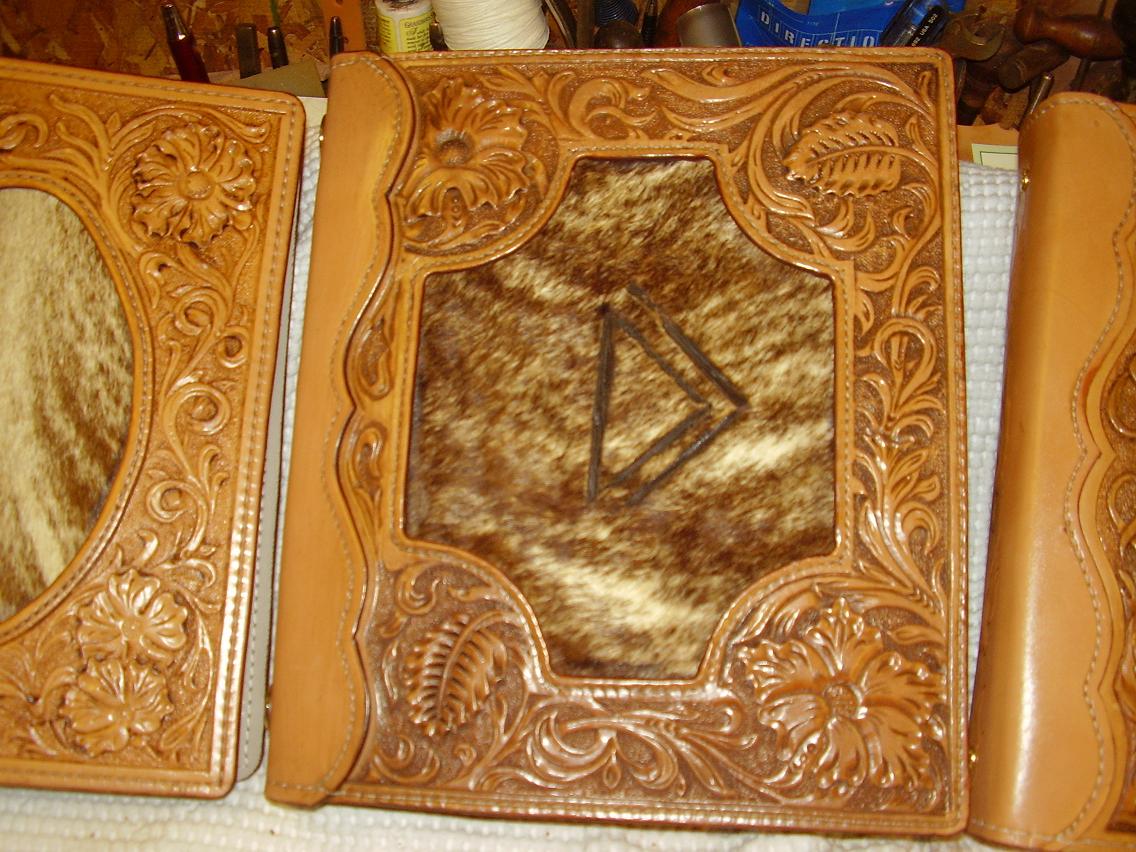
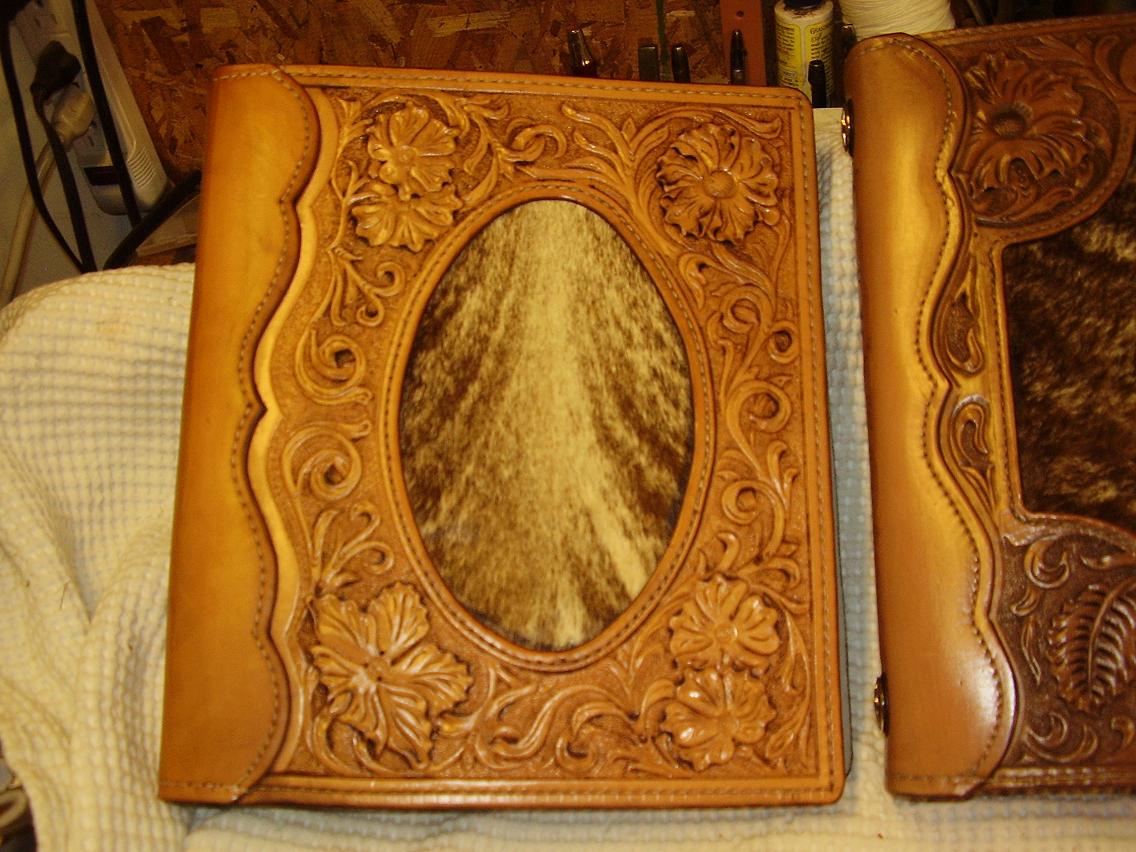
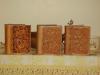
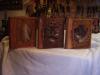
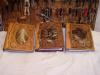
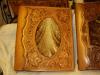
Hi Y'all, recently I finished an order of photo albums for Christmas, and I posted them. Well, She came back and had me do 3 more in a 5X7 size. Here are the latest ones. Thought that I'd post these also, hope you like! Bob
-
Boot Strap Award
BondoBobCustomSaddles replied to Leatherimages's topic in Marketing and Advertising
Hey Bob, this is no surprise to me. You have always been " top drawer" in my book! Can't tell you how many times I set down to do a project, and spend a little time looking at your work for inspiration. Congrats! Bondo Bob -
Getting A Flat Plate Rigging Level?
BondoBobCustomSaddles replied to bjr's topic in Saddle Construction
BJ, working to make sure your rigging is balanced, square and level, is the way it should be done. There are many different ways to skin this cat, and most of them work well as long as you take care. There is a section in the Stohlman books that covers it very well. A little tip. when you get your tree put it on the horse and make note what angle it sets on the horse in relationship to the ground. Then when you put it on your draw down stand, make sure it sits in the same relationship to the floor as it did on the horse. Likely as not, it doesn't. When I am setting up riggings and other things I have a fabed spacer made from the tree out of an old english saddle that I put between the stand and the tree that brings the tree to the same relationship with the floor as if it were sitting on a horses back in the position it should be just behind the withers. Hope that helps. Bob -
Particle, that's funny, your wife sounds just like mine! She is always saying the same thing to me. Usually, I will skin the price down a little if it is someone I know well or a repeat customer, but; that is always where I start. As for my wife, on the other hand she is a quilter and I wouldn't even begin to tell her how to price her stuff, she is always giving it away! Go figure!!! Regards! Bob
-
Newest Christmas Present
BondoBobCustomSaddles replied to BondoBobCustomSaddles's topic in Saddle & Tack Maker Gallery
Hi Joel, hope you had a Merry Christmas! Thanks for your comments, and to answer your questions, first, the tree came from Bowden. They are a production house, however they also make trees on special order using the templates that I send them, and that has always worked for me. i agree that I have to do a lot of finish work when they come out of the box, however they have always fit perfectly, and are priced in a range my customers will pay. I would love to use Rods trees of some of the other truely custom makers, but; so far my customers haven't opted for the higher level trees. Second I will be glad to send you the pages, I think I am going to try to scan the pages and put them on the sight for all. Bob -
Newest Christmas Present
BondoBobCustomSaddles replied to BondoBobCustomSaddles's topic in Saddle & Tack Maker Gallery
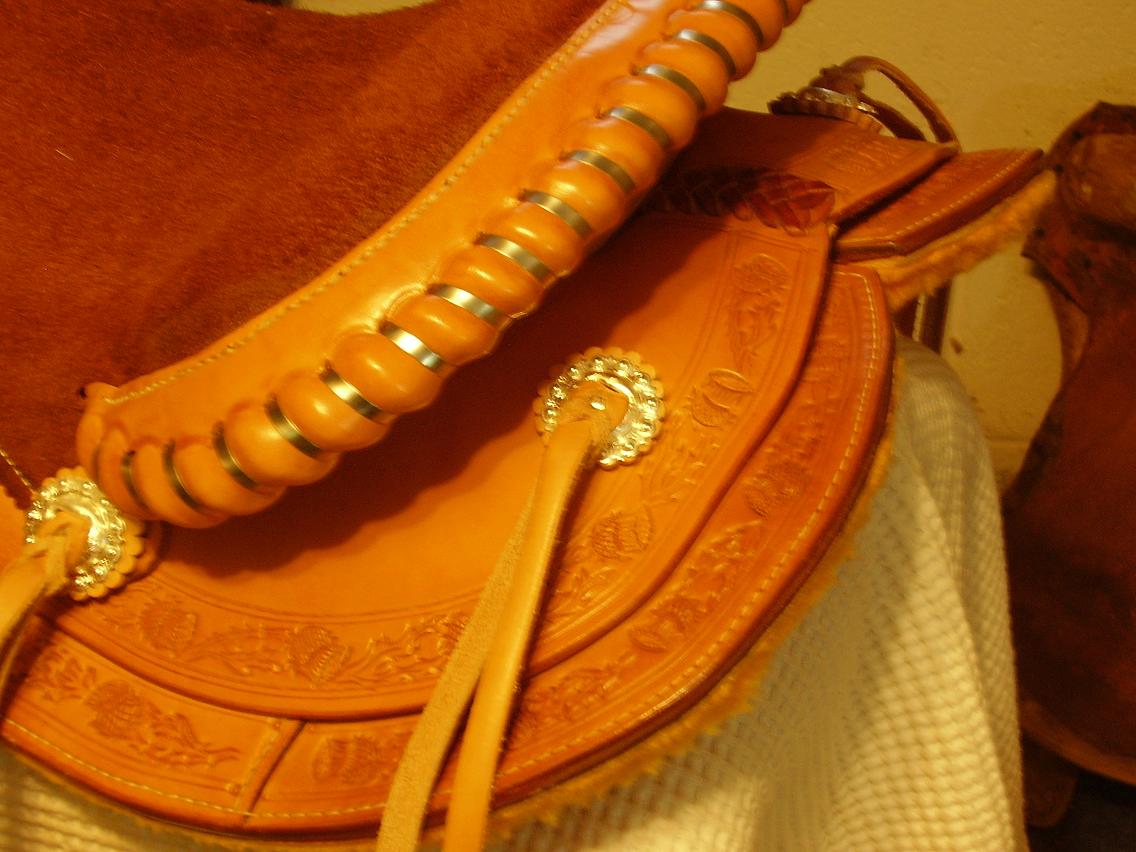
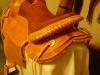
Thanks Rohn and CW for the comments. CW, lacing and getting it to look uniform can be tricky. I was lucky enough to contact Ann Stohlman a long time ago and ask her about that very thing. Al had passed before he got the book finished that had the details in about how to do rolled rope edges, however; Ann had the hand written pages that detailed the procedure and she put me in touch with Bob Pleyton of Wilsaw Montana, between them they sent me not only Al's notes, but; excerps from some other books on how to do it . If you PM me with your address, I will copy them and send them to you. Regards, Bob -
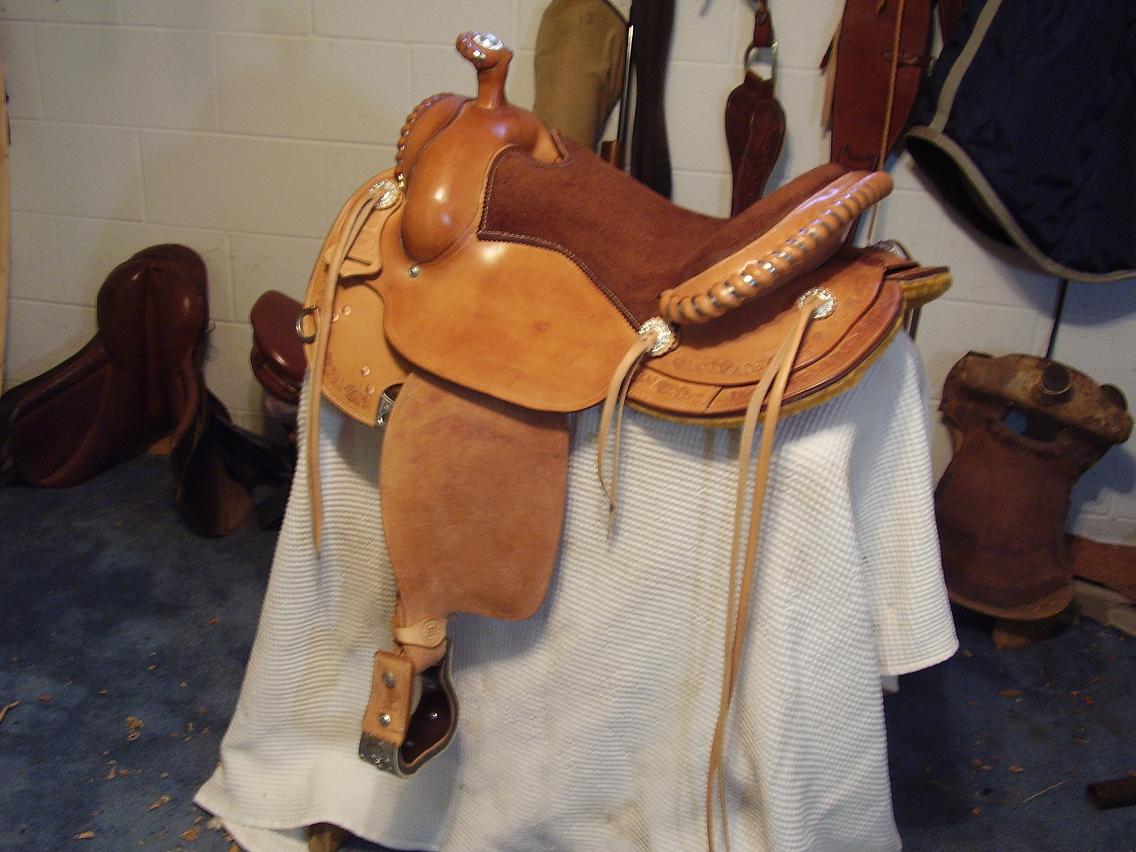
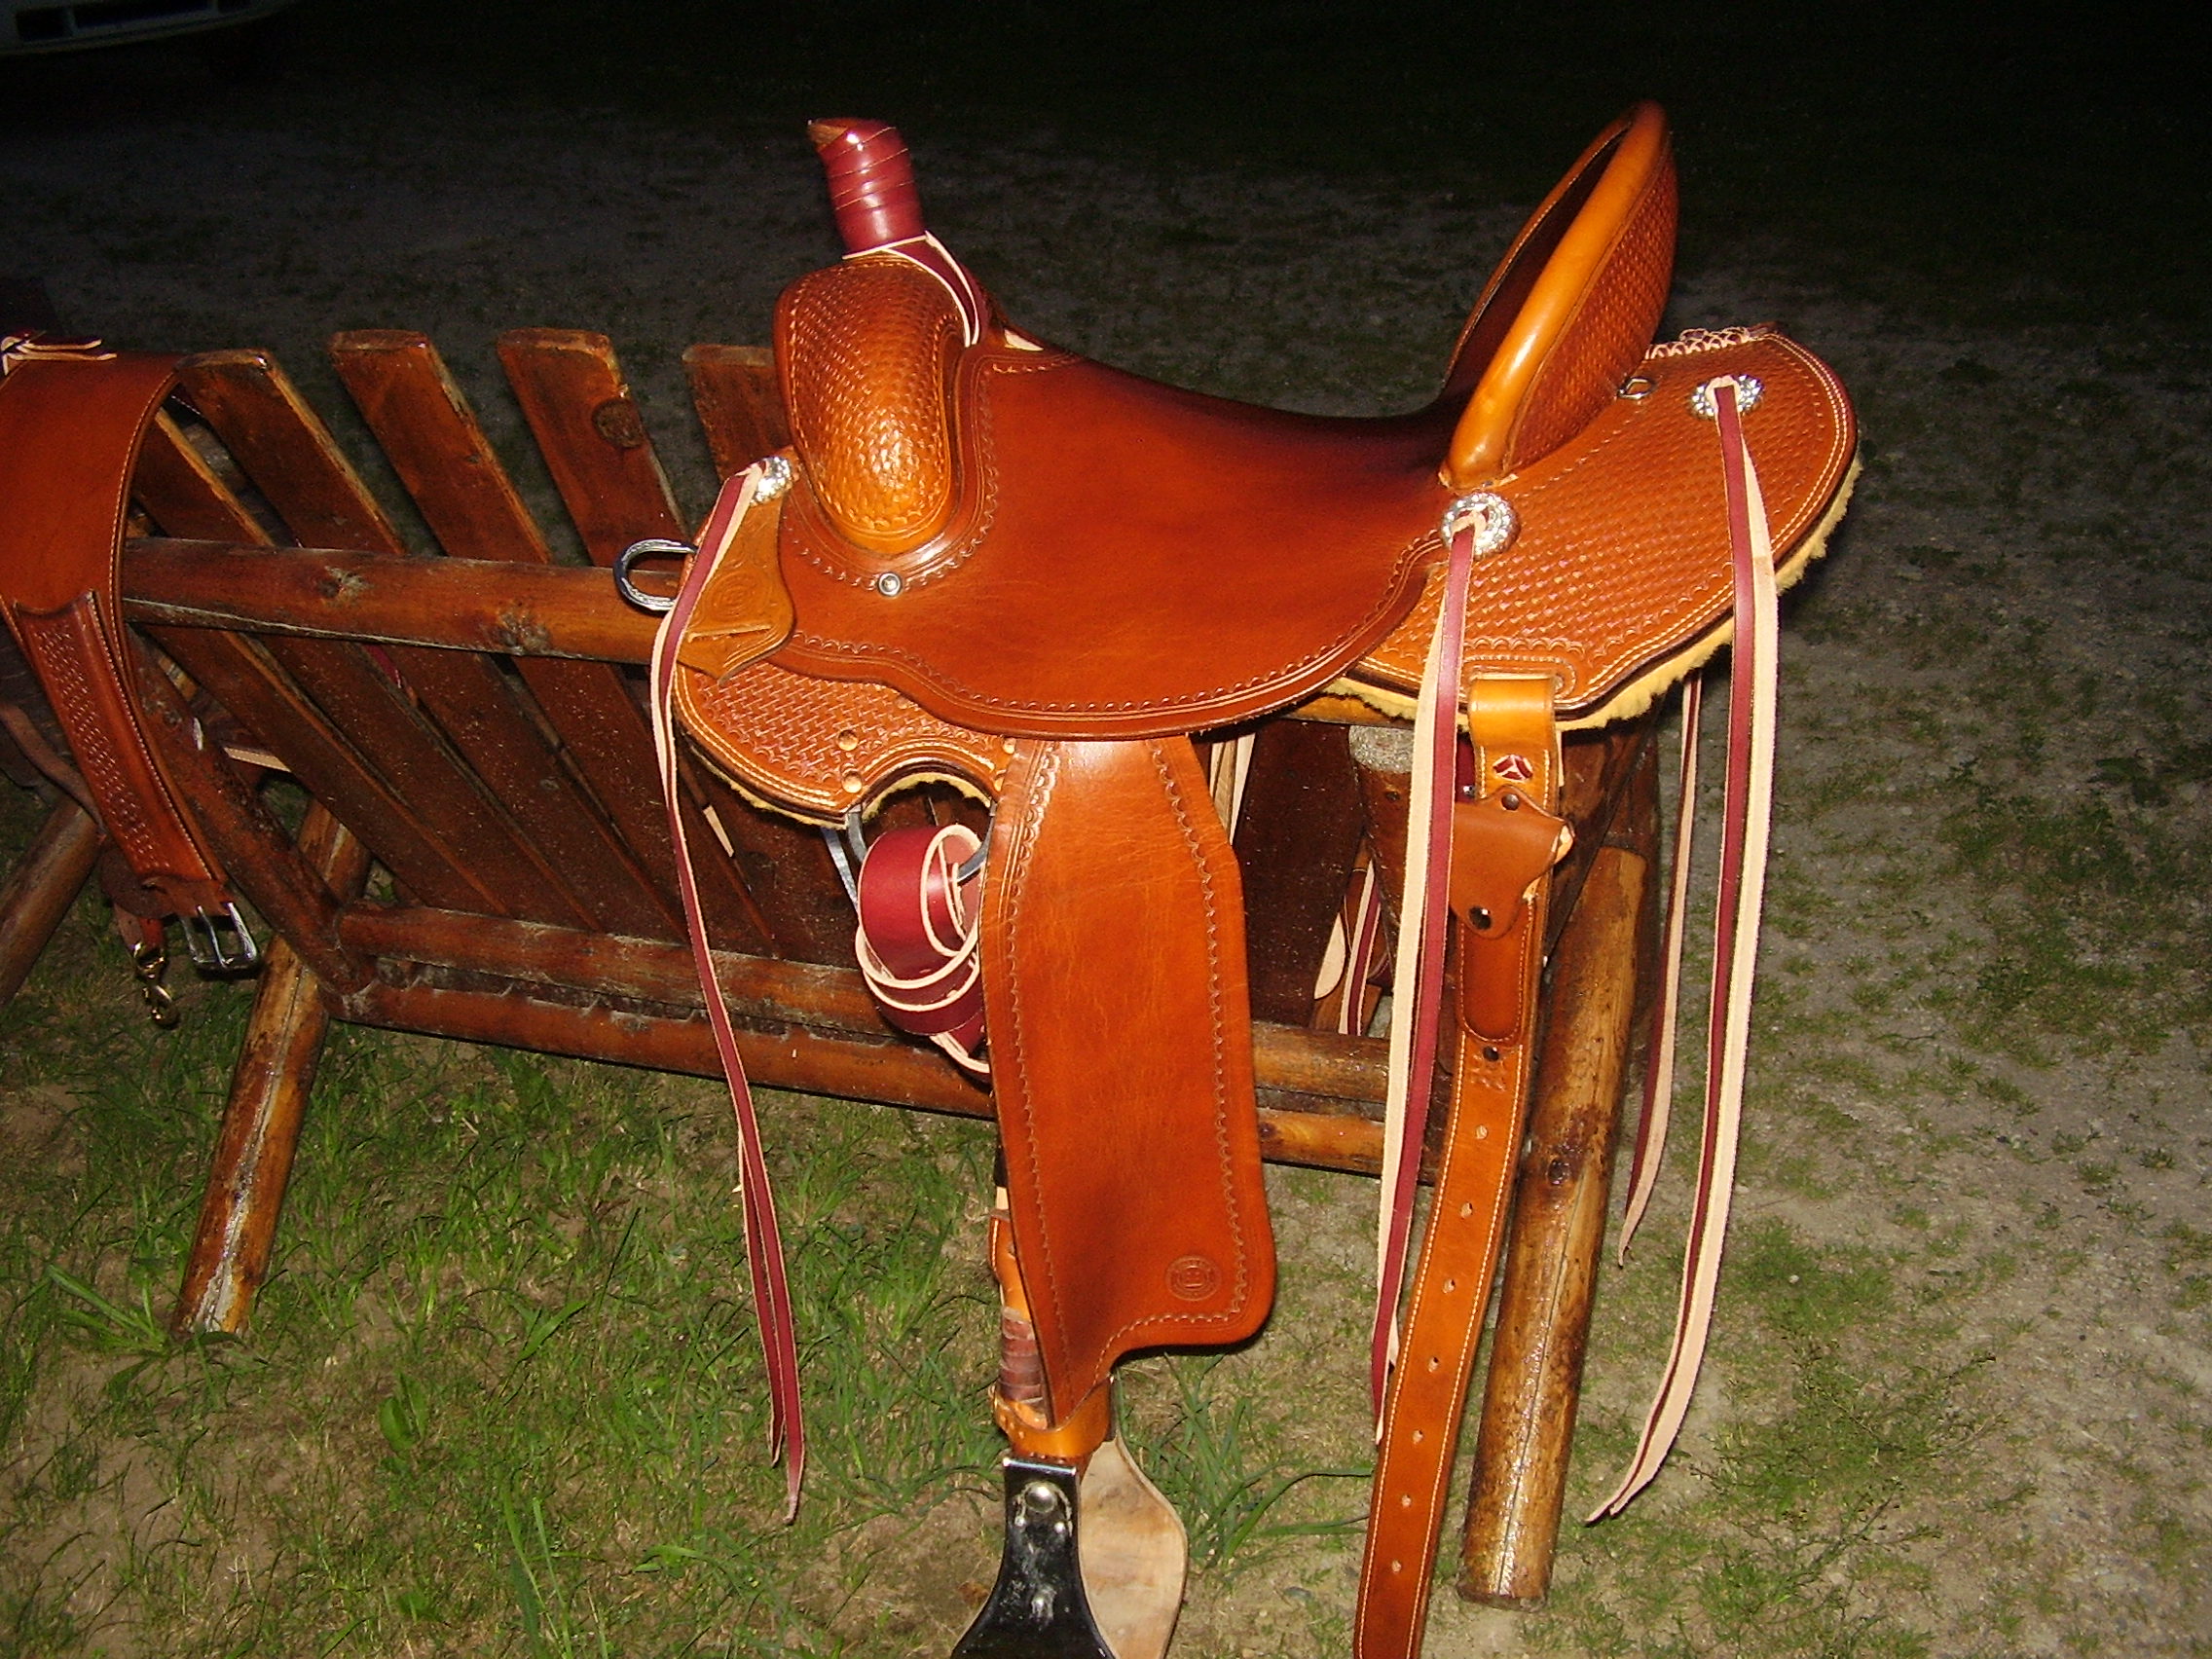
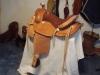
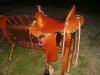
Well, like everybody here I have been busy for Christmas also. Here is a saddle I just finished for a lady for her Fjord. She was having trouble with getting a saddle to fit. Nothing special here, except that she wanted a border pattern that looked like thistles, and she also wanted rolled rope edges on horn, cantle and fork. Just got it finished and it is delivered tomorrow. Now I am caught up , for now! Hope everyone had a Merry Christmas. Regards Bob

-
CW, very nice work, especially for your first. I agree with JW as to what he thinks about the skirts. As for the fenders, something that I do when I make a saddle for a youth is make 2 sets of stirrups, one set for now and one set for when they grow up some. Not a lot of extra work, but; well worth it . One thing I think I see is the alignment of the rear jockeys with the centerline of the saddle. Perhaps just the picture. That happens to me sometime when I take pics, they just don't accurately reflect what's there. If they are off a litte, just wet them dome, and really draw spike them in place , that will serve to center them, and at the same time, pull the edge of the jockey down tight to the skirt, for a nice finished look. When I cut the front seat cover to form around the swells, I always leave at lease 1/2" extra inch because no matter how careful you are, once you bevel the under side at the edge of the cut it really drops down more than you think it will. It appears as if you got really close to showing one of the tacks that holds your fork cover on at the back on the left side. Leaving extra will allow you to tune after you bevel and finish the edges. Bottom line, if we have to nit pic that close, you are doing a really fine job. Bob
-
3B Saddle For Traveller
BondoBobCustomSaddles replied to D.A. Kabatoff's topic in Saddle & Tack Maker Gallery
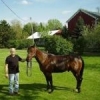
Very nice and as usual clean!! Good job Darc, The pics of the saddle on the horse tell it all. It looks like it "grew" on him naturally. Bob -
Little Cowboy's Christmas
BondoBobCustomSaddles replied to CWR's topic in All About Us and Off Topic
Some day he'll be all growed up, and bragging about the saddle his dad made him back in "011". Nice work!! Always good to see youngsters in the saddle. Bob -
Particle, I can only tell you what I do. I charge a set $per Hr, plus material cost. If they want it, that's what they pay, otherwise, I just won't do it. If you have 2 1/2 hrs in one then you charge accordingly. For instance, 2 1/2 hrs @ $30 /hr plus $20 for material equals $95. If it's a close friend or some special reason to, you can discount it, but; don't sell yourself short, your labor is worth it. Bob
-
Nice work Particle! I like the way you have your patterns planned out, and the way they go together with the colors, and stitching as accent. Well done, nice professional look. Bob
-
Nice work JW! Nice and clean and not cluttered. I always like to look at your work, especially when it something you've done and it is sitting on top of the stout horse of yours. They just seem to go together. Bob
-
Bowden Or Double C Tree?
BondoBobCustomSaddles replied to Horsecloud's topic in Saddle & Tack Maker Gallery
Blake, sorry if what I said offended you. I am guessing that you live in an area, and have customers that use there horses as a living. These people tend know from experience, what they want, how it should fit and so on. I would have no problem building a saddle for some one like that, however; up here, most of the horsemen are weekenders, that live and work in the auto or finance world and only ride for pleasure some of the time. They don't know what they really want or need and read all the adds from saddle fitters and the like and think they know all there is to know and expect you to make it right because that is what they are entitled to. I personally have not had a problem with my customers, but; I am very careful to make sure that they understand what they are getting before I take an order. I have on the other hand seen some guys up here that have ended up in court for exactly what we are talking about. Their customers "forget" that they were supposed to be responsible for the fit and so on. Unfortunately we live in a world where some folks have gotten used to depending on lawyers to correct their mistakes! Not a good thing, but; that is the way it is. Bob -
Bowden Or Double C Tree?
BondoBobCustomSaddles replied to Horsecloud's topic in Saddle & Tack Maker Gallery
There are some very good tree makers out there, Rod and Denise are in the top tier. Many others on this web sight also are in that level. As for Bowden, they are a production house, however; they will make your tree from templates that you send them. Their quality is decent and with a little prep make really good saddles. Prices are another thing. If you have a custom tree made from those that specialize in it, you will pay in the $600 range and wait about 6 mos. On the other hand from Bowden or some of the other middle of the road makers, you are in for about $300 and 8 to 12 weeks. I have used Bowden trees off and on for some time and like I said with a little prep, you get a good tree. I would personally rather use Rod and Denise, or Darc , or some of the others because when their trees arrive there is no prep, however; it is a matter of what your customer or your are willing to pay. As for buying your own tree and then having a saddle maker build you a saddle on it, well it is kind of like buying your own parts and going to a mechanic to have him fix your car. Good luck! You open up a can of worms. Because I guarrantee my work, and my customers that they will be satisfied with the end product, I do not use others "parts". It is my responsibility to make sure that a saddle fits and is what the customer is what they ordered. Hope this helps. Bob -
Photo Albums
BondoBobCustomSaddles replied to BondoBobCustomSaddles's topic in Books, Journals and Photo Albums
That is exactly how I did it. Brilliant minds think alike. Bob -
Photo Albums
BondoBobCustomSaddles replied to BondoBobCustomSaddles's topic in Books, Journals and Photo Albums
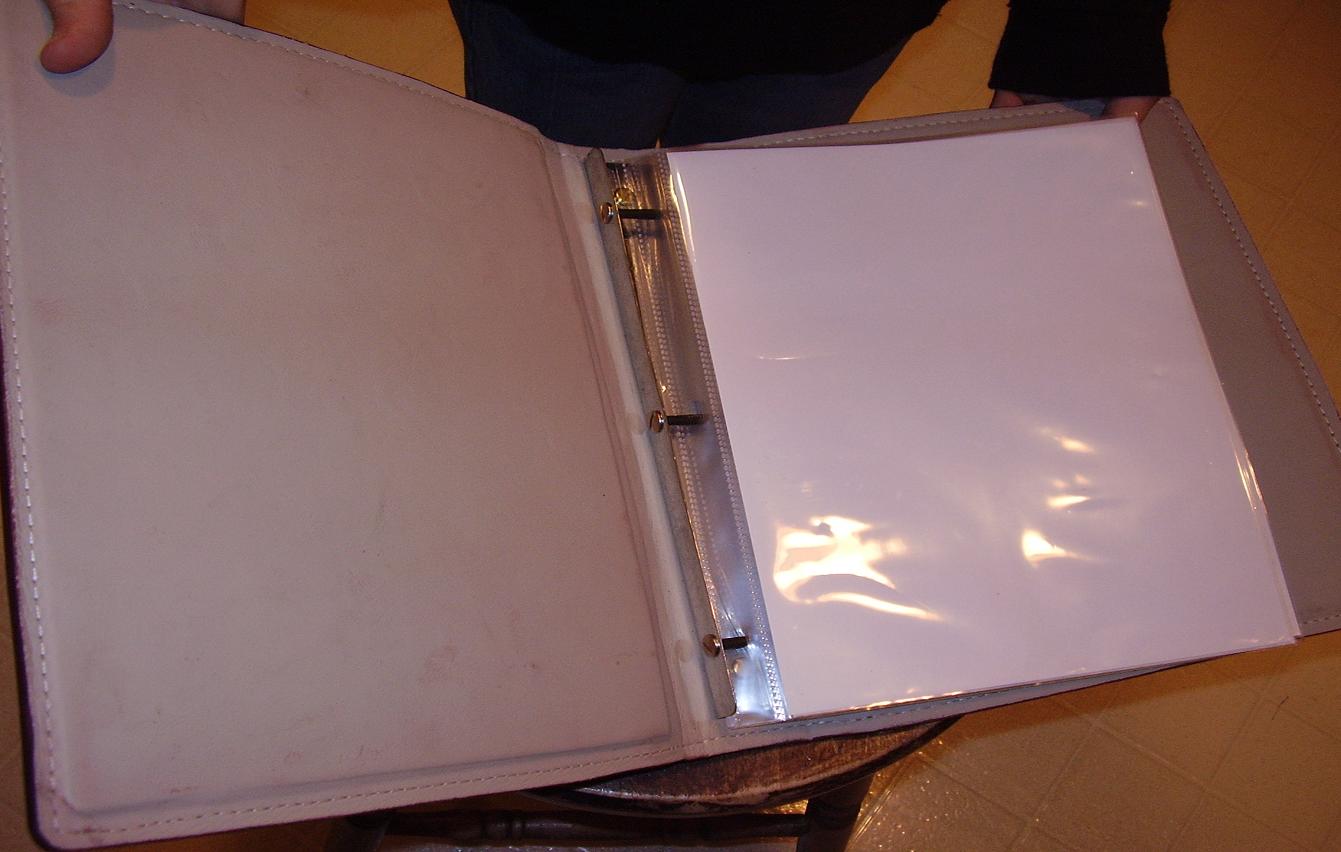
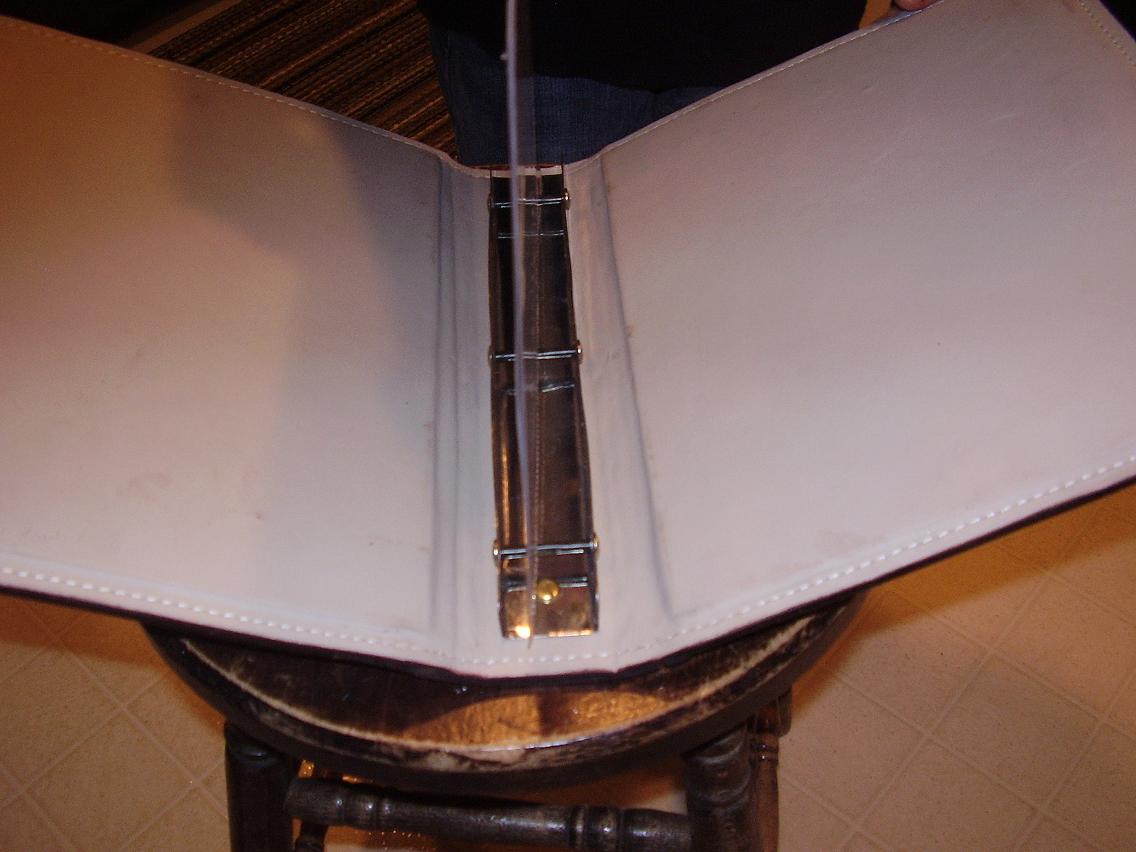
Well Pete, I will try to explain how I did it, and hope it makes sense. I first measured out and cut the front and back covers. then did the layout and tooling for each. After that I decided what width I wanted to make the spine allowed and additional 1/4" on either side of that then allowed the amount needed for the "scallop" after fold that covers the front and back covers. As for assembling, once I knew what width I wanted for the spine, (in this case I ended up making my own out of some sheet aluminum, the width plus 5/8" for each flange, then breaking the flange on each side) I then laid it out on the leather and grooved the "spine cover" on the inside where I want the whole thing to hinge/fold. Where the front and rear covers overlap under the scallops, before I glued and stitched it together, I skived it almost to a feather edge so the bulk would not interfere with the fold of the flange when folded. Finally, I ended up using a single piece of furnature / garment leather for the inside. Between the inner cover and the outer covers I used a piece of stiffening board glued in and then stitched. Once that is done, I then assembled and added the flange. I will try to get a picture and add it to this post of what I mean by the flange. I am sure you will have more questions as this makes perfect sense to me, but; that is all together a horse of a different color! I am going to go down to the shop and take a pic of what I am talking about and post it in a few minutes. Bob Ok, here goes, I hope I got the sizing right.

-
Photo Albums
BondoBobCustomSaddles replied to BondoBobCustomSaddles's topic in Books, Journals and Photo Albums
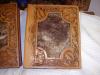
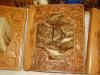
Thanks Leatherworker. As for the thickness of leather, like I said in the post, mostly I make saddles, tack and chaps, except when that little outlaw in side of me commits me to make something, when I am asked and can't say no. After I have said sure I can do that, then I use what I have around which is mostly 12/13 oz, 13/14, and chap leather. Mostly that is what I use, and when I need something less, I skive it. In the case of these albums, I used 12/13 oz mostly for the covers, and the inards on the one with the brand on it was 7oz buffalo, the other two were covered inside with 2/3 oz uppolstery hide. This is the first time i made these. If I were going to make a lot of them rather than skiving the edges down to give the less bulky appearance, I would just order leather more appropriate for the job. I would probably use 8/9 on the covers and 2/3 on the inside covers. Also I did not like the snap ring holderes ao I made my own with some 1 3/8" aluminum channel I made. Bob -
Hi All, I haven't posted any work in a while. I've been really busy, but; just no time to get anything posted. This year I had some orders for photo albums, which I have never made before, however; since it was a friend that wanted these, so I stopped working on saddles long enough to do these for him. Thought that I would post. Sorry about the quality of the pics, just one of those things i still have to master. At least I think that I have finally found out how to make pics smaller. Hope that he will like them. He hasn't seen them yet. Bob

-
In keeping with what Bob said, the round knife is the most used tool in my collection. I use it so much for everything, that I don't even have a holder for it, it just sits right where I can get it, next to the beer! Bob
-
OK Auriele, I can only tell you what I do, and that may not be the same as you were taught, but; then there is always more than one way to skin a cat. When I fit the skirts to the tree, I really "block" the skirt leather deep around the edges of the tree, and then plug the underside to bring the bottom flush with the rest of the skirt. That way, there is a deep pocket for the tree to set in and the top leather or Jockey is flush at the top and there is not a big "lump" where the tree is. Here is a pic of a saddle that is not a barrel racing saddle, however: at the owner's request it was made similar to one and shows how it looks when completed. Hope that helps. Bob
-
Silver Covered Swell And Horn
BondoBobCustomSaddles replied to Go2Tex's topic in General Saddlery Discussion
I am only guessing here, but; having been a tinsmith back in the service, and looking at the available pics, I would guess that that seam that runs down the center of the fork from side to side is actually a joint that is fitted and tapped into place once the front half and back half fit the fork, something like the seam on duct-work for your furnace. Again, this is only a guess. I am sure that Keith or one of the guys that worked in some of old shops can shed some light on it. Bob -
Aurelie, a lot of questions that you ask are talked about in the books from Al Stohlman. While you were taught by someone else, and his/her methods may not be the same as Al's, you will find that with a little common sense applied to both your teacher and Al's instructions, and how they match/blend with what you were taught, you will be able to complete your saddles with that level of professionalism you are searching for. Good Luck ! Bob
-
Briefcase / Belt Combo Set
BondoBobCustomSaddles replied to hidepounder's topic in Satchels, Luggage and Briefcases
Bob, every time I see a new project you do, I think, wow he's outdone himself again! Looks like I am going to have to come up with a new comment for this work! They say that copying someones work/art is the most sincere form of flattery, guess that will be my goal on the next project, and I am going to do it just like yours! ;~) As always, thanks for posting! Bob -
Very , very nice. Please post more pics of your work. I always love to see what everyone is doing, It gives me inspiration. Bob