MtlBiker
-
Posts
850 -
Joined
-
Last visited
Content Type
Profiles
Forums
Events
Blogs
Gallery
Store
Everything posted by MtlBiker
-
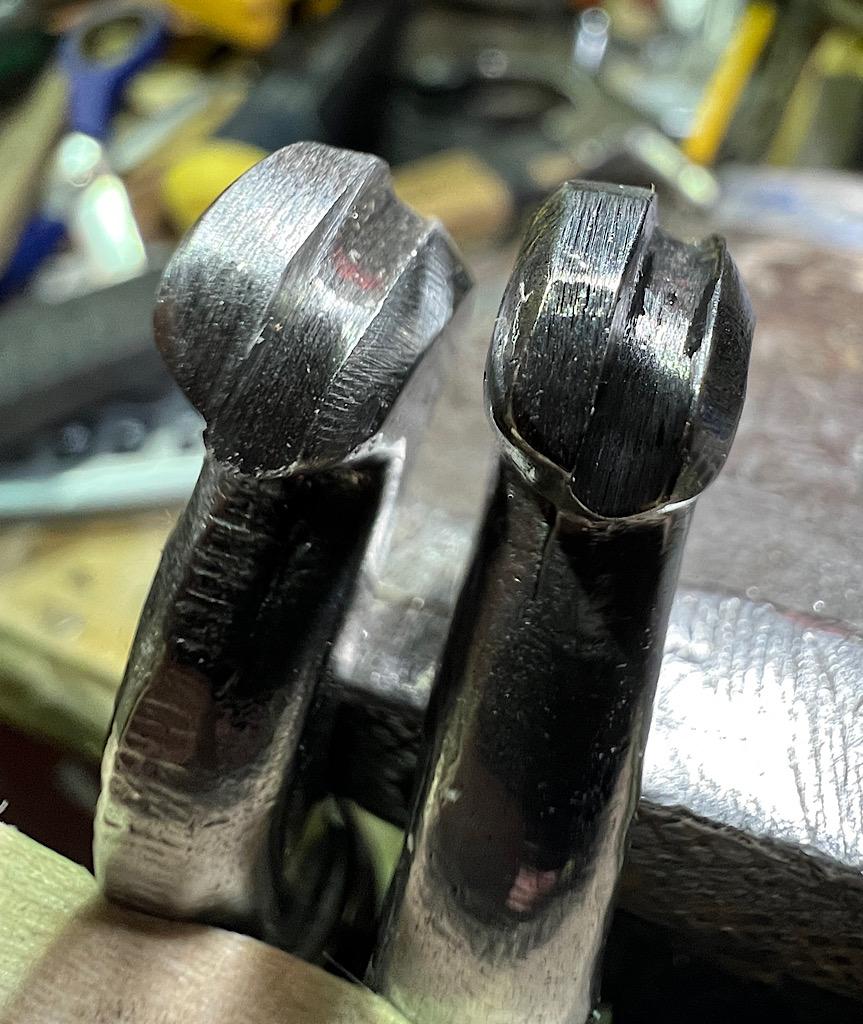
The first stitching chisels I bought were the ones you linked to. I didn't like them because when they say 3mm or 4mm, it's NOT the distance between the points, but rather the distance between the forks. I found that frustrating especially when I tried to add a different size spacing... I didn't get what I thought I was ordering. So I switched to these stainless steel ones from Tandy. With those the spacing specification is actually the distance between the points. And I find they actually punch through the leather better. But lately I'm using them more for marking the holes (or using a stitching wheel) and then using my awl to make the actual holes. I don't quite understand the use of that "pulling block" you describe... do you place it on the handle side of the chisel or the business end? And how does that help removing the chisel from the leather? I did have a lot of trouble removing the chisel from thicker assemblies, which is why I started using my awl a lot more. Especially since I learned how to sharpen it to my satisfaction. I keep practicing and practicing my hole marking, punching and stitching, but perfection seems to be an awfully long distance away for me. SIGH I am getting better though.
-
If you'll forgive me as a newbie... I think a cork on the backside is great! It lets me have full control over my awl and how I'm punching through. If I would use another piece of leather, it would be chewed up in no time plus the resistance felt while pushing would be quite different. I don't have a cork "block" but rather use wine corks (of which I have PLENTY!) and what I'm doing so far is holding my leather assembly in a pony and after having marked where my stitching holes should be, I hold the wine cork on the underside (left side in my case) and push the awl through from the right. No distortion of the leather and no danger of my poking into my fingers. Now if you're using stitching chisels to make your holes, I'd think the poundo board would be better. And if with the chisel you're punching through both (assuming there are two) layers, maybe the piece of leather would be better. I guess it all depends on what you're doing and how. But you've certainly got more experience than I do.
-
Thanks for that. Funny (but not unexpected) that Osborne creaser through Amazon is much more expensive than through a dealer here. I paid $38 (Cdn). The other creaser you linked to looks very nice but I wasn't sure what size(s) would be best and there didn't seem to be a link to the same product in different sizes. So I bought another one which was a set of four creasers for $29 with free next day delivery. Sizes 1.0, 1.5, 2.0 and 2.5mm. I should have done that much earlier.
-
Thanks Fred! Those do look far better quality (not to mention far cheaper) than the Osborne creaser. I'd looked at them but delivery was supposedly 4-6 weeks, so I ordered what I could get quicker. Turns out not to be all that much quicker. You got two of them... one 2.5mm... what is the other one? I'm going to order. Just wish I'd ordered 4-6 weeks ago.
-
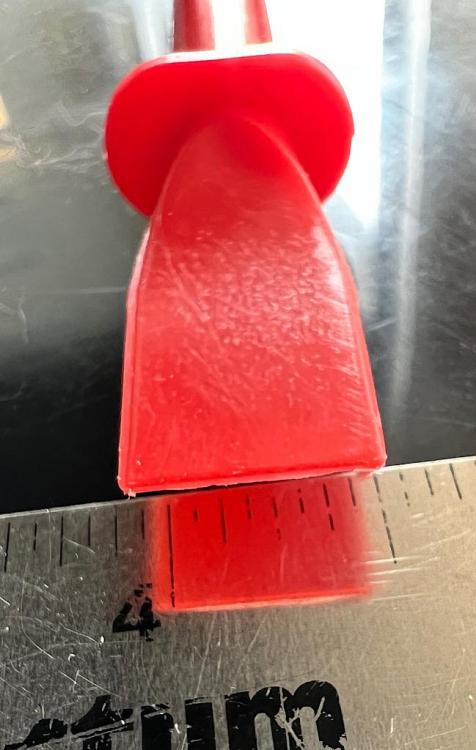
I just received the glue spreaders (and other items) I ordered yesterday from Tandy. I'm real happy with the spreader... it's just the right flexibility and the business end is only 1/2" wide... perfect for applying glue to narrow stitch edges. The ones I'd seen on Amazon are quite a bit wider than this one, making them more suitable for applying glue to large areas.
-
I saw those on Amazon (Canada) and while they may look the same on the photos, I'm pretty sure that they are much larger (wider at the business end) than the ones Tandy has. Maybe I'm wrong, but I emailed them today asking if they ever thought they'd be back in stock and the reply was that I'm in luck and that they have just arrived. Their website still says sold out, but they do have them now. (I thought I was wrong once... but I was mistaken.) Cheers!
-
I've been wanting these glue spreaders from Tandy Leather for over a couple of months now, but they're continuously showing as sold out. I suspect they are just the right size for leather work and flexible enough to make spreading contact cement or Leather Weld very easy. I've cut up a plastic container to make my own little spreader but I think these would be ideal... $6.79 (Cdn) for a pack of 6.
-
I just received the Osborne Creaser replacement from my supplier. Osborne had agreed with them and me that the first one wasn't right. So Osborne sent replacements to my dealer and they sent me one. When I got it, the business end was covered in the material (some kind of plastic I think, not wax) to protect it, so it's pretty clear the dealer didn't examine it before sending it out to me. I opened it, and I'll be damned if I can see any difference between the first defective one and the replacement. The new one is just as sharp and will cut into the leather instead of just creasing it. I'm not going to be buying any more Osborne creasers, that's for sure.

-
Very well said! (Whatever that means! )
-
Wow! You're really good! (No kidding.) I'm impressed. And I'm really glad you showed how that's done. I hadn't had any idea. But it would still be faster for me (maybe not you) to do this on the computer, especially since it allows me to easily modify the curve just by dragging the handles of the bezier curves. And that lets me very easily try different radiusssssses. Until I get the one that's most pleasing to my eye.
-
Thanks again for that link... I just ordered a set of those curve templates. The shipping to Canada was reasonable enough.
-
I certainly don't cut against those cheap plastic ones! I scribe my line and then cut. It would be nice though to have those aluminum ones linked to earlier, as they would stand up to a lot and you could cut against them, saving time. I had put that pouch in my jacket pocket this morning, together with my house keys. SIGH I wasn't thinking of the possibility of scratching the pouch. It is though, just a practice pouch so it's no big deal. I've got SO much to practice... making and marking my pattern, cutting out the leather, marking the stitching holes (I did that one just with an awl and a stitching wheel) and finishing the edges. I never realized before getting into this exactly how much skill goes into a nice pouch or other leather product. Gives me even more respect for you guys and what you are turning out.
-
Yeah, but worldwide shipping is INCLUDED!!!! Probably hand delivered by the designer. But surely that price is a mistake... I mean, it's not Dior, Hermes, or some other high end name. Crazy price! Their price for the aluminum templates sounds reasonable though, considering that thin cheap plastic ones are about $25 from Amazon. And these you could cut against.
-
In my case, school was almost 100 years ago! (Okay, maybe not quite that long.) But to use a compass to create something similar to what I just did for my pouch flap would have been challenging and probably would have taken a lot longer than it took to create the curve in Designer. Of course, I'm familiar with that program (and Illustrator) and creating something like that takes only a minute.
-
Those are really nice! I'm strongly tempted. I'll see what they will charge for shipping to Canada. I have a set of arcs like that which I got from Amazon and they are such flimsy thin plastic that I really don't like using them and I certainly couldn't cut against the.
-
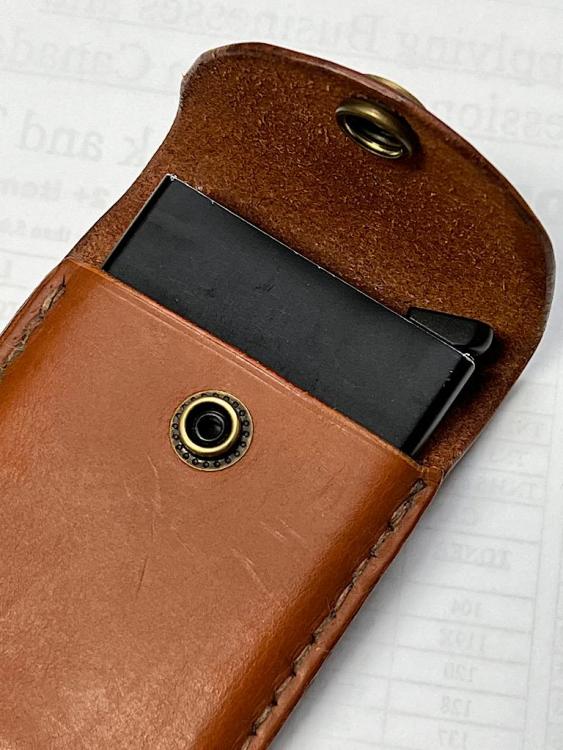
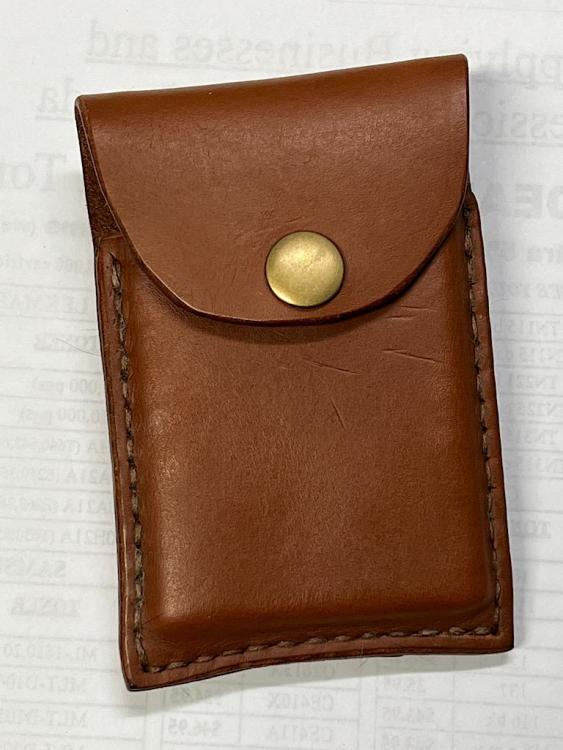
You must be good! But as far as my experience, I think it would be much harder to do this with a CAD program than with a graphic design program (like Adobe Illustrator or Affinity Designer) which has easy to use bezier curves. Here's the pouch I just finished... my curve isn't perfect because I kinda butchered it before making the curve design with Designer but as I said before, with practice I'm getting better and better. This is a little belt pouch for a metal Secrid credit card holder.
-
The only problem with that idea is that often what I want isn't a perfect arc of a circle that you could use a compass to create. Maybe it's more pointy, or more gentle. I was looking for other ideas/options, but so far what works best for me is creating the curve I want using a graphic program that has bezier curves. Then I mark my leather according to the printout and cut away. I'm not perfect with that cutting yet, but I'm getting better as I practice.
-
Hi Klara, But I'm a guy... liking curves is in my nature! Seriously though, that's not a bad idea and it would work for many projects.
-
What I ended up doing (again) is using a graphics program to draw my curve using bezier curves. That made it perfectly symmetrical and I was able to control the amount of the curve. I printed that out, and used it as a template on my pouch flap to cut it. Came out pretty darn well if I say so myself.
-
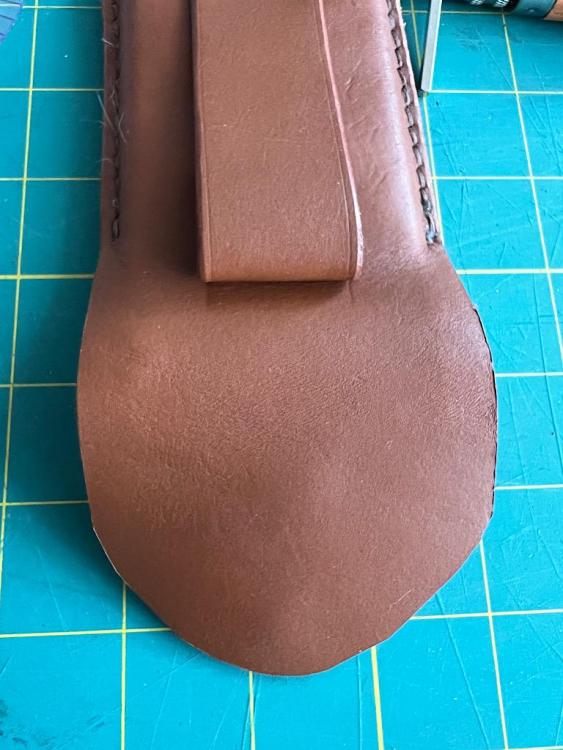
I'm having some trouble making nice curves on things like pouch flaps. I have little trouble with round corners, or the actual cutting, but what I'm having trouble with is marking the actual curve that I want to follow. I have a couple of plastic template thingies but they're inadequate for the majority of what I need. I also have one of those flexible curve things and that also is probably not the best for this. I do use that to make nice flowing curves on things like apron sides, etc. but pouch flaps have always given me trouble. The best solution I have found so far is to use a design program on the computer (bezier curves) and drag out the shape of the curve I like, print it out and trace it on my leather. How do you folks do it? Have you a better way, or are you just so good at eyeballing the curve that you don't need any aids? Here is a little pouch I'm currently working on and I'm really not happy with the curve on the flap. I'd like to refine it before finishing the edge and installing the snap.
-
@Brooks125 - Sorry, but I cannot comment on the skipped stitch issue you're having but as a relative beginner to leatherwork who's trying to learn, I wanted to ask you a question: On the photo you posted of those stitch lines, it looks like you might have cut a groove for your stitch line. Is that right? I know this is done for hand stitching, but I'd never seen/heard that it's also done for machine stitching. I would imagine it would be very hard when machine stitching to keep the stitches within that stitch line groove, or is that just a question of experience? Thanks.
-

First Leather Project worth showing
MtlBiker replied to MtlBiker's topic in Leatherwork Conversation
This is the first time I've done that (after assembly) and I think in some (many?) cases it might be impossible to get the item inside to wet form after stitching. For this little case, I had to work and work with my fingers to get the leather open enough to slip the case inside. And I was surprised that it actually worked so well. -
English you say? Here in Montreal we're so dominated by the French (Canadians) that étuis still just means "case".
-
Wow! Very nicely done! Not to mention practical. (But you do know I hope that "etui" simply means "case", right?)
-
New Duffle
MtlBiker replied to GavinO's topic in Purses, Wallets, Belts and Miscellaneous Pocket Items
Wow! What a beautiful job! I'm sure you will be very successful and I wish you the best of luck!